Welcome! This guide will help you access and set up your lab environment. Please read the page carefully to ensure a smooth experience.
Prerequisites
-
Student access to Launchpad
-
Stable internet connection
Welcome to Techblue Avionics!
-
While you are using the Infoblox Education lab environment, you are a Techblue Avionics employee.
Warning: DO NOT USE your production Infoblox Portal tenant; you will use a Techblue Infoblox Portal tenant as part of the lab initiation process.
Four Steps to Initiating a Universal DDI/Infoblox Threat Defense Lab Environment
To successfully initiate the Universal DDI/Infoblox Threat Defense labs, we will need to deploy a lab environment that hosts all the Techblue Avionics infrastructure. Then, we will need to request and set up a Techblue Infoblox tenant. This tenant will serve as the central point for all configuration and monitoring activities.
Please follow these four steps to initiate a Universal DDI/Infoblox Threat Defense lab:
Step 1: Deploying a lab environment
You can have a maximum of 2 lab environments deployed at the same time.
-
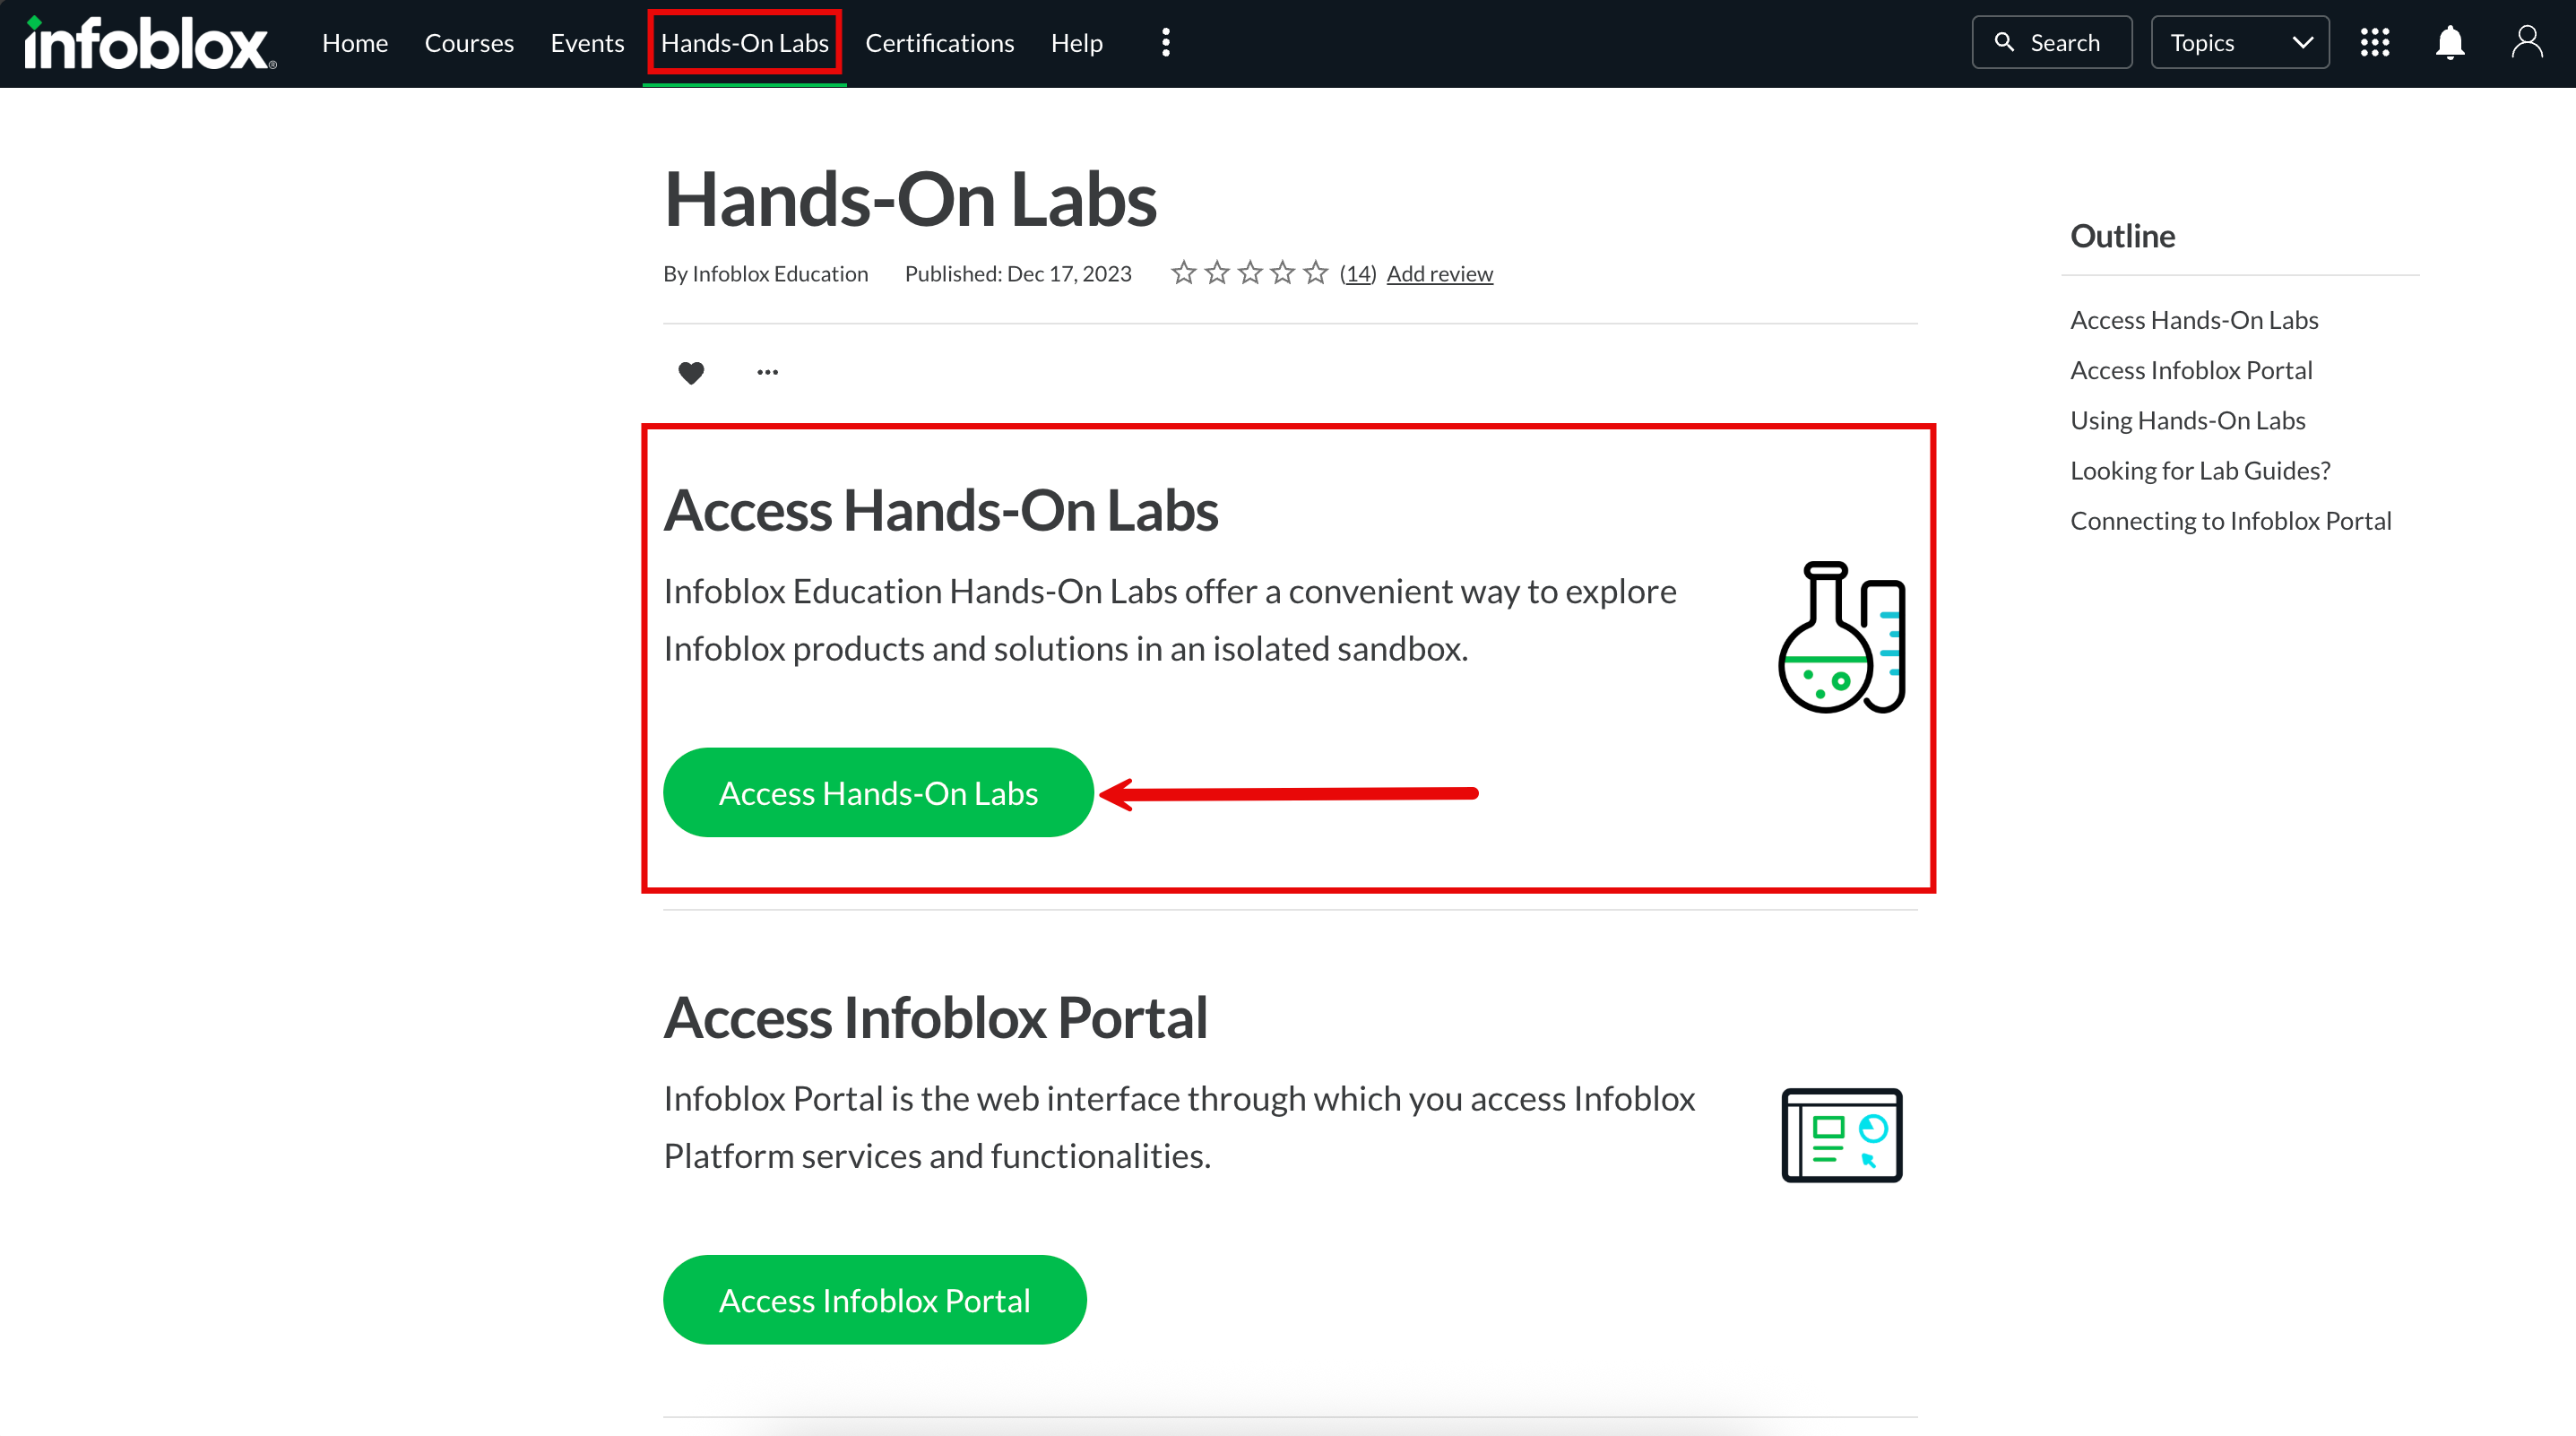
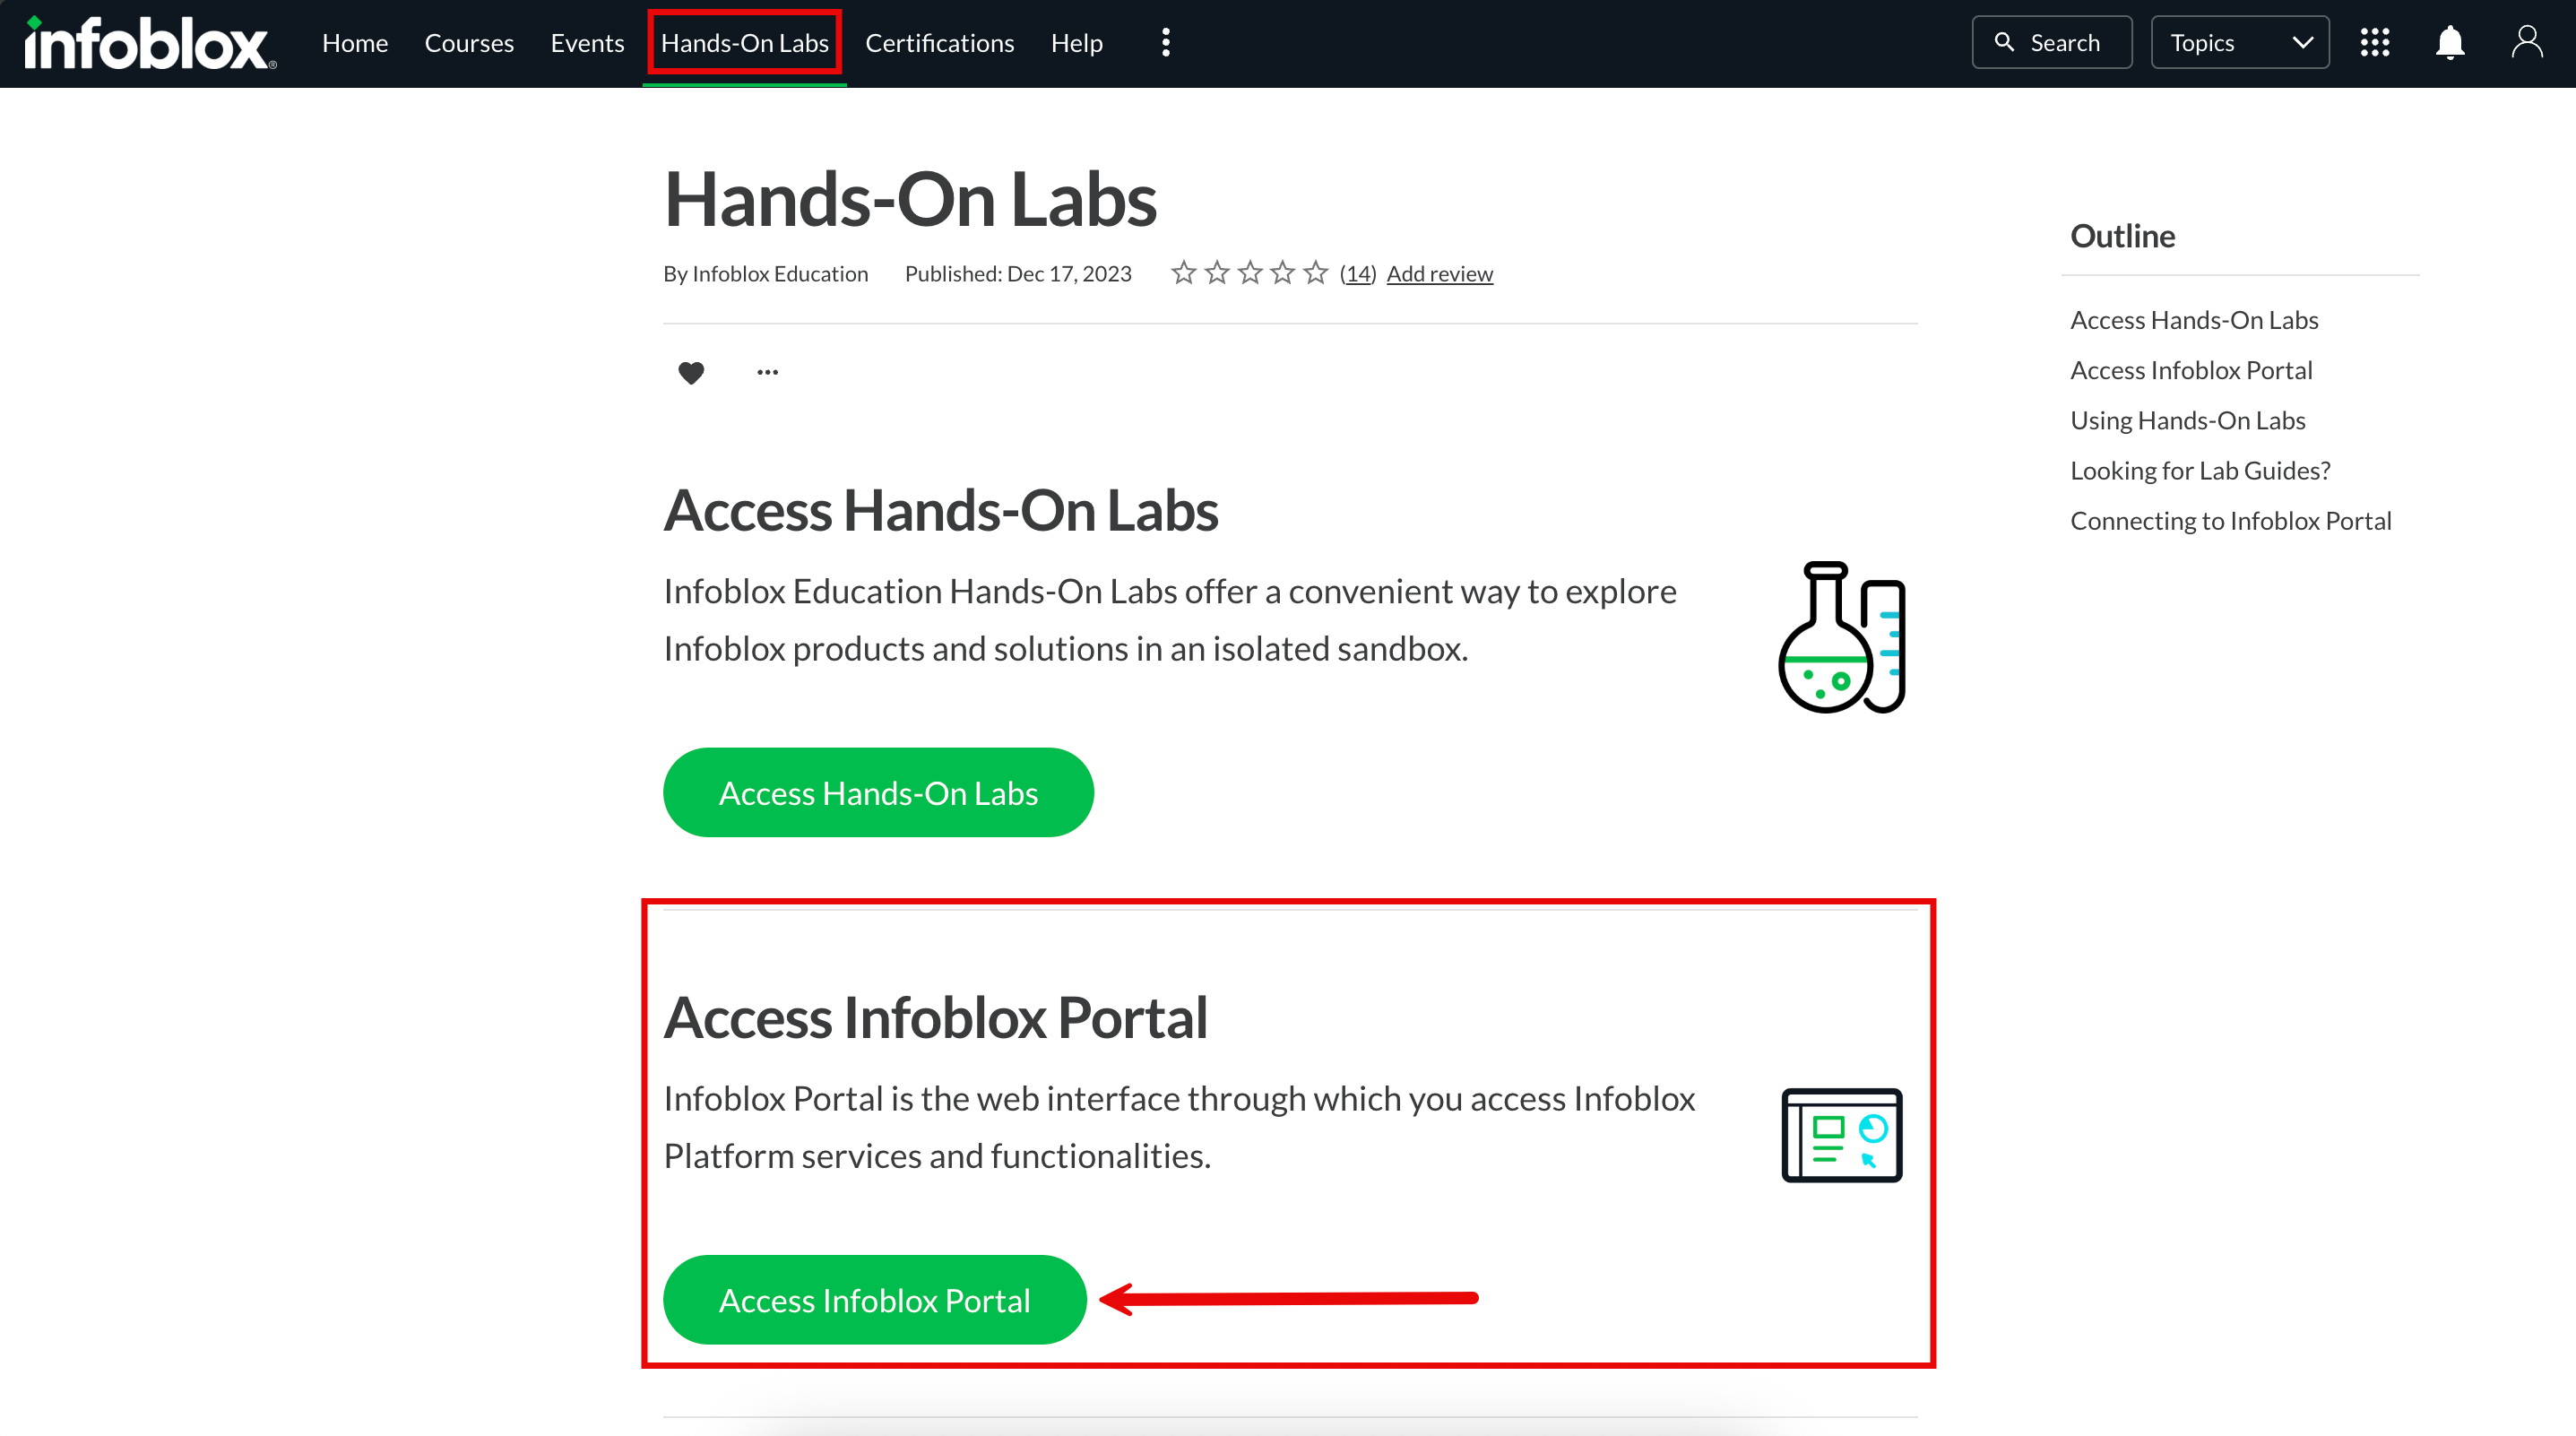
From Launchpad, locate the Hands-On Labs page:
-
From the main toolbar at the top of the screen, click Hands-On Labs. This will open a new browser tab with the page.
-
Locate the “Access Hands-On Labs” section.
-
Click the Access Hands-On Labs button to begin.
-
-
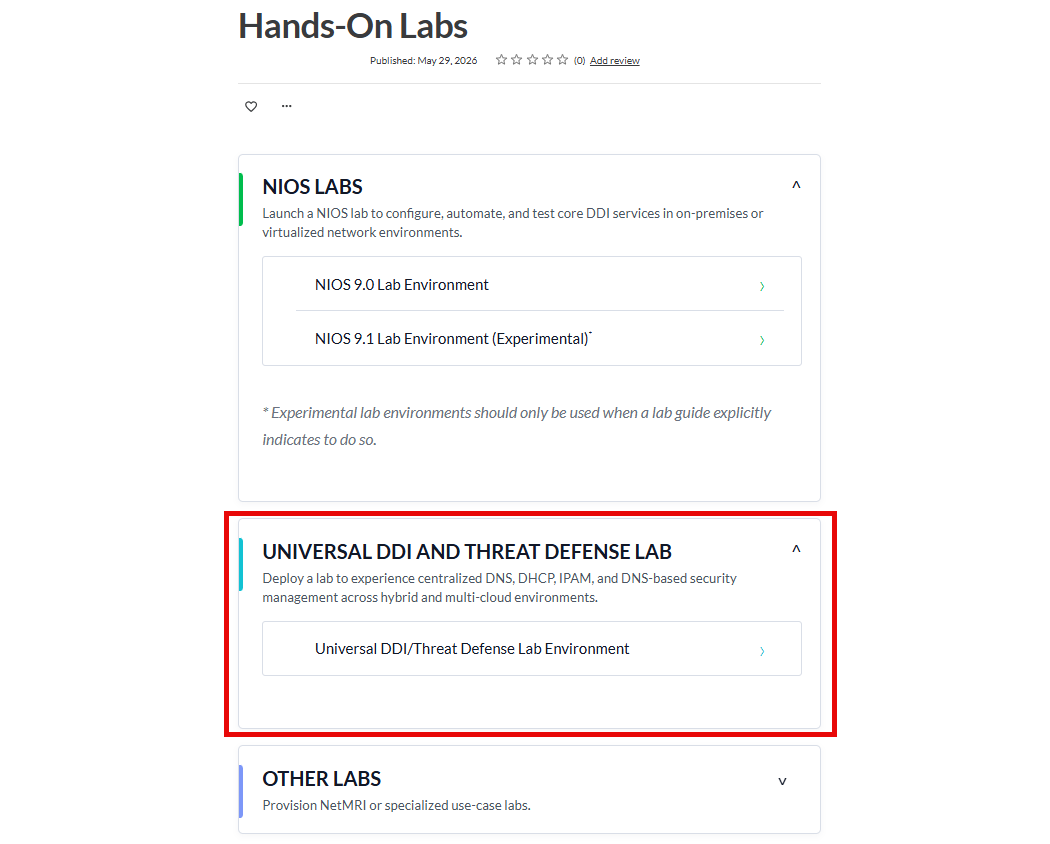
Deploy a lab environment:
-
Under Universal DDI and Threat Defense Labs, select Universal DDI/Threat Defense Lab Environment to launch the lab.
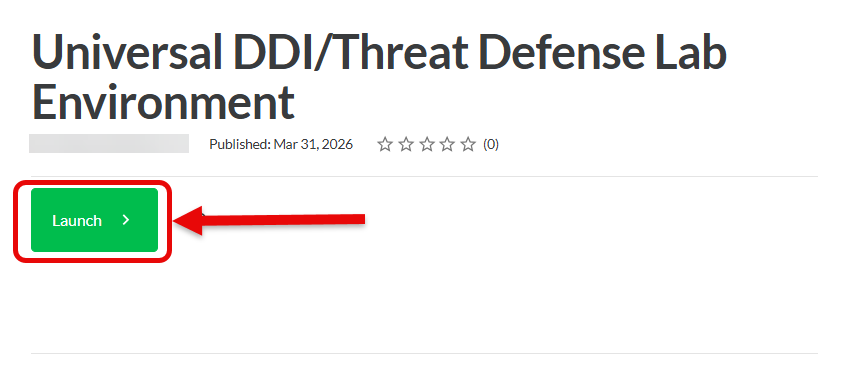
After launching:
-
An initial loading screen will appear while the environment is being prepared
Once ready:
-
The environment viewer will open automatically
-
A green “Preparing” progress bar will be displayed while the virtual machines start
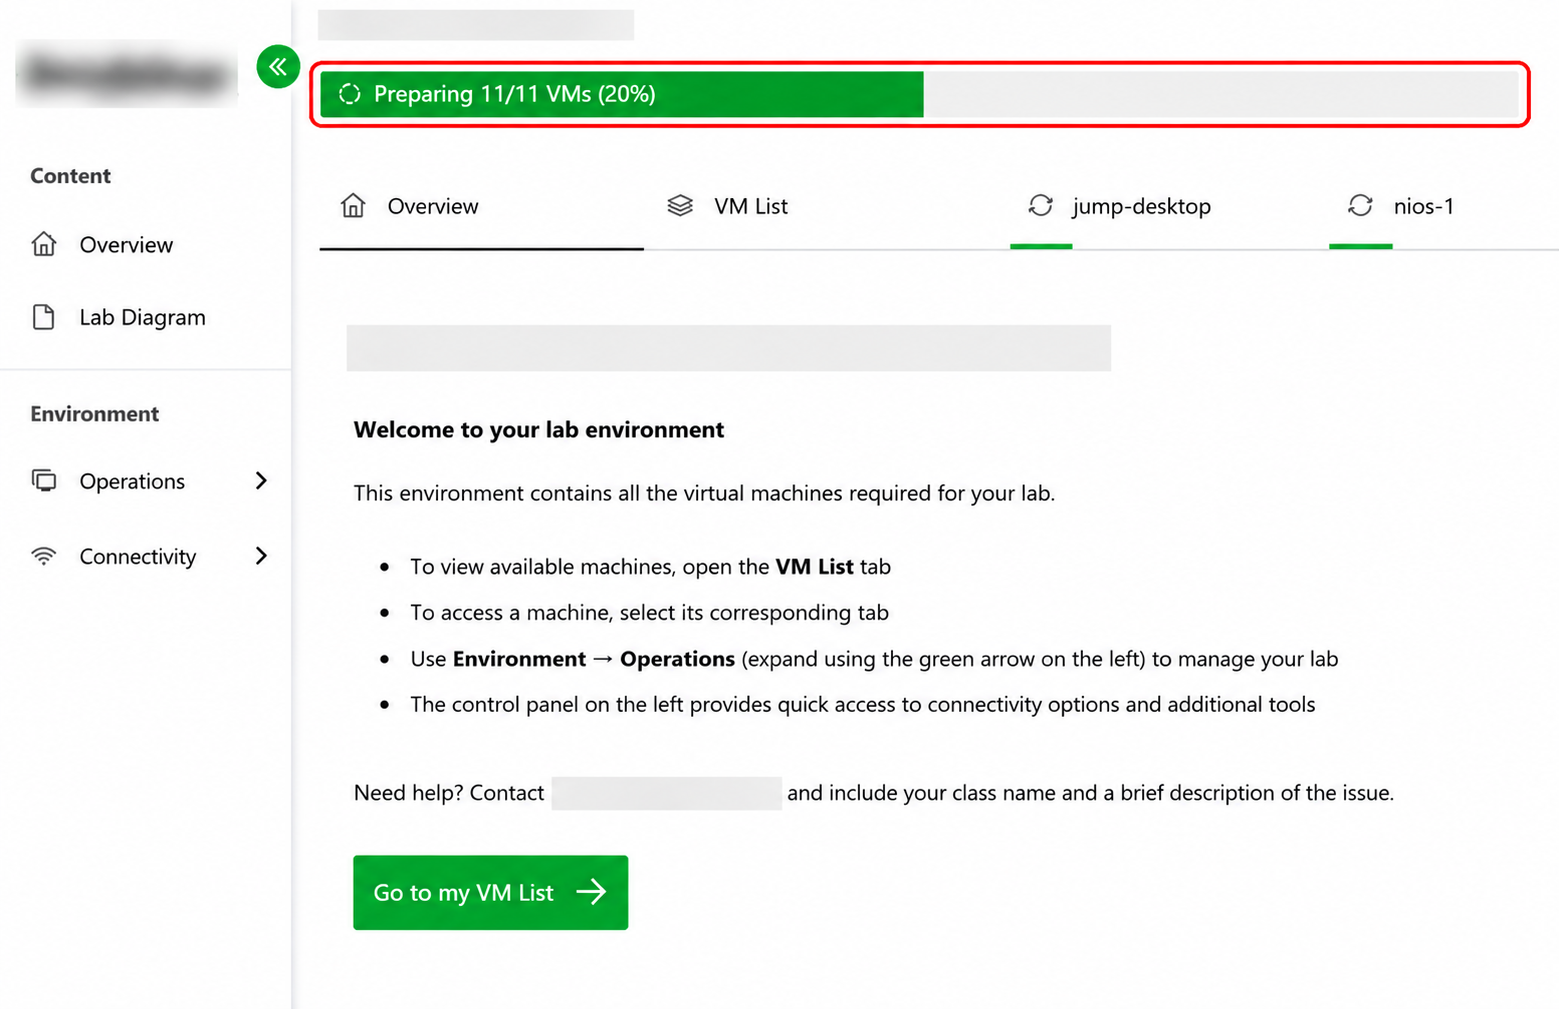
When the progress completes, the lab environment is ready for use.
-
-
Lab deployment can take up to 20 minutes to complete.
-
Step 2: Accessing lab systems
-
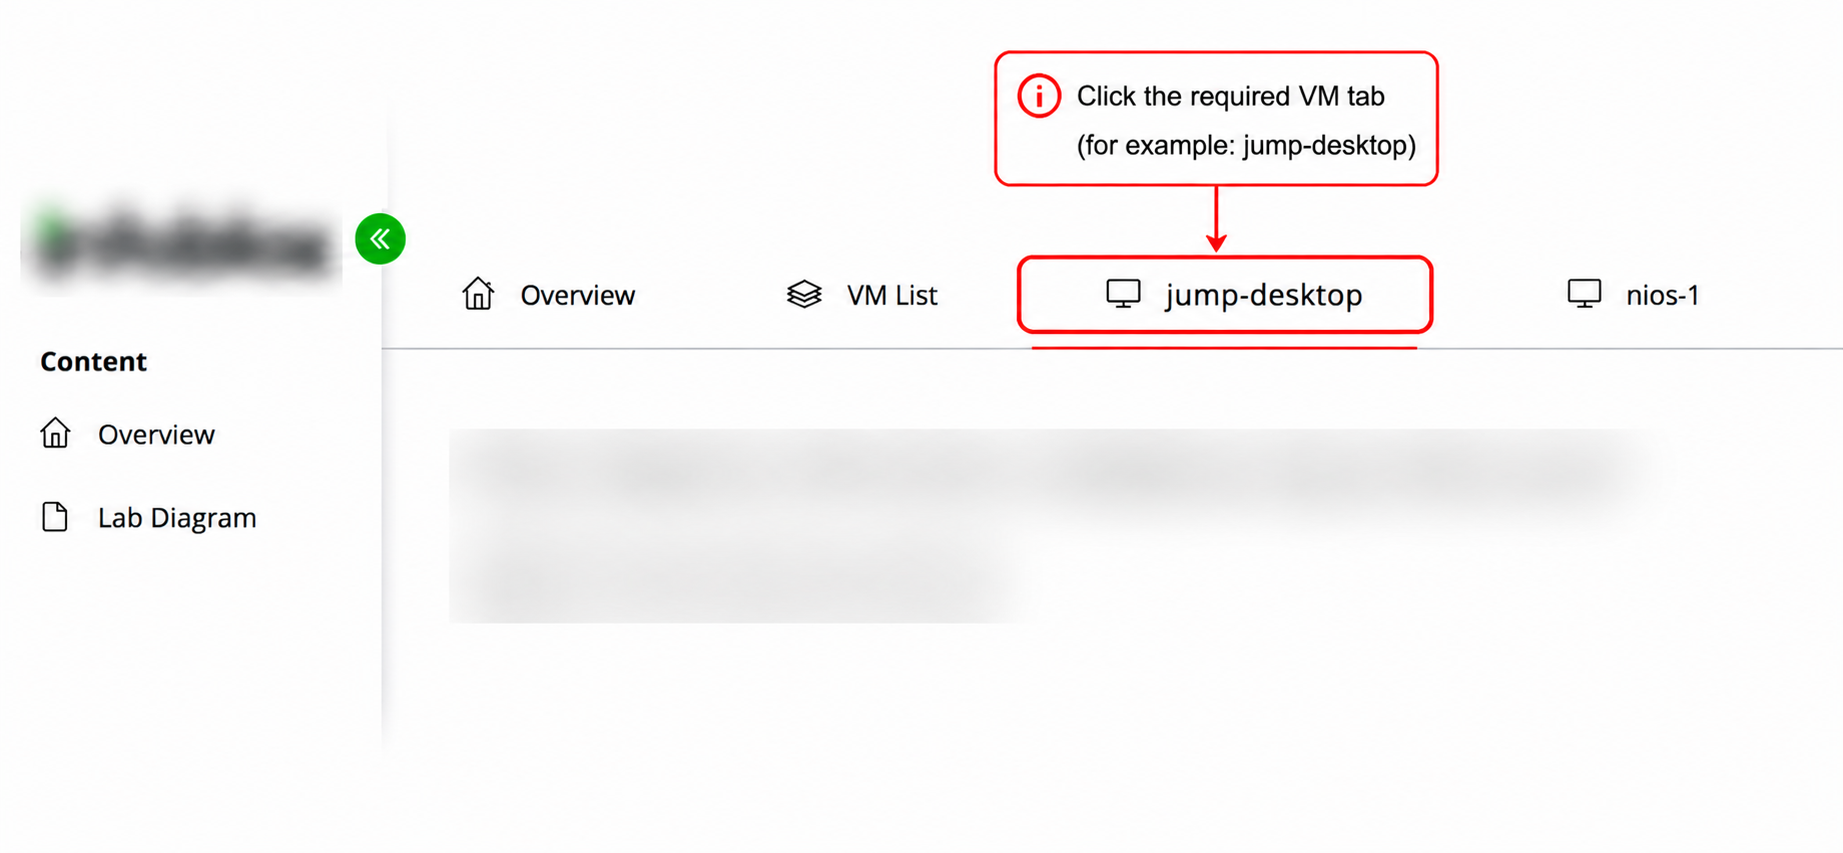
To access a virtual machine:
-
Click on the required VM tab (for example: jump-desktop) from the top menu
-
-
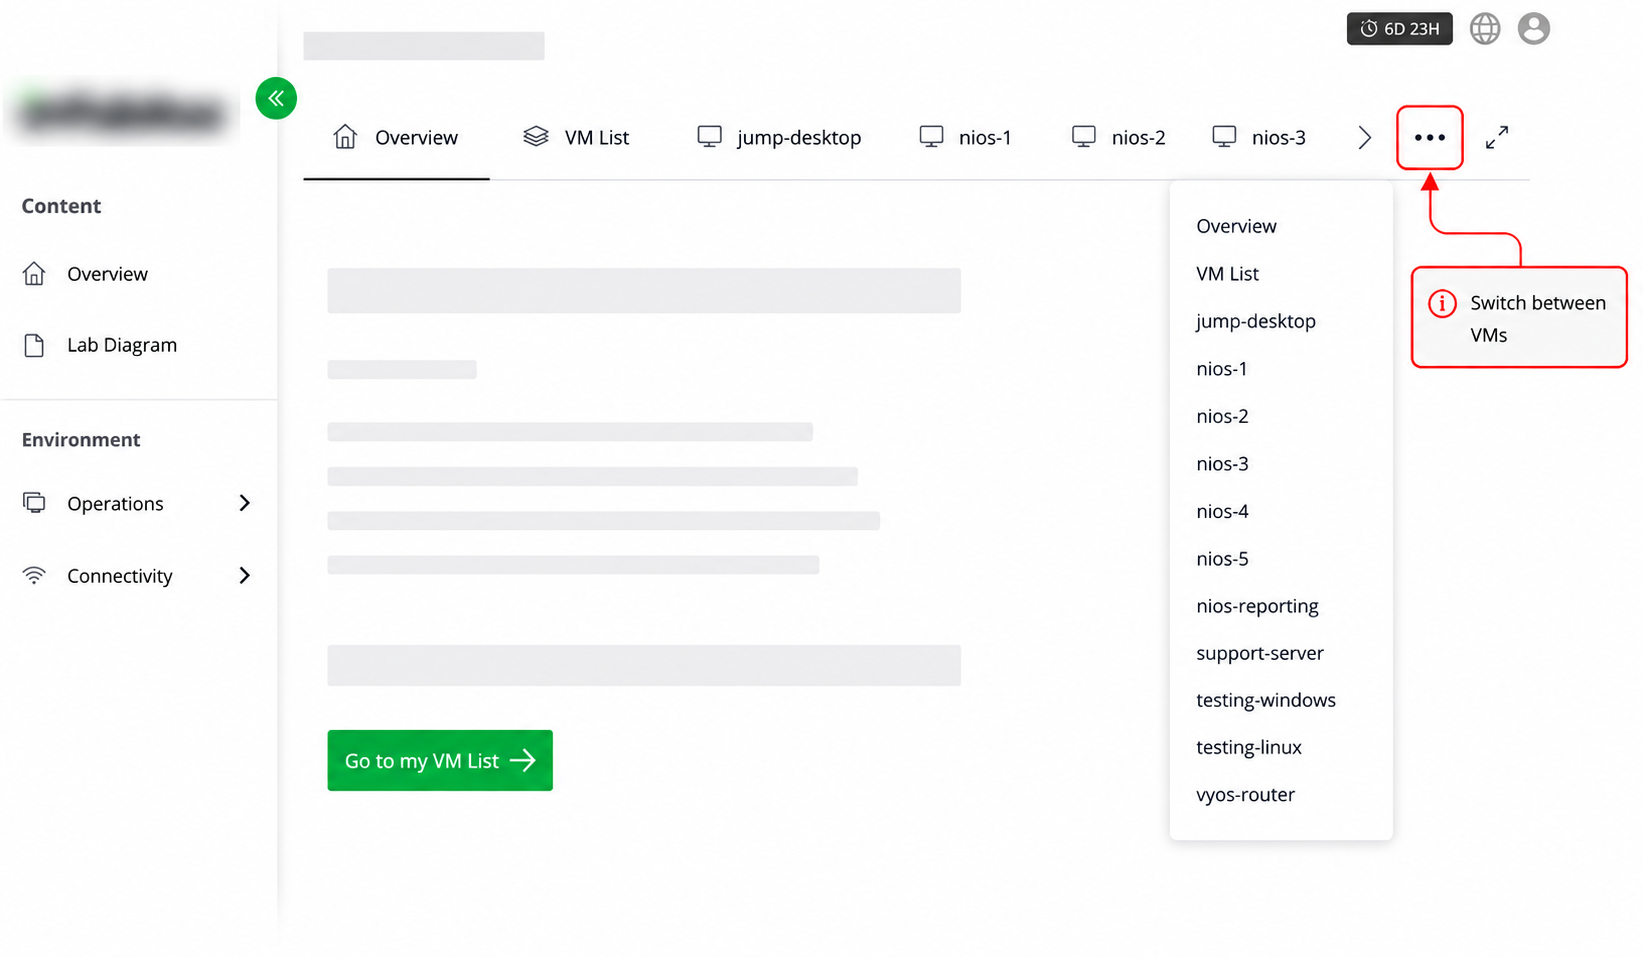
To switch between virtual machines:
-
Use the VM tabs in the top menu, or
-
Click the … (ellipsis) menu and select the required VM
-
-
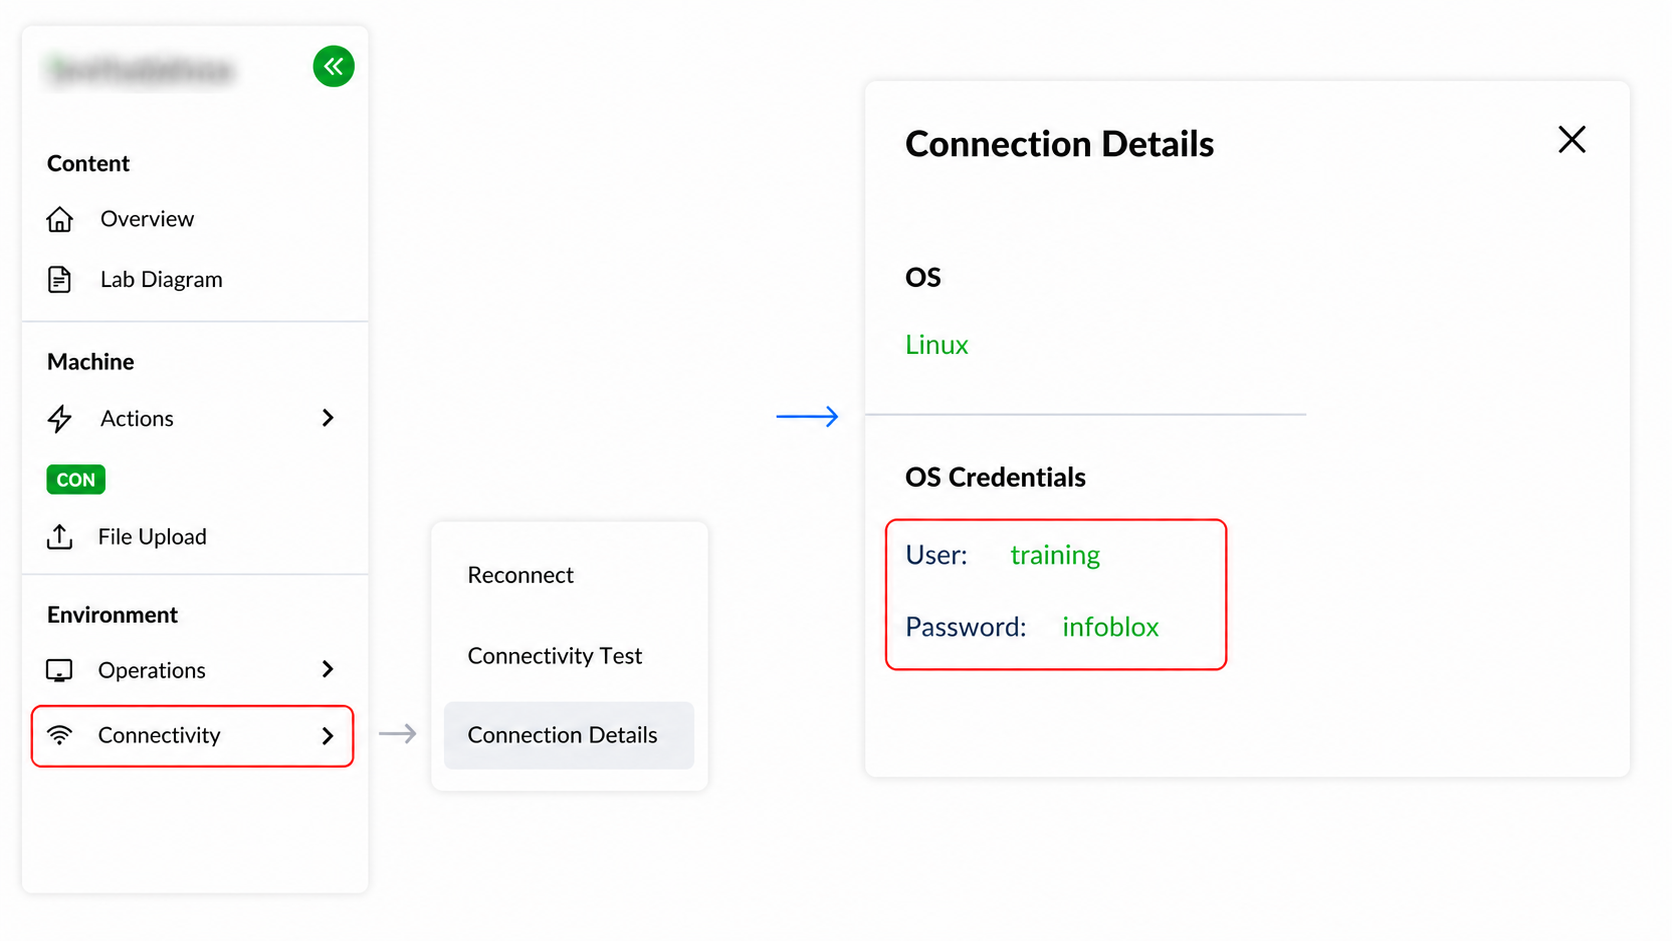
VM credentials can be found after selecting a VM:
-
Navigate to Environment → Connectivity
-
Click Connection Details
-
Step 3: Requesting a Techblue Infoblox tenant
-
Locate the access request page:
-
Navigate back to the Hands-On Labs tab.
-
Locate the “Access Infoblox Portal” section.
-
Click on the Access Infoblox Portal button to begin.
-
-
Requesting an Infoblox Portal tenant:
-
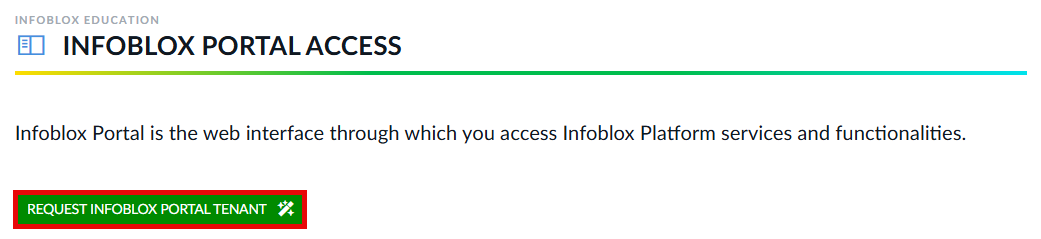
Click the Request Infoblox Portal Tenant button to create a tenant.
-
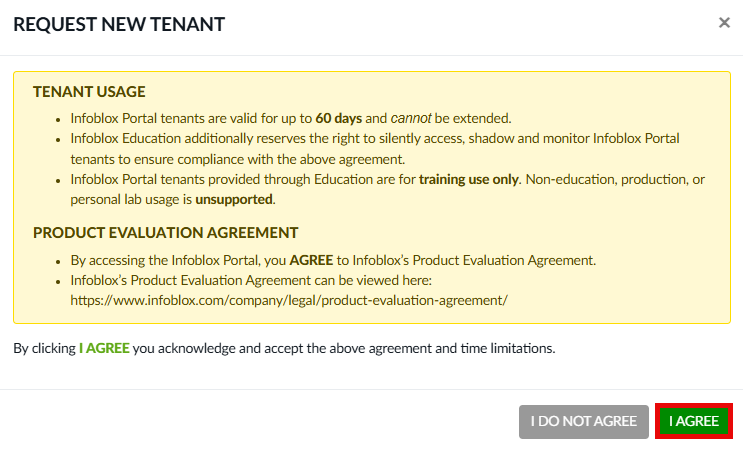
Confirm tenant creation by clicking the I AGREE button
-
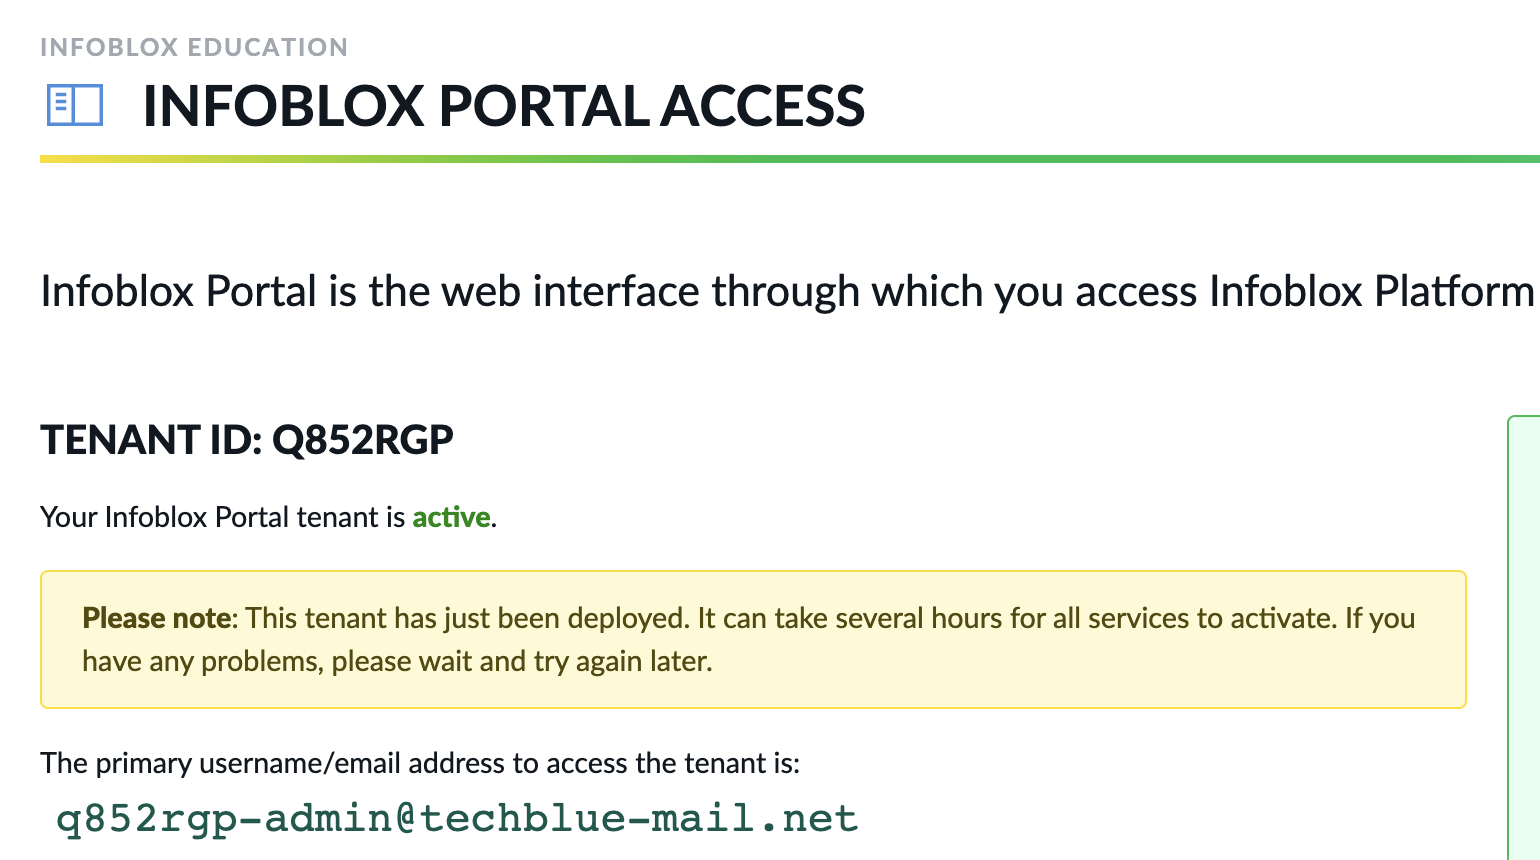
Use the primary username/email address for the tenant listed below for step 4.
-
Tenant requests can take up to 30 minutes to complete.
Step 4: Setting your Techblue Infoblox Portal account password
-
Log in to the jump-desktop virtual machine of your lab environment.
-
In a new web browser window, navigate to https://portal.infoblox.com
-
Under the login panel, click the Need Assistance? link.
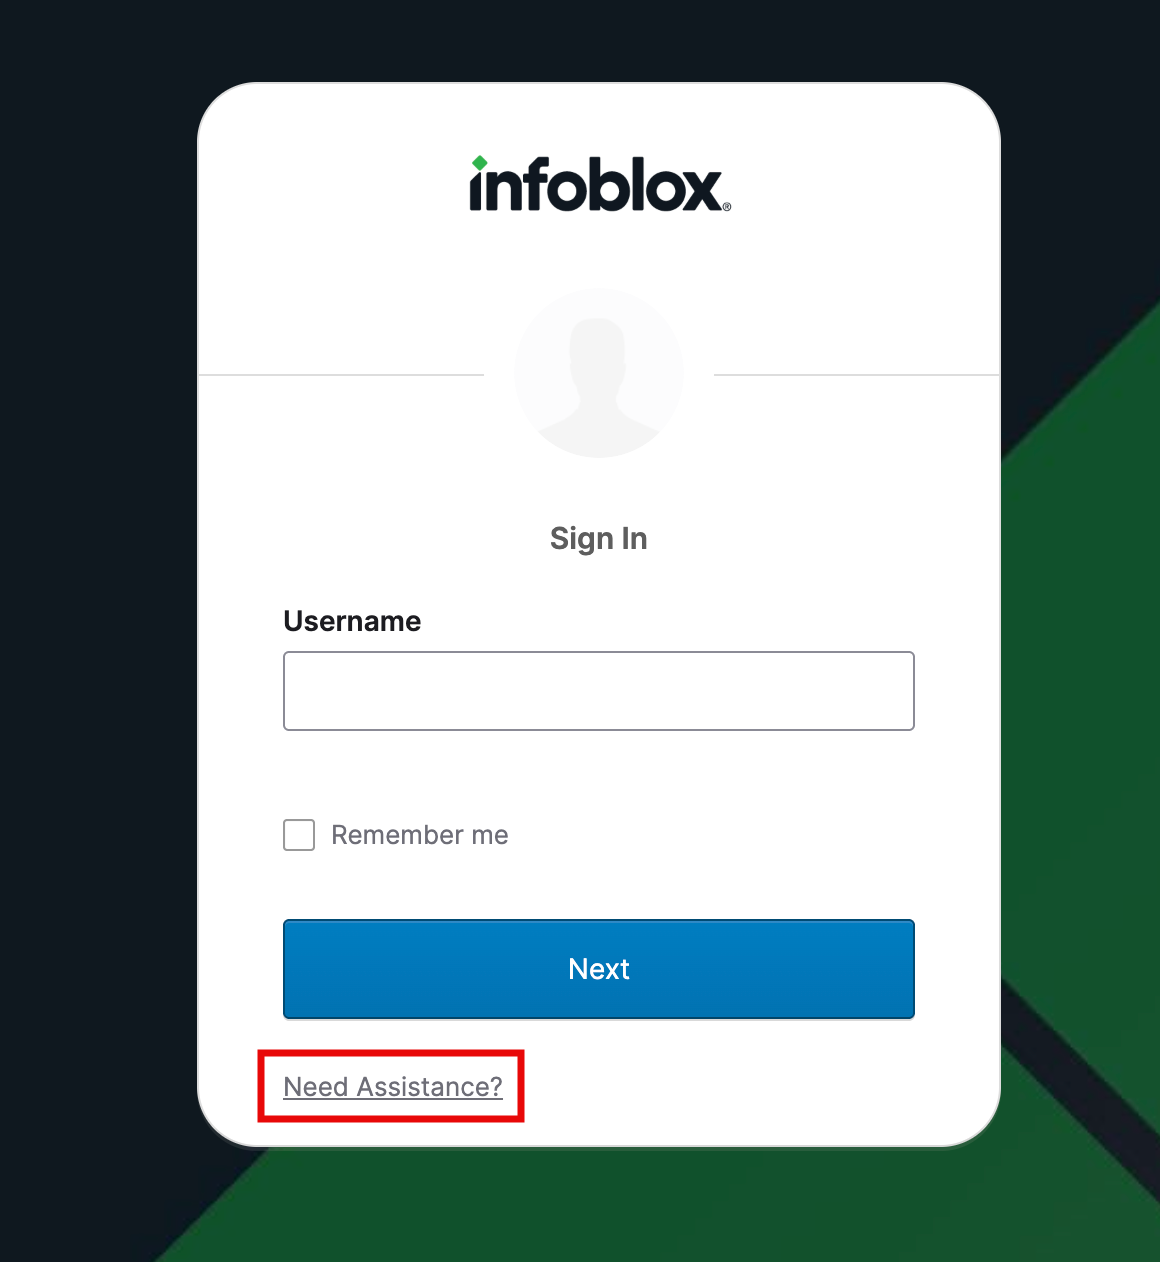
-
Then select the option for Help me sign in / Forgot password?
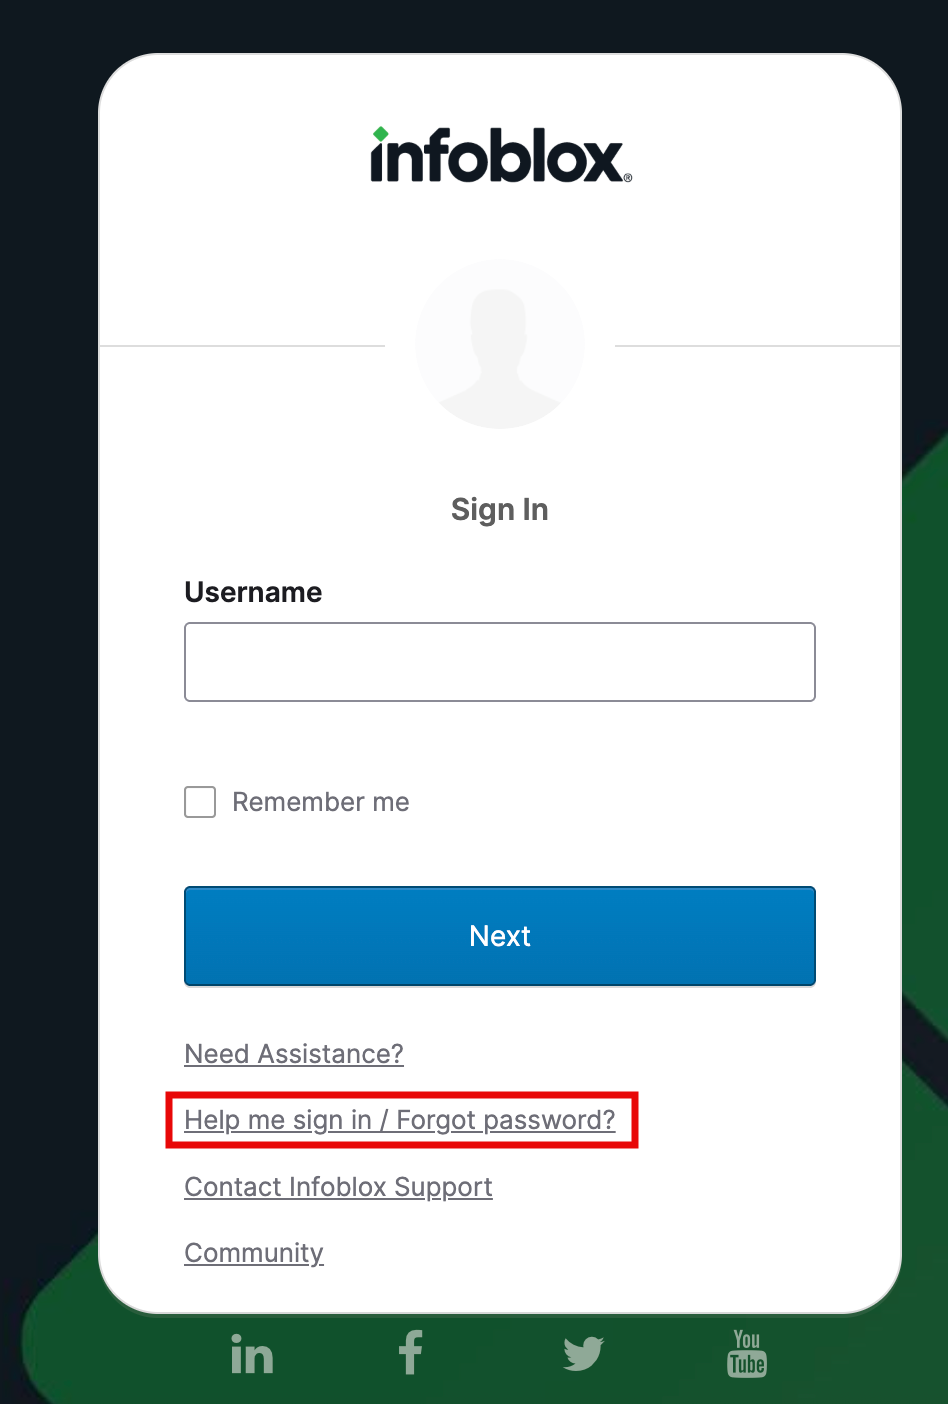
-
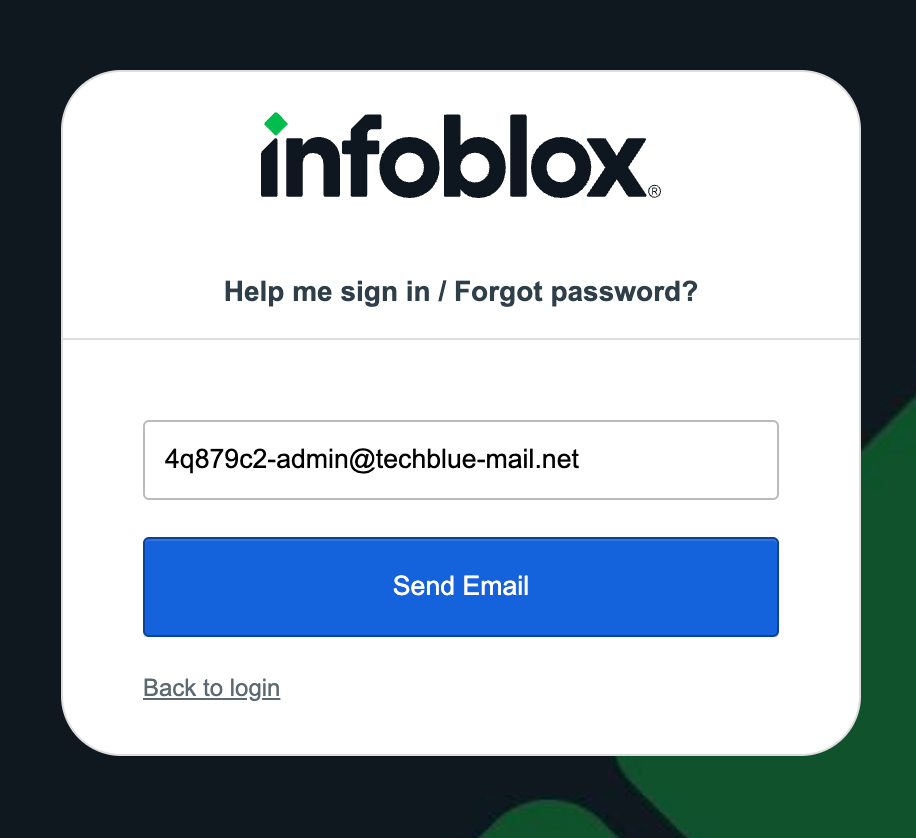
Enter your Infoblox Portal tenant's username, and click Send Email.
-
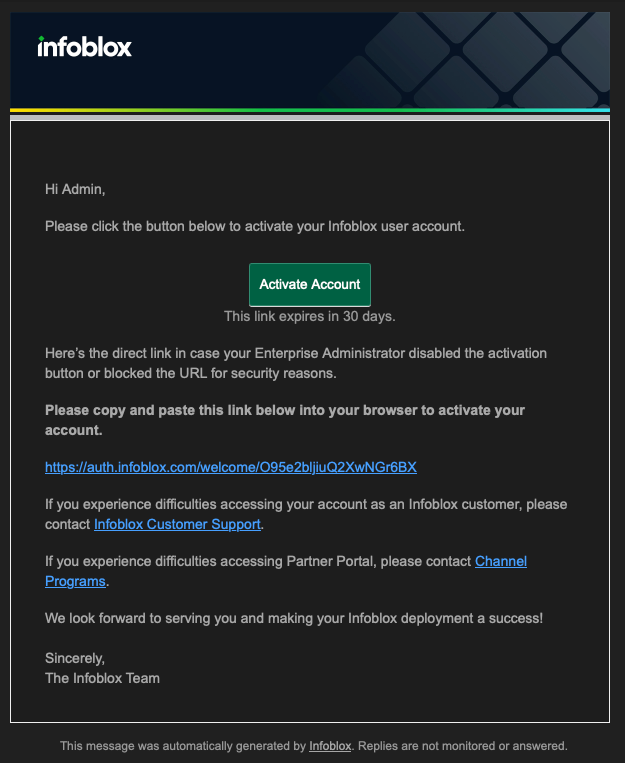
Check your email for a password reset email.
Do not forget to check your Spam or Junk folders!
-
Click the link in the email and set a password for your account.
Supplementary Information on Navigating the Lab Environment
-
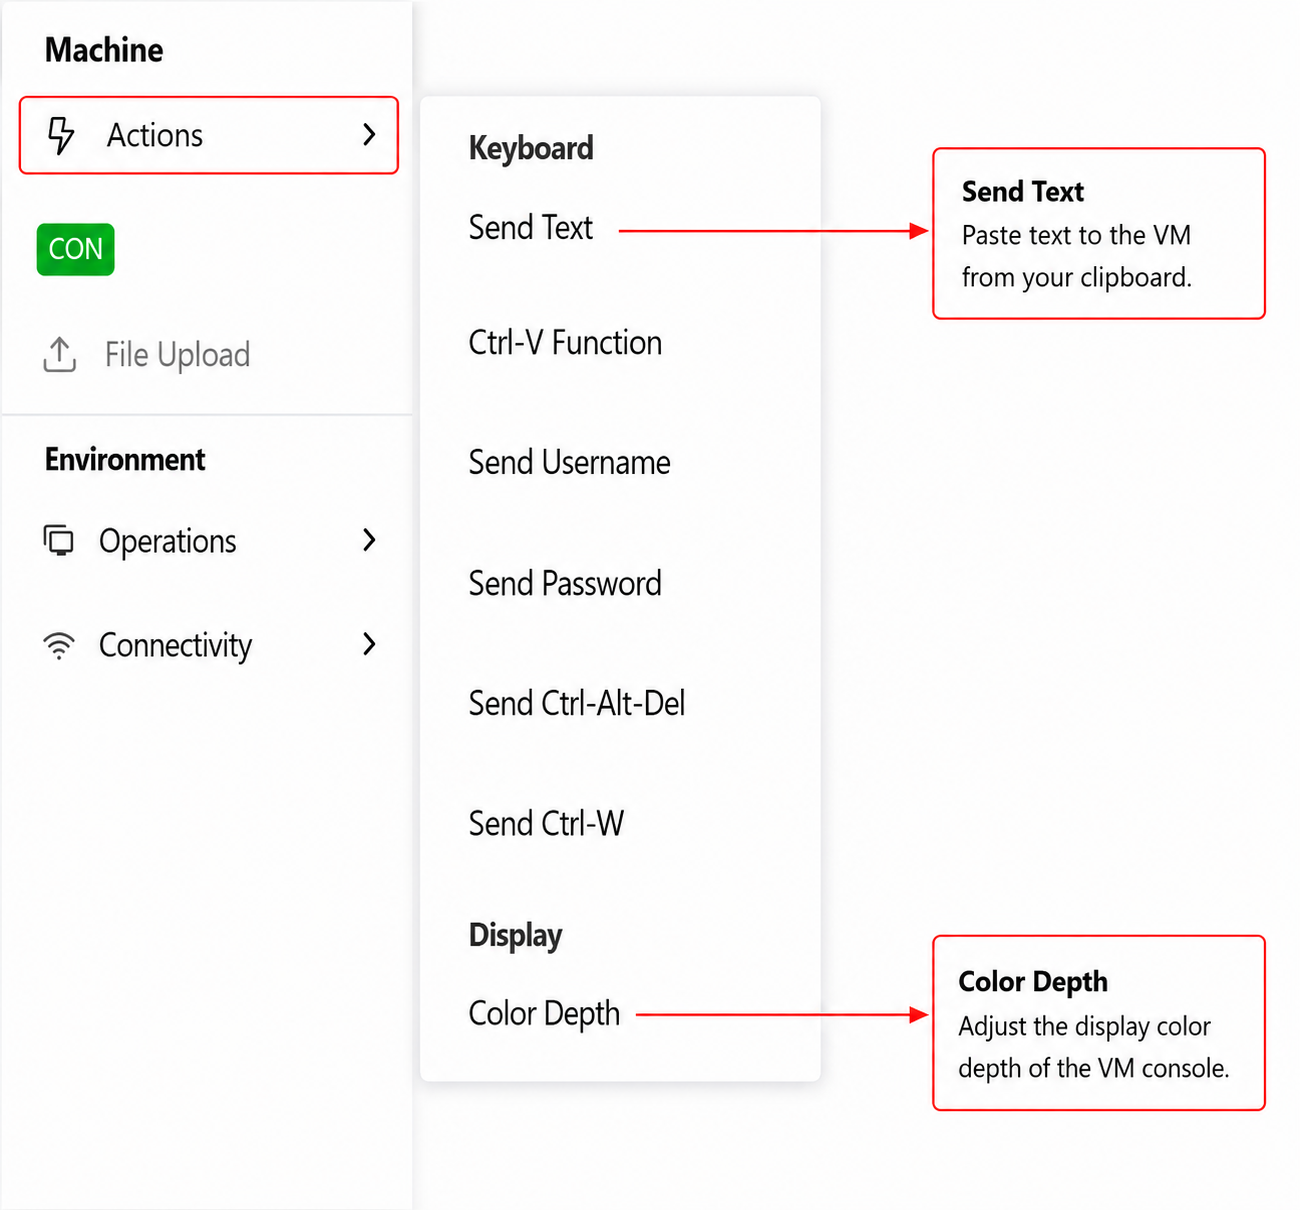
Use the Machine → Actions menu to manage VM interaction settings such as keyboard controls, sending clipboard text and display options.
-
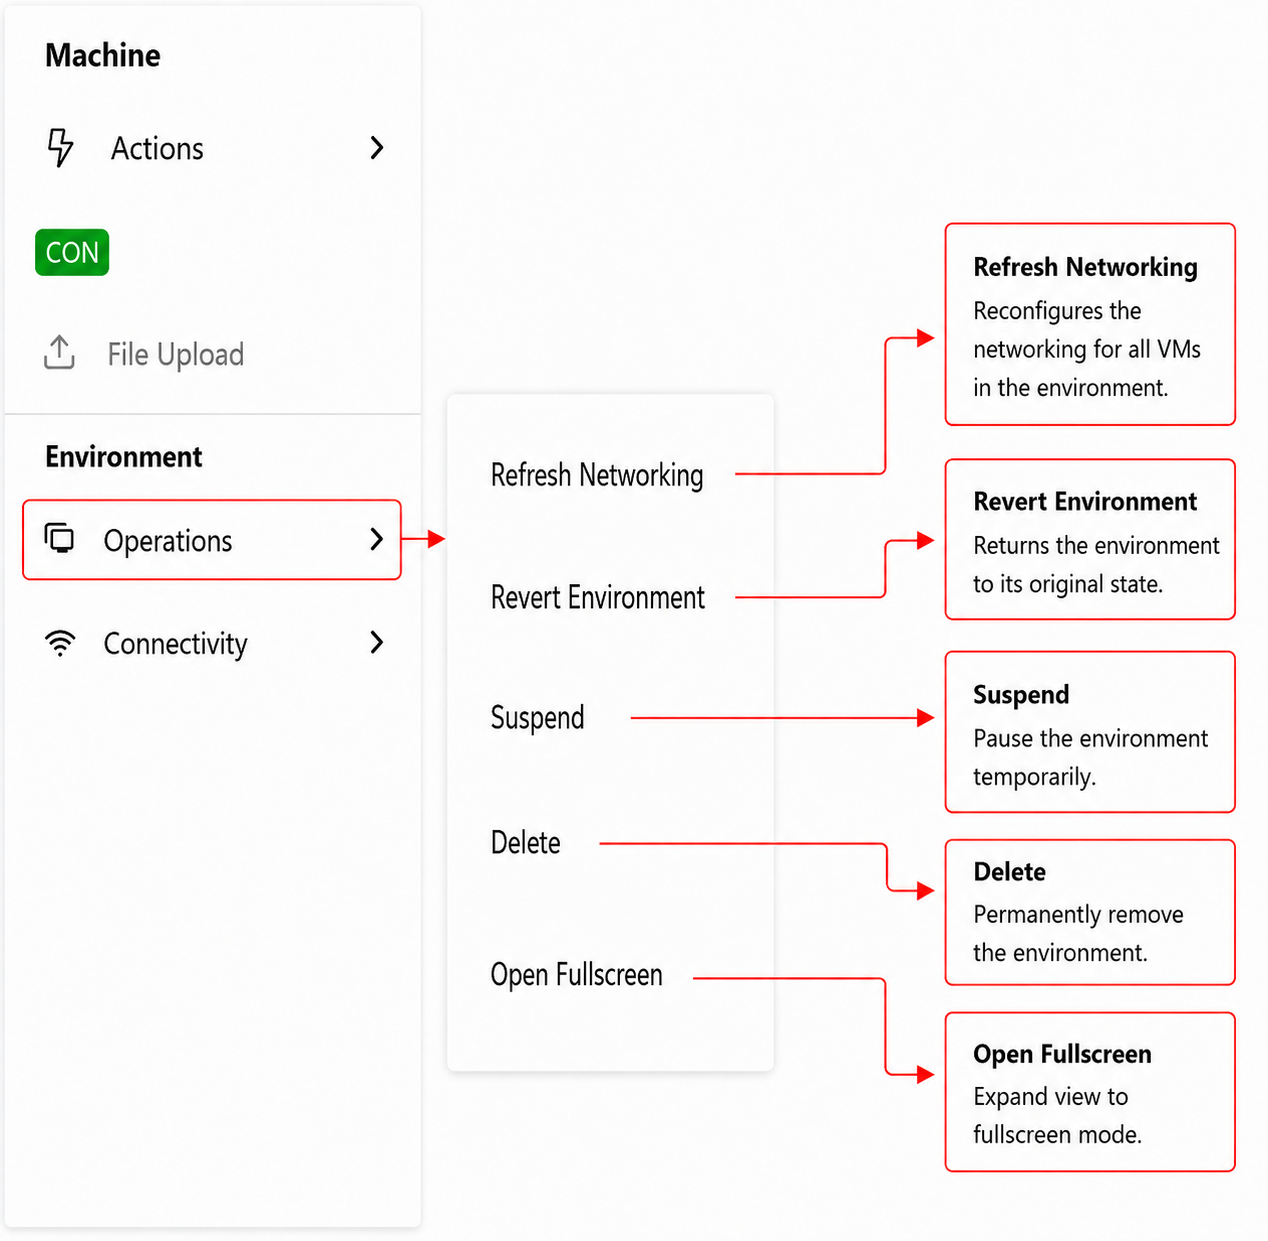
Open the Environment → Operations menu to manage the virtual environment lifecycle, networking, suspend/revert actions, and display options
-
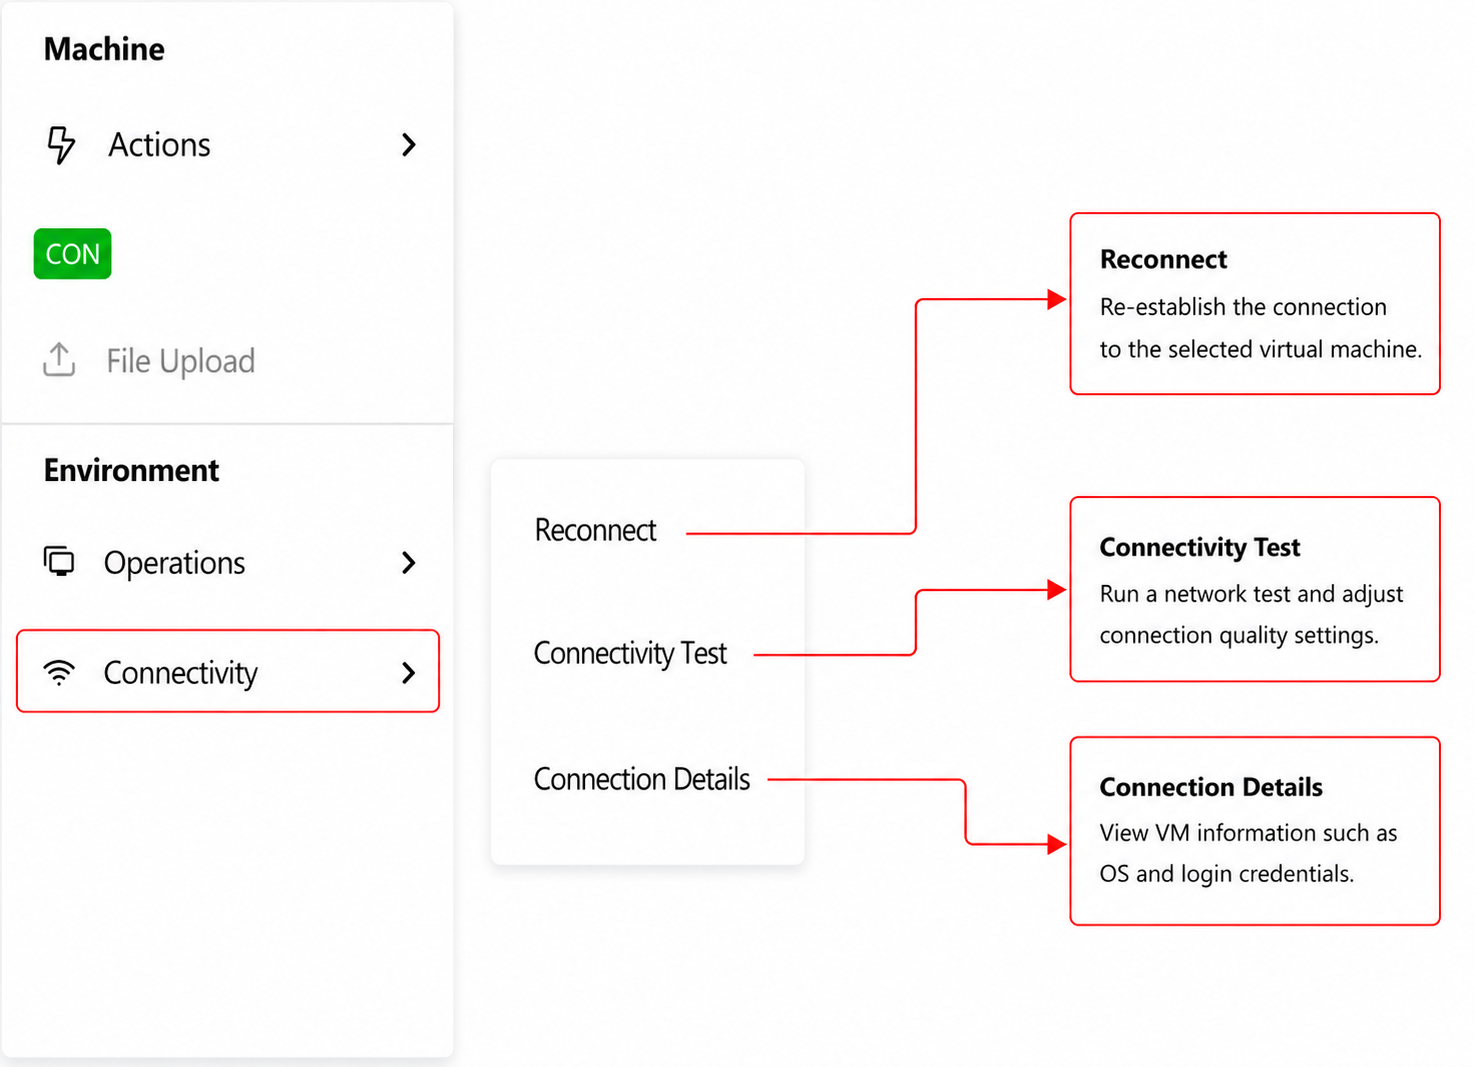
Select the required VM within the Environment Viewer, then open the Environment → Connectivity menu to reconnect sessions, run connectivity tests, adjust connection quality, and view VM operating system and credential details.
-
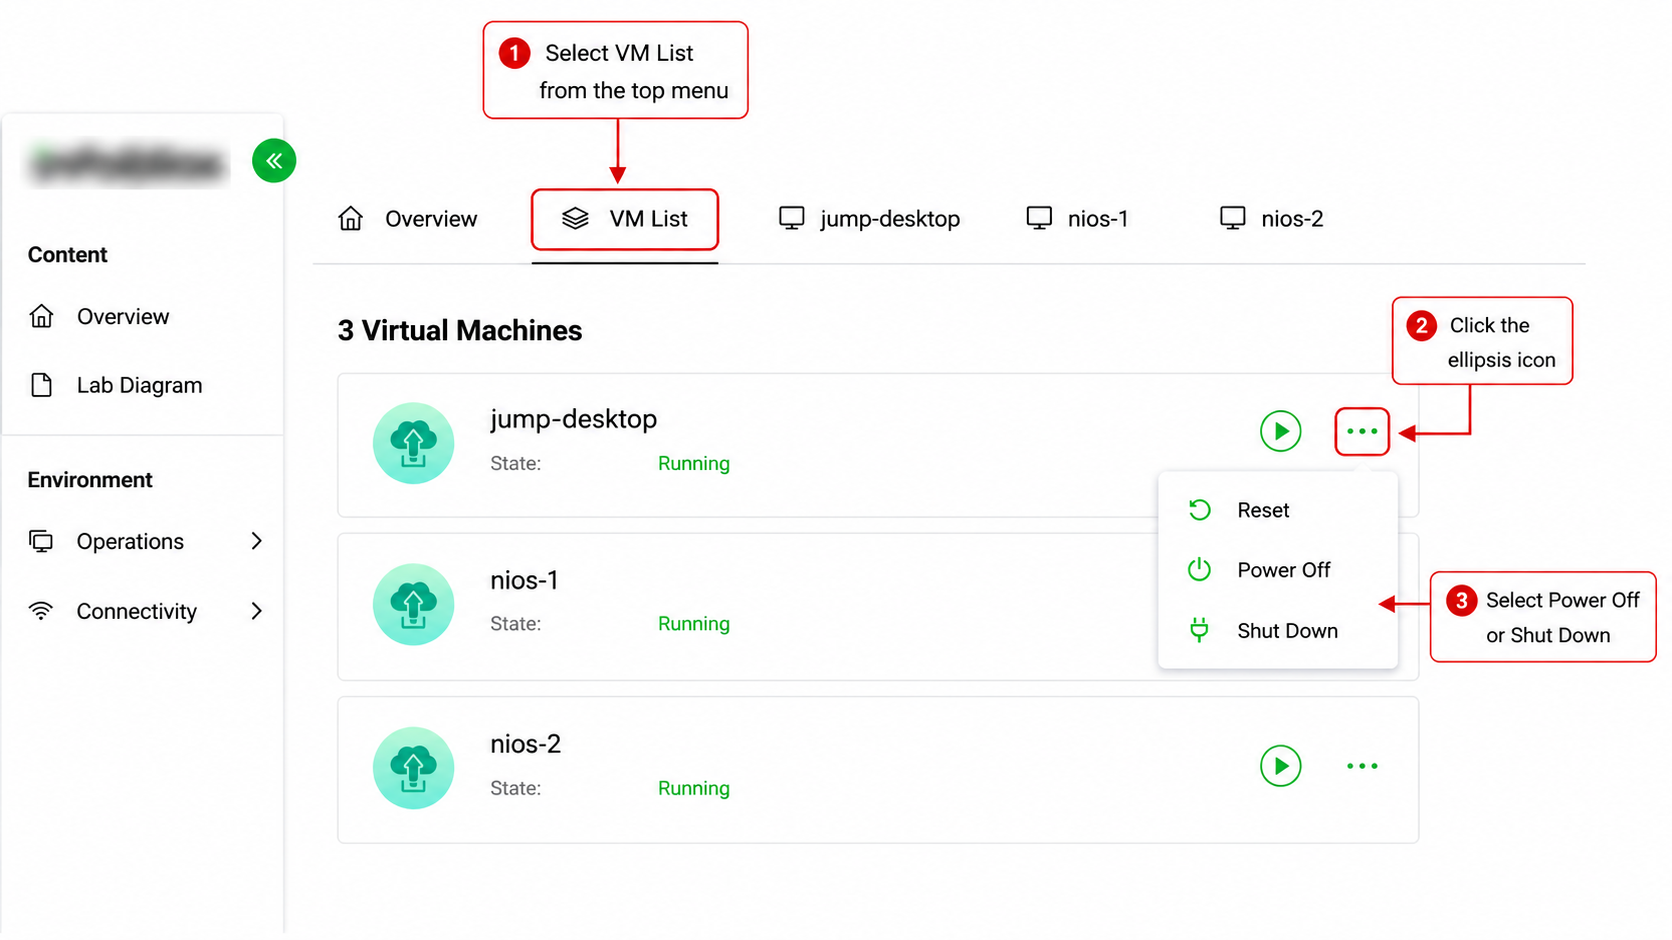
To shut down or power off a virtual machine:
-
Select VM List from the top menu
-
Locate the required VM
-
Click the … (ellipsis) icon next to the VM
-
Select Power Off or Shut Down
-
-
To suspend the environment, navigate to: Environment → Operations → Suspend
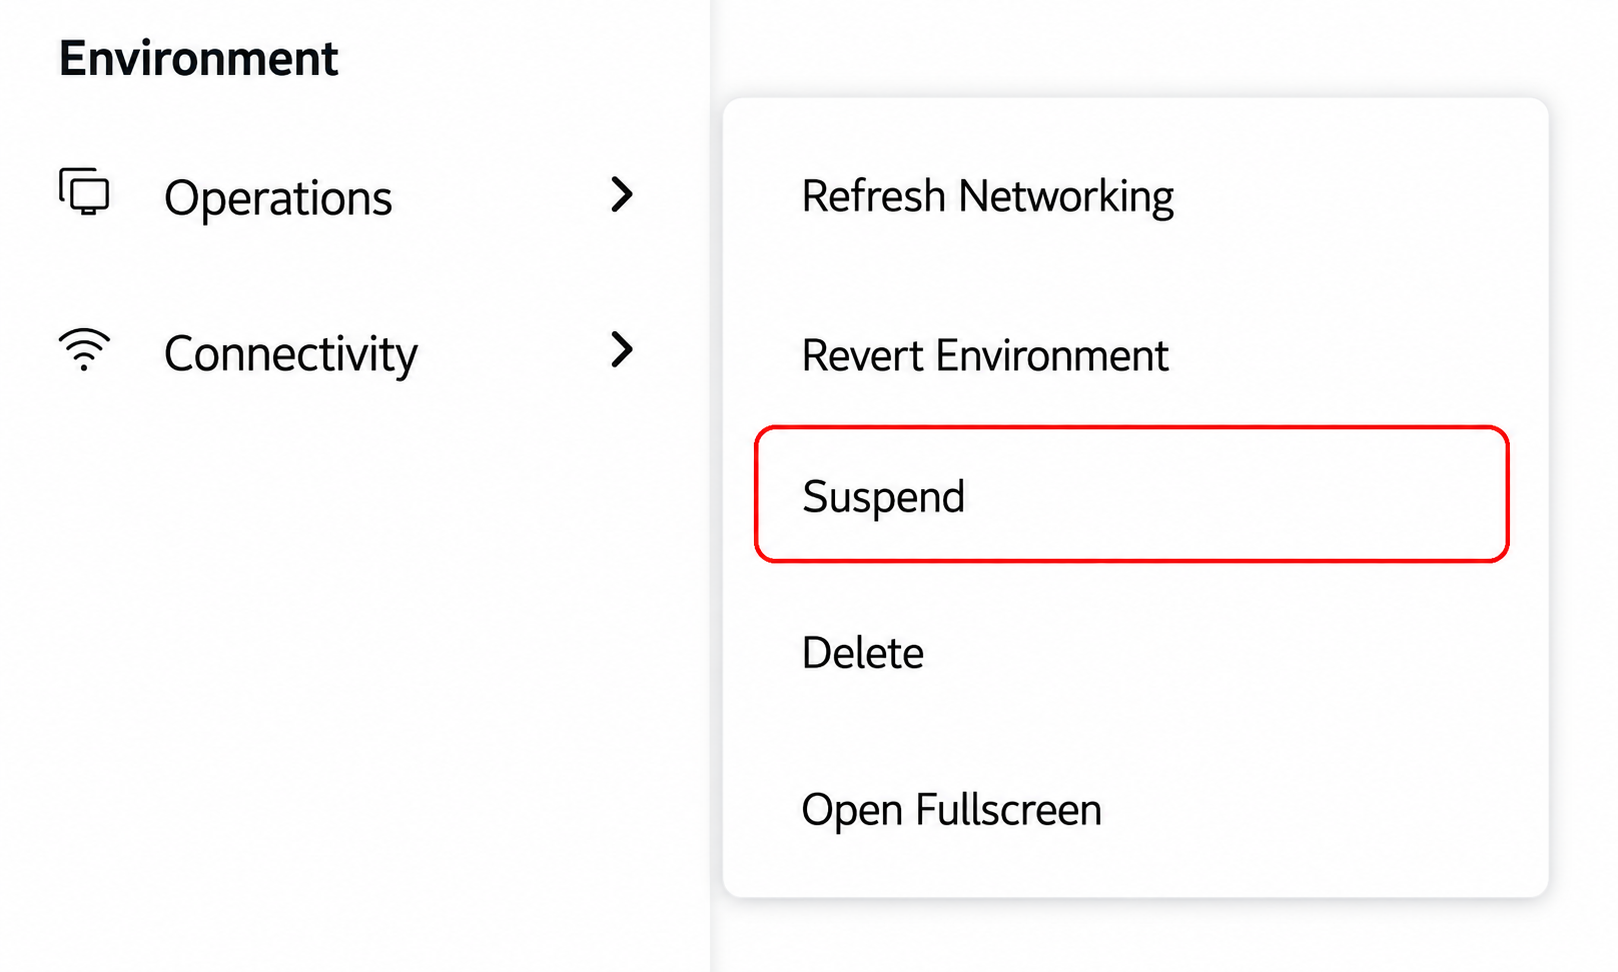
Note : When you are not actively using the lab environment, suspend it to avoid unnecessary lab runtime usage. To return to your lab environment later, access the Universal DDI Lab Environment/Threat Defense Lab Environment item in Launchpad again and click Launch.
-
To extend the environment runtime or storage lease, navigate to: Environment → Operations → Extend
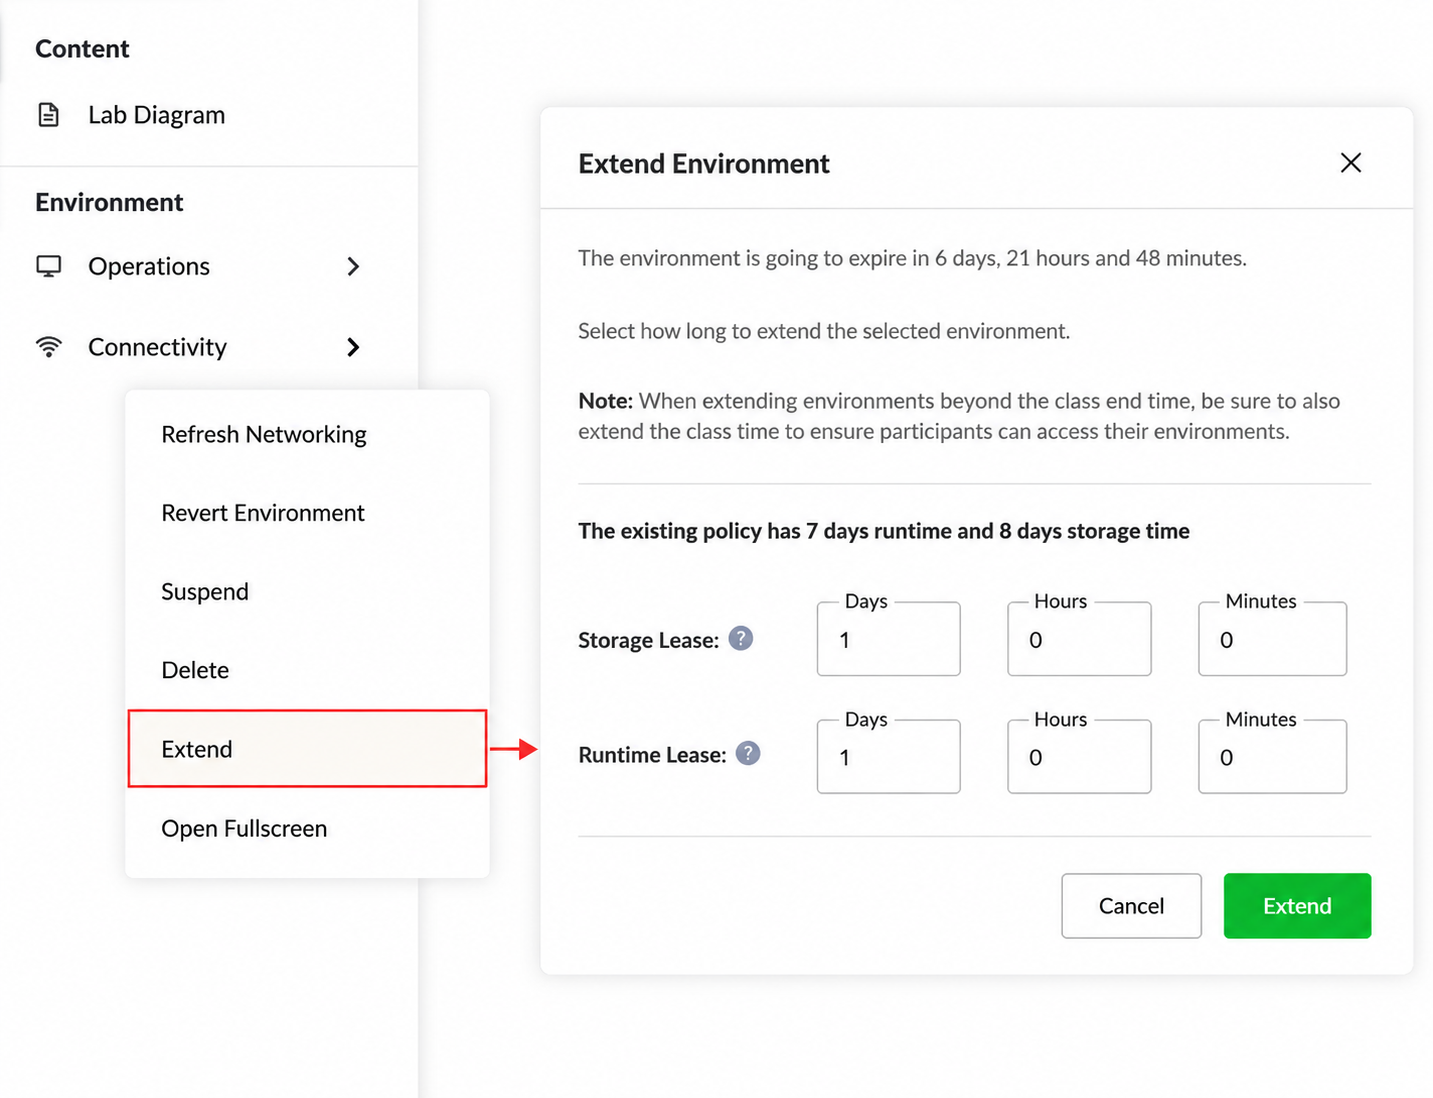
The Extend Environment window allows you to increase the Runtime Lease and Storage Lease duration for supported lab environments.
-
If your lab connection is unstable or slow, you can reduce the display quality to improve responsiveness.
-
From within the lab environment, navigate to: Environment → Connectivity → Connectivity Test
-
Move the slider towards Performance (left side) to reduce quality

-
Click Apply
-
This reduces display quality and improves responsiveness over slower connections.
-
Additional Notes for Lab Environments
You can permanently delete a lab environment by navigating to Environment → Operations → Delete, then clicking Delete again to confirm.
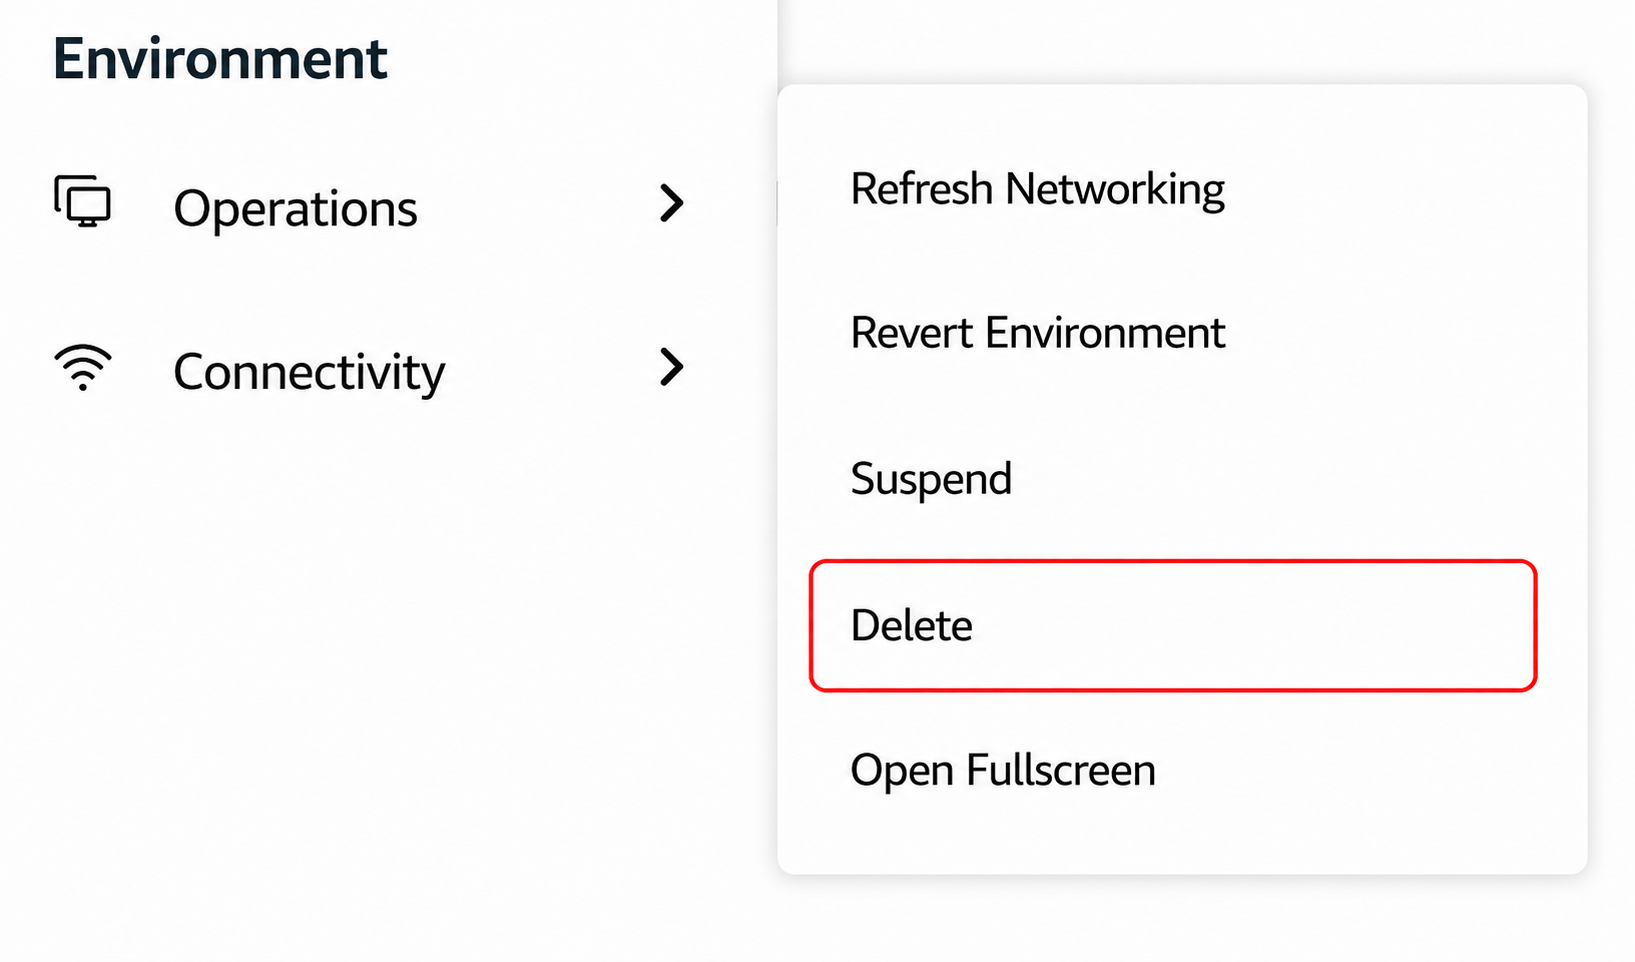
Warning: Deleting a lab environment is a permanent action and cannot be undone.
Additional Notes for Techblue Infoblox Portal Access
-
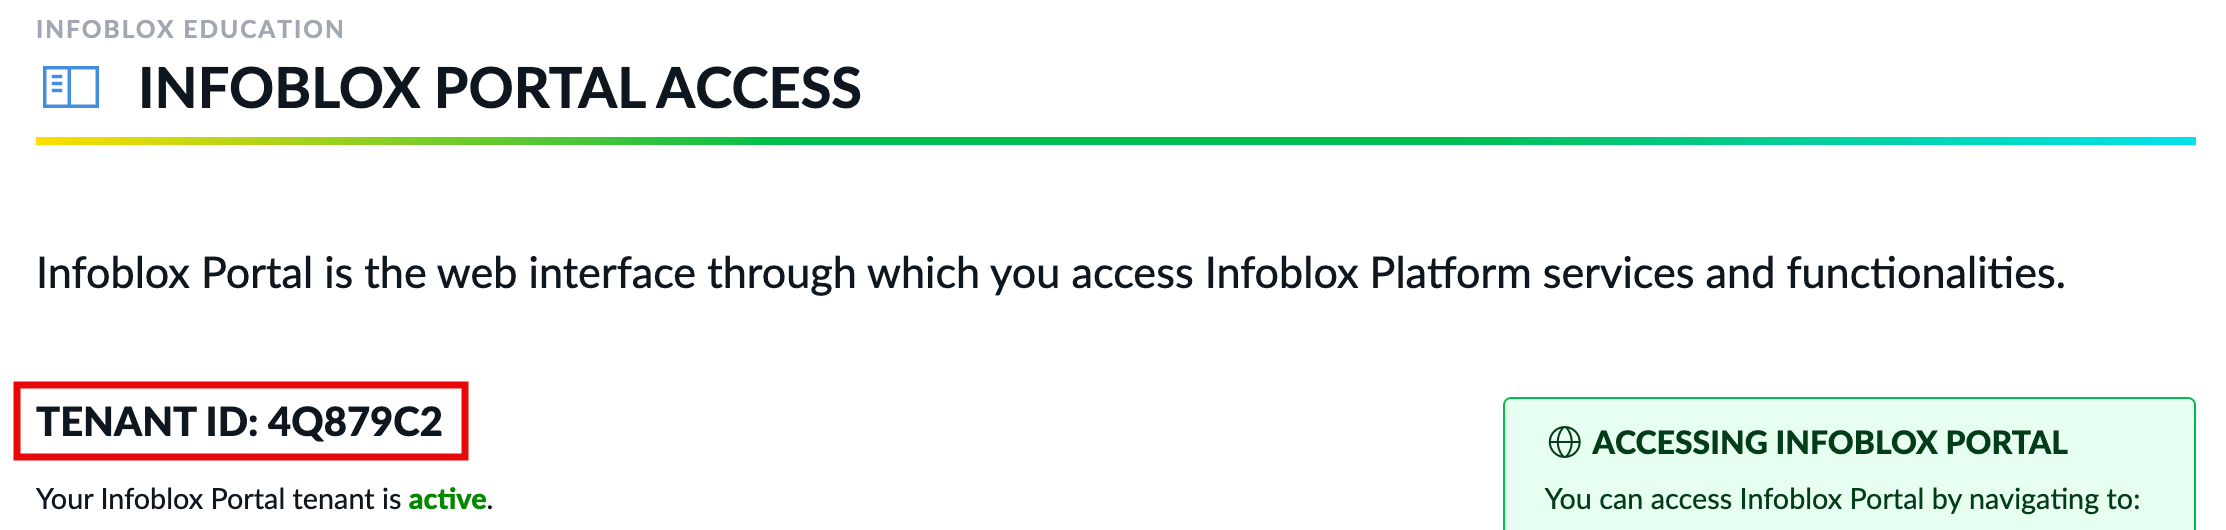
A seven-character Tenant ID will be provided on the Infoblox Portal Access page when you create a tenant.
-
If you need assistance, please provide this code to your instructor or include it in your email request to education@infoblox.com.
-
-
The
tenantid-admin@techblue-mail.netusername/email address will be used to log in to the Infoblox Portal.-
This email address will automatically relay/forward emails to your email address.
-
Do not forget to check your Spam or Junk folders!
-
The expiration date will be displayed under the tenant username/email address.
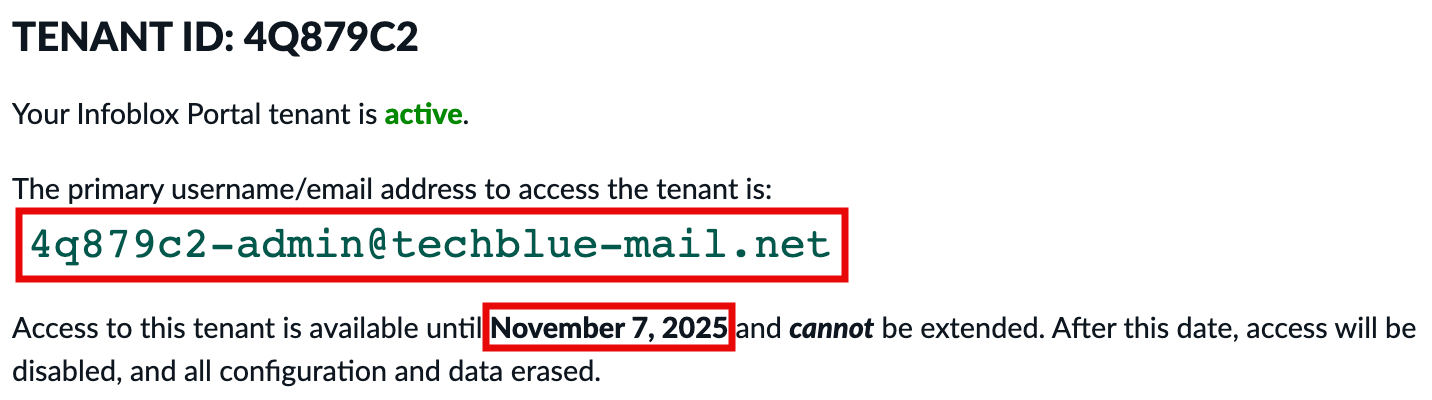
The Infoblox Portal tenant will remain valid for up to 60 days. Time extensions are not possible.