Scenario
The network team has provisioned a new IPv4 subnet and has requested that a range of IP addresses in the subnet is to be handed out dynamically. Please create the appropriate objects in NIOS.
Estimate Completion Time
-
15 to 20 minutes
Credentials
|
Description |
Username |
Password |
URL or IP |
|---|---|---|---|
|
Grid Manager UI |
ops |
infoblox |
Requirements
-
Read-write access to DHCP range
Learning Content
Lab Initiation
Access jump-desktop
Once the lab is deployed, you can access the virtual machines required for this activity. To begin, select VM List from the navigation bar at the top, locate jump-desktop, and click the green play icon to open its console. Log in to the Linux UI.

Username: training
Password: infoblox
Initiate lab
To initiate the lab, double-click the Launch Lab icon on the Desktop.

Choose the lab number from the list and click OK.

After clicking OK, you will see a pop-up message with a brief description of the lab task. If the description looks correct, click Yes to continue lab initiation.

Lab initiation will take a couple of minutes to finish.
Once complete, you will see another pop-up message with the login credentials and the URL for the Grid Manager’s User Interface. Note that the credentials may differ from those from prior labs.

Tasks
Task 1: Creating a DHCPv4 range for normal clients
Login to the GM web interface and navigate to the network 172.31.111.0/24. The request is to support up to 50 clients so please create a range suitable for it.
Task 2: Creating a DHCPv4 range with special options
Login to the GM web interface and navigate to the network 172.31.111.0/24. The request is to support up to 4 printers so please create a range suitable for it, with the custom DHCP options listed in Table 1511-1.
Table 1511-1
|
DHCP Option |
Value |
|---|---|
|
(9) LPR Servers |
10.100.1.1, 10.200.1.1 |
|
(15) Domain Name |
print.techblue.net |
Solutions
Task 1 Solution: Creating a DHCPv4 range for normal clients
-
Login to NIOS GM web interface.
-
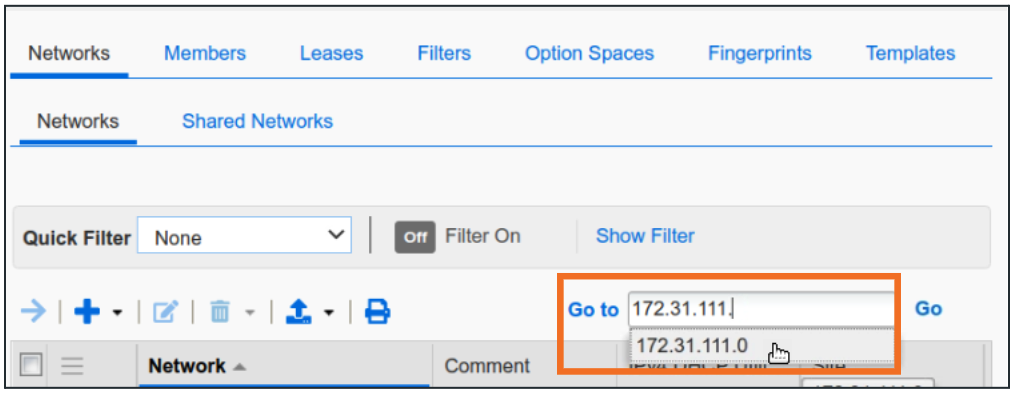
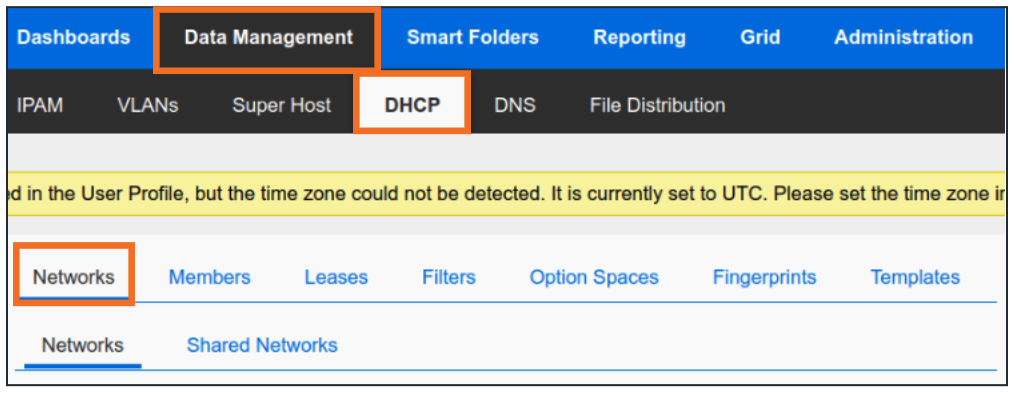
Navigate to Data Management → DHCP → Networks

-
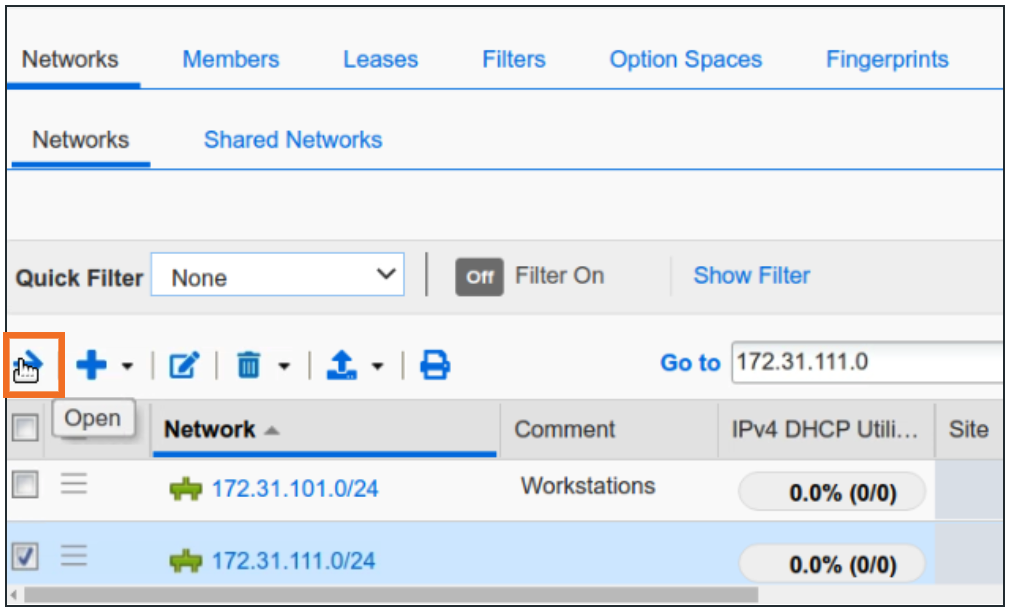
In the Go to field, type in 172.31.111 and click on the first match (172.31.111.0).
-
Open the network object 172.31.111.0/24 by clicking on Open (→)
-
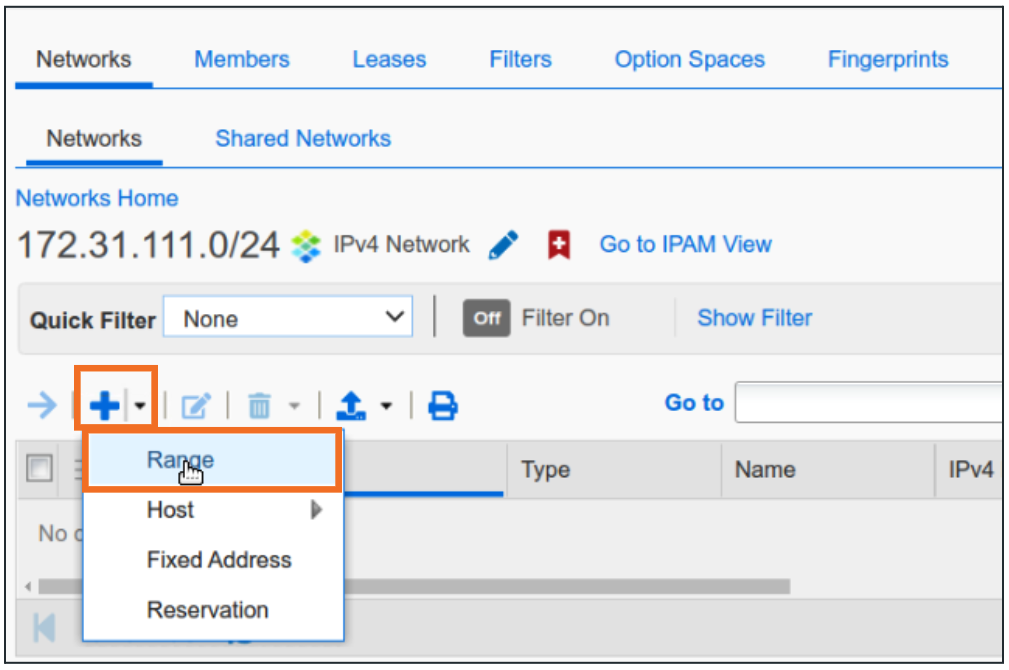
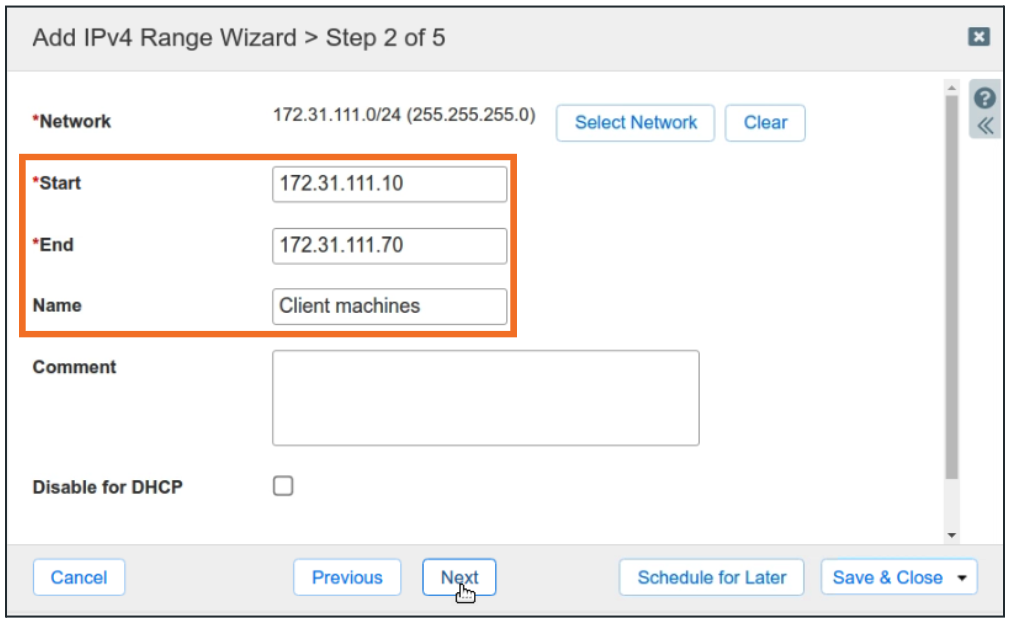
Once inside 172.31.111.0/24, click + from the dropdown and choose Range.
-
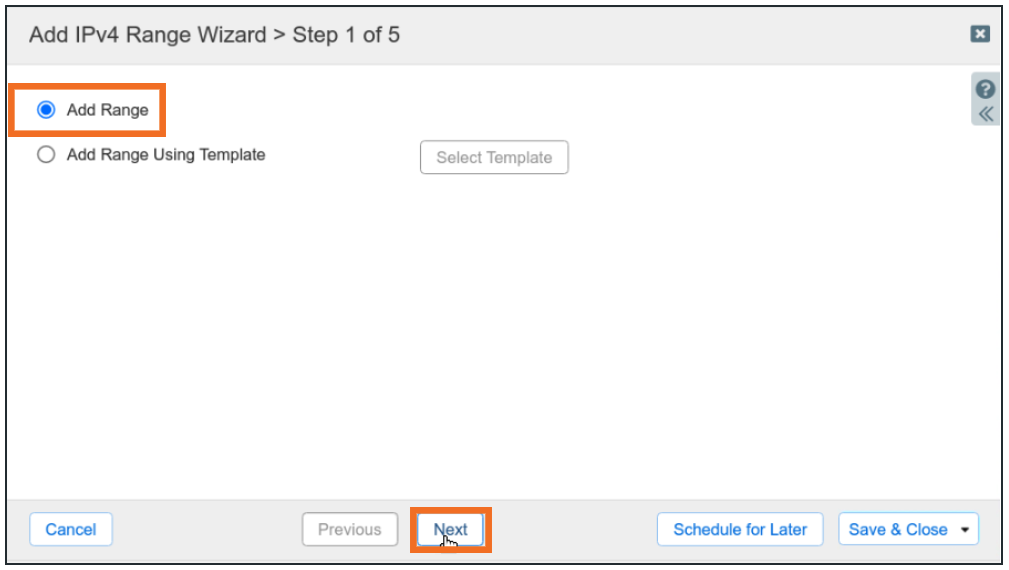
Click Next for the first step of Add IPv4 Range Wizard (no templates available).
-
In step 2 provide Start and End IP addresses along with a name for the range. In our example below, we are creating a range of 61 addresses although the requirement is only for 50 clients. It is recommended to have 10-20% extra IP addresses in client ranges.
-
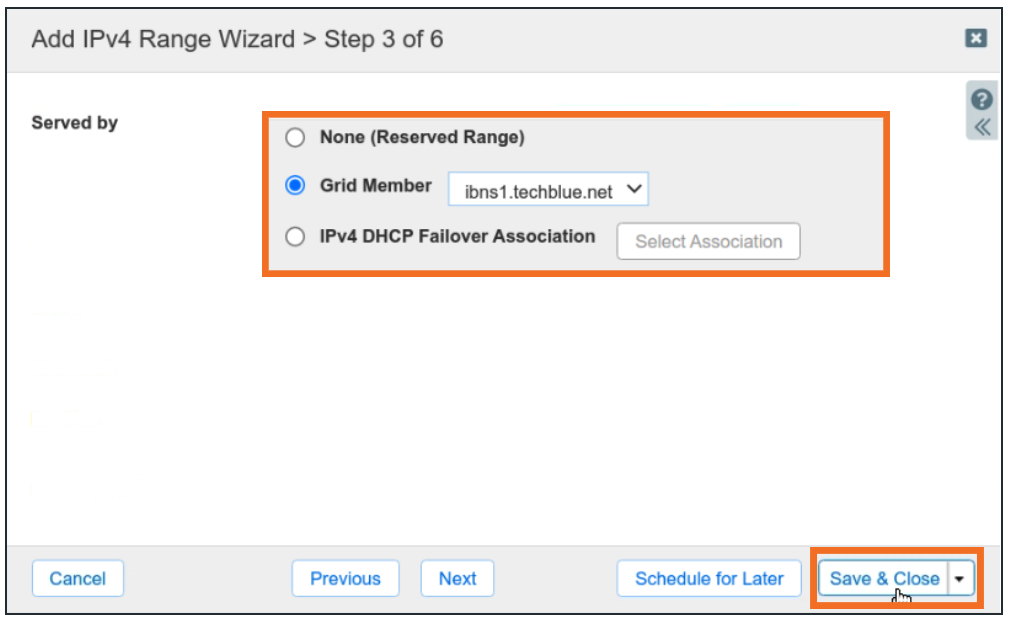
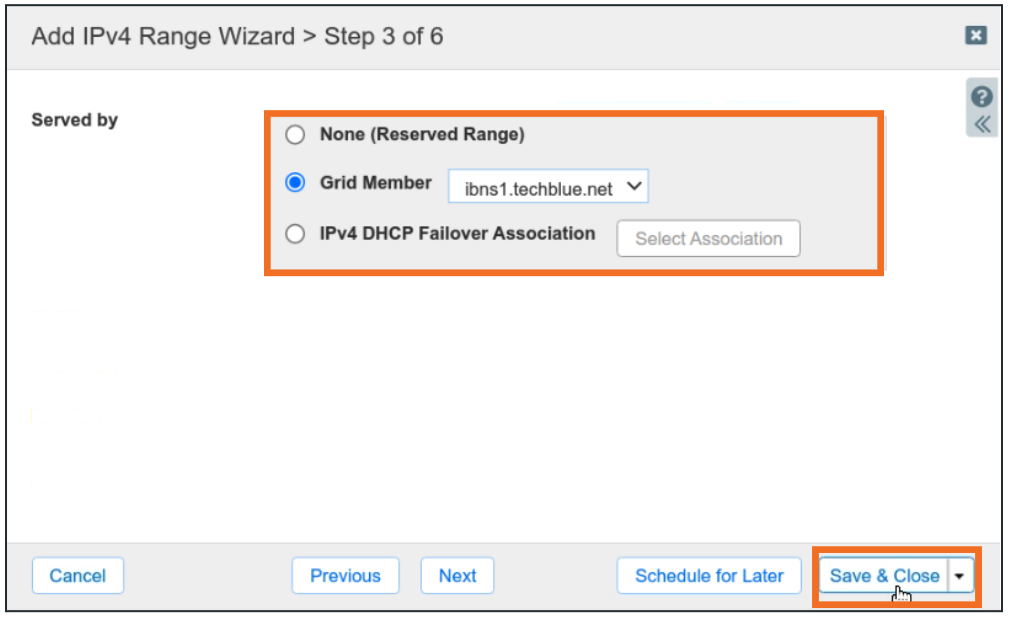
In Step 3, choose Grid Member, then click Save and Close.
Task 2 Solution: Creating a DHCPv4 range with special options
-
Login to NIOS GM web interface.
-
Navigate to Data Management → DHCP → Networks.
-
In the Go to field, type in 172.31.111 and click on the first match (172.31.111.0).

-
Open the network object 172.31.111.0/24 by clicking on Open (→).

-
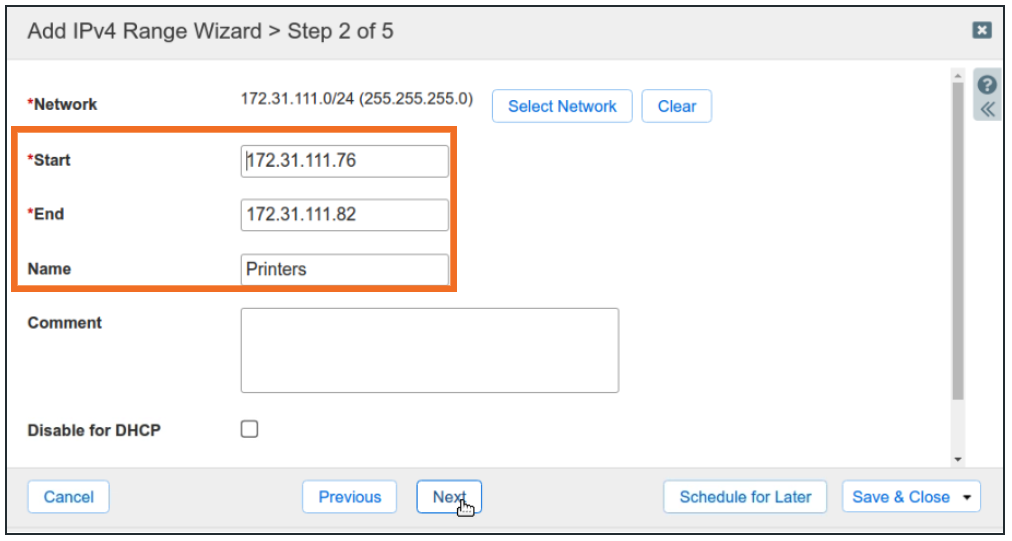
Once inside the 172.31.111.0/24, click + from the dropdown and choose Range.

-
Click Next for the first step of Add IPv4 Range Wizard (no templates available).

-
In step 2 provide Start and End IP addresses along with a name for the range. In our example, we are creating a range of 7 addresses although the requirement is only for 4 clients.
-
In Step 3, choose Grid Member, then click Save and Close. Do not restart service yet.
-
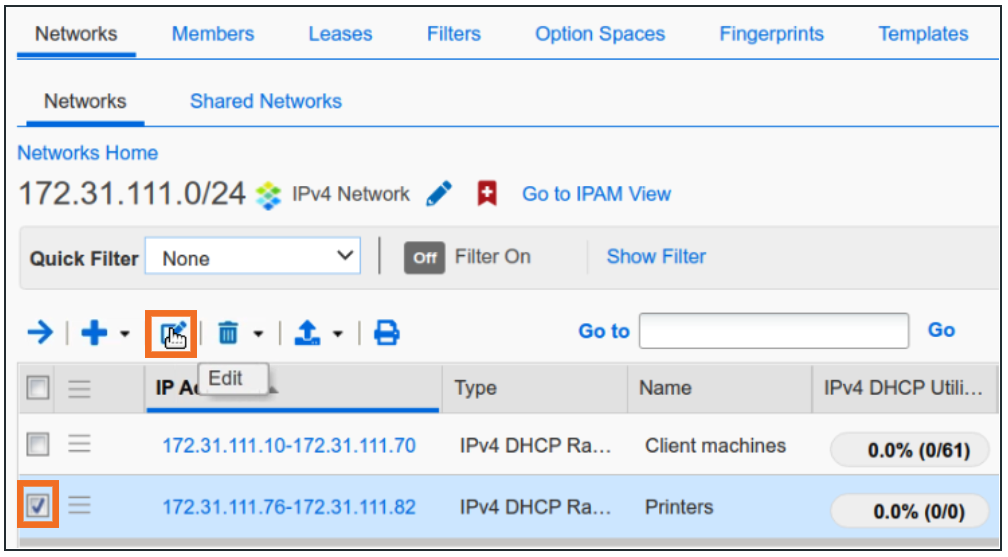
After saving the printer range, we need to assign special options to the range object. Select the 172.31.111.76-172.31.111.82 range and click Edit.
-
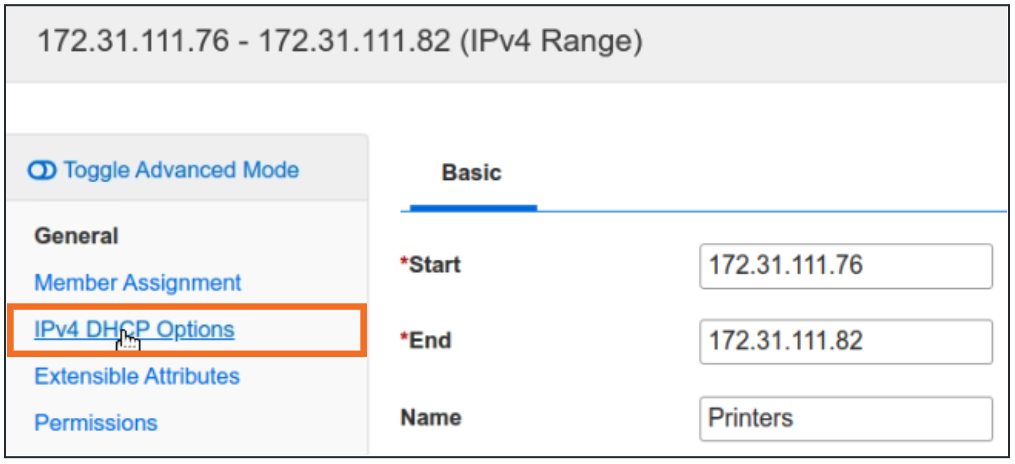
In the object editor window, click IPv4 DHCP Options.
-
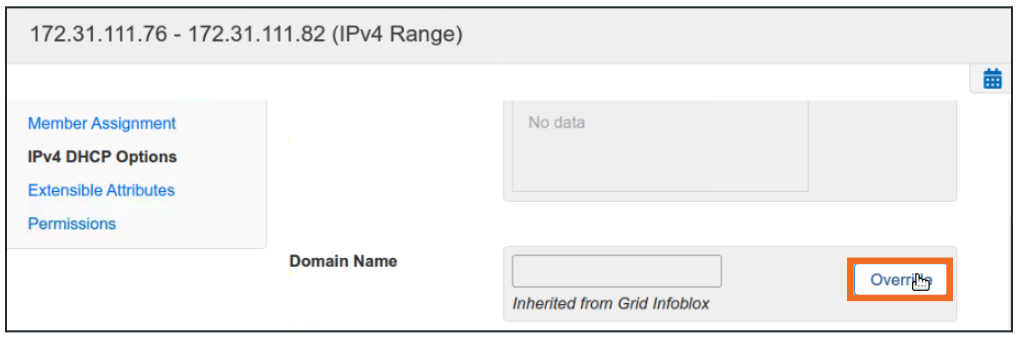
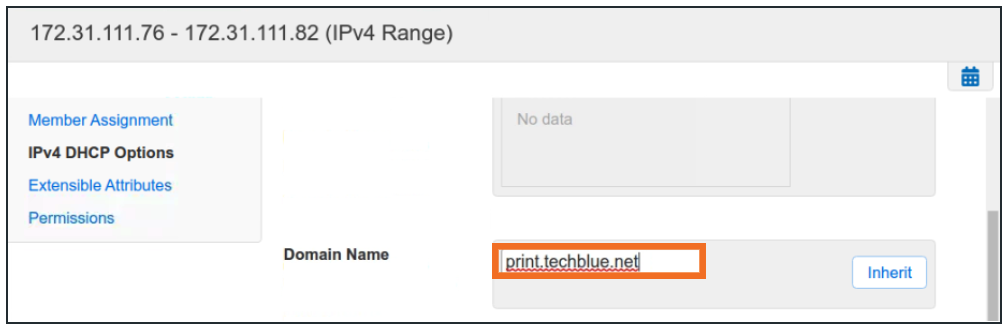
In the IPv4 DHCP Options tab, click Override for Domain Name.
-
Then enter custom Domain Name print.techblue.net
-
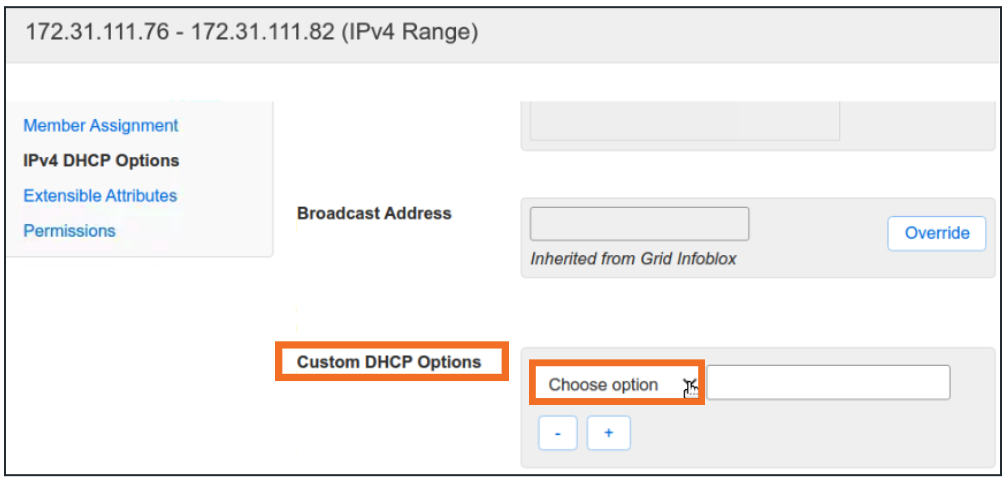
Once completed, scroll down further to set Custom DHCP Options.
-
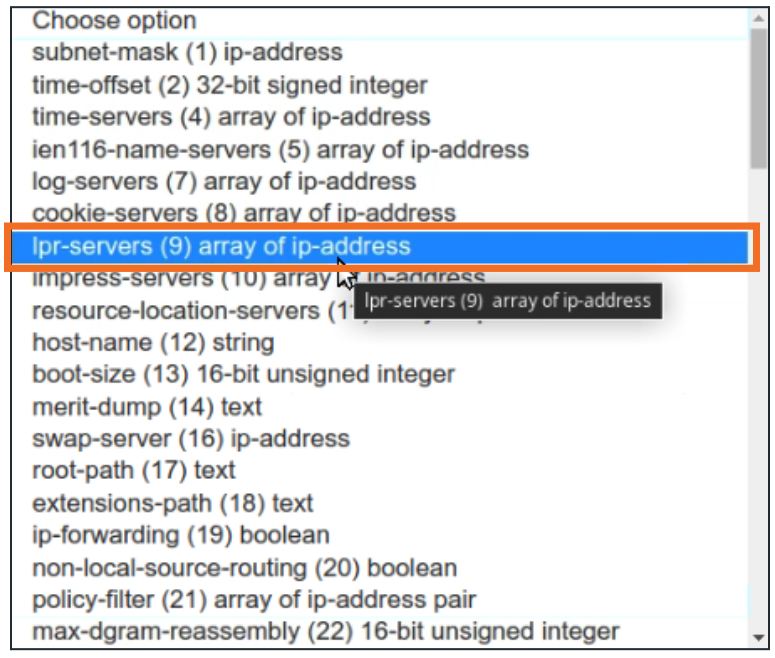
Choose the Custom Option lpr-servers(9).
-
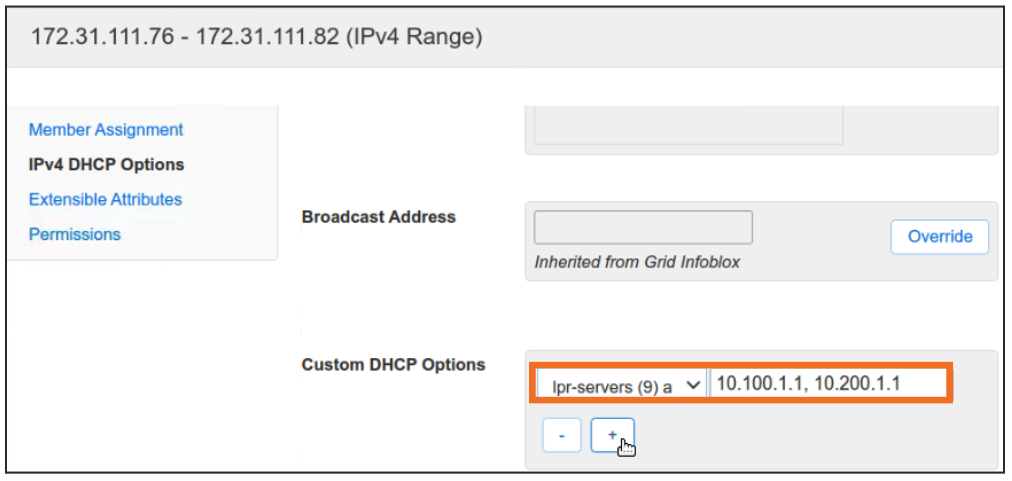
Fill option values as specified in Table 1511-1.
-
Save and Close when finished.
-
Restart service when prompted.
Changes made during this lab would require a restart of DHCP services to take effect. The objective here is to familiarize yourself with the process.