Scenario
A systems developer has requested that you reserve the IP address 172.31.100.2 as a future secondary router’s IP address. She also requests that you block off the IP addresses 172.31.100.101 through 172.31.100.109 for “Project X”. Please make the necessary configurations in NIOS for her.
Estimate Completion Time
-
10 to 15 minutes
Credentials
|
Description |
Username |
Password |
URL or IP |
|---|---|---|---|
|
Grid Manager UI |
ops |
infoblox |
Requirements
-
Read-write access to DHCP reservations
-
Read-write access to DHCP ranges
Learning Content
Lab Initiation
Access jump-desktop
Once the lab is deployed, you can access the virtual machines required for this activity. To begin, select VM List from the navigation bar at the top, locate jump-desktop, and click the green play icon to open its console. Log in to the Linux UI.

Username: training
Password: infoblox
Initiate lab
To initiate the lab, double-click the Launch Lab icon on the Desktop.

Choose the lab number from the list and click OK.

After clicking OK, you will see a pop-up message with a brief description of the lab task. If the description looks correct, click Yes to continue lab initiation.

Lab initiation will take a couple of minutes to finish.
Once complete, you will see another pop-up message with the login credentials and the URL for the Grid Manager’s User Interface. Note that the credentials may differ from those from prior labs.

Tasks
Task 1: Creating a DHCPv4 reservation
Login to the GM web interface. Use global search to find the IPv4 address 172.31.100.2. While possible to add the reservation alongside other objects such as DNS entries, it is good to know if any objects are related to the same IPv4 address. Navigate to the parent DHCP network and create this as an IPv4 reservation.
Task 2: Creating a DHCPv4 reserved range
Login to the GM web interface. Create the reserved range 172.31.100.101 – 172.31.100.109, with the comment Project X.
This serves the purpose of reserving several IP addresses with one object. You could achieve the same by creating 9 separate DHCPv4 reservation objects.
Solutions
Task 1 Solution: Creating a DHCPv4 reservation
The use-case for this reservation is that this IP address is being reserved for future use, which means that the DHCP service will not be allocating this IP address to any client while the reservation still exists. A Fixed Address should not be used here because the address would be permanently bound to a MAC address.
To create a reservation,
-
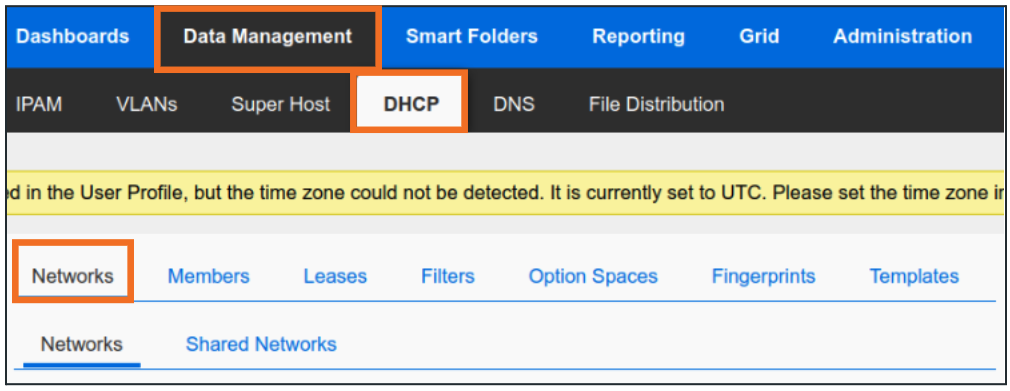
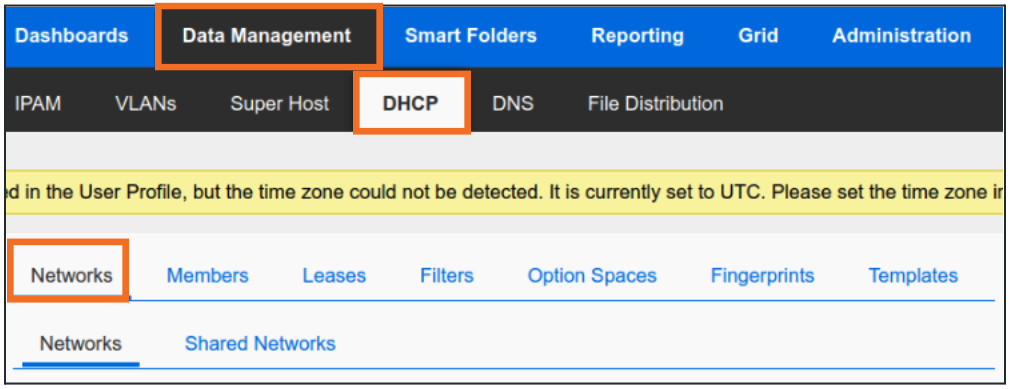
Navigate to Data Management → DHCP → Networks
-
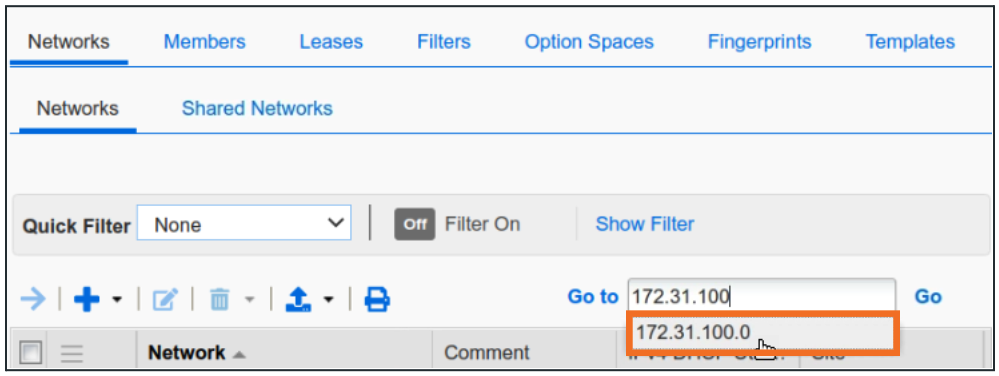
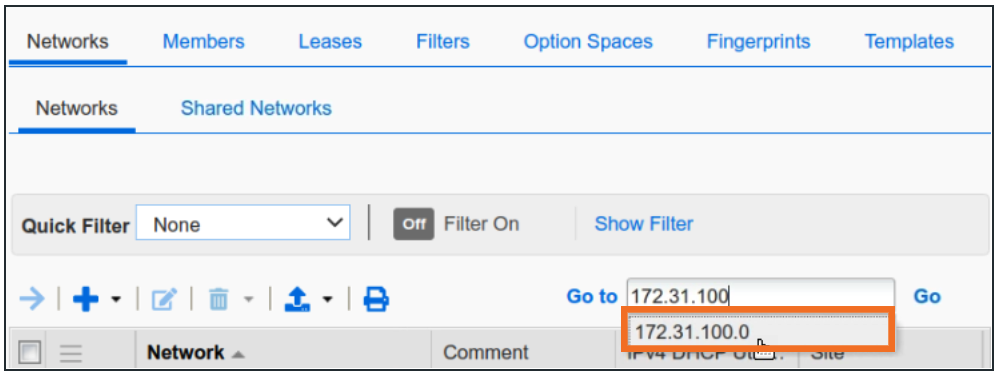
In the Go to field, type in 172.31.100.0 and click on the first match
-
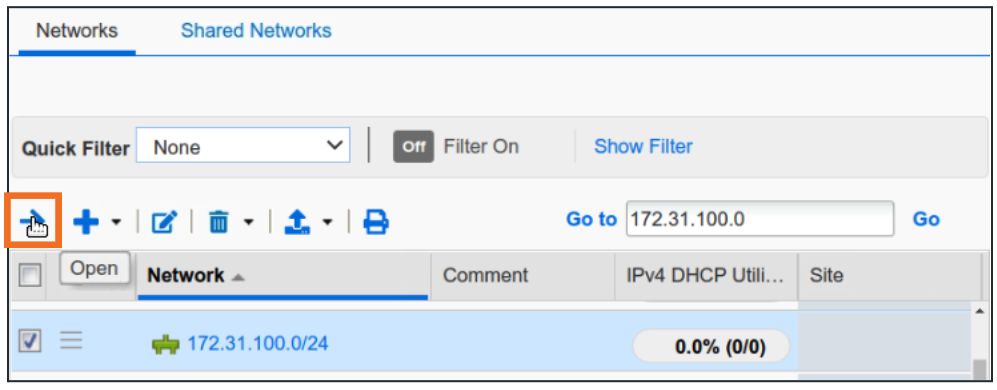
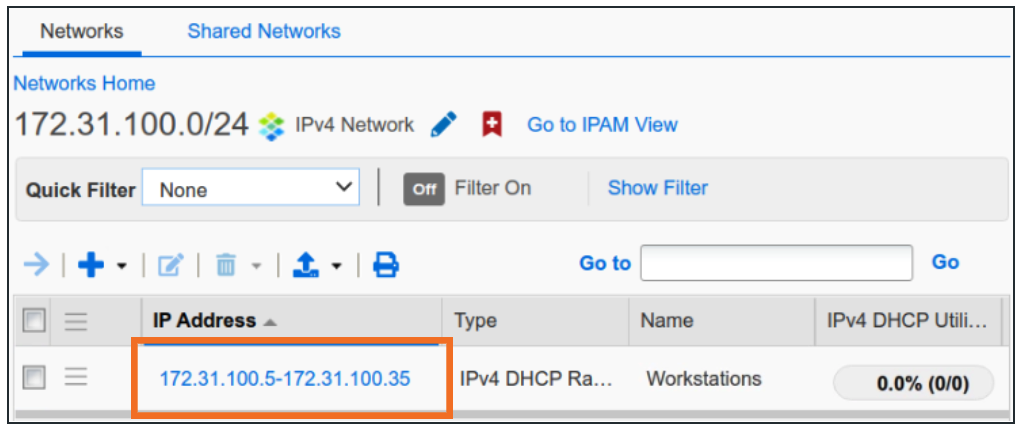
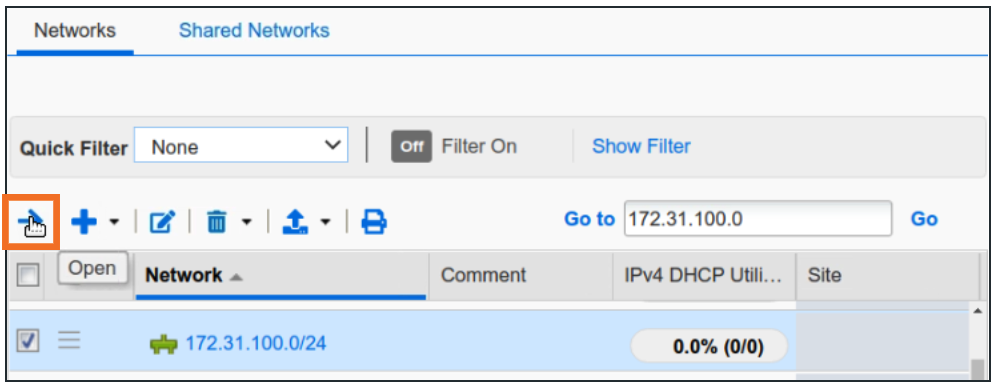
Open the network object 172.31.100.0/24 by clicking on Open (→)
-
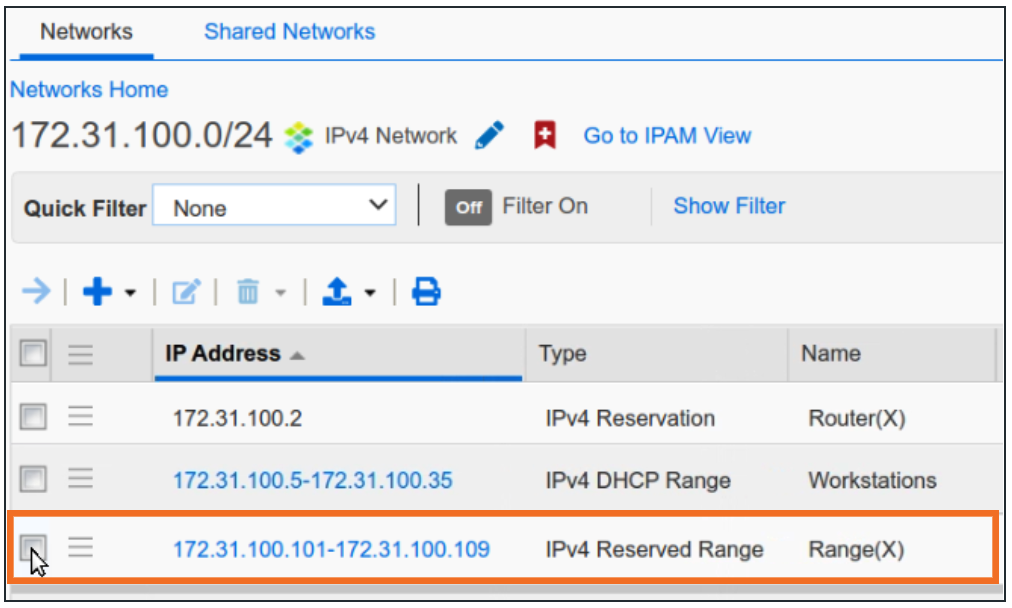
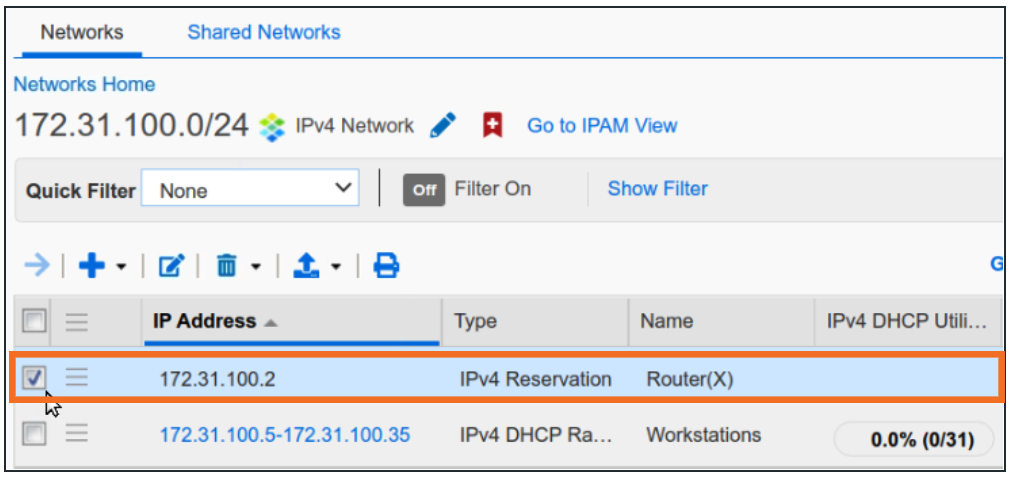
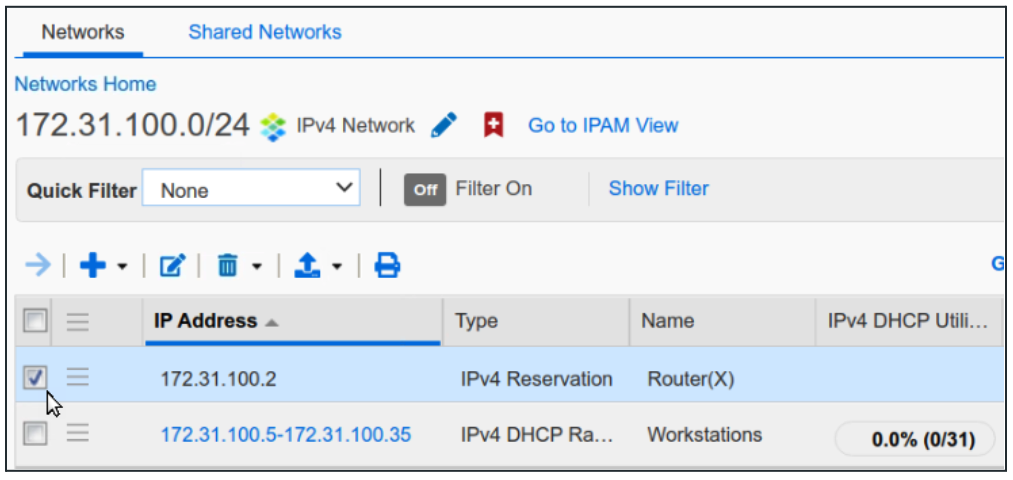
Here, we can see a pre-existing DHCP Range object 172.31.100.5-172.31.100.35. We can move on and create the reservation.
-
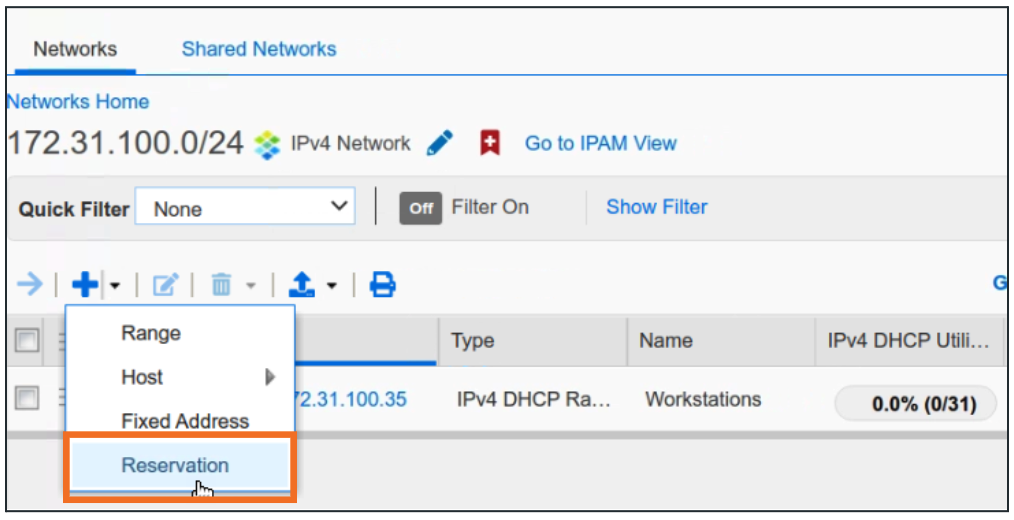
Click + from the dropdown and choose Reservation
-
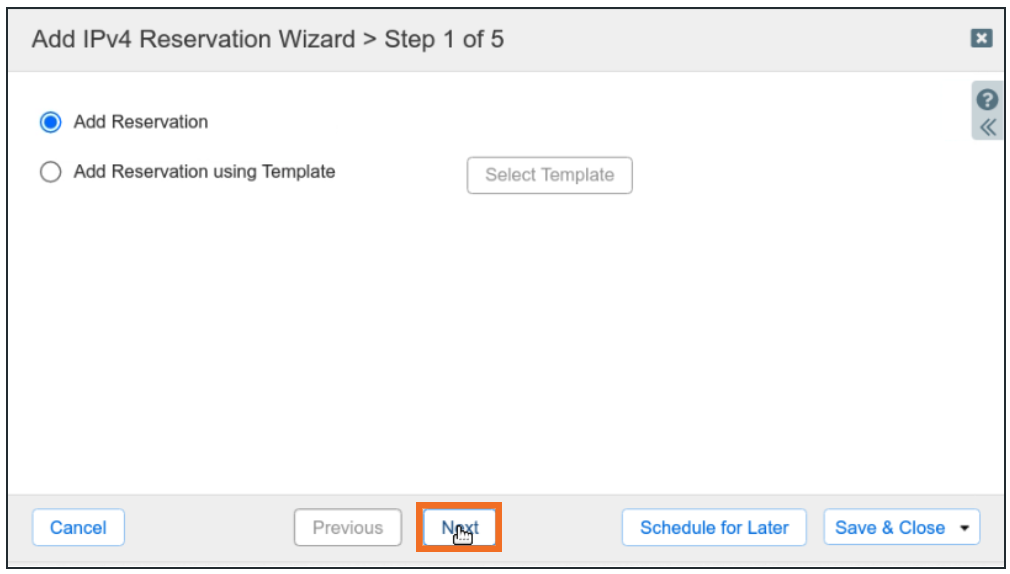
Click Next for the first step of the Add IPv4 Reservation Wizard (no templates available in lab)
-
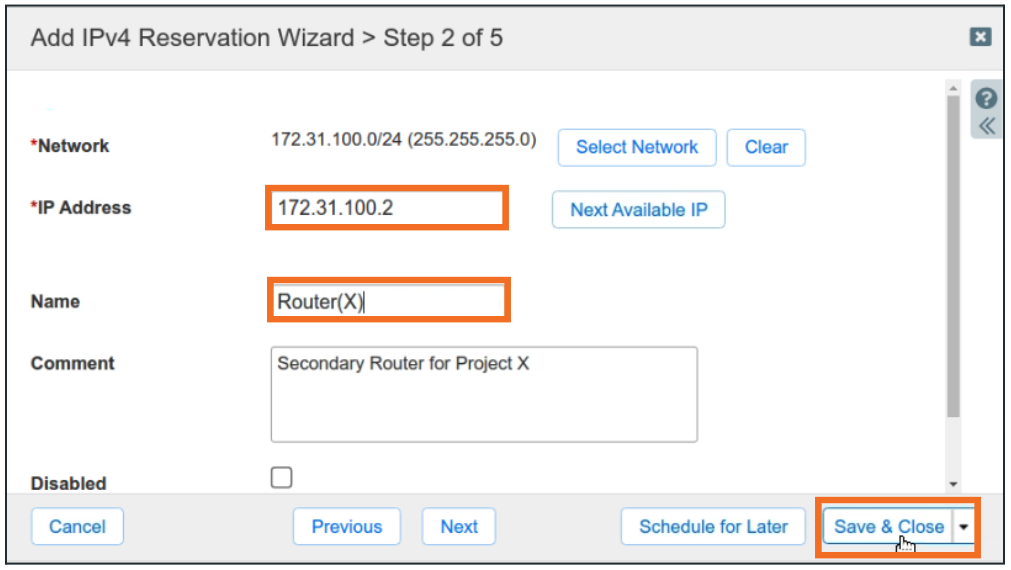
In step 2 provide the IP Address 172.31.100.2 which is to be reserved, along with a Name and an optional Comment about why this reservation was created. Once completed, click Save and Close
-
The reservation is now visible within 172.31.100.0/24 network
Task 2 Solution: Creating a DHCPv4 reserved range
Creating a Reserved Range is the same as creating any IPv4 DHCP Range, except that for a Reserved Range, we do not choose a member to serve the range.
To create a reserved range:
-
Login to NIOS GM web interface
-
Navigate to Data Management → DHCP → Networks
-
In the Go to field, type in 172.31.100.0 and click on the first match
-
Open the network object 172.31.100.0/24 by clicking on Open (→)
-
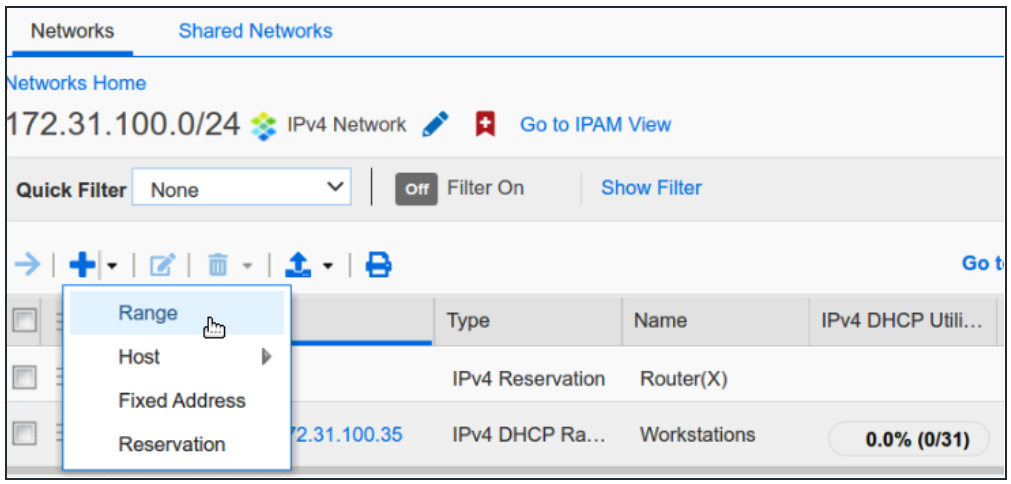
Here, we can see the existing DHCP Range object 172.31.100.5-172.31.100.35, as well as the reservation we just created
-
Click + from the dropdown and choose Range
-
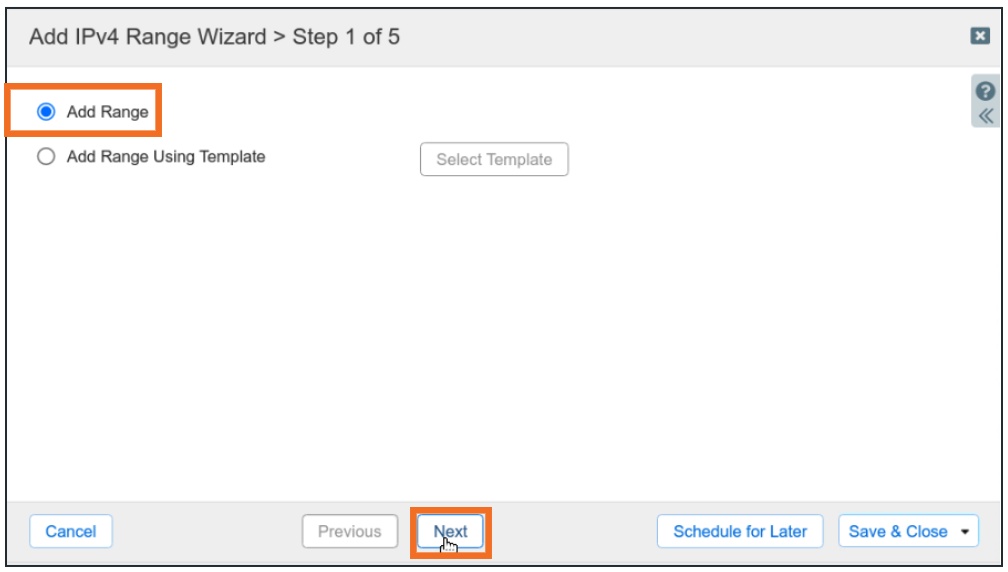
Click Next for the first step of Add IPv4 Range Wizard (no templates available in lab)
-
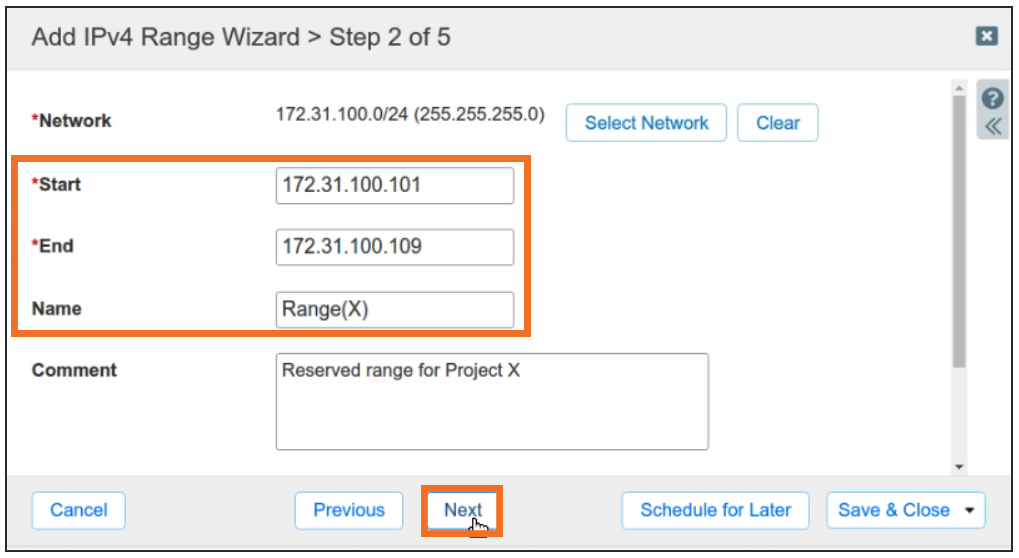
In step 2 provide Start and End IP addresses along with a name for the range and an optional comment, then click Next
-
In Step 3, choose None(Reserved Range) for Served by and click Save and Close

-
We can now see the reserved range along with the other child objects of the 172.31.100.0/24 network