Scenario
The network team has provisioned a new IPv4 subnet and has requested that a new range of 20 addresses in the subnet to be handed out dynamically. Please create the appropriate objects in NIOS.
Estimate Completion Time
-
15 to 20 minutes
Credentials
|
Description |
Username |
Password |
URL or IP |
|---|---|---|---|
|
Grid Manager UI |
ops |
infoblox |
Requirements
-
Read-only access to DHCP members and failover associations
-
Read-write access to DHCP ranges
Learning Content
Lab Initiation
Access jump-desktop
Once the lab is deployed, you can access the virtual machines required for this activity. To begin, select VM List from the navigation bar at the top, locate jump-desktop, and click the green play icon to open its console. Log in to the Linux UI.

Username: training
Password: infoblox
Initiate lab
To initiate the lab, double-click the Launch Lab icon on the Desktop.

Choose the lab number from the list and click OK.

After clicking OK, you will see a pop-up message with a brief description of the lab task. If the description looks correct, click Yes to continue lab initiation.

Lab initiation will take a couple of minutes to finish.
Once complete, you will see another pop-up message with the login credentials and the URL for the Grid Manager’s User Interface. Note that the credentials may differ from those from prior labs.

Tasks
Task 1: Creating a DHCPv4 failover range
Login to the GM web interface and create the DHCPv4 range 172.31.110.17 – 172.31.110.36, enough for 20 IP addresses.
How do you know that this requires DHCP failover? And how do you find out which failover associations to use? Look at the network configuration to see which members are serving the network, then compare that to the DHCP Failover Associations to find out which one you should use for the range.
Task 2: Monitoring DHCPv4 failover association status
In the GM web interface, navigate to the DHCPv4 failover association and monitor its status change. Verify the status is Running OK.
Solutions
Task 1 Solution: Creating a DHCPv4 failover range
A Failover Range is a range that is served by an IPv4 DHCP Failover association and involves two DHCP servers. Creating the failover range object is like creating a regular range, except the failover range will be served by a Failover Association instead of individual DHCP servers. An important consideration while creating Failover ranges is to provide some buffer space for extra IP Addresses. This should be done to ensure service continuity in case one of the Failover peers fails and the service is restricted to just one server.
-
Login to NIOS GM web interface.
-
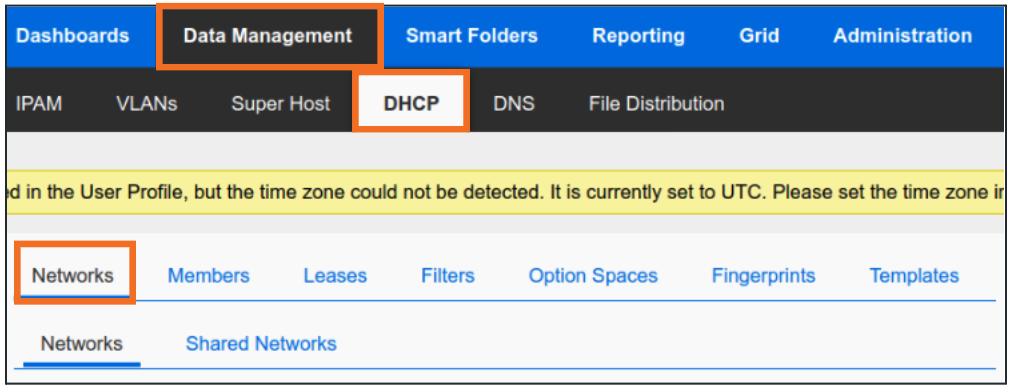
Navigate to Data Management → DHCP → Networks
-
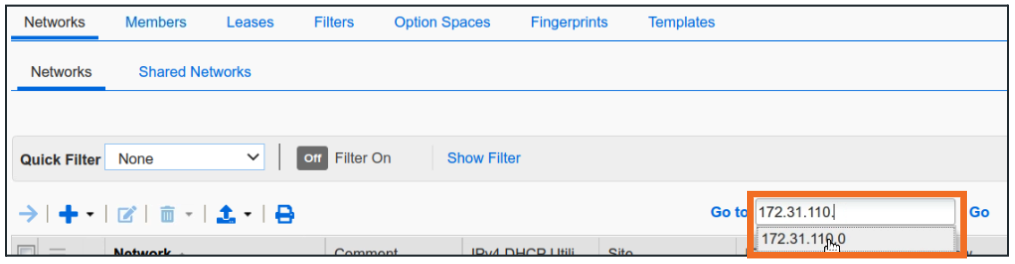
In the Go to field, type in 172.31.110.0 and click on the first match
-
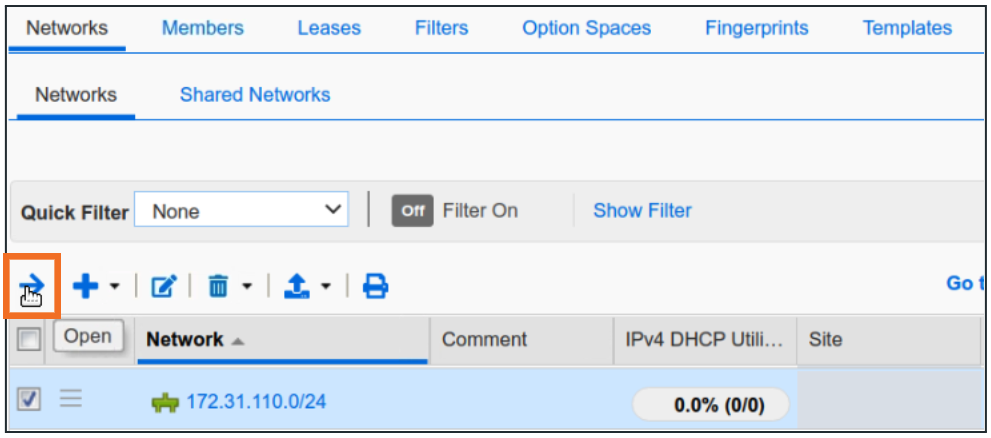
Open the network object 172.31.110.0/24 by clicking on Open (→)
-
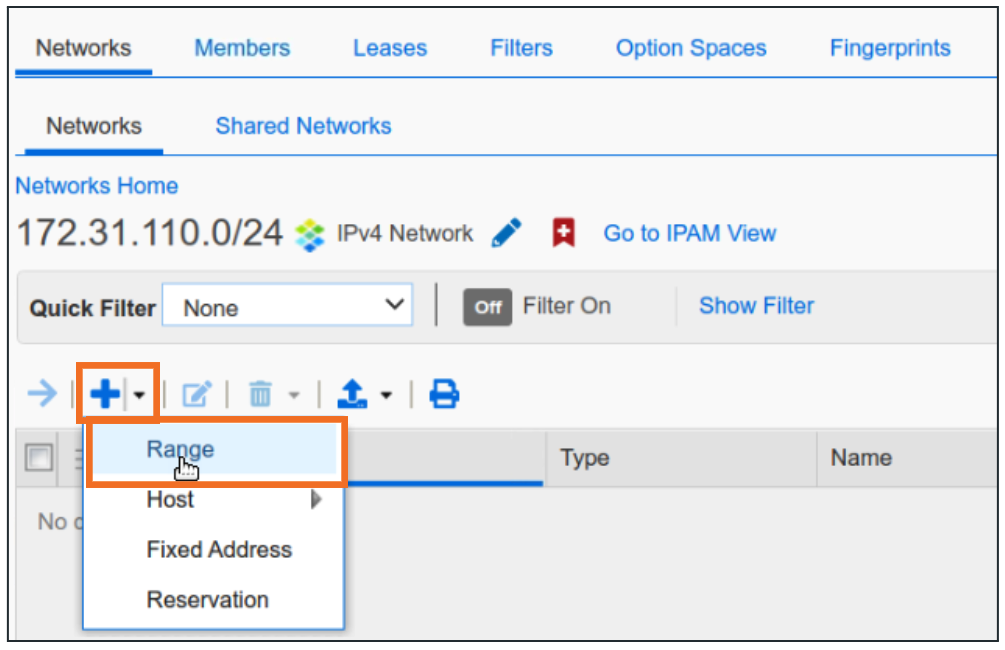
Once inside 172.31.110.0/24, click + from the dropdown and choose Range
-
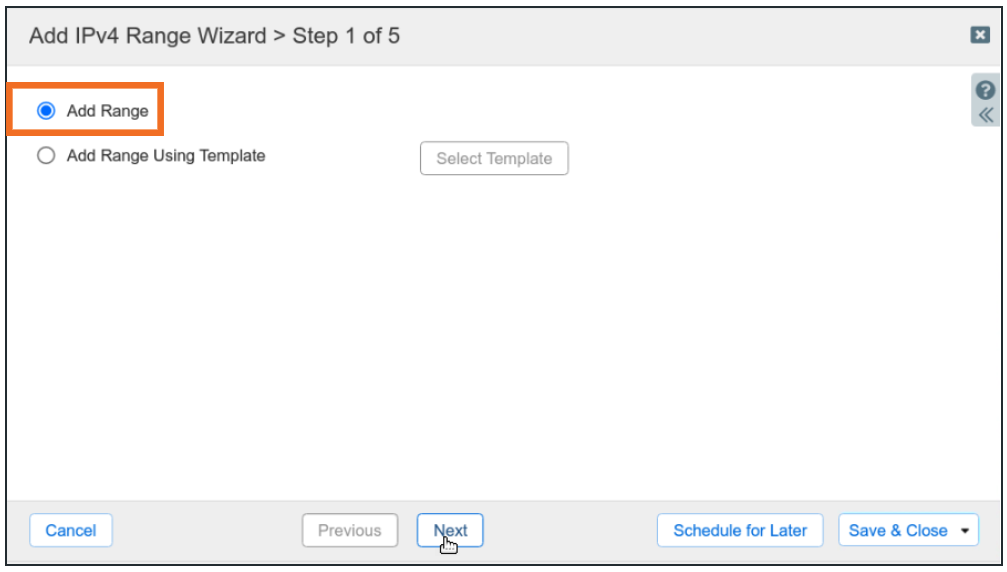
Click Next for the first step of Add IPv4 Range Wizard (no templates available in lab)
-
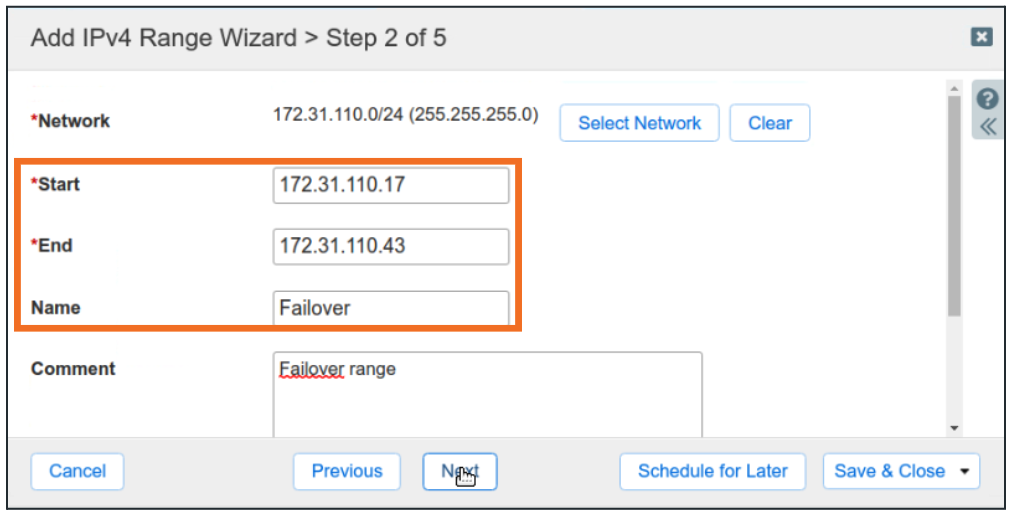
In step 2 provide Start and End IP addresses along with a name for the range and click Next. Here we are provisioning the range with an extra buffer of 30%. Instead of 20 IP Addresses, we are creating a range of 26.
-
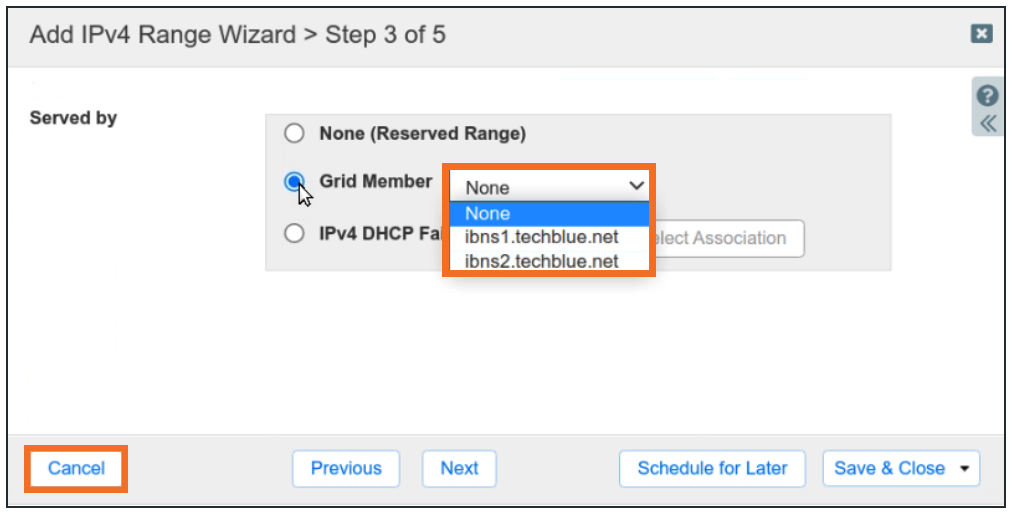
In Step 3, if you choose Grid Member, you will see that there are two members assigned to the parent network
-
This gives us a hint as to which failover association we should assign this range to. Cancel the operation to check the failover configuration
-
To verify, we can check for existing DHCP Failover configuration
-
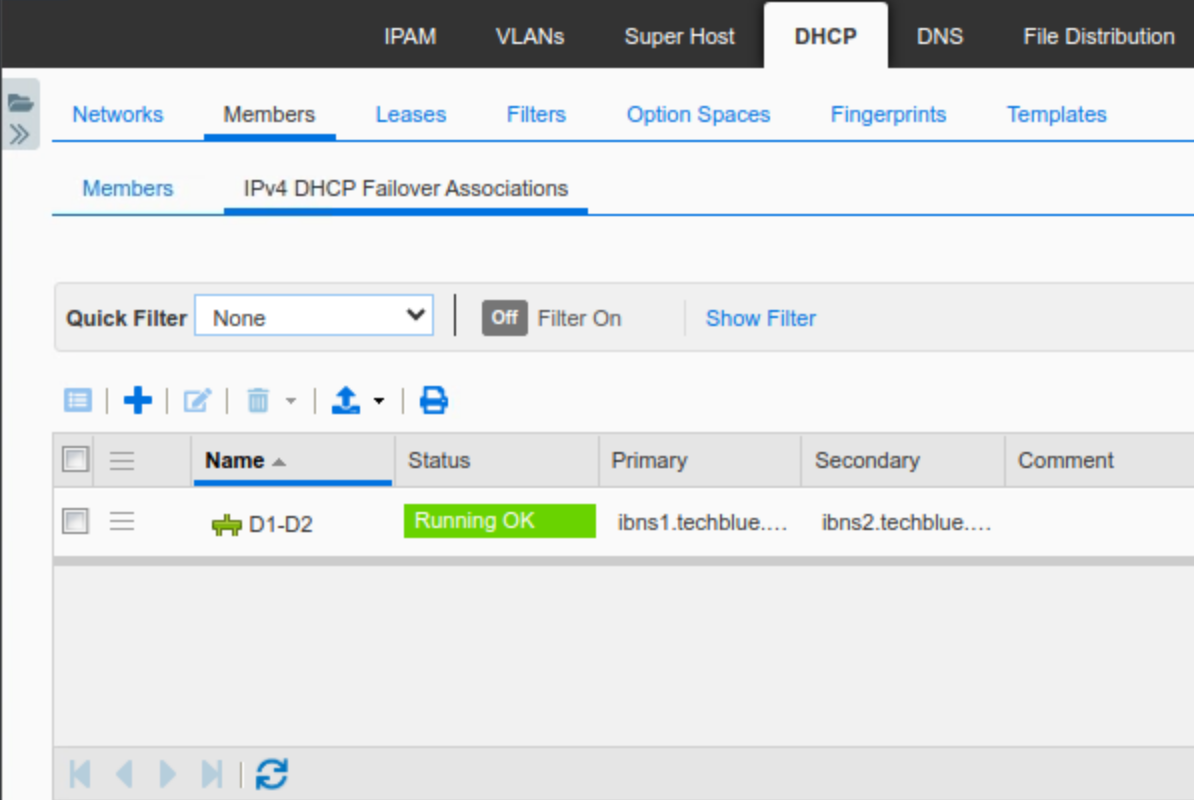
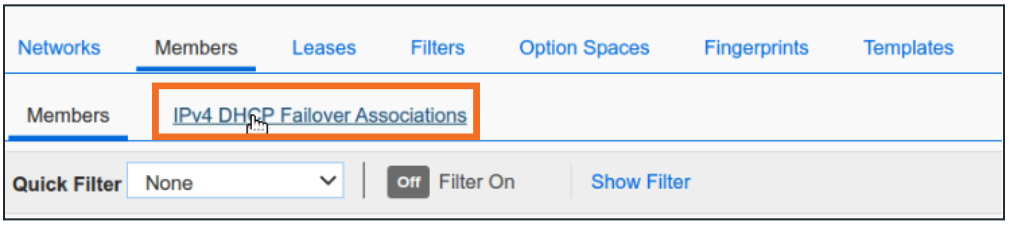
Navigate to Data Management → DHCP → Members → IPv4 DHCP Failover Associations
-
In the lab, there is only one Failover association, which we can Edit to make sure that it was created with ibsn1.techblue.net and ibns2.techblue.net
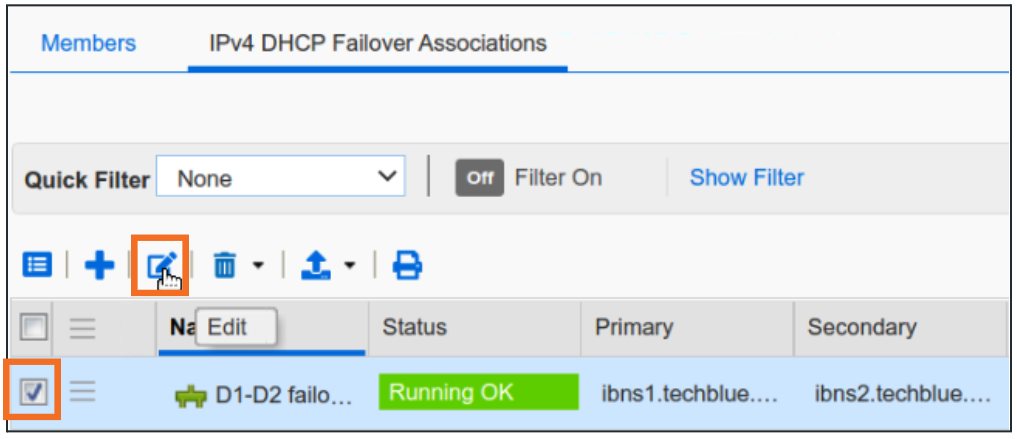
-
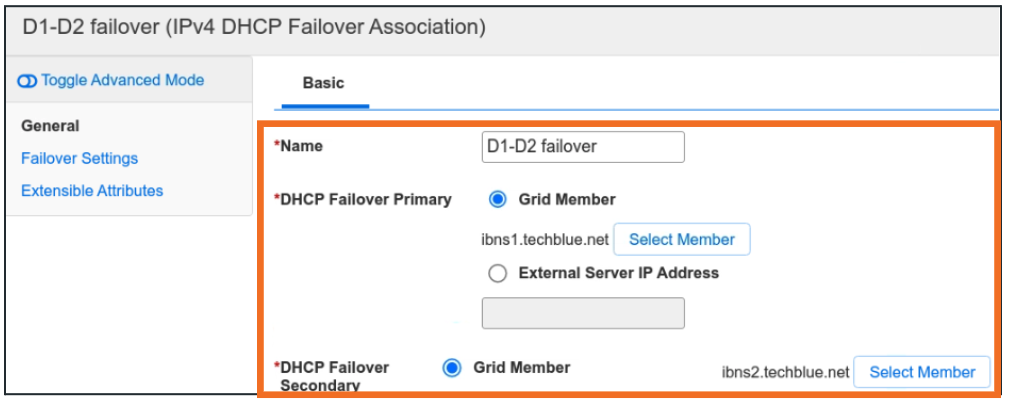
In the Object Editor window, we can see that ibns1.techblue.net is the DHCP Failover Primary and ibns2.techblue.net is the DHCP Failover Secondary in this D1-D2 failover association
-
We can now go back to the range object and assign it to this Failover Association to complete our range creation. Repeat steps 1 through 7.
-
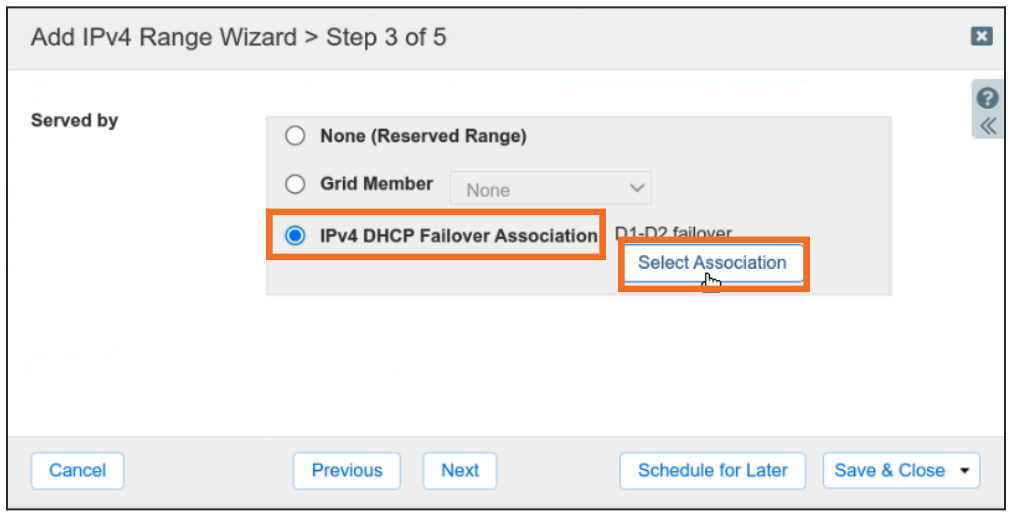
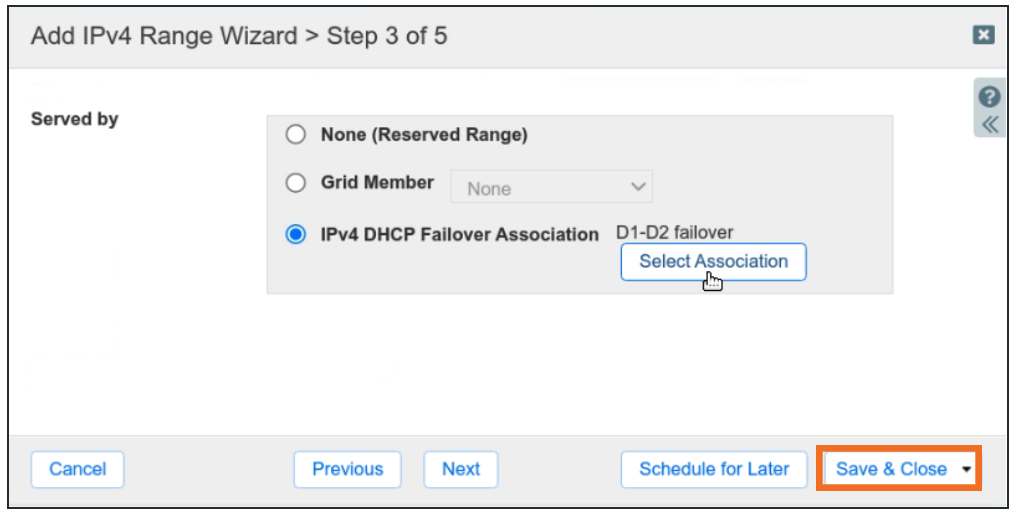
In step 3 of Add IPv4 Range Wizard, choose IPv4 DHCP Failover Association and click Select Association
-
Since there is only one Failover Association in the lab (D1-D2 failover), it will be selected by default
-
Finish by clicking Save and Close.
-
Restart service when prompted.
-
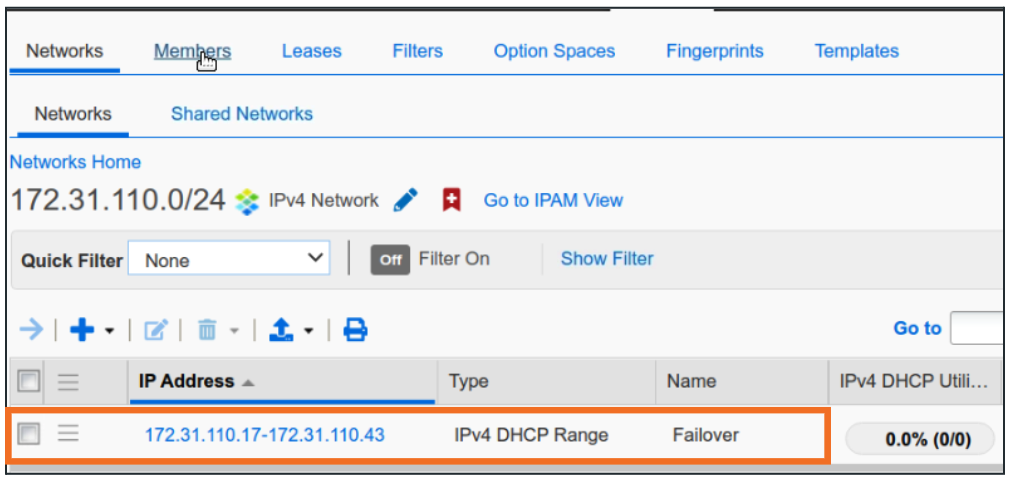
Once finished, we can see our failover range in the network object 172.31.110.0/24.
Task 2 Solution: Monitoring DHCPv4 failover association status
Validate that the DHCP Failover Association comes up, and is Running OK.
-
From the Data Management → DHCP → Members → IPv4 DHCP Failover Associations tab
-
Validate the Status is Running OK. This could take a minute or two. You may also use the refresh icon

in the GM interface to refresh the screen.