Scenario
A request ticket came in, supplying the IP address, fully qualified host name, and MAC address for a printer to be deployed. Please create the necessary configuration in NIOS so that when this printer is deployed in the field, it will automatically receive the IP address via DHCP, and its FQDN will be resolvable.
Estimate Completion Time
-
10 to 15 minutes
Credentials
|
Description |
Username |
Password |
URL or IP |
|---|---|---|---|
|
Grid Manager UI |
ops |
infoblox |
Requirements
-
Read-write access to DNS records
-
Read-write access to DHCP objects
Learning Content
Lab Initiation
Access jump-desktop
Once the lab is deployed, you can access the virtual machines required for this activity. To begin, select VM List from the navigation bar at the top, locate jump-desktop, and click the green play icon to open its console. Log in to the Linux UI.

Username: training
Password: infoblox
Initiate lab
To initiate the lab, double-click the Launch Lab icon on the Desktop.

Choose the lab number from the list and click OK.

After clicking OK, you will see a pop-up message with a brief description of the lab task. If the description looks correct, click Yes to continue lab initiation.

Lab initiation will take a couple of minutes to finish.
Once complete, you will see another pop-up message with the login credentials and the URL for the Grid Manager’s User Interface. Note that the credentials may differ from those from prior labs.

Tasks
Task 1: Search the Grid to be sure this entry is not already in use
Login to the GM web interface. Use the search function to ensure that there are no other DNS or DHCP objects using the same information as listed in Table 1520-1
Table 1520-1
|
IP Address |
MAC Address |
FQDN |
|---|---|---|
|
10.200.0.80 |
FFFF:FFFF:FFFF |
printer44.techblue.net |
Task 2: Create a Host with the supplied information and enable DHCP for the entry
Assuming there are no conflicts with existing data, please create the appropriate object or objects so that 1) this device will receive the specified IP address when it comes online via DHCP and 2) the device is reachable via the FQDN.
There is more than one way to achieve these goals. In NIOS, it is possible to do it with just a single object or with multiple objects. There is no single correct answer.
Solutions
Task 1 Solution: Search the Grid to be sure this entry is not already in use
The values mentioned in the task can be associated with more than one object in NIOS. For example, the same FQDN can be in multiple DNS views, the same MAC address could be in different network views etc. To get a clear understanding of the object that you are about to create, it is always a good practice to search for these values before the actual object creation.
-
Login to NIOS GM web interface.
-
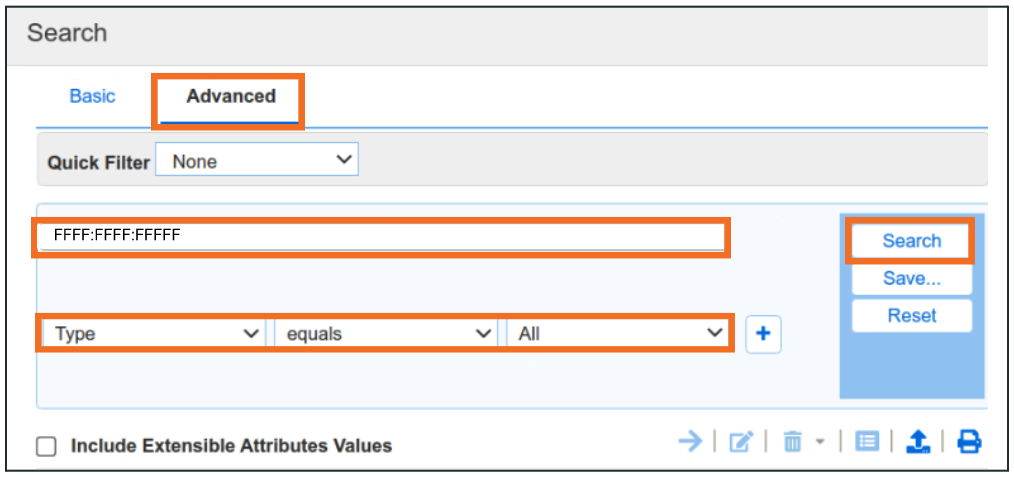
Navigate to Global Search → Advanced
-
Provide the MAC address from Table 1520-1 as a search string then click Search for Type equals All

-
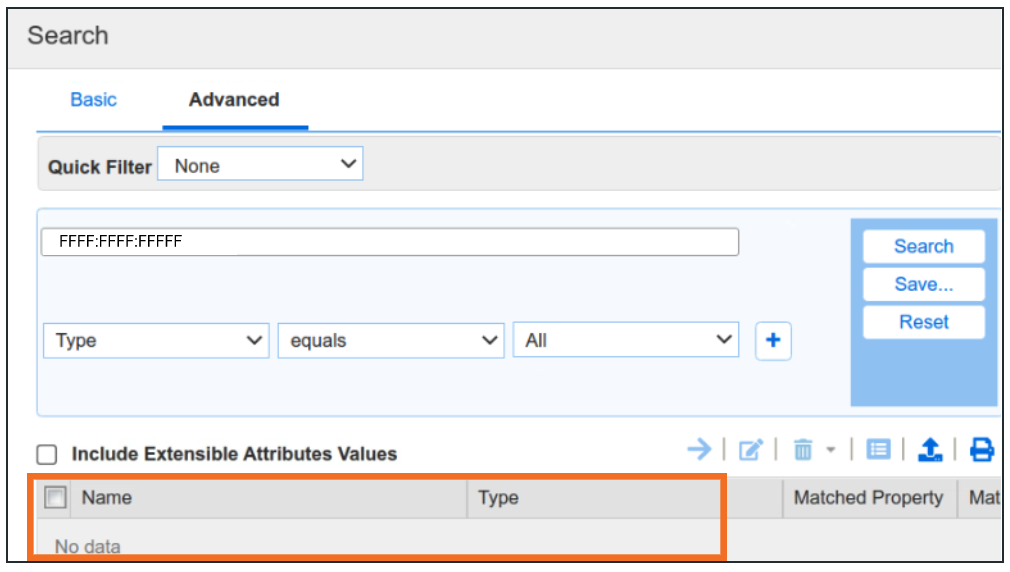
Here we see no information. This indicates that the MAC address is not present in NIOS database
-
Repeat the steps for IP address and FQDN mentioned in Table 1520-1.
Task 2 Solution: Create a Host with the supplied information and enable DHCP for the entry
The request fulfillment in this scenario requires you to create an object that ties both DNS and DHCP together. DNS best practices tell us that we should create forward and reverse-mapping for hostnames so that lookups will work in both directions. When an A record is created in DNS we should also create PTR record for the host’s IP address. DHCP Fixed address objects ensure that clients receive specific IP addresses based on the client MAC address.
A Host record is a unique Infoblox object, which allows you to create forward and reverse-mapping records(A and PTR) from the same wizard. Host records can simultaneously create DHCP fixed addresses as well.
To create a host record:
-
Navigate to Data Management → DNS → Zones
-
Click the link for techblue.net

-
Select the Records tab
-
Click the Add dropdown menu and choose Host → Host

-
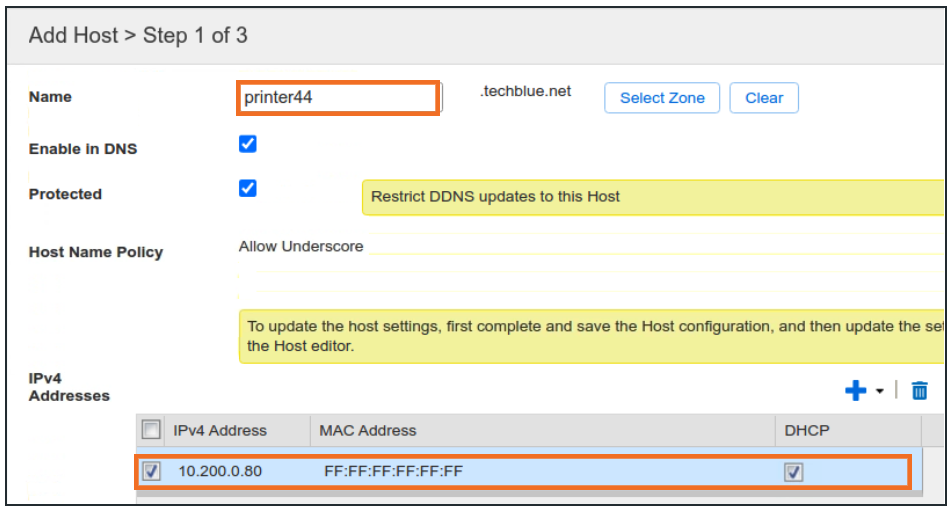
At Step 1 of 3, enter printer44 for the Name
-
Click the IPv4 Addresses Add button
-
Enter the address 10.200.0.80
-
In the MAC Address field fill in ff:ff:ff:ff:ff:ff. This is an invalid MAC address used for lab only. It will not match anything on the network.
-
Place a check in the box for DHCP
-
Click Save and Close
-
Restart services when prompted
-
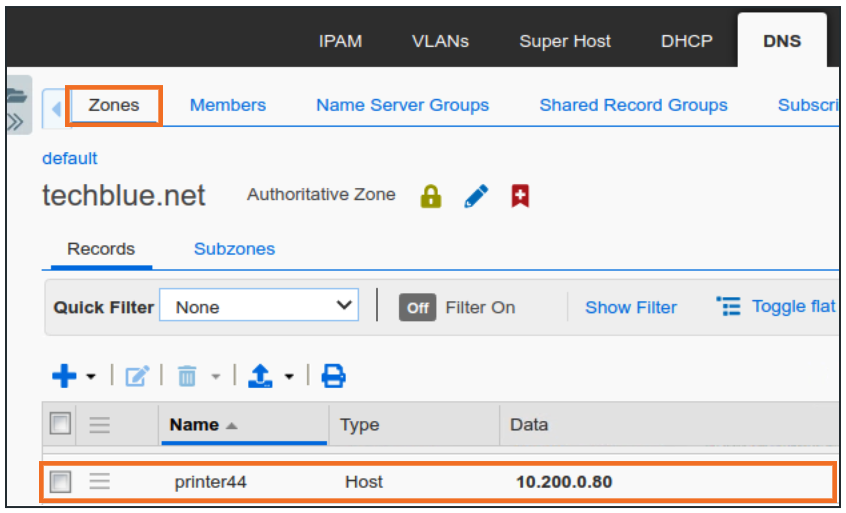
We can now see the host record for printer44 under techblue.net
-
Navigate to Data Management → DNS → Zones → Default, and click on the 200.10.in-addr.arpa zone.
Here, you will find the Host Record for printer44 reflected in the reverse-mapping zone.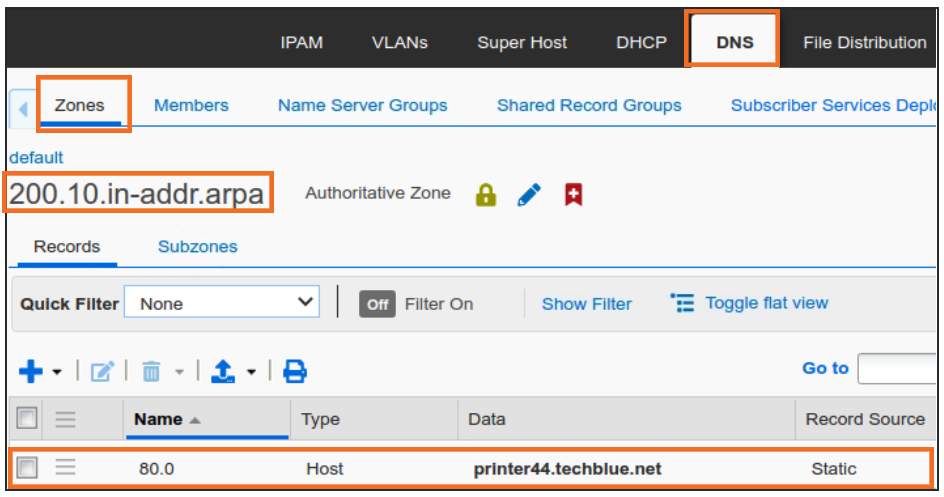
-
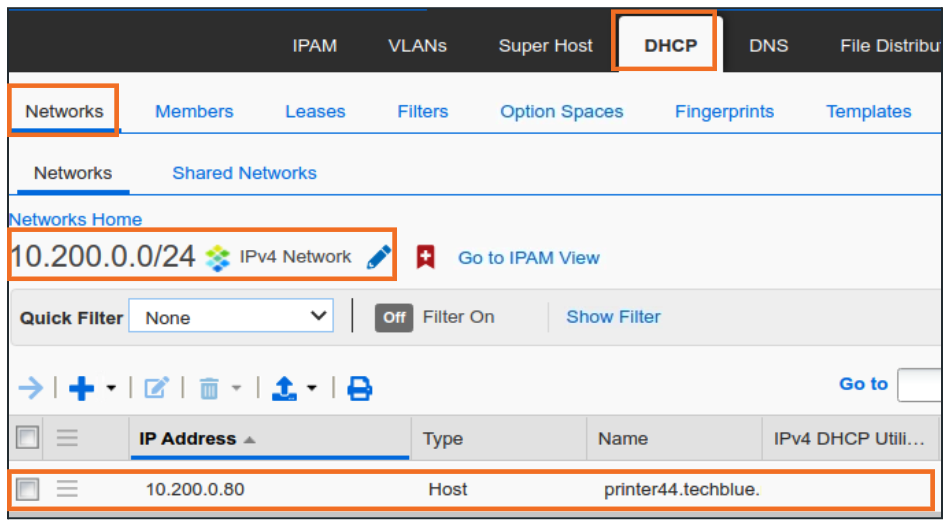
Since we had checked the box for DHCP, we can find the Host record under Data Management → DHCP → Networks under the 10.200.0.0/24 network object
Alternatively, we can create 3 individual objects: A record, PTR record and a Fixed address object for the same results.
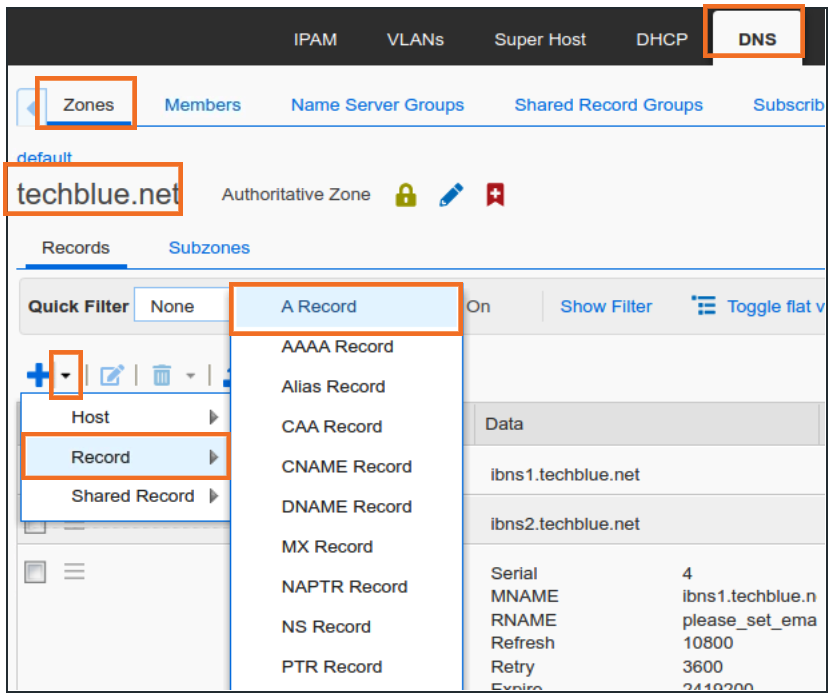
To create the A Record:
-
Navigate to Data Management → DNS → Zones
-
Open the techblue.net authoritative zone
-
In the Records tab, click + dropdown and choose A record
-
In Step 1 of 3, provide Name as printer44
-
Set the IP Address as 10.200.0.80
-
Optionally check the box Create associated PTR record
-
Click Save and Close
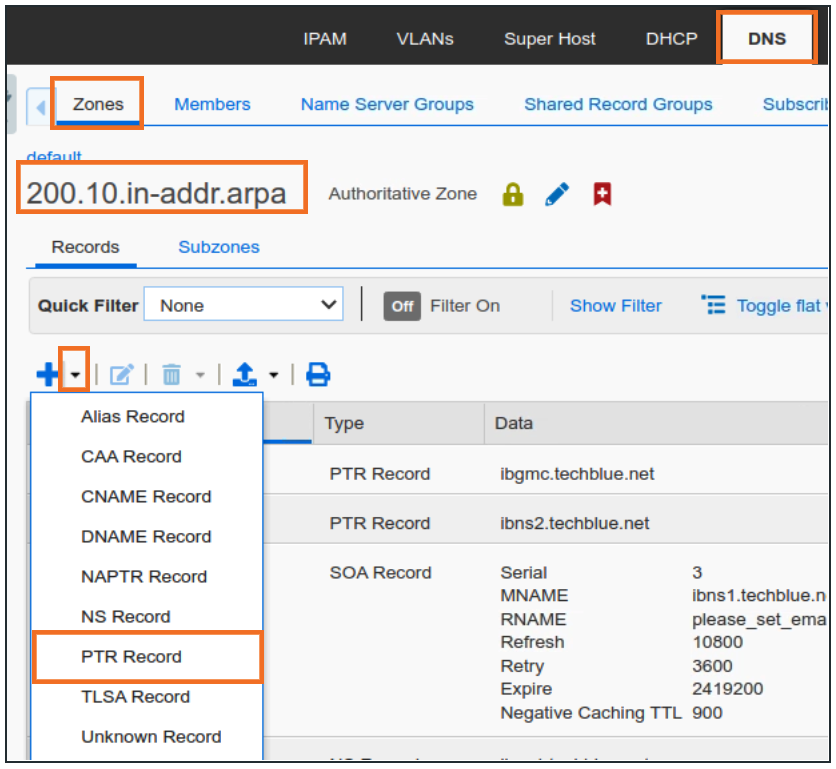
To create a PTR record:
-
Navigate to Data Management → DNS → Zones
-
Open the 200.10.in-addr.arpa authoritative reverse mapping zone
-
In the Records tab, click + dropdown and choose PTR Record
-
In Step 1 of 3, provide IP Address 10.200.0.80
-
Provide a Domain Name of printer44.techblue.net

-
Click Save and Close
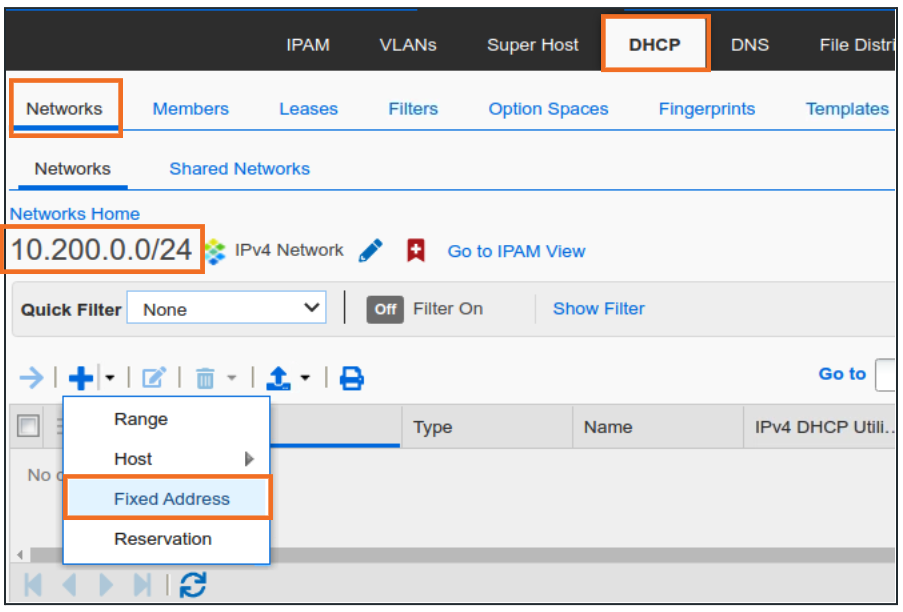
To create the DHCP Fixed address:
-
Navigate to Data Management → DHCP v Networks
-
Open the network 10.200.0.0/24
-
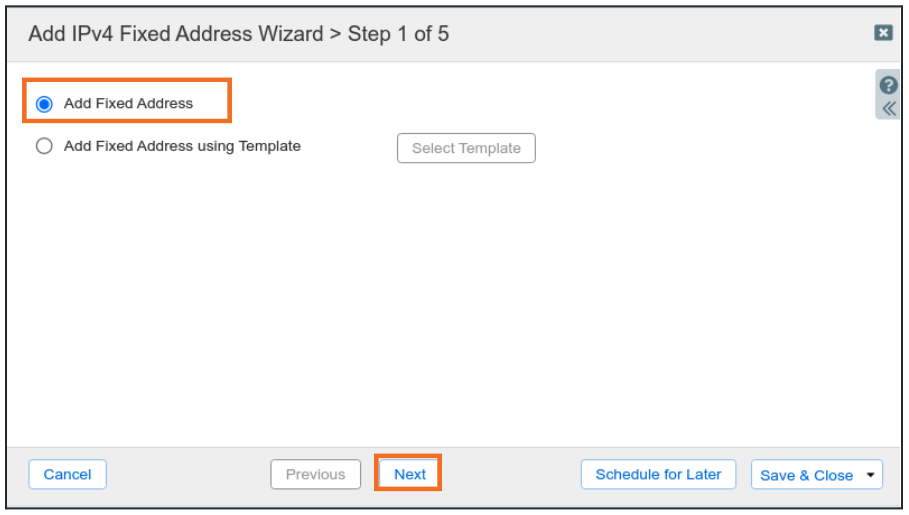
Click the + dropdown menu and choose DHCP Fixed Address
-
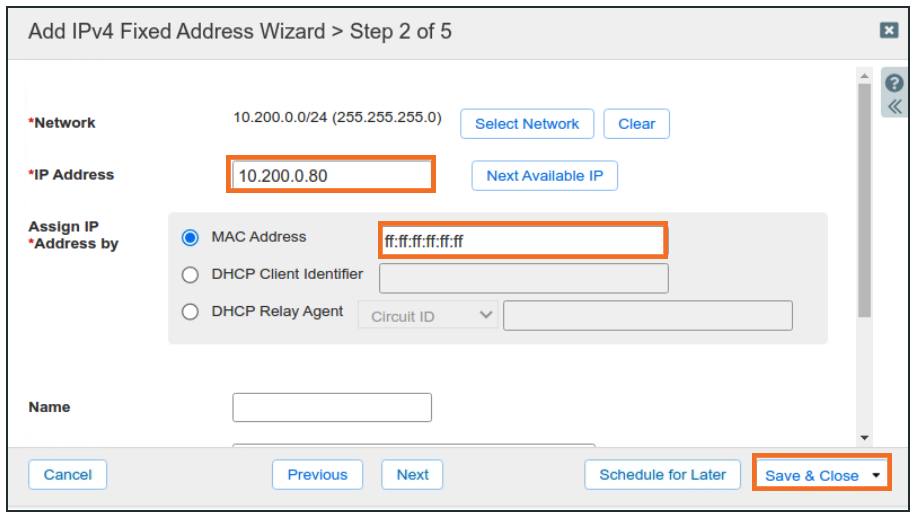
In Step 1 of 5, choose Add Fixed Address and click Next
-
In Step 2 of 5, provide the IP Address value as 10.200.0.80
-
Provide the MAC Address value as ff:ff:ff:ff:ff:ff
-
Click Save and Close
-
All the above actions are available from the Toolbar in the respective Workspaces as well
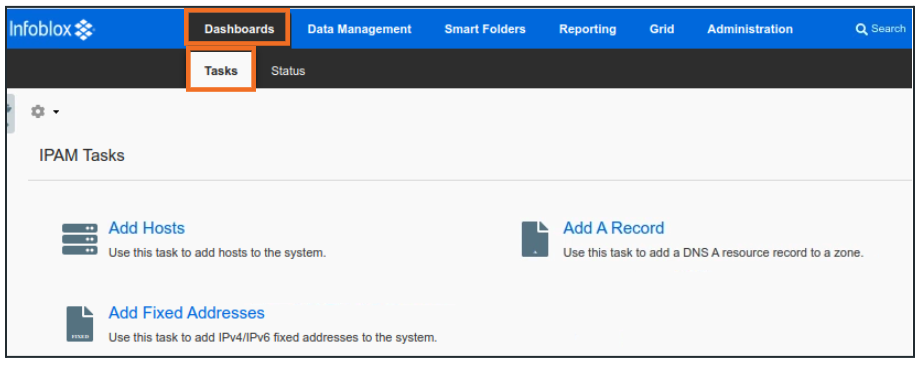
Another way is to create these objects from Tasks Dashboard: