Scenario
A user has reported that their device is unable to obtain an IP address, preventing network access. The user states that the device was previously assigned 172.31.101.23 as a fixed address and was functioning correctly earlier.
Your task is to investigate what happened to the fixed address by analyzing the Audit Log in NIOS and determine its current status. Based on your findings, take the required steps to resolve the issue.
Estimate Completion Time
-
15 to 20 minutes
Credentials
|
Description |
Username |
Password |
URL or IP |
|---|---|---|---|
|
Grid Manager UI |
morpheus |
infoblox |
Requirement
-
Read-write access to DHCP Objects
Learning Content
Lab Initiation
Access jump-desktop
Once the lab is deployed, you can access the virtual machines required for this activity. To begin, select VM List from the navigation bar at the top, locate jump-desktop, and click the green play icon to open its console. Log in to the Linux UI.

Username: training
Password: infoblox
Initiate lab
To initiate the lab, double-click the Launch Lab icon on the Desktop.

Choose the lab number from the list and click OK.

After clicking OK, you will see a pop-up message with a brief description of the lab task. If the description looks correct, click Yes to continue lab initiation.

Lab initiation will take a couple of minutes to finish.
Once complete, you will see another pop-up message with the login credentials and the URL for the Grid Manager’s User Interface. Note that the credentials may differ from those from prior labs.

Tasks
Task 1: Investigating the Missing Fixed Address
Log in to the Grid Manager UI and search for the fixed address 172.31.101.23 to confirm that it is no longer present in the system.
Task 2: Reviewing Audit Activity
Use the Audit Log in the Grid Manager UI to investigate whether any recent administrative actions may have affected the fixed address 172.31.101.23.
Task 3: Exploring Recovery Options
If your investigation in the previous task suggests that the object was removed, explore the available object recovery options in Grid Manager. Check whether the fixed address for 172.31.101.23 can be restored.
Solutions
Task 1 Solution: Investigating the Missing Fixed Address
To check for the fixed address in NIOS:
-
Login to Grid Manager web interface
-
Navigate to Global Search → Advanced and provide
172.31.101.23as a search string, then click Search for Type equals All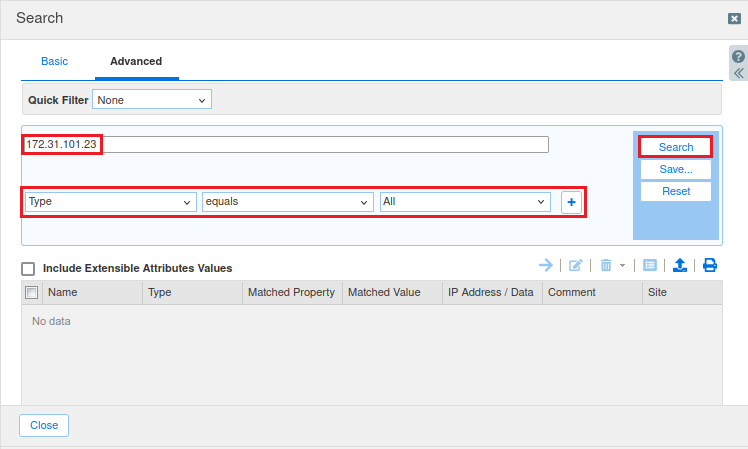
-
The search results should not display any matching entries, confirming that the fixed address is missing.
Task 2 Solution: Reviewing Audit Activity
To investigate recent changes related to the Fixed address 172.31.101.23:
-
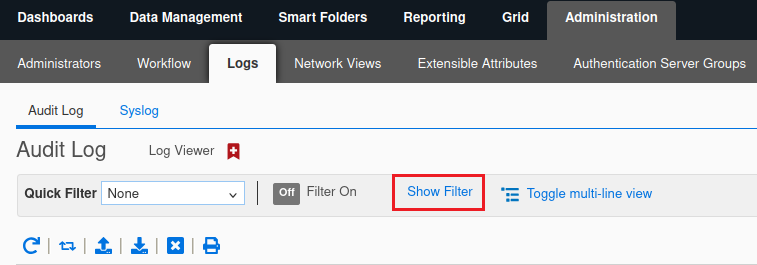
Navigate to Administration → Logs → Audit Log.
-
Click Show Filter at the top of the page.
-
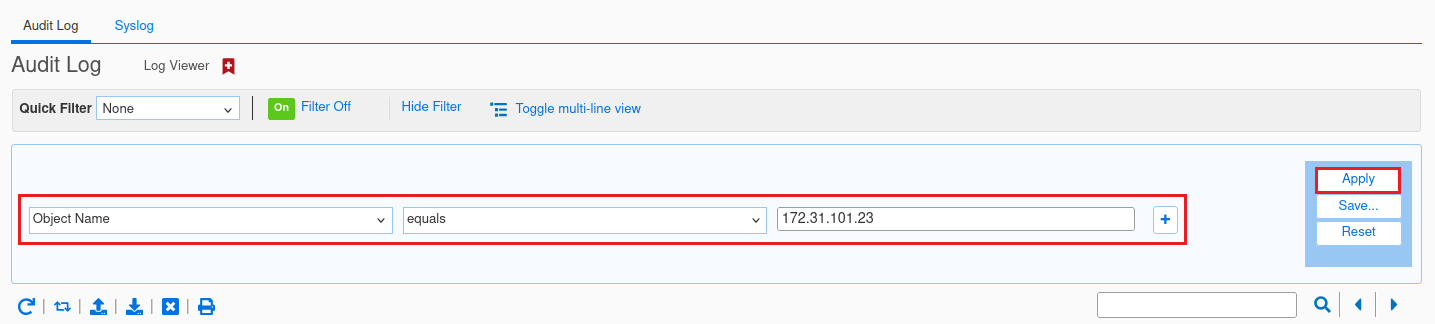
In the first row of the filter section:
-
From the Choose Filter drop-down menu, select Object Name.
-
From the Choose Operator drop-down menu, select equals.
-
In the text field, enter
172.31.101.23.
-
-
Click Apply to filter the results.
-
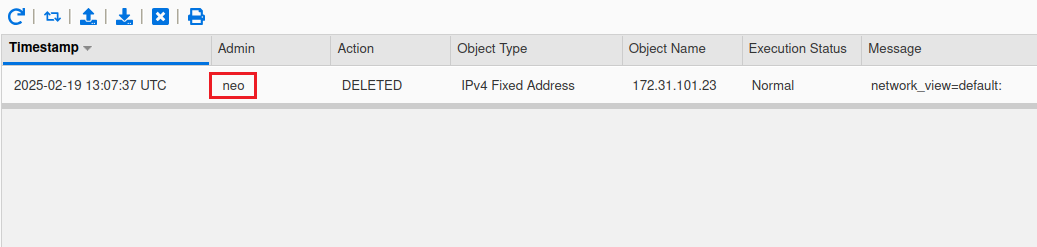
Review the filtered entries to identify if a deletion event occurred and note the timestamp and user responsible for the deletion.
-
Based on the log details, we can conclude that the user Neo deleted the fixed address 172.31.101.23.
Task 3 Solution: Exploring Recovery Options
To determine whether the missing object can be restored:
-
Navigate to Dashboards
-
Expand the Finder panel (If not already expanded)
-
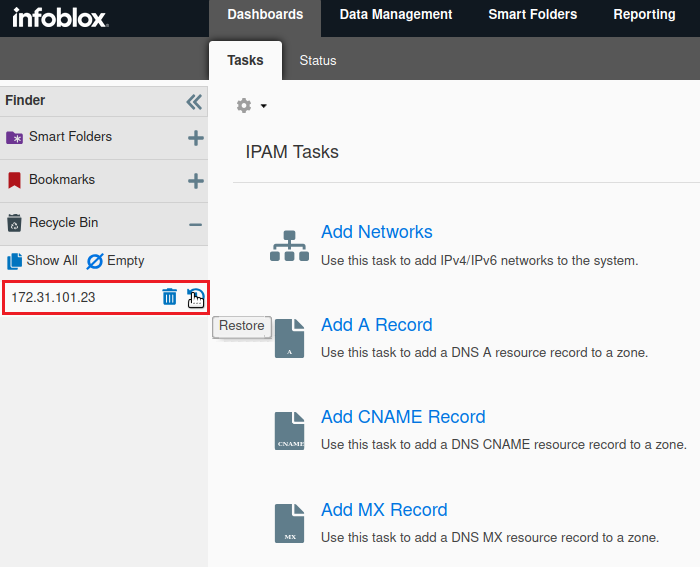
Expand the Recycle Bin by clicking +
-
Look for the deleted fixed address 172.31.101.23 in the list.
-
If found, hover over the deleted object’s name to reveal the Restore function.
-
Click Restore to reinstate the fixed address.
-
When prompted, restart the service to apply the changes.
-
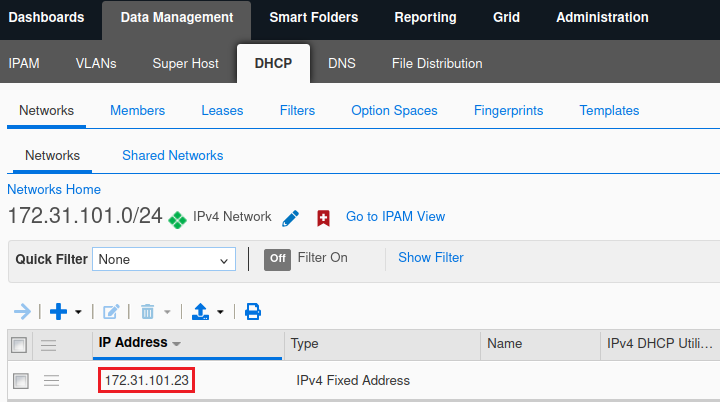
After restoring, navigate to Data Management → DHCP → Networks → Networks → 172.31.101.0/24.
-
You should now see an entry for the restored fixed address 172.31.101.23 in the list.