Scenario
Your team recently hired an intern to assist with Infoblox Grid tasks. Since she is still new, you want her to have read-only access to all DNS and DHCP configurations, but no permissions to change anything. Please setup the permissions on the Grid for the intern.
Global permissions in NIOS means they apply to all objects of that type. In this scenario, we want to apply the same permissions to all DNS objects and all DHCP objects. That informs us to use global permissions rather than object permissions.
Estimate Completion Time
10 to 20 minutes
Credentials
|
Description |
Username |
Password |
URL or IP |
|---|---|---|---|
|
Grid Manager UI |
admin |
infoblox |
Requirements
-
Administrative access to the Grid
Learning Content
Lab Initiation
Access jump-desktop
Once the lab is deployed, you can access the virtual machines required for this activity. To begin, select VM List from the navigation bar at the top, locate jump-desktop, and click the green play icon to open its console. Log in to the Linux UI.

Username: training
Password: infoblox
Initiate lab
To initiate the lab, double-click the Launch Lab icon on the Desktop.

Choose the lab number from the list and click OK.

After clicking OK, you will see a pop-up message with a brief description of the lab task. If the description looks correct, click Yes to continue lab initiation.

Lab initiation will take a couple of minutes to finish.
Once complete, you will see another pop-up message with the login credentials and the URL for the Grid Manager’s User Interface. Note that the credentials may differ from those from prior labs.

Tasks
Task 1: Creating a new group
Create a group named interns in the Grid.
NIOS maps permissions to groups, not individual user or admin accounts. This means, even if there is only one user, you need to create a group for the single user, in order to map custom permissions.
Task 2: Creating global permissions for the group
Create global permissions for the group interns, allowing members of the group to have the followings:
-
Read-only access to all DNS objects
-
Read-only access to all DHCP objects
Task 3: Creating user account in the group
Create an account named alice in the group interns. Set her password to infoblox.
Task 4: Verifying permission settings
Log out, and log back in as the user alice. Verify you have read-only access to the DNS and DHCP objects.
Solutions
Task 1 Solution: Creating a new group
-
In the GM web interface, navigate to Administration → Administrators → Groups.
-
Click Add to create a new group. The Add Admin Group Wizard dialog appears.
-
In Step 1, for Name, enter interns. Click Save & Close.
There are many settings and options that you can configure when creating a group. However, they are not relevant to mapping permissions. Feel free to explore the other steps and options of the Add Admin Group Wizard. For this lab, we are skipping them, focusing on creating a basic group for the purpose of permissions mapping.
Task 2 Solution: Creating global permissions for the group
-
In the GM web interface, navigate to Administration → Administrators → Permissions.
-
In the middle column Groups, select interns. This displays all the current permissions for the group in the bottom half of the screen.
-
In the lower half of the screen, in the section named intern Permissions, we see the label No data. This indicates there are currently no permissions assigned for this group.
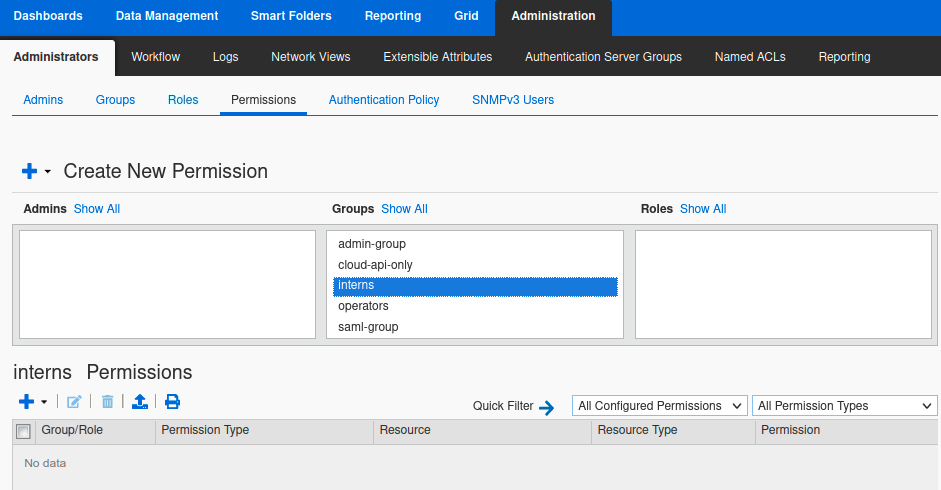
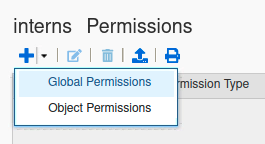
-
To assign permissions, click Add → Global Permissions. This brings out the Manage Global Permissions dialog window.
-
In the Permission Type drop-down menu, select DNS Permissions. Then check the boxes under Read-Only in the DNS objects you want to grant RO access.
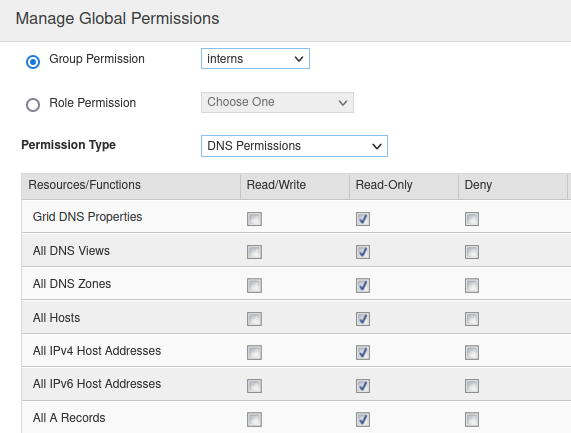
-
Click Save & Close.
-
Click Add → Global Permissions. This brings out the Manage Global Permissions dialog window again, to assign DHCP permissions.
-
In the Permission Type drop-down menu, select DHCP Permissions. Then check the boxes under Read-Only in the DHCP objects you want to grant RO access.
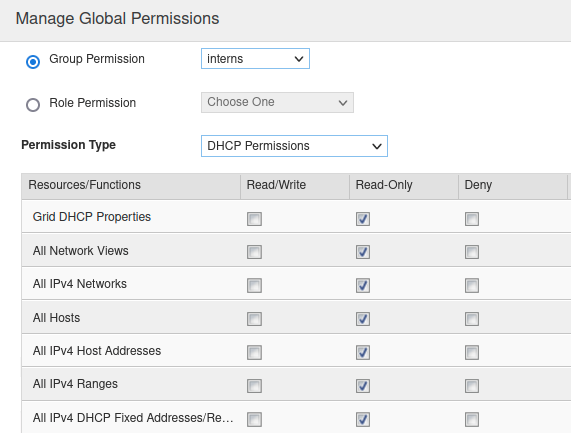
-
Click Save & Close.
There are many objects under DNS and DHCP, for this lab, you do not need to select every single object. Select several, or the first 10 object types, that is enough to experience how permission mapping works in NIOS.
Task 3 Solution: Creating user account in the group
-
In the GM web interface, navigate to Administration → Administrators → Admins.
-
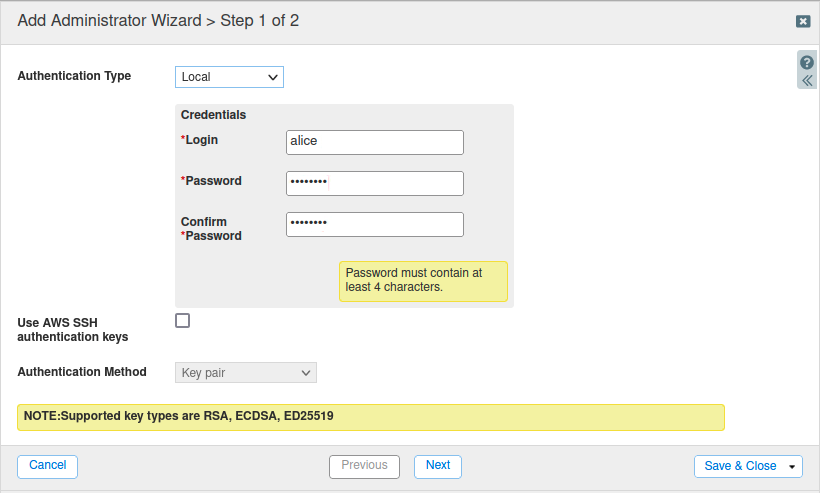
Click Add to create a new admin (user). The Add Administrator Wizard dialog appears.
-
Enter the login and password for the intern:
-
Login: alice
-
Password: infoblox
-
-
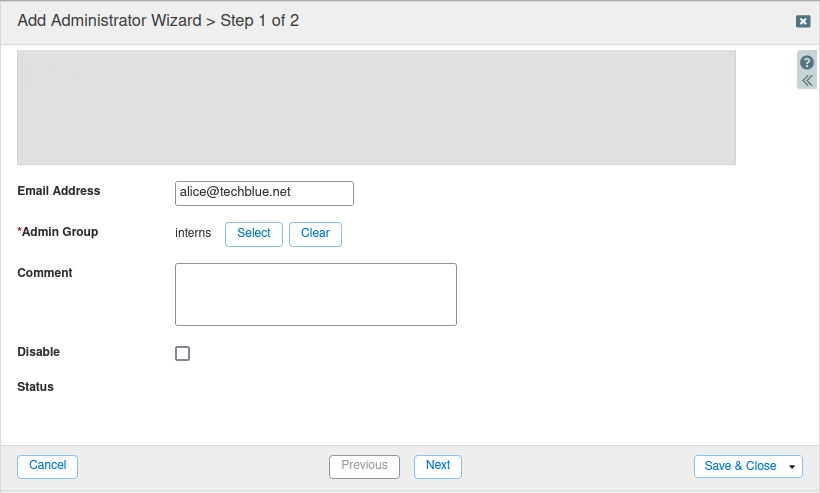
Scroll down and find the section Admin Group. Select the group interns.
-
Click Save & Close.
Task 4 Solution: Verifying permission settings
-
Logout of the GM web interface. Alternatively, you may open a different web browser and navigate to the GM address.
-
Login as the user alice.
-
Navigate around the Grid and attempt to add a DNS or DHCP object, such as a Host record or a Network. While the wizard appears and you can enter values, when you click Save & Close you will see an error message informing you that you do not have the permission to create/write the object. Below is an example screenshot when attempting to create a Host object.

The NIOS permissions settings can be very granular. We do not cover every possible combinations in this lab. Feel free to explore on your own to test permissions that best suit your needs.