This lab requires a NIOS 9.0 Lab Environment
This lab guide has been developed using the new NIOS 9.0 Lab Environment. Please ensure that you deploy a NIOS 9.0 lab environment to complete these lab tasks. If you use a different lab environment, this is untested, and the lab likely will not work.
Scenario
Your team has been assigned the task of setting up the Infoblox DNS Firewall feature on the Grid. This implementation will enable your organization to enforce DNS-based policies that define which domains and IP addresses are considered safe or acceptable for access.
To accomplish this, it is essential to properly configure the Grid to support the DNS Firewall. Additionally, since security is closely related to logging and reporting, please ensure that the correct logging and reporting settings are established on the Grid. This will allow your team to verify the configuration and effectively troubleshoot any future issues.
Learning Content
Estimate Completion Time
-
25 to 30 minutes
Credentials
|
Description |
Username |
Password |
URL or IP |
|---|---|---|---|
|
Grid Manager UI |
admin |
infoblox |
Requirements
-
Administrative access to a NIOS Grid
Lab Initiation
Access jump-desktop
Once the lab is deployed, you can access the virtual machines required for this activity. To begin, select VM List from the navigation bar at the top, locate jump-desktop, and click the green play icon to open its console. Log in to the Linux UI.

Username: training
Password: infoblox
Initiate lab
To initiate the lab, double-click the Launch Lab icon on the Desktop.

Choose the lab number from the list and click OK.

After clicking OK, you will see a pop-up message with a brief description of the lab task. If the description looks correct, click Yes to continue lab initiation.

Lab initiation will take a couple of minutes to finish.
Once complete, you will see another pop-up message with the login credentials and the URL for the Grid Manager’s User Interface. Note that the credentials may differ from those from prior labs.

Tasks
-
Create RPZ Local NSG Name Server Group
-
Verify RPZ logging is enabled on the Grid.
-
Ensure that the Reporting Server has security reporting enabled.
Task 1: Create RPZ Local NSG Name Server Group
Create a name server group named RPZ Local NSG. This name server group will be used by the local RPZs. The members of the group are ibns1.techblue.net as the primary and ibns2.techblue.net as the secondary.
Task 2: Verify RPZ logging is enabled on the Grid
Verify RPZ logging is enabled on the Grid.
Task 3: Enable Security Reporting for the Grid
Ensure that the Reporting Server has security reporting enabled.
Solutions
Task 1 Solution: Create RPZ Local NSG Name Server Group
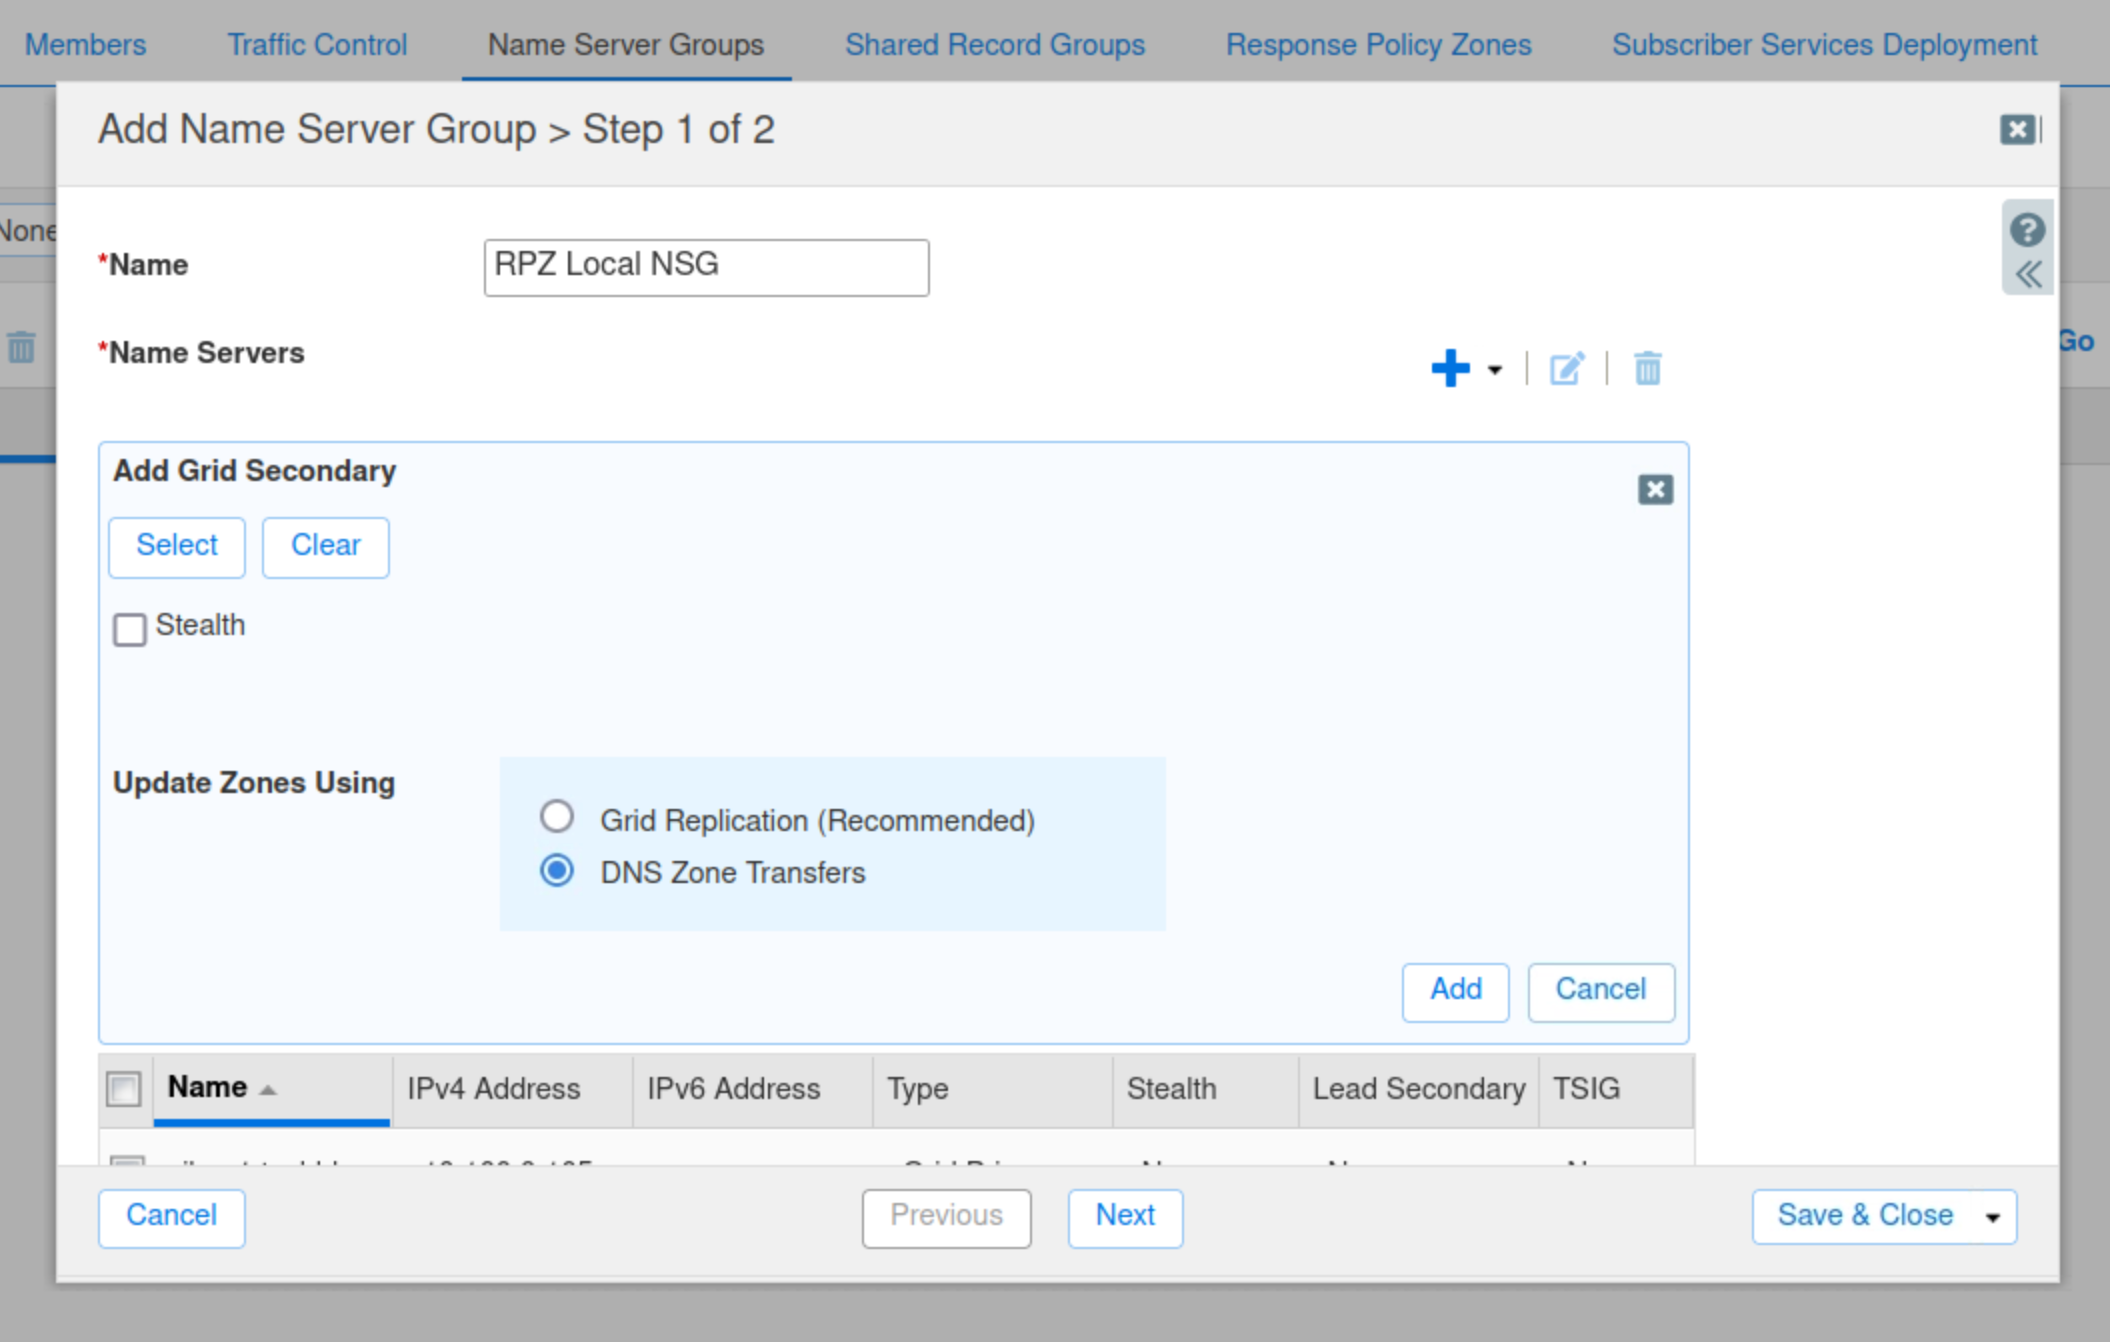
In this task, you create the RPZ Local NSG Name Server Group. This Name Server Group will be used by the local RPZs you create in later labs to inform them which DNS-enabled Grid members they should use to process their rules. The members of RPZ Local NSG are ibns1.techblue.net and ibns2.techblue.net. You need to choose DNS Zone Transfers for the Update Zones Using method. You get an error if you try and add a name server group with Grid Replication as the Update Zones Using method to an RPZ.
-
On the jump-desktop machine, open a browser window and access https://10.100.0.100.
-
Navigate to Data Management → DNS → Name Server Groups.
-
Click the drop-down arrow next to the plus(+) symbol to add a new Authoritative Name Server Group.

-
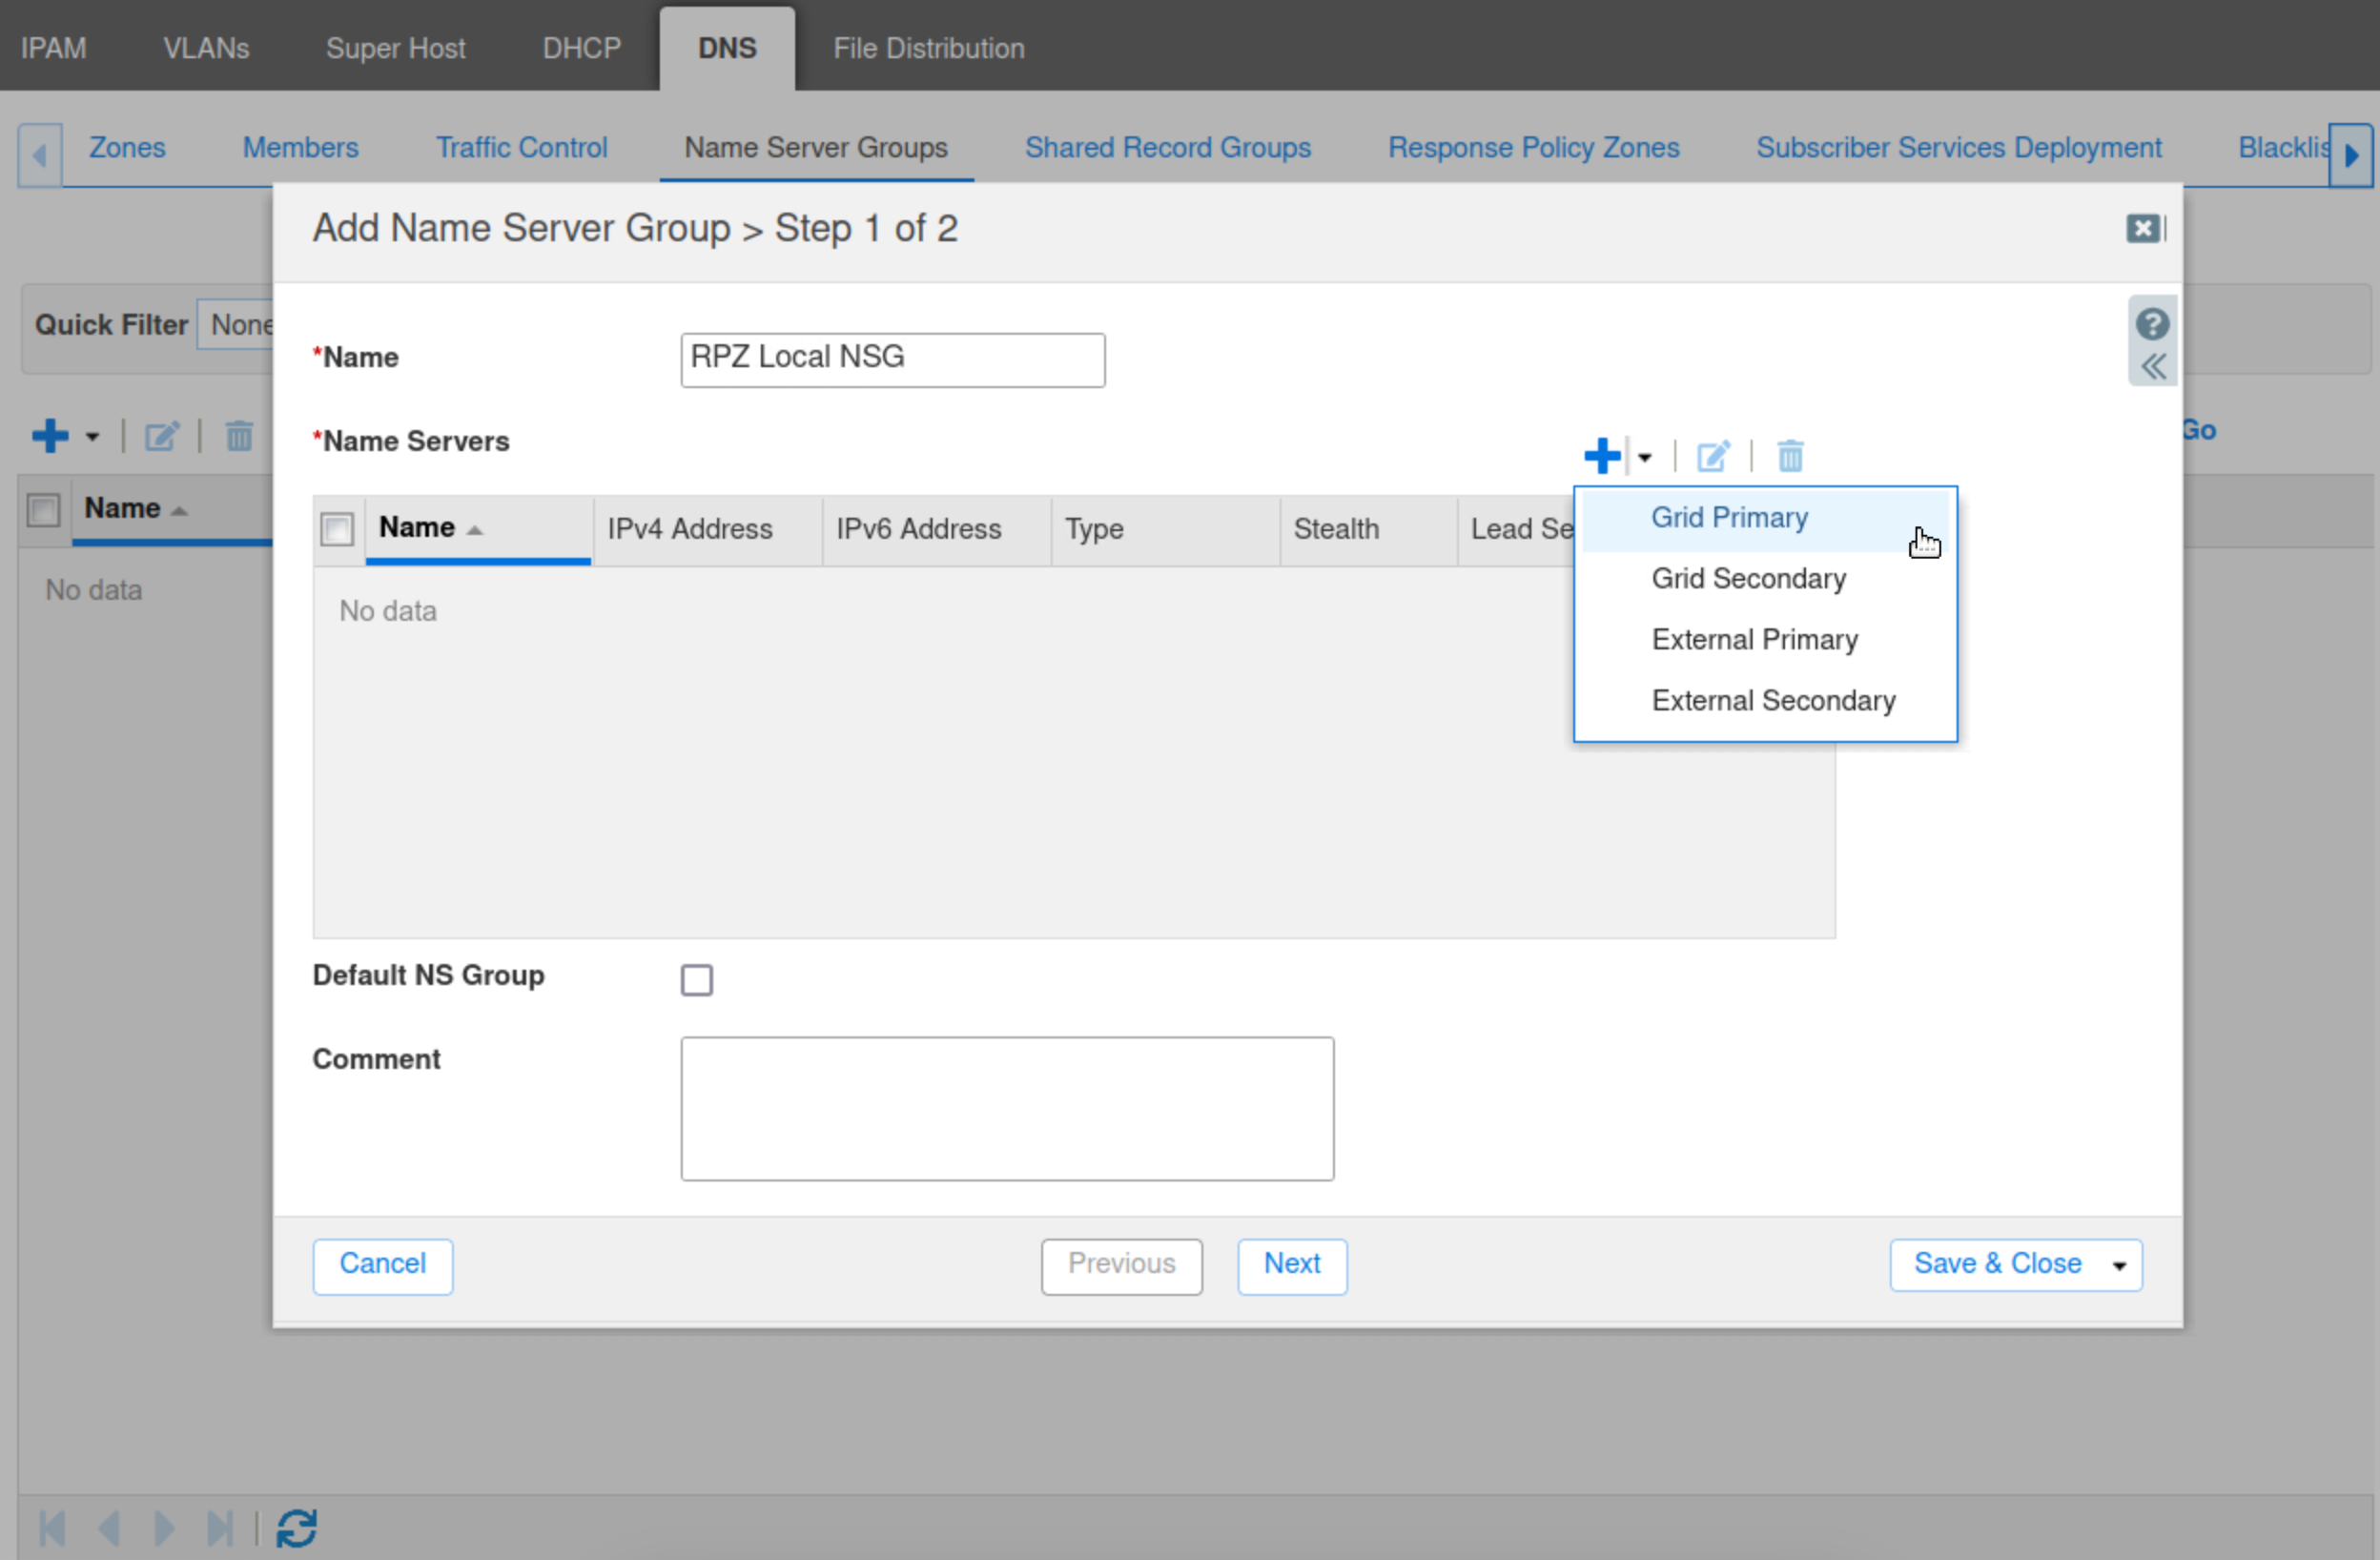
Type RPZ Local NSG in the Name box. Click the drop-down arrow next to the plus (+) symbol and select Grid Primary.
-
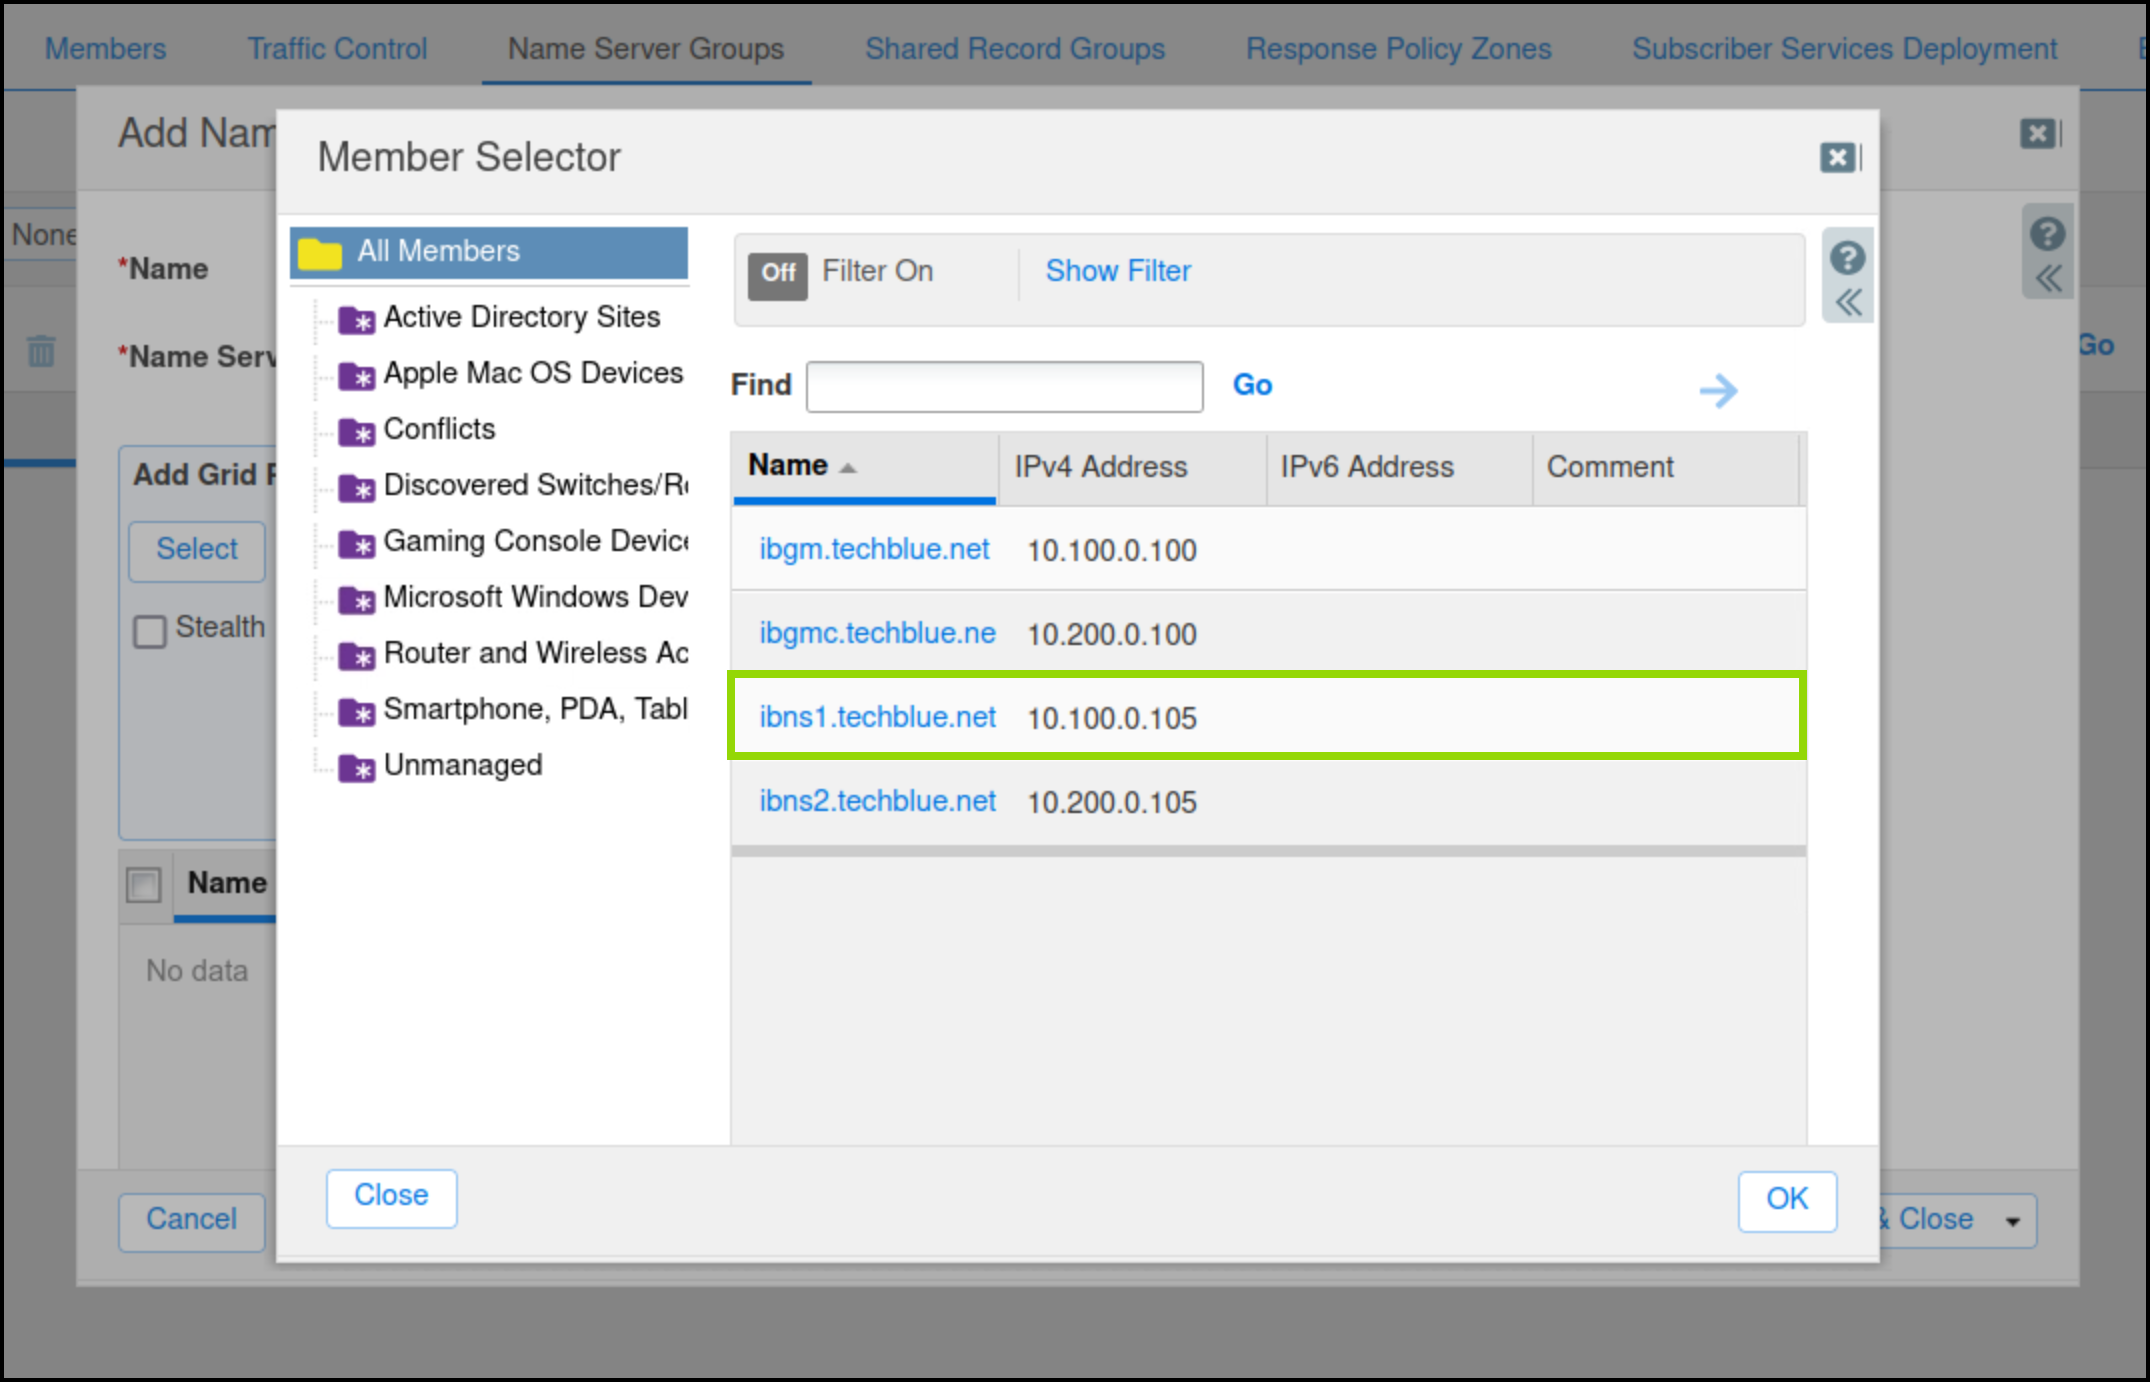
Click Select.
-
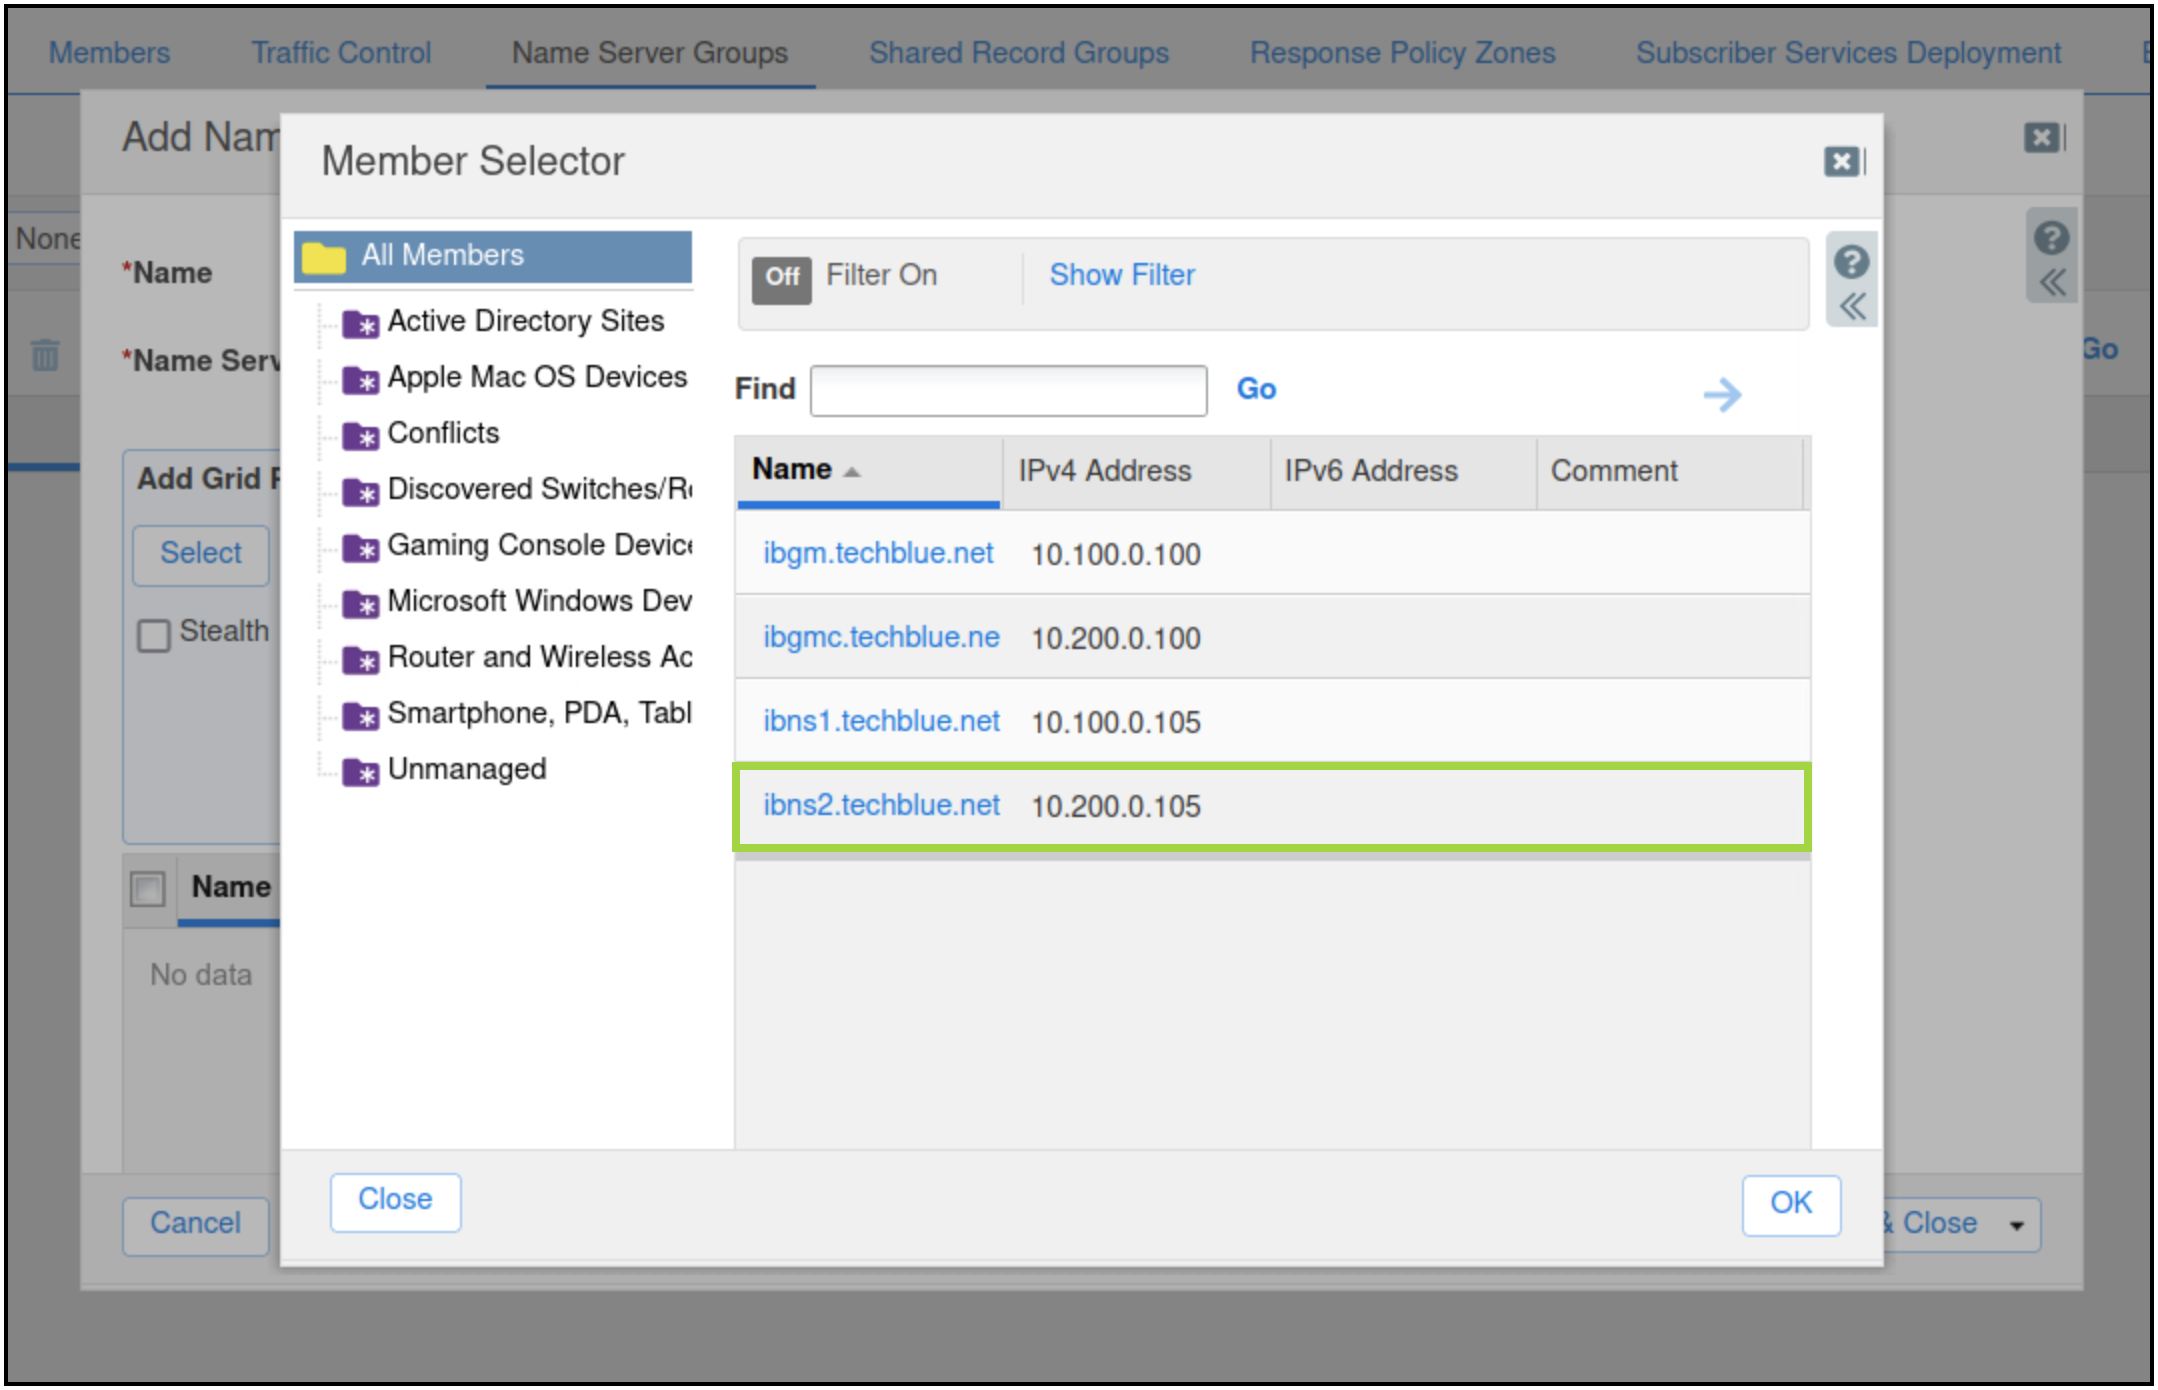
Choose ibns1.techblue.net from the Member Selector. Click OK.
-
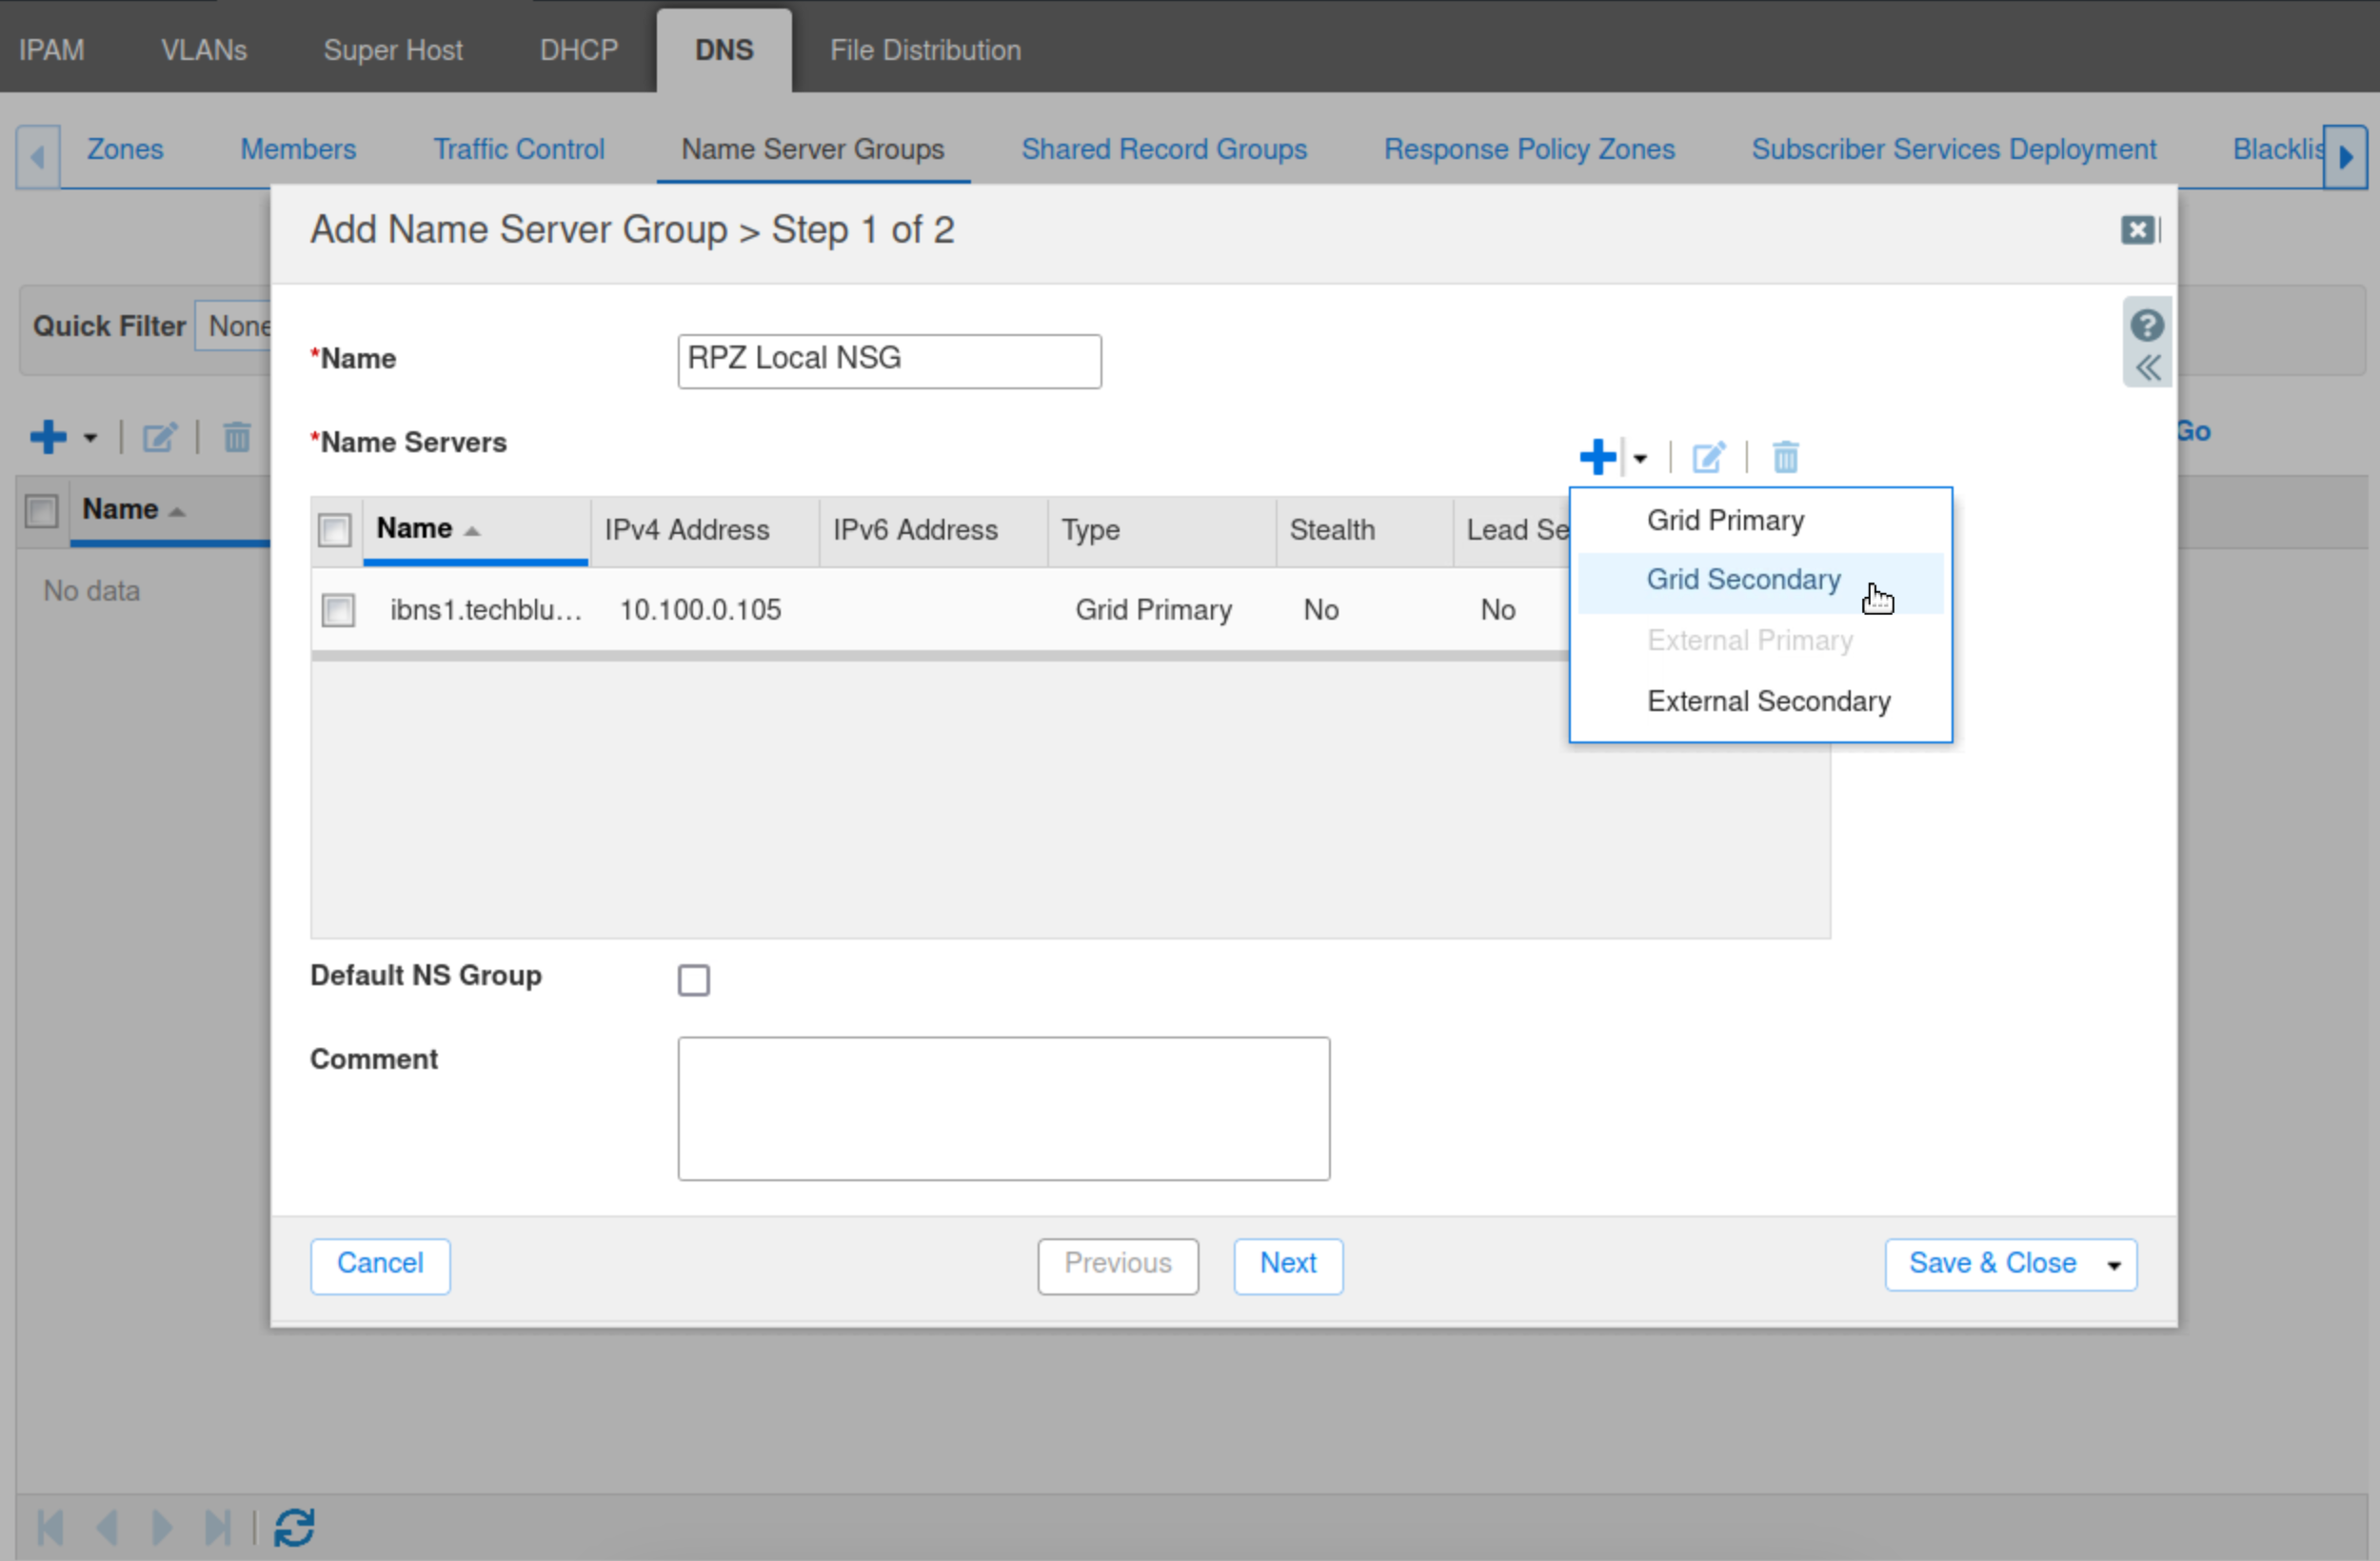
Click Add in the Add Name Server Group wizard to add ibns1.techblue.net to the RPZ Local NSG group.
-
Click the drop-down arrow next to the plus (+) symbol and select Grid Secondary.
-
Ensure Update Zones Using is set to DNS Zone Transfers. Click Select.
-
Choose ibns2.techblue.net from the Member Selector.
-
Click Add to add ibns2.techblue.net to the Name Server Group RPZ Local NSG.
-
Click Save & Close to save the configuration.
Task 2 Solution: Verify RPZ logging is enabled on the Grid
In this task, you verify that RPZ logging is enabled. This ensures that RPZ events are logged to syslog, allowing us to verify our RPZ configuration and troubleshoot potential issues in the future.
-
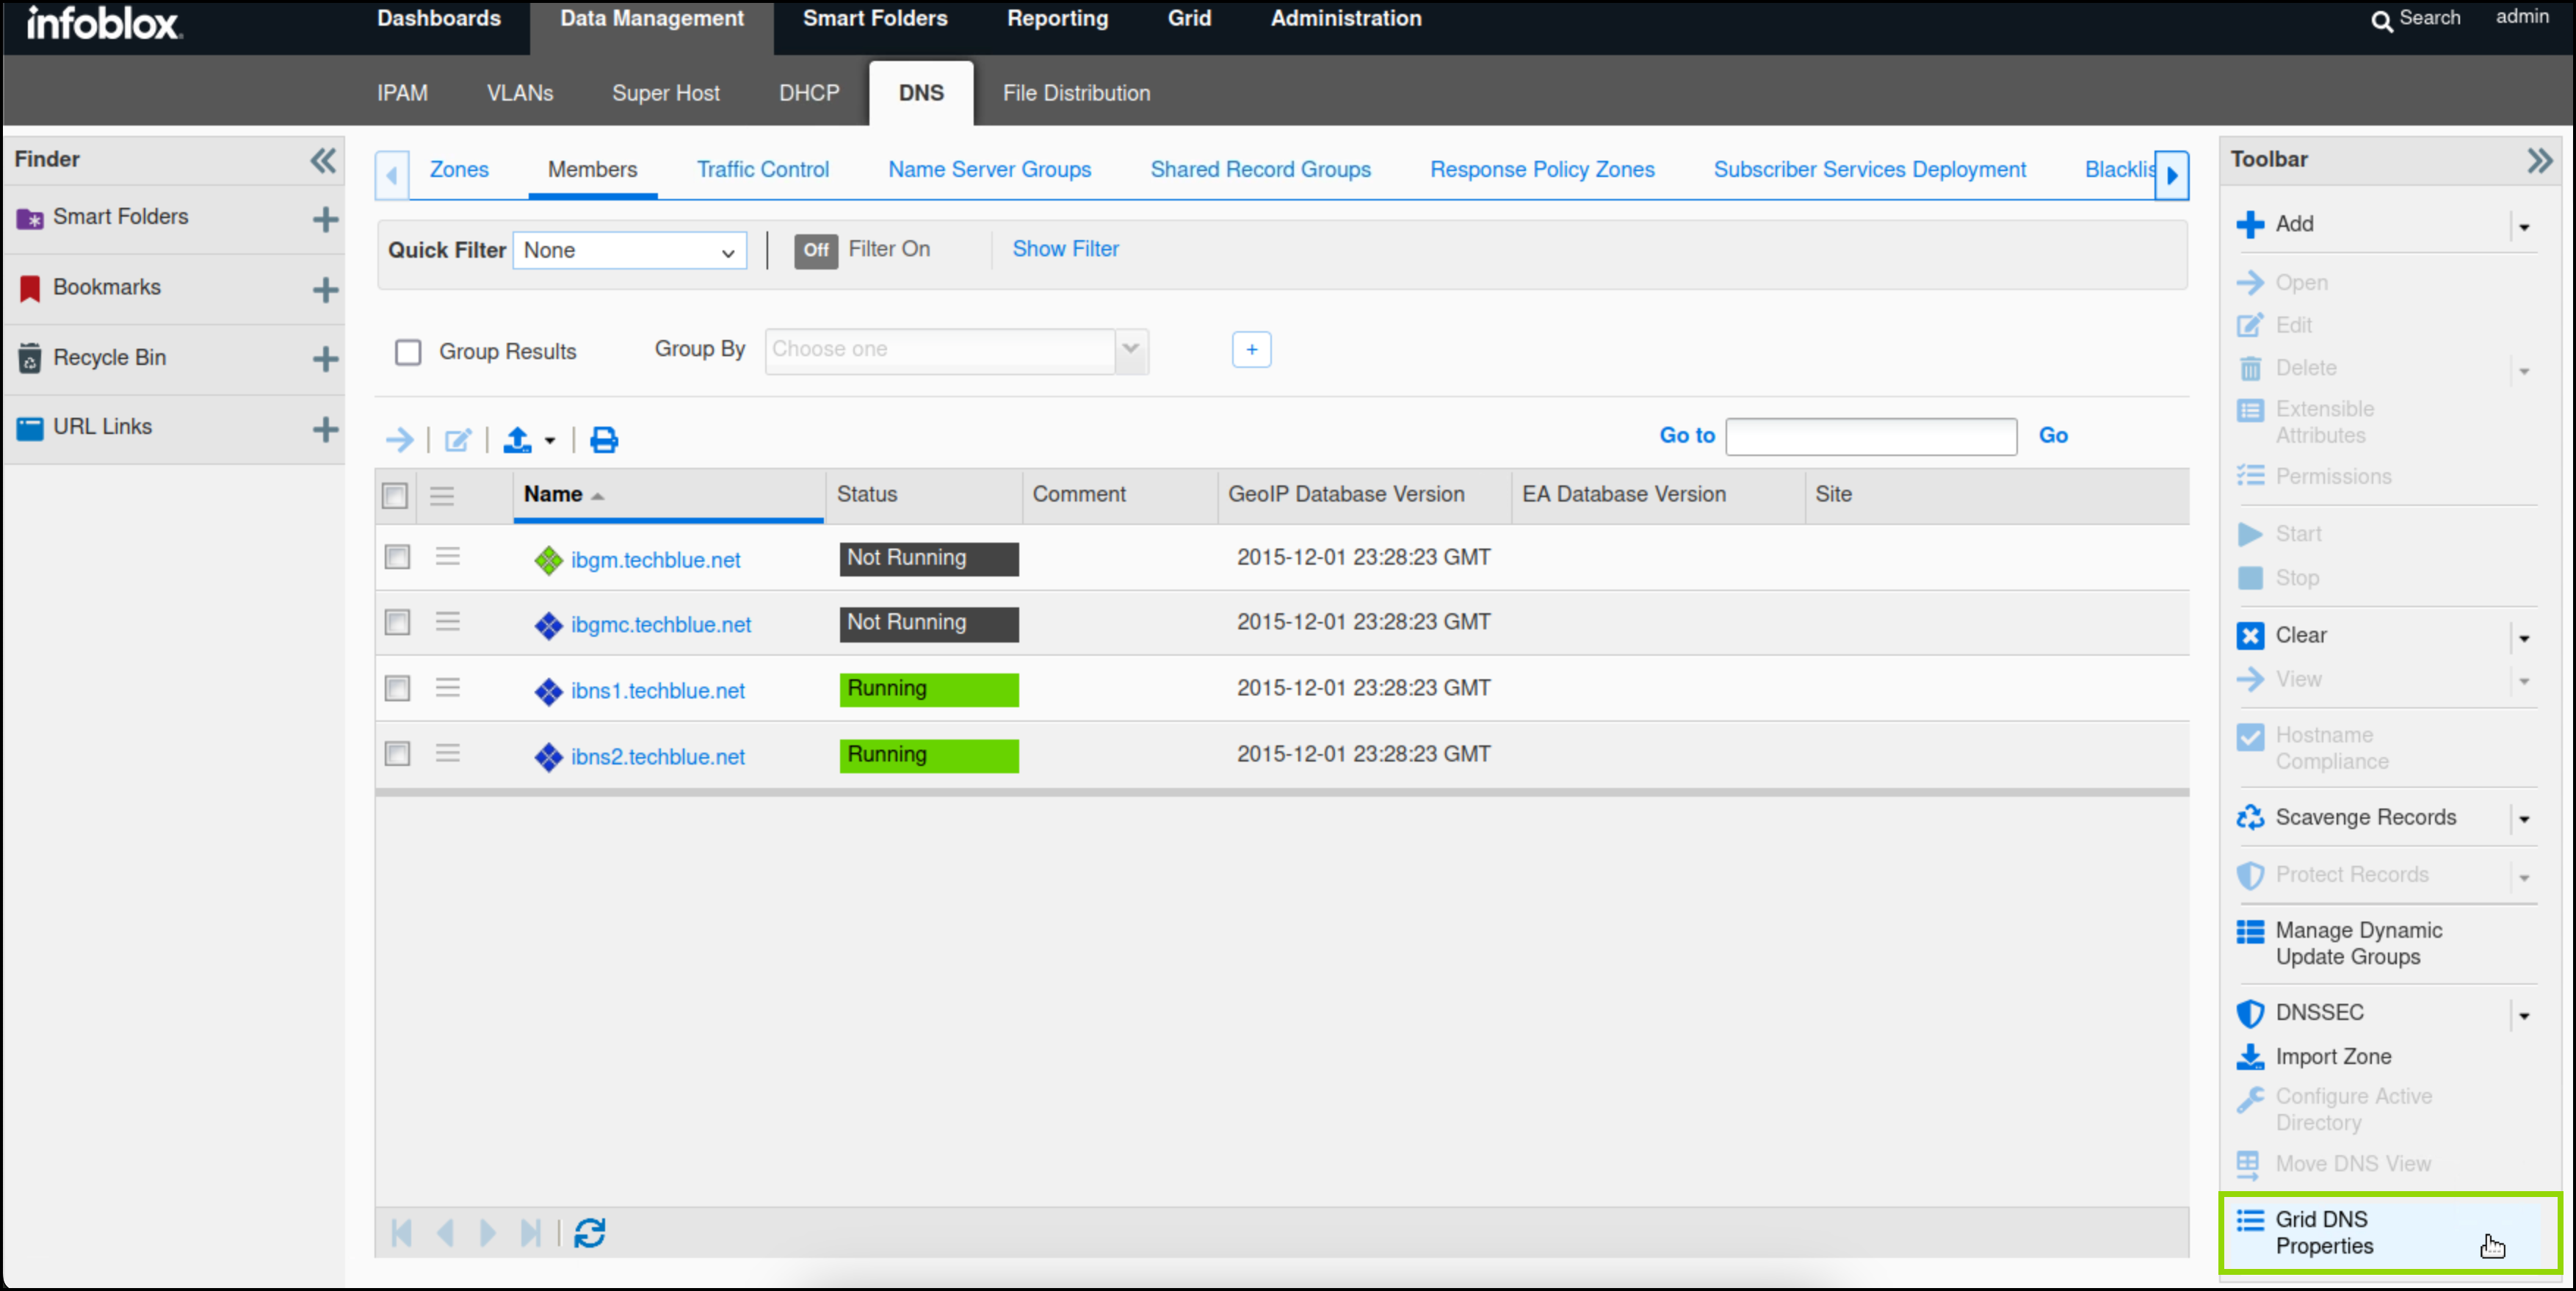
Navigate to Data Management → DNS → Members.
-
Select Grid DNS Properties from the toolbar.
-
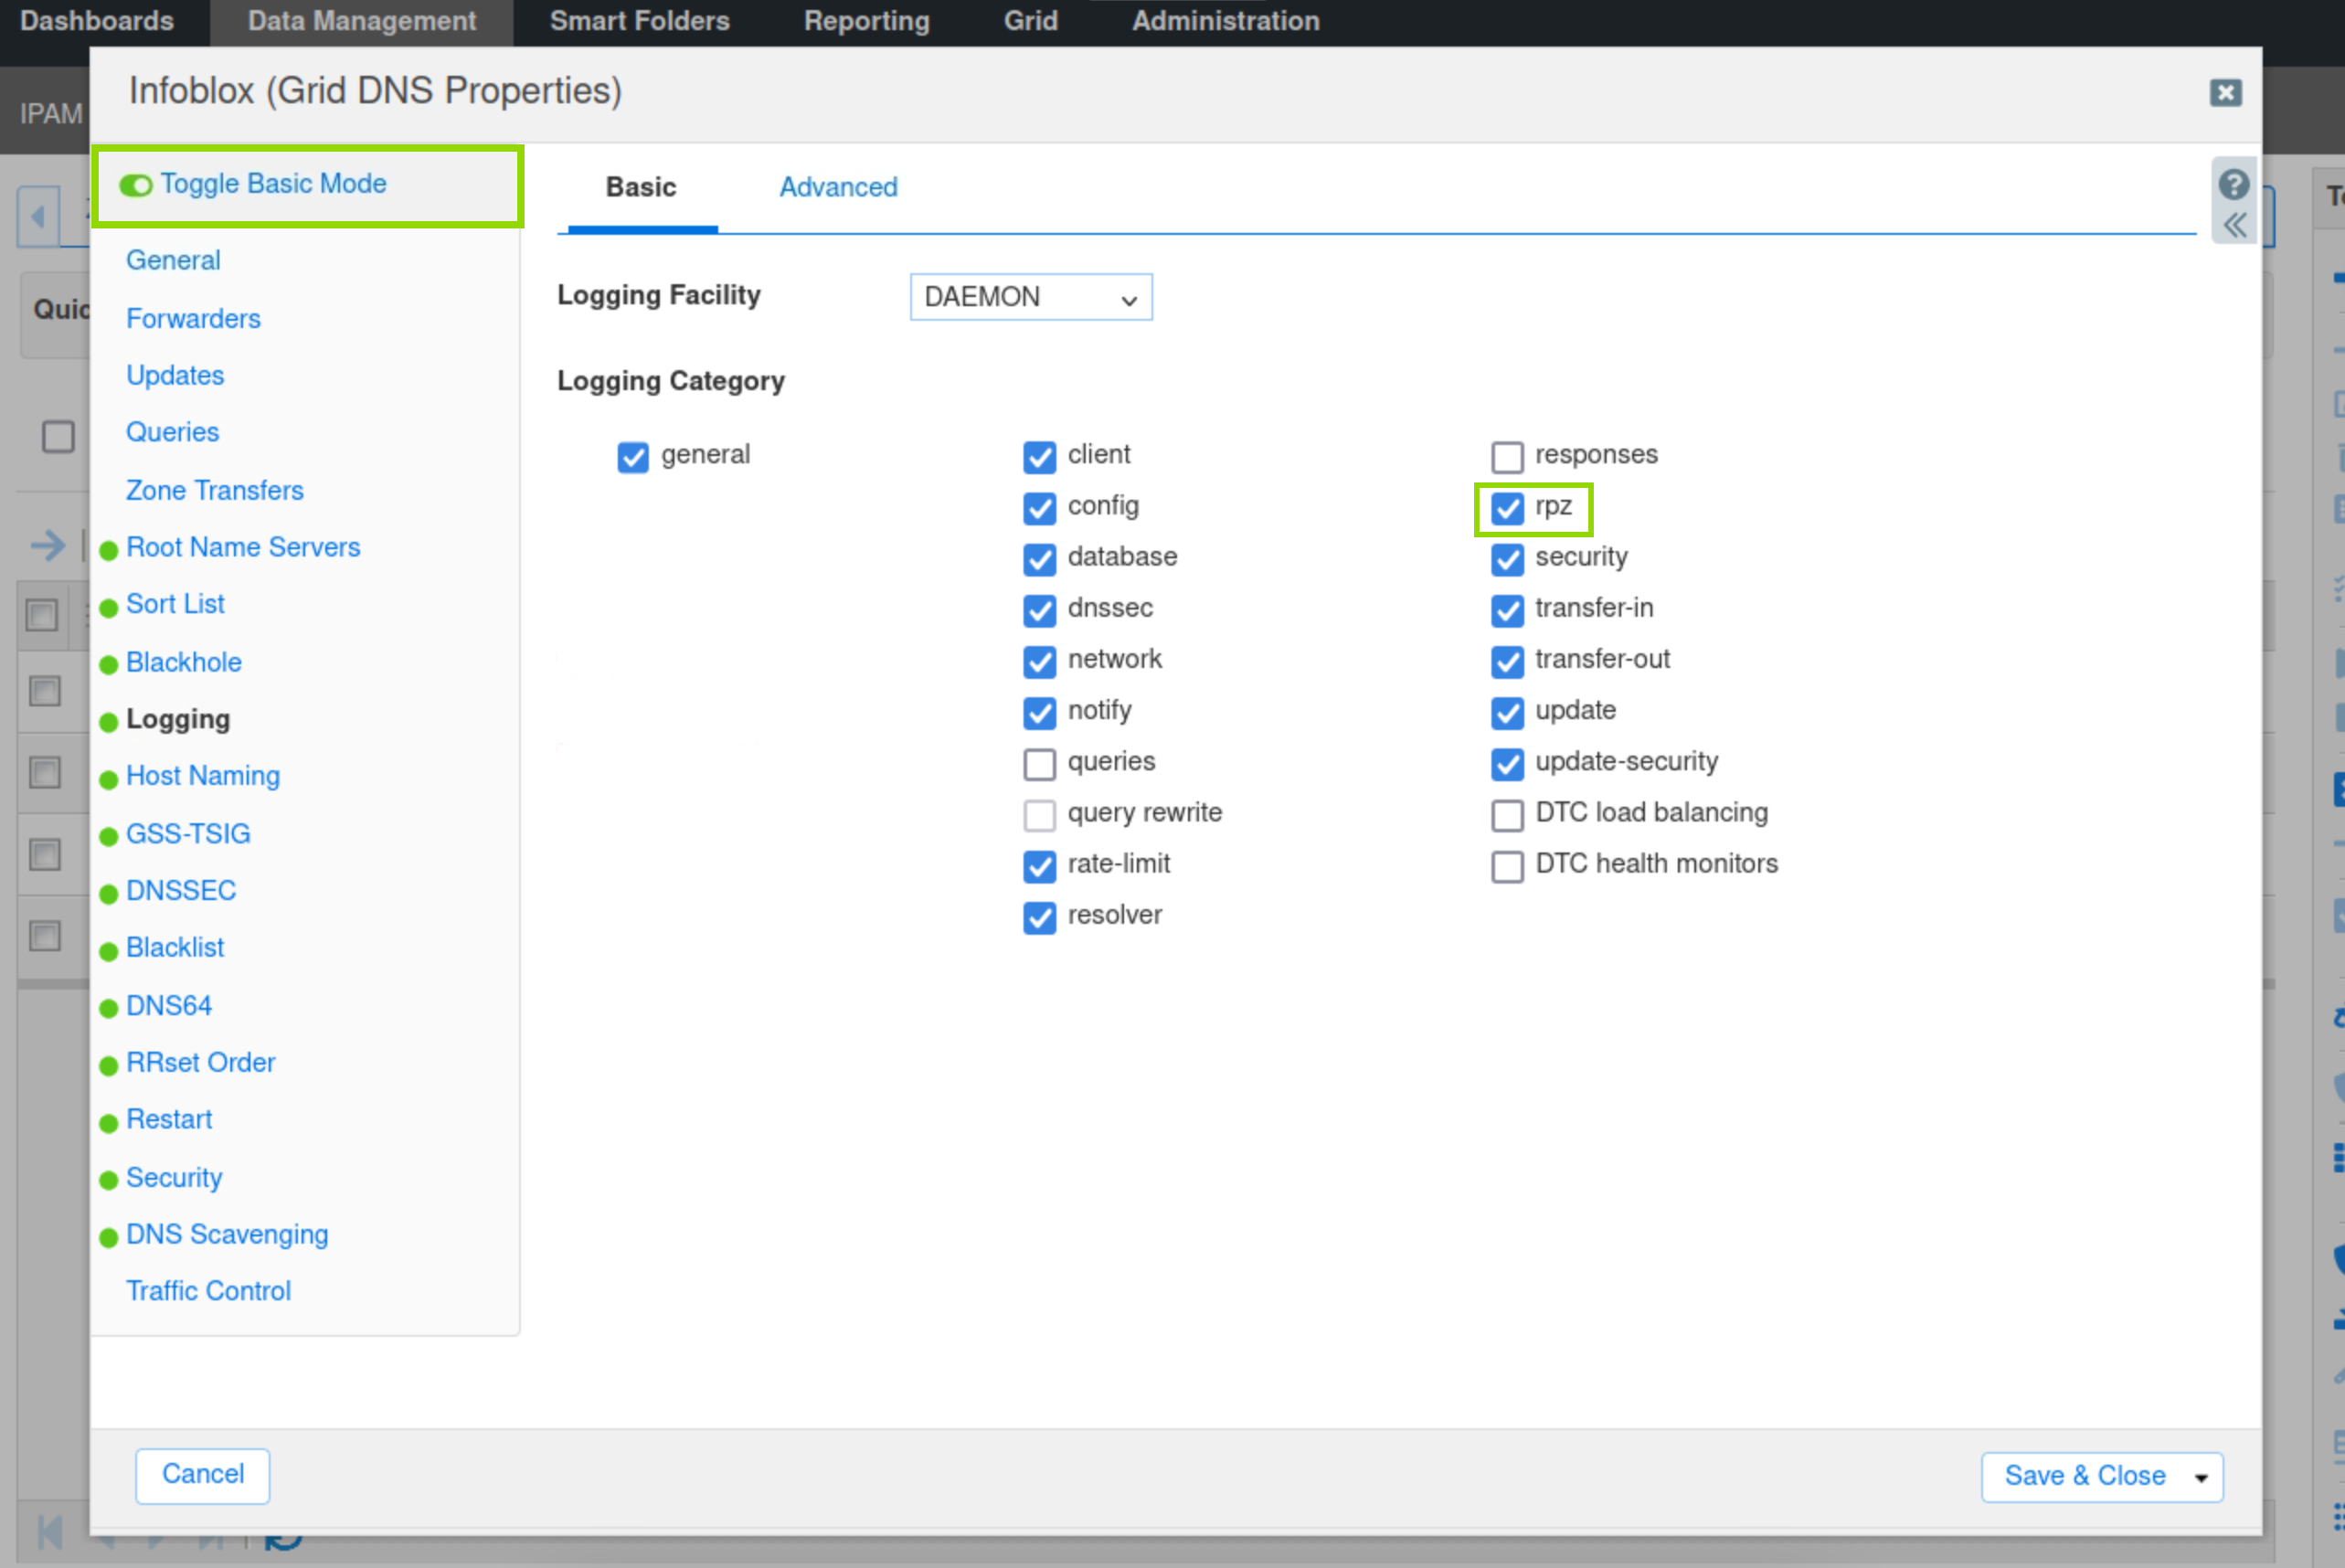
Toggle Advanced Mode. Select Logging.
-
Verify that the RPZ checkbox is checked; if not, check it.
-
Click Save & Close.
-
Restart Services if prompted.
Task 3 Solution: Enable Security Reporting for the Grid
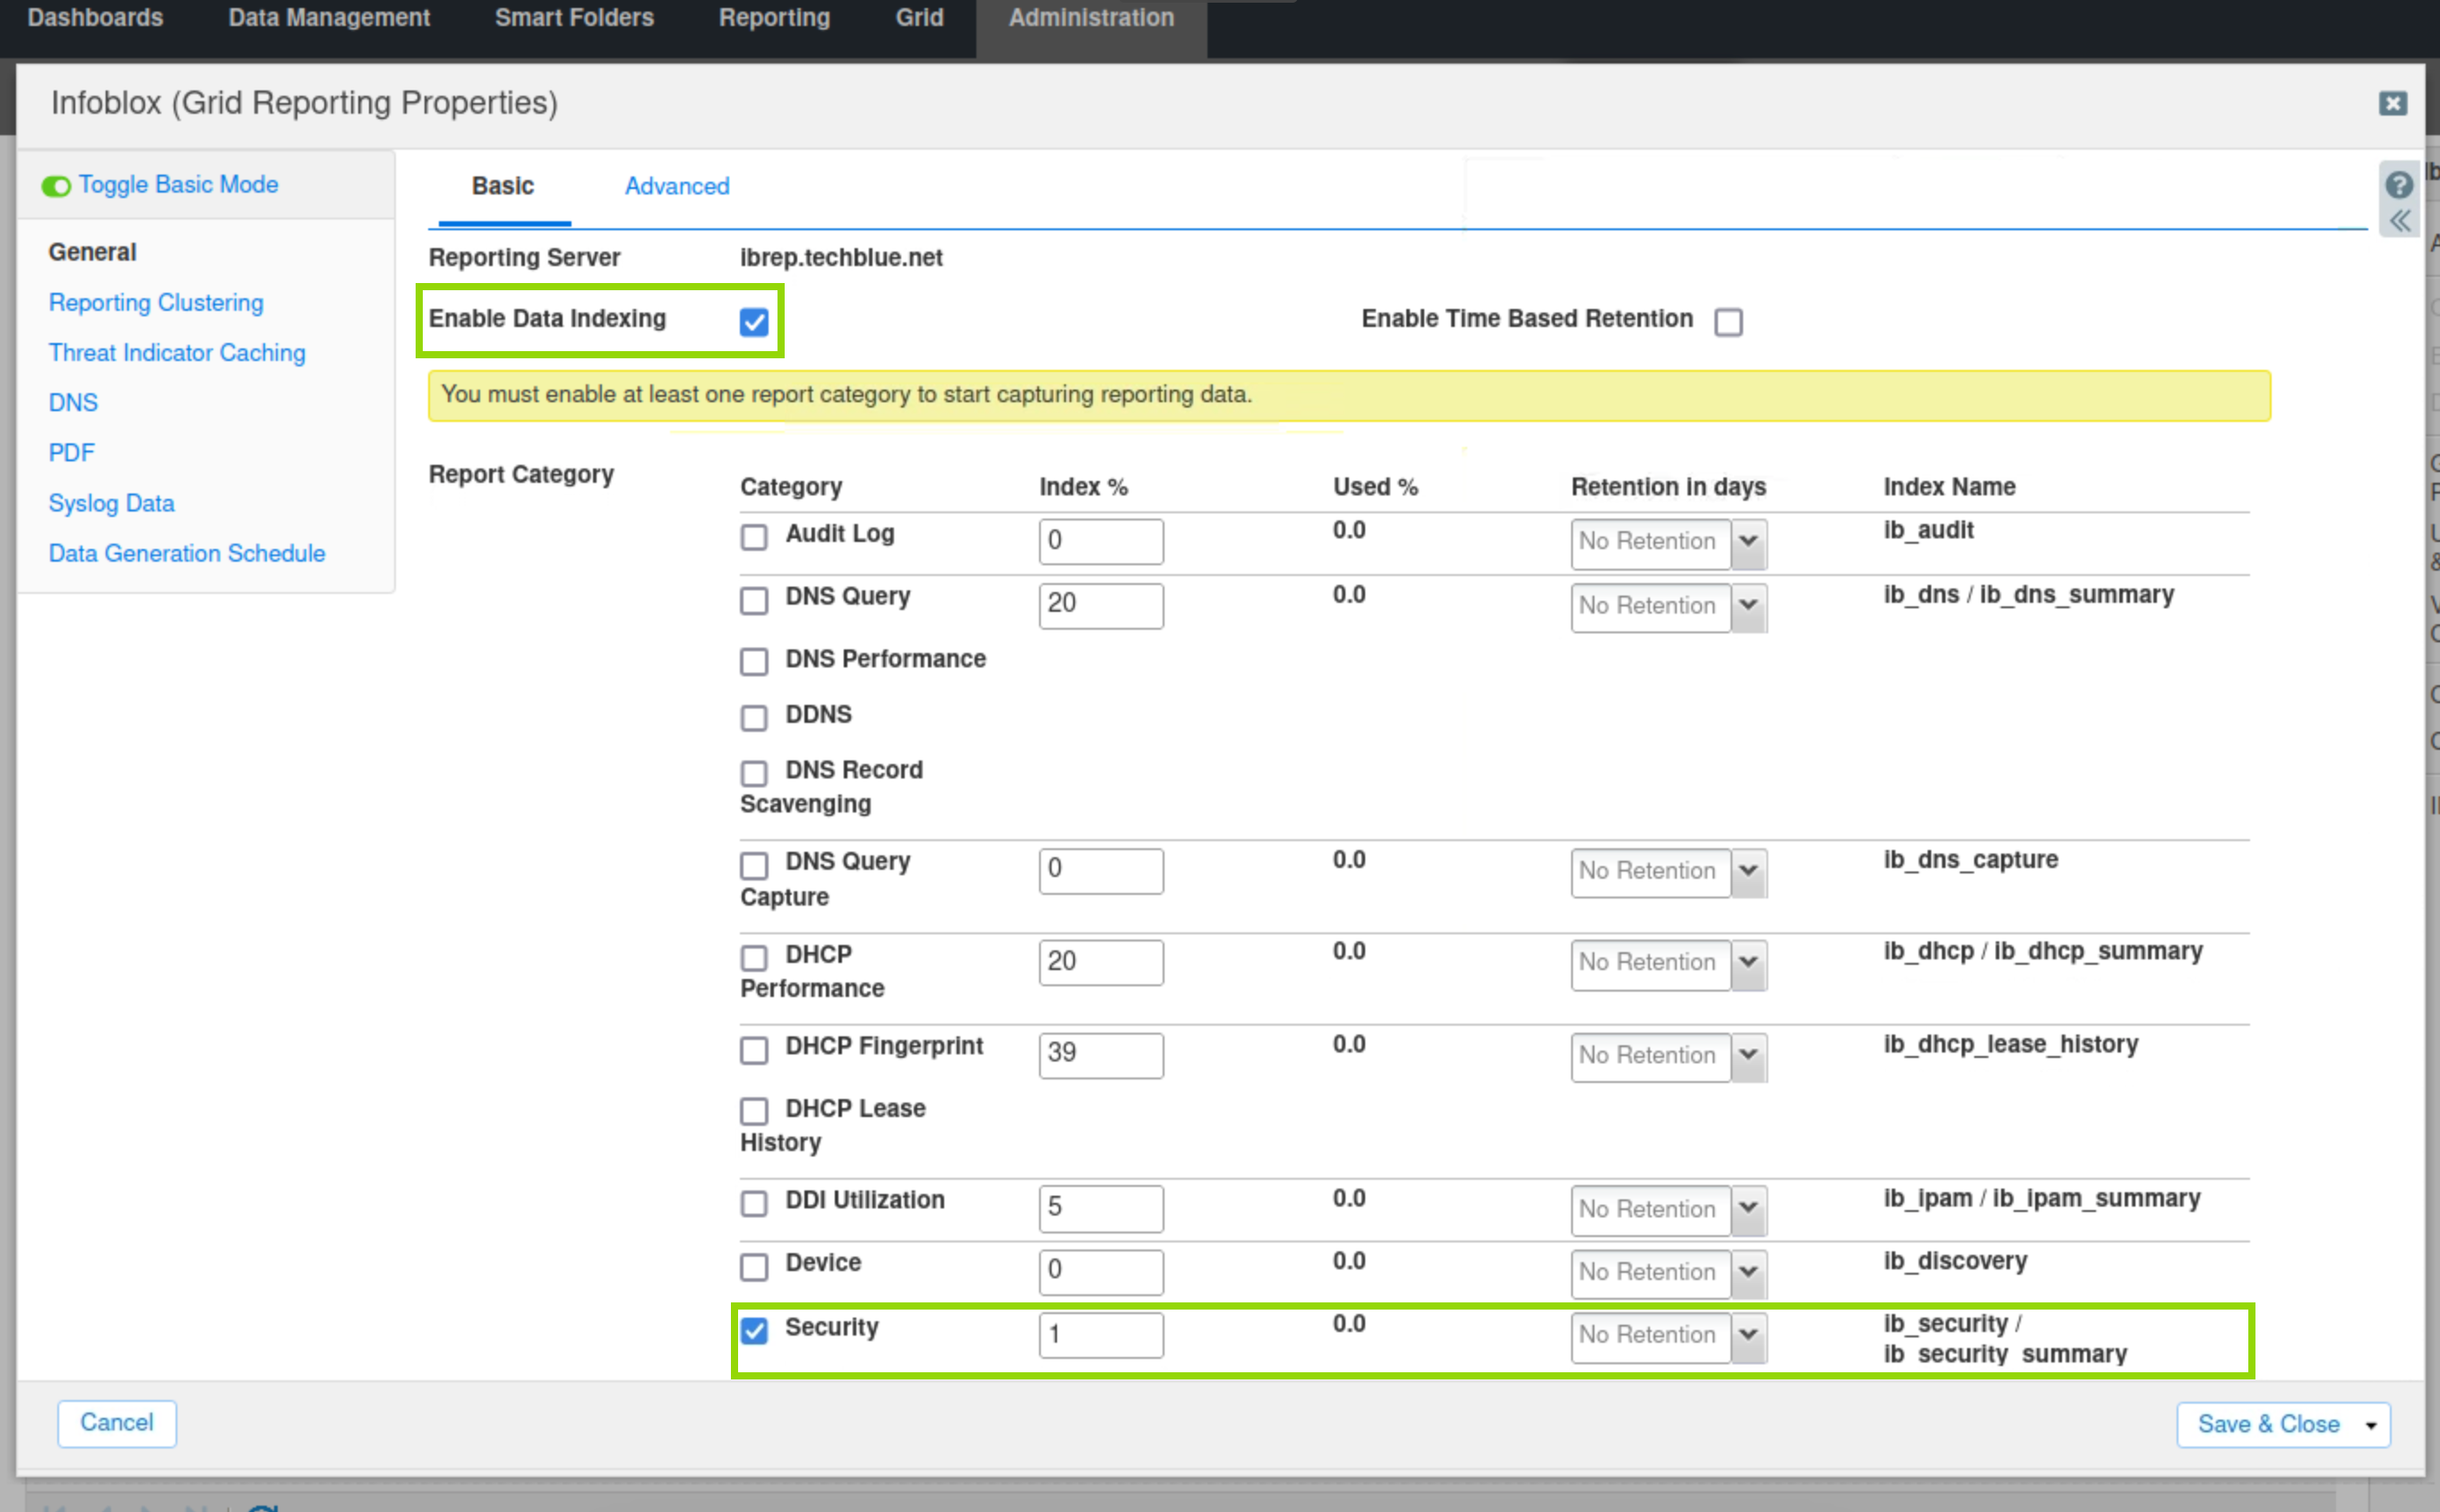
In this task, we enable the Reporting Server Security category, which has an index % value. This allows the reporting server to generate reports on security events, including RPZ.
NOTE: To allow grid members to send data to the reporting server, we must enable data indexing. If the "Enable Time-Based Retention “ box is enabled, the reporting server will retain data for the number of days we set for each reporting category.
-
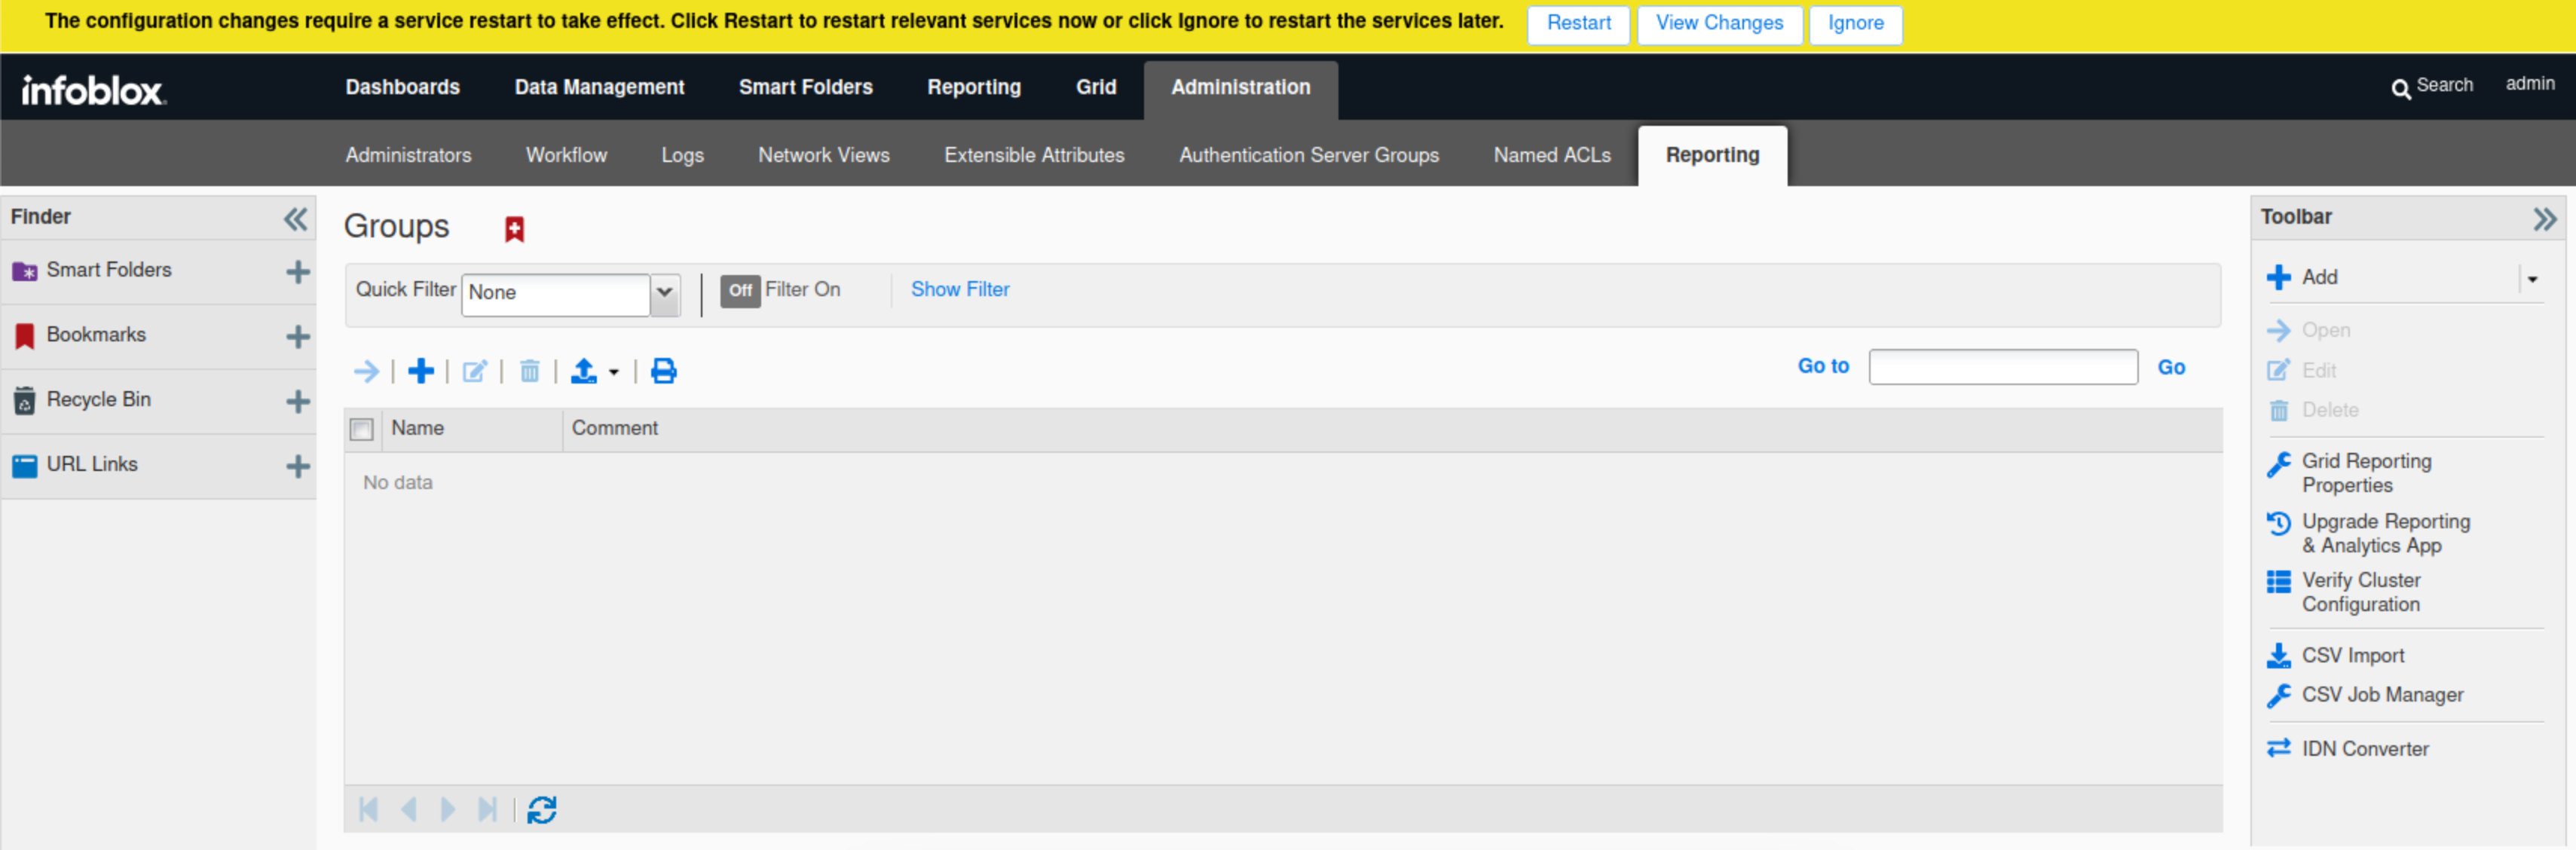
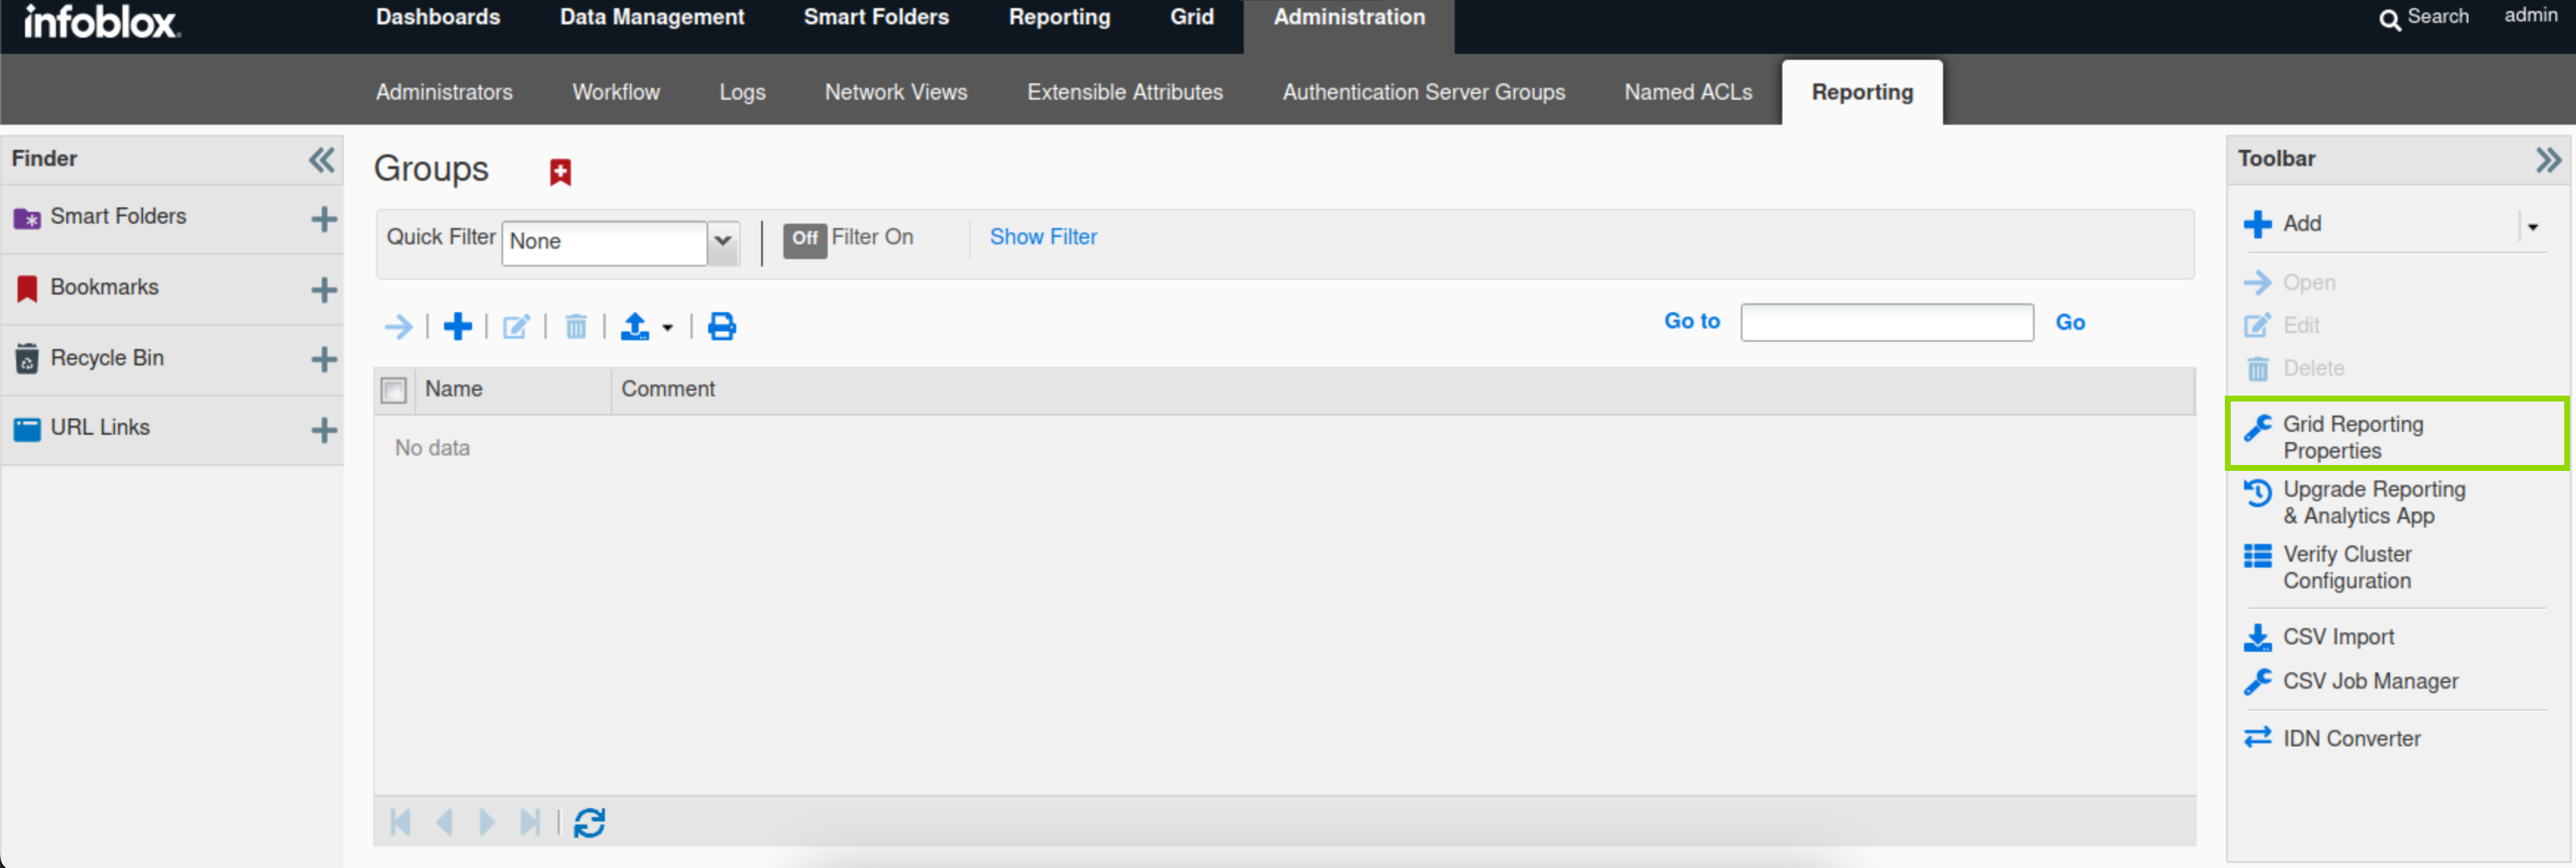
Navigate to Administration → Reporting.
-
Select Grid Reporting Properties from the Toolbar.
-
Check the "Enable Data Indexing“ box; this enables grid members to transfer data to the reporting server.
-
Ensure the Security Category is selected, and the Index% field has a value; you can leave it as the default value.
-
Click Save & Close.
-
Restart Services if prompted