Scenario
You’re tasked with enabling DNS Infrastructure Protection in your environment. In this lab, we will focus on setting up the Grid for DNS Infrastructure Protection by updating the grid member extibns.techblue.net settings and importing a configuration file to create an external DNS zone techblue.io. The member extibns.techblue.net is assumed to sit outside of a firewall and exposed to Internet traffic.
Estimate Completion Time
-
30 to 35 minutes
Credentials
|
Description |
Username |
Password |
URL or IP |
|---|---|---|---|
|
Grid Manager UI |
admin |
infoblox |
Requirements
-
Administrative access to the Grid
-
Usage of the NIOS Lab Environment (with DNS Infrastructure Protection) Lab environment
Learning Content
Lab Initiation
Access jump-desktop
Once the lab is deployed, you can access the virtual machines required for this activity. To begin, select VM List from the navigation bar at the top, locate jump-desktop, and click the green play icon to open its console. Log in to the Linux UI.

Username: training
Password: infoblox
Initiate lab
To initiate the lab, double-click the Launch Lab icon on the Desktop.

Choose the lab number from the list and click OK.

After clicking OK, you will see a pop-up message with a brief description of the lab task. If the description looks correct, click Yes to continue lab initiation.

Lab initiation will take a couple of minutes to finish.
Once complete, you will see another pop-up message with the login credentials and the URL for the Grid Manager’s User Interface. Note that the credentials may differ from those from prior labs.

Tasks
-
Set up a new management interface for Grid Member extibns.techblue.net
-
Change LAN1 interface setting to its public address for Grid Member extibns.techblue.net
-
Verify extibns.techblue.net successfully rejoined the Grid after the restart
-
Update extibns.techblue.net Reporting Settings
-
Import the DNS-techblue.io.csv file and verify that the DNS service is running on extibns.techblue.net
Task 1: Set up a new management interface for Grid Member extibns.techblue.net
Use the following information to configure a new IPv4 management port on the Grid member extibns.techblue.net, and configure the VPN services (Infoblox Grid communication) to run over that management port. Use the following information:
|
IP Address |
10.35.22.105 |
|
Netmask |
255.255.255.0 |
|
Gateway |
10.35.22.1 |
Task 2: Change LAN1 interface setting for Grid Member extibns.techblue.net
Change the LAN1 interface (the DNS service interface) on the Grid member extibns.techblue.net to its new public IP address. Use the following information:
|
IP Address |
203.0.113.105 |
|
Netmask |
255.255.255.0 |
|
Gateway |
203.0.113.1 |
Task 3: Verify extibns.techblue.net successfully joined the Grid after the restart
After an address change, the Grid member extibns.techblue.net will disconnect from the Grid and rejoin. We need to verify that it has successfully rejoined before moving on. This process can take several minutes.
Task 4: Configure extibns.techblue.net Reporting Settings
Update the reporting configuration to use the management interface to send data to the reporting server.
Task 5: Import the DNS-techblue.io.csv file and verify the DNS service is running on extibns.techblue.net
Finally, we will configure the external-facing Grid member with DNS data by importing the file DNS-techblue.io.csv. This import does the following:
-
Create a DNS View called External
-
Create a Name Server Group called External NSG, and assign extibns.techblue.net to the group
-
Create and populate the techblue.io zone and assign it to extibns.techblue.net
After the import, verify that the DNS service is running on extibns.techblue.net.
Solutions
Task 1 Solution: Set up a new management interface for Grid Member extibns.techblue.net
In this task, we configure a new IPv4 management interface on extibns.techblue.net. The port will be used as an out-of-band management port for the grid member, as it is strongly recommended to use a management interface for Grid traffic. Since extibns.techblue.net is assumed to be exposed to the Internet without a firewall, we need to configure it with a dedicated management interface. This way, the DNS service runs on one interface, and management runs on another.
-
On the jump-desktop machine, open a browser window to https://10.100.0.100.
-
Navigate to Infoblox Grid → Grid Manager → Members.
-
Select extibns.techblue.net and click the Edit button.
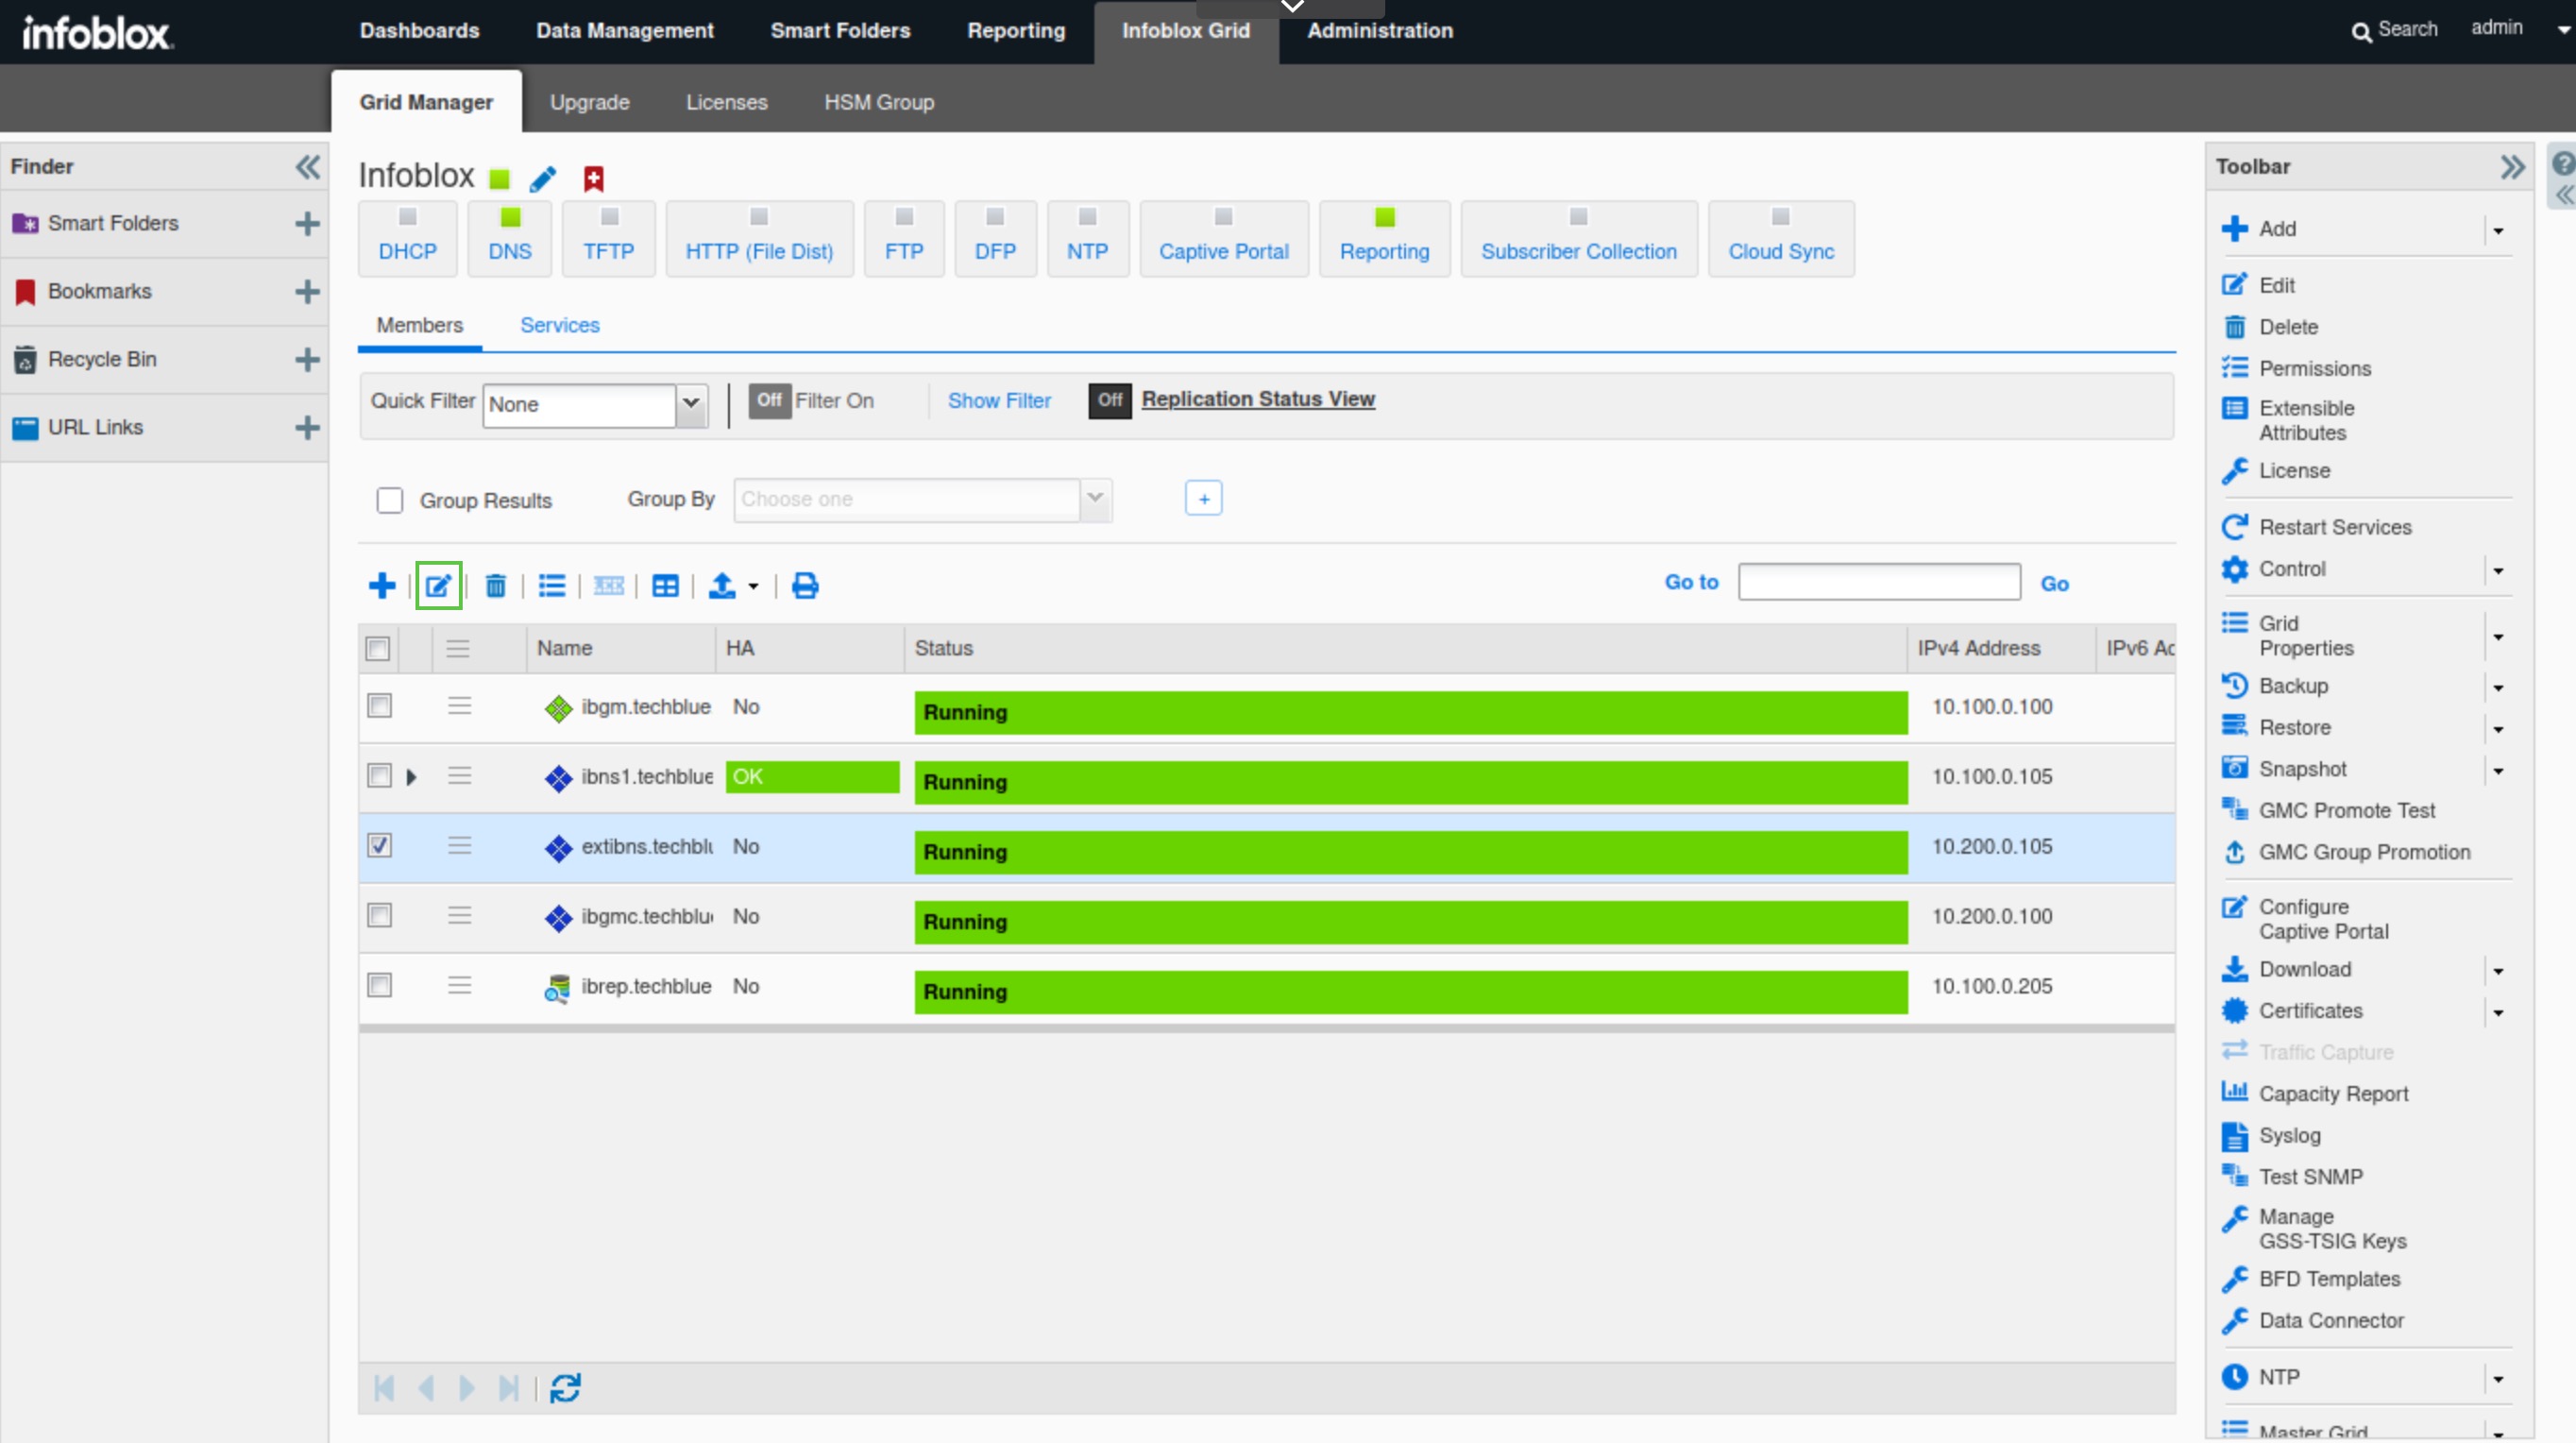
-
Click Toggle Advanced Mode.
-
Select the Network tab.
-
Scroll down the page to the Additional Ports and Addresses section.
-
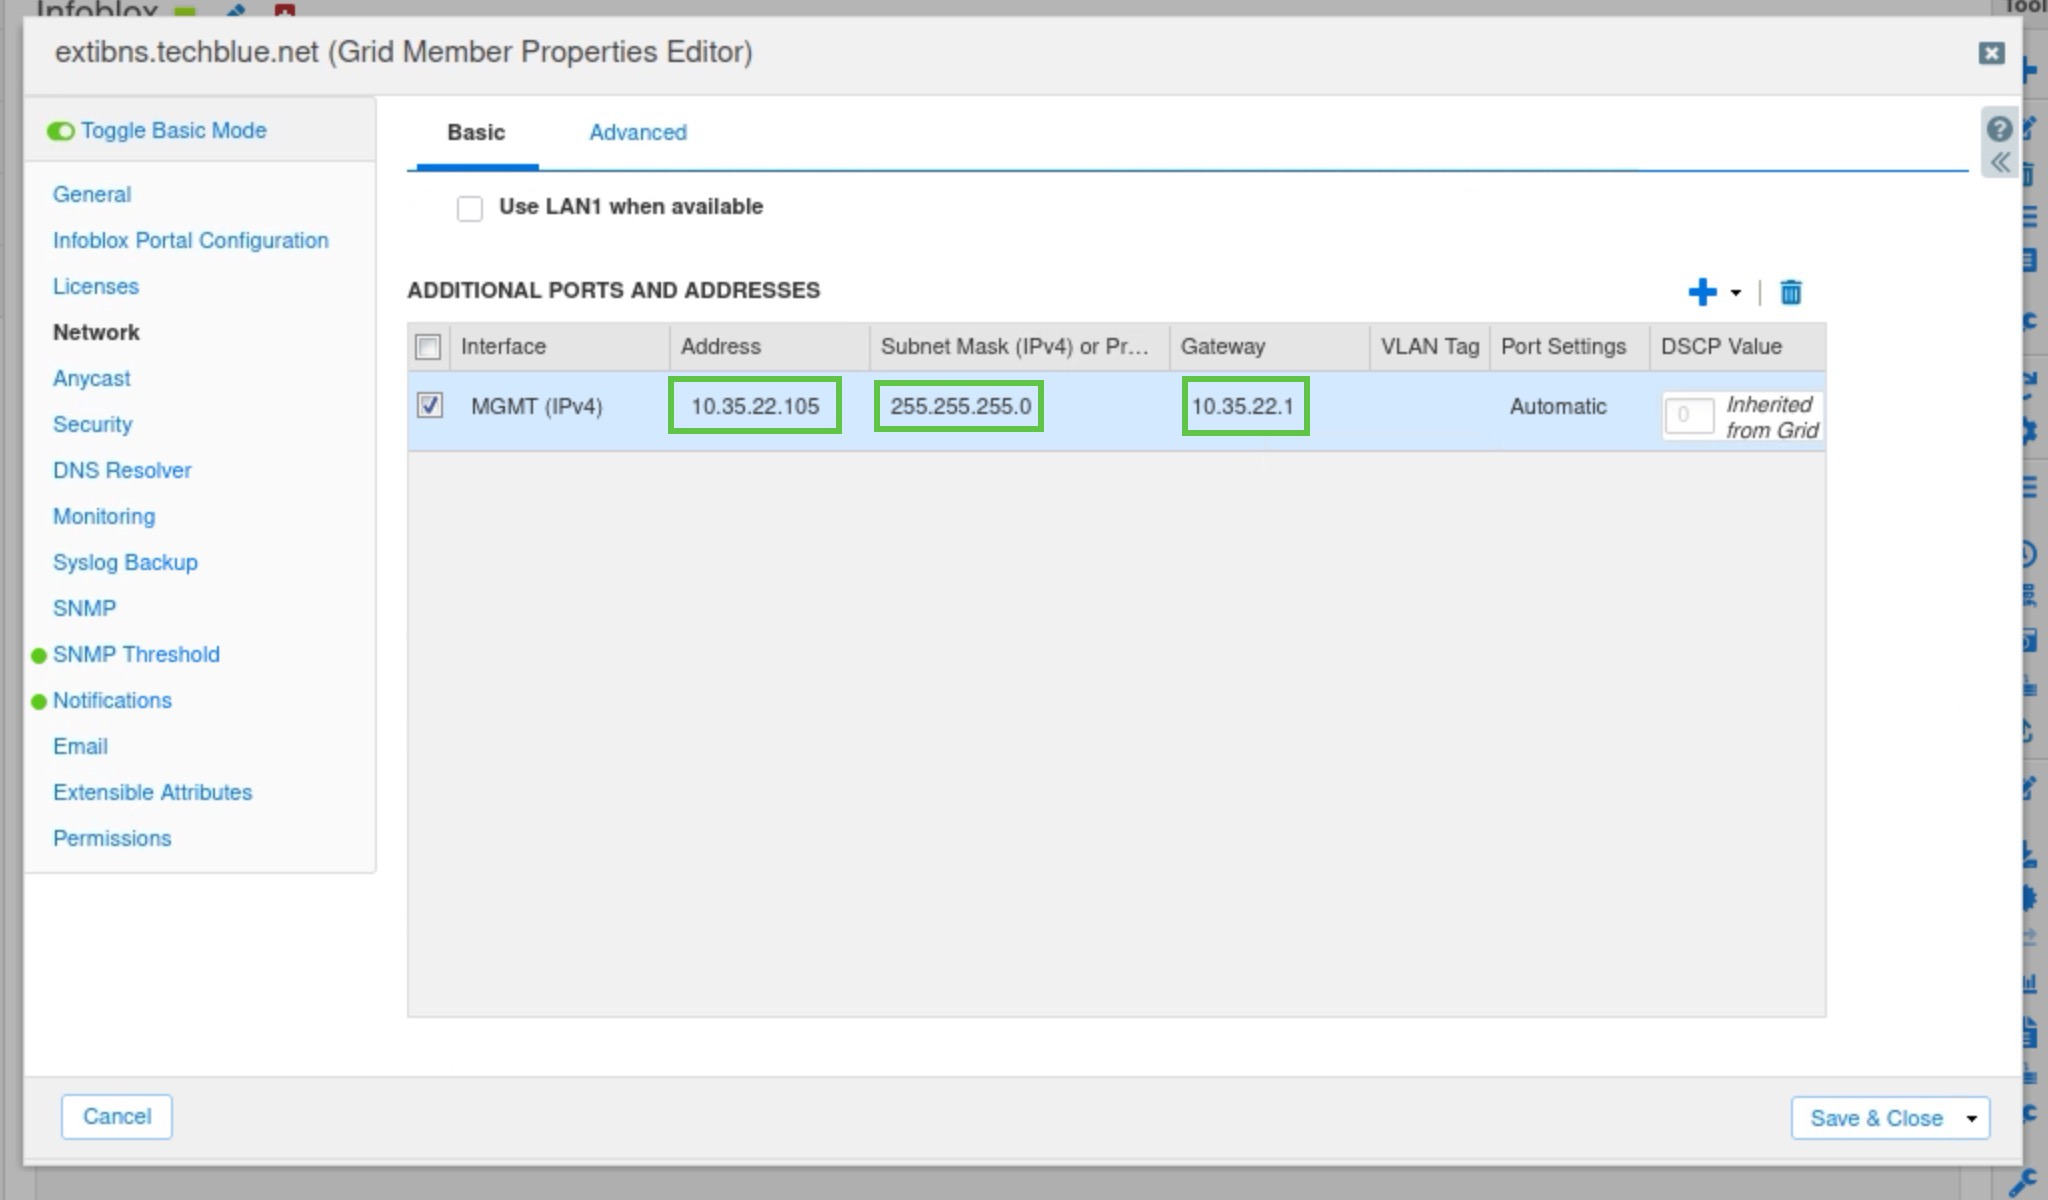
Click the plus (+) symbol, and add a MGMT(IPv4) port.
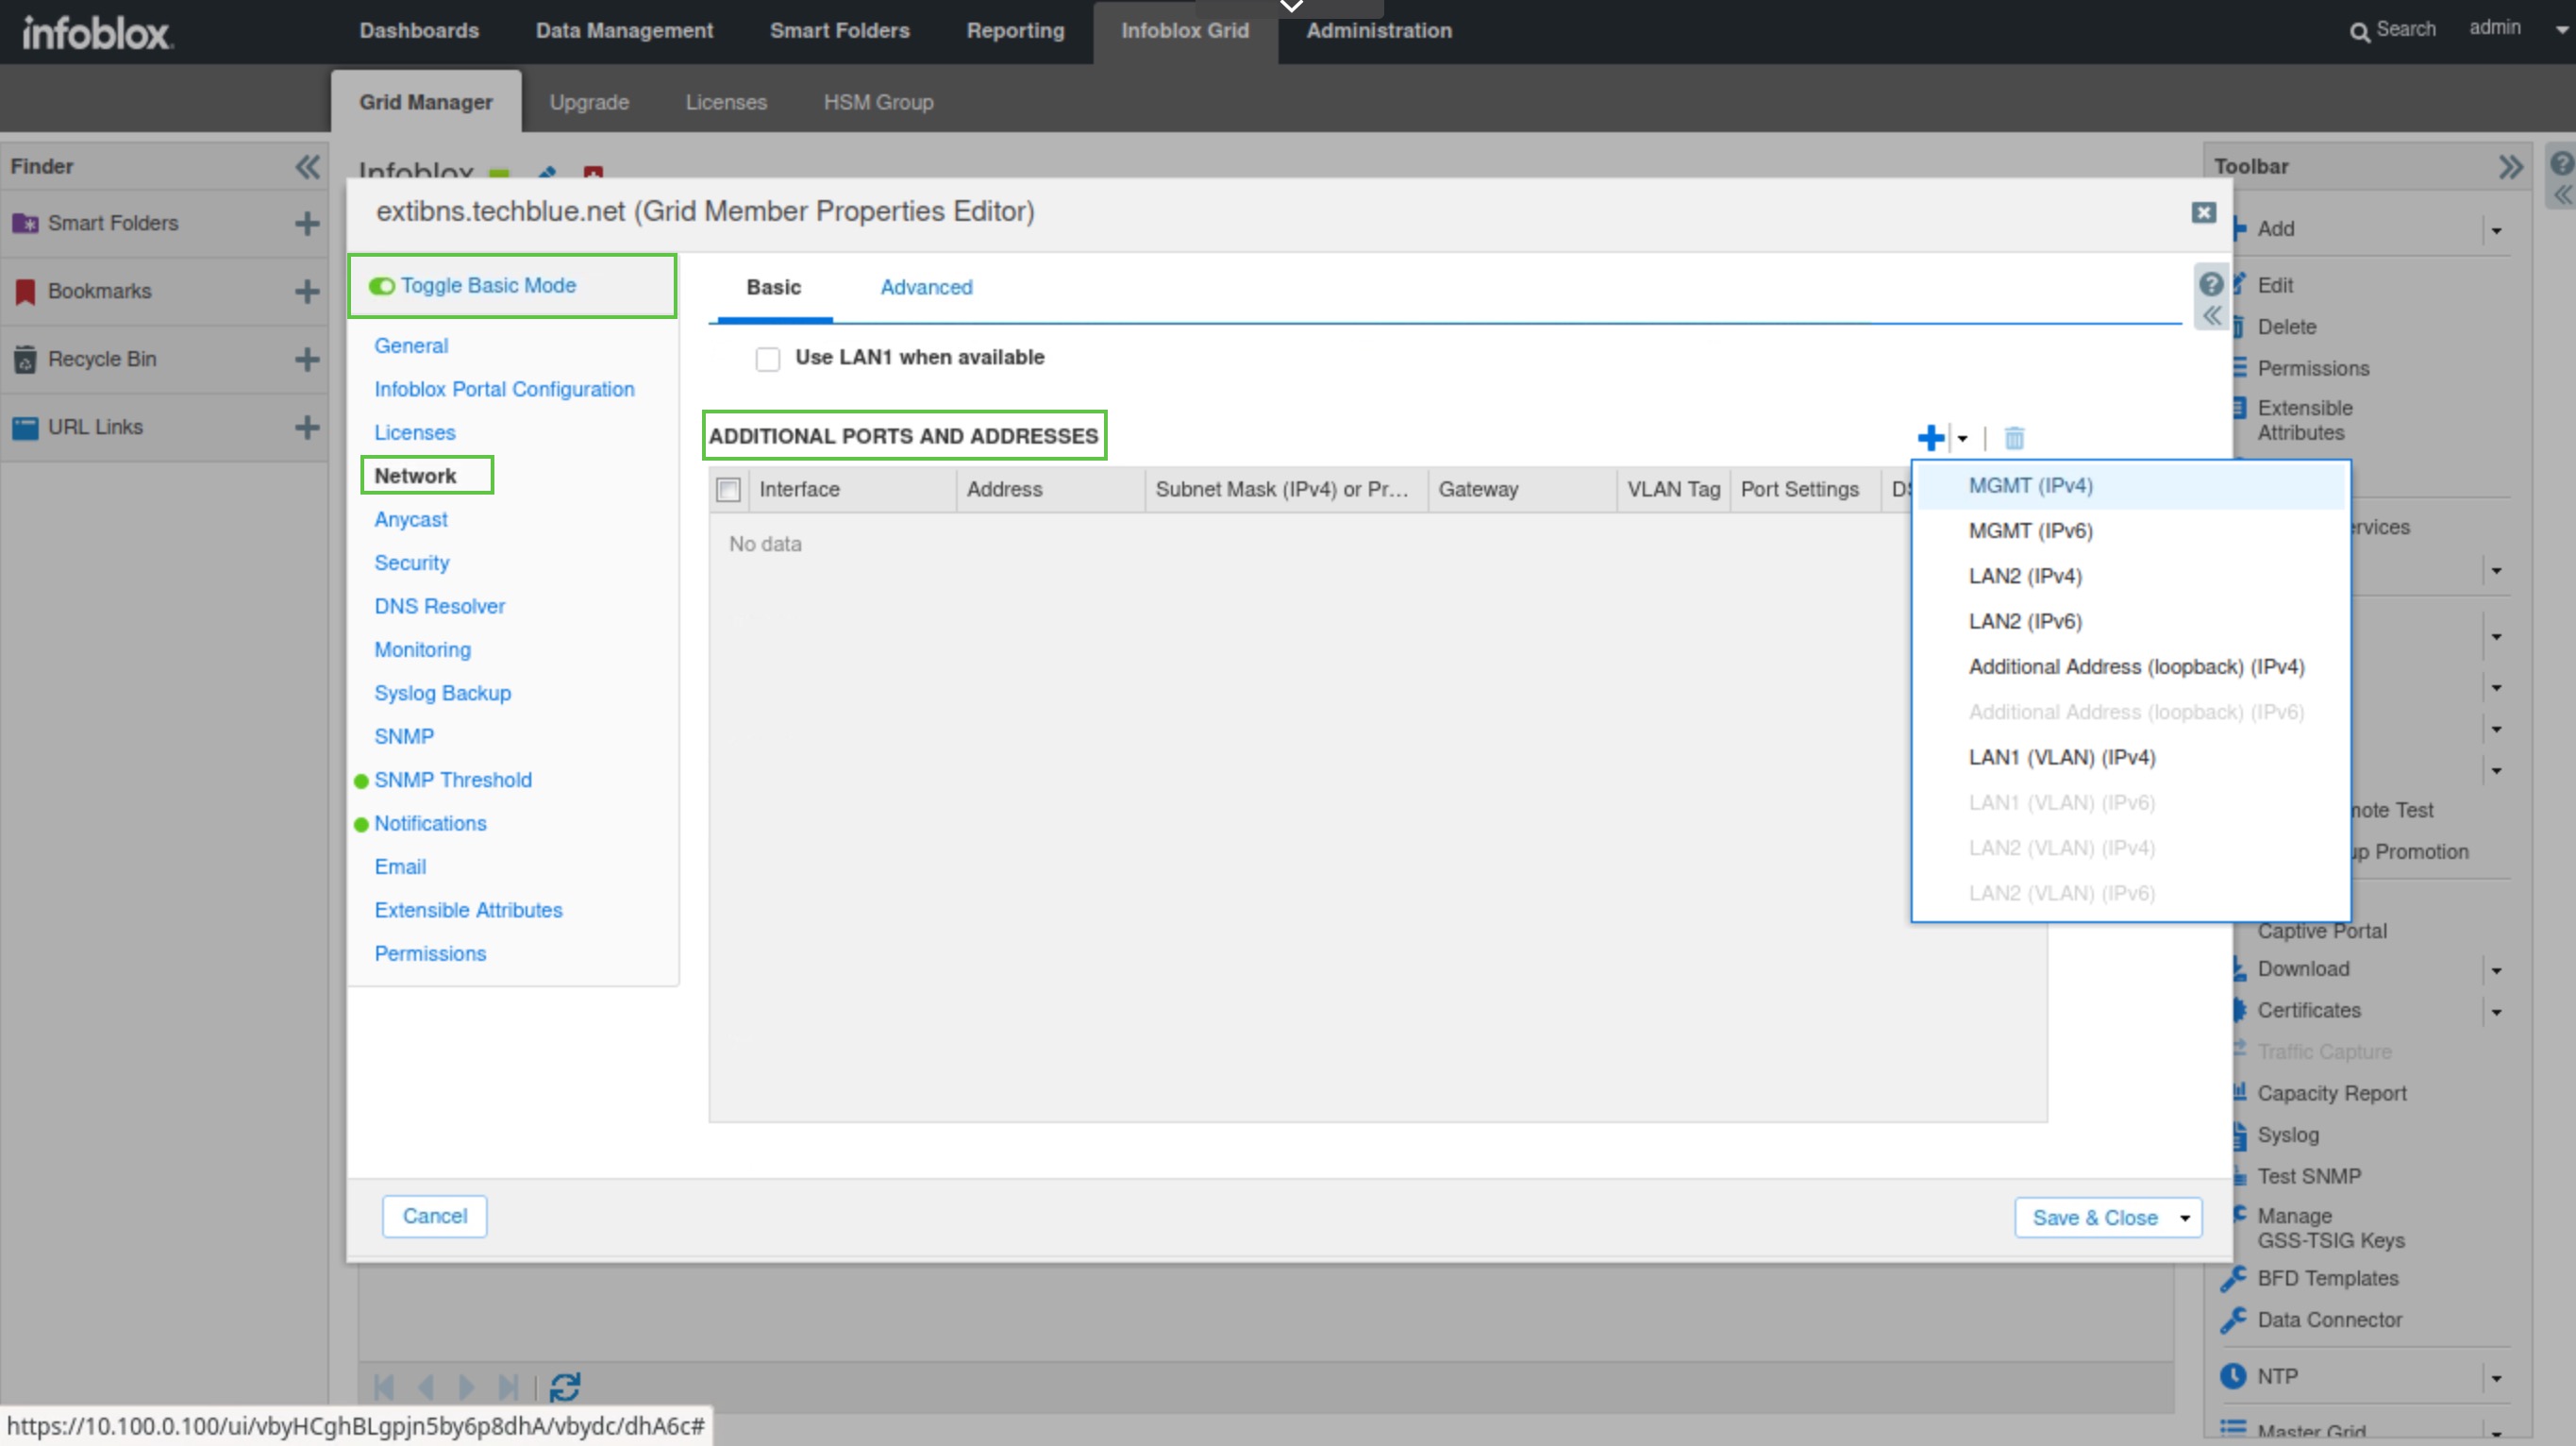
-
Set the address to 10.35.22.105, the subnet mask to 255.255.255.0, and the Gateway to 10.35.22.1.
-
Select the Advanced tab at the top of the screen.
-
Scroll down and check the Enable VPN on the MGMT port checkbox.
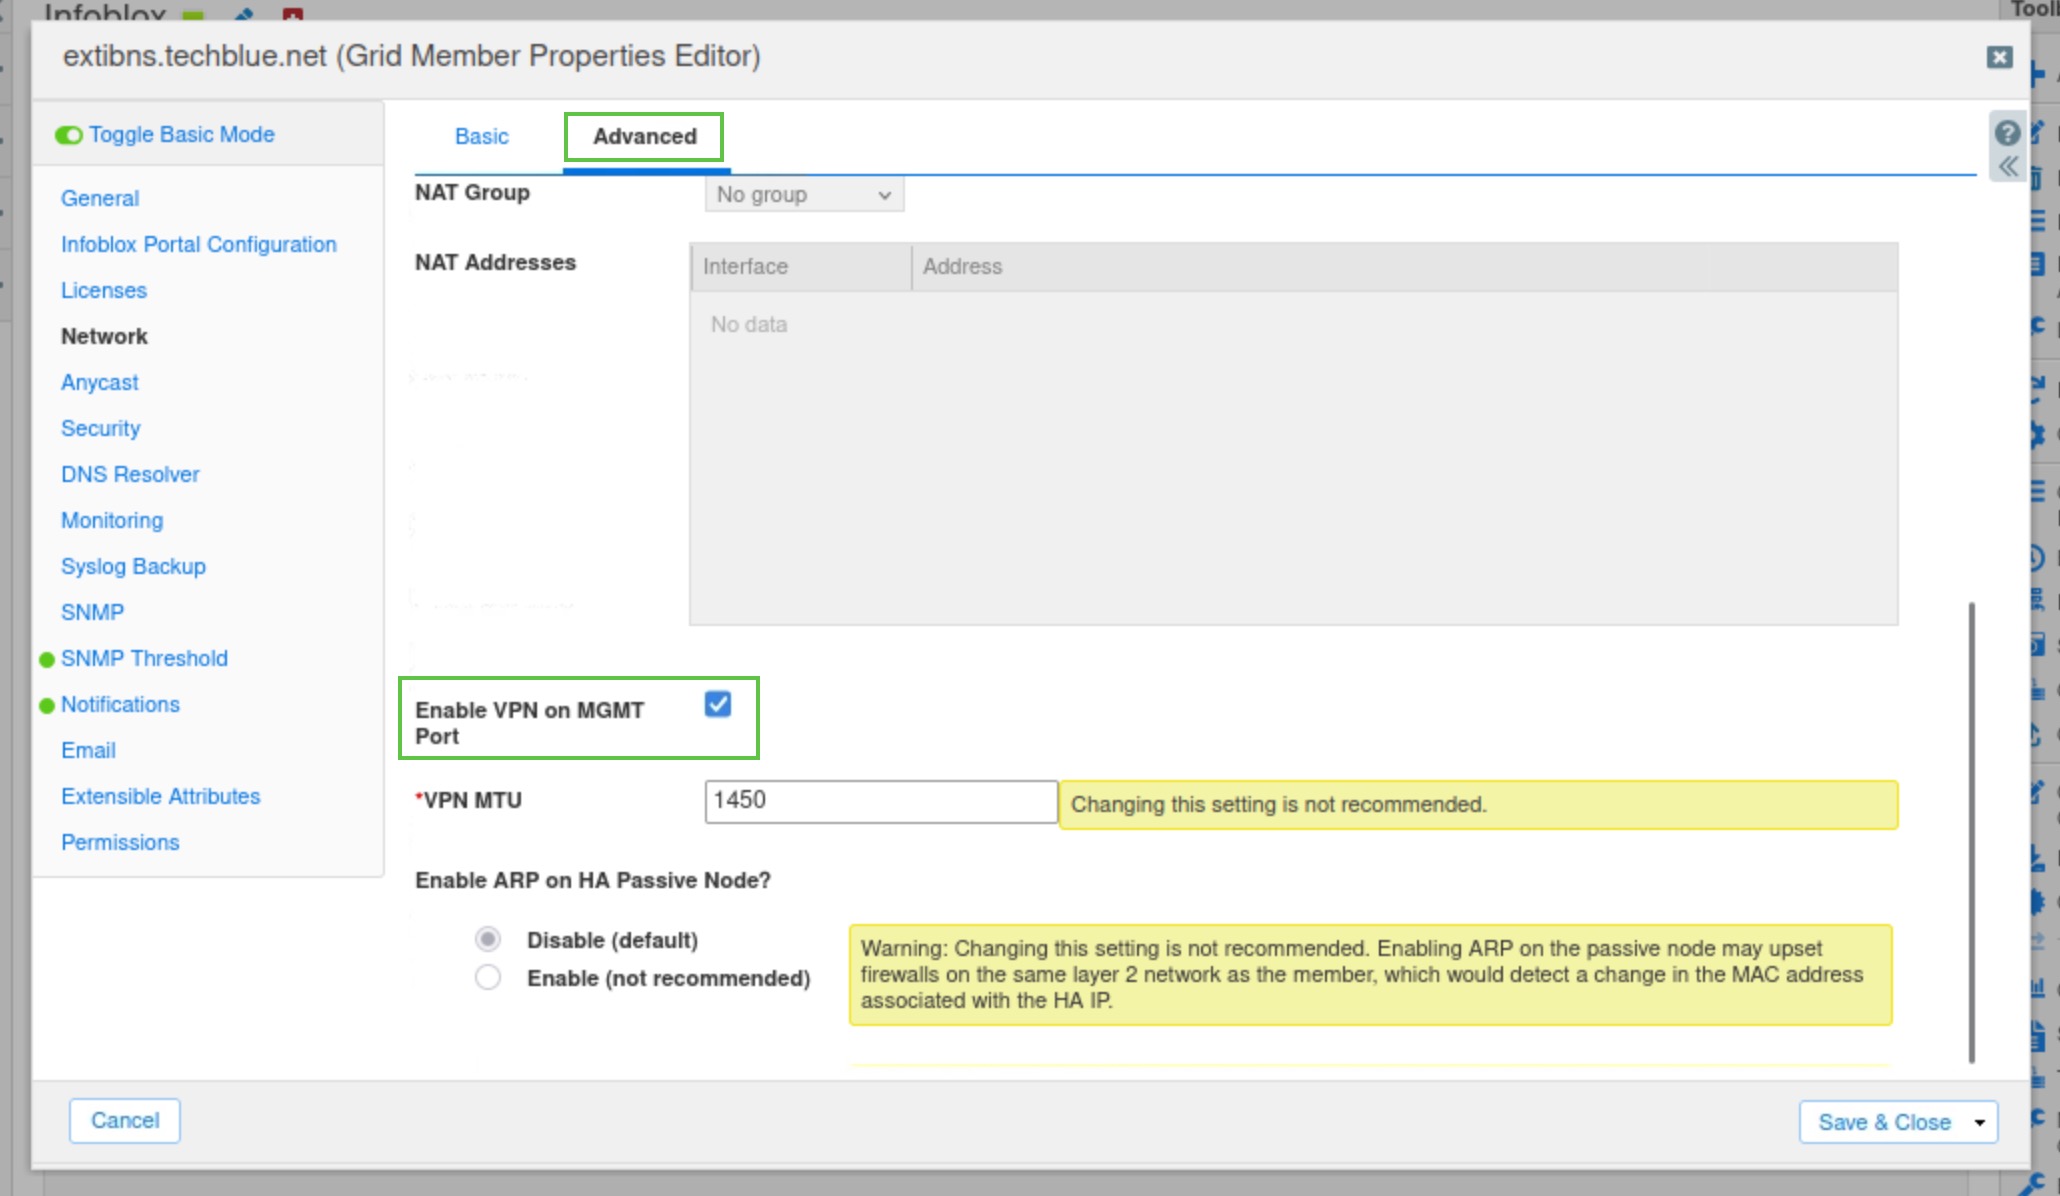
-
Click Save & Close to save the configuration settings. The grid member will restart and disconnect briefly after this change.
Task 2 Solution: Change LAN1 interface setting for Grid Member extibns.techblue.net
In this task, we will modify the configuration of the LAN1 interface on extibns.techblue.net to use a public IP address, allowing the Grid member to serve the zone techblue.io for external clients. The zone techblue.io will be imported in the next task of the lab guide.
We are separating the creation of the MGMT interface and the adjustment of the LAN1 setting into two separate steps as a precaution to maintain management access to the Grid in case we misconfigure the IP address of one of the interfaces.
-
Select extibns.techblue.net and click the Edit button.
-
Select the Network tab
-
Under the Ports and Addresses section, edit the LAN1 interface’s settings. Set the address to 203.0.113.105, the subnet mask to 255.255.255.0, and the Gateway to 203.0.113.1
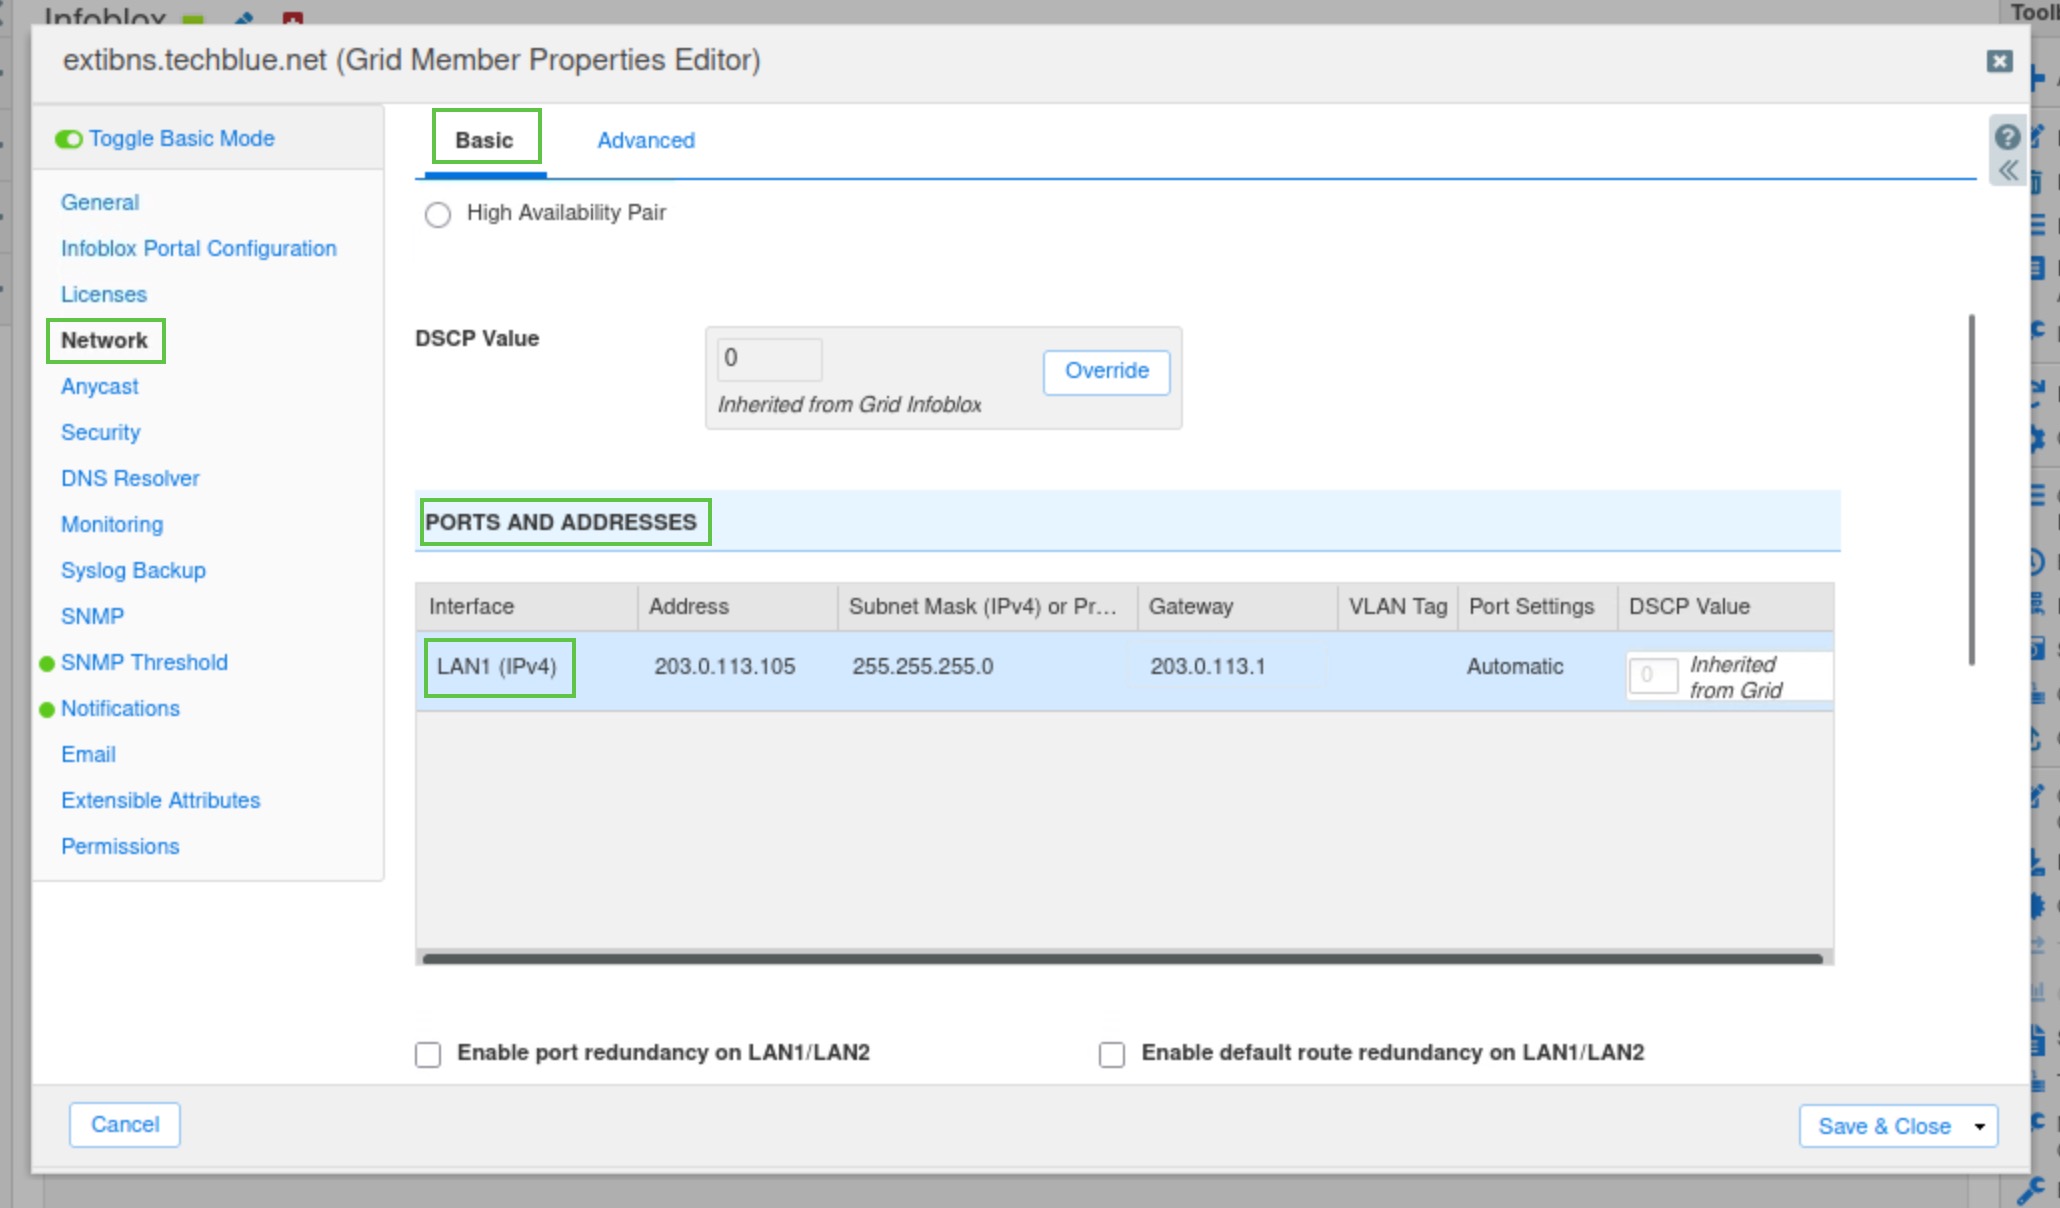
-
Click Save & Close.
-
Restart the services when prompted.
Task 3 Solution: Verify extibns.techblue.net successfully joined the Grid after the restart
In this task, we will wait for extibns.techblue.net to successfully rejoin the grid with the new interface configurations we added in the previous two steps.
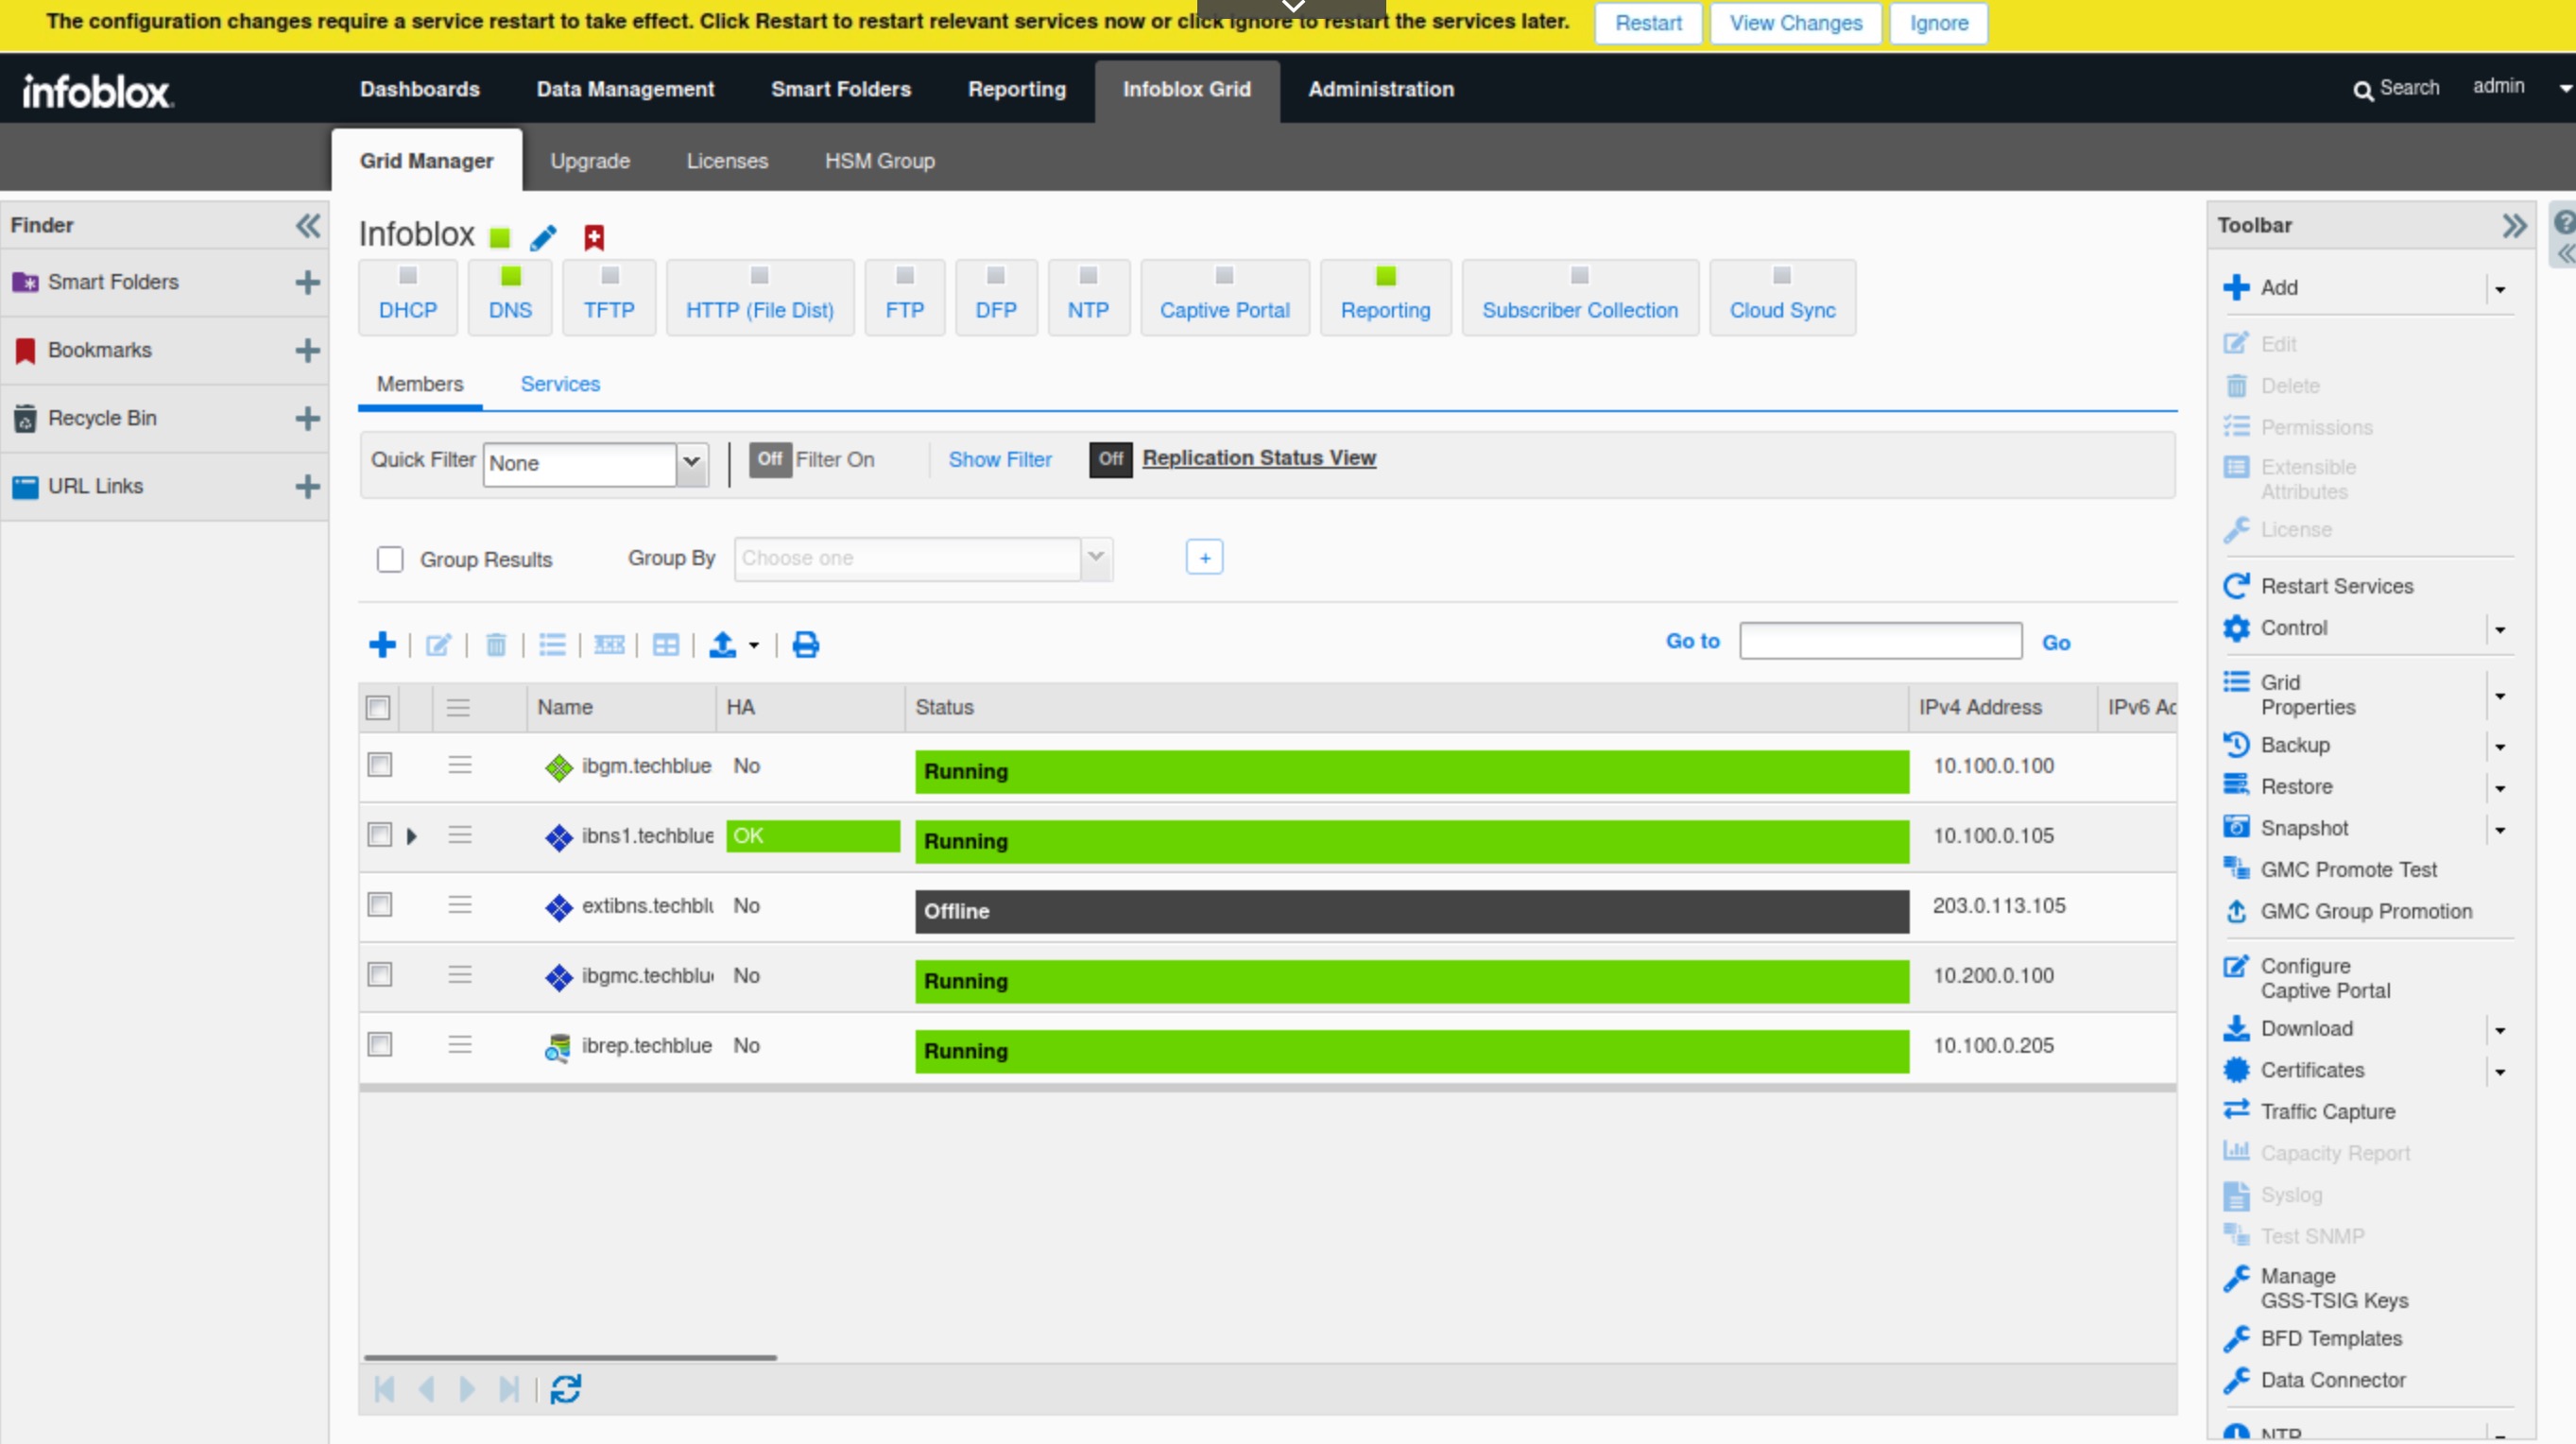
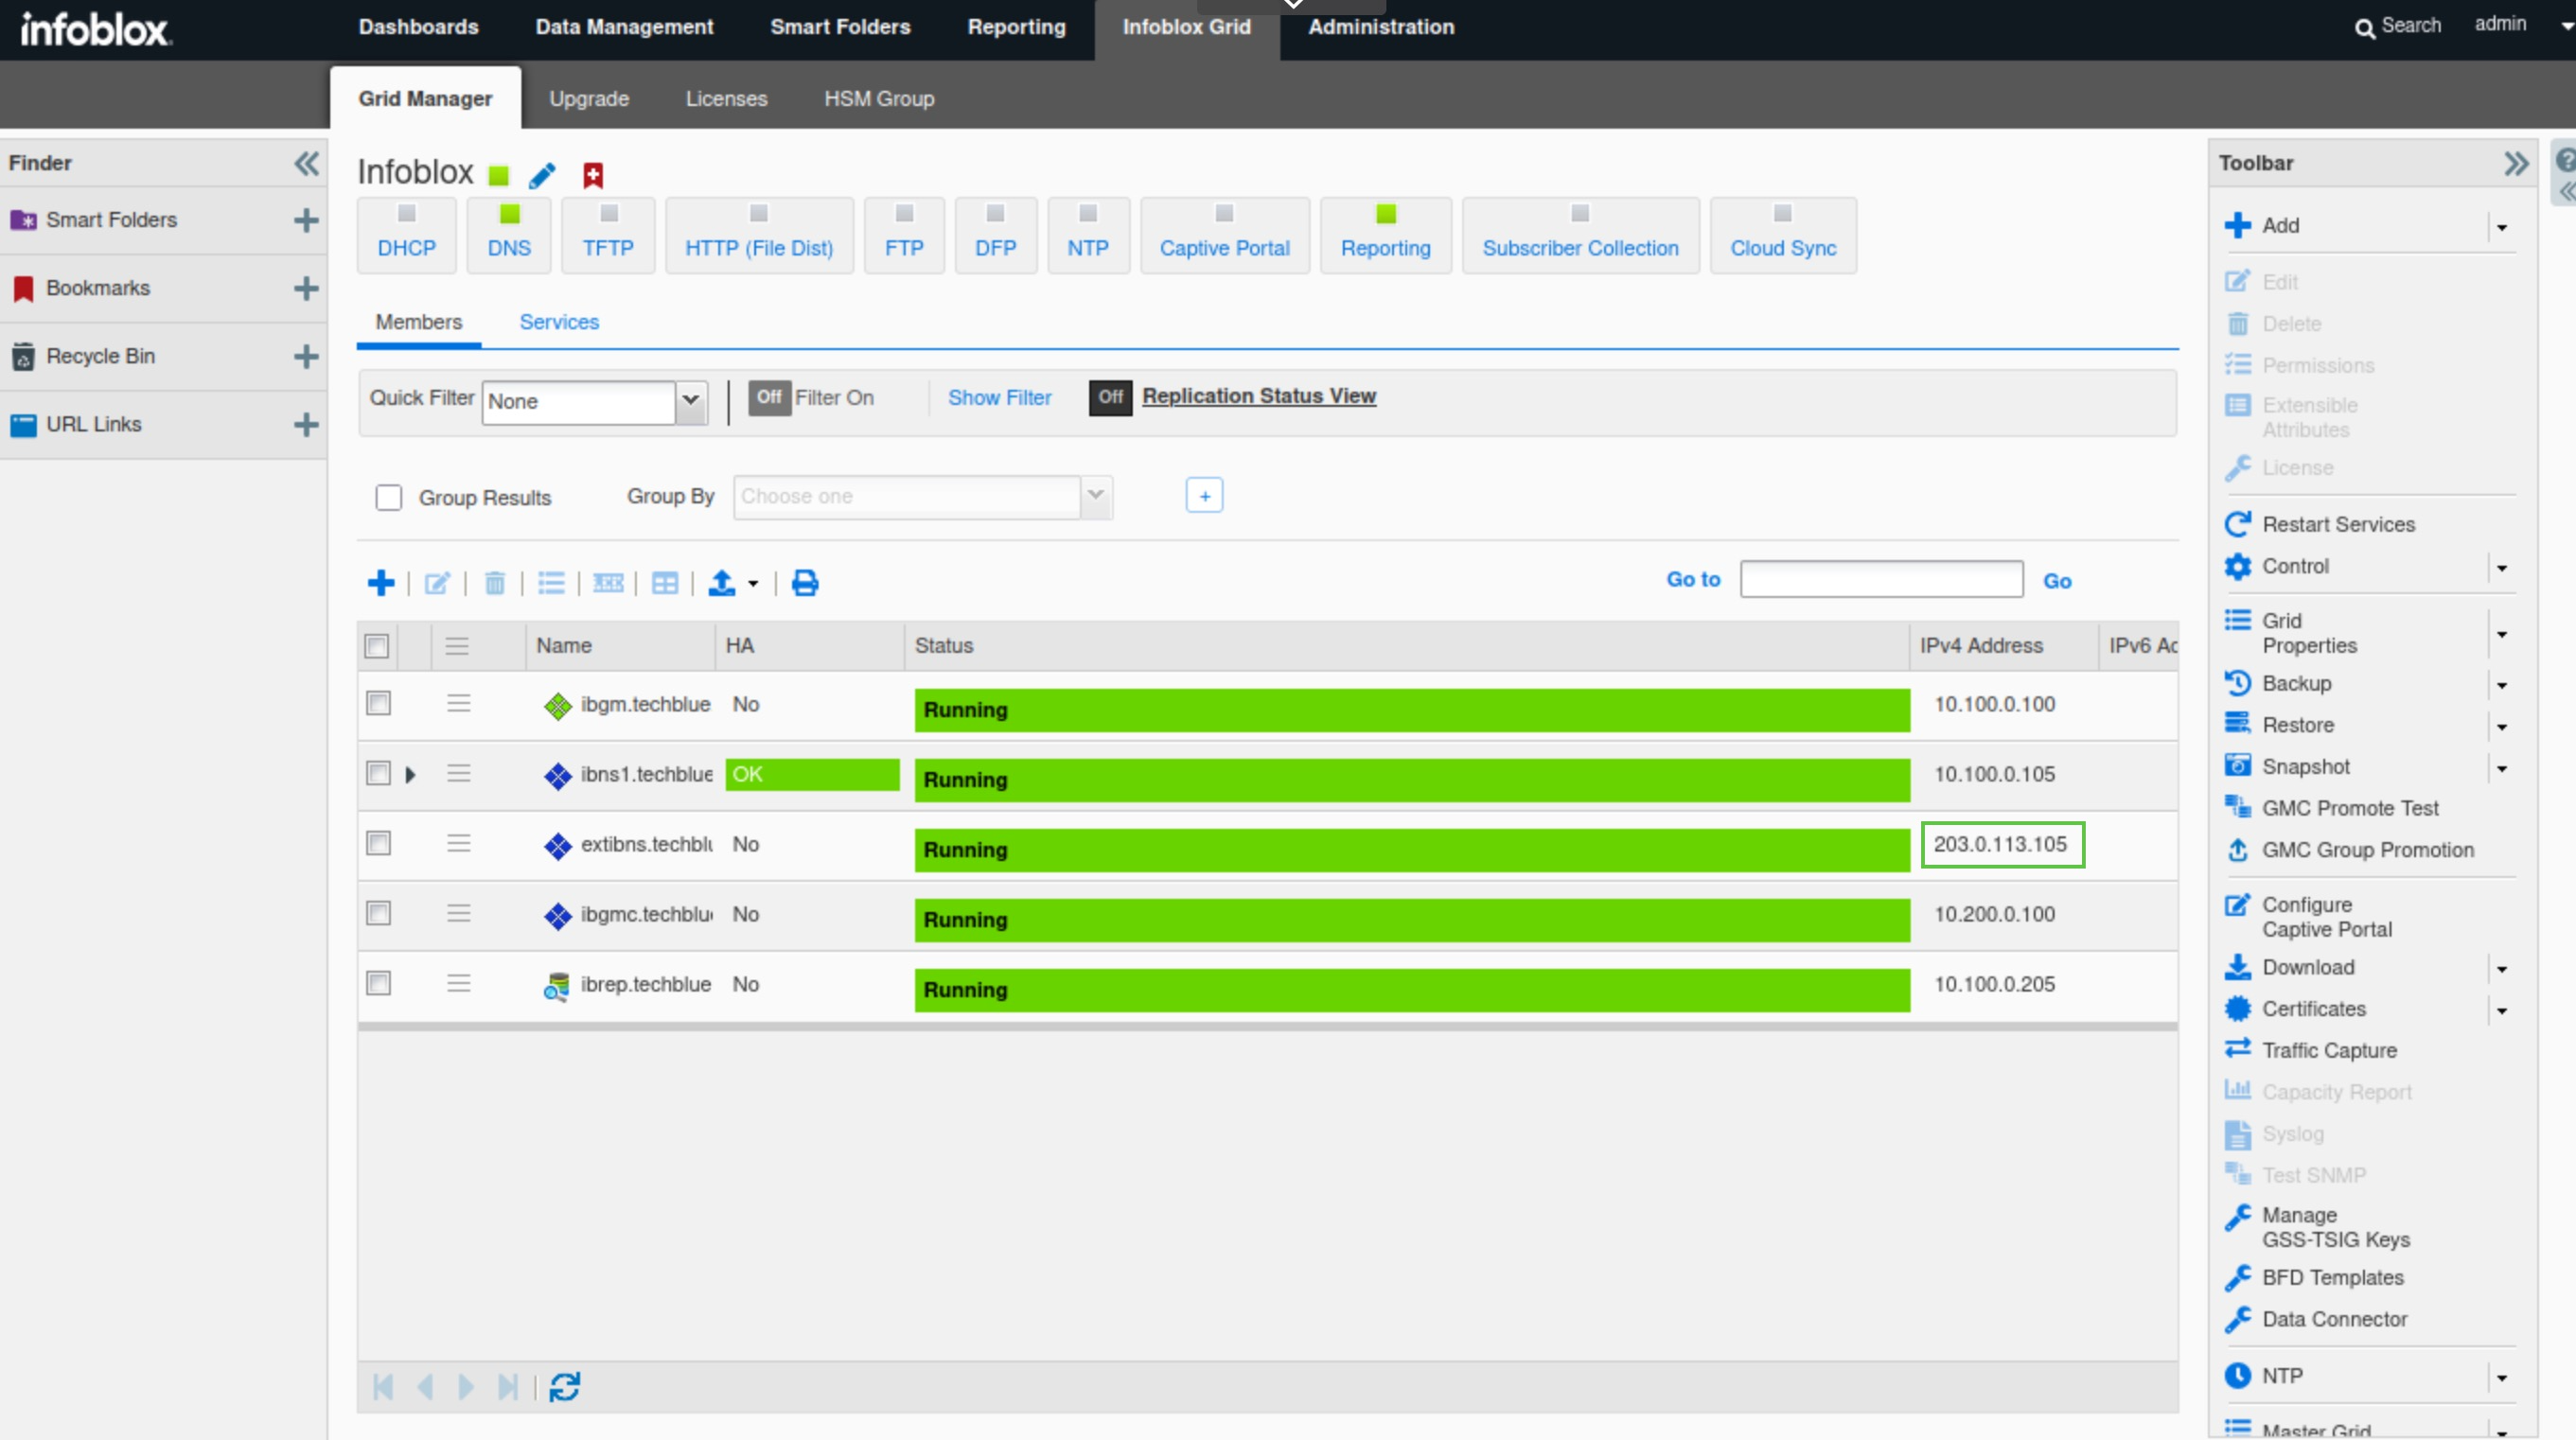
-
Click the Refresh icon under Infoblox Grid → Grid Manager → Members to validate that extibns.techblue.net has successfully rejoined the Grid and is running.
-
It may take several minutes for extibns.techblue.net to rejoin the grid.
-
Task 4 Solution: Configure extibns.techblue.net Reporting Settings
In this task, we update the reporting configuration to allow extibns.techblue.net to use its management interface MGMT to send data to the reporting server.
-
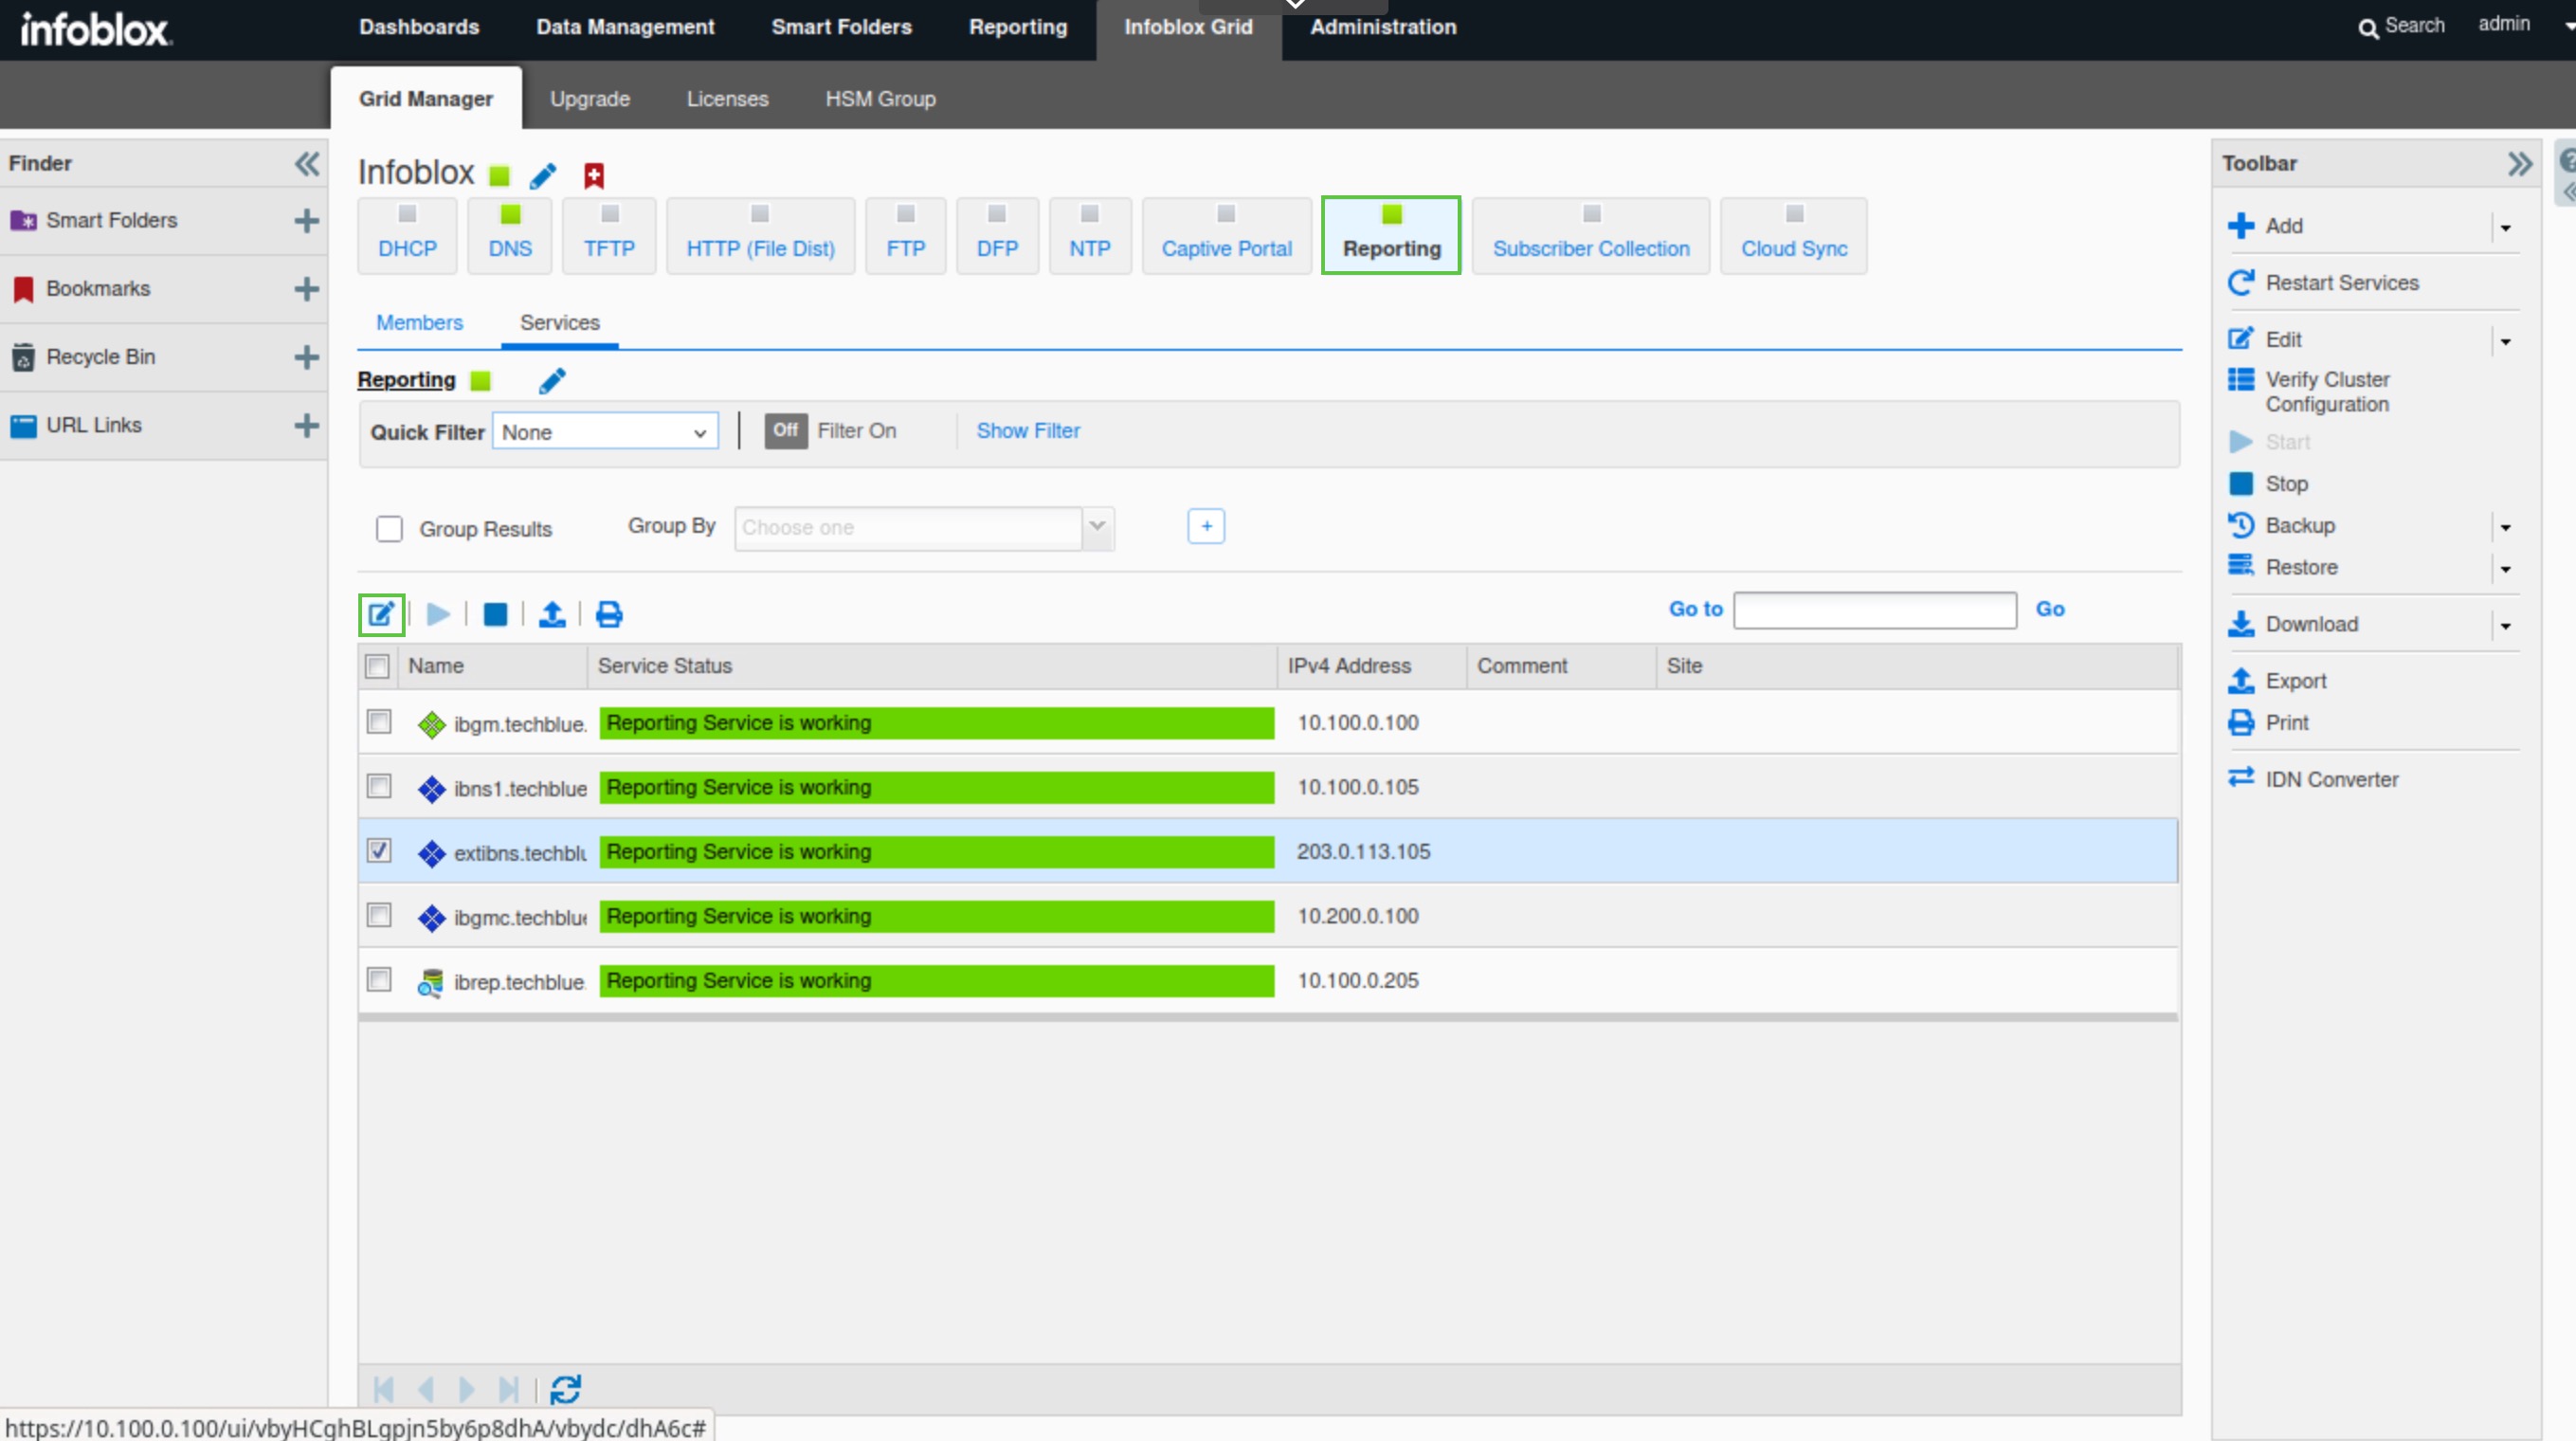
Navigate to Infoblox Grid → Grid Manager → Reporting.
-
Select extibns.techblue.net and click the Edit button.
-
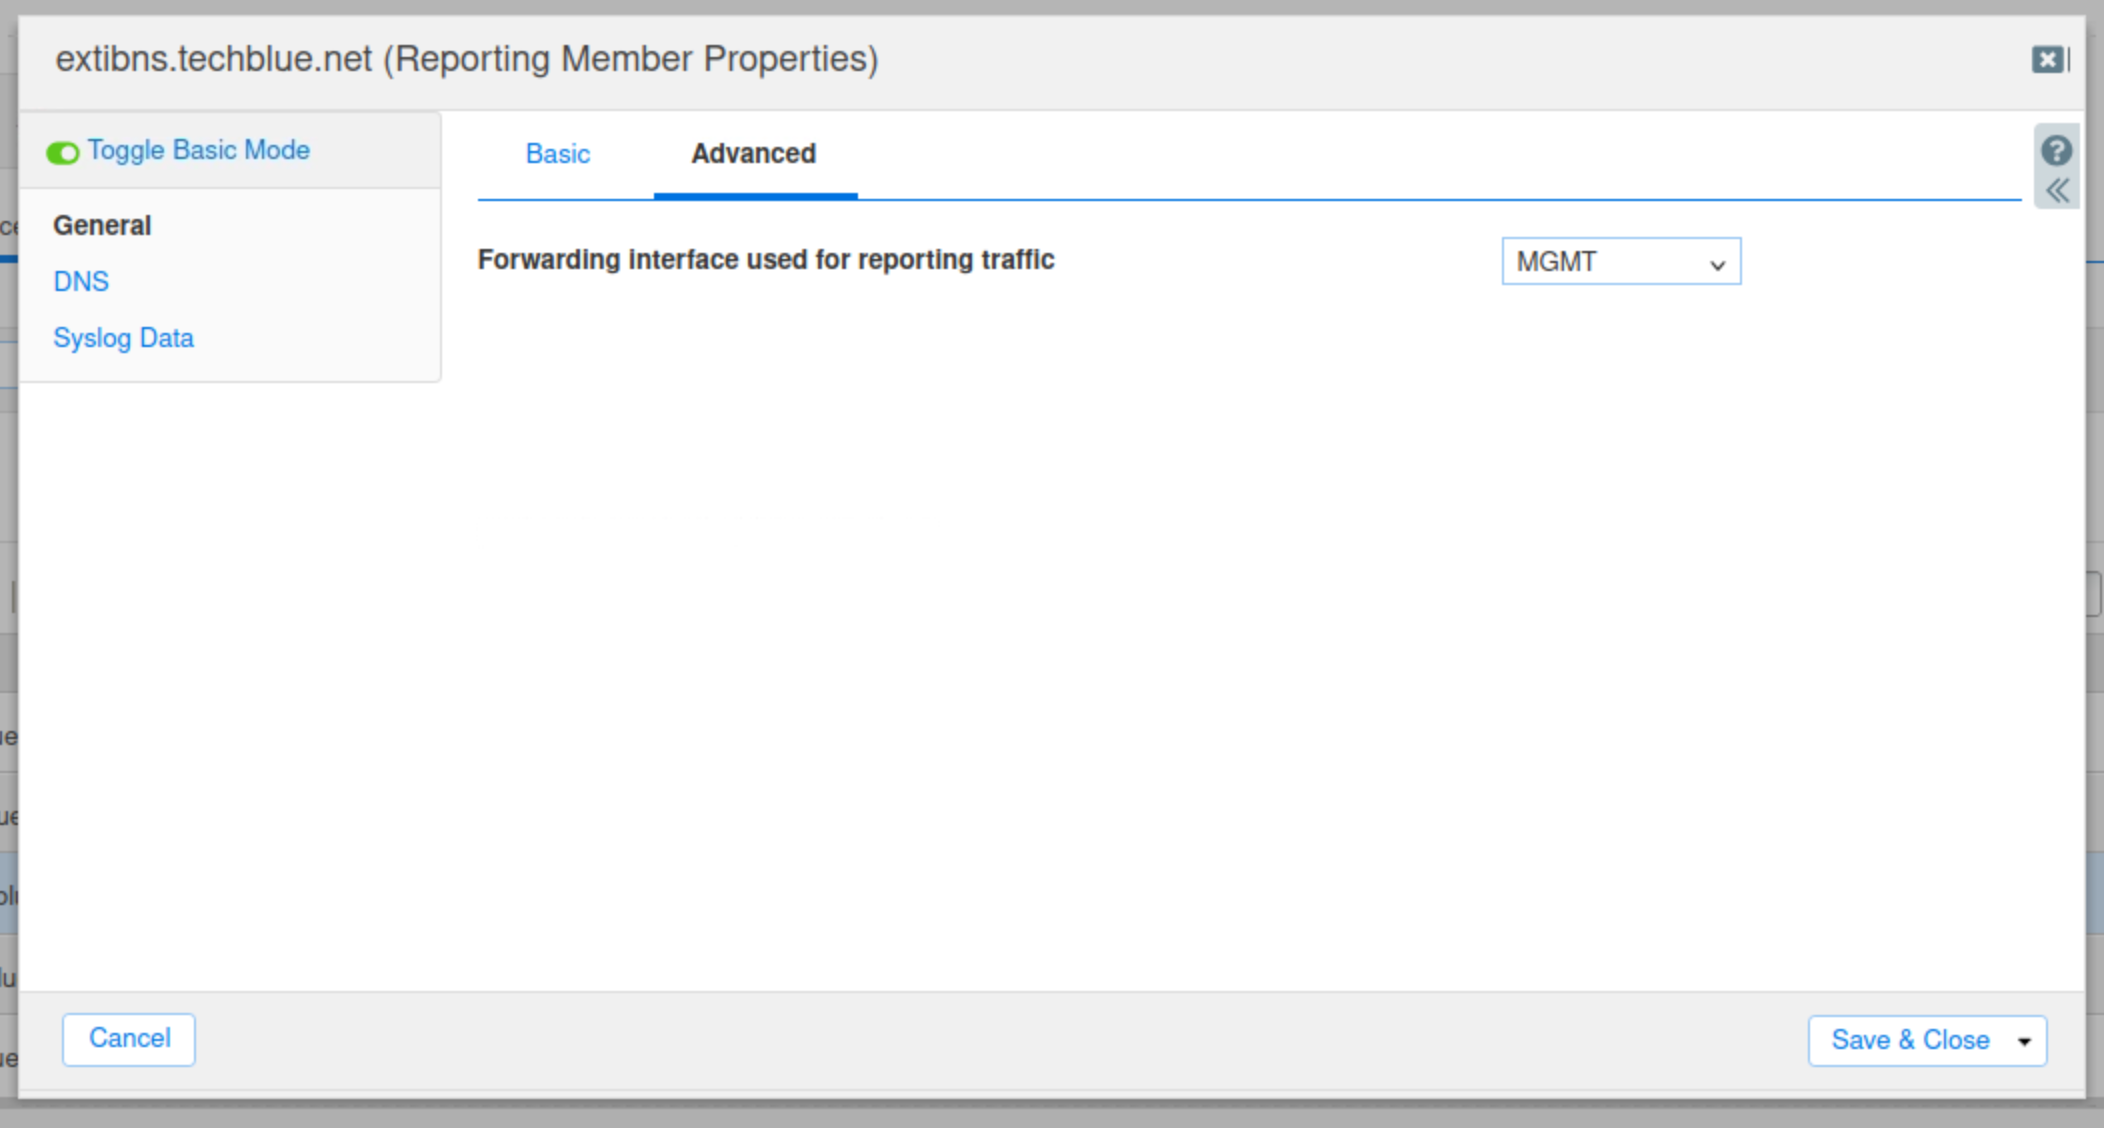
Under General, select the Advanced tab.
-
From the Forwarding Interface drop-down menu, select MGMT.
-
Click Save & Close.
-
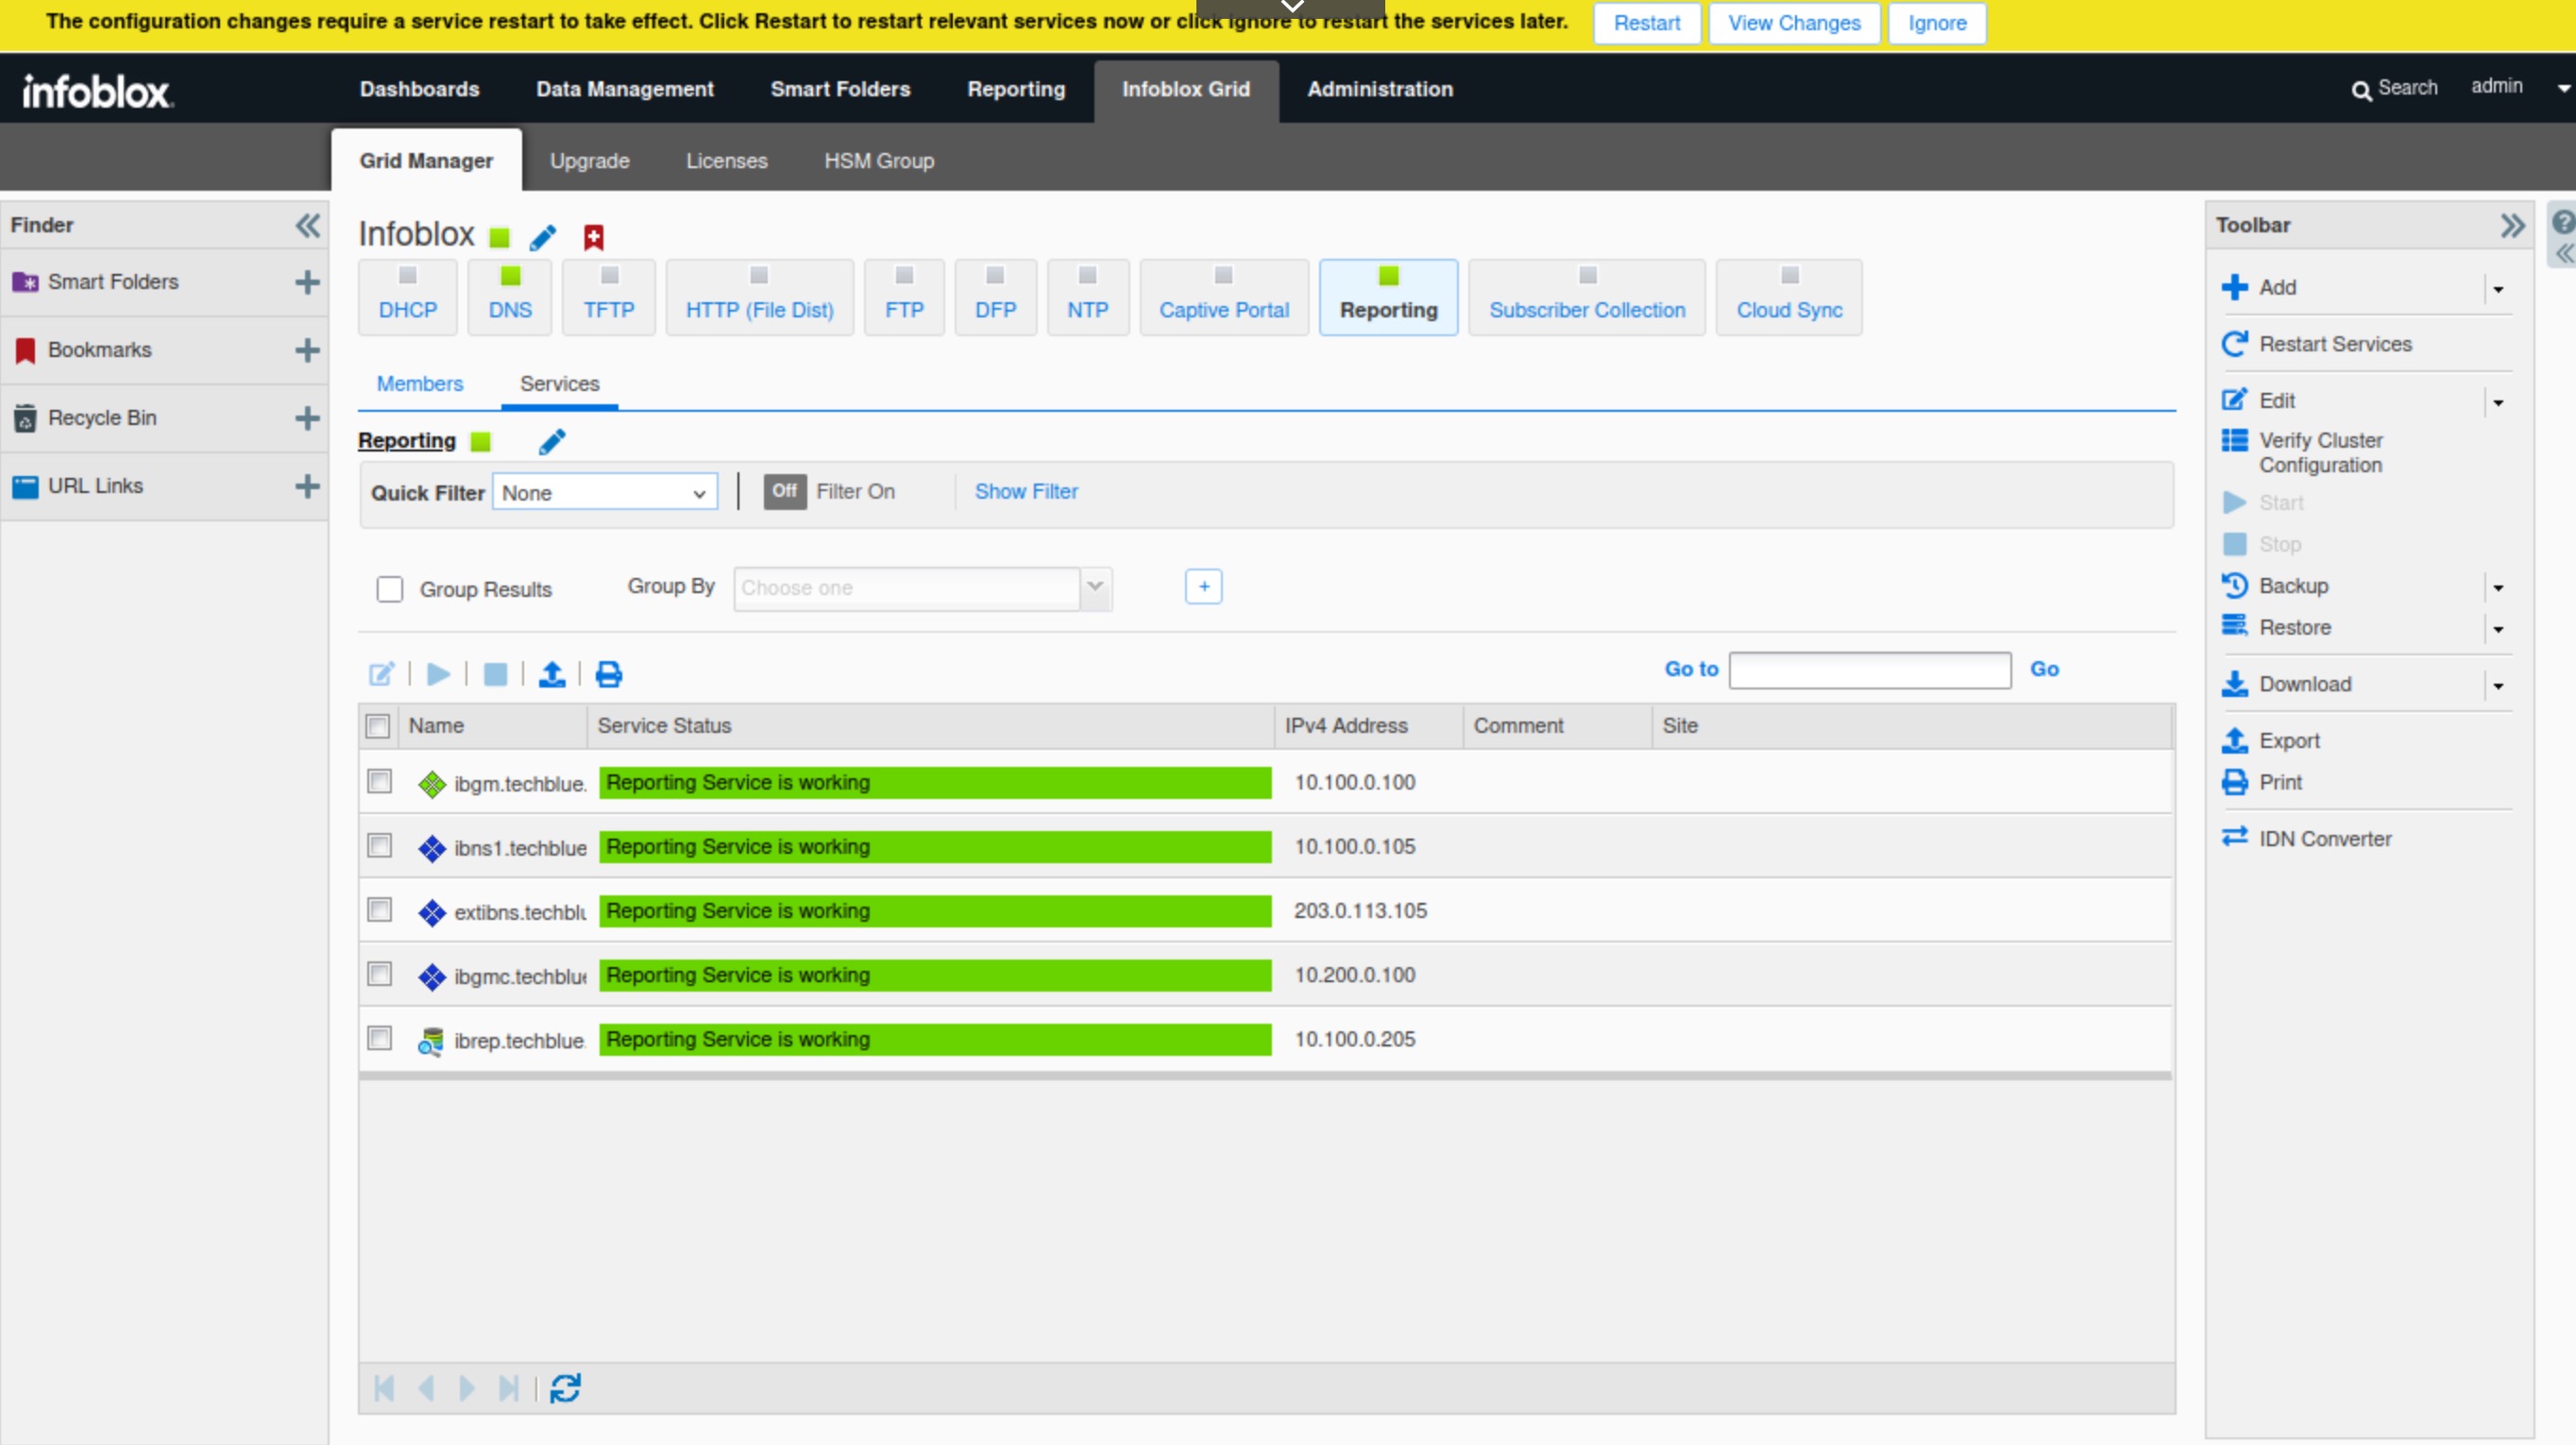
Restart Services when prompted.
Task 5 Solution: Import the DNS-techblue.io.csv file and verify the DNS service is running on extibns.techblue.net
In this task, we will import a CSV file, DNS-techblue.io.csv. The file adds a new DNS view, External, containing a new DNS zone, techblue.io, which is a public DNS zone accessible to external users. The file will also assign extibns.techblue.net to the zone through a Name Server Group (NSG) called External NSG.
The zone techblue.io will be used as a target for malicious actors in later labs to test and tune DNS Infrastructure Protections rules.
-
Navigate to Infoblox Grid → Grid Manager → Members.
-
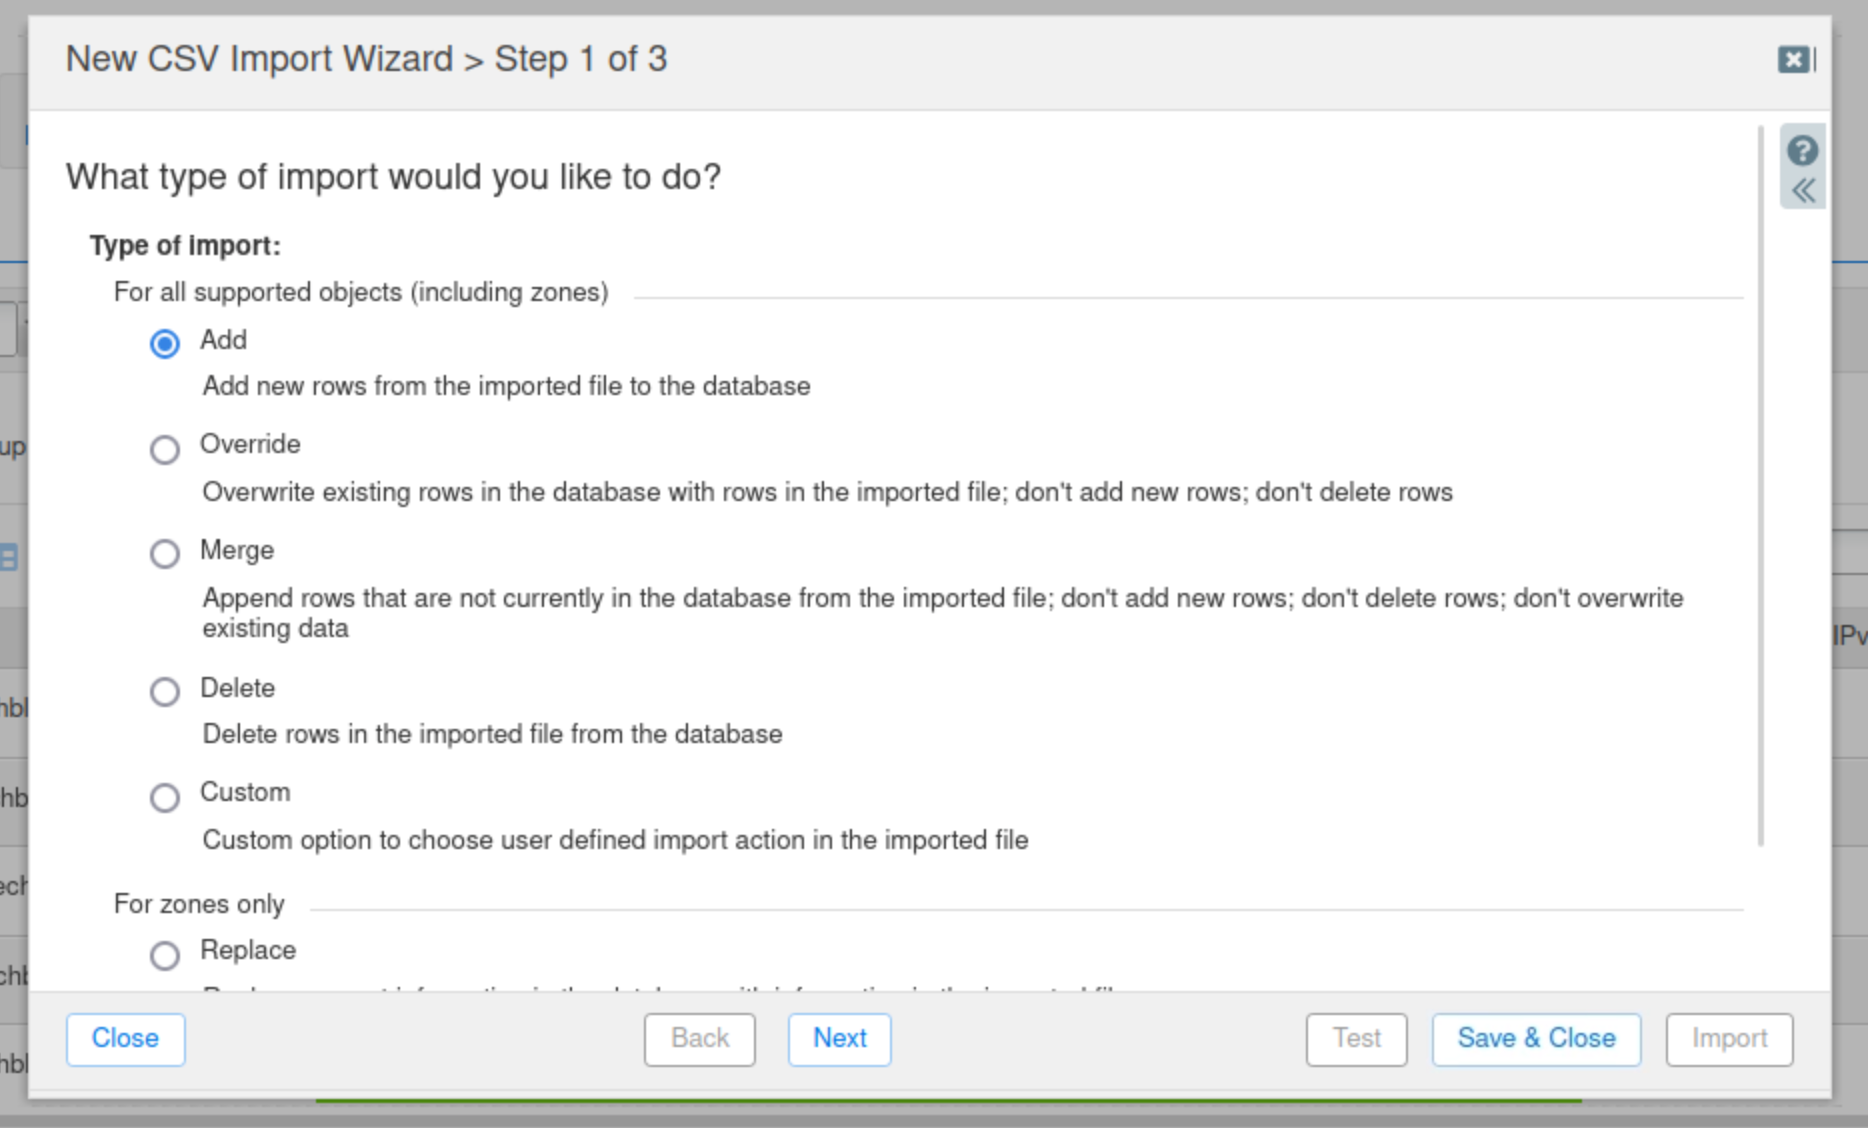
Click CSV Import on the Toolbar.

-
Select Add, then click Next.
-
Select Choose.
-
Navigate to the
Shared Drive/nios-importsfolder and select the DNS-techblue.io.csv file.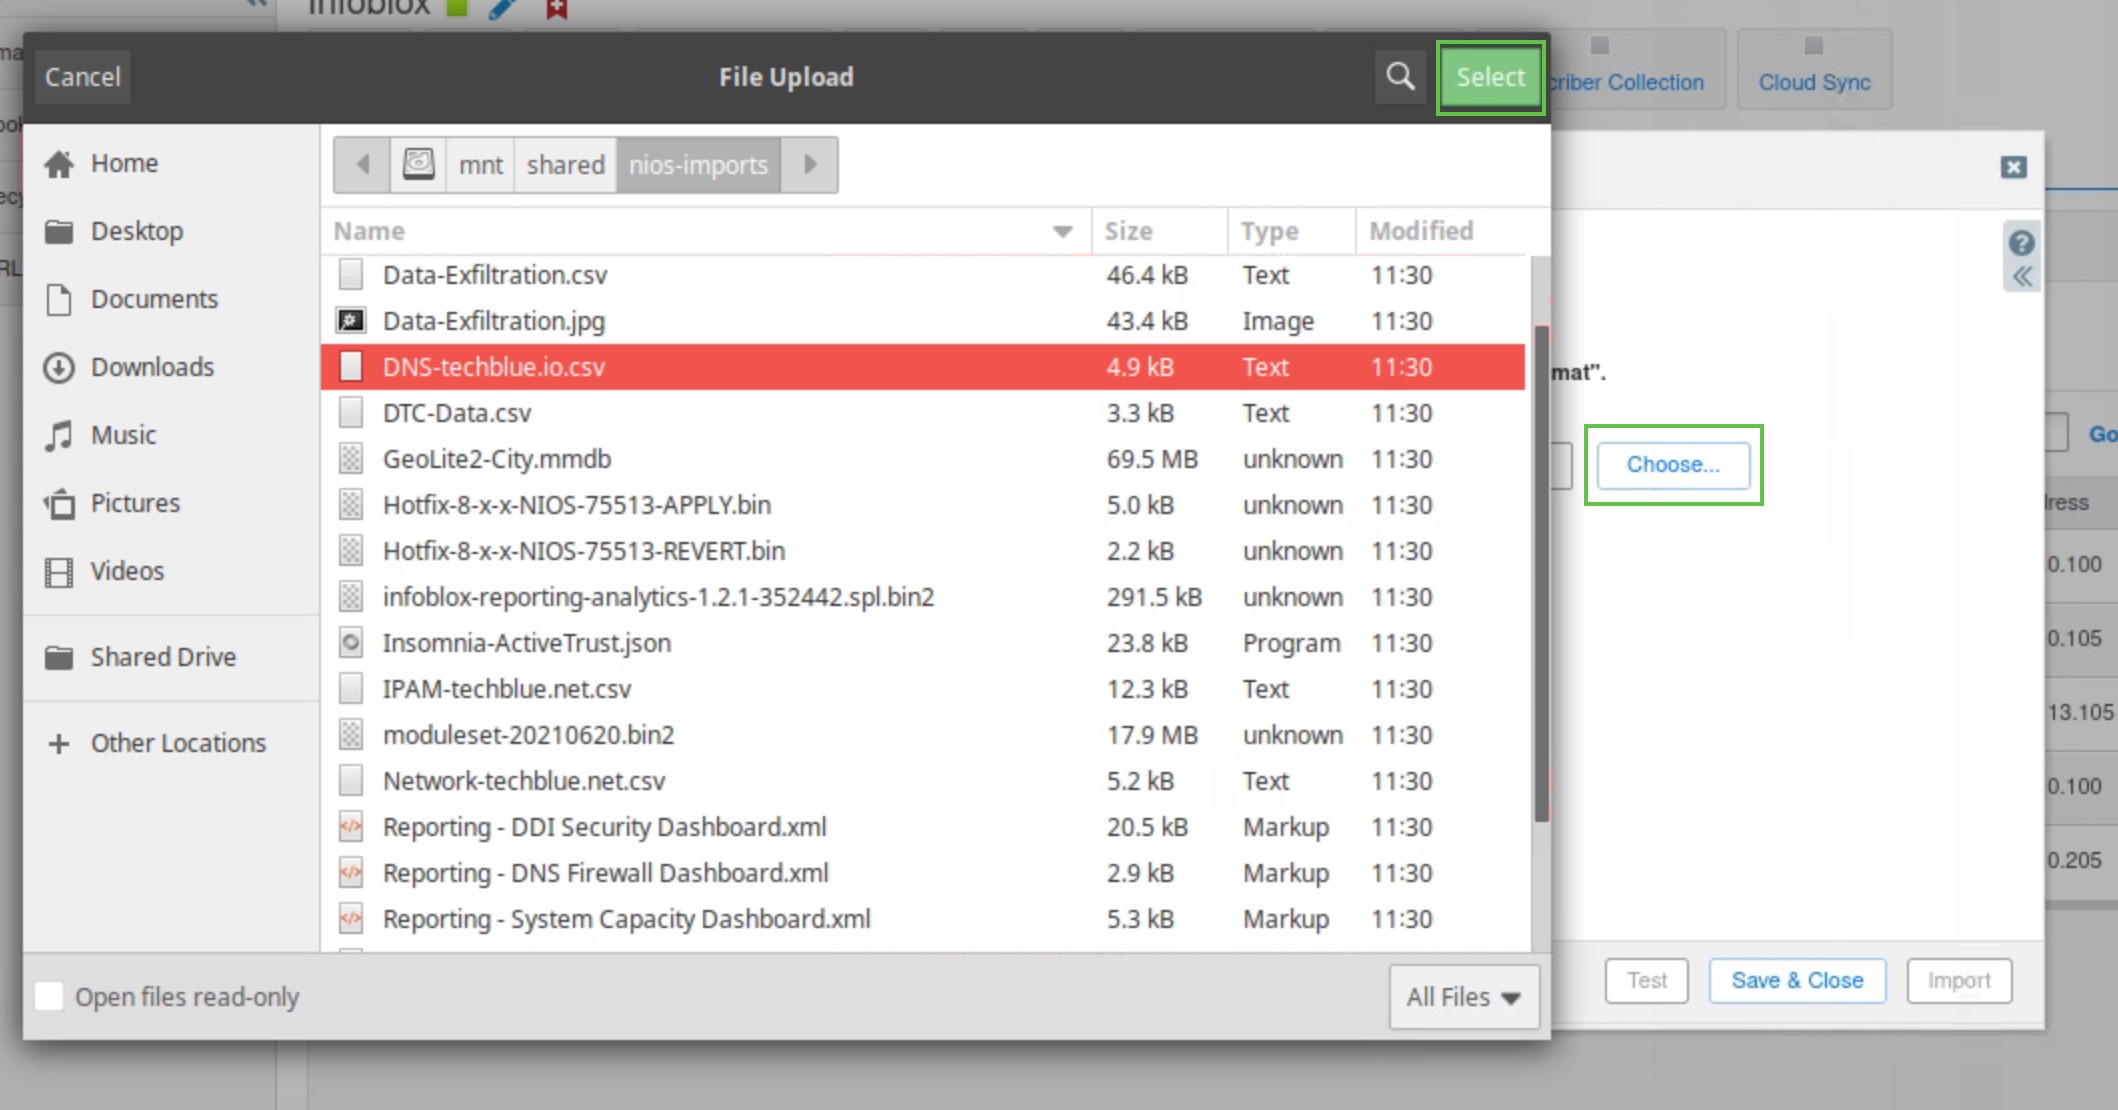
-
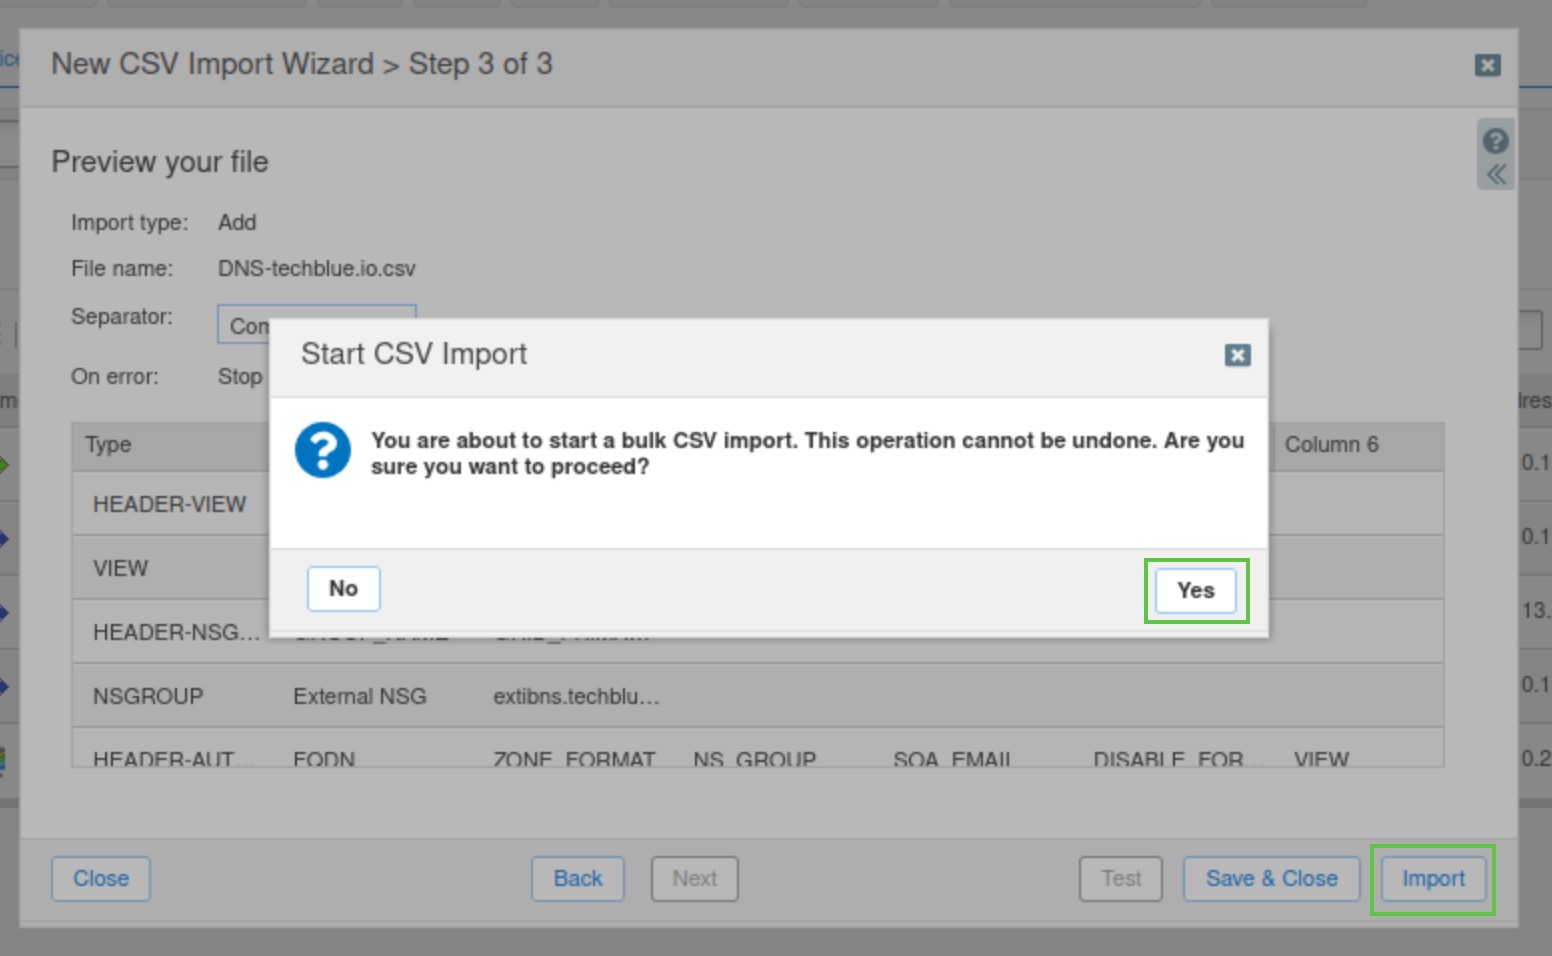
Click Next to go to Step 3 of the Import wizard, then click Import to start importing.
-
Click Yes to confirm the import.
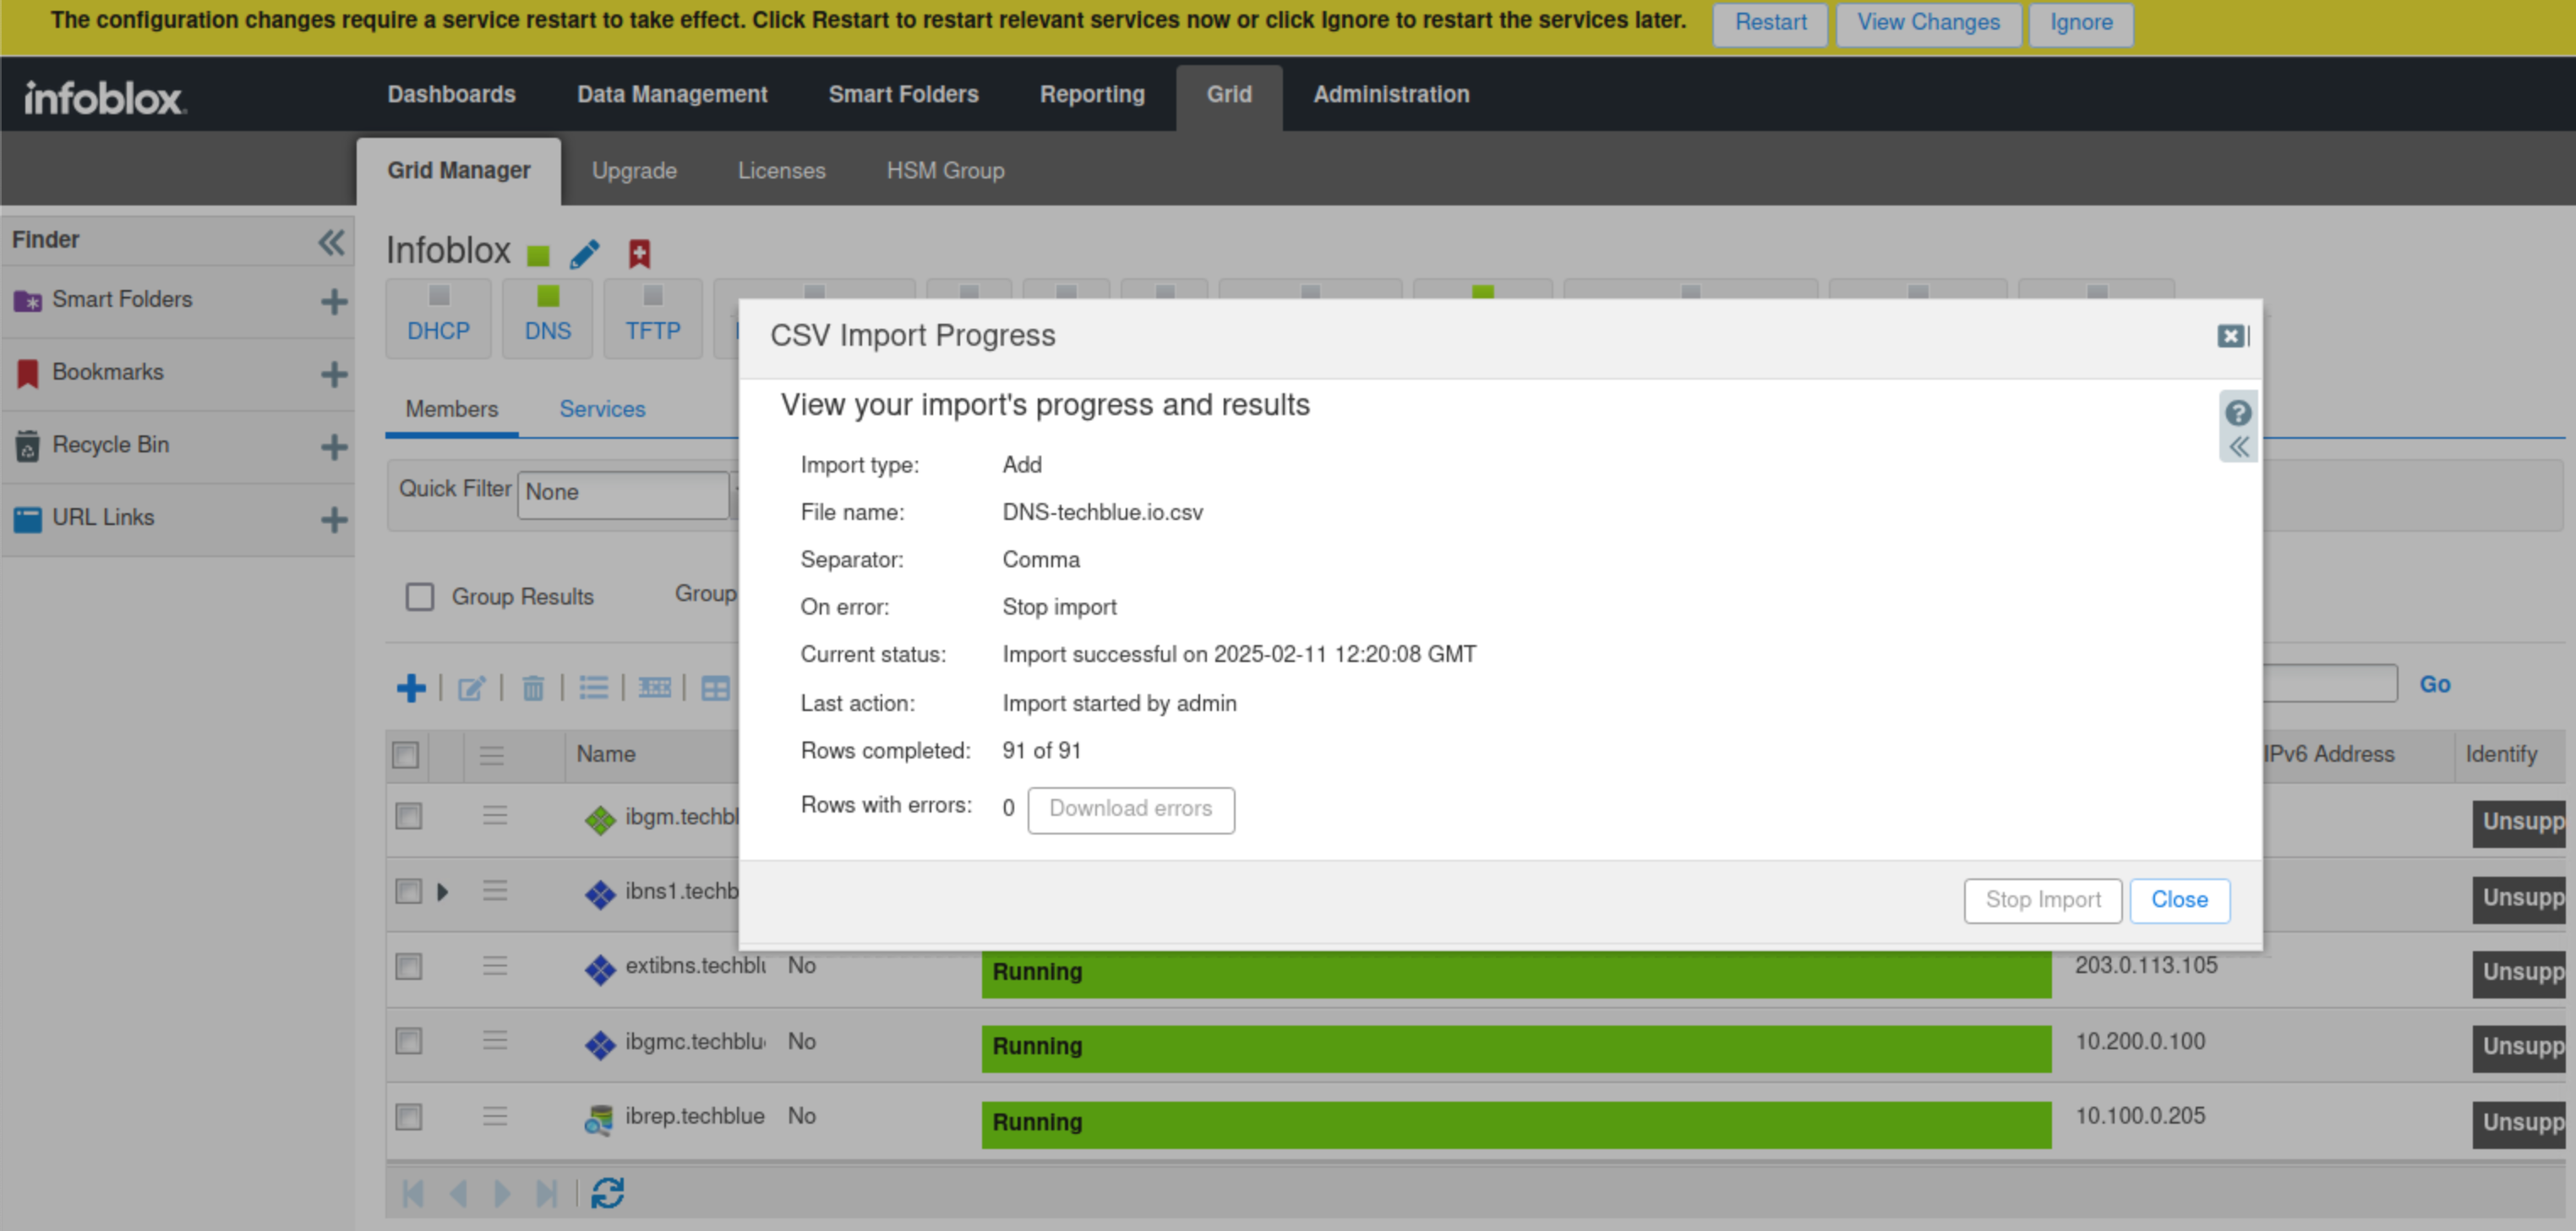
-
Click Close once the import is successfully completed.
-
Restart services when prompted.
-
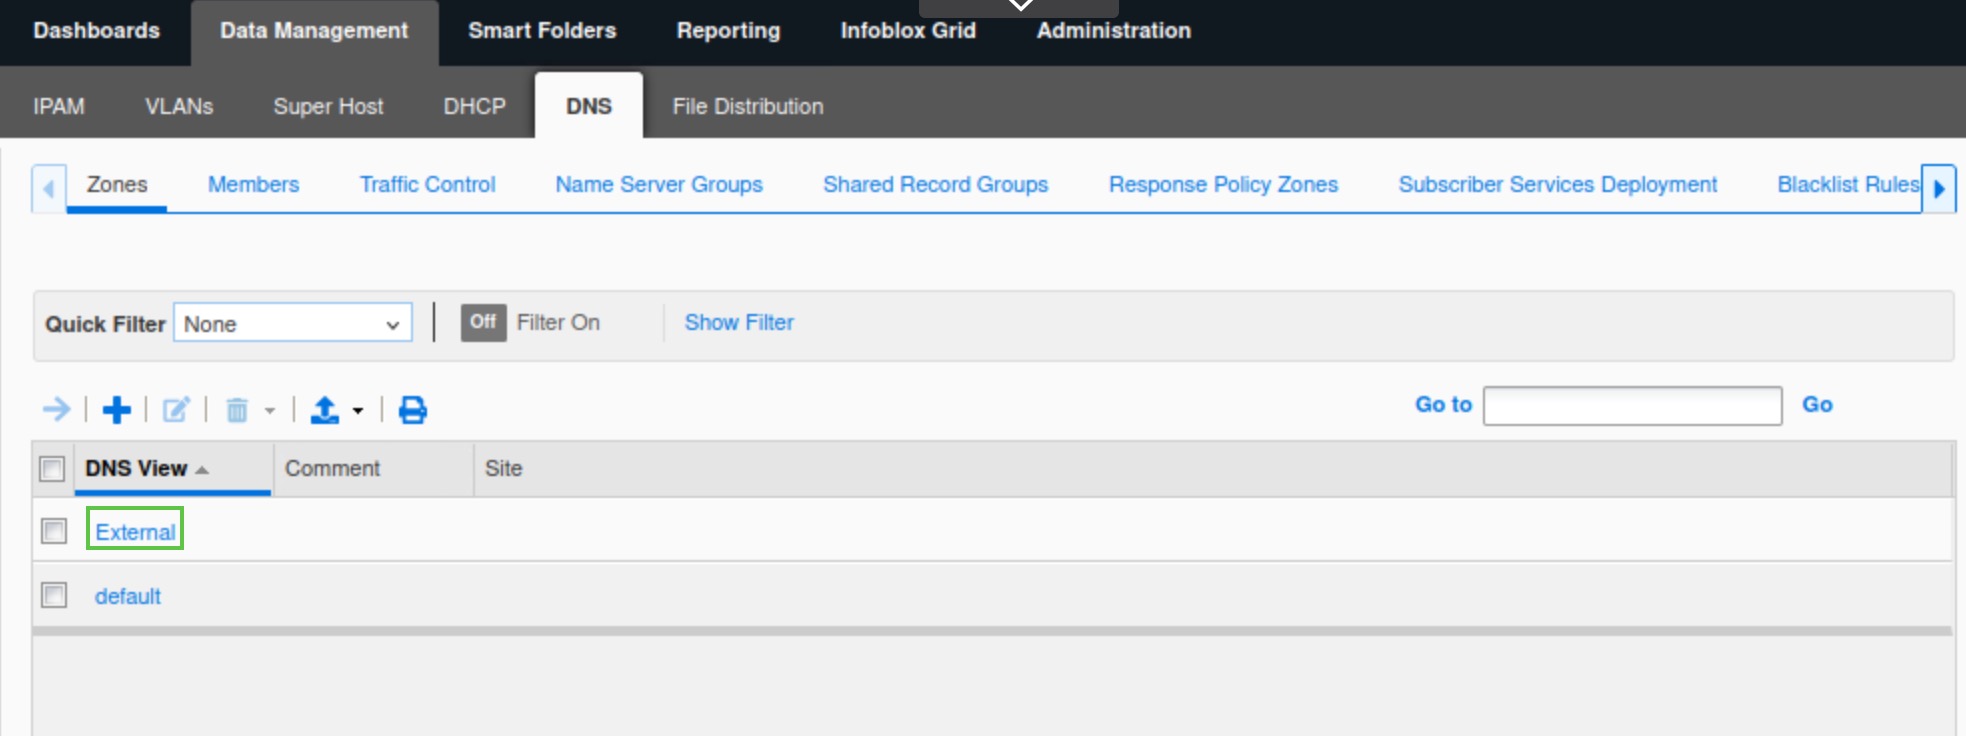
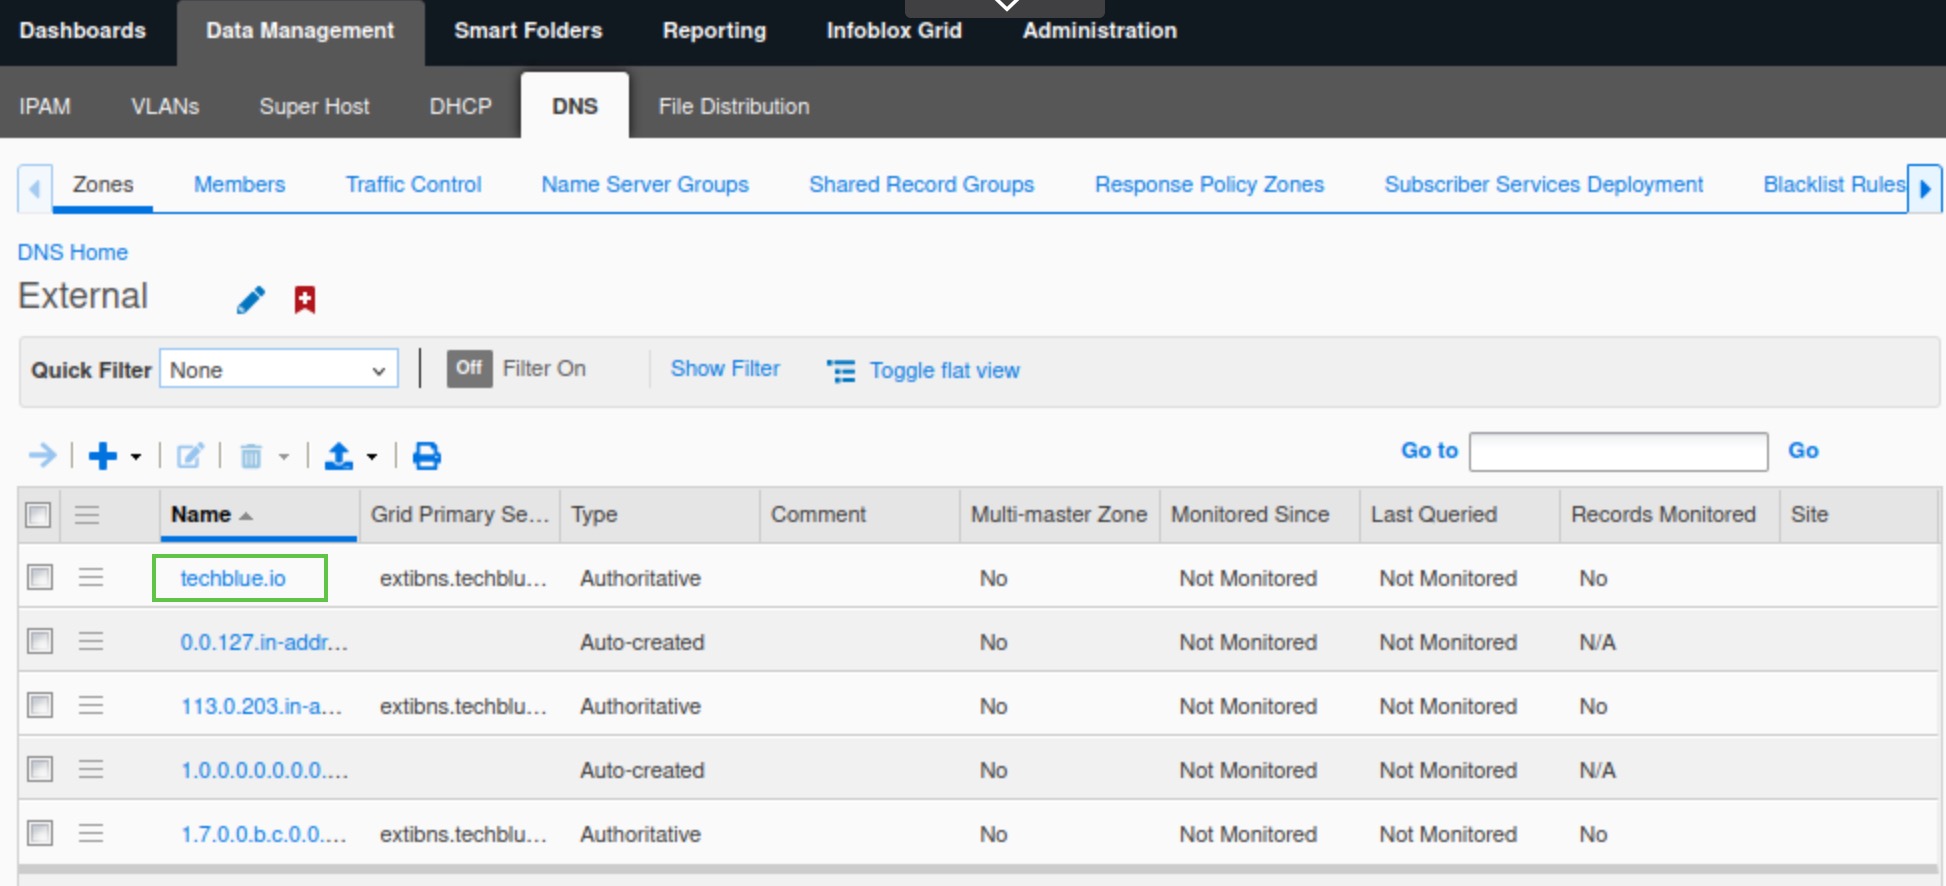
Confirm that the DNS view External is created by navigating to Data Management → DNS → Zones.
-
Click the External view name to see the zones.
-
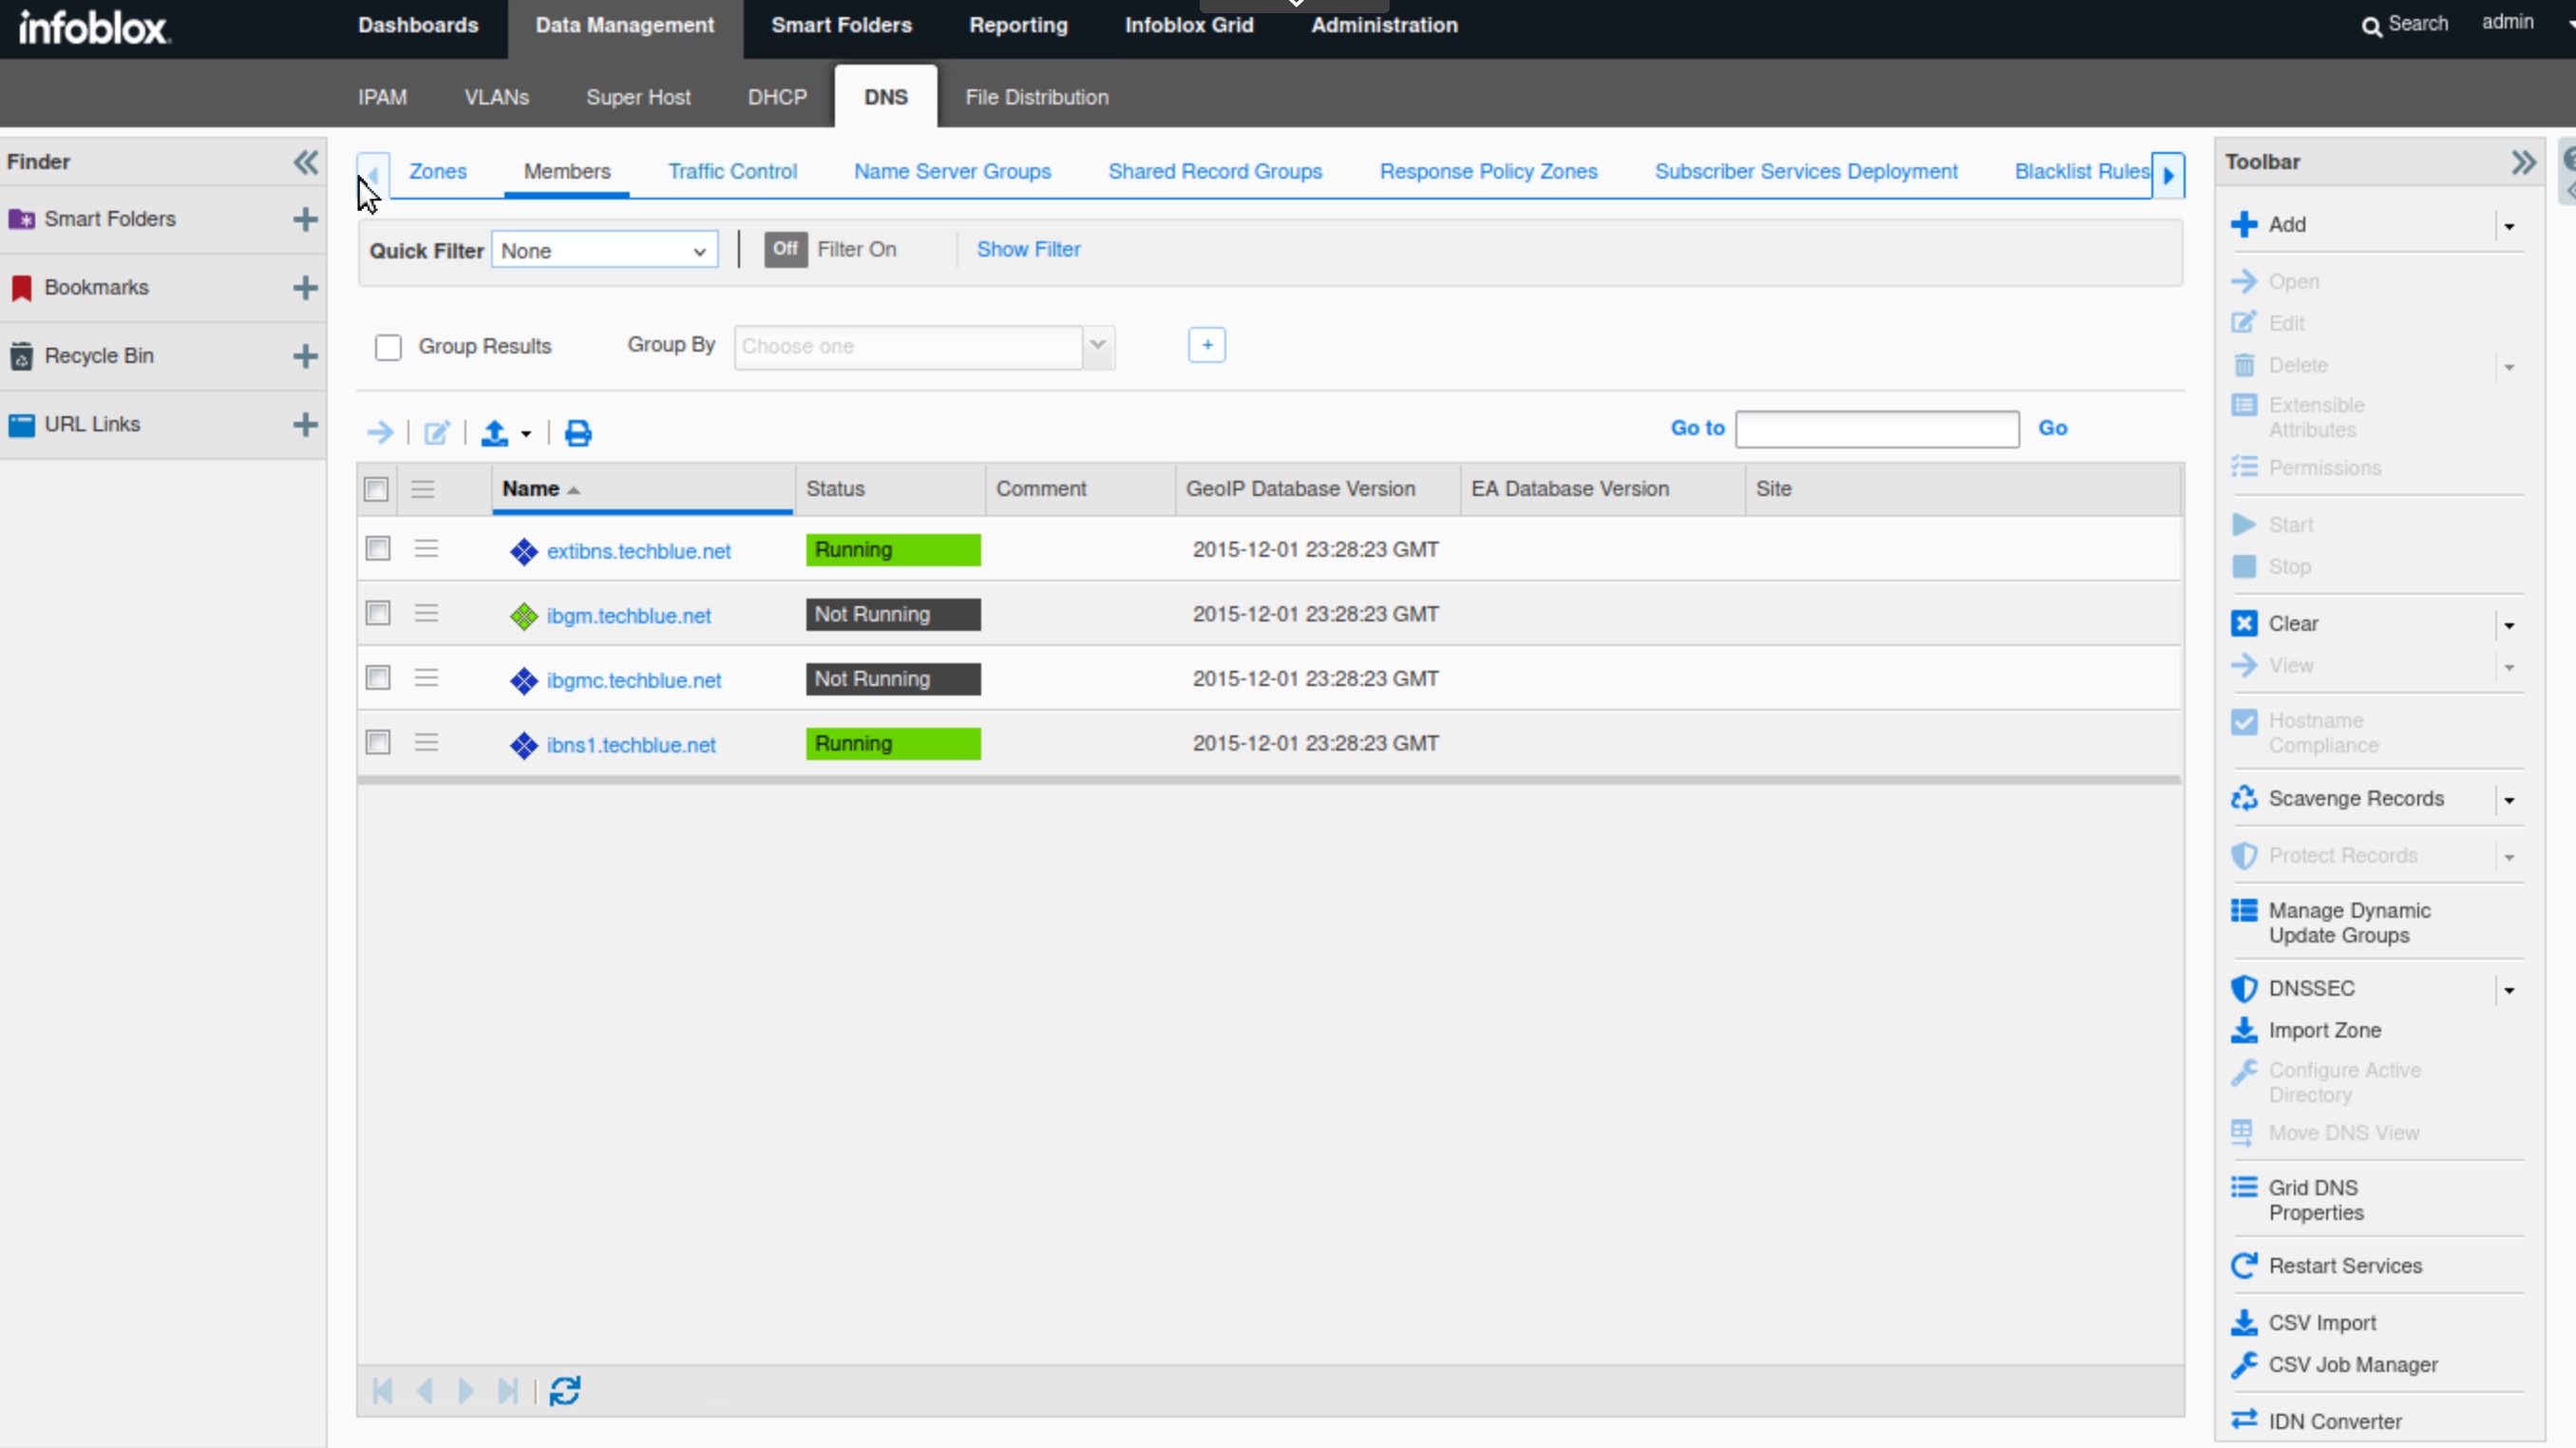
Navigate to Data Management → DNS → Members.
-
Verify that the service is started/green and is showing as Running.