This lab requires a NIOS 9.0 Lab Environment
This lab guide has been developed using the new NIOS 9.0 Lab Environment. Please ensure that you deploy a NIOS 9.0 lab environment to complete these lab tasks. If you use a different lab environment, this is untested, and the lab likely will not work.
Scenario
As a measure to increase your corporate DNS security posture, a corporate compliance policy was created, the policy dictates what domains will be allowed and which ones will be blocked or modified. Your current task is to create a substitute policy redirecting users when accessing unwanted domains.
Learning Content
Estimate Completion Time
-
20 to 25 minutes
Credentials
|
Description |
Username |
Password |
URL or IP |
|---|---|---|---|
|
Grid Manager UI |
admin |
infoblox |
Requirements
-
Administrative access to the Grid
Lab Initiation
Access jump-desktop
Once the lab is deployed, you can access the virtual machines required for this activity. To begin, select VM List from the navigation bar at the top, locate jump-desktop, and click the green play icon to open its console. Log in to the Linux UI.

Username: training
Password: infoblox
Initiate lab
To initiate the lab, double-click the Launch Lab icon on the Desktop.

Choose the lab number from the list and click OK.

After clicking OK, you will see a pop-up message with a brief description of the lab task. If the description looks correct, click Yes to continue lab initiation.

Lab initiation will take a couple of minutes to finish.
Once complete, you will see another pop-up message with the login credentials and the URL for the Grid Manager’s User Interface. Note that the credentials may differ from those from prior labs.

Tasks
-
Create a local RPZ named walledgarden.rpz
-
Re-arrange Response Policy Zones in the correct order
-
Add a Substitute (Domain Name) Policy Rules to walledgarden.rpz
-
Test Substitute Local RPZ Rules
Task 1: Create local RPZ - walledgarden.rpz
-
Create a local RPZ named walledgarden.rpz, use a previously configured server group called RPZ Local NSG.
Task 2: Rearrange Response Policy Zones in the correct order
-
Place the RPZs into the correct order, ensuring that traffic that should pass through is not blocked, and vice versa
-
Allowlist.rpz
-
Walledgarden.rpz
-
Denylist.rpz
-
Task 3: Add Substitute (Domain Name) Policy Rules to walledgarden.rpz
-
Add a Substitute (Domain Name) rule to the walledgarden.rpz. Queries for the malware.signalorange.net domain should be redirected to walledgarden.techblue.net.
Task 4: Test Substitute Local RPZ Rules
-
Switch over to the testing-linux machine with the credentials (training/infoblox) and set the machine up for testing.
-
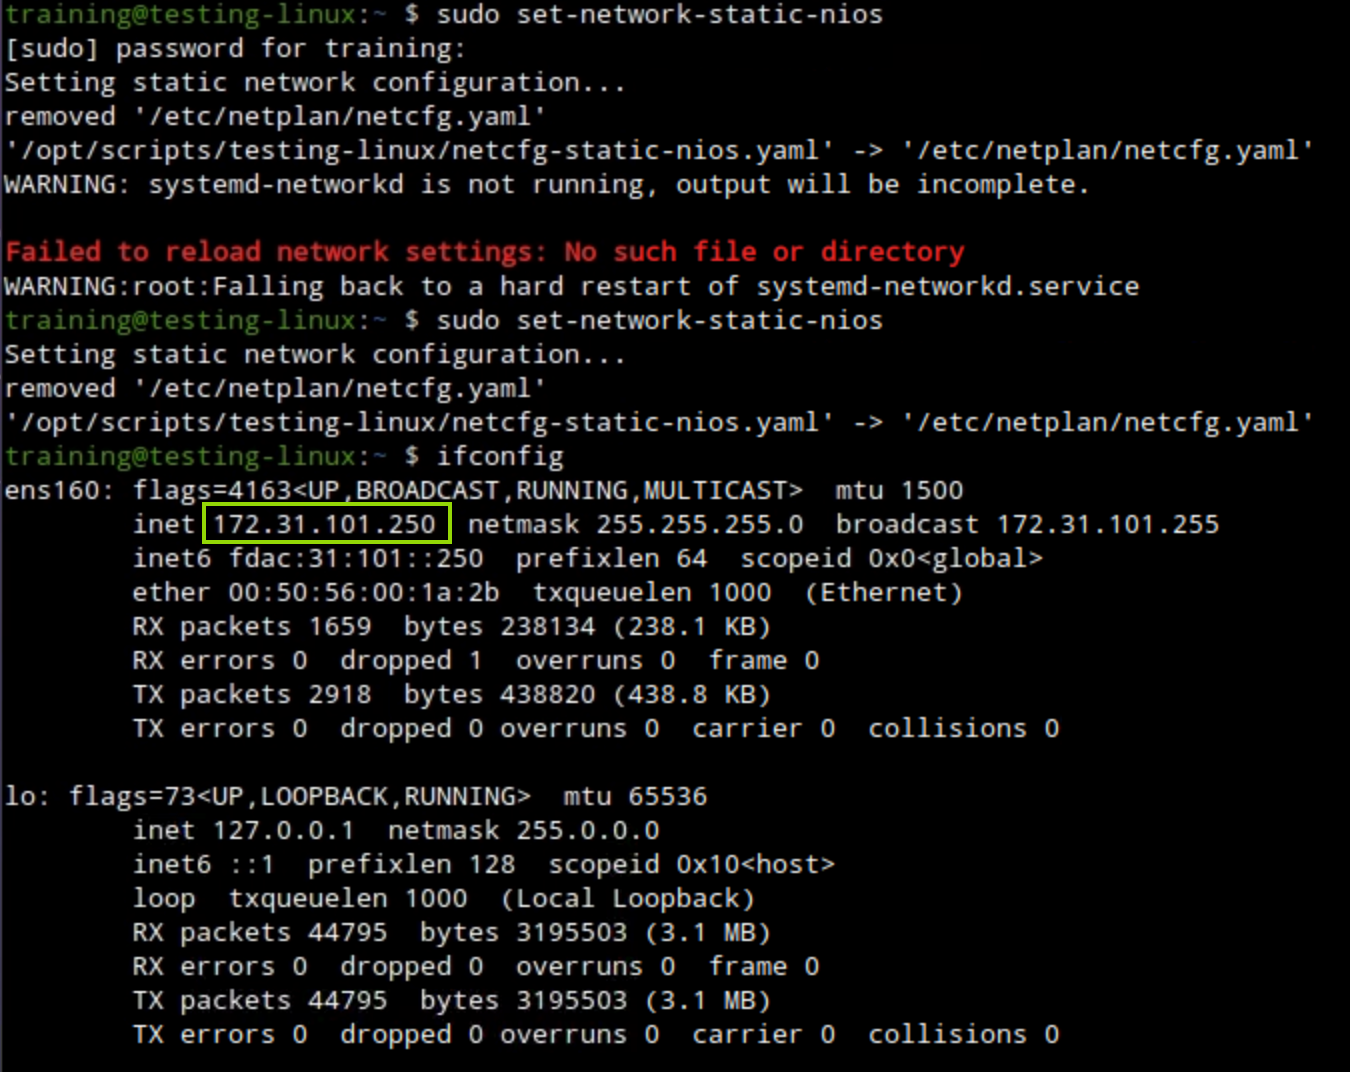
Open a terminal window, issue the command sudo set-network-static-nios, and verify that the machine now has the IP address 172.31.101.250 using the command ifconfig.
-
-
Use dig and syslog entries to validate the local RPZ configurations.
Solutions
Task 1 Solution: Create local RPZ - walledgarden.rpz
In this task, you create a local RPZ called walledgarden.rpz. The RPZ is used to redirect queries for malware.signalorange.net to walledgarden.rpz.infoblox.com.
-
On the jump-desktop machine, open a browser window and access https://10.100.0.100.
-
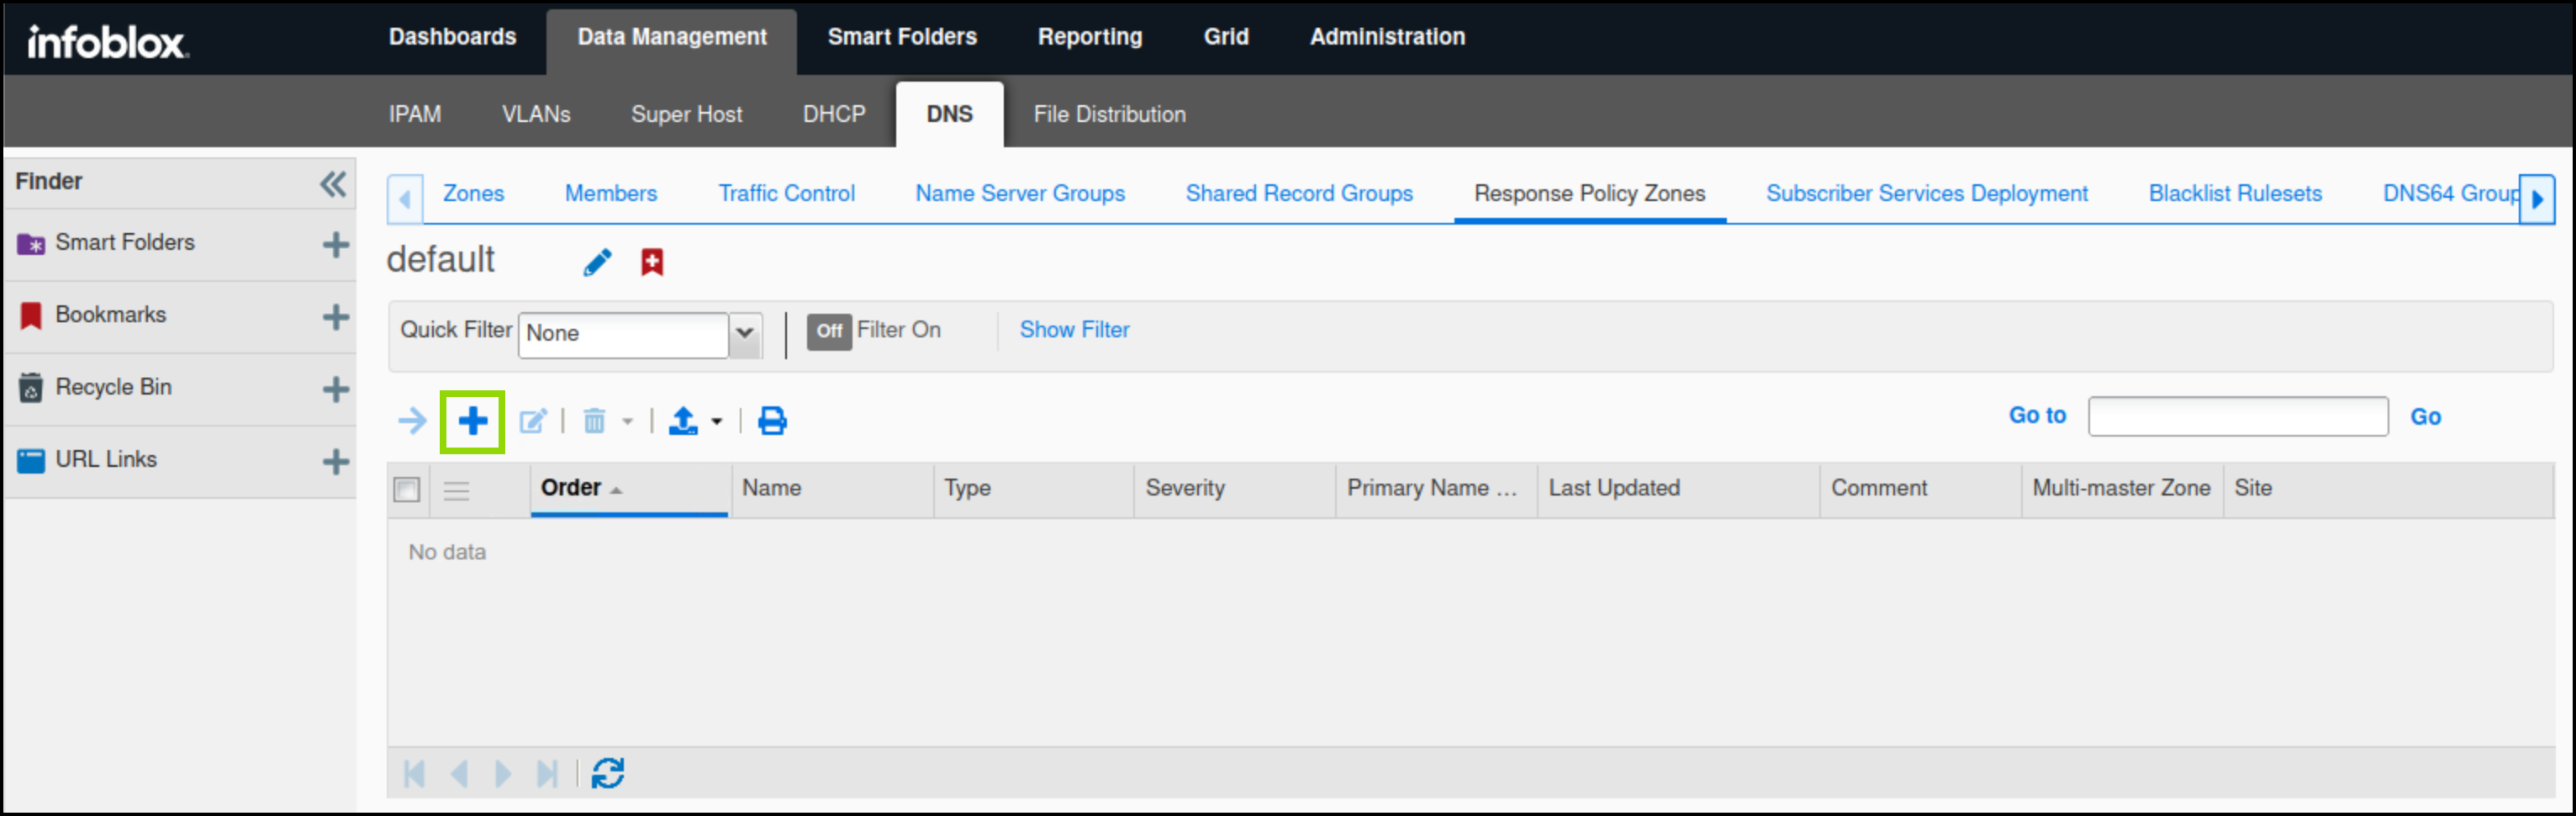
Navigate to Data Management → DNS → Response Policy Zones.
-
Click the plus (+) symbol to add a new RPZ.
-
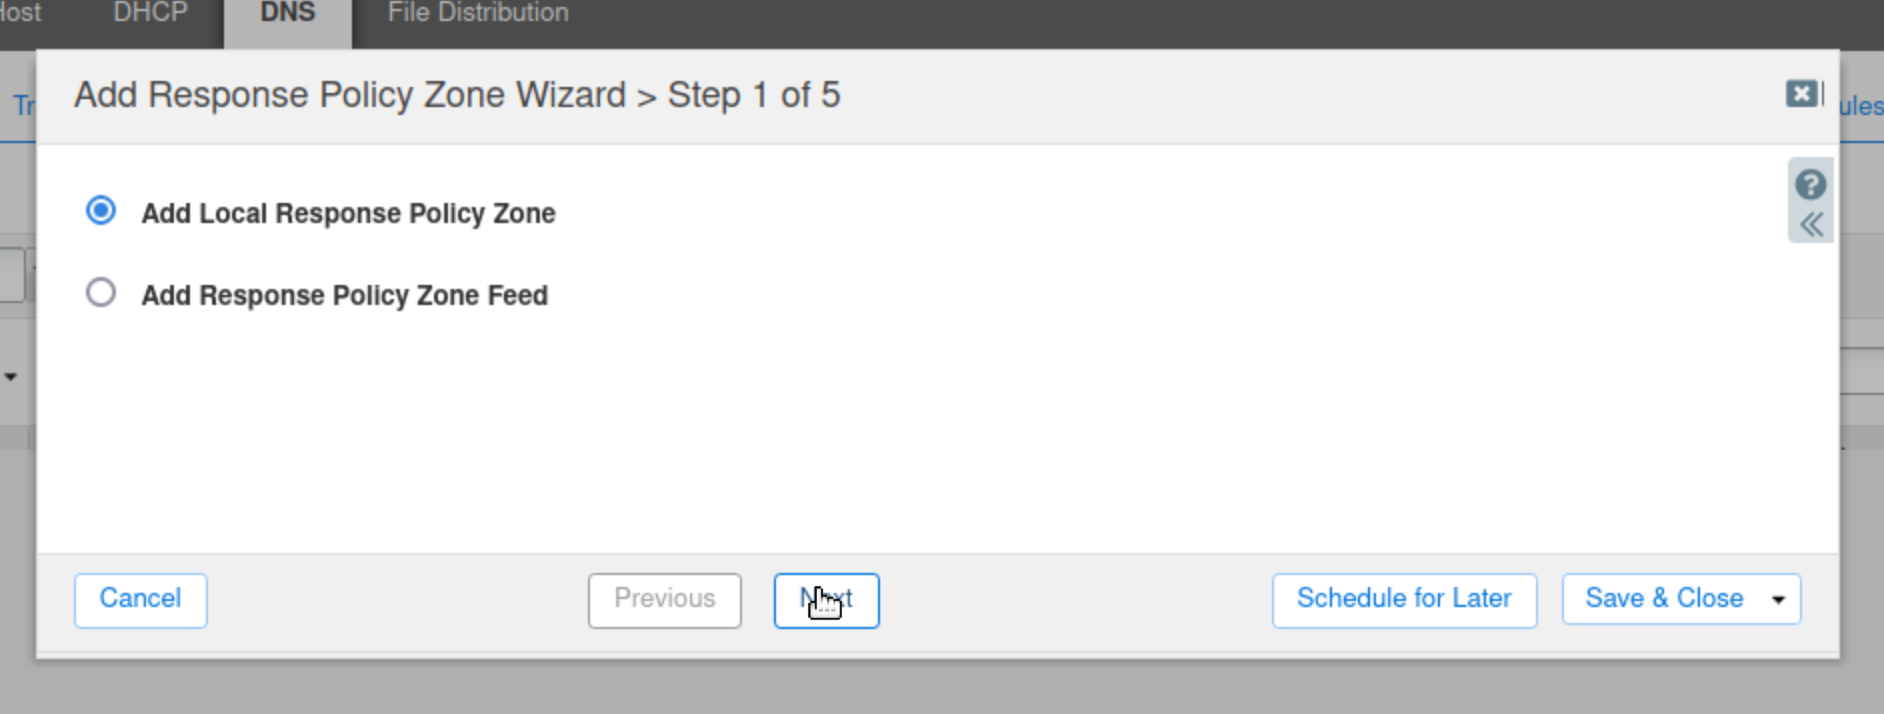
Select Add Local Response Policy Zone and click Next.
-
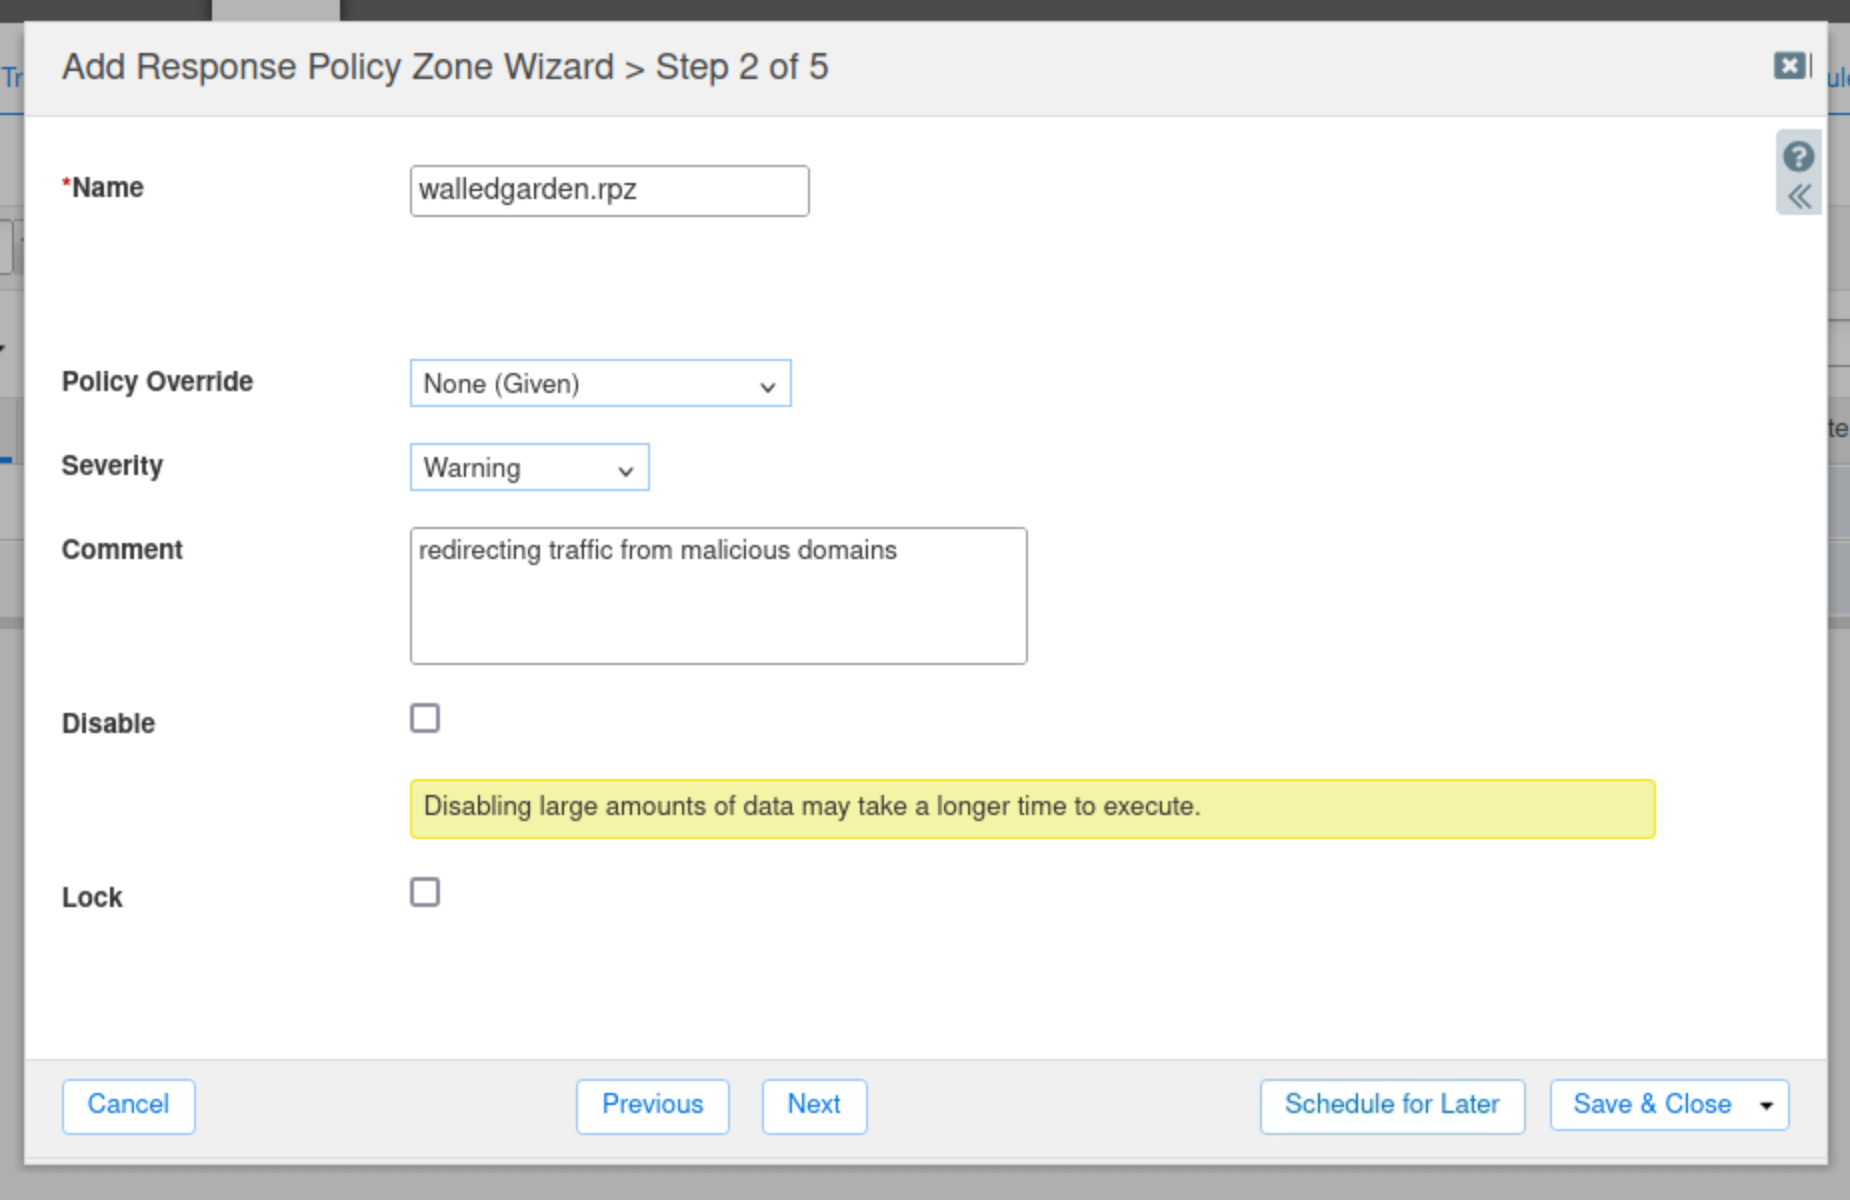
Enter walledgarden.rpz for the name of the zone.
-
Change the Severity to Warning.
-
Select None (Given) for the Policy Override value.
-
The policy will be specified in the rule.
-
-
Type in a comment to describe the purpose of the RPZ.
-
Click Next to continue.
-
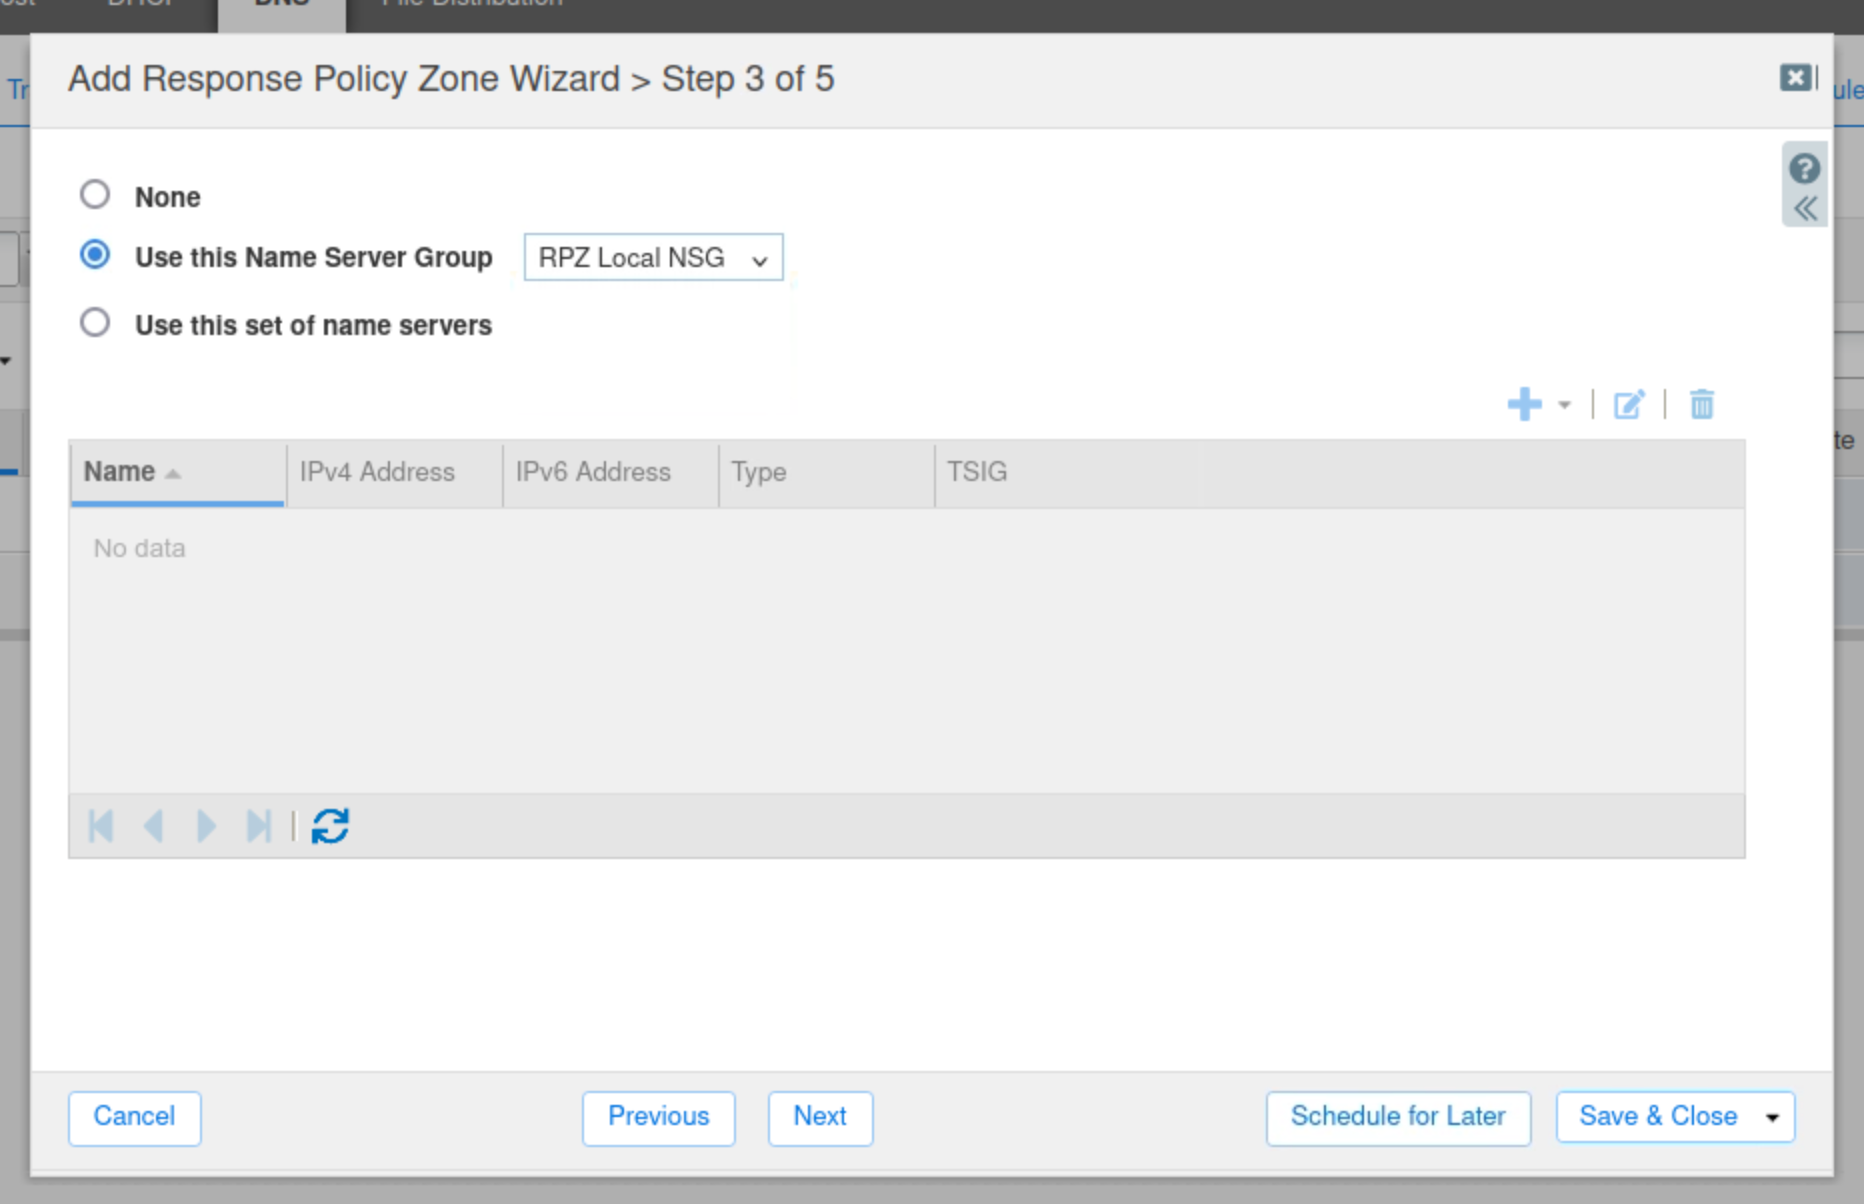
Select the Use this Name Server Group button.
-
Choose RPZ Local NSG from the drop-down list.
-
Click Save & Close.
-
Restart Services when prompted.
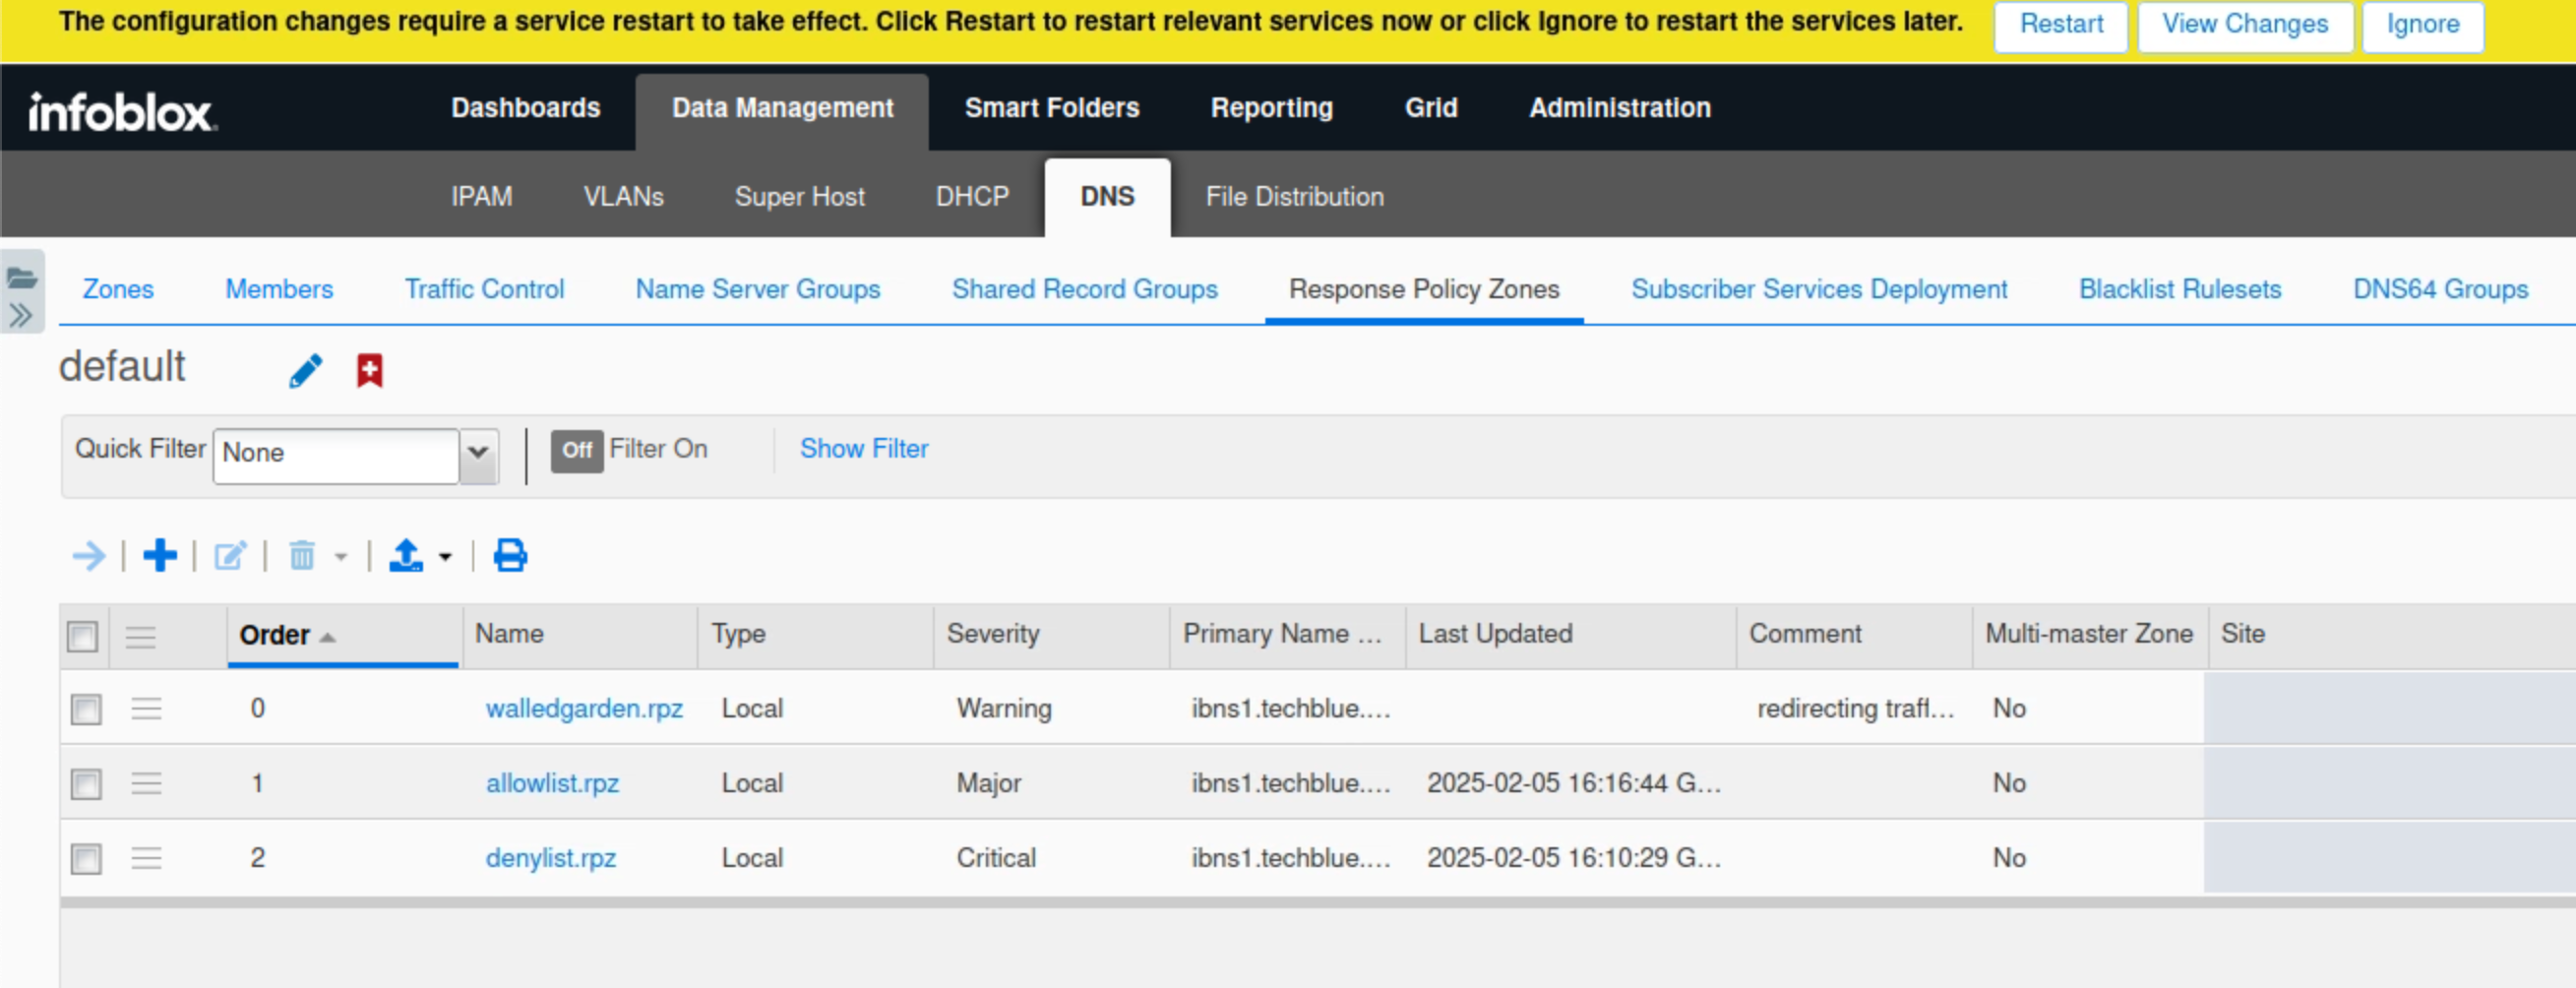
Task 2 Solution: Rearrange Response Policy Zones in the correct order
In this task, we arrange the RPZs in the correct order, ensuring that traffic is targeted by the correct policy.
-
Navigate to Data Management → DNS → Response Policy Zones.
-
Click Order Response Policy Zones on the toolbar.
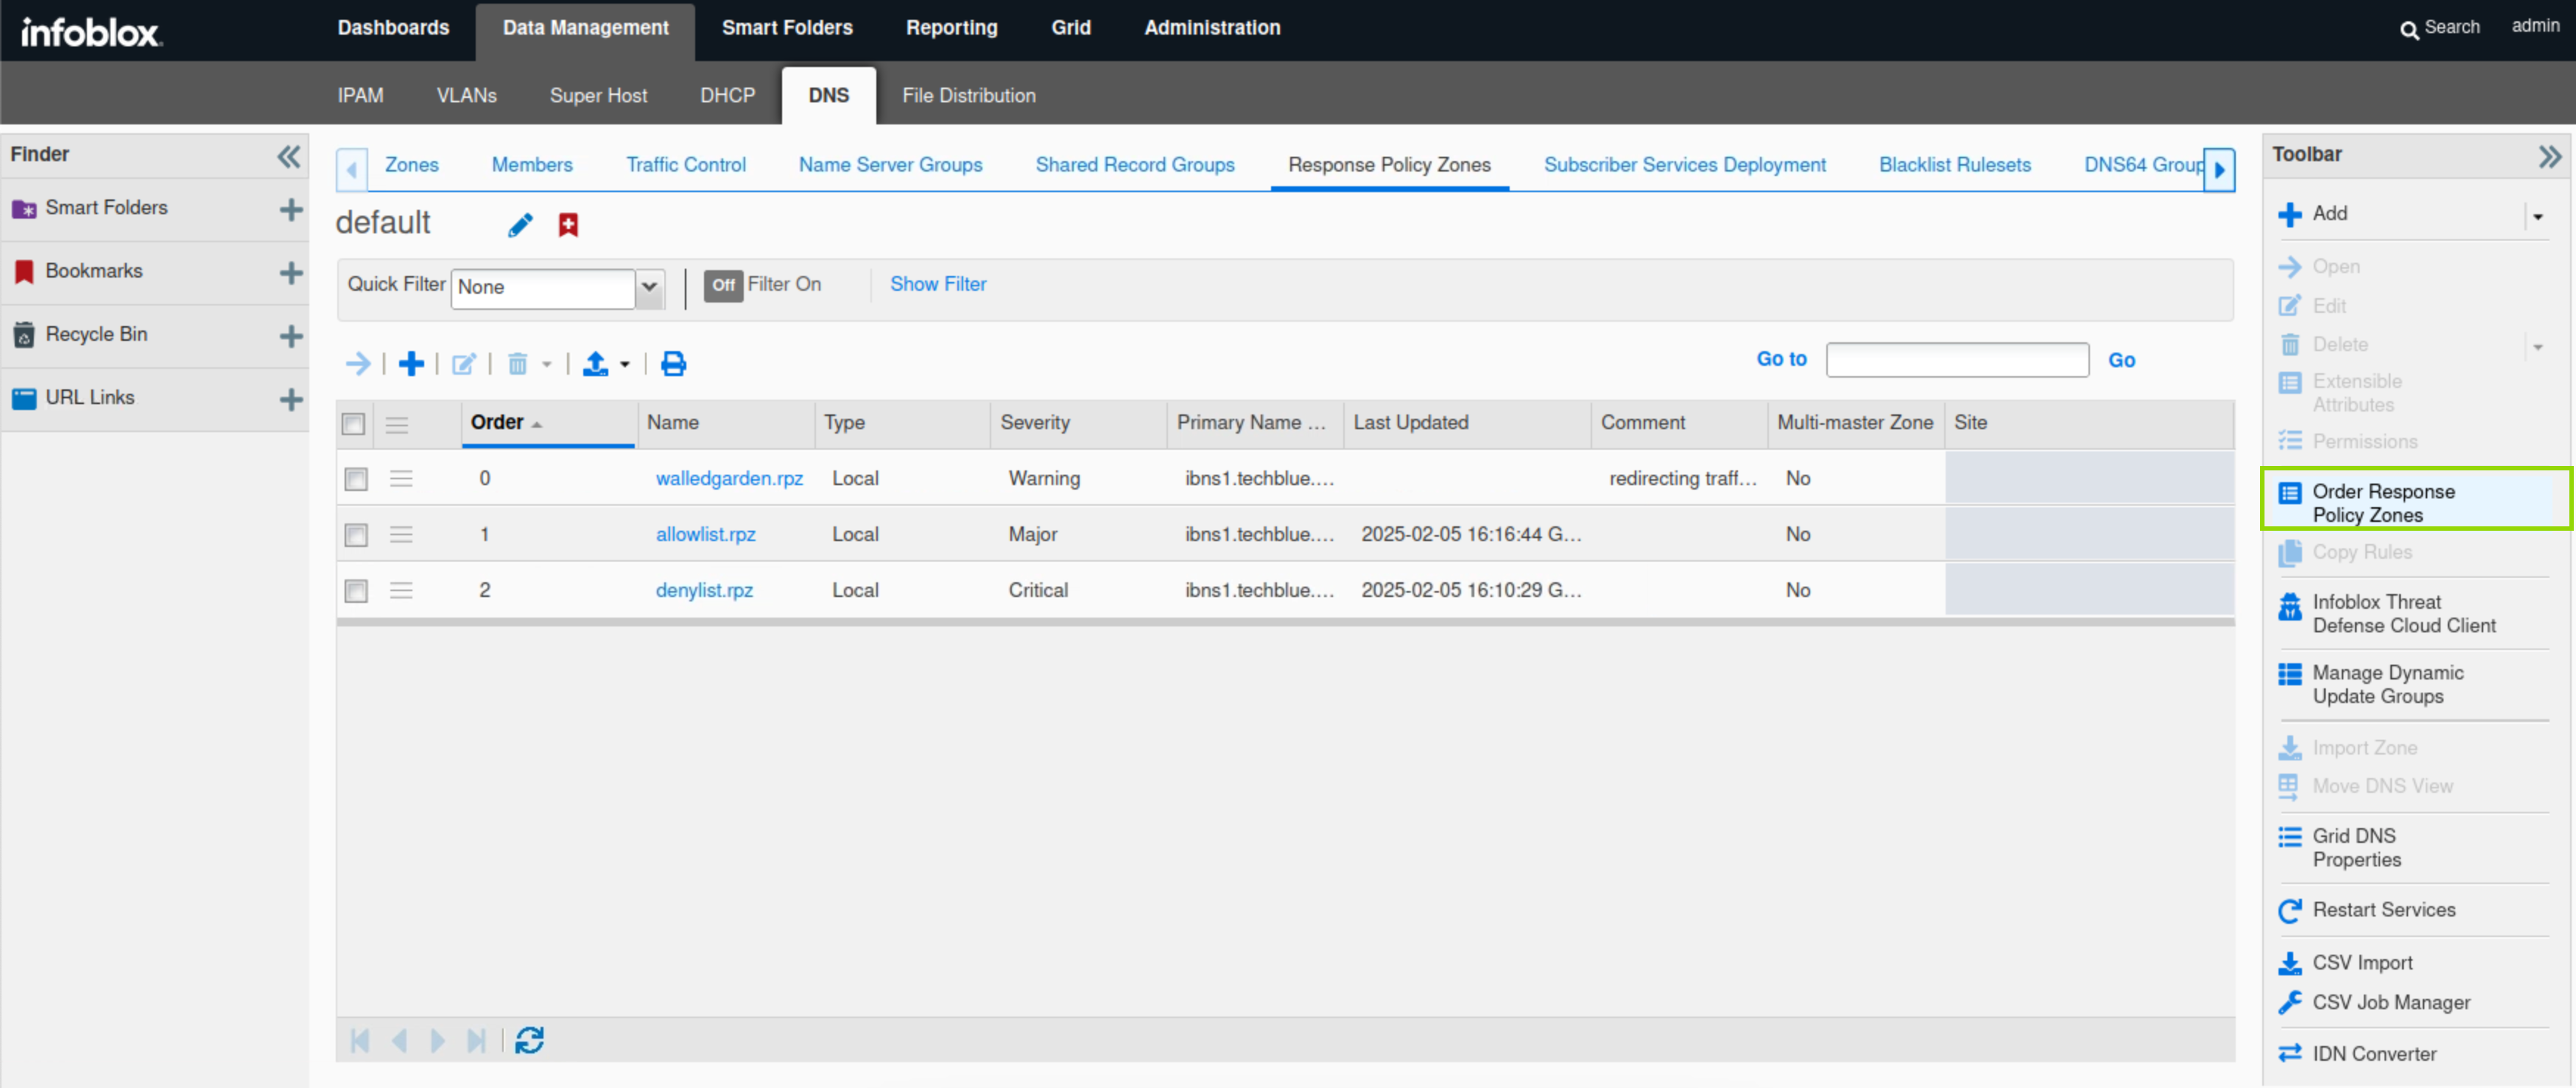
-
Arrange the RPZs so that allowlist.rpz is first, walledgarden.rpz is second, and denylist.rpz is last.
-
Click OK.

-
Restart services when prompted.
Task 3 Solution: Add Substitute (Domain Name) Policy Rules to walledgarden.rpz
In this task, you add a Substitute (Domain Name) rule to the walledgarden.rpz. Queries for the malware.signalorange.net domain are redirected to walledgarden.techblue.net. We will start by creating an address record for walledgarden.techblue.net for the RPZ to substitute malware.signalorange.net for. Then, we will create two RPZ rules: one to replace malware.signalorange.net and the other to replace all of its subdomains.
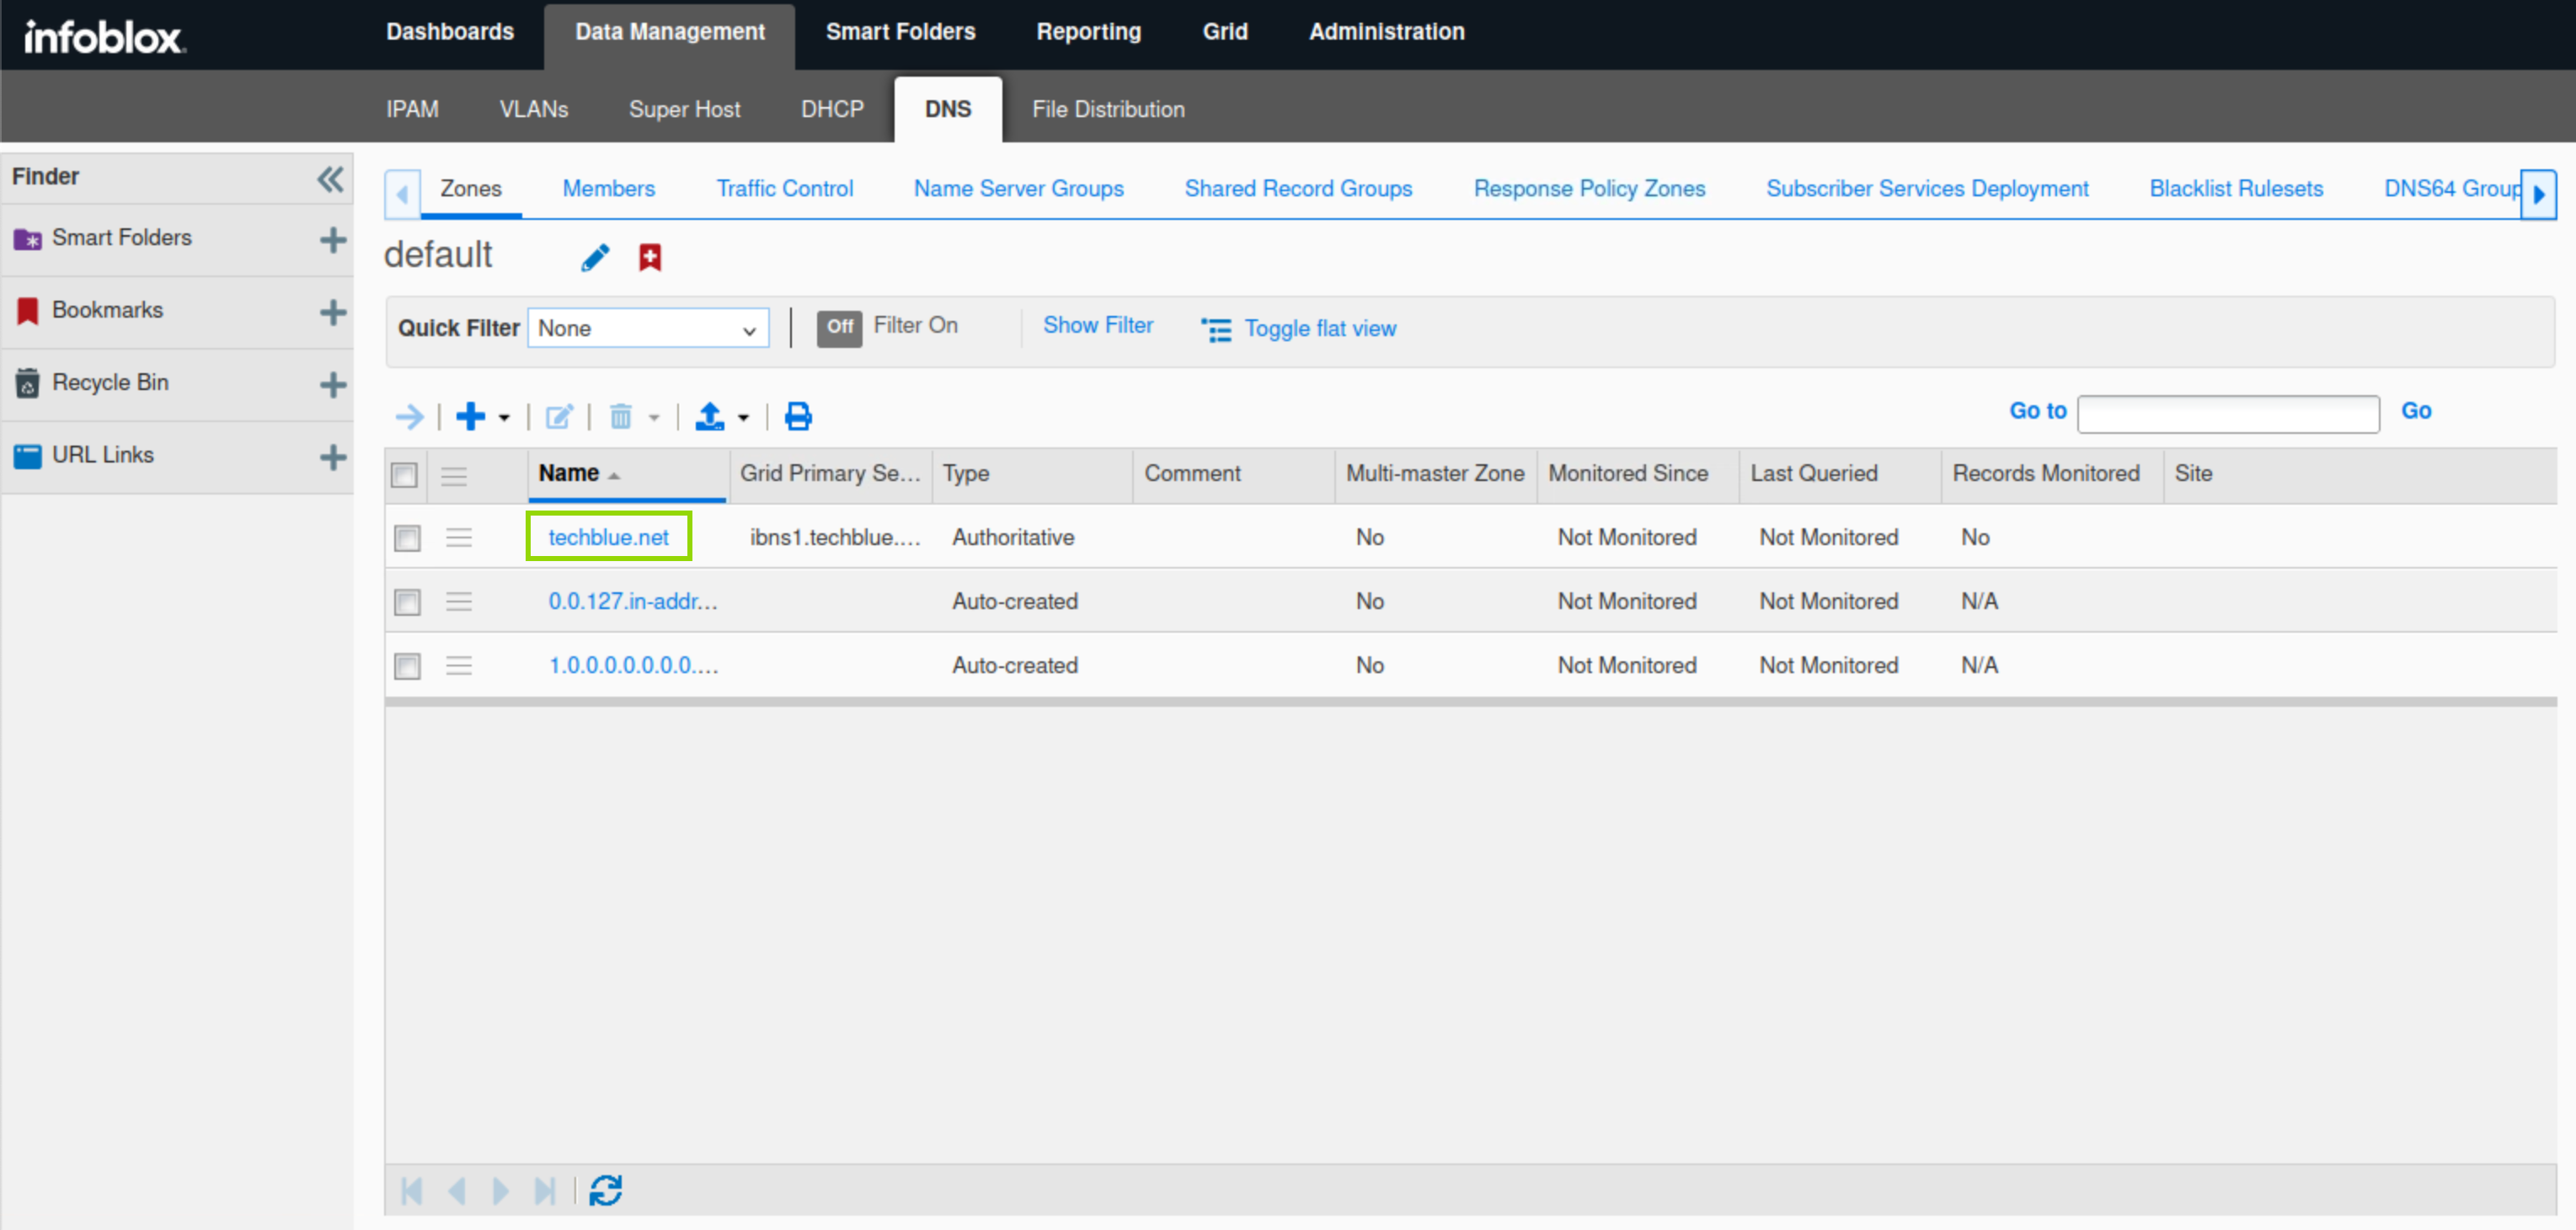
-
Navigate to Data Management → DNS → Zones.
-
Click the link to techblue.net.
-
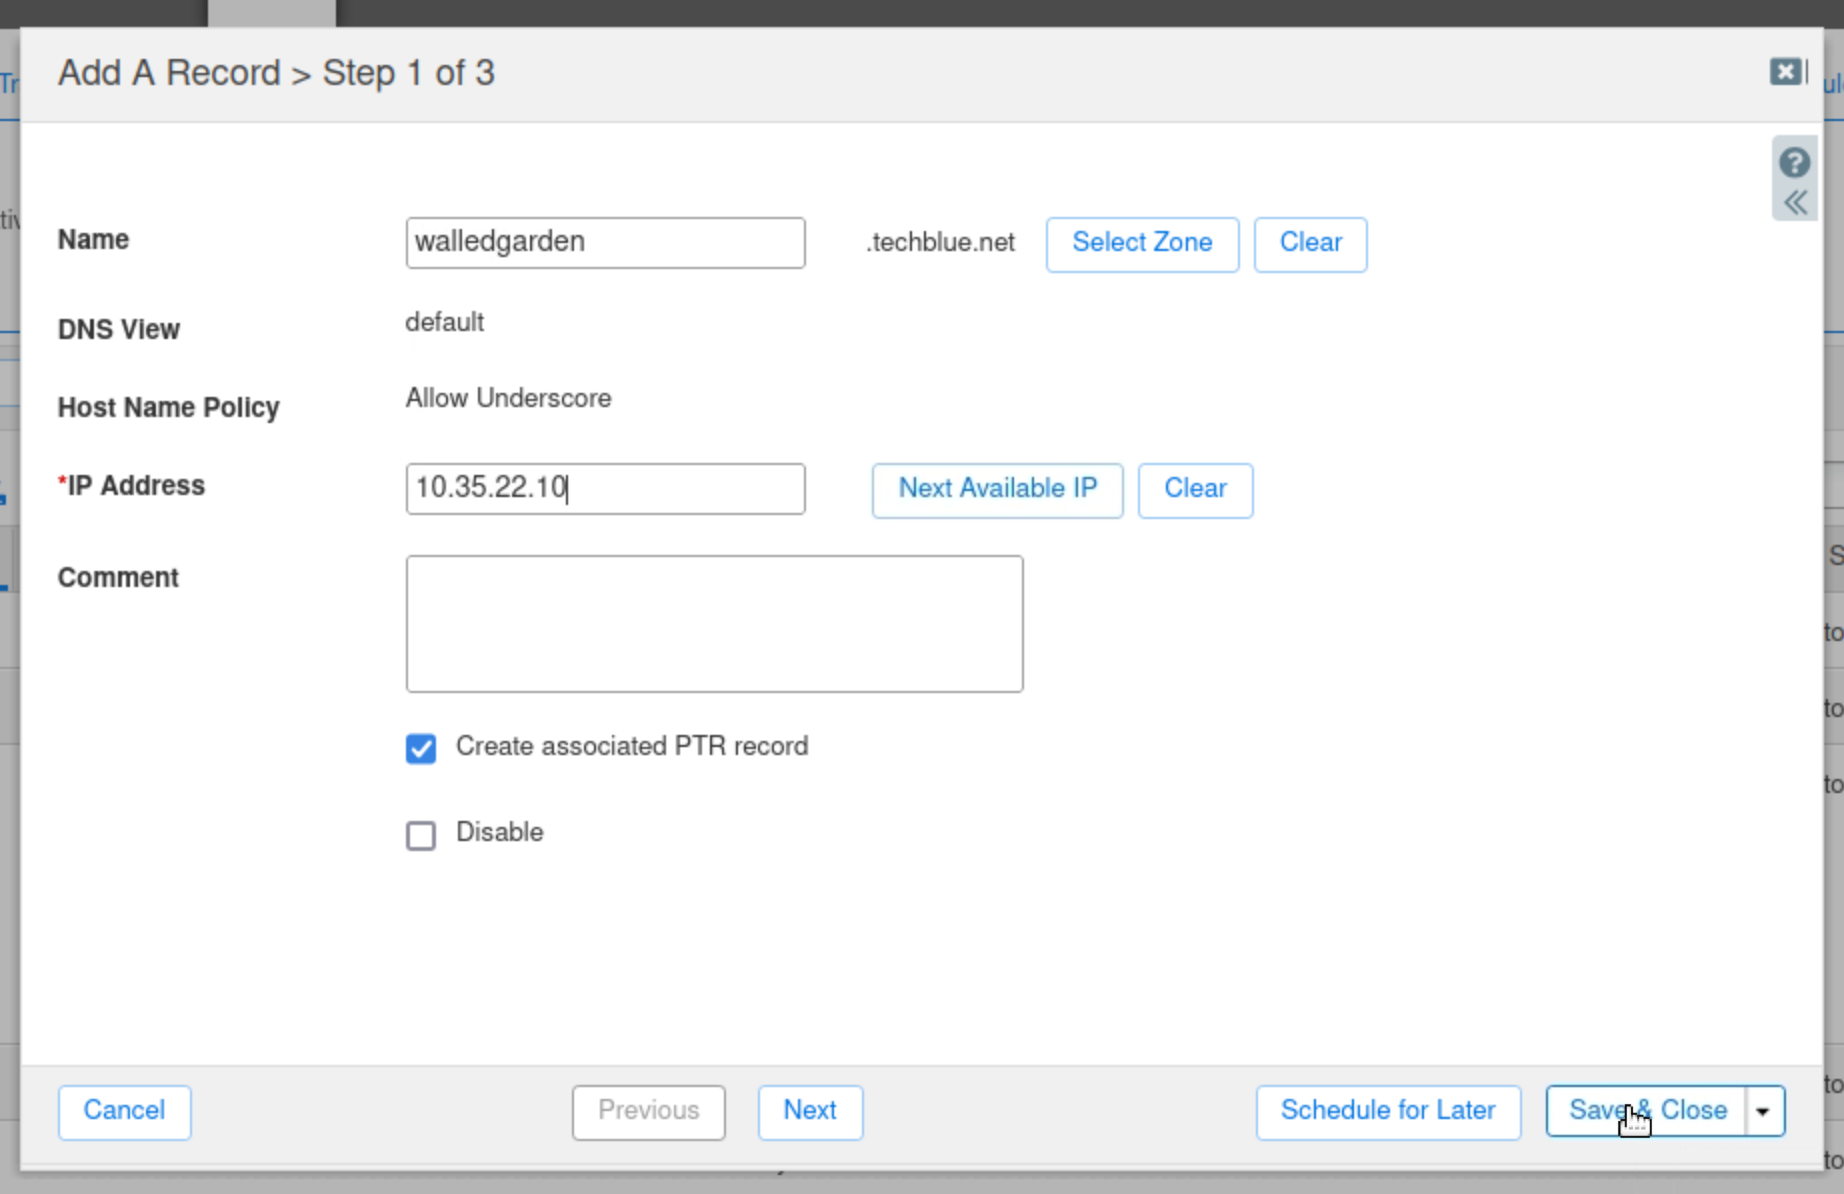
Click the drop-down list for Add. Select A record.
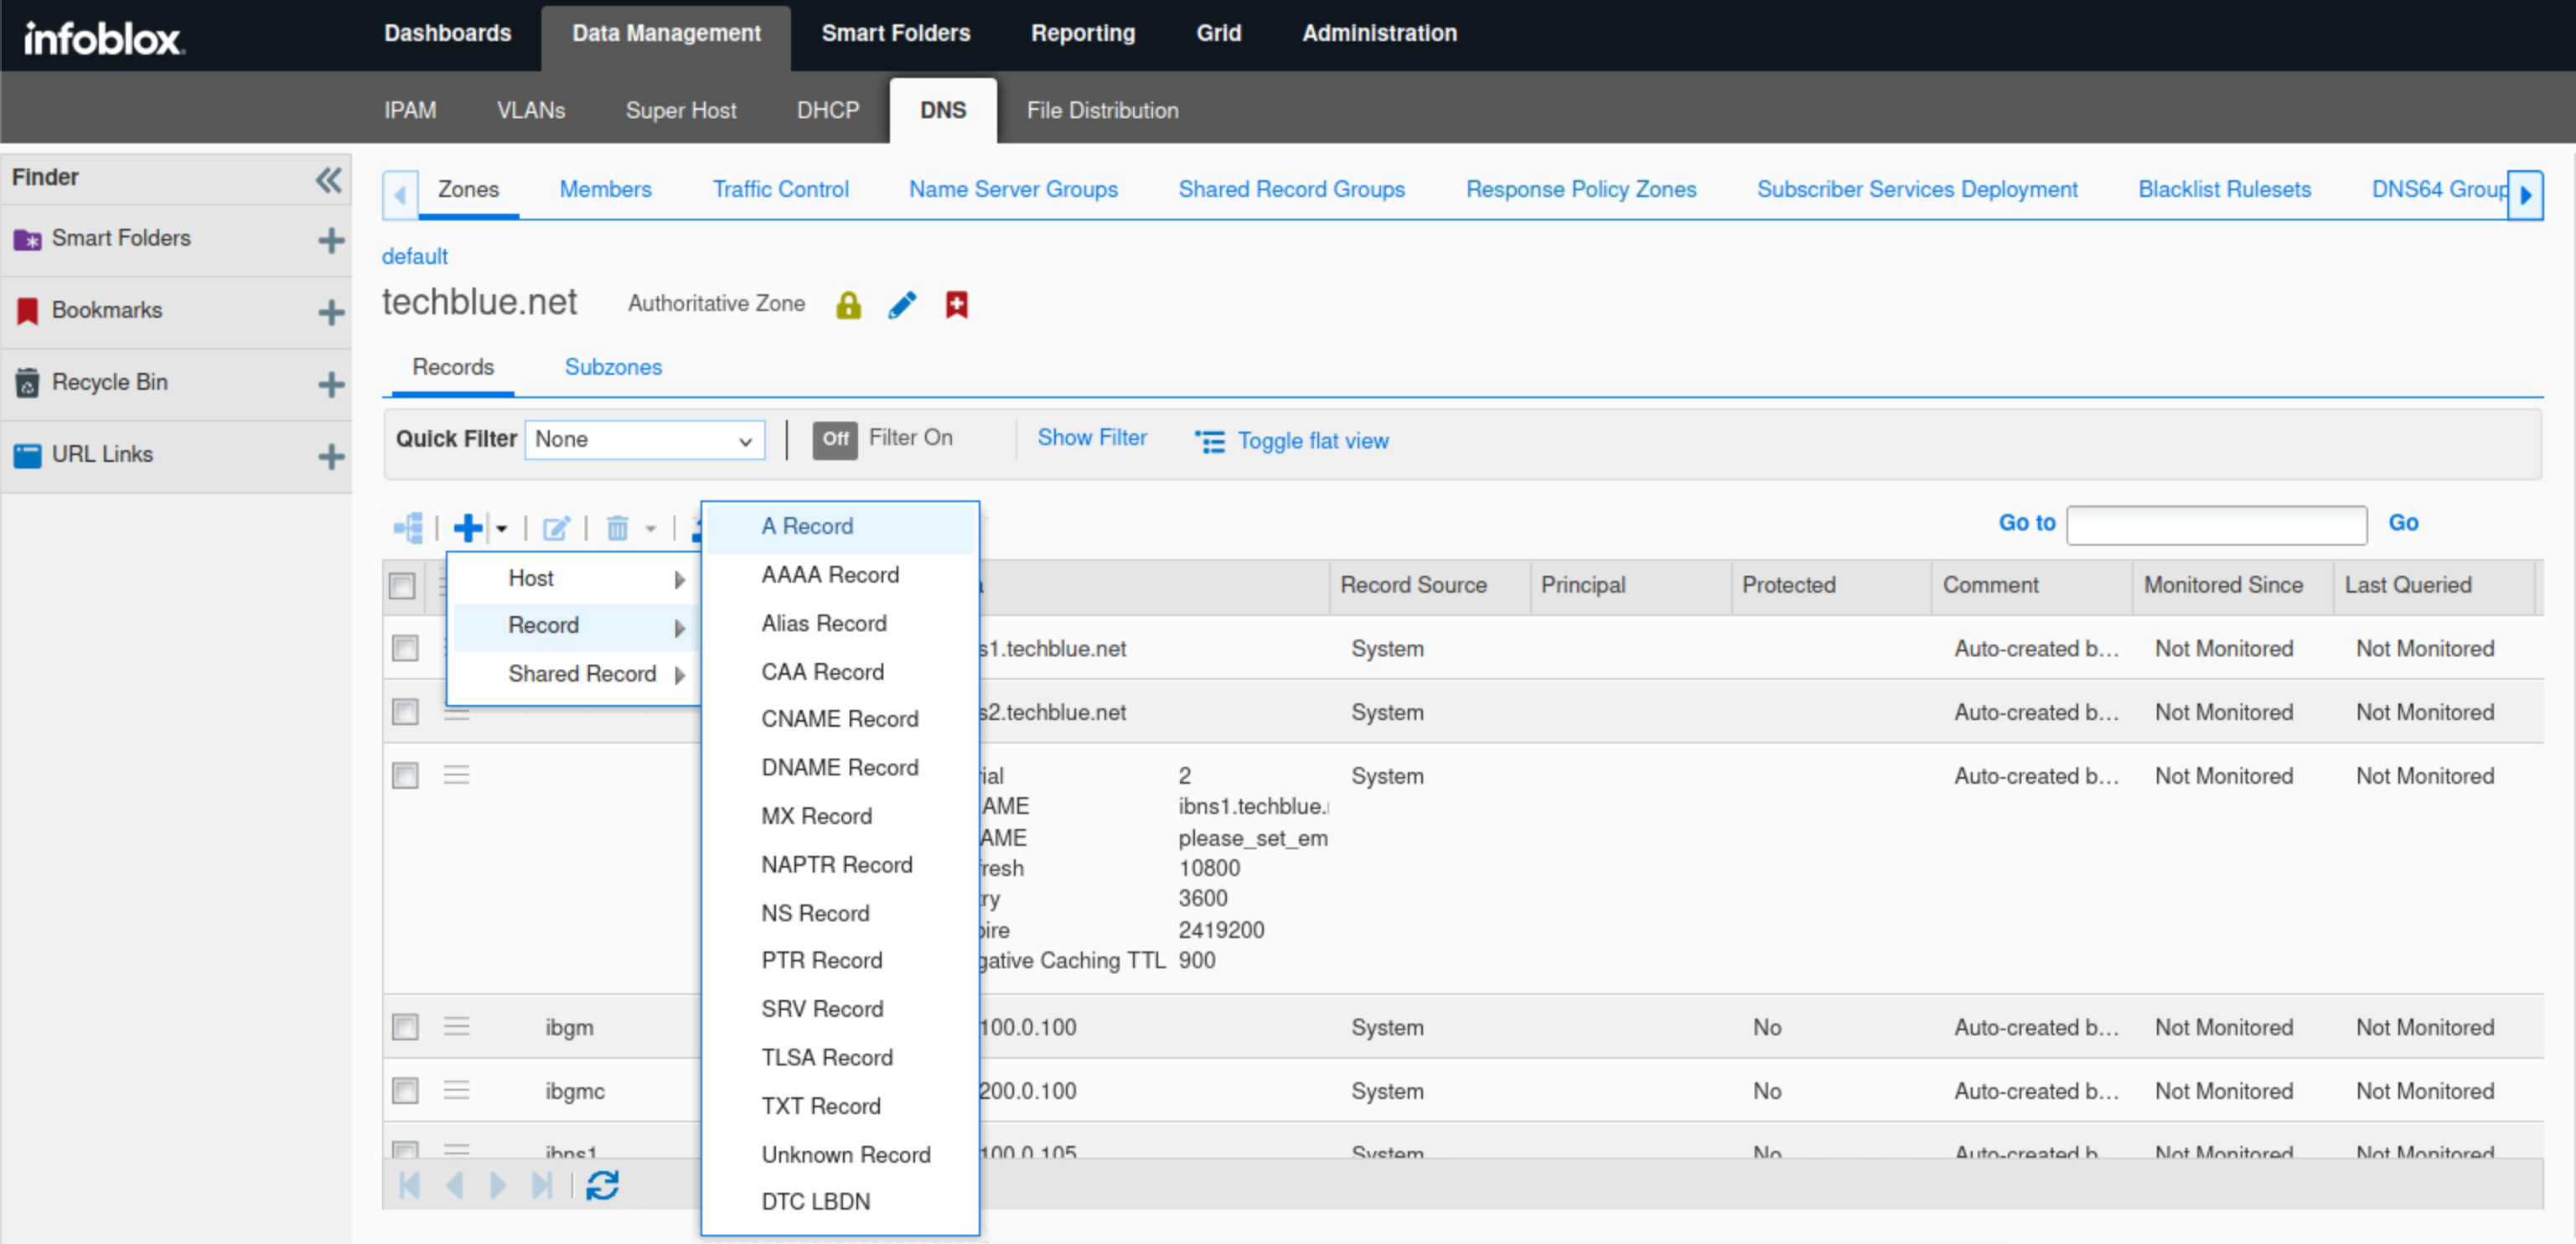
-
Enter the name walledgarden.
-
Enter the IP Address 10.35.22.10.
-
Click Save & Close and accept the warning prompt.
-
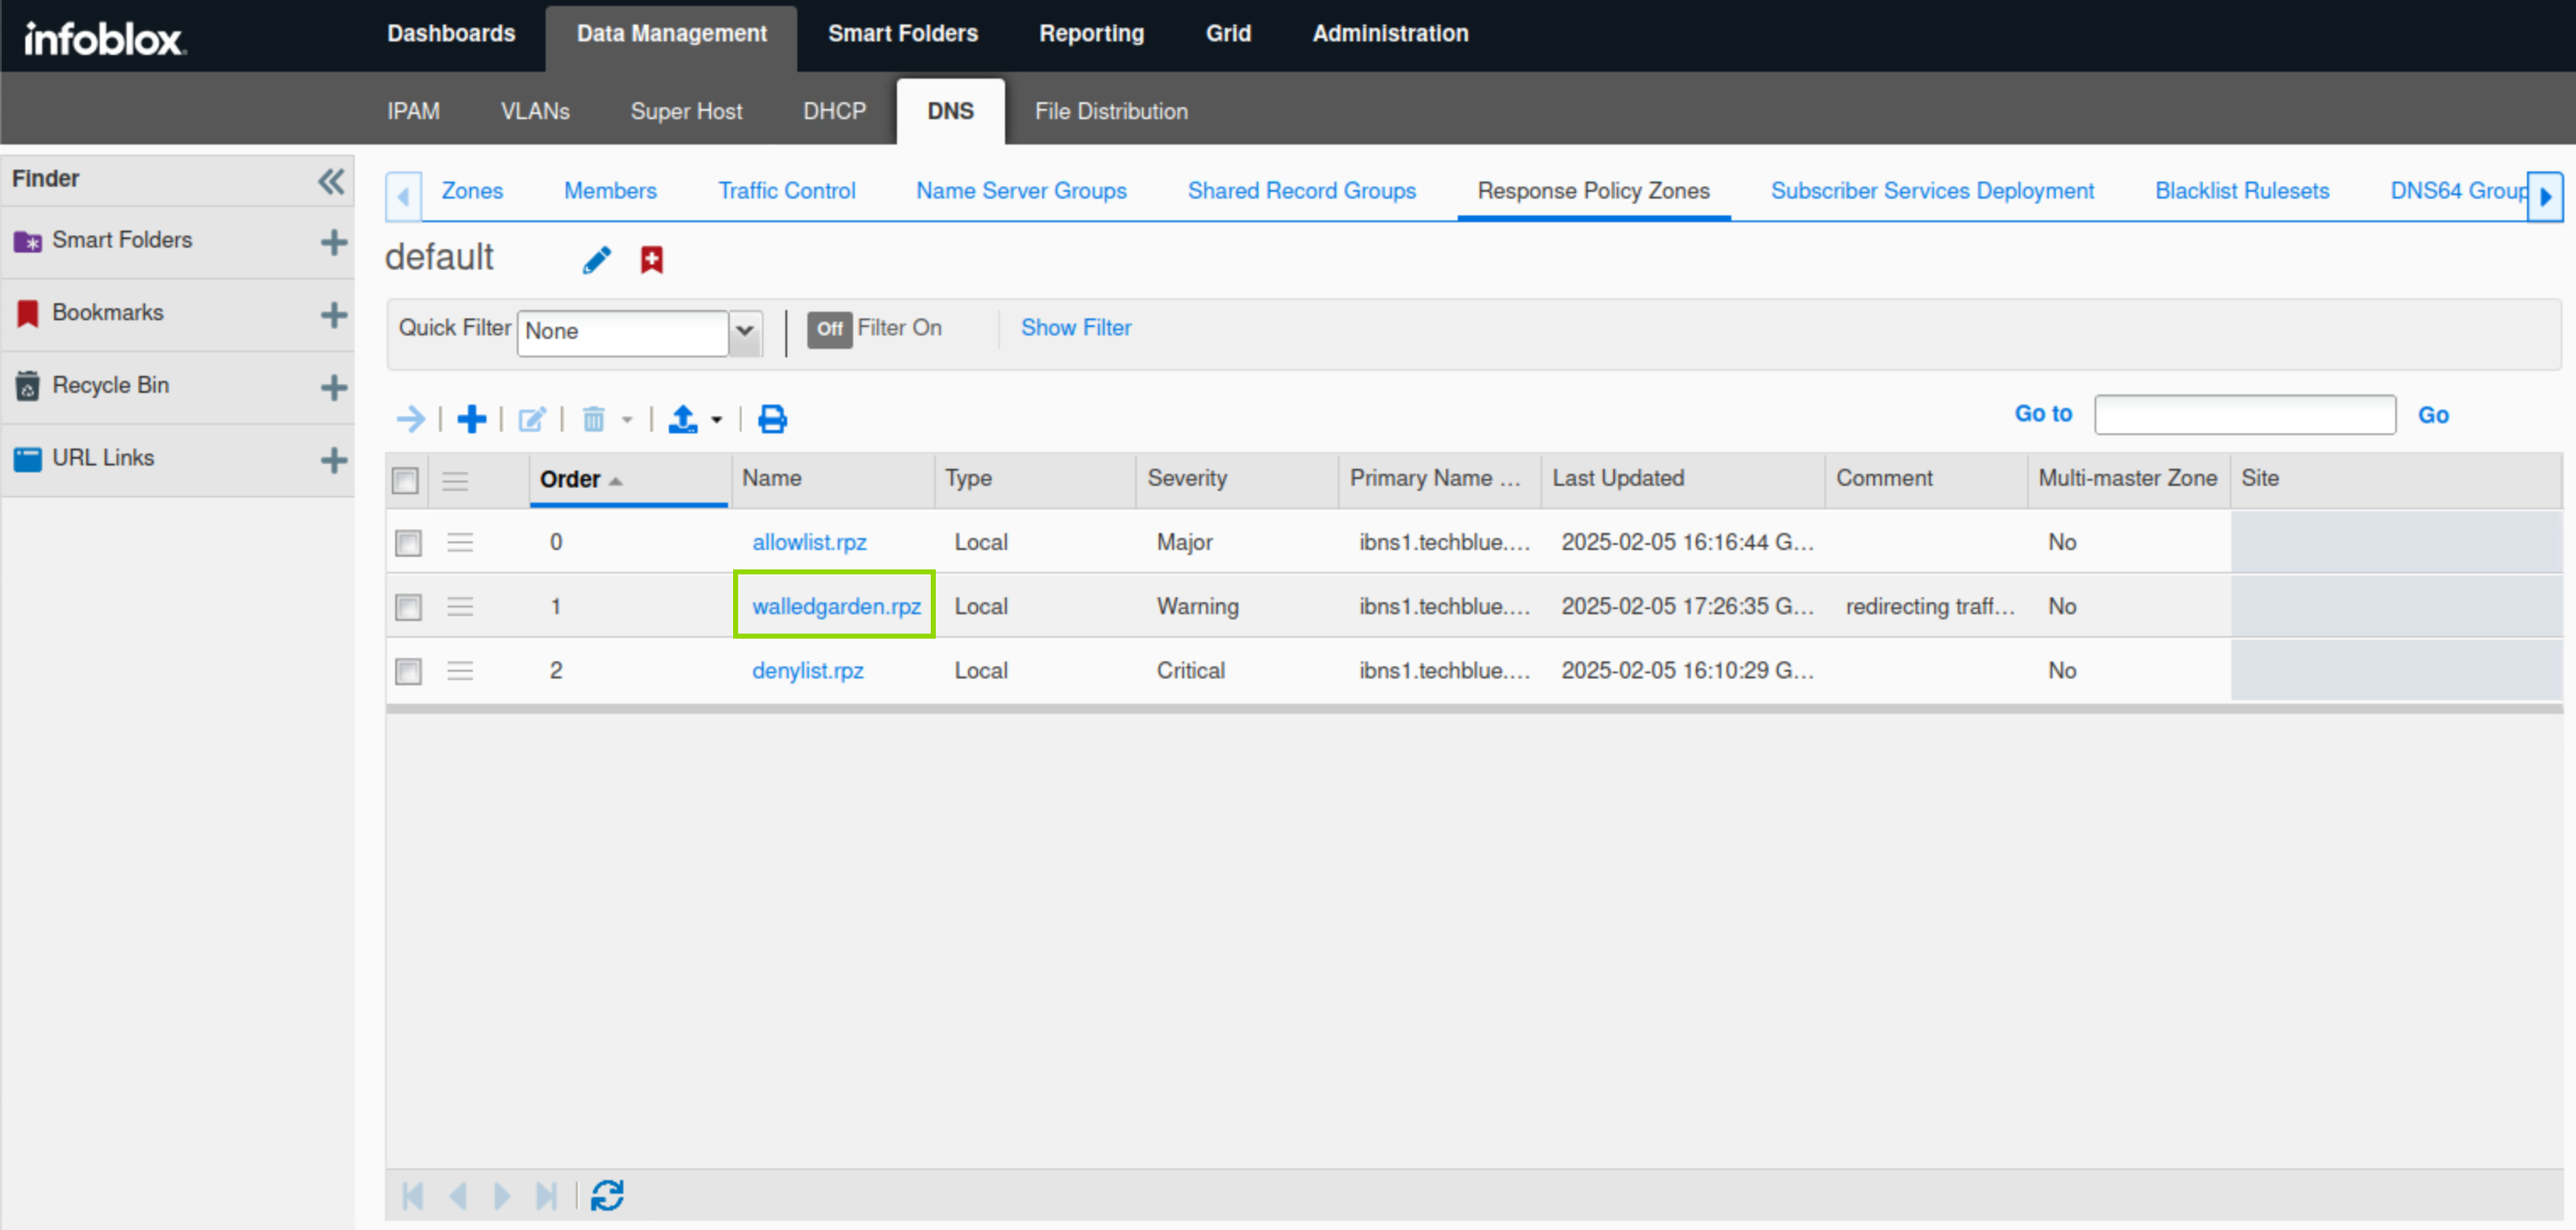
Navigate to Data Management → DNS → Response Policy Zones.
-
Click the link to walledgarden.rpz.
-
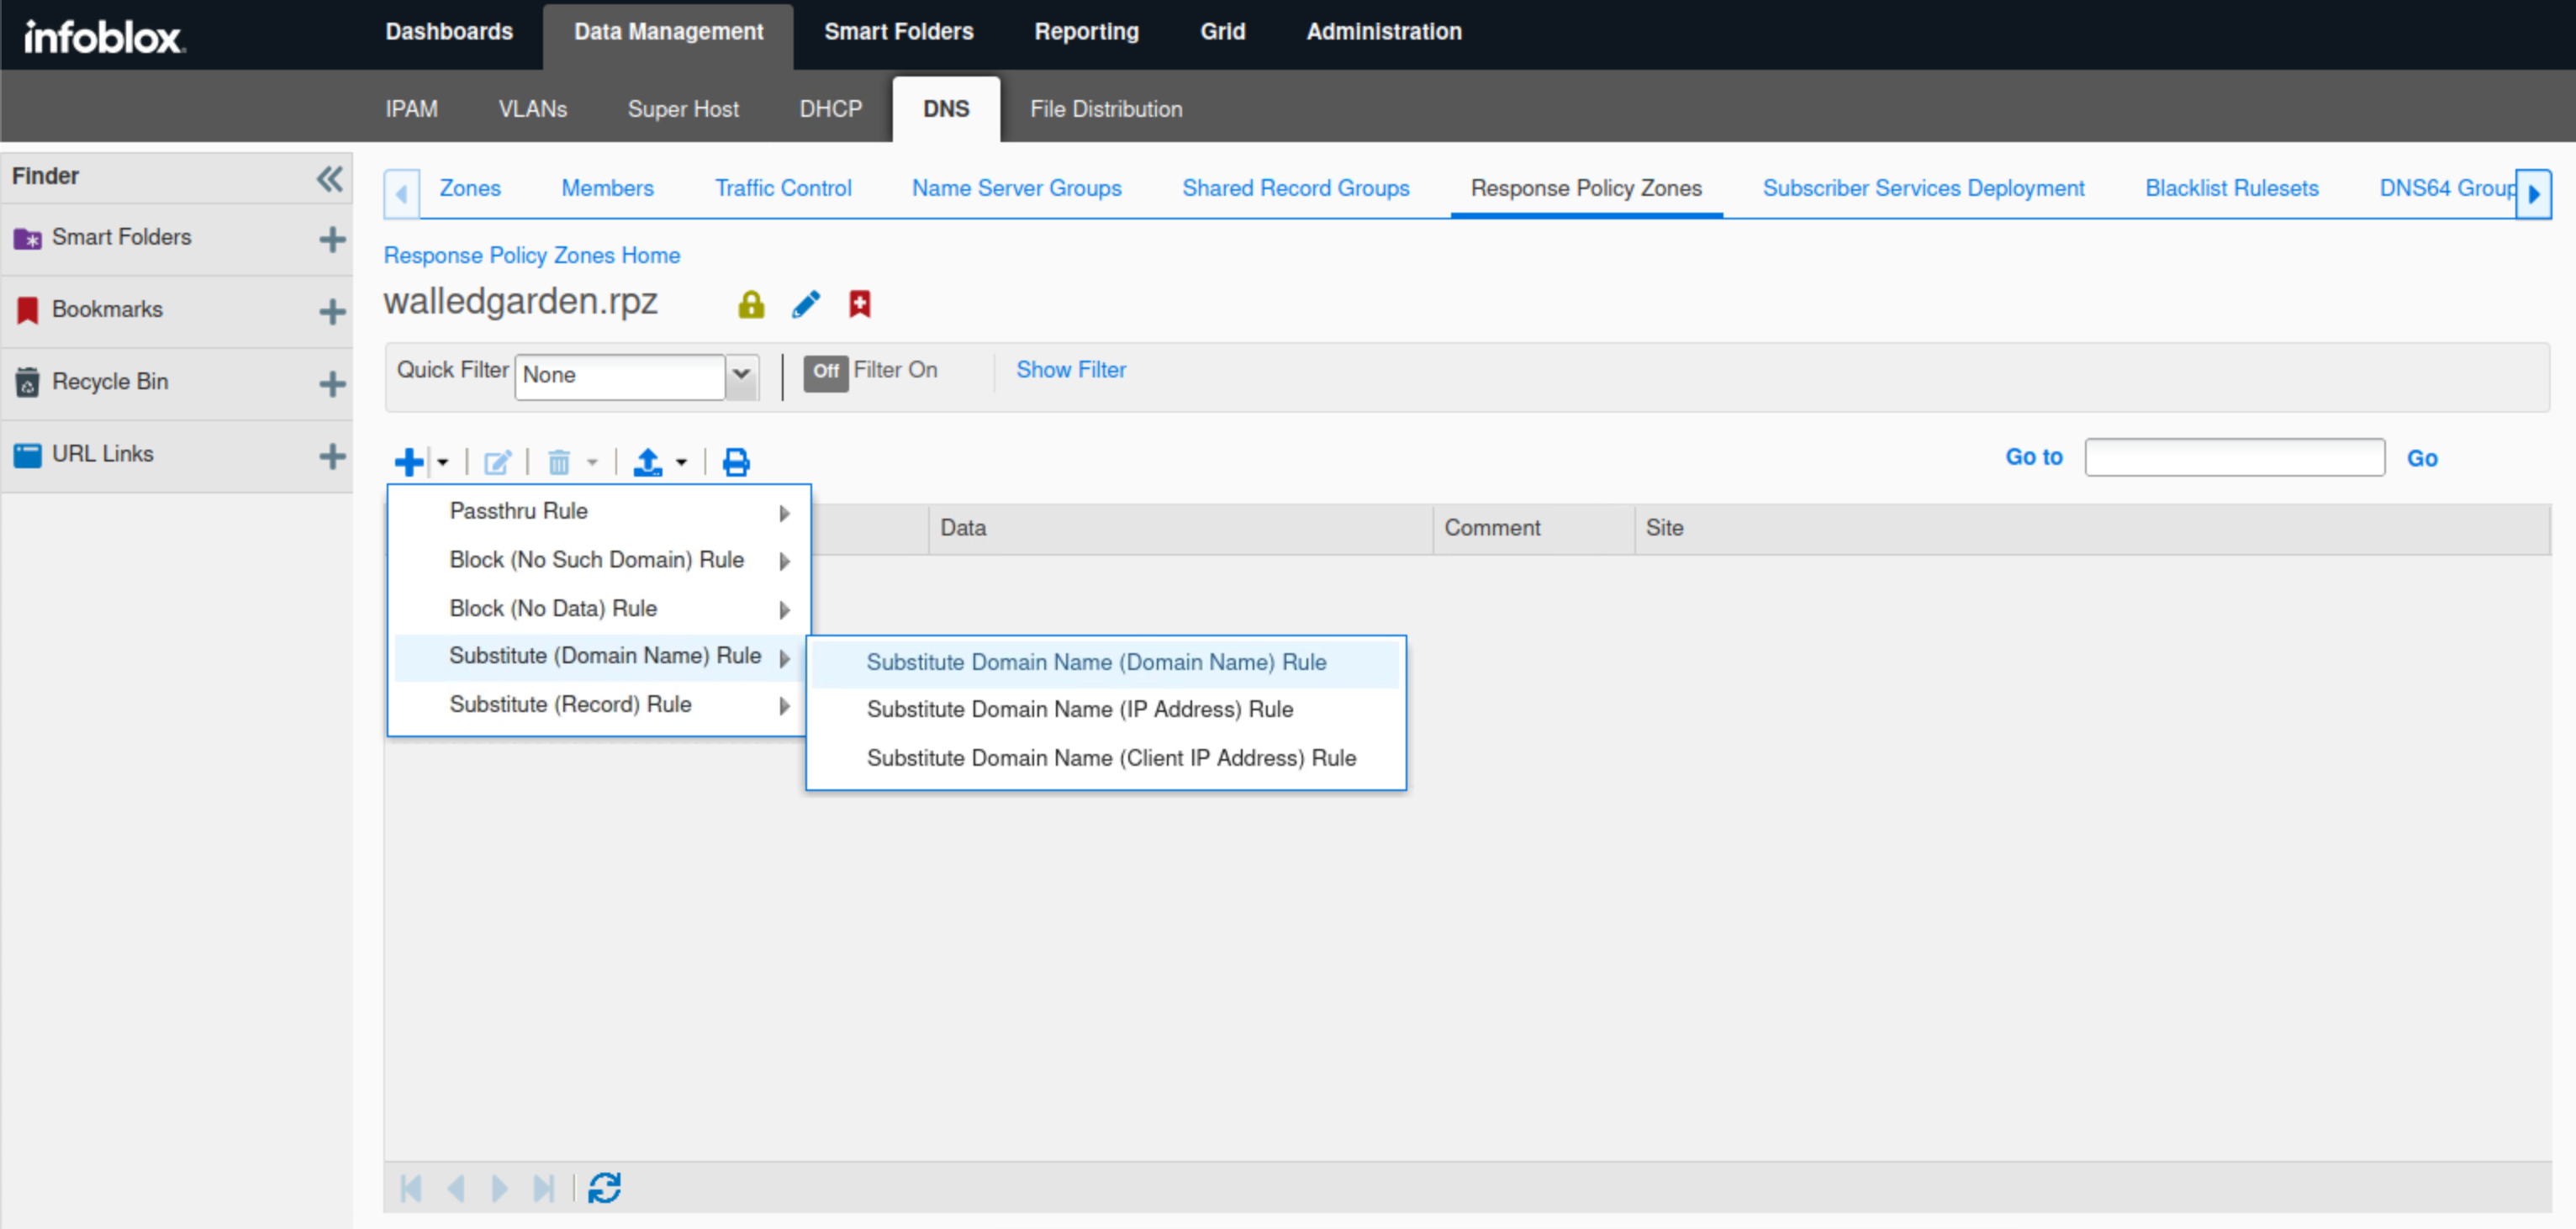
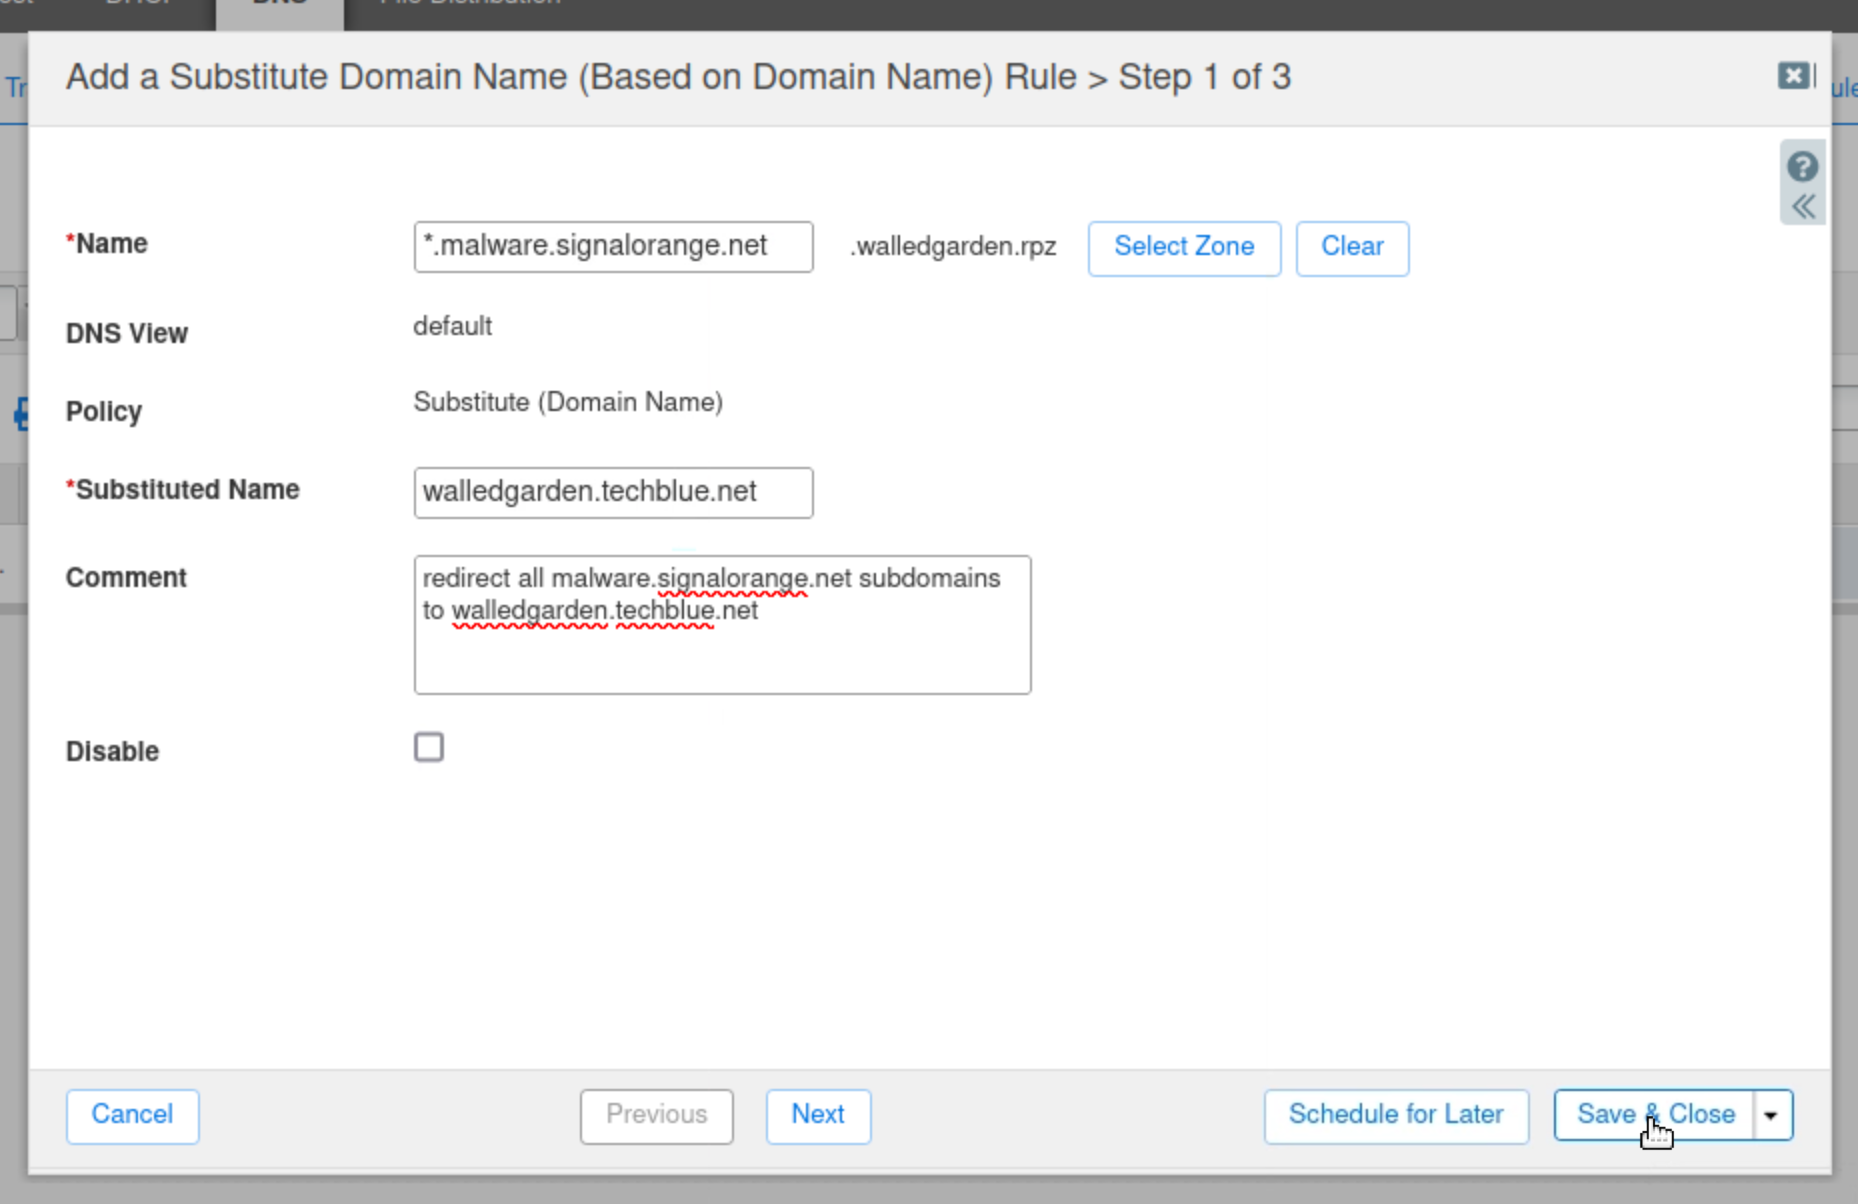
Click the arrow next to the plus (+) symbol and select Substitute (Domain Name) Rule from the drop-down list.
-
Select Substitute Domain Name (Domain Name) Rule.
-
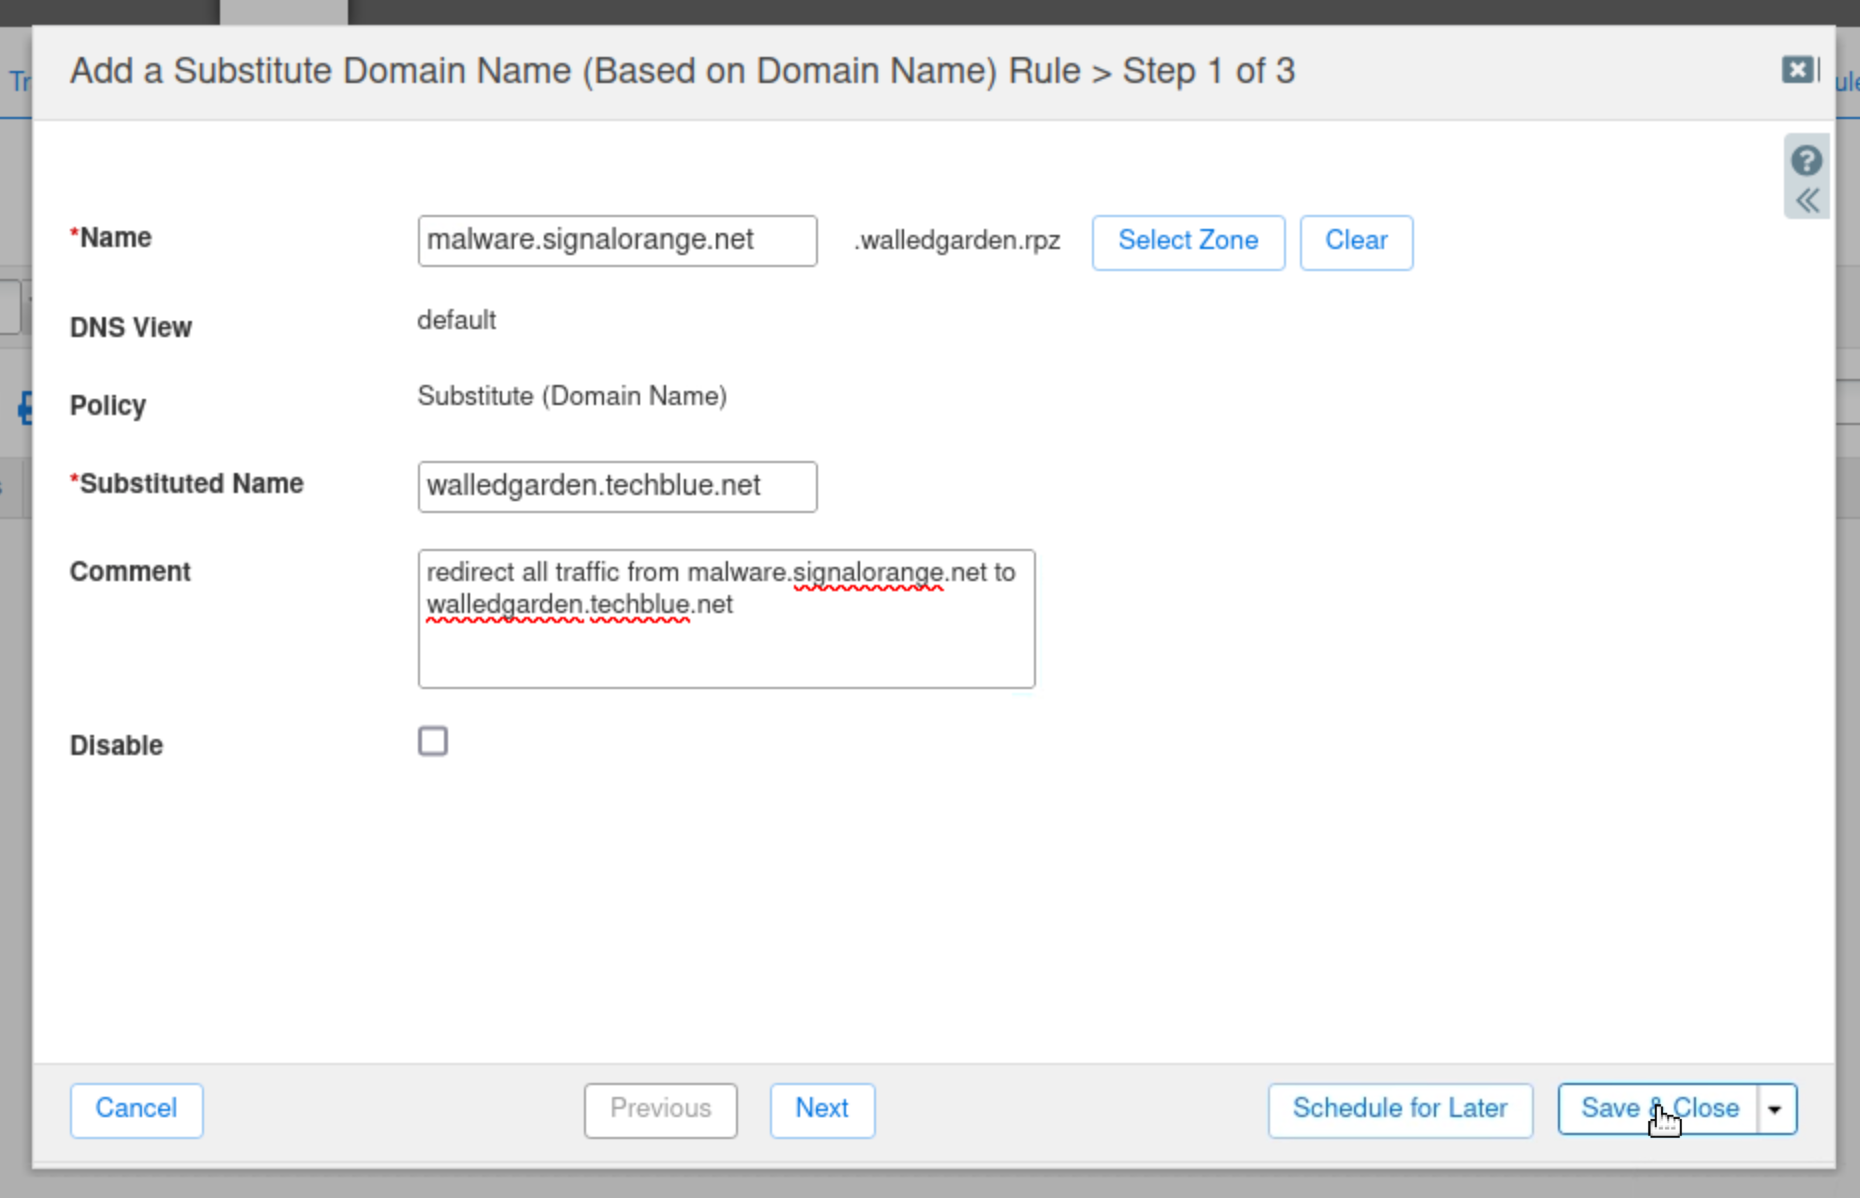
Enter malware.signalorange.net in the Name field.
-
Enter walledgarden.techblue.net in the Substituted Name field.
-
Type a Comment to describe the purpose of the rule.
-
Click Save & Close.
-
Click the arrow next to the plus (+) symbol and select Substitute (Domain Name) Rule from the drop-down list.
-
Select Substitute Domain Name (Domain Name) Rule.
-
Enter *.malware.signalorange.net in the Name field.
-
Enter walledgarden.techblue.net in the Substituted Name field.
-
Click Save & Close.
Task 4 Solution: Test Substitute Local RPZ Rules
The newly created RPZ must be tested to ensure that the malicious domain is being substituted. In this task, we will use dig and syslog entries to validate the local RPZ configurations.
-
Switch over to the testing-linux virtual machine with the credentials (training/infoblox).
-
Open a terminal window and issue the command sudo set-network-static-nios and verify that the machine now has the IP address 172.31.101.250 using the command ifconfig.
-
-
Open another terminal window.
-
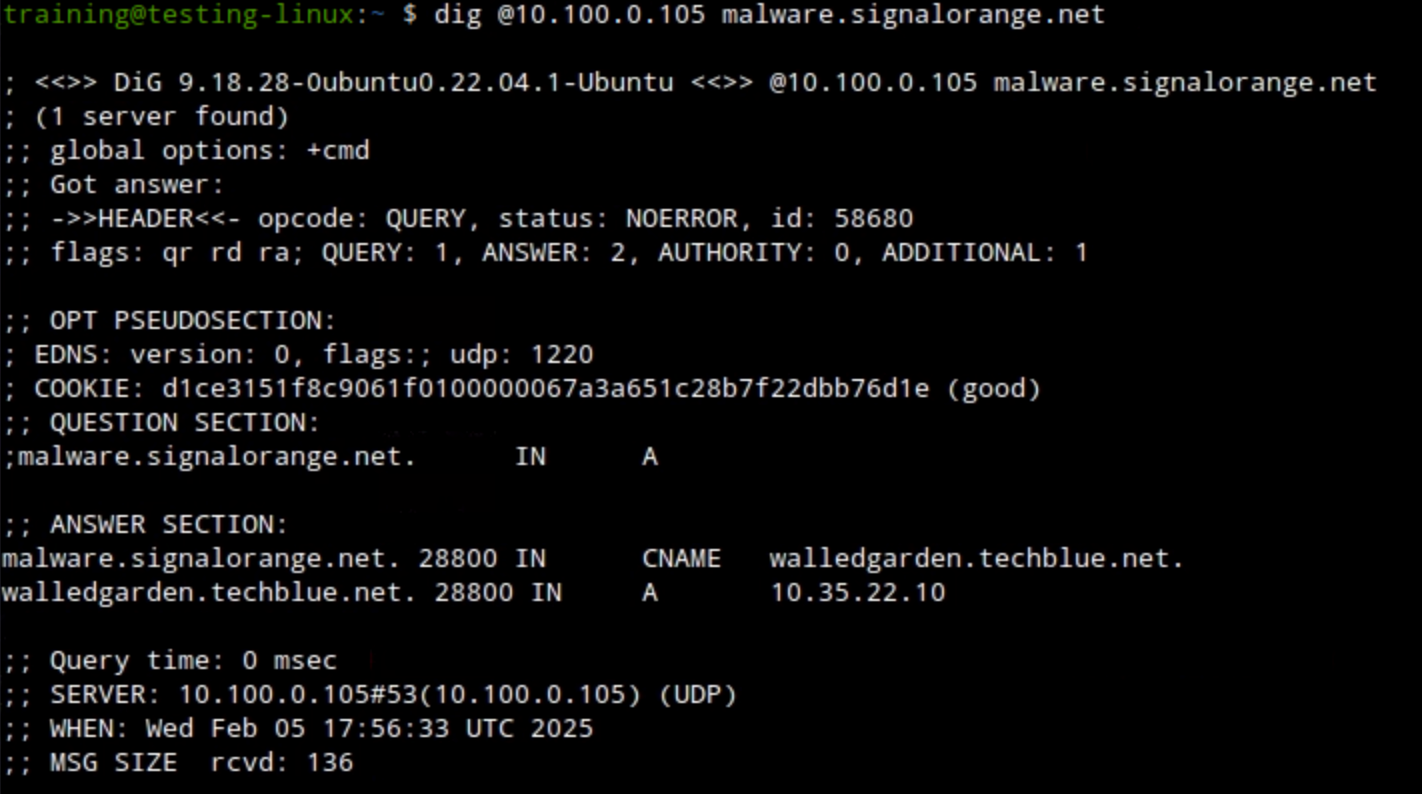
Use the dig command dig @10.100.0.105 malware.signalorange.net. The DNS server returns the address record. The name substitution with a CNAME record is visible in the results.
-
Switch back to jump-desktop.
-
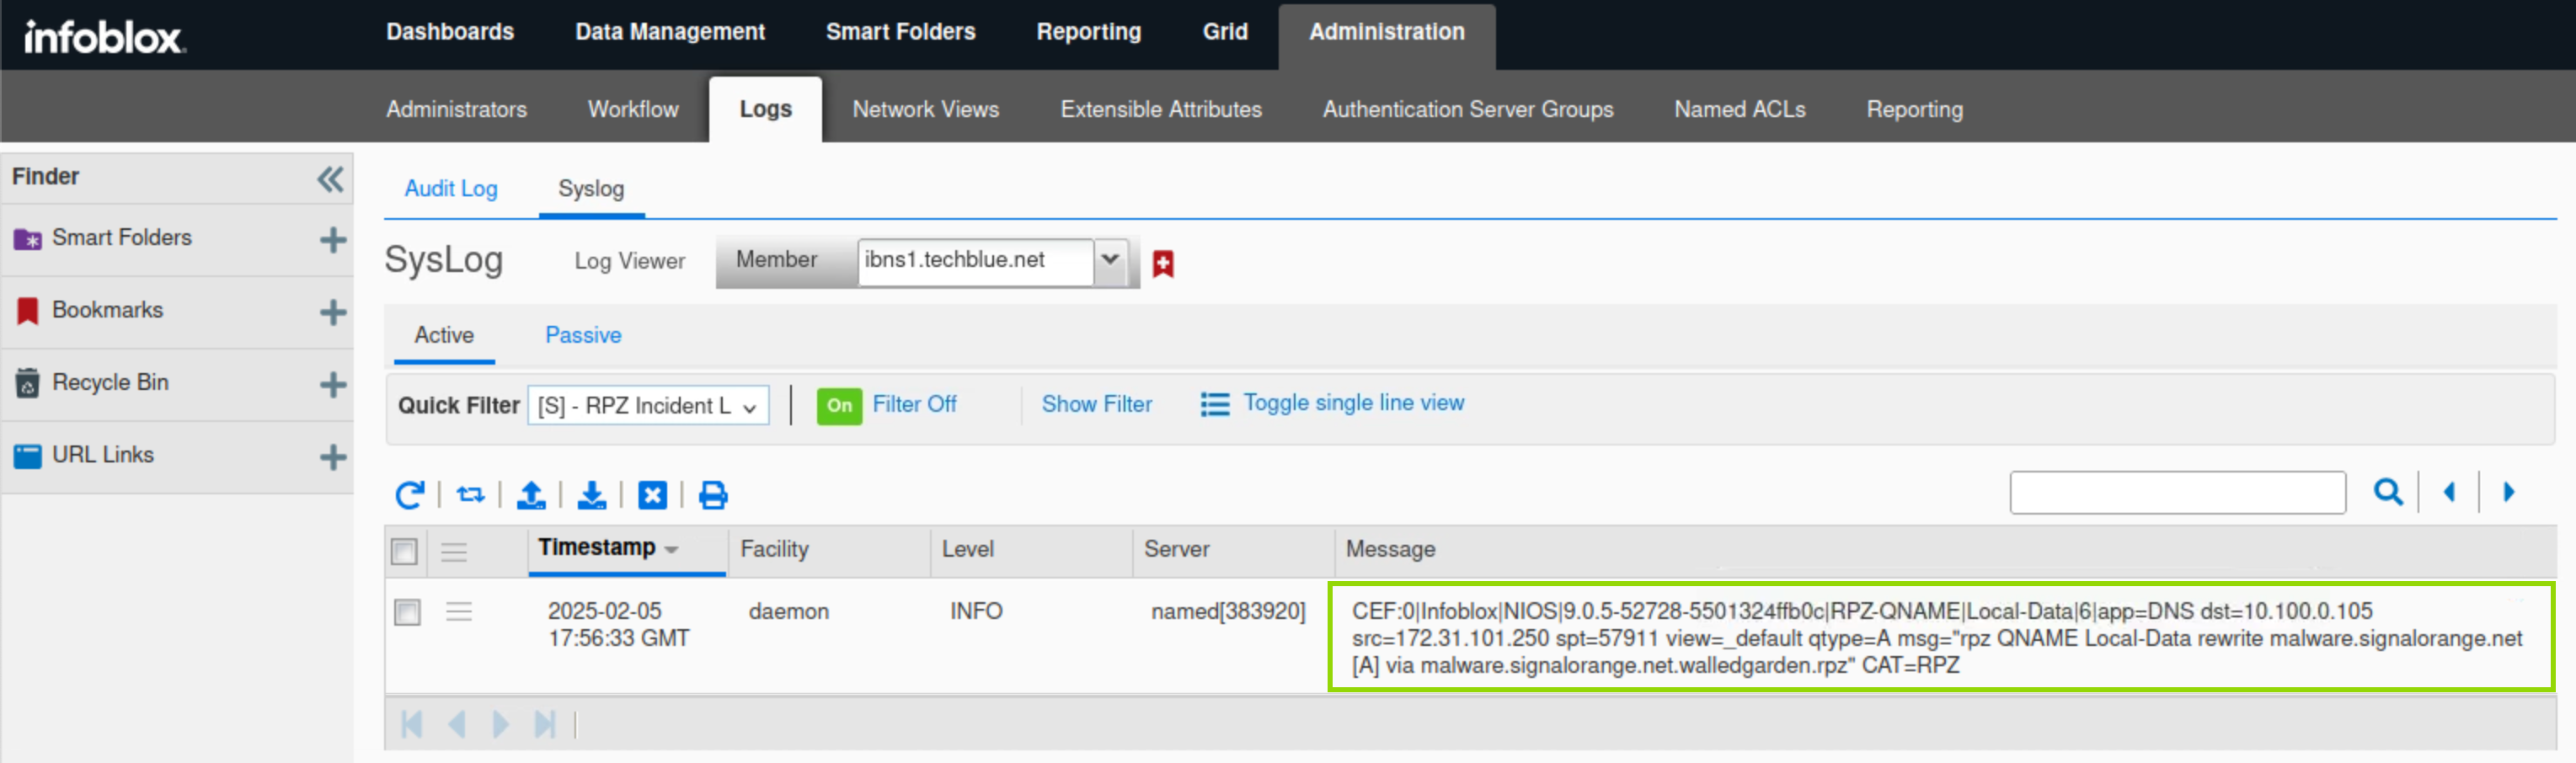
Under Administration → Logs → Syslog.
-
Select Member ibns1.techblue.net from the drop-down list.
-
Choose RPZ Incidents from the Quick Filter drop-down list.
-
Click the Toggle Multi line view link.
-
The DNS Query for malware.signalorange.net is listed in the messages section, in CEF format.
-
The name malware.signalorange.net is rewritten to malware.signalorange.net.walledgarden.rpz.
-
The query has matched a Substitute Domain Name rule in walledgarden.rpz.
-