Configuring remote authentication in NIOS (2551)
Scenario
After many users have completed NIOS training, your organization decided it is time to allow more users access to the NIOS Grid. Instead of re-creating many usernames and groups in NIOS, you decided to leverage existing usernames and groups in Active Directory (AD). You have obtained information from your AD administrator, listed in Table 2551-1. Please complete the configuration in NIOS such that users may use their AD credentials to login to the GM.
Table 2551-1
Name of Authentication Service | TechBlue AD |
|---|---|
IP Address or FQDN of Domain Controller | 10.100.0.20 |
Active Directory Domain | ad.techblue.net |
Authentication Port | 389 |
Encryption | None |
Group 1 Name | ad-dnsreadwrite |
Group 2 Name | ad-dhcpreadwrite |
Group 1 Test Username | dnsreadwrite |
Group 2 Test Username | dnsreadwrite |
Estimate Completion Time
20 to 30 minutes
Credentials
Description | Username | Password | URL or IP |
|---|---|---|---|
Grid Manager UI | admin | infoblox |
Requirements
Administrative access to the Grid
Name of the authentication service (any label that makes sense to your team, such as “Site 66 AD”)
FQDN or IP address of the AD domain controller(s)
Active Directory domain
Authentication information with the domain controller (port, encryption method, etc.)
Exact names of groups created in AD
Permissions to be set for each group in NIOS
At least one set of credential within each group for testing
Learning Content
Lab Initiation
Access jump-desktop
Once the lab is deployed, you can access the virtual machines required to complete this lab activity. To initiate the lab, click on the jump-desktop tile and login to the Linux UI:
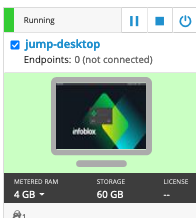
Username: training
Password: infoblox
Initiate lab
To initiate the lab, double-click the Launch Lab icon on the Desktop.

Launch Lab
Choose the lab number from the list and click OK.

After clicking OK, you will see a pop-up message with a brief description of the lab task. If the description looks correct, click Yes to continue lab initiation.
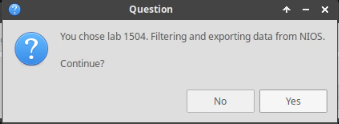
Lab initiation will take a couple of minutes to finish.
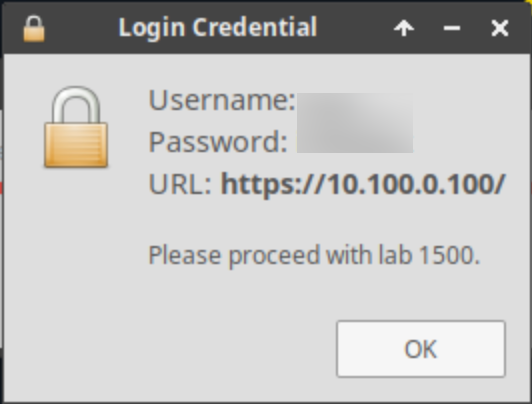
Once complete, you will see another pop-up message with the login credentials and the URL for the Grid Manager’s User Interface. Note that the credentials may differ from those from prior labs.
Tasks
Task 1: Configuring Authentication Server Groups
Add the remote AD authentication server (domain controller) to Authentication Server Groups in NIOS. Please use the information provided in Table 2551-1.
For production, more than 1 domain controller is recommended for redundancy.
Task 2: Modifying the Grid authentication policy
Add Active Directory as an authentication service for the Grid.
Task 3: Creating local groups to match remote groups
Create local groups in NIOS with matching names as the ones already configured in AD. Assign roles to the local groups as shown in Table 2551-2.
Table 2551-2
Local Group Name | Role |
|---|---|
ad-dnsreadwrite | DNS Admin |
ad-dhcpreadwrite | DHCP Admin |
Task 4: Configuring authentication group ordering
Complete the remote authentication configuration by creating an ordered list of the group names.
Task 5: Testing remote authentication by logging in
Log in to the GM using credentials provided in Table 2551-3. These are usernames configured in AD. If the remote authentications are configured correctly, you should be able to login, even when these usernames do not exist in the NIOS local user database. Verify the in logs that these logins were authenticated with AD.
Table 2551-3
Username | Password |
|---|---|
dnsreadwrite | infoblox |
dhcpreadwrite | infoblox |
Instead of logging out and logging back in, it may be easier to start a second, different, web browser to test the logging in, while observing log messages as the admin user in the first web browser.
Solutions
Task 1 Solution: Configuring Authentication Server Groups
Add the remote AD authentication server (domain controller) to Authentication Server Groups in NIOS. Please use the information provided in Table 2551-1.
Navigate to Administration→Authentication Server Groups→Active Directory Services
Click Add. The Add Active Directory Authentication Service dialog window appears.
Using Table 2551-1, fill in the following information:
Name: TechBlue AD
Active Directory Domain: ad.techblue.net
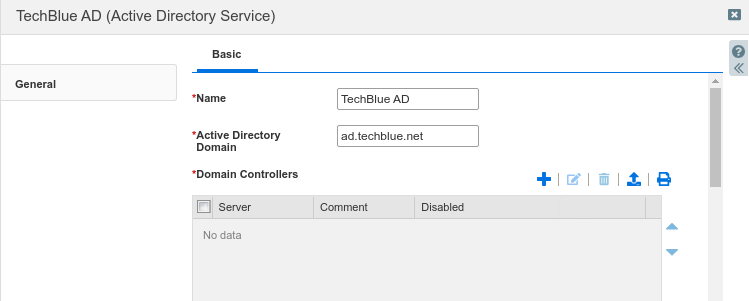
In the section Domain Controllers, click the Add button to display the Add Domain Controller dialog.
Using Table 2551-1, fill in the following information:
Server Name or IP Address: 10.100.0.20
Authentication Port: 389
Encryption: None.
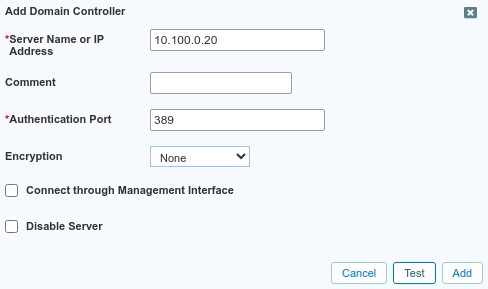
Click Test.
You should get a blue notification bar indicating the test was successful.
If the test is successful, scroll down in the window and click the Add button.
Click Yes to confirm the entry without encryption.
The entry appears in the list of Domain Controllers.
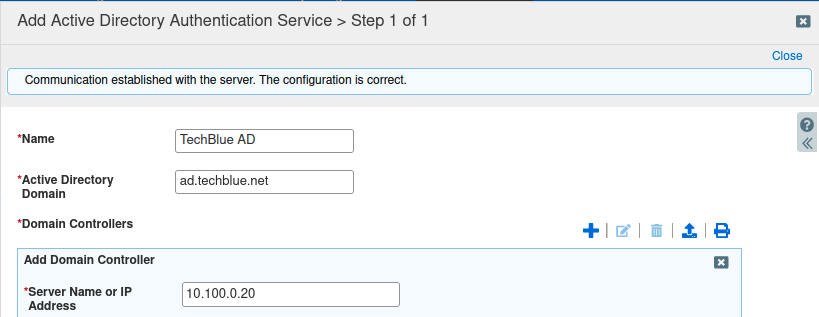
Click Save & Close
If the Test fails, verify the information you entered in this screen and try the test again.
We are choosing to not use encryption for the lab environment. For a production deployment, we recommend trying it first without encryption to ensure all authentications work correctly, then enable encryption for the added security. You may follow the detailed steps in the NIOS Admin Guide.
Task 2 Solution: Modifying the Grid authentication policy
Add Active Directory as an Authentication Service for the Grid
Navigate to Administration→Administrators→Authentication Policy.
Click Add in the section for Authenticate users against these services in this order.

The dialog Add Authentication Service appears.
In the Active Directory drop-down menu, select TechBlue AD, the entry you created in the previous task.
Click the Add button
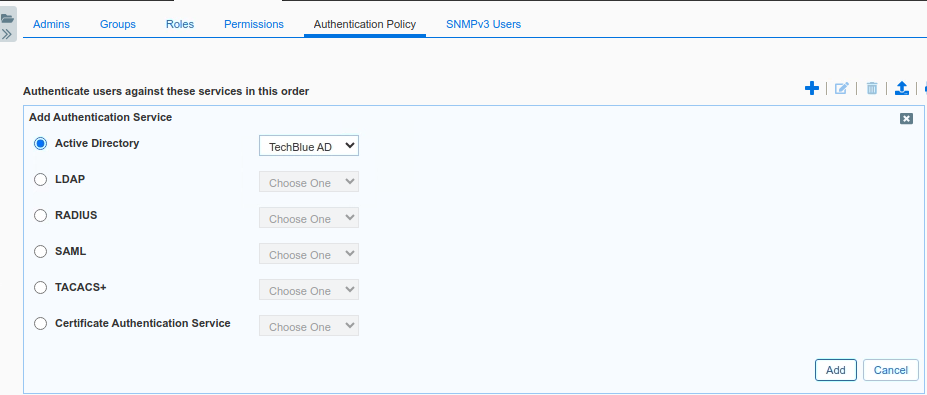
The entry appears below Local Admin

As the section title suggests, the ordering here is important. With this configuration, users logging into NIOS will be first checked against the Local User Database. If the username is not found there or the login fails, NIOS will then attempt to authenticate the user using Active Directory.
Task 3 Solution: Creating local groups to match remote groups
Create local groups in NIOS with matching names as the ones already configured in AD. Assign roles to the local groups as shown in Table 2551-2.
Navigate to Administration→Administrators→Groups.
Click the Add button. The Add Admin Group Wizard dialog appears.
At Step 1 of 8, enter ad-dnsreadwrite for Name.
For Comment, enter a description for this group.
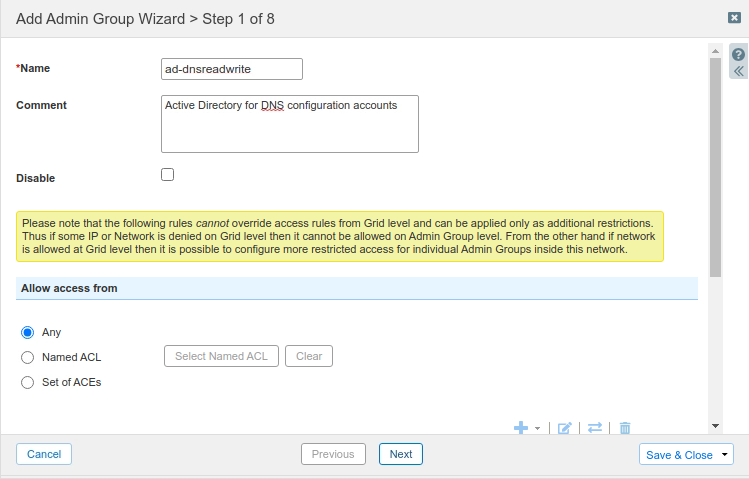
Click Next
At Steps 2,3 and 4, click Next.
At Step 5, click the Add button to display the Role Selector dialog window.
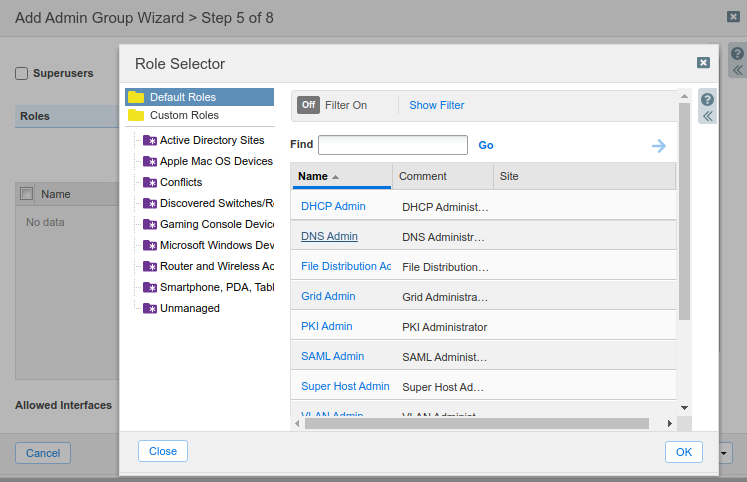
Click the link for DNS Admin.
This action places the DNS Admin entry in the Roles section
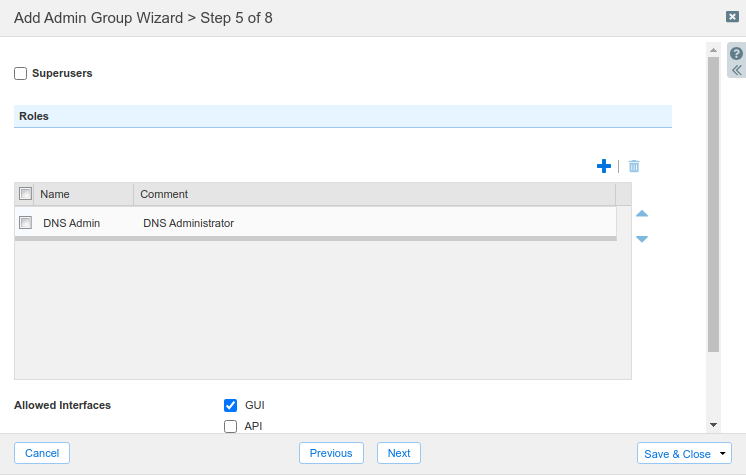
Leave the remaining options unchanged
Click Save & Close
The new entry appears in the list of Groups
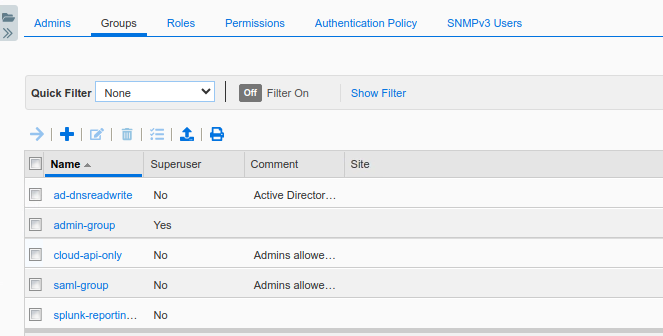
Repeat steps 2 to 12 , this time, create a second group called ad-dhcpreadwrite, and assign the role DHCP Admin.
The new entry appears in the list of Groups.
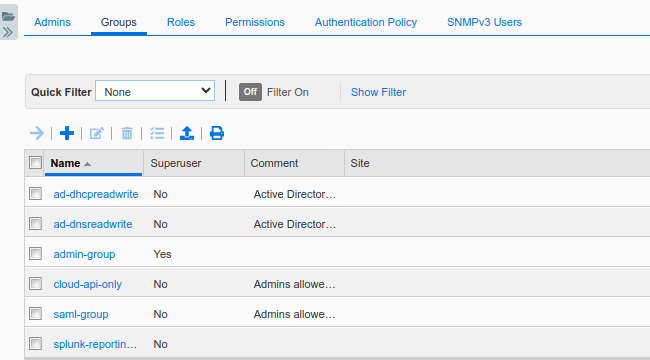
Task 4 Solution: Configuring authentication group ordering
Complete the remote authentication configuration by creating an ordered list of the group names.
Navigate to Administration→Administrators→Authentication Policy.
Scroll down to the section named Map the remote admin group to the local group in this order. Click Add.

Click the link for ad-dnsreadwrite
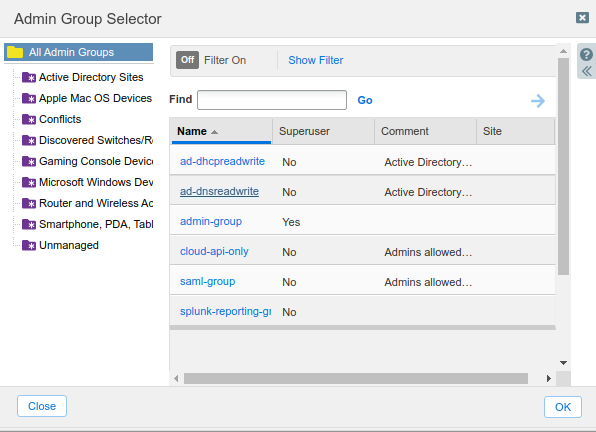
Click Add again to display the Admin Group Selector dialog.
Click the link for ad-dhcpreadwrite.
Both group names appear. Readjust the ordering if necessary

This ordering is mandatory, even if there is only one group. When there are multiple groups, this list informs NIOS how to authenticate users who belong to multiple groups.
Task 5 Solution: Testing remote authentication by logging in
Log in to the GM using credentials provided in Table 2551-3. These are usernames configured in AD. If the remote authentications are configured correctly, you should be able to login, even when these usernames do not exist in the NIOS local user database. Verify the in logs that these logins were authenticated with AD.
Do not log out of your current administrative GM session. Keep this web browser window open.
Using a second, new, web browser on the jump-desktop, navigate to the GM web interface.
Log in with credential provided in Table 2551-3. For example, username dnsreadwrite and password infoblox.
Switch back to the first web browser, which is still logged in as admin.
Navigate to Administration → Logs → Audit Log.
Scroll down and search for recent login events. You can also search for the username you tested with in step 3.
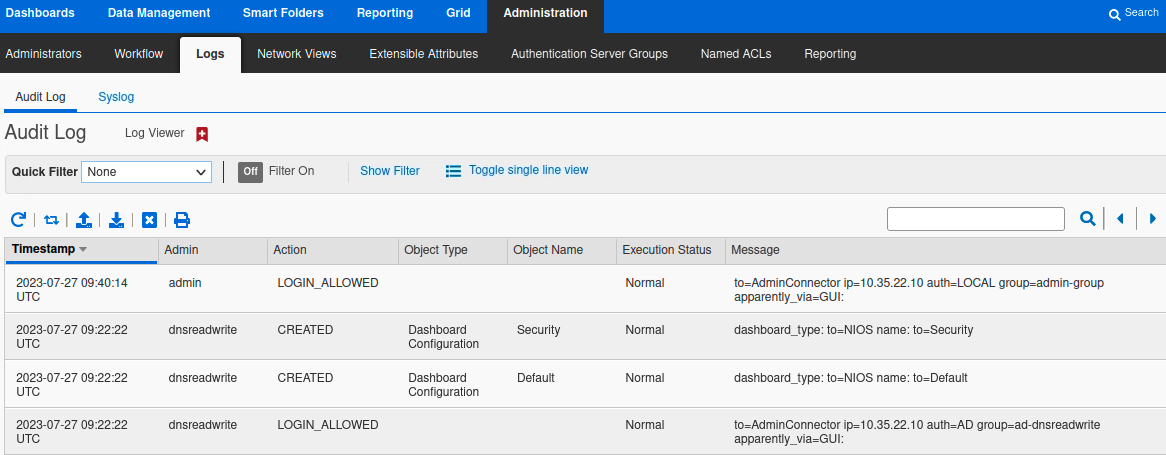
The sample screenshot below shows a successful login by the user dnsreadwrite (lowest entry). The log message shows the user authenticated with AD (auth=AD), and was applied permissions from the group ad-dnsreadwrite (group=ad-dnsreadwrite). You can compare this to a local login in the first message, where the user admin authenticated with the local user database.
