Scenario
An Infoblox Education Universal DDI lab environment has expired, but the Infoblox Portal tenant to which its servers were joined is still active. To continue learning with a new Universal DDI lab, you need to start servers in the new lab environment and join them to your existing Infoblox Portal tenant to replace the old servers.
You're tasked with replacing two offline NIOS-X Servers from the previous lab. You have remote access to the replacement virtual machines, which are pre-installed with Docker. This allows you to install the NIOS-X Server image and connect it to the Infoblox Portal.
Estimate Completion Time
-
45 to 55 Minutes
Prerequisites
-
Administrative access to the Infoblox Portal
-
Prior Completion of Lab 2801
Tasks
-
Creating a user API key.
-
Deploying Docker Instance on oph1 and oph2.
-
Validating that the new NIOS-X Servers are connected to the Infoblox Portal.
-
Swapping offline NIOS-X instances with new servers on Infoblox Portal.
Task 1: Creating a new user API key
-
Generate a new user API key from the Infoblox Portal, then save it as a text file for future use using the text editor Geany.
Task 2: Deploying Docker Instance on oph1 and oph2
-
On the Jump-Desktop, open the terminal application on your application taskbar.
-
Deploy the servers using the command
/mnt/shared/deploy-oph1-2.pyand provide the API key when prompted.
-
Task 3: Validating that the new NIOS-X Servers are connected to the Infoblox Portal
-
Verify both new Instances are visible on Infoblox Portal, and wait for them to be online in the UI.
It may take up to 20 mins for the two instances to be online.
Task 4: Swapping offline NIOS-X instances with new servers on Infoblox Portal
-
On the Jump-Desktop, open the terminal application on your application taskbar.
-
Swap the offline servers using the command
/mnt/shared/replace-oph.pyand provide the API Key obtained in Task 1 when prompted
-
It may take up to 20 mins for the two instances to be online post the command execution.
Solutions
Task 1 Solution: Creating a user API key
-
On the Jump-Desktop, click on the start menu and run the application Geany. We will use this application to save the API key for use in the next task.
-
Switch to your Infoblox Portal browser window.
-
From the Infoblox Portal, Click your Admin user name at the top right-hand corner of the portal and select Profile -> User API Keys tab.

-
On the User API Keys tab, click Create.
-
In the Create User API Keys dialog, complete the following:
-
Name: Enter the name of the user API key. Use a name that identifies the purpose of the key, so you can easily locate it in the future.
-
Expires at: Click the calendar icon to select a date and time when the user API key should expire.
-
Click Save & Close to save the configuration.
-
-
Click Copy in the confirmation dialog to copy the user API key and paste it into Geany.
-
Save this document to the Desktop as API-key.txt. Tasks 2 and 4 will require this API key.
-
Ensure you save the API key text, as they will not be displayed again. Failure to do so means we'll have to revoke them and generate new ones.
Task 2 Solution: Deploying Docker Instance on oph1 and oph2
-
On the Jump-Desktop, open the terminal application on your application taskbar.
-
Deploy the servers using the command
/mnt/shared/deploy-oph1-2.pyand enter the API key when prompted. Finally, answeryafter verifying the API key is correct.

-
Wait for the command execution to complete.
Task 3 Solution: Validating that the new NIOS-X Servers are connected to the Infoblox Portal
It may take up to 20 minutes for the two new NIOS-X Servers to be online.
-
Switch to your Infoblox Portal browser window, and navigate to Network → Services & Servers → Servers.
-
Your new NIOS-X Servers should appear in the list of servers. If they are not visible, wait 10 seconds and refresh the browser.
-
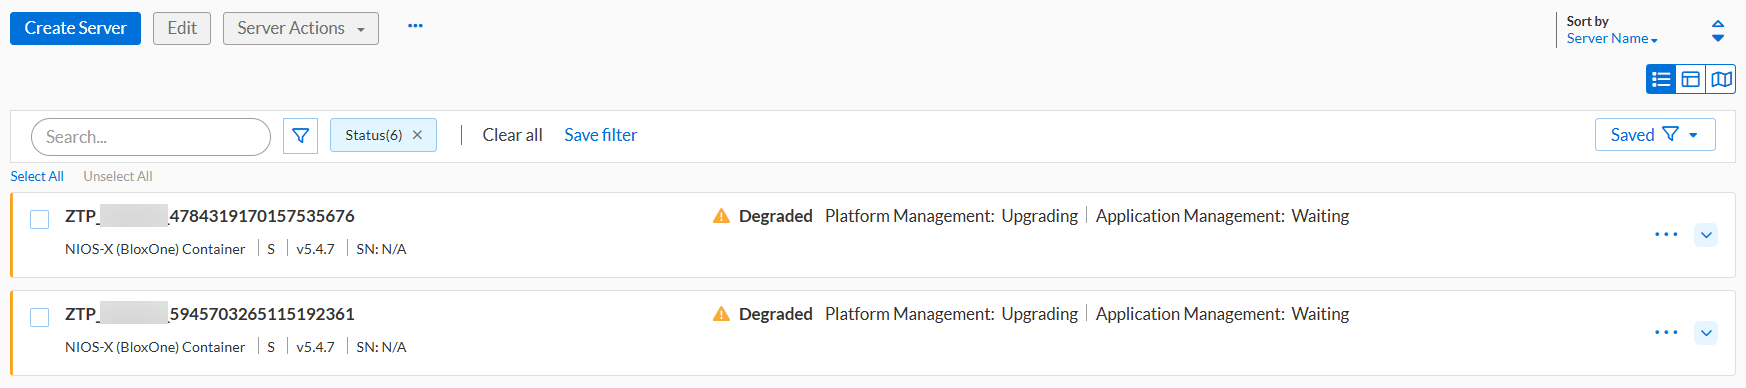
Your new NIOS-X Servers' status may at first indicate Offline or Degraded. This is normal as it comes up. You should also see the Platform Management in an Upgrading state. All NIOS-X Servers are automatically upgraded to the latest version to work with the Infoblox Portal. Refreshing the page periodically may show a change.
-
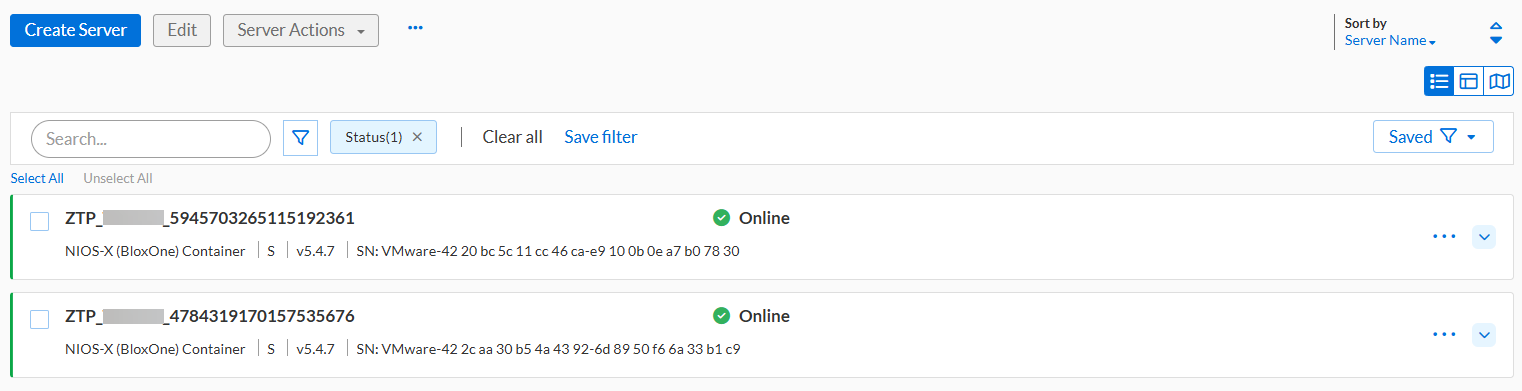
The status of your NIOS-X servers will progress from Pending to Review Details, and finally to Online. Once both servers show an Online status, they are ready for configuration. You may need to refresh the page to see the updated status.
Task 4 Solution: Swapping offline NIOS-X instances with new servers on Infoblox Portal
Ensure the newly joined servers are in online status in the Infoblox Portal UI prior to proceeding with this task.
-
On the Jump-Desktop, open the terminal application on your application taskbar, if it is not already open.
-
Replace the offline servers with the corresponding online servers using the command
/mnt/shared/replace-oph.pyand enter the API Key obtained from Task 1 when prompted. Finally, answeryafter verifying the API Key is correct.

-
Please wait for the command to complete execution. This command swaps offline servers with their corresponding online counterparts, attaching the services to these online servers. It then proceeds to remove the offline servers from the Infoblox Portal.
-
Once the command execution is completed, the new servers should appear in the Infoblox Portal UI with the names oph1.techblue.net and oph2.techblue.net. Please allow up to 30 minutes for the new servers to transition to 'Online' status.