Importing Data into NIOS Using CSV Files (2562)
Scenario
You are tasked with adding new DNS and network configurations to the NIOS Grid. You will be using CSV files to streamline the process. You need to import these configurations, address any errors that occur during the import, and confirm the successful addition of the data to the Grid.
Estimate Completion Time
15 to 20 minutes
Credentials
Description | Username | Password | URL or IP |
|---|---|---|---|
Grid Manager UI | admin | infoblox |
Requirements
Administrative access to the Grid
Learning Content
Lab Initiation
Access jump-desktop
Once the lab is deployed, you can access the virtual machines required to complete this lab activity. To initiate the lab, click on the jump-desktop tile and login to the Linux UI:
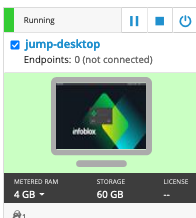
Username: training
Password: infoblox
Initiate lab
To initiate the lab, double-click the Launch Lab icon on the Desktop.

Launch Lab
Choose the lab number from the list and click OK.

After clicking OK, you will see a pop-up message with a brief description of the lab task. If the description looks correct, click Yes to continue lab initiation.
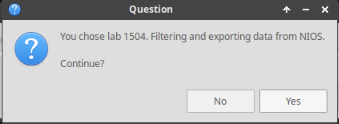
Lab initiation will take a couple of minutes to finish.
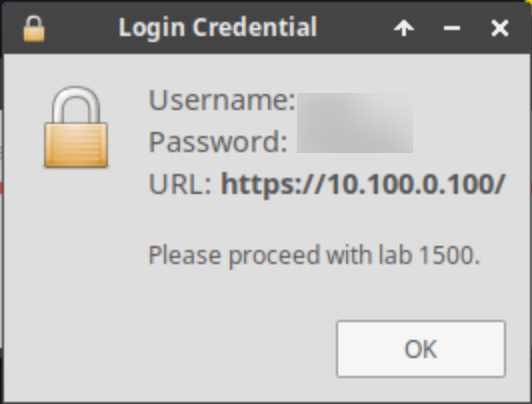
Once complete, you will see another pop-up message with the login credentials and the URL for the Grid Manager’s User Interface. Note that the credentials may differ from those from prior labs.
Tasks
Task 1: Import a DNS Zone Using the CSV Import Function
Navigate to the Grid Manager web interface and use the CSV Import function to import the AuthZone-Engineering.csv file. Ensure the import is successful.
Task 2: Import a CSV File Containing Errors
Use the CSV import function to import the AuthZone-Regions.csv file and download the error report to troubleshoot the import issues.
Task 3: Fix the CSV File Errors and Re-import the Data
Correct the errors in the CSV error report downloaded in Task 2, and re-import the data into the NIOS Grid.
Task 4: Import a CSV File Containing Network Data
Use the CSV import function to import the Network-techblue.net.csv file and verify that the network information has been imported correctly.
Task 5: Use a CSV File to Import Missing IPAM Information
Use the CSV import function to import the IPAM-techblue.net.csv file and verify that the IPAM data has been updated for the networks.
Solutions
Task 1 Solution: Import a DNS Zone Using the CSV Import Function
To import DNS zones into NIOS using CSV, follow these steps:
In the GM web interface, navigate to Data Management → DNS → Zones.
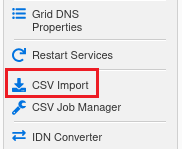
From the toolbar on the right, click CSV Import.
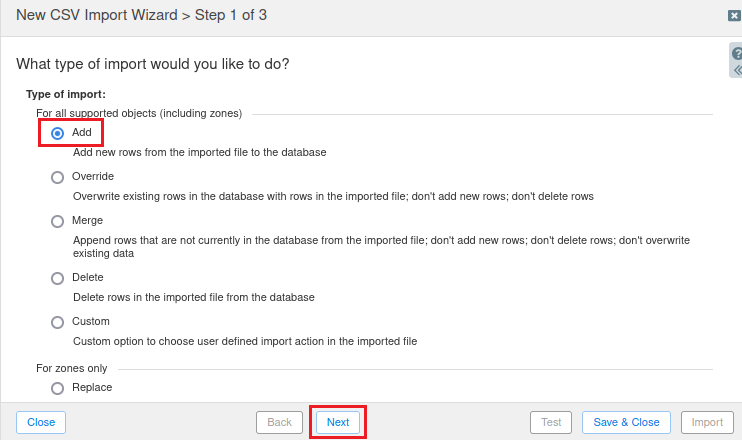
At Step 1 of 3, leave the radio button set to Add.
Click Next.
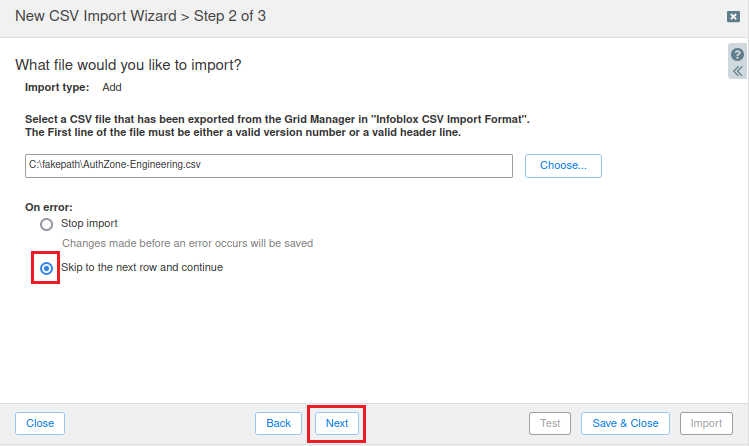
At Step 2 of 3, click Choose.

Open the Desktop and select the
AuthZone-Engineering.csvfile.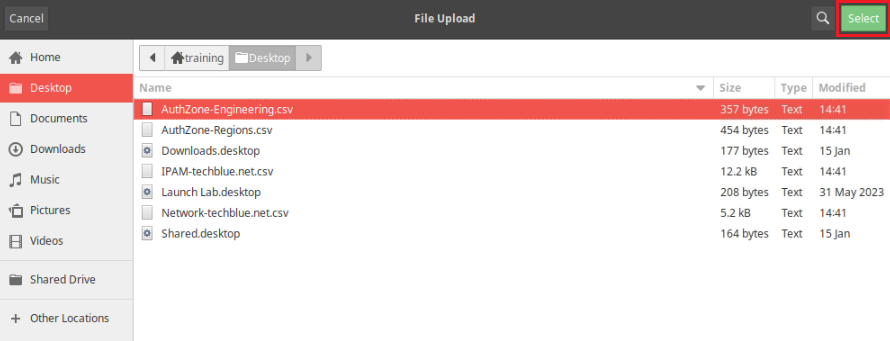
Select the radio button Skip to the next row and continue.
Click Next.
At Step 3 of 3, leave the settings unchanged.
Click Import.
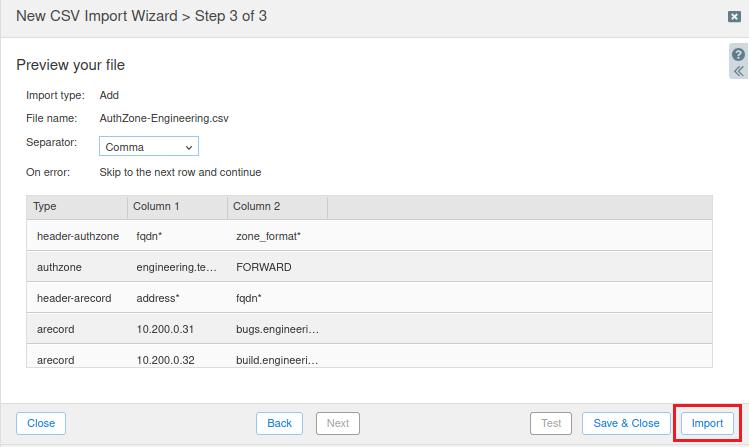
At the Start CSV Import window, click Yes to proceed.

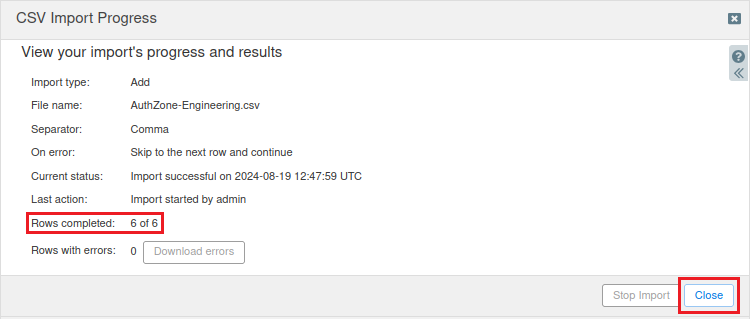
At the CSV Import Progress window, wait until the Rows completed section displays 6 of 6, indicating that the import process is complete.
Click Close.
Restart Services by clicking the Restart button in the notification banner at the top of Grid Manager UI

At the Restart Grid Services window, click Restart.
Navigate to Data Management → DNS → Zones → techblue.net → Subzones to verify that the new DNS zone has been imported successfully.

Task 2 Solution: Import CSV File with Errors and Fix the Errors
To import the AuthZone-Regions.csv file, follow these steps:
In the GM web interface, navigate to Data Management → DNS → Zones.
From the toolbar on the right, click CSV Import.
At Step 1 of 3, leave the radio button set to Add.
Click Next.
At Step 2 of 3, click Choose.
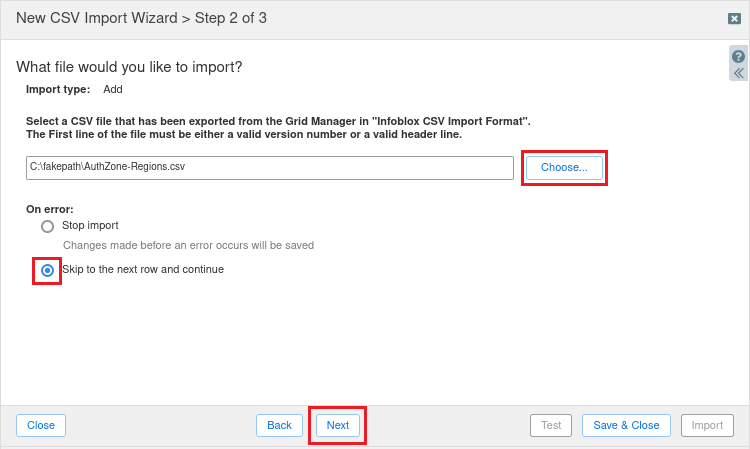
Select the
AuthZone-Regions.csvfile from the Desktop.Select the radio button Skip to the next row and continue.
Click Next.
At Step 3 of 3, leave the settings unchanged.
Click Import.
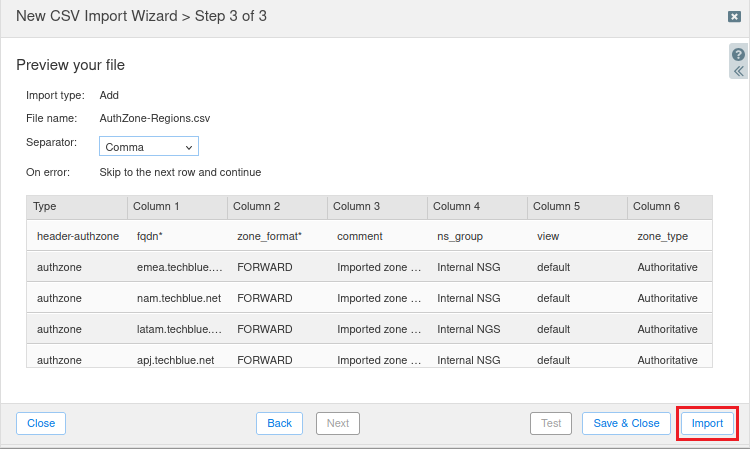
At the Start CSV Import window, click Yes to proceed.
At the CSV Import Progress window, wait until the Current Status section no longer shows that it is pending.
Note that the Rows with errors section indicates that some rows were not imported.
Click the Download errors button.
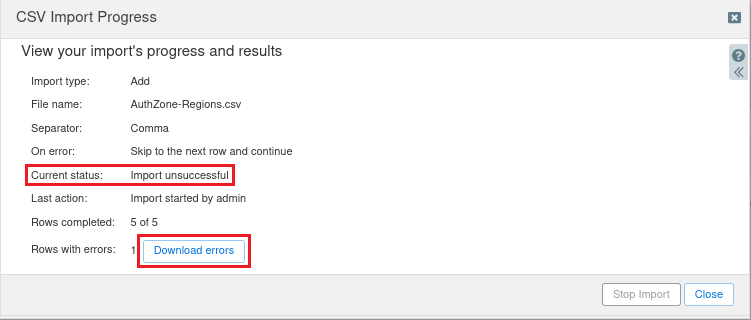
Save the error file to the Downloads folder and make a note of the file name (e.g.,
csv-error.2.csv). This file will be used in Task 3.
Task 3 Solution: Fix the CSV File Errors and Re-import the Data
To fix the errors in the CSV file downloaded in Task 2, follow these steps:
Open the Downloads folder icon from the Linux Desktop.
Double-click the error file you downloaded (e.g.,
csv-error.2.csv) to open it in LibreOffice.At the Text Import window, ensure the Character set is configured to UTF-8, leave the remaining settings unchanged, and click OK.
When the spreadsheet opens in LibreOffice , note that there is a new column at the beginning that includes the error.

Fix the errors by following these steps:
Scroll to the right until you see Column F.
Change the text from Internal NGS to Internal NSG.
Scroll back to Column A.
Click the column header labeled A to highlight the entire column.
Click Sheet from the menu.
Select Delete Columns.
Click File, then Save, and then click the Use Text CSV Format option.
Click File, then Exit LibreOffice to close the spreadsheet file and return to the browser window.
At the CSV Import Progress window, click Close.
Repeat the CSV Import process to import the newly edited file (e.g.,
csv-error.2.csv) from the Downloads folder.Once completed, Restart Services by clicking the Restart button in the notification banner at the top of Grid Manager UI
At the Restart Grid Services window, click Restart.
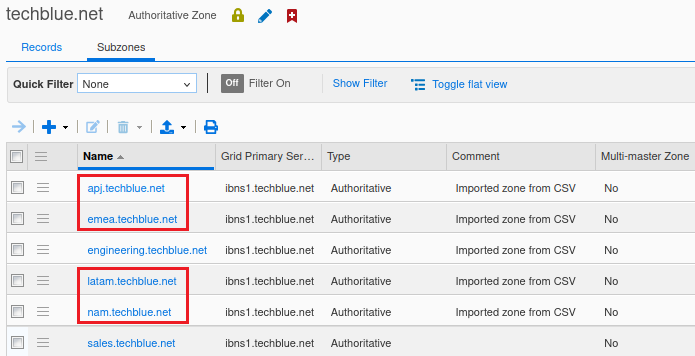
Navigate to Data Management → DNS → Zones → techblue.net → Subzones.
Check the Zone list and verify that the following zones were imported successfully:
apj.techblue.net
emea.techblue.net
nam.techblue.net
latam.techblue.net (imported after the error was fixed).
Task 4 Solution: Import a CSV File Containing Network Data
To import the Network-techblue.net.csv file, follow these steps:
In the GM web interface, navigate to Data Management → IPAM.
From the toolbar on the right, click CSV Import.
At Step 1 of 3, leave the radio button set to Add.
Click Next.
At Step 2 of 3, click Choose.
Select the
Network-techblue.net.csvfile from the Desktop.Select the radio button Skip to the next row and continue.
Click Next.
Click Import.
Click Yes at the Start CSV Import confirmation box.
Wait until 138 of 138 rows are imported with 0 errors.
Click Close to close the CSV Import Progress window.
Restart services if prompted.
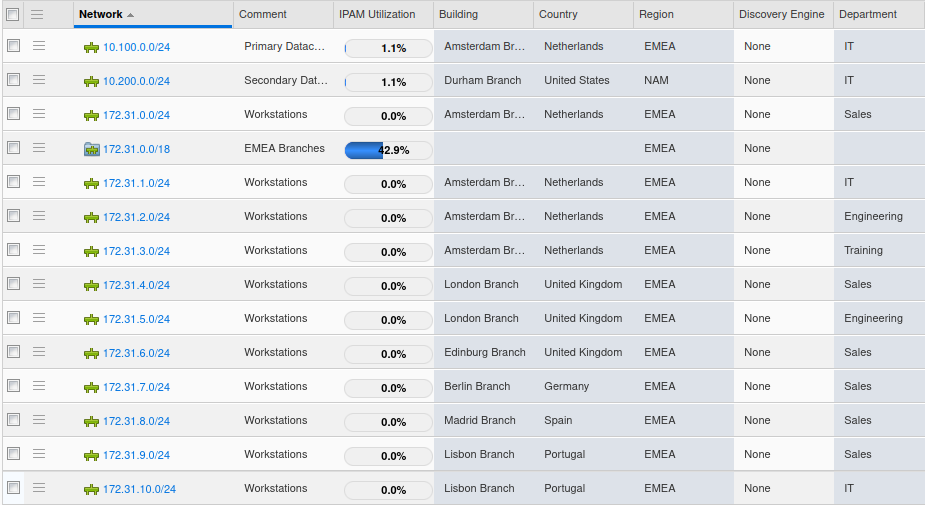
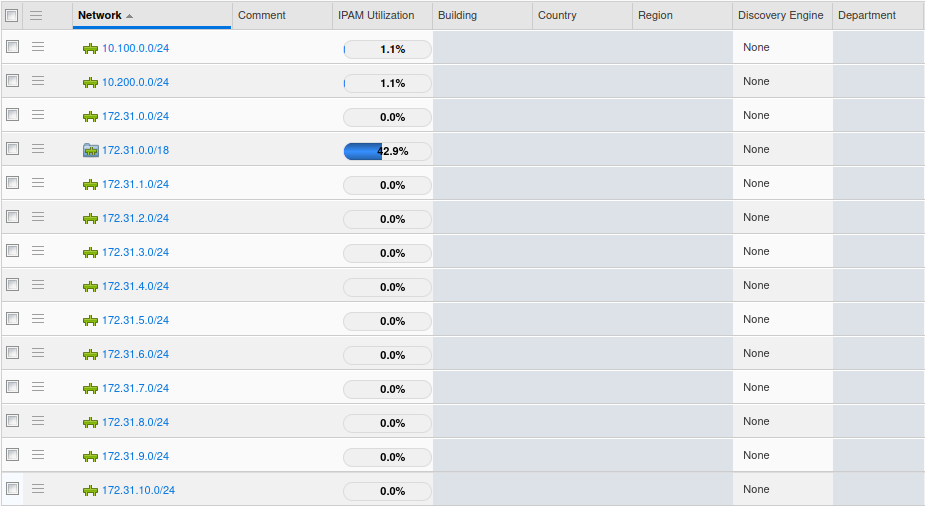
Verify that the new networks are visible in IPAM. If the networks are not visible, click Toggle flat view to switch from hierarchical to flat view and display the networks as shown in the image below.
Task 5 Solution: Use a CSV File to Import Missing IPAM Information
To import the IPAM-techblue.net.csv file, follow these steps:
In the GM web interface, navigate to Data Management → IPAM.
From the toolbar on the right, click CSV Import.
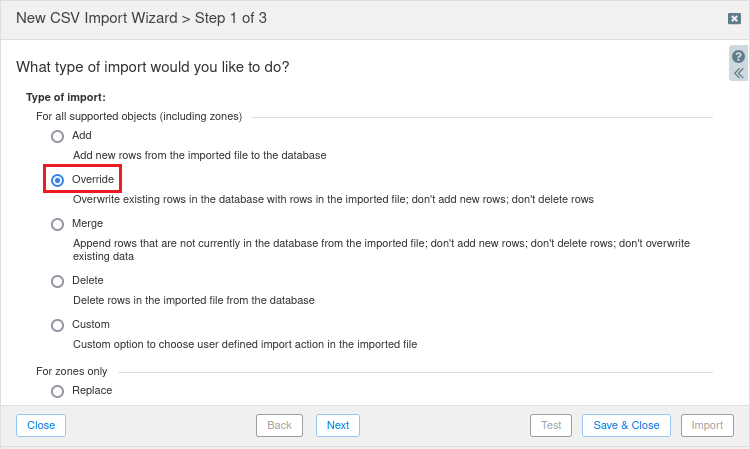
At Step 1 of 3, change the radio button to Override.
Click Next.
At Step 2 of 3, click Choose.
Select the
IPAM-techblue.net.csvfile from the Desktop.Select the radio button Skip to the next row and continue.
Click Next.
Click Import.
Click Yes at the Start CSV Import confirmation box.
Wait until the 145 of 145 rows are imported with 0 errors.
Click Close to close the CSV Import Progress window.
Restart services if requested.
Review the networks and you can see they have now been updated with additional information.
