This lab requires a NIOS 9.0 Lab Environment
This lab guide has been developed using the new NIOS 9.0 Lab Environment. Please ensure that you deploy a NIOS 9.0 lab environment to complete these lab tasks. If you use a different lab environment, this is untested, and the lab likely will not work.
Scenario
Your organization is deploying DNS Traffic Control (DTC) to provide simple load balancing for the website www.dtc.techblue.net. In this lab, you will build a solution that distributes DNS responses across four backend web servers located in two data centers. Because this is the initial DTC deployment, you will use the default load balancing method (Round Robin) with standard settings. Finally, you will verify the configuration by issuing multiple DNS queries and observing how responses are distributed.
Estimate Completion Time
-
30 minutes
Credentials
|
Description |
Username |
Password |
URL or IP |
|---|---|---|---|
|
Grid Manager UI |
admin |
infoblox |
Requirements
-
Administrative access to the Grid
Lab Initiation
Access jump-desktop
Once the lab is deployed, you can access the virtual machines required for this activity. To begin, select VM List from the navigation bar at the top, locate jump-desktop, and click the green play icon to open its console. Log in to the Linux UI.

Username: training
Password: infoblox
Initiate lab
To initiate the lab, double-click the Launch Lab icon on the Desktop.

Choose the lab number from the list and click OK.

After clicking OK, you will see a pop-up message with a brief description of the lab task. If the description looks correct, click Yes to continue lab initiation.

Lab initiation will take a couple of minutes to finish.
Once complete, you will see another pop-up message with the login credentials and the URL for the Grid Manager’s User Interface. Note that the credentials may differ from those from prior labs.

Tasks
Task 1: Add an Authoritative Subzone
Create a new subzone, dtc.techblue.net, under the techblue.net zone. This subzone will support DTC-related records and configurations. Use Internal NSG as the Name Server Group for this subzone.
Task 2: Create DTC Server Objects
In this task, add four DTC server objects representing backend servers that will be used for load balancing. Each server object should be configured with a unique name and IP address, as shown in Table 2567-1:
Table 2567-1
|
Name |
IP Address |
Comment |
|---|---|---|
|
srvr1.dtc.techblue.net |
10.100.0.210 |
Server in Pool A |
|
srvr2.dtc.techblue.net |
10.100.0.220 |
Server in Pool A |
|
srvr3.dtc.techblue.net |
10.200.0.210 |
Server in Pool B |
|
srvr4.dtc.techblue.net |
10.200.0.220 |
Server in Pool B |
Task 3: Create DTC Pool Objects
Create two DTC pools, Pool A and Pool B, each containing two servers.
-
Pool A: Contains
srvr1.dtc.techblue.net(10.100.0.210) andsrvr2.dtc.techblue.net(10.100.0.220). This pool represents the primary data center and will balance traffic across these two servers. -
Pool B: Contains
srvr3.dtc.techblue.net(10.200.0.210) andsrvr4.dtc.techblue.net(10.200.0.220). This pool represents the secondary data center.
Each pool will be configured to use icmp as the health monitor and will follow a Round Robin load balancing method.
Task 4: Create an LBDN Object
In this task, set up a Load-Balanced Domain Name (LBDN) for dtc.techblue.net to distribute incoming traffic across the configured pools.
Task 5: Verify Load Balancing Status
After configuring the LBDN, verify in the Grid Manager that the status shows the objects are healthy.
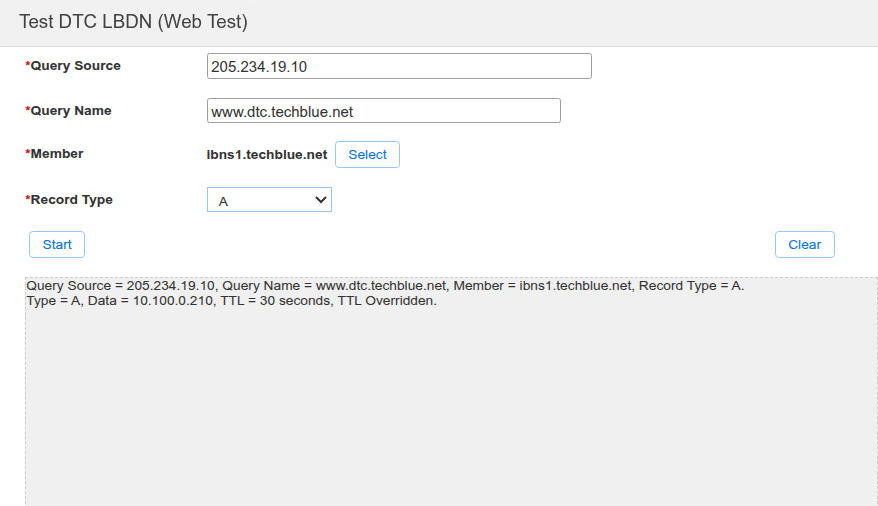
Task 6: Send Test DNS Queries
Send test queries for www.dtc.teechblue.net and observe the different responses. You may use the Test DTC LBDN tool to send queries.
Solutions
Task 1 Solution: Add an Authoritative Subzone
To add an authoritative subzone, follow these steps:
-
Navigate to Data Management → DNS → Zones.
-
Click Add dropdown menu and select Authoritative Zone.
-
Leave the radio button set to Add an authoritative forward-mapping zone
-
Click Next.
-
Enter the following details:
-
Name: dtc.techblue.net
-
Comment: Subzone for DTC records
-
-
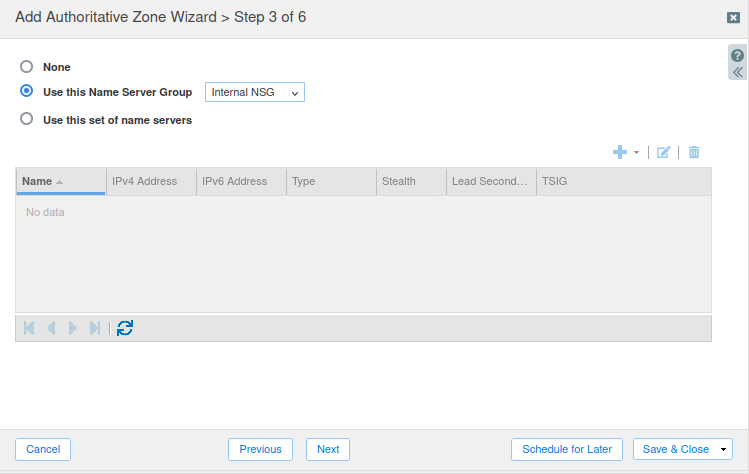
Leave the remaining settings unchanged and click Next.
-
Select the radio button for Use this Name Server Group.
-
In the Name Server Group dropdown, select Internal NSG.
-
Click Save & Close and Restart Services to apply changes.
Task 2 Solution: Create DTC Server Objects
To create DTC server objects, proceed as follows:
-
Navigate to Data Management → DNS → Traffic Control
-
Click Add dropdown menu and select Server.
-
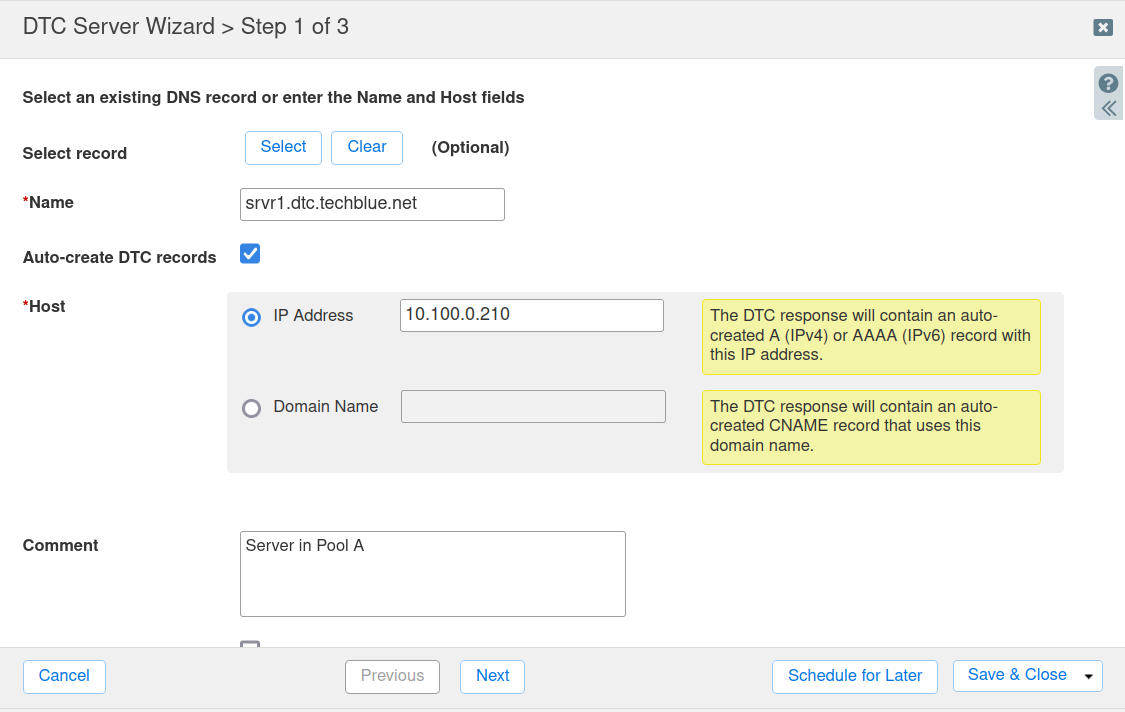
In the DTC Server Wizard, enter:
-
Name: srvr1.dtc.techblue.net
-
IP Address: 10.100.0.210
-
Comment: Server in Pool A
-
-
Leave the remaining settings unchanged.
-
Click Save & Close
-
Repeat the same steps for the remaining servers using the details provided in Table 2567-1.
Task 3 Solution: Create DTC Pool Objects
To create DTC pool objects:
-
Navigate to Data Management → DNS → Traffic Control
-
Click Add dropdown menu and select Pool.
-
In the DTC Pool Wizard, enter the following for Pool A:
-
Name: Pool A
-
Comment: Primary Data Center
-
-
Click Next
-
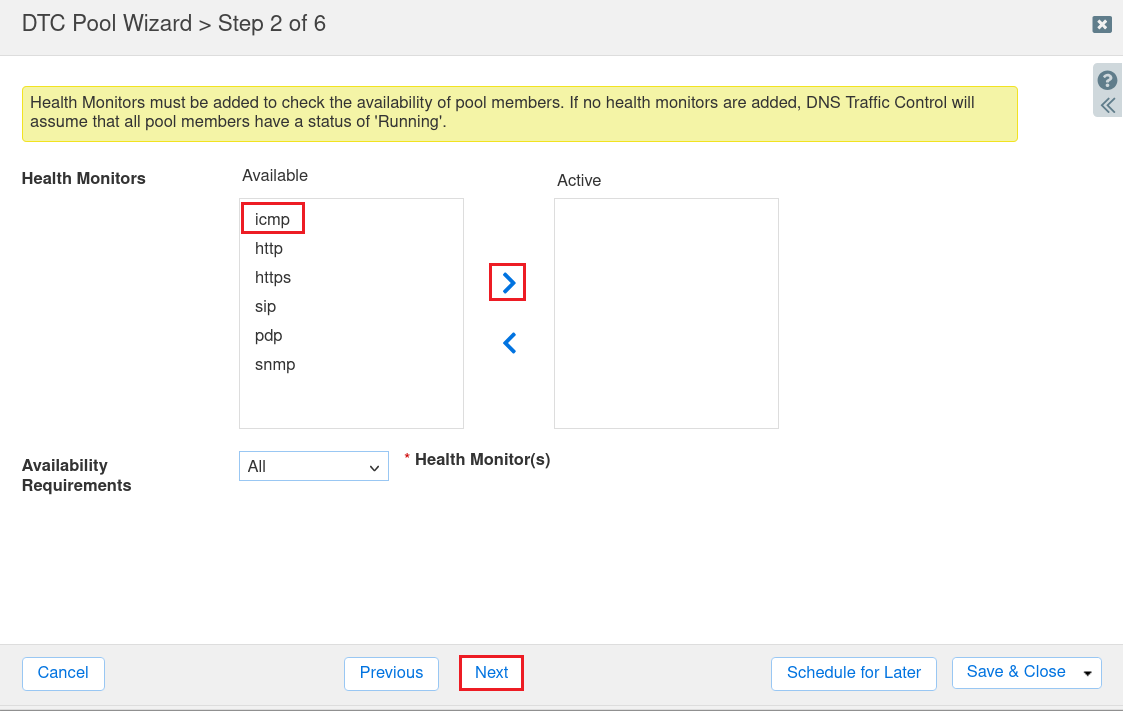
In Step 2, move icmp in Health Monitor from Available to Active. Set Availability Requirement to All and click Next.
-
In Step 3, leave the Load Balancing Method at the default selection of Round Robin and click Next.
-
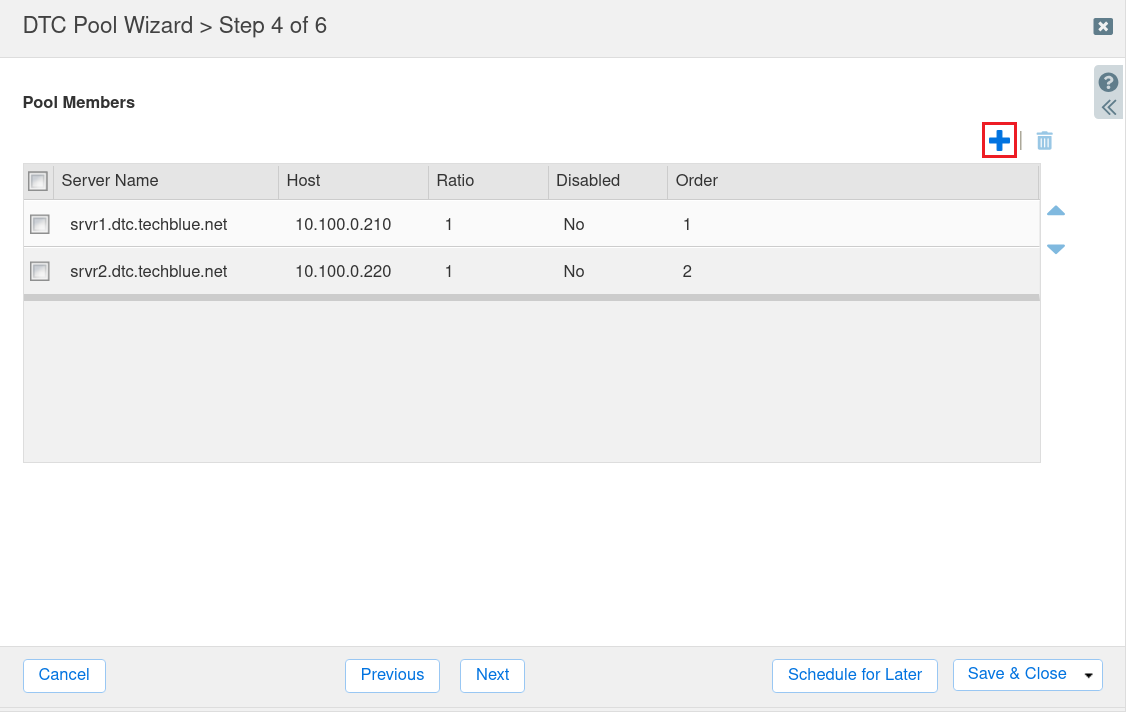
In Step 4, click Add (+) to select srvr1.dtc.techblue.net and srvr2.dtc.techblue.net, leaving the ratio at the default of 1 for both servers. Click Save & Close.
-
Repeat the steps 1 to 7 to create Pool B with the srvr3.dtc.techblue.net and srvr4.dtc.techblue.net as Pool Members.
-
Name: Pool B
-
Comment: Secondary Data Center
-
Task 4 Solution: Create an LBDN Object
Follow these steps to create an LBDN for load balancing across Pool A and Pool B:
-
Navigate to Data Management → DNS → Traffic Control.
-
Click the Add dropdown menu and select LBDN.
-
In Step 1 of the DTC LBDN wizard, enter the following details:
-
Display Name: Web Test
-
Patterns: Click the + button to add a new pattern. Then, enter www.dtc.techblue.net
-
Load Balancing Method: Round Robin
-
Persistence: 0
-
Comment: Web server load balancing for www.dtc.techblue.net
-
-
Click Next.
-
In Step 2, verify that the checkboxes are selected for the following record types:
-
A: selected
-
CNAME: selected
-
AAAA: selected
-
-
Click Add (+) to add the Associated Zone:
-
This opens the Zone Selector
-
Locate and click dtc.techblue.net
-
-
Click Next.
-
In Step 3, click Add (+) and add Pool A and Pool B to the LBDN .
-
Click Save & Close to create the LBDN.
-
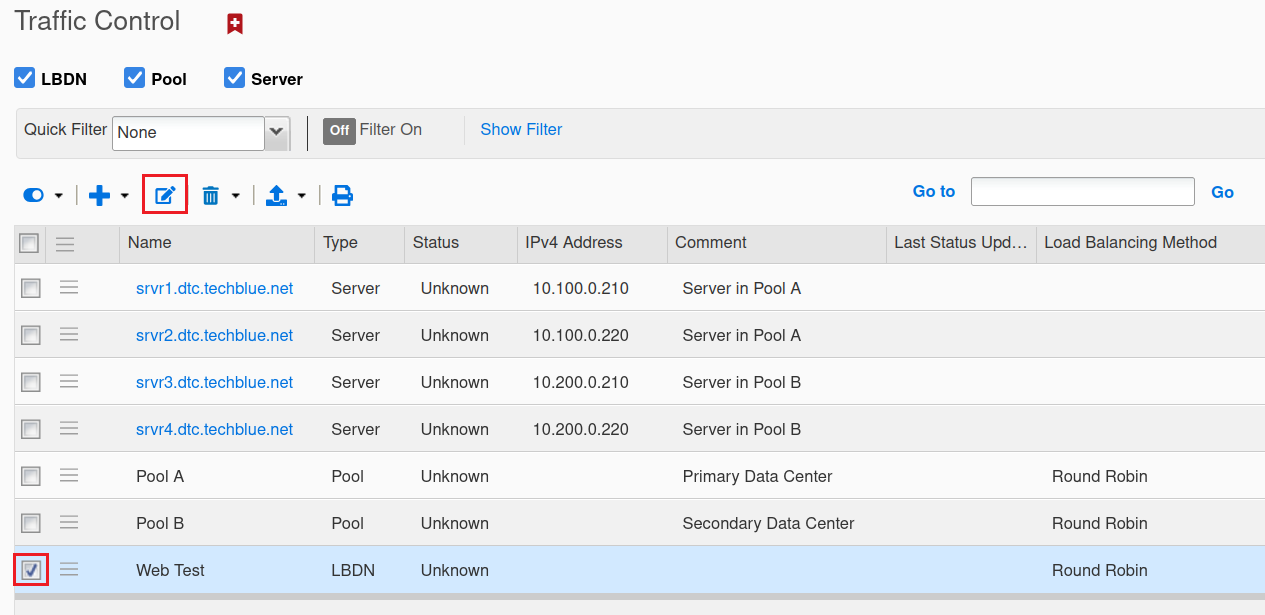
Select the newly created LBDN (Web Test), then click Edit.
-
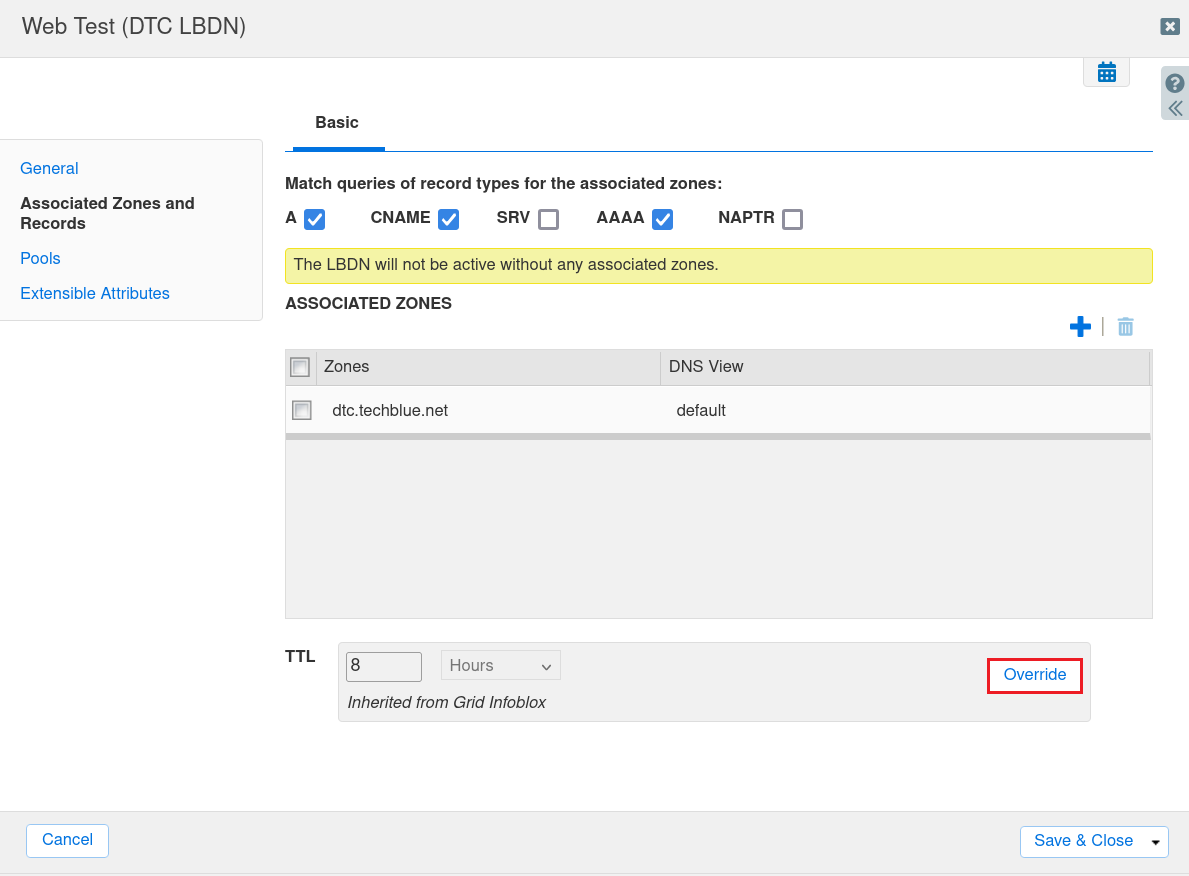
Select the Associated Zones and Records section.
-
Click Override for the TTL value.
-
Set the TTL to 30 seconds.
-
Click Save & Close.
-
When prompted, restart services to apply the changes.
Task 5 Solution: Verify Load Balancing
To verify that load balancing is functioning as expected across the configured DTC pools, follow these steps:
-
Navigate to Data Management → DNS → Traffic Control.
-
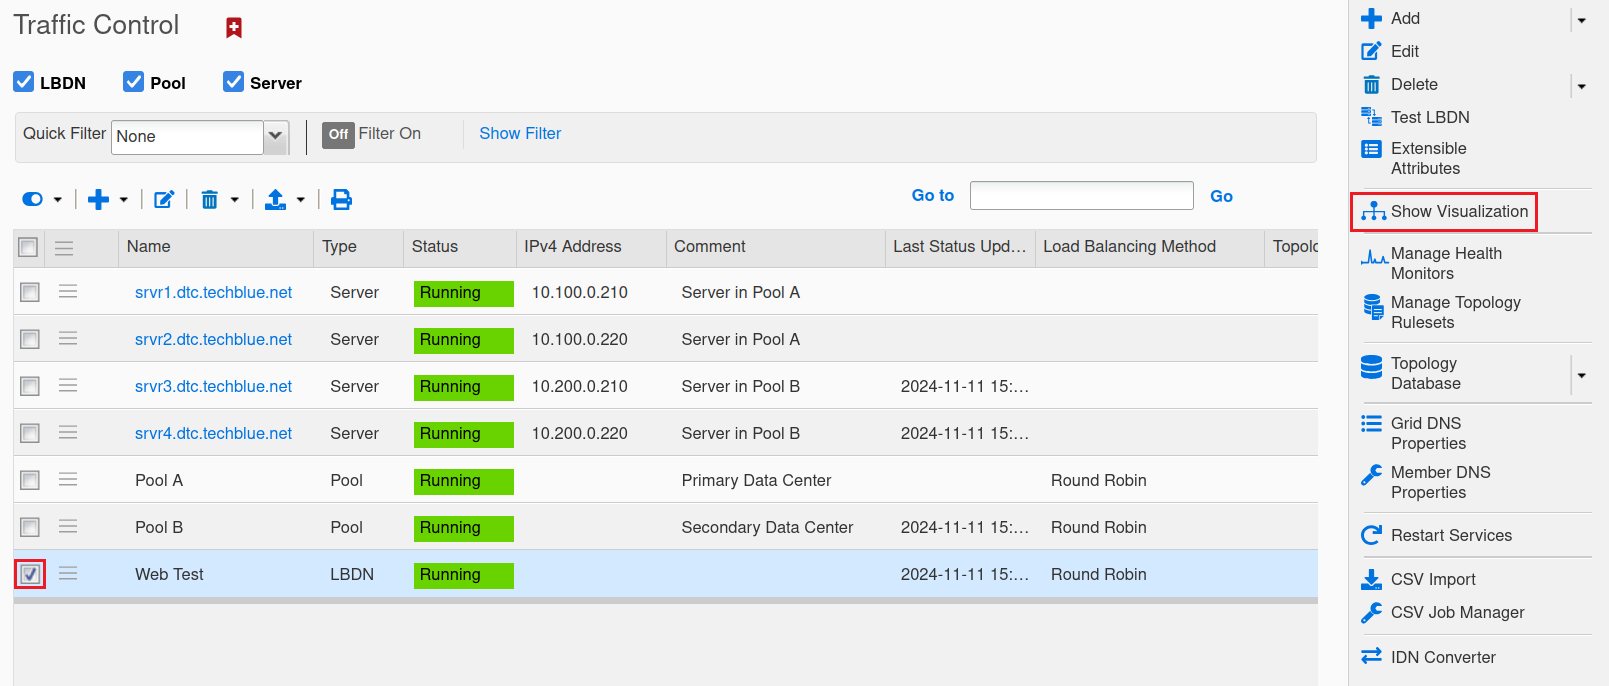
Select the LBDN Web Test, and from the Toolbar, select Show Visualization.
-
Enable Auto Refresh and verify both Pool A and Pool B have green status. You may hover over or click on objects for more information.
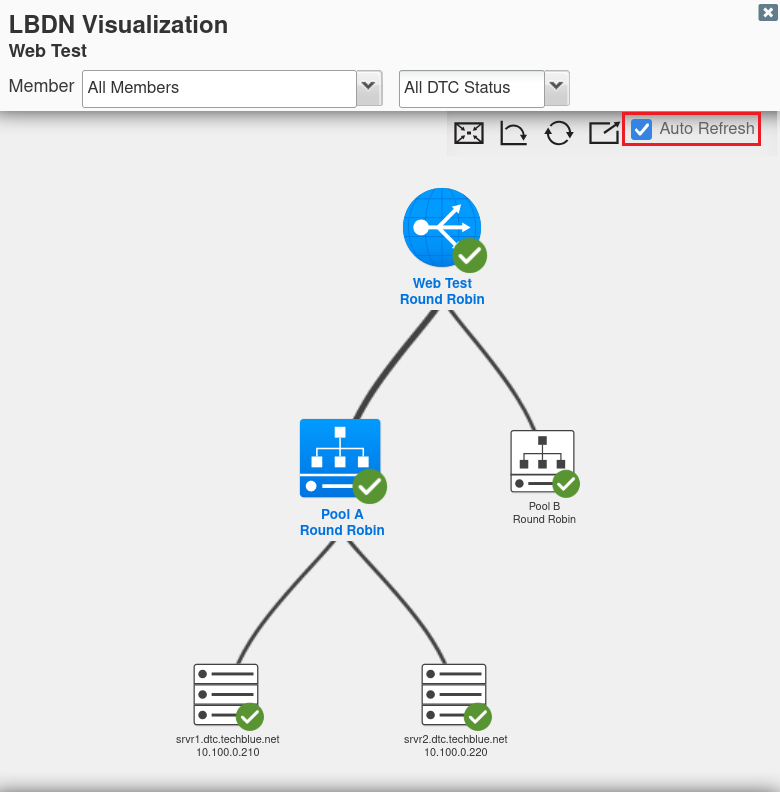
Note: After configuration, the pool status may take a few minutes to appear green.
Task 6 Solution: Send Test DNS Queries
-
Navigate to Data Management → DNS → Traffic Control.
-
Select the LBDN object Web Test.
-
With the object Web Test selected, click the button Test LBDN in the Toolbar. This launches the built-in tool.
-
Enter the following details:
-
Query Source: 205.234.19.10 (or any other IP to simulate a request)
-
Query Name: www.dtc.techblue.net
-
Member: ibns1.techblue.net
-
Record Type: A
-
-
Click Start to send a test query and observe the response. If load balancing is working correctly, you should see responses from different servers in Pool A and Pool B on each try. Run the same test enough times, and you will eventually see all four (4) addresses in the response (10.100.0.210, 10.100.0.220, 10.200.210, and 10.200.220). You may use the Clear button to restart a test.