Consolidated NIOS Grid Administration Lab (2580)
Scenario
Your team is implementing several new security and operational policies for the NIOS Grid. These updates include:
Session Timeout Update: Due to a recent security policy change, users are now allowed to stay logged in to devices for up to 15 minutes (900 seconds). The current NIOS Grid session timeout needs to be updated to match this new policy.
Login Banner Update: There is a new corporate security policy agreement that must be displayed to all users logging into the Grid. The login banner needs to be updated to ensure everyone sees this message.
Enabling Remote Console Access: Your team needs remote console access to all Grid members to access the command line interface (CLI) remotely. The necessary configuration changes must be made on the GM.
Configuring External Syslog Settings: To comply with the security team’s requirement, all log messages from the Grid must be sent to the central log server for auditing and archiving purposes. The necessary configuration changes need to be made.
Scheduling Backups: Following a recent incident, the frequency of the NIOS Grid backups has been increased. A new server has been acquired to store all hourly backup files. The Grid needs to be configured for hourly backups, and the backup files' accessibility on the remote server must be verified.
Adding External NTP Servers: To adhere to best practices, the team has decided to add three more external NTP servers to the Grid as time sources. The NTP configuration needs to be updated to include these external NTP servers.
Enabling NTP Services: The infrastructure team has decided that the Grid members ibns1 and ibns2 will also provide NTP services in addition to DNS and DHCP services. NTP services need to be enabled on these members.
Generating Support Bundles: While working with Infoblox support, you are instructed to generate a support bundle on one of the Grid members. Follow the instructions to generate the support bundle file.
Estimate Completion Time
60 to 90 minutes
Credentials
Description | Username | Password | URL or IP |
|---|---|---|---|
Grid Manager UI | admin | infoblox |
Requirements
Administrative access to the NIOS Grid
Learning Content
Lab Initiation
Access jump-desktop
Once the lab is deployed, you can access the virtual machines required to complete this lab activity. To initiate the lab, click on the jump-desktop tile and login to the Linux UI:
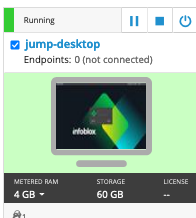
Username: training
Password: infoblox
Initiate lab
To initiate the lab, double-click the Launch Lab icon on the Desktop.

Launch Lab
Choose the lab number from the list and click OK.

After clicking OK, you will see a pop-up message with a brief description of the lab task. If the description looks correct, click Yes to continue lab initiation.
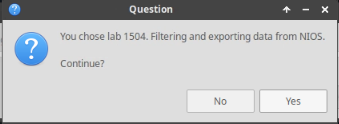
Lab initiation will take a couple of minutes to finish.
Once complete, you will see another pop-up message with the login credentials and the URL for the Grid Manager’s User Interface. Note that the credentials may differ from those from prior labs.
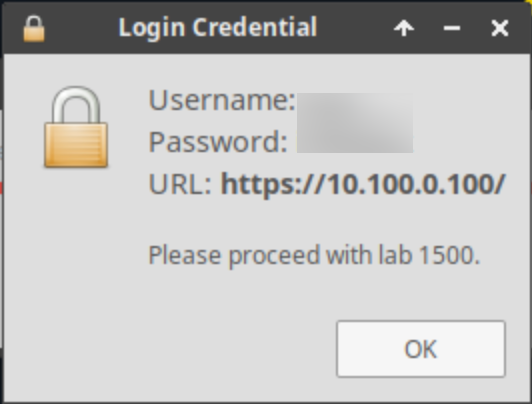
Tasks
Task 1: Changing the Grid session timeout
Login to the GM web interface and verify what the current session timeout value. Update it, if necessary, to match the new policy requirement of 15 minutes (900 seconds).
Task 2: Changing the login banner
Update the login banner with the new corporate security policy message:
"Unauthorized or improper use of this system is prohibited. By continuing to use this system, you agree to the terms and conditions of use."
Please update the login banner so this message is displayed to everyone who attempts to login to the GM.
Task 3: Enabling and Verifying Remote Console Access
Login to the GM interface and make the necessary changes to enable remote console access (SSH access) for all Grid members.
Launch the terminal application on the jump-desktop and use the ssh client to connect to the Grid members. Please use the information listed in Table 2502-1 to verify that you are able to remotely connect into each of the devices.
Table 2502-1
Device | IP Address |
|---|---|
nios1 | 10.100.0.100 |
nios2 | 10.100.0.101 |
nios3 | 10.100.0.102 |
nios4 | 10.200.0.105 |
nios5 | 10.200.0.100 |
nios-reporting | 10.100.0.205 |
Task 4: Configuring and Verifying External Syslog Settings
Login to the GM interface and make the necessary changes to send syslog and audit log messages to the external log server support-server) located at 10.35.22.20.
Login to the jump-desktop and use the Elasticsearch tool to verify syslog messages from the Grid are showing up.
The easiest way to generate some log messages is to log out of the GM, and log back in. These actions will trigger new Audit logs.
Task 5: Schedule and Verify Hourly Backups to Remote Servers
Login to the GM interface. Use the information provided in Table 2504-1 and schedule the Grid to perform an hourly backup.
Table 2504-1
Remote Server | Protocol | Path | Username | Password |
|---|---|---|---|---|
10.100.0.20 | SCP | /home/training/Desktop | training | infoblox |
To see the backup file appear sooner, schedule the hourly backup time to 5 minutes after the current time. For example, if the current time is UTC 16:10, set the backup to occur at 15 minutes after the hour.
On the Grid, observe logs to ensure the backup to remote server support-server is successful.
Locate the backup file on the remote server support-server.
Task 6: Adding and Verifying NTP Servers
The Grid is already configured to use one NTP server. Please add 3 more NTP servers to the Grid as external NTP servers to synchronize time with:
216.239.35.0 (Google's time server)
17.253.20.253 (Apple's time server)
129.6.15.28 (NIST's time server)
Use the GM user interface to verify that NTP has been synchronized.
Task 7: Enabling NTP services
Login to the GM user interface and enable the NTP services on members ibns1 and ibns2.
Task 8: Generating support bundles
Login to the GM user interface and download the support bundle for the member ibns2.techblue.net. You are asked to generate the support bundles with the following options:
Current Logs
Rotated Logs
Cached DNS Recursive Data
Cached Zone Data
Solutions
Task 1 Solution: Changing the Grid session timeout
Session timeout value is a Grid Property. To edit the existing timeout value:
Login to NIOS GM web interface
Navigate to Grid → Grid Manager.
Select Grid Properties from the Toolbar on the right side of the window.
Select the section for Security on the left side of the Grid Properties Editor window.

Change the Session Timeout (s) value to 900 (900 seconds = 15 minutes)
Click Save & Close
Review the warning text, and click the Yes button to continue
Task 2 Solution: Changing the login banner
Login banner is a basic Grid Property. To set one in NIOS:
Navigate to Grid → Grid Manager
Select Grid Properties from the Toolbar on the right side of the window
Switch to the Security tab
Scroll down to find the checkbox to Enable Login Banner
Check the box and add the message
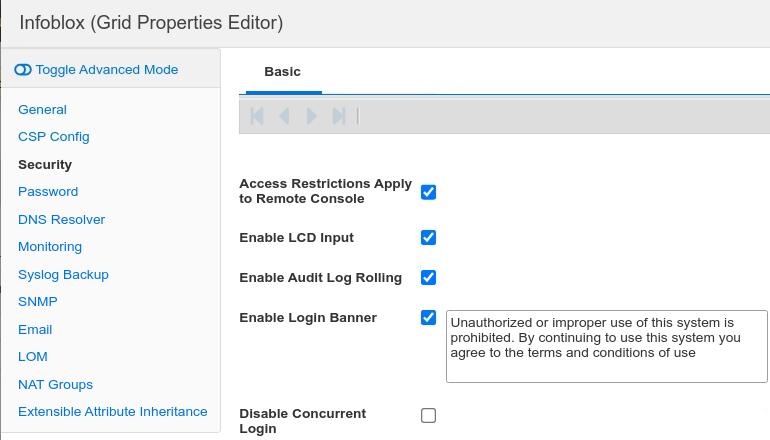
Task 3 Solution: Enabling and Verifying Remote Console Access
Enabling Remote Console Access:
Remote console access settings can be set at the grid level, which will then be inherited by all Grid Members. To change Grid level access settings, please perform the following steps.
Navigate to Grid → Grid Manager
Select Grid Properties from the Toolbar on the right side of the window
Click on the Toggle Advanced Mode link in the top left corner of the window
Switch to the Security tab, and while still in the Security tab, click the Advanced tab
Scroll down to find and check the box labeled Enable Remote Console Access
Click Save & Close to save changes

Verifying Remote Console Access:
You may need to wait a minute or two for the changes to be applied to all Grid members. Then you can launch the Terminal program on jump-desktop and use the command
sshto connect to each of the IP addresses listed in Table 2502-1. Below is an example of what you should see when you connect to the remote console: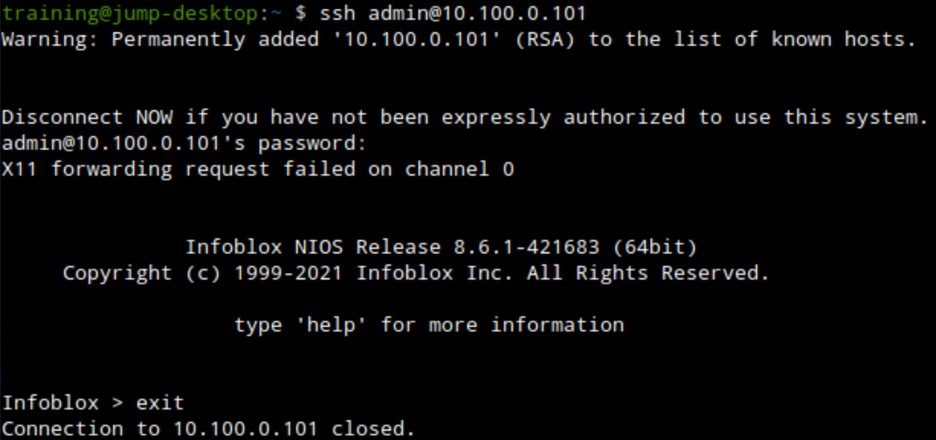
Task 4 Solution: Configuring and Verifying External Syslog Settings
Configuring External Syslog Settings: Configure the Grid to send syslog messages by UDP to your support-server: 10.35.22.20.
Login to NIOS GM web interface, navigate to Grid → Grid Manager.
From the Toolbar on the right side of the window, select Grid Properties.
The Grid Properties Editor dialog window appears. Select the Monitoring tab on the left.
Place a check mark in the box for Log to External Syslog Servers.
In the section EXTERNAL SYSLOG SERVERS, click the Add (+) button to add a server.
For Address, enter 10.35.22.20
For Transport, set to UDP
Leave all other settings at their default values
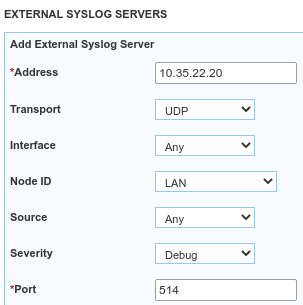
Click Add to add this External syslog server.
Scroll down further, place a check mark in the box for Copy Audit Log Message to Syslog
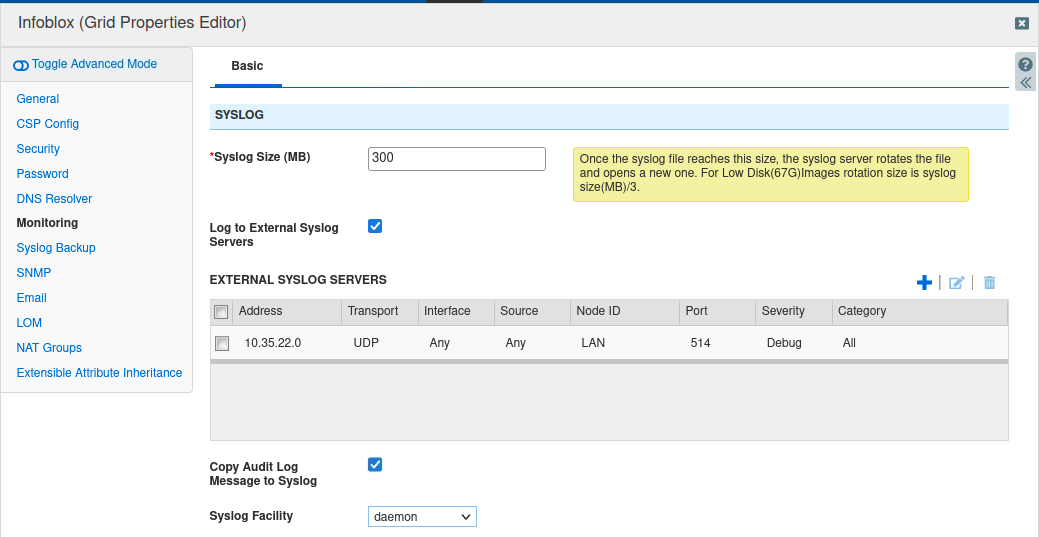
Click Save & Close
Verifying Logs on the External Syslog Server: Use Elasticsearch on the jump Desktop to verify that the Grid is sending Syslog and audit log messages
Open Elasticsearch by clicking on the Infoblox logo/start menu at the bottom left corner of your Linux Desktop
Choose Elasticsearch from the list
Elasticsearch opens in a web browser window
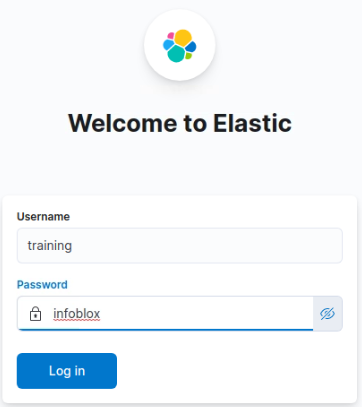
Login with username: training and password infoblox
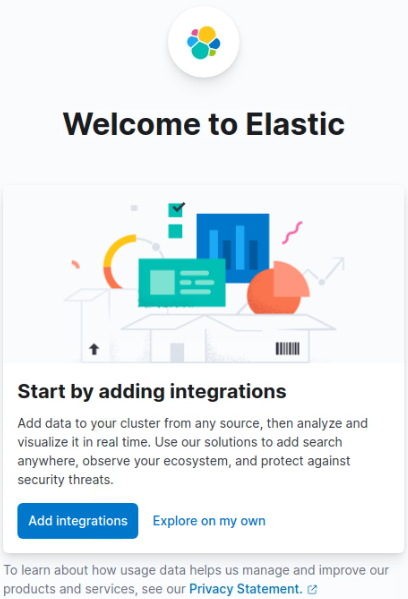
Skip adding integrations and click Explore on my own
Open the menu by clicking the three lines below elastic from the top left of the screen
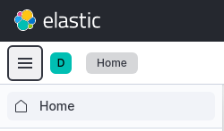
Select Discover under Analytics
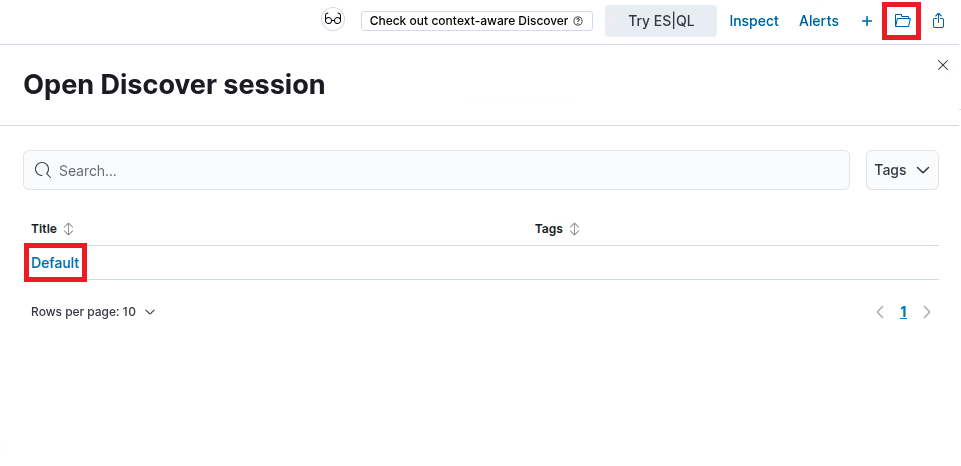
In Discover, click the folder icon in the top-right corner and select Default.
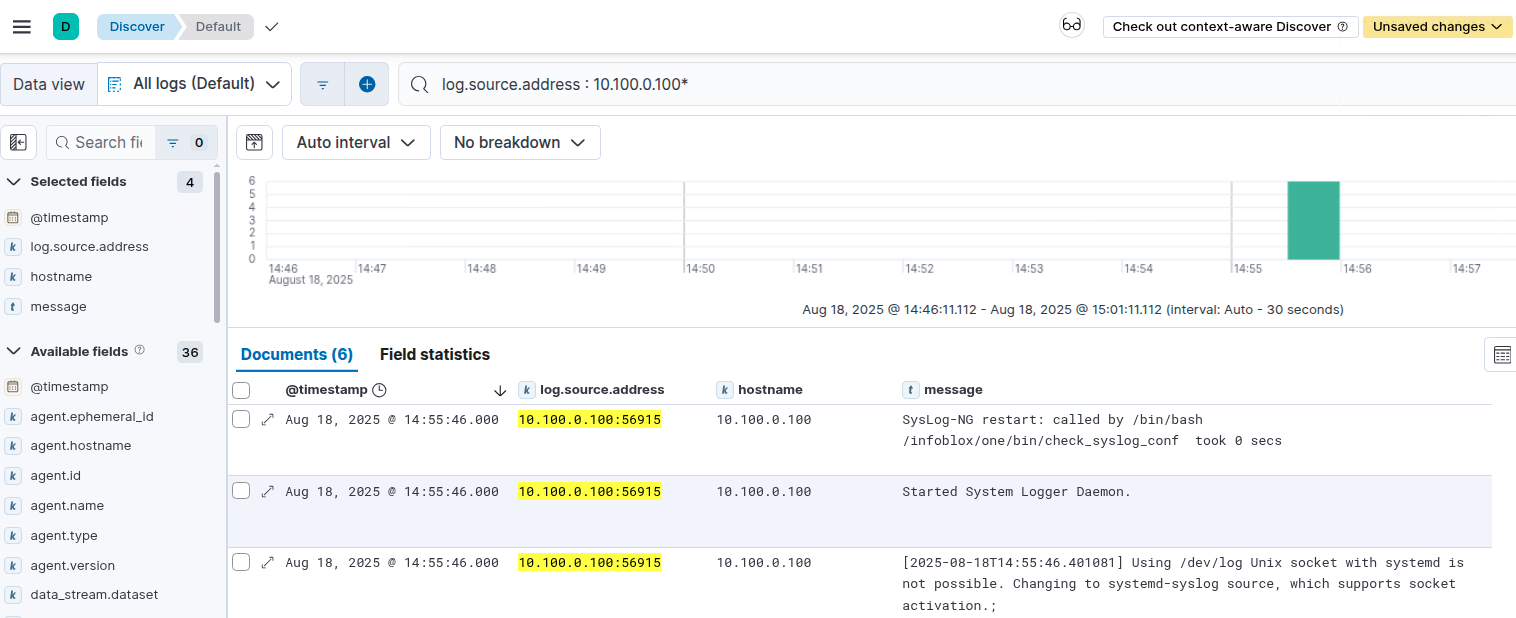
To find entries logged by the GM, type in
log.source.address:10.100.0.100*in the search boxEntries sent from the Infoblox GM appear under the Message heading
Your listing of events will differ from the example shown here
Close the browser tab to exit Elasticsearch
Task 5 Solution: Schedule and Verify Hourly Backups to Remote Servers
Scheduling Backups:
Navigate to Grid → Grid Manager → Members.
From the Toolbar, select Backup → Grid Backup → Schedule Backup.
Configure the backup according to the information provided in Table 2504-1.
Set the Recurrence to Hourly. Choose a time that is 4 to 5 minutes after the current time, you can observe the backup occurring sooner.
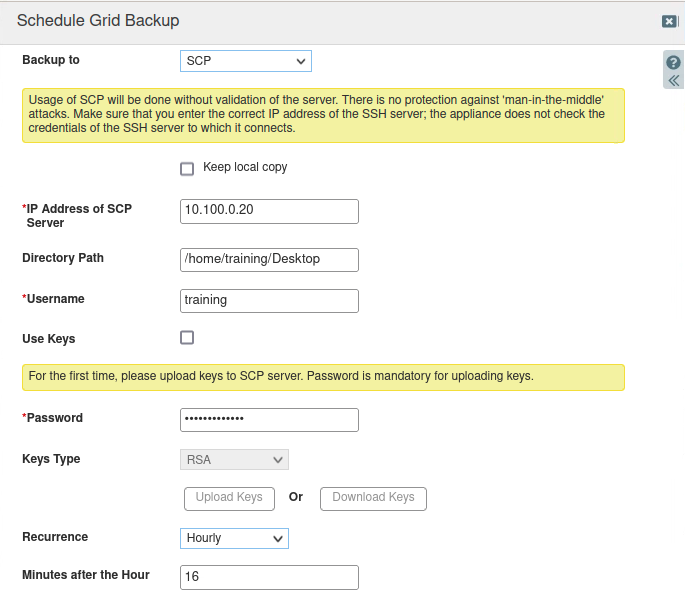
Click Save & Close and accept the warning about SCP connection validation.
Verifying Backup in Logs:
Navigate to Administration → Logs → Syslog.
In the Log Viewer selection, for Member, choose the GM (ibgm.techblue.net) from the drop-down list.
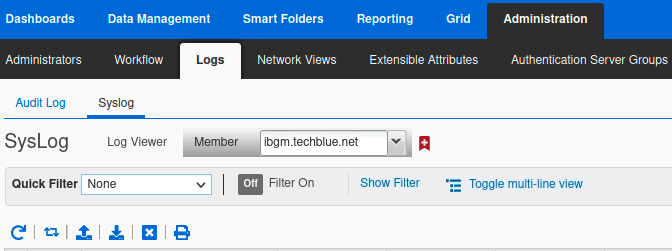
Whether the backup was successful or not, you will see a log entry. In the example screenshot below, we see the first entry showing the backup was successful along with the filename; in the third entry, we see that the backup failed, along with the reason why it failed.

You need to wait a few minutes for the scheduled backup to happen. While you wait, you may use the Auto-Refresh icon (second from the left, next to Refresh) to help you keep watch. When clicked, it will automatically refresh the logs every 2 seconds, displaying the latest entry on top.
Verifying on the Remote Server: After you have verified in logs that the backup was successful, locate the actual backup file on the remote server.
Switch to the VM support-server.
Login using the credentials provided in Table 2504-1.
You should be able to see the backup file(s) on the desktop after you login.
Task 6 Solution: Adding and Verifying NTP Servers
Adding NTP Servers:
The Grid is already configured to synchronize time with one NTP server, 10.35.22.20. However, using only a single source for NTP is not recommended. We are adding 3 more public NTP servers to the list:
216.239.35.0 (Google's time server)
17.253.20.253 (Apple's time server)
129.6.15.28 (NIST's time server)
To add a new NTP server as a time source, perform these steps:
Navigate to Grid → Grid Manager.
On the Toolbar on the right of the screen, scroll down and click NTP.
In the Infoblox (Grid NTP) window, place a check mark in the box for Synchronize the Grid with these External NTP Servers.
Click the Add (+) button.
In the NTP Server (FQDN or IP Address) field, enter the IP address of the NTP server, then click the Add button.
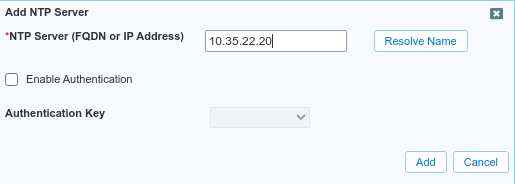
Repeat until all 3 NTP servers have been added. The final screen should look something like this:
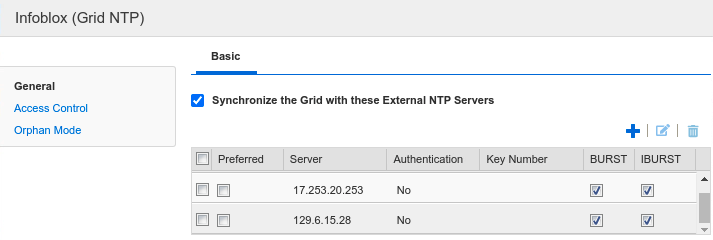
You may add NTP servers by its fully qualified domain name (FQDN). For this scenario, we are adding them by IP addresses, to ensure that time will stay synchronized even when DNS service is not available.
You may see a "red status" for the Grid Master while NTP synchronizes. This is expected, refresh periodically to watch it change to green
Verifying NTP synchronization status
The most sure way to verify that NTP has synchronized is to view the detailed statistics on the CLI. Login to NIOS-1, or the GM, and use the command
show ntpto view:
In this example, the GM's time is synchronized with stratum 1 server 17.253.20.253 (noted by the * symbol). The GM has made contact with other time servers (noted by the + symbol) and will use them for backup should the first NTP server is unreachable. 10.35.22.20 is a stratum 2 server, and 216.239.35.0 and 129.6.15.28 are both stratum 1 servers.
Task 7 Solution: Enabling NTP services
Enable the NTP service on Grid members ibns1 and ibns2 so that other hosts in the network can use them as an NTP source.
Navigate to Grid → Grid Manager and click the NTP menu item.
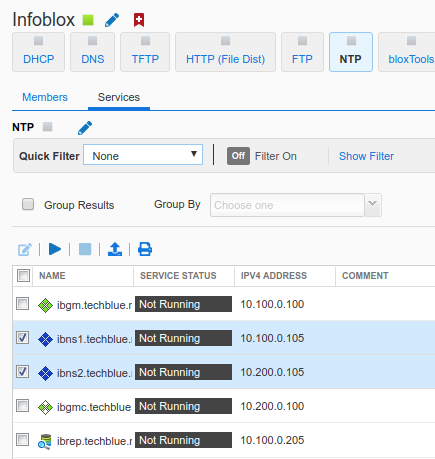
Place check marks in the boxes next to ibns1.techblue.net and ibns2.techblue.net.
On the Toolbar on the right of the screen, click on the Start button.
Read the message in the confirmation window and click Yes.
Click the Refresh button at the bottom of the Services window and the Service Status for NTP will change to green, indicating that the service is now running.
The service status for both members will also change color to green.
Task 8 Solution: Generating support bundles
Generate a Support Bundle that contains Current Logs, Rotated Logs, Cached DNS Recursive Data and Cached Zone Data only for the ibns2.techblue.net device. Save the Support Bundle to the Downloads folder of the Linux jump-desktop.
Login to NIOS GM web interface.
Navigate to Grid → Grid Manager → Members.
Place a check mark in the box beside ibns2.techblue.net.
From the Toolbar on the right, select Download → Support Bundle.
In the Download Support Bundle window, check the boxes next to Current Logs, Rotated Logs, Cached DNS Recursive Data and Cached Zone Data then click OK
Support Bundle can take a minute or two to generate. After generation is complete, your web browser may prompt you to save the file, or save it automatically to its default location.
The file name of the support bundle will always be supportBundle.tar.gz. We recommend you add the device name to the file to avoid future confusion when working with multiple support bundles. For example, this file from this lab can be renamed to: ibns2-supportBundle.tar.gz or 10.200.0.105-supportBundle.tar.gz.
