Scenario
Your organization is implementing several access control and authentication improvements for the NIOS Grid. These updates align with organizational policies and ensure secure, granular access for different teams while leveraging external authentication systems. The tasks include:
-
Setting Permissions for Interns: A new intern requires read-only access to DNS and DHCP objects for training purposes. You'll set up a group, assign global permissions, and verify access for the intern.
-
Setting Permissions for the Sales Team: The sales department needs specific permissions to manage their DNS and IPAM resources without accessing other objects. You'll configure object permissions for the sales group, create a user account, and verify the access.
-
Configuring Remote Authentication: To streamline user management, your organization plans to leverage existing Active Directory (AD) groups for authentication. You'll configure the NIOS Grid to use AD credentials, map remote groups to local groups with appropriate roles, and test the authentication process. You have obtained information from your AD administrator, listed in Table 2587-1. Please complete the configuration in NIOS so that users may use their AD credentials to log in to the GM.
Table 2587-1
|
Name of Authentication Service |
TechBlue AD |
|---|---|
|
IP Address or FQDN of Domain Controller |
10.100.0.20 |
|
Active Directory Domain |
ad.techblue.net |
|
Authentication Port |
389 |
|
Encryption |
None |
|
Group 1 Name |
ad-dnsreadwrite |
|
Group 2 Name |
ad-dhcpreadwrite |
|
Group 1 Test Username |
dnsreadwrite |
|
Group 2 Test Username |
dnsreadwrite |
Estimate Completion Time
-
50 to 60 minutes
Credentials
|
Description |
Username |
Password |
URL or IP |
|---|---|---|---|
|
Grid Manager UI |
admin |
infoblox |
Requirements
-
Administrative access to the NIOS Grid
Learning Content
Lab Initiation
Access jump-desktop
Once the lab is deployed, you can access the virtual machines required to complete this lab activity. To initiate the lab, click on the jump-desktop tile and login to the Linux UI:
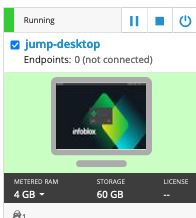
Username: training
Password: infoblox
Initiate lab
To initiate the lab, double-click the Launch Lab icon on the Desktop.

Choose the lab number from the list and click OK.

After clicking OK, you will see a pop-up message with a brief description of the lab task. If the description looks correct, click Yes to continue lab initiation.

Lab initiation will take a couple of minutes to finish.
Once complete, you will see another pop-up message with the login credentials and the URL for the Grid Manager’s User Interface. Note that the credentials may differ from those from prior labs.

Tasks
Task 1: Create a New Group for Interns
Create a group named interns in the Grid.
NIOS maps permissions to groups, not individual user or admin accounts. This means, even if there is only one user, you need to create a group for the single user, in order to map custom permissions.
Task 2: Assign Global Permissions to the Interns Group
Create global permissions for the group interns, allowing members of the group to have the followings:
-
Read-only access to all DNS objects
-
Read-only access to all DHCP objects
Task 3: Add a User to the Interns Group
Create an account named alice in the group interns. Set her password to infoblox.
Task 4: Verifying permission for Interns Group
Log out, and log back in as the user alice. Verify you have read-only access to the DNS and DHCP objects.
Task 5: Creating a New Group for the Sales Team
Create a group named sales in the Grid.
NIOS maps permissions to groups, not individual user or admin accounts. This means, even if there is only one user, you need to create a group for the single user, in order to map custom permissions.
Task 6: Assigning Object Permissions to the Sales Group
The sales department should have read-write access to the following objects, and deny for everything else:
-
Read-write access to the network 172.31.3.0/24
-
Read-write access to the zone sales.techblue.net
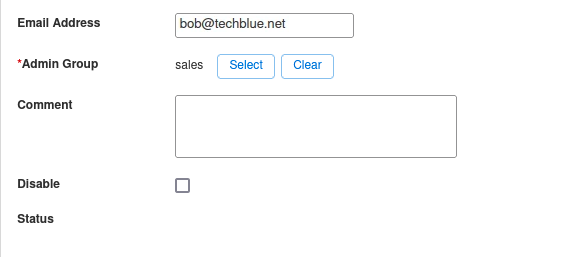
Task 7: Adding a User to the Sales Group
Create an account named bob in the group interns. Set his password to infoblox.
Task 8: Verifying Permissions for the Sales Group
Log out and log back in as the user bob. Verify you have read-only access to the DNS and DHCP objects.
Task 9: Configuring Authentication Server Groups
Add the remote AD authentication server (domain controller) to Authentication Server Groups in NIOS. Please use the information provided in Table 2587-1.
For production, more than one domain controller is recommended for redundancy.
Task 10: Modifying the Grid Authentication Policy
Add Active Directory as an authentication service for the Grid.
Task 11: Creating Local Groups to Match Remote Groups
Create local groups in NIOS with names matching the ones already configured in AD. Assign roles to the local groups as shown in Table 2587-2.
Table 2587-2
|
Local Group Name |
Role |
|---|---|
|
ad-dnsreadwrite |
DNS Admin |
|
ad-dhcpreadwrite |
DHCP Admin |
Task 12: Configuring Authentication Group Ordering
Complete the remote authentication configuration by creating an ordered list of the group names.
Task 13: Testing Remote Authentication by Logging In
Log in to the GM using the credentials provided in Table 2587-3. These are usernames configured in AD. If the remote authentications are configured correctly, you should be able to log in, even when these usernames do not exist in the NIOS local user database. Verify the logs that these logins were authenticated with AD.
Table 2587-3
|
Username |
Password |
|---|---|
|
dnsreadwrite |
infoblox |
|
dhcpreadwrite |
infoblox |
Instead of logging out and logging back in, it may be easier to start a second, different web browser to test the logging in while observing log messages as the admin user in the first web browser.
Solutions
Task 1 Solution: Create a New Group for Interns
-
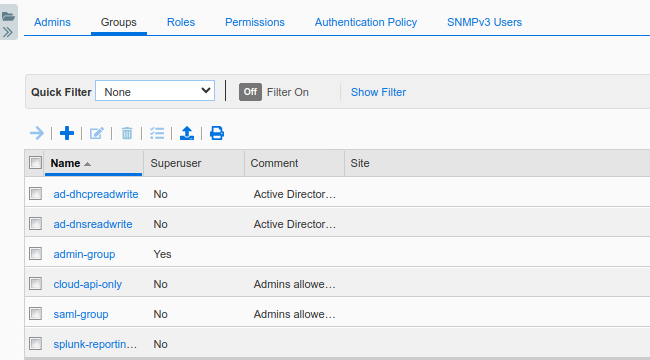
In the GM web interface, navigate to Administration → Administrators → Groups.
-
Click Add to create a new group. The Add Admin Group Wizard dialog appears.
-
In Step 1, for Name, enter interns. Click Save & Close.
There are many settings and options that you can configure when creating a group. However, they are not relevant to mapping permissions. Feel free to explore the other steps and options of the Add Admin Group Wizard. For this lab, we are skipping them, focusing on creating a basic group for the purpose of permissions mapping.
Task 2 Solution: Assign Global Permissions to the Interns Group
-
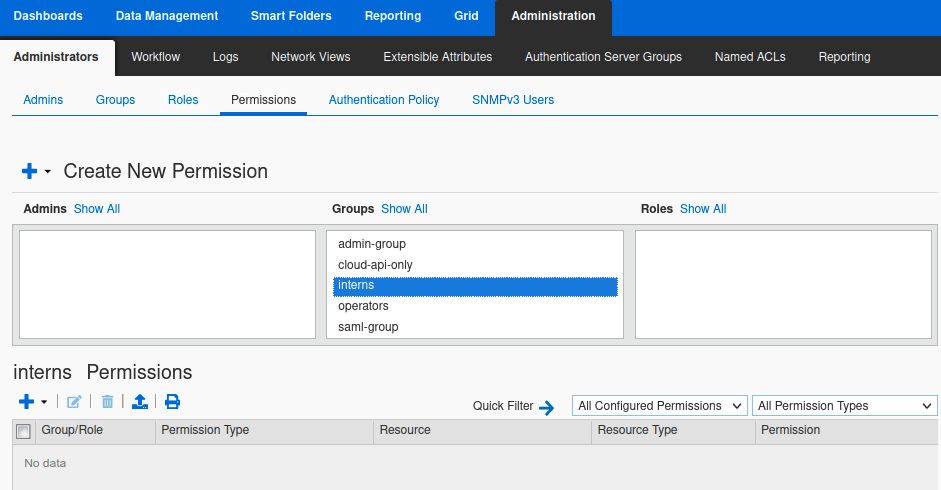
In the GM web interface, navigate to Administration → Administrators → Permissions.
-
In the middle column, Groups, select interns. The bottom half of the screen displays all the current permissions for the group.
-
In the lower half of the screen, in the section named intern Permissions, we see the label No data. This indicates that no permissions have been assigned for this group.
-
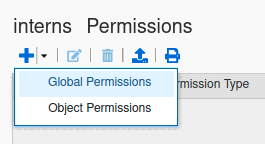
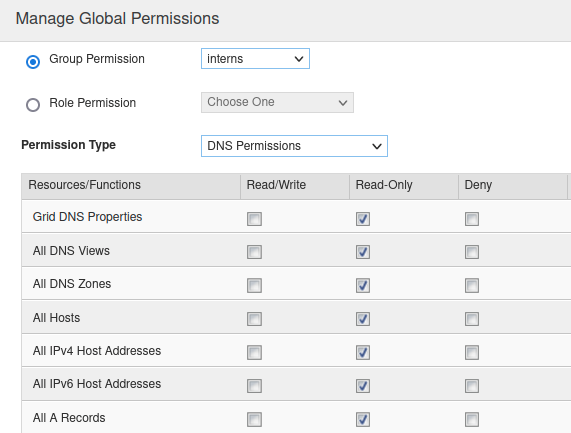
To assign permissions, click Add → Global Permissions. This brings out the Manage Global Permissions dialog window.
-
In the Permission Type drop-down menu, select DNS Permissions. Then check the boxes under Read-Only in the DNS objects you want to grant RO access.
-
Click Save & Close.
-
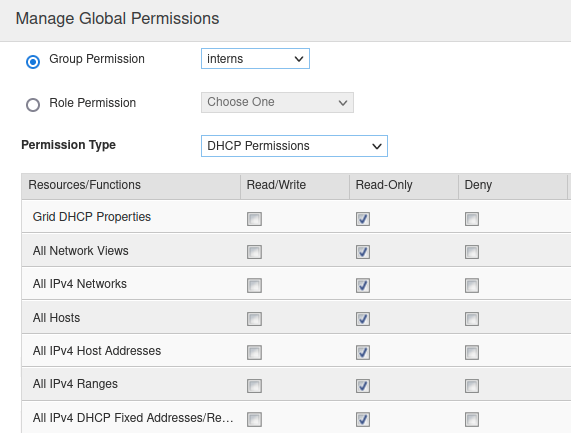
Click Add → Global Permissions. This brings out the Manage Global Permissions dialog window again, to assign DHCP permissions.
-
In the Permission Type drop-down menu, select DHCP Permissions. Then check the boxes under Read-Only in the DHCP objects you want to grant RO access.
-
Click Save & Close.
There are many objects under DNS and DHCP. For this lab, you do not need to select every single object. Select several or the first 10 object types; that is enough to experience how permission mapping works in NIOS.
Task 3 Solution: Add a User to the Interns Group
-
In the GM web interface, navigate to Administration → Administrators → Admins.
-
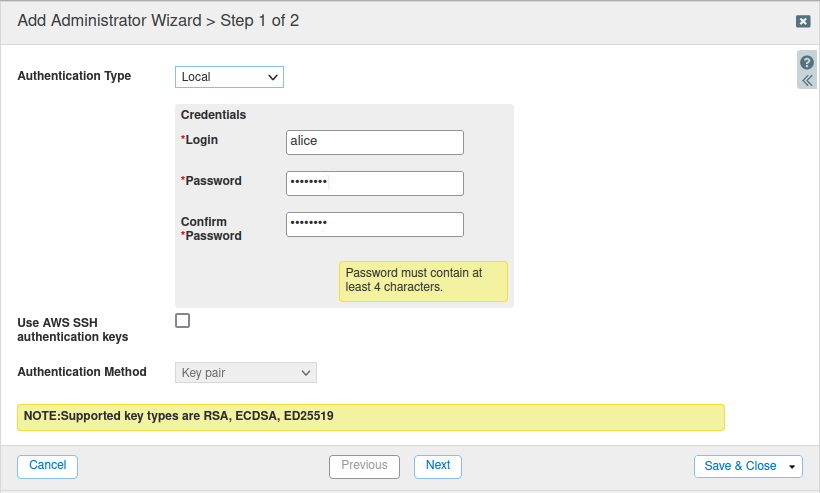
Click Add to create a new admin (user). The Add Administrator Wizard dialog appears.
-
Enter the login and password for the intern:
-
Login: alice
-
Password: infoblox
-
-
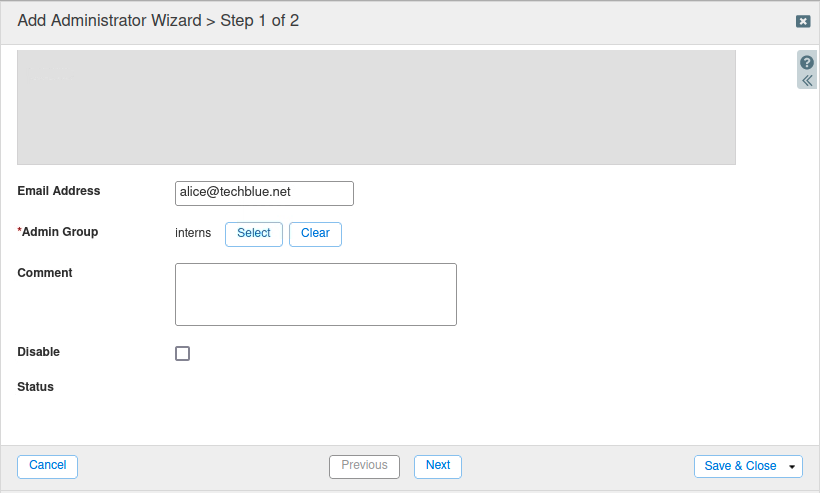
Scroll down and find the section Admin Group. Select the group interns.
-
Click Save & Close.
Task 4 Solution: Verifying permission for Interns Group
-
Logout of the GM web interface. Alternatively, you may open a different web browser and navigate to the GM address.
-
Log in as the user Alice.
-
Navigate around the Grid and attempt to add a DNS or DHCP object, such as a Host record or a Network. While the wizard appears and you can enter values, when you click Save & Close, you will see an error message informing you that you do not have the permission to create/write the object. Below is an example screenshot when attempting to create a Host object.

The NIOS permissions settings can be very granular. This lab does not cover every possible combination. Feel free to explore on your own to test permissions that best suit your needs.
Task 5 Solution: Creating a New Group for the Sales Team
-
In the GM web interface, navigate to Administration → Administrators → Groups.
-
Click Add to create a new group. The Add Admin Group Wizard dialog appears.
-
In Step 1, for Name, enter sales. Click Save & Close.
Task 6 Solution: Assigning Object Permissions to the Sales Group
The easiest way to apply object permission is to go to the object in question and then change its permission settings. For this lab, we will update the objects:
-
Read-write access to the network 172.31.3.0/24
-
Read-write access to the zone sales.techblue.net
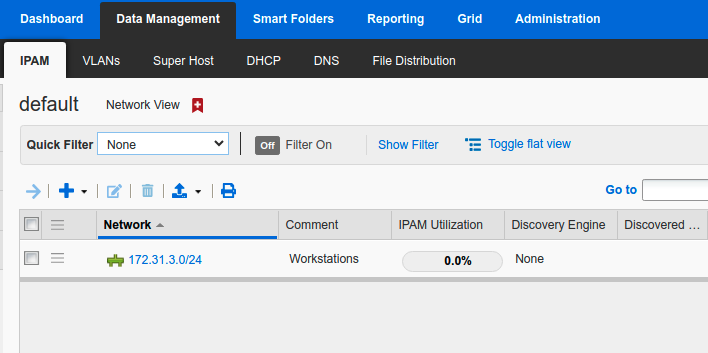
Applying object permissions for the network 172.31.3.0/24
-
In the GM web interface, navigate to Data Management → IPAM.
-
Click Edit on the network 172.31.3.0/24.
-
Select the Permission tab on the left.
-
Click + to add a permission rule. The Admin Group/Role Selector dialog appears.
-
Select the group sales and click OK.
-
Select the Permissions column in the added permission rule and change it to Read/Write.
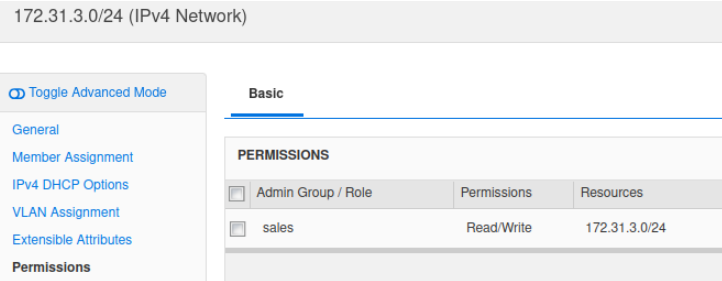
-
Click Save & Close.
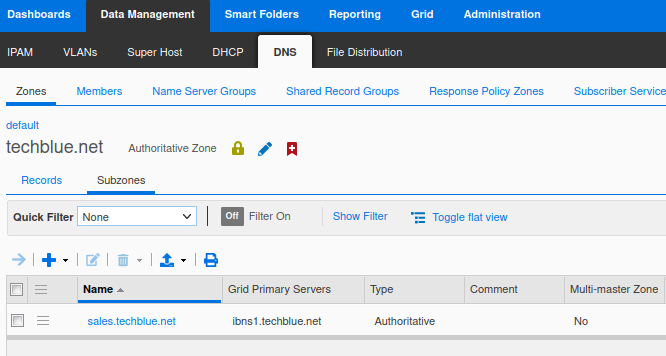
Applying object permissions for the zone sales.techblue.net
-
In the GM web interface, click Search on the upper right corner.
-
The Search dialog window appears. Click Advanced.
-
Enter sales.techblue.net as the search string.
-
Change Type to All Zones.
-
Click Search.
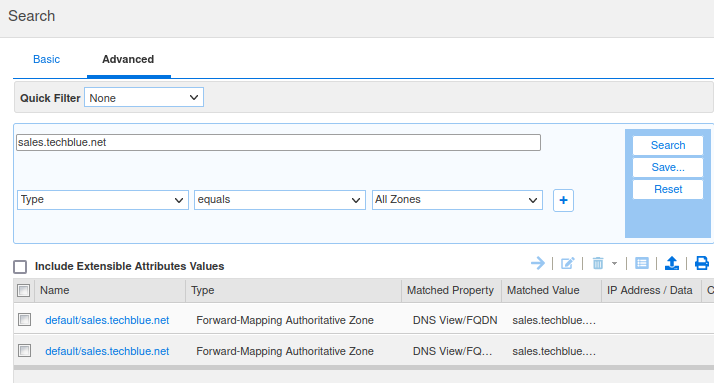
-
Click on the search result to Edit the zone sales.techblue.net.
-
Select the Permission tab on the left.
-
Click + to add a permission rule. The Admin Group/Role Selector dialog appears.
-
Select the group sales and click OK.
-
Select the Permissions column in the added permission rule and change it to Read/Write.
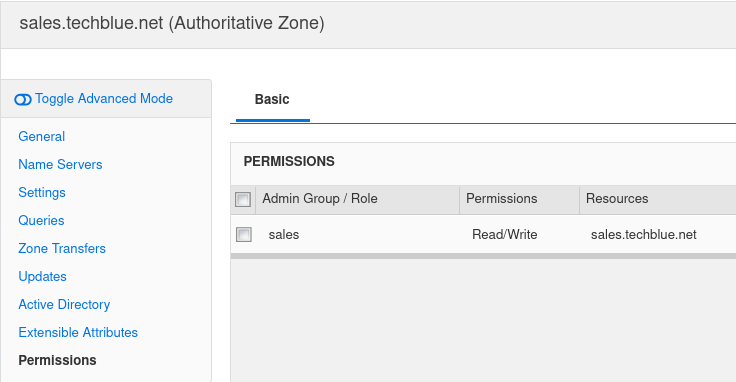
-
Click Save & Close.
Task 7 Solution: Adding a User to the Sales Group
-
In the GM web interface, navigate to Administration → Administrators → Admins.
-
Click Add to create a new admin (user). The Add Administrator Wizard dialog appears.
-
Enter the login and password for the intern:
-
Login: bob
-
Password: infoblox
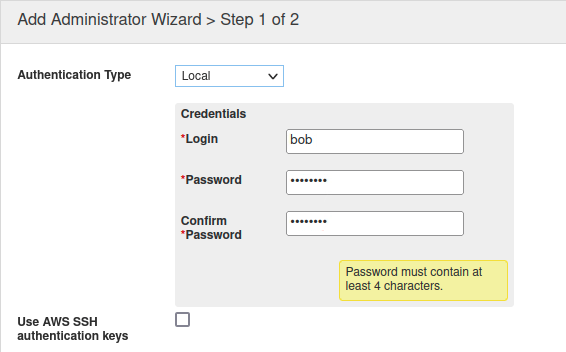
-
-
Scroll down and find the section Admin Group. Select the group sales
-
Click Save & Close.
Task 8 Solution: Verifying Permissions for the Sales Group
-
Logout of the GM web interface. Alternatively, you may open a different web browser and navigate to the GM address.
-
Log in as the user, bob.
-
Navigate around the Grid and compare what you can see as the user bob. You will not see the dozens of networks under Data Management → IPAM or DHCP.
-
You will also only be able to see the zone sales.techblue.net under Data Management → DNS → Zones → techblue.net → Subzones.
Task 9 Solution: Configuring Authentication Server Groups
Add the remote AD authentication server (domain controller) to Authentication Server Groups in NIOS. Please use the information provided in Table 2587-1.
-
Navigate to Administration→Authentication Server Groups→Active Directory Services
-
Click Add. The Add Active Directory Authentication Service dialog window appears.
-
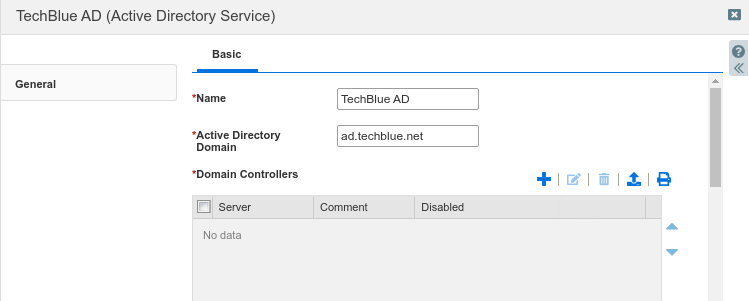
Using Table 2587-1, fill in the following information:
-
Name: TechBlue AD
-
Active Directory Domain: ad.techblue.net
-
-
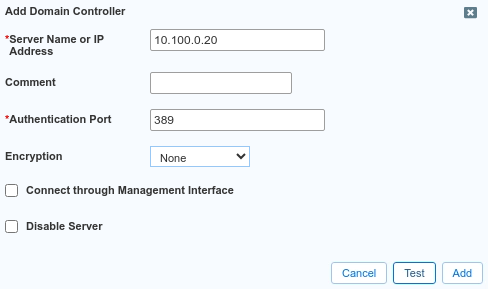
In the section Domain Controllers, click the Add button to display the Add Domain Controller dialog.
-
Using Table 2587-1, fill in the following information:
-
Server Name or IP Address: 10.100.0.20
-
Authentication Port: 389
-
Encryption: None.
-
-
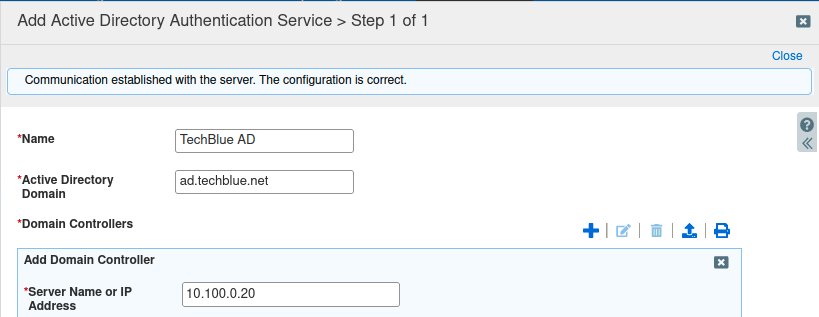
Click Test.
-
You should get a blue notification bar indicating the test was successful.
-
If the test is successful, scroll down in the window and click the Add button.
-
Click Yes to confirm the entry without encryption.
-
The entry appears in the list of Domain Controllers.
-
Click Save & Close
If the Test fails, verify the information you entered in this screen and try the test again.
We are choosing not to use encryption for the lab environment. For a production deployment, we recommend trying it first without encryption to ensure all authentications work correctly, then enable encryption for added security. You may follow the detailed steps in the NIOS Admin Guide.
Task 10 Solution: Modifying the Grid Authentication Policy
Add Active Directory as an Authentication Service for the Grid
-
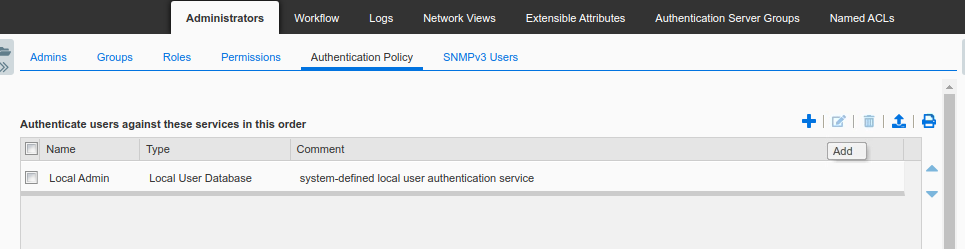
Navigate to Administration→Administrators→Authentication Policy.
-
Click Add in the section for Authenticate users against these services in this order.
-
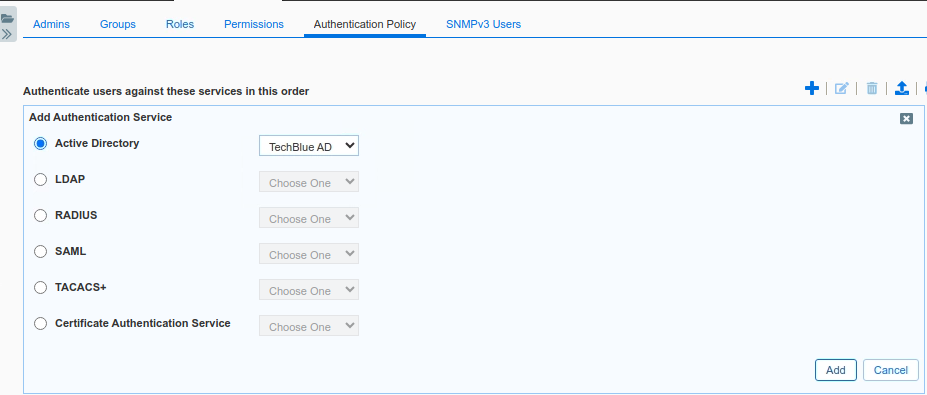
The dialog Add Authentication Service appears.
-
In the Active Directory drop-down menu, select TechBlue AD, the entry you created in the previous task.
-
Click the Add button
-
The entry appears below Local Admin

As the section title suggests, the ordering here is important. With this configuration, users logging into NIOS will be first checked against the Local User Database. If the username is not found there or the login fails, NIOS will then attempt to authenticate the user using Active Directory.
Task 11 Solution: Creating Local Groups to Match Remote Groups
Create local groups in NIOS with matching names as the ones already configured in AD. Assign roles to the local groups as shown in Table 2587-2.
-
Navigate to Administration→Administrators→Groups.
-
Click the Add button. The Add Admin Group Wizard dialog appears.
-
At Step 1 of 8, enter ad-dnsreadwrite for Name.
-
For Comment, enter a description for this group.
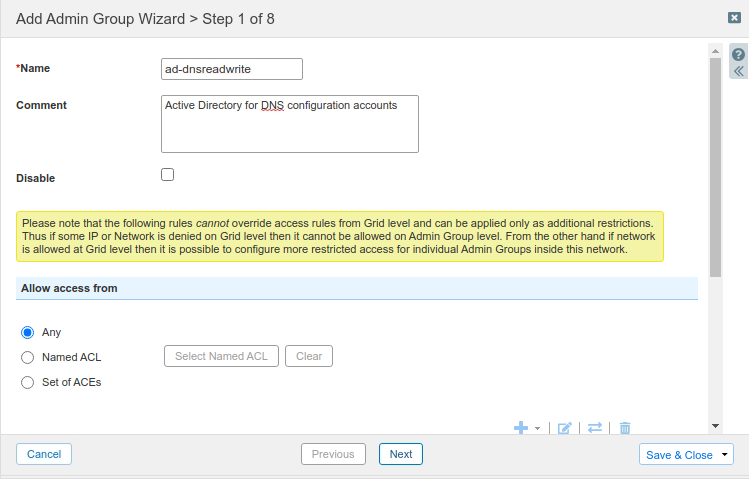
-
Click Next
-
At Steps 2,3 and 4, click Next.
-
At Step 5, click the Add button to display the Role Selector dialog window.
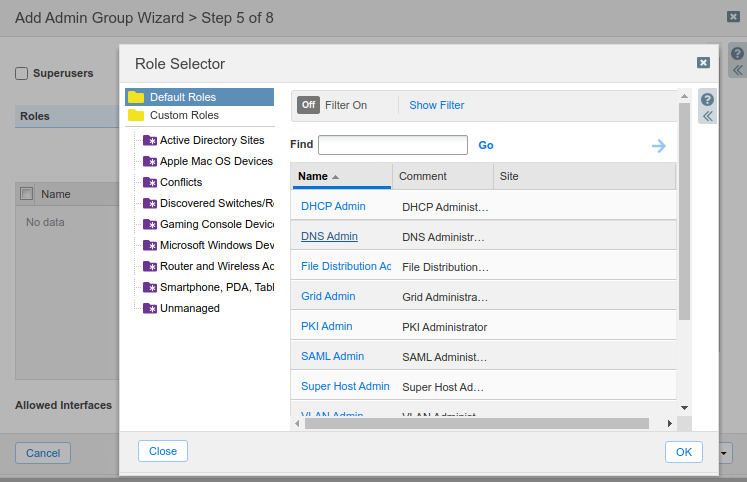
-
Click the link for DNS Admin.
-
This action places the DNS Admin entry in the Roles section
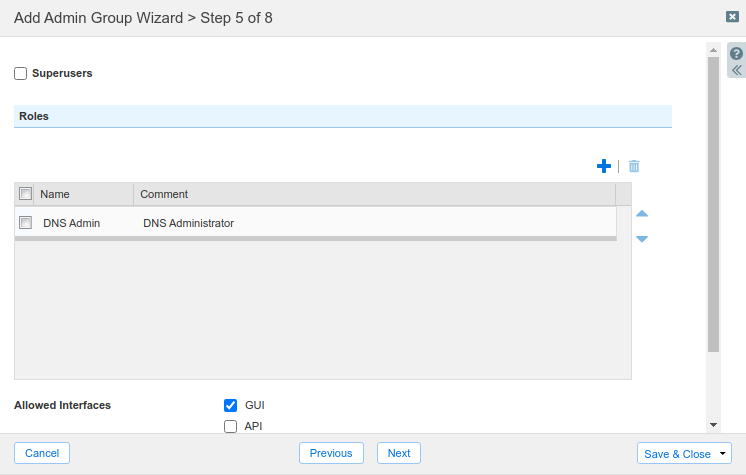
-
Leave the remaining options unchanged
-
Click Save & Close
-
The new entry appears in the list of Groups
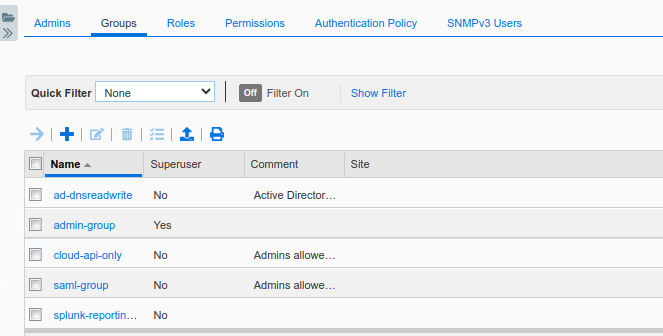
-
Repeat steps 2 to 12 , this time, create a second group called ad-dhcpreadwrite, and assign the role DHCP Admin.
-
The new entry appears in the list of Groups.
Task 12 Solution: Configuring Authentication Group Ordering
Complete the remote authentication configuration by creating an ordered list of the group names.
-
Navigate to Administration→Administrators→Authentication Policy.
-
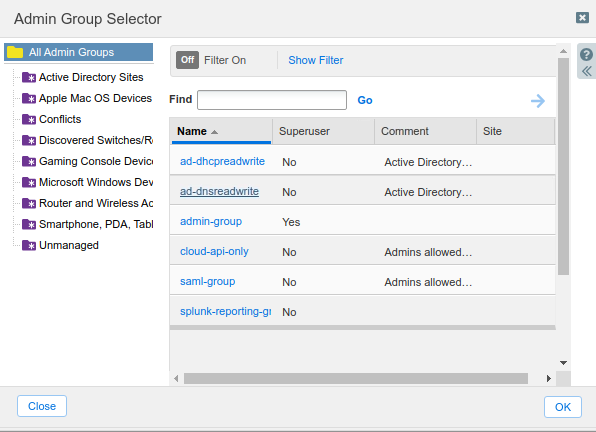
Scroll down to the section named Map the remote admin group to the local group in this order. Click Add.

-
Click the link for ad-dnsreadwrite
-
Click Add again to display the Admin Group Selector dialog.
-
Click the link for ad-dhcpreadwrite.
-
Both group names appear. Readjust the ordering if necessary

This ordering is mandatory, even if there is only one group. When there are multiple groups, this list informs NIOS how to authenticate users who belong to multiple groups.
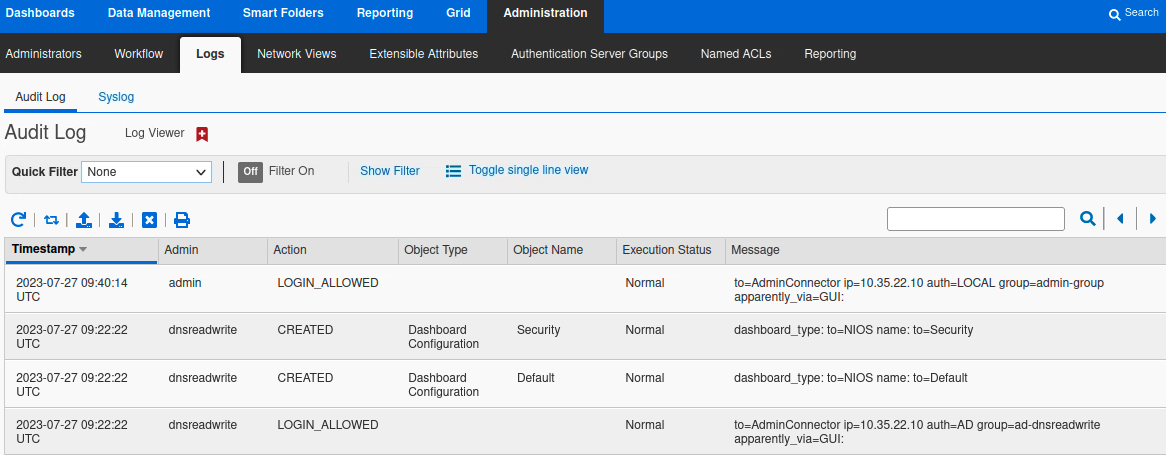
Task 13 Solution: Testing Remote Authentication by Logging In
Log in to the GM using credentials provided in Table 2587-3. These are usernames configured in AD. If the remote authentications are configured correctly, you should be able to login, even when these usernames do not exist in the NIOS local user database. Verify the in logs that these logins were authenticated with AD.
-
Do not log out of your current administrative GM session. Keep this web browser window open.
-
Using a second, new, web browser on the jump-desktop, navigate to the GM web interface.
-
Log in with credential provided in Table 2587-3. For example, username dnsreadwrite and password infoblox.
-
Switch back to the first web browser, which is still logged in as admin.
-
Navigate to Administration → Logs → Audit Log.
-
Scroll down and search for recent login events. You can also search for the username you tested with in step 3.
-
The sample screenshot below shows a successful login by the user dnsreadwrite (lowest entry). The log message shows the user authenticated with AD (auth=AD), and was applied permissions from the group ad-dnsreadwrite (group=ad-dnsreadwrite). You can compare this to a local login in the first message, where the user admin authenticated with the local user database.