Scenario
You are a DDI administrator at Nimbus Avionics, preparing to move existing network and DNS data into Universal DDI by using Infoblox-specific CSV import files instead of creating each object manually. The first CSV file contains the core objects needed to establish the environment, and the second CSV file adds supporting DNS and DHCP objects. Your goal is to import both files from jump-desktop and confirm that the imported objects appear in the correct locations in the Infoblox Portal.
Estimate Completion Time
-
15 - 20 minutes
Prerequisites
-
Administrative access to the CSP
Course References
Tasks
You may use the VMs jump-desktop to perform this task because the import file is located in the shared folder on this desktop.
To complete this lab, you need to perform the following tasks.
-
Review existing data.
-
Import core objects.
-
Verify core objects.
-
Import additional objects
-
Verify additional objects.
Task 1: Review existing data
Sign in to the Infoblox Portal from jump-desktop and review the current IPAM and DNS views so you have a baseline before importing new data. You are checking for existing IP spaces, networks, fixed addresses, DNS zones, records, subzones, and DHCP ranges before any CSV objects are added.
Task 2: Import core objects
Import the first CSV file - CSP-Import-1.csv - from the shared drive. This file adds the foundational objects for the environment, including IP spaces, networks, fixed addresses, and DNS zones.
Task 3: Verify core objects
After the first import completes, review the job status and then verify that the core IPAM and DNS objects were created successfully in the Portal. Confirm that the IP space, networks, fixed addresses, and DNS zones appear in the Portal.
Task 4: Import additional objects
Import the second CSV file - CSP-Import-2.csv - from the shared drive. This file adds DNS records, subzones, and DHCP ranges that depend on the core objects imported earlier.
Task 5: Verify additional objects
After the second import completes, confirm that the additional DNS and DHCP objects are present and associated with the correct zones and networks.
Solutions
Task 1 Solution: Review existing data
Before you import any CSV data, review the current IPAM and DNS views so you can recognize which objects are new after the import. This baseline also helps you catch problems quickly if imported data appears in the wrong place or does not appear at all.
-
From jump-desktop, sign in to the Infoblox Portal.
-
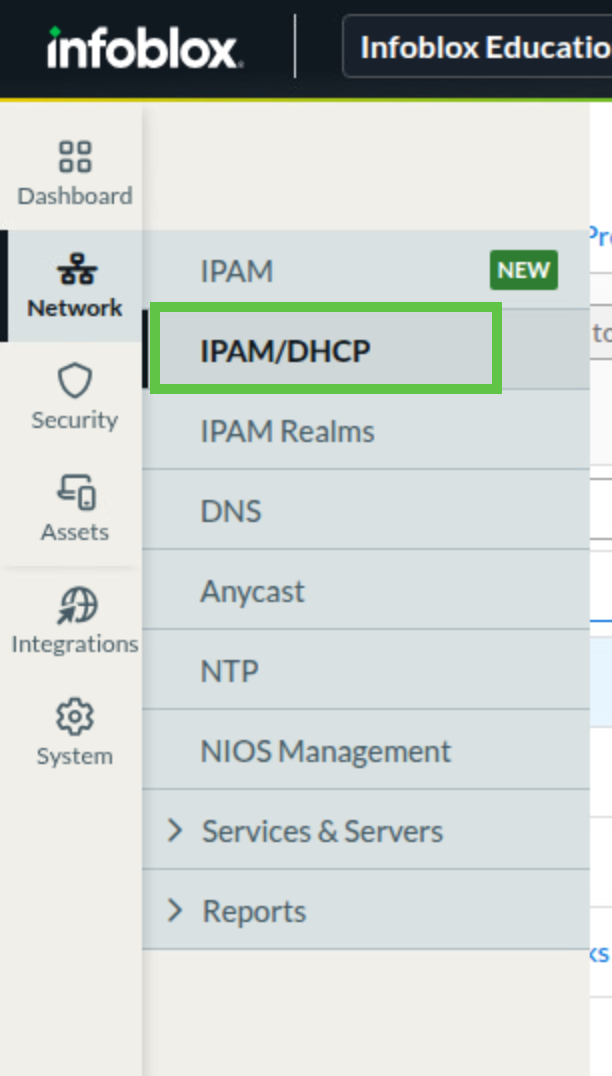
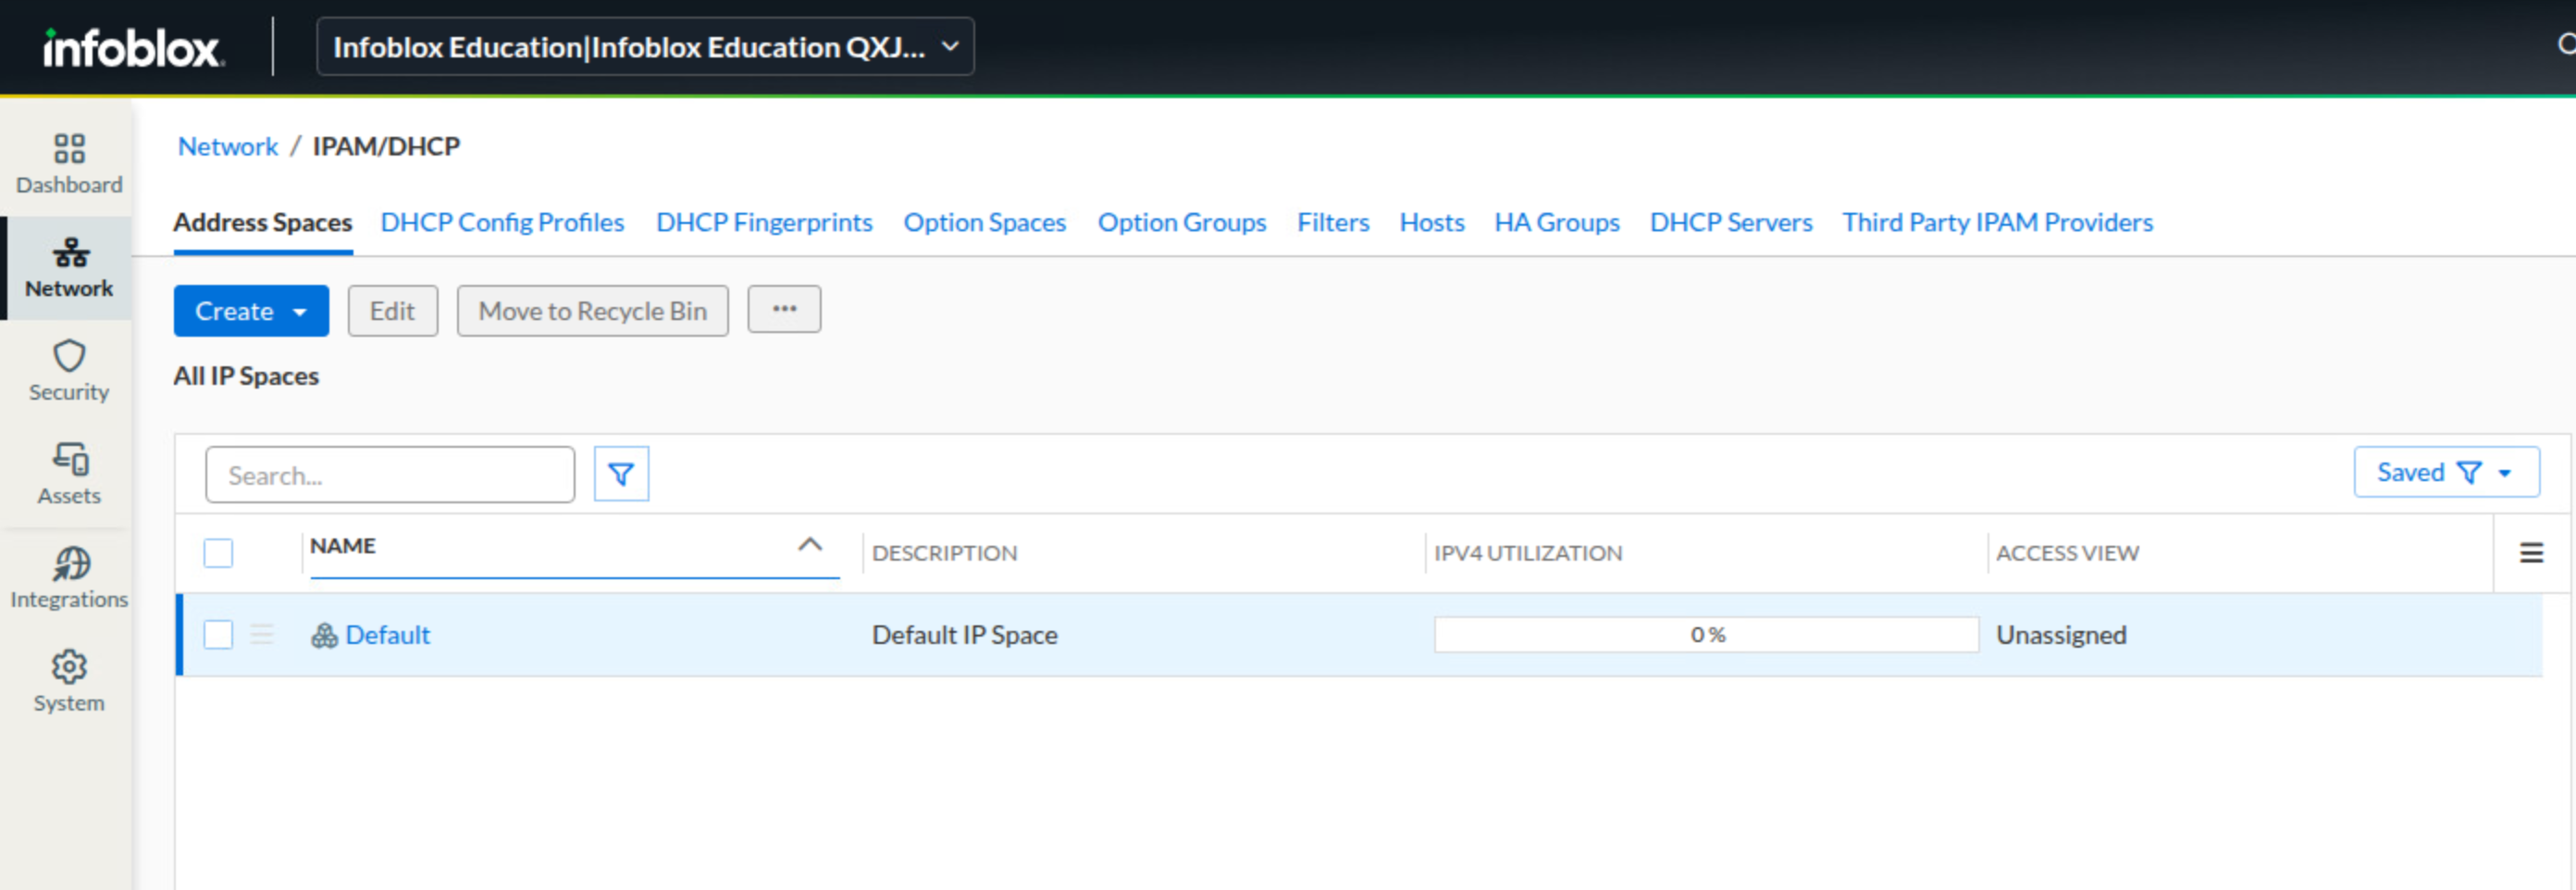
Navigate to Network → IPAM/DHCP.
-
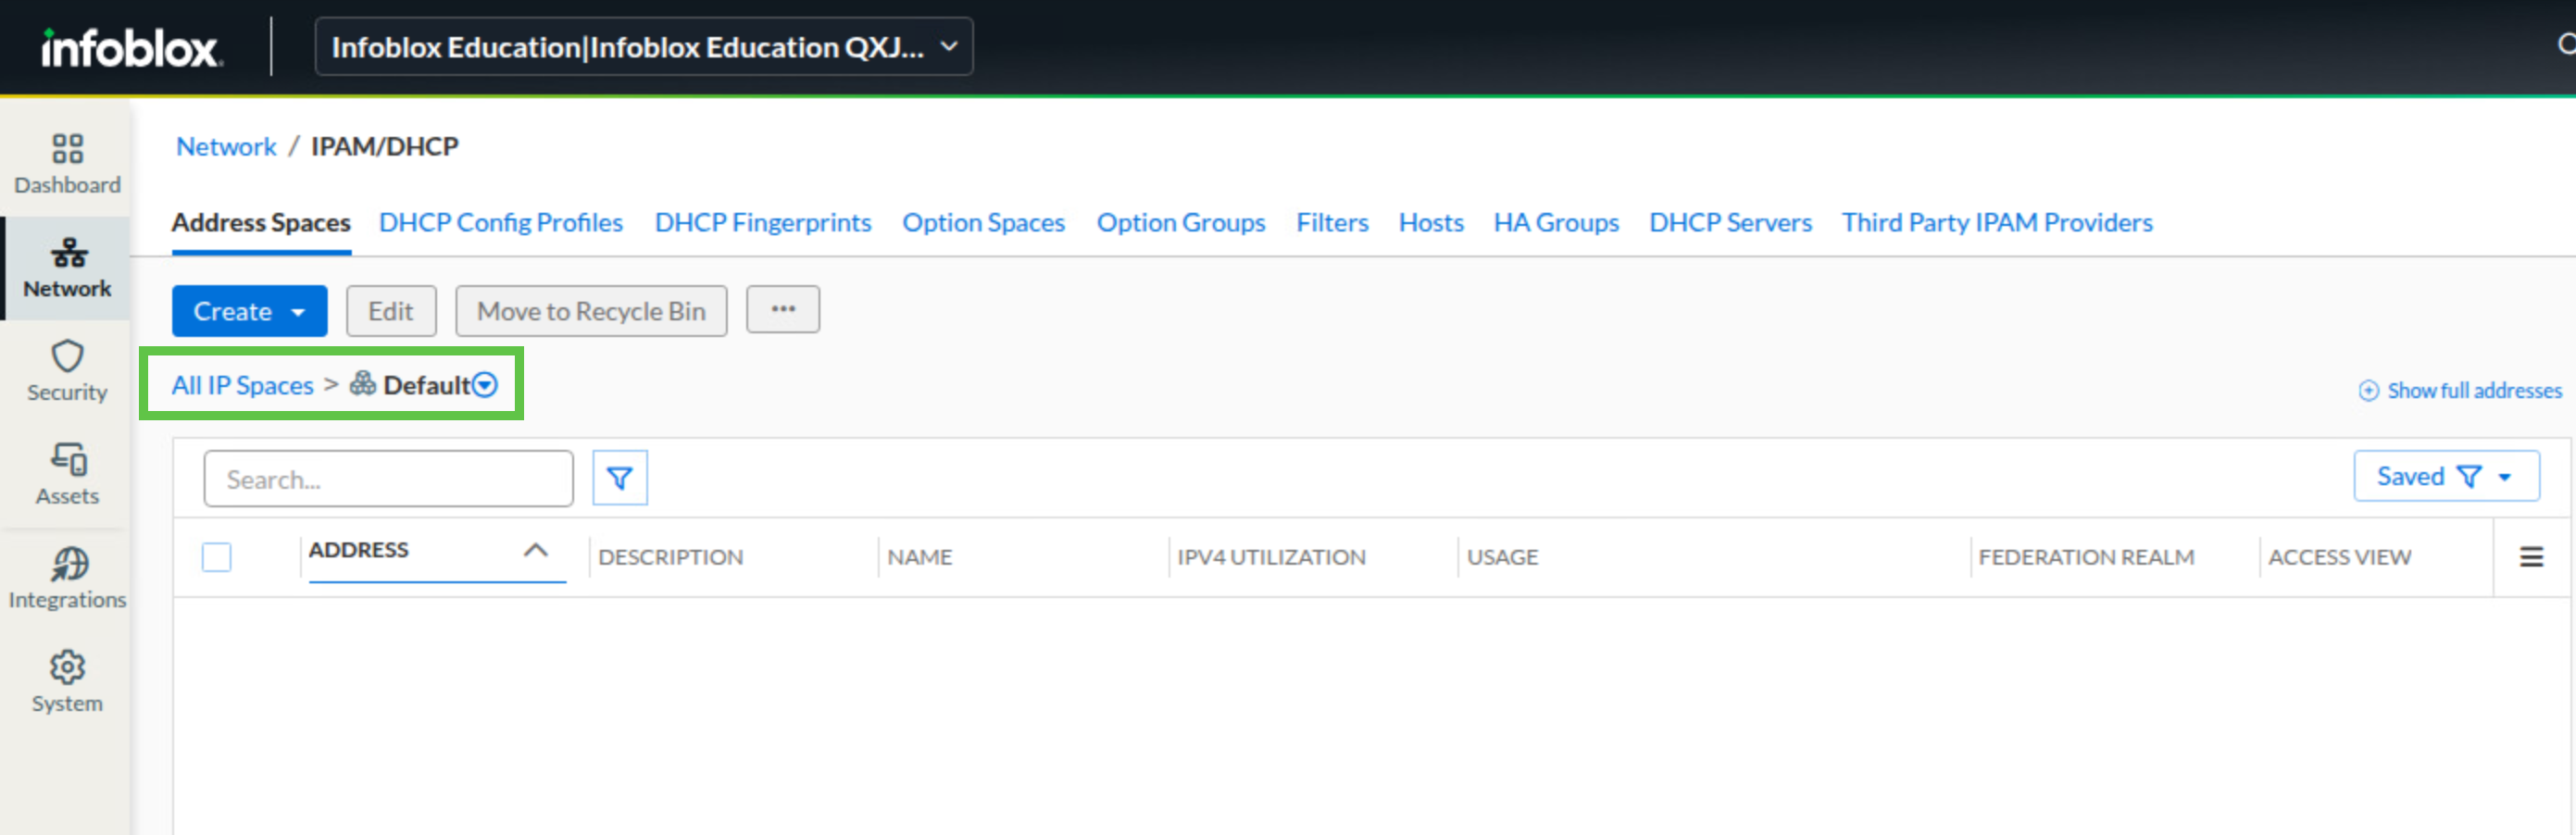
On the Address Spaces tab, verify that there is one address space named default.
-
Click default and confirm that there is no DHCP data.
-
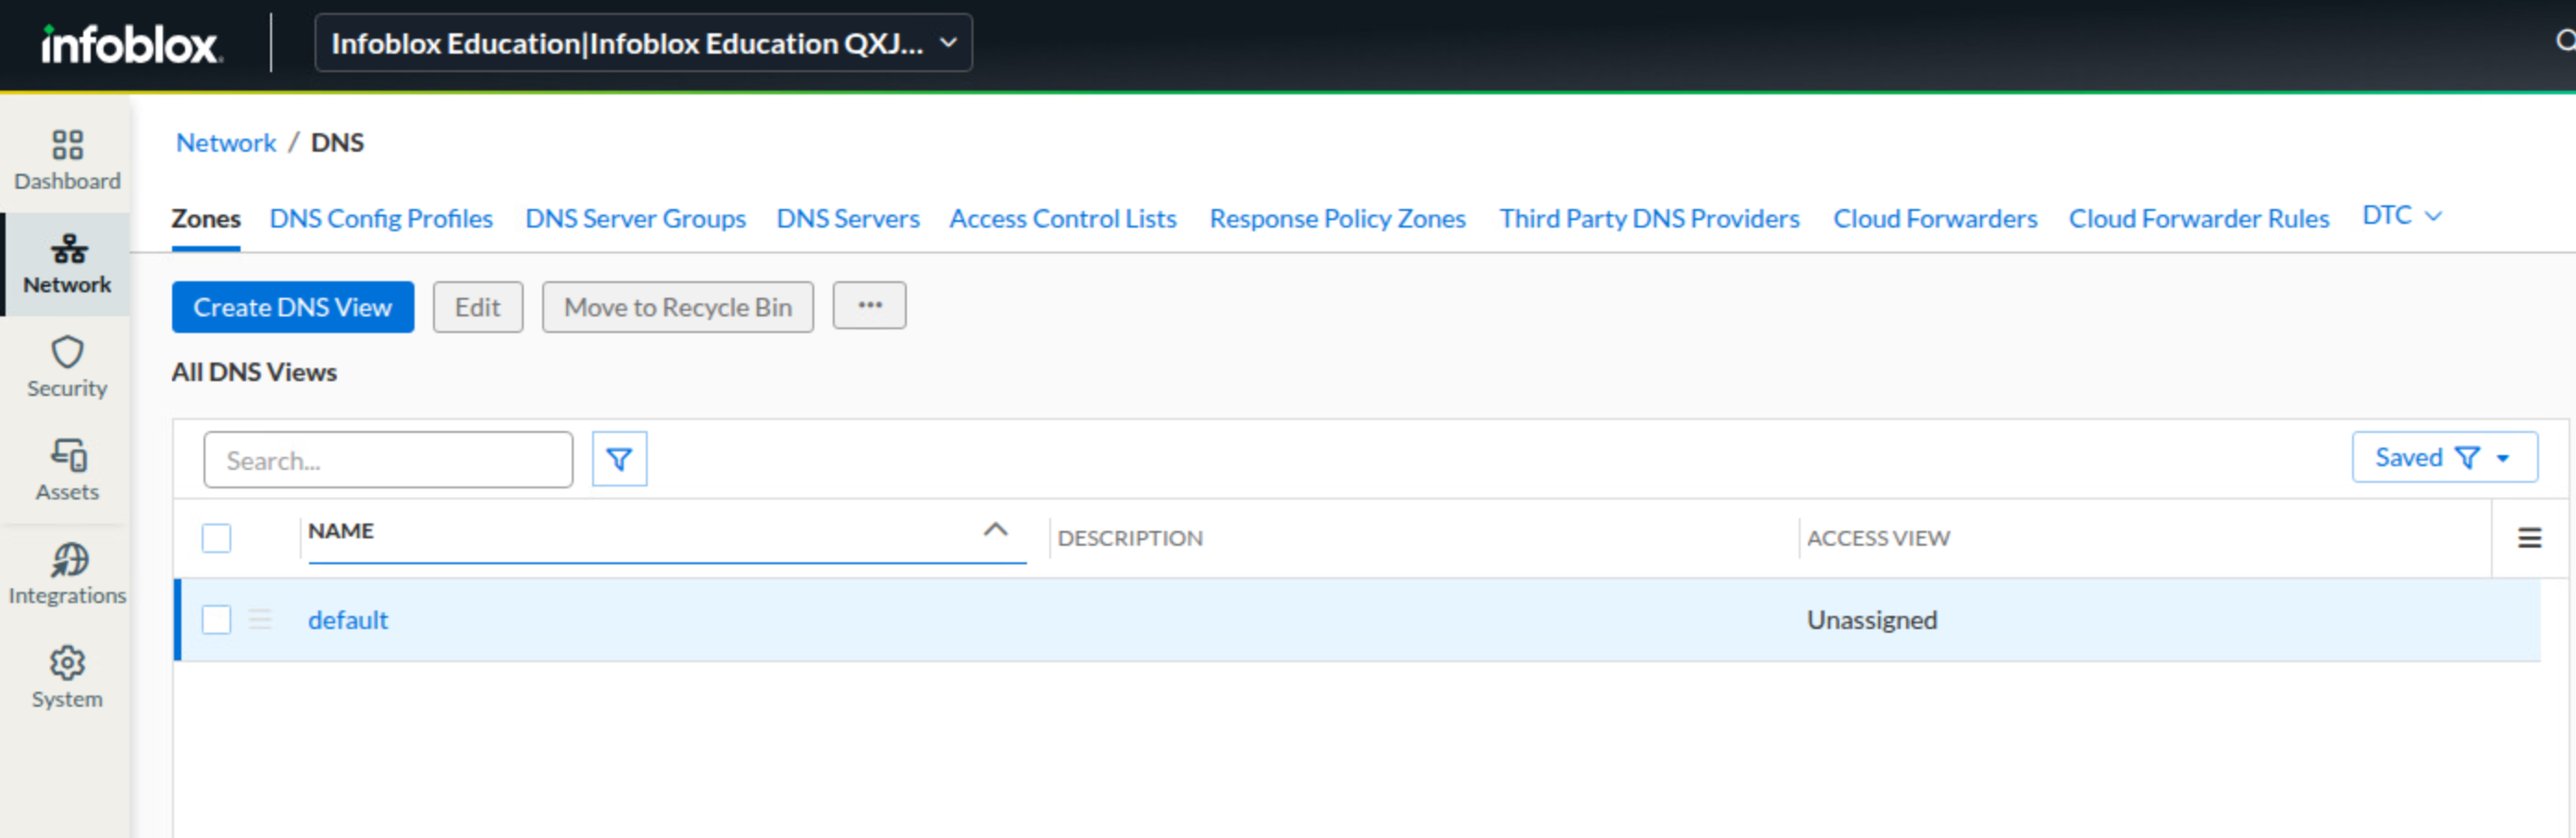
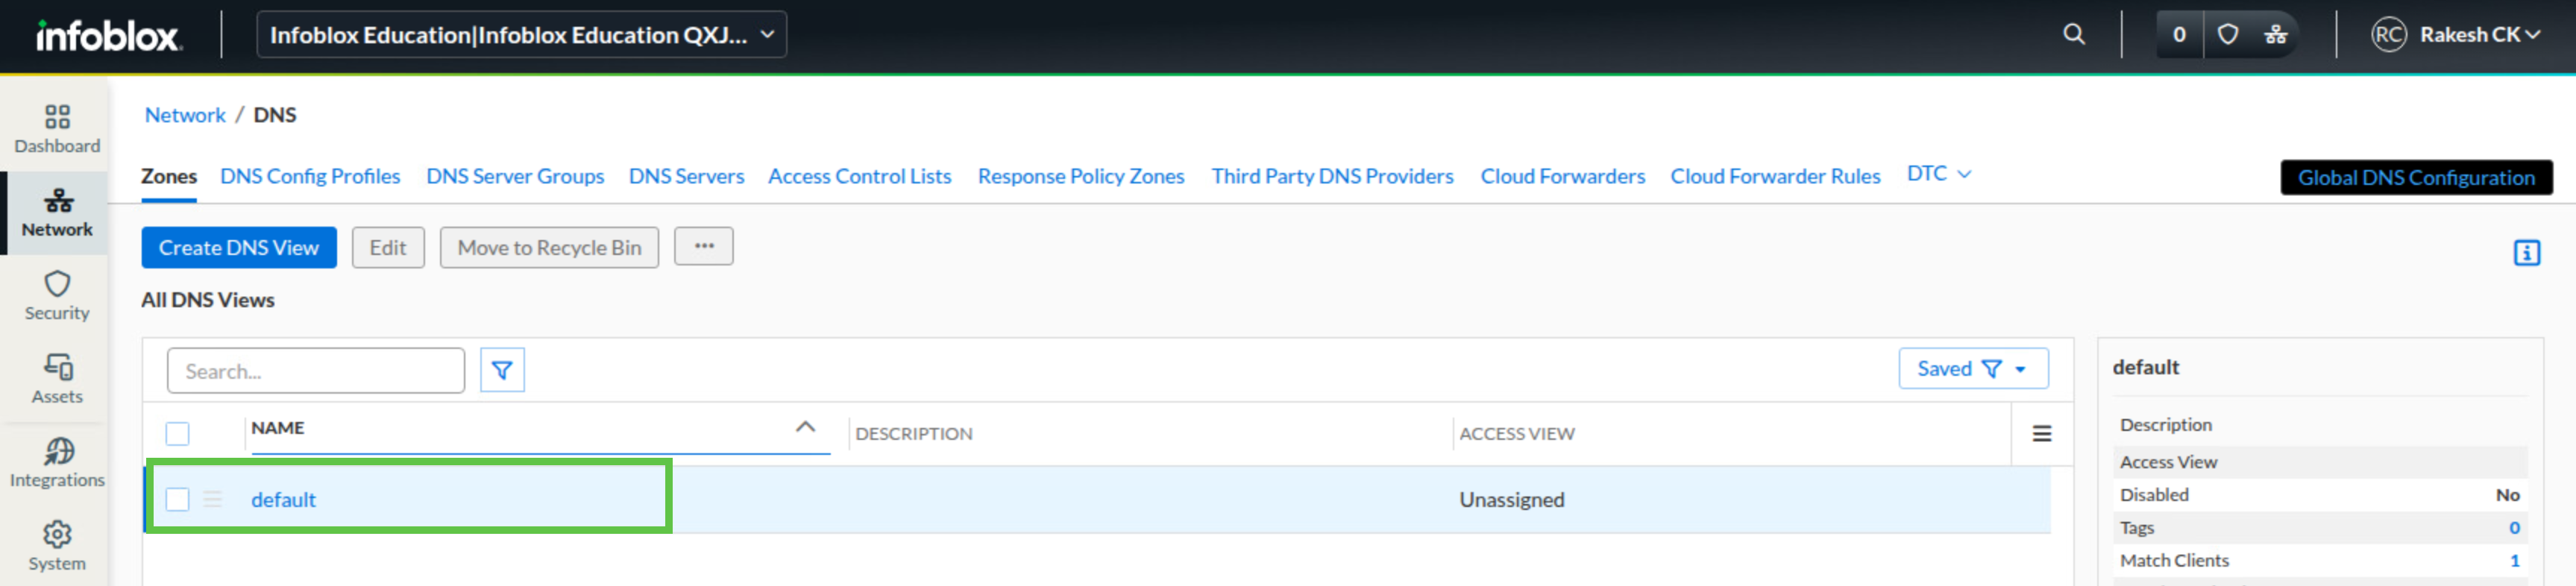
Navigate to Network → DNS.
-
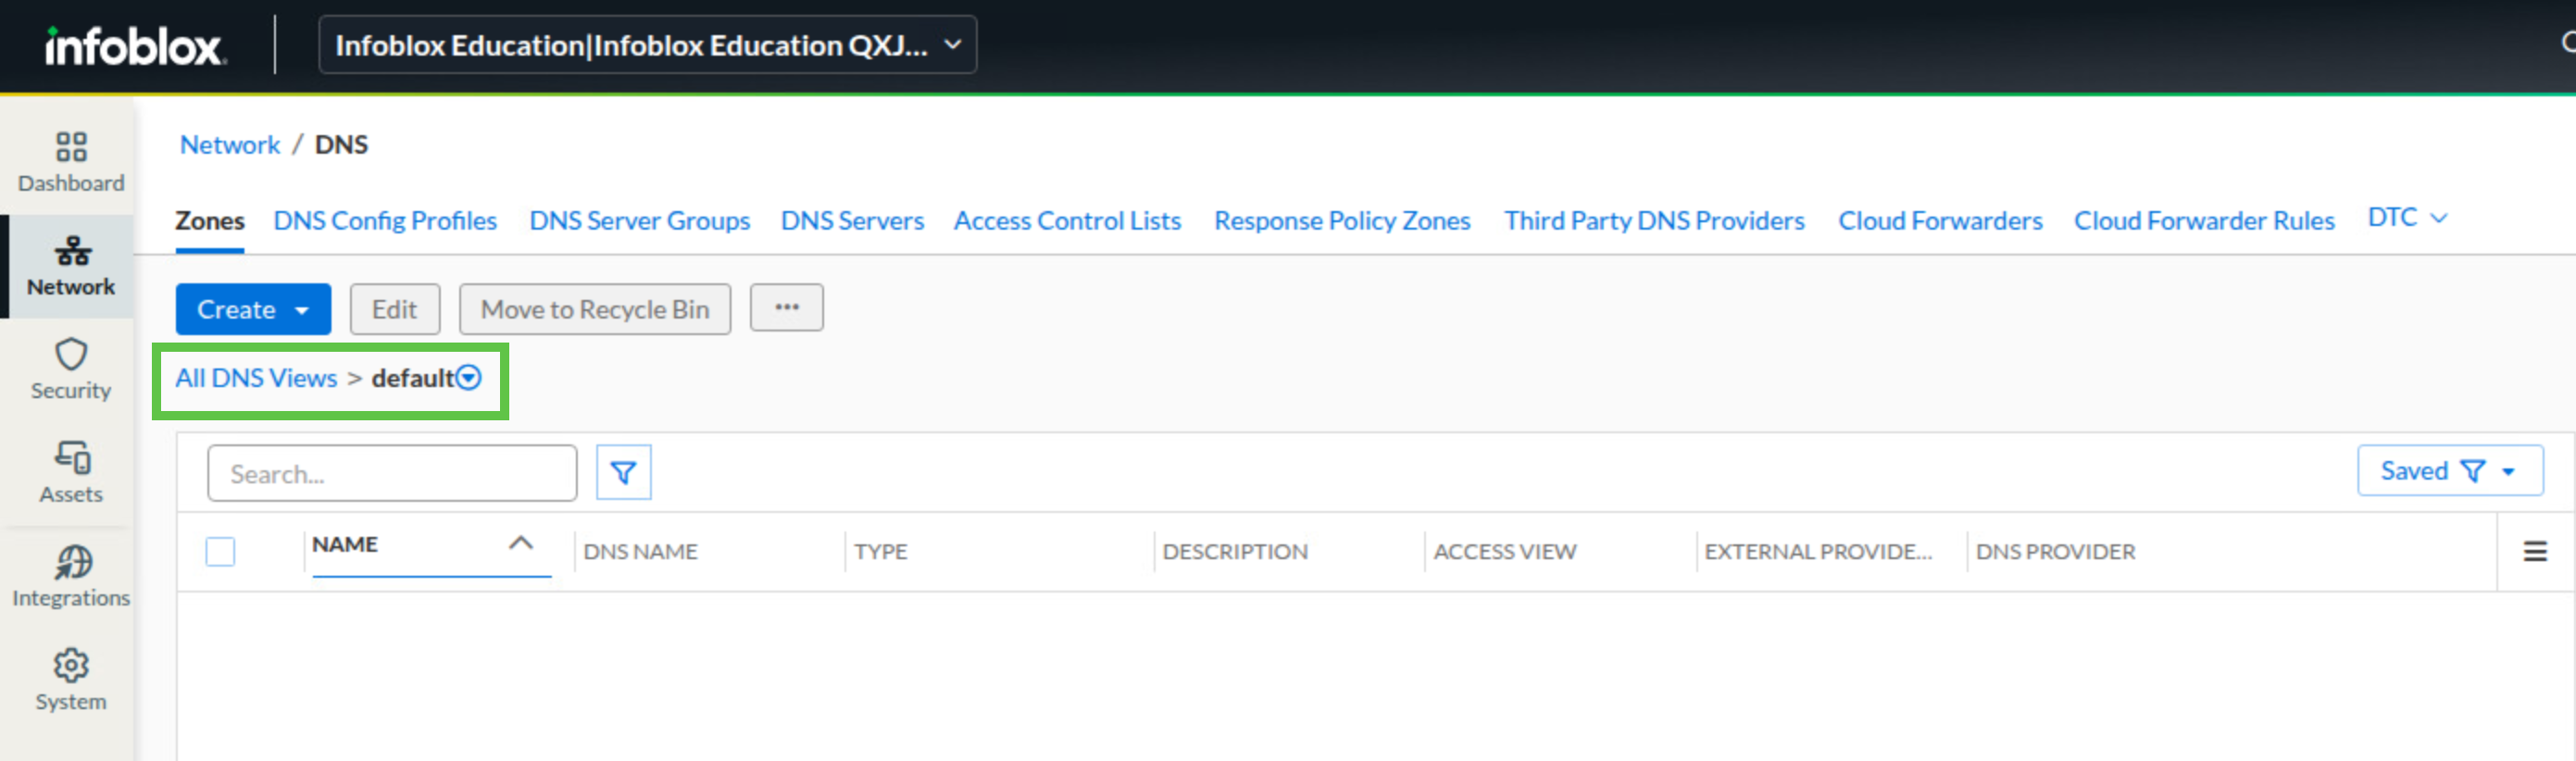
Under the Zones area, click the default DNS view.
-
Confirm that no DNS data is currently shown.
Task 2 Solution: Import core objects
You import the core CSV file first because later DNS and DHCP objects depend on the foundational IP spaces, networks, fixed addresses, and zones being present.
-
From jump-desktop, sign in to the Infoblox Portal.
-
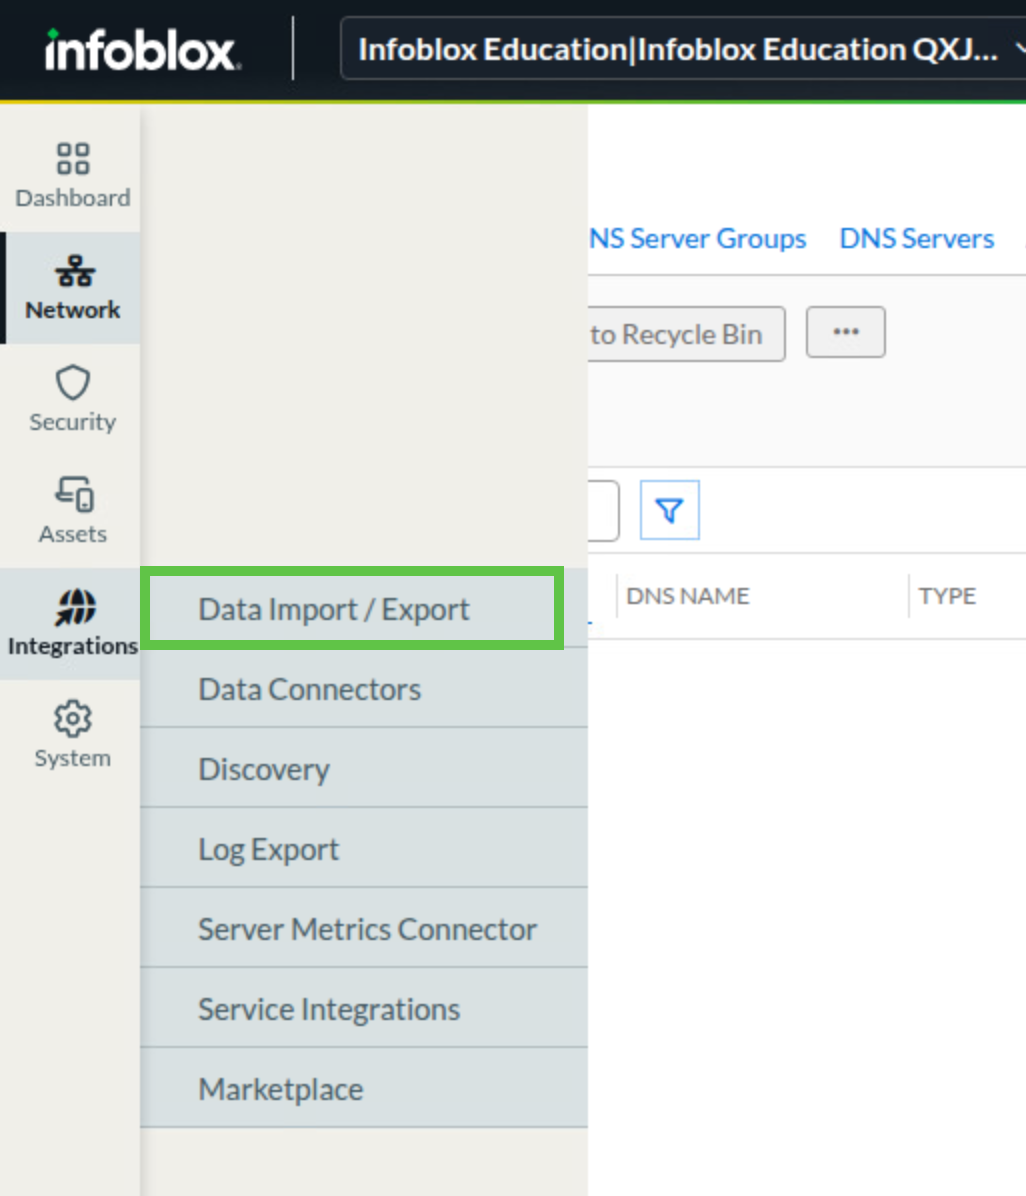
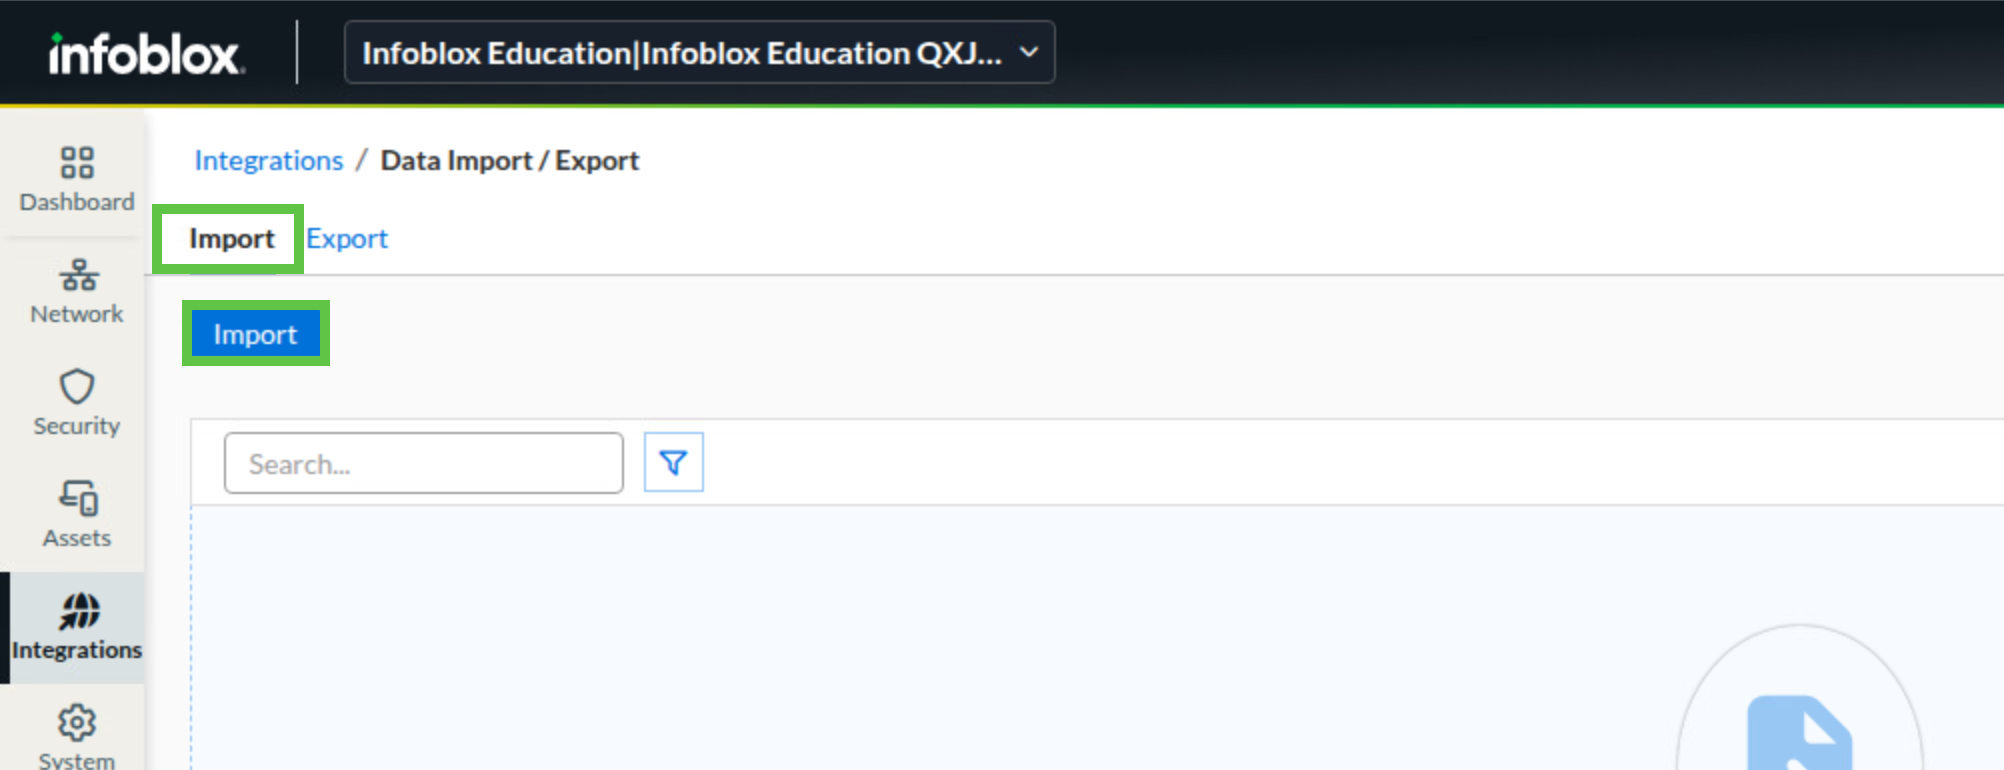
Navigate to Integrations → Data Import / Export.
-
Open the Import submenu and click Import to begin a new import job.
-
In the import name field, enter Import 1, then click Next.

-
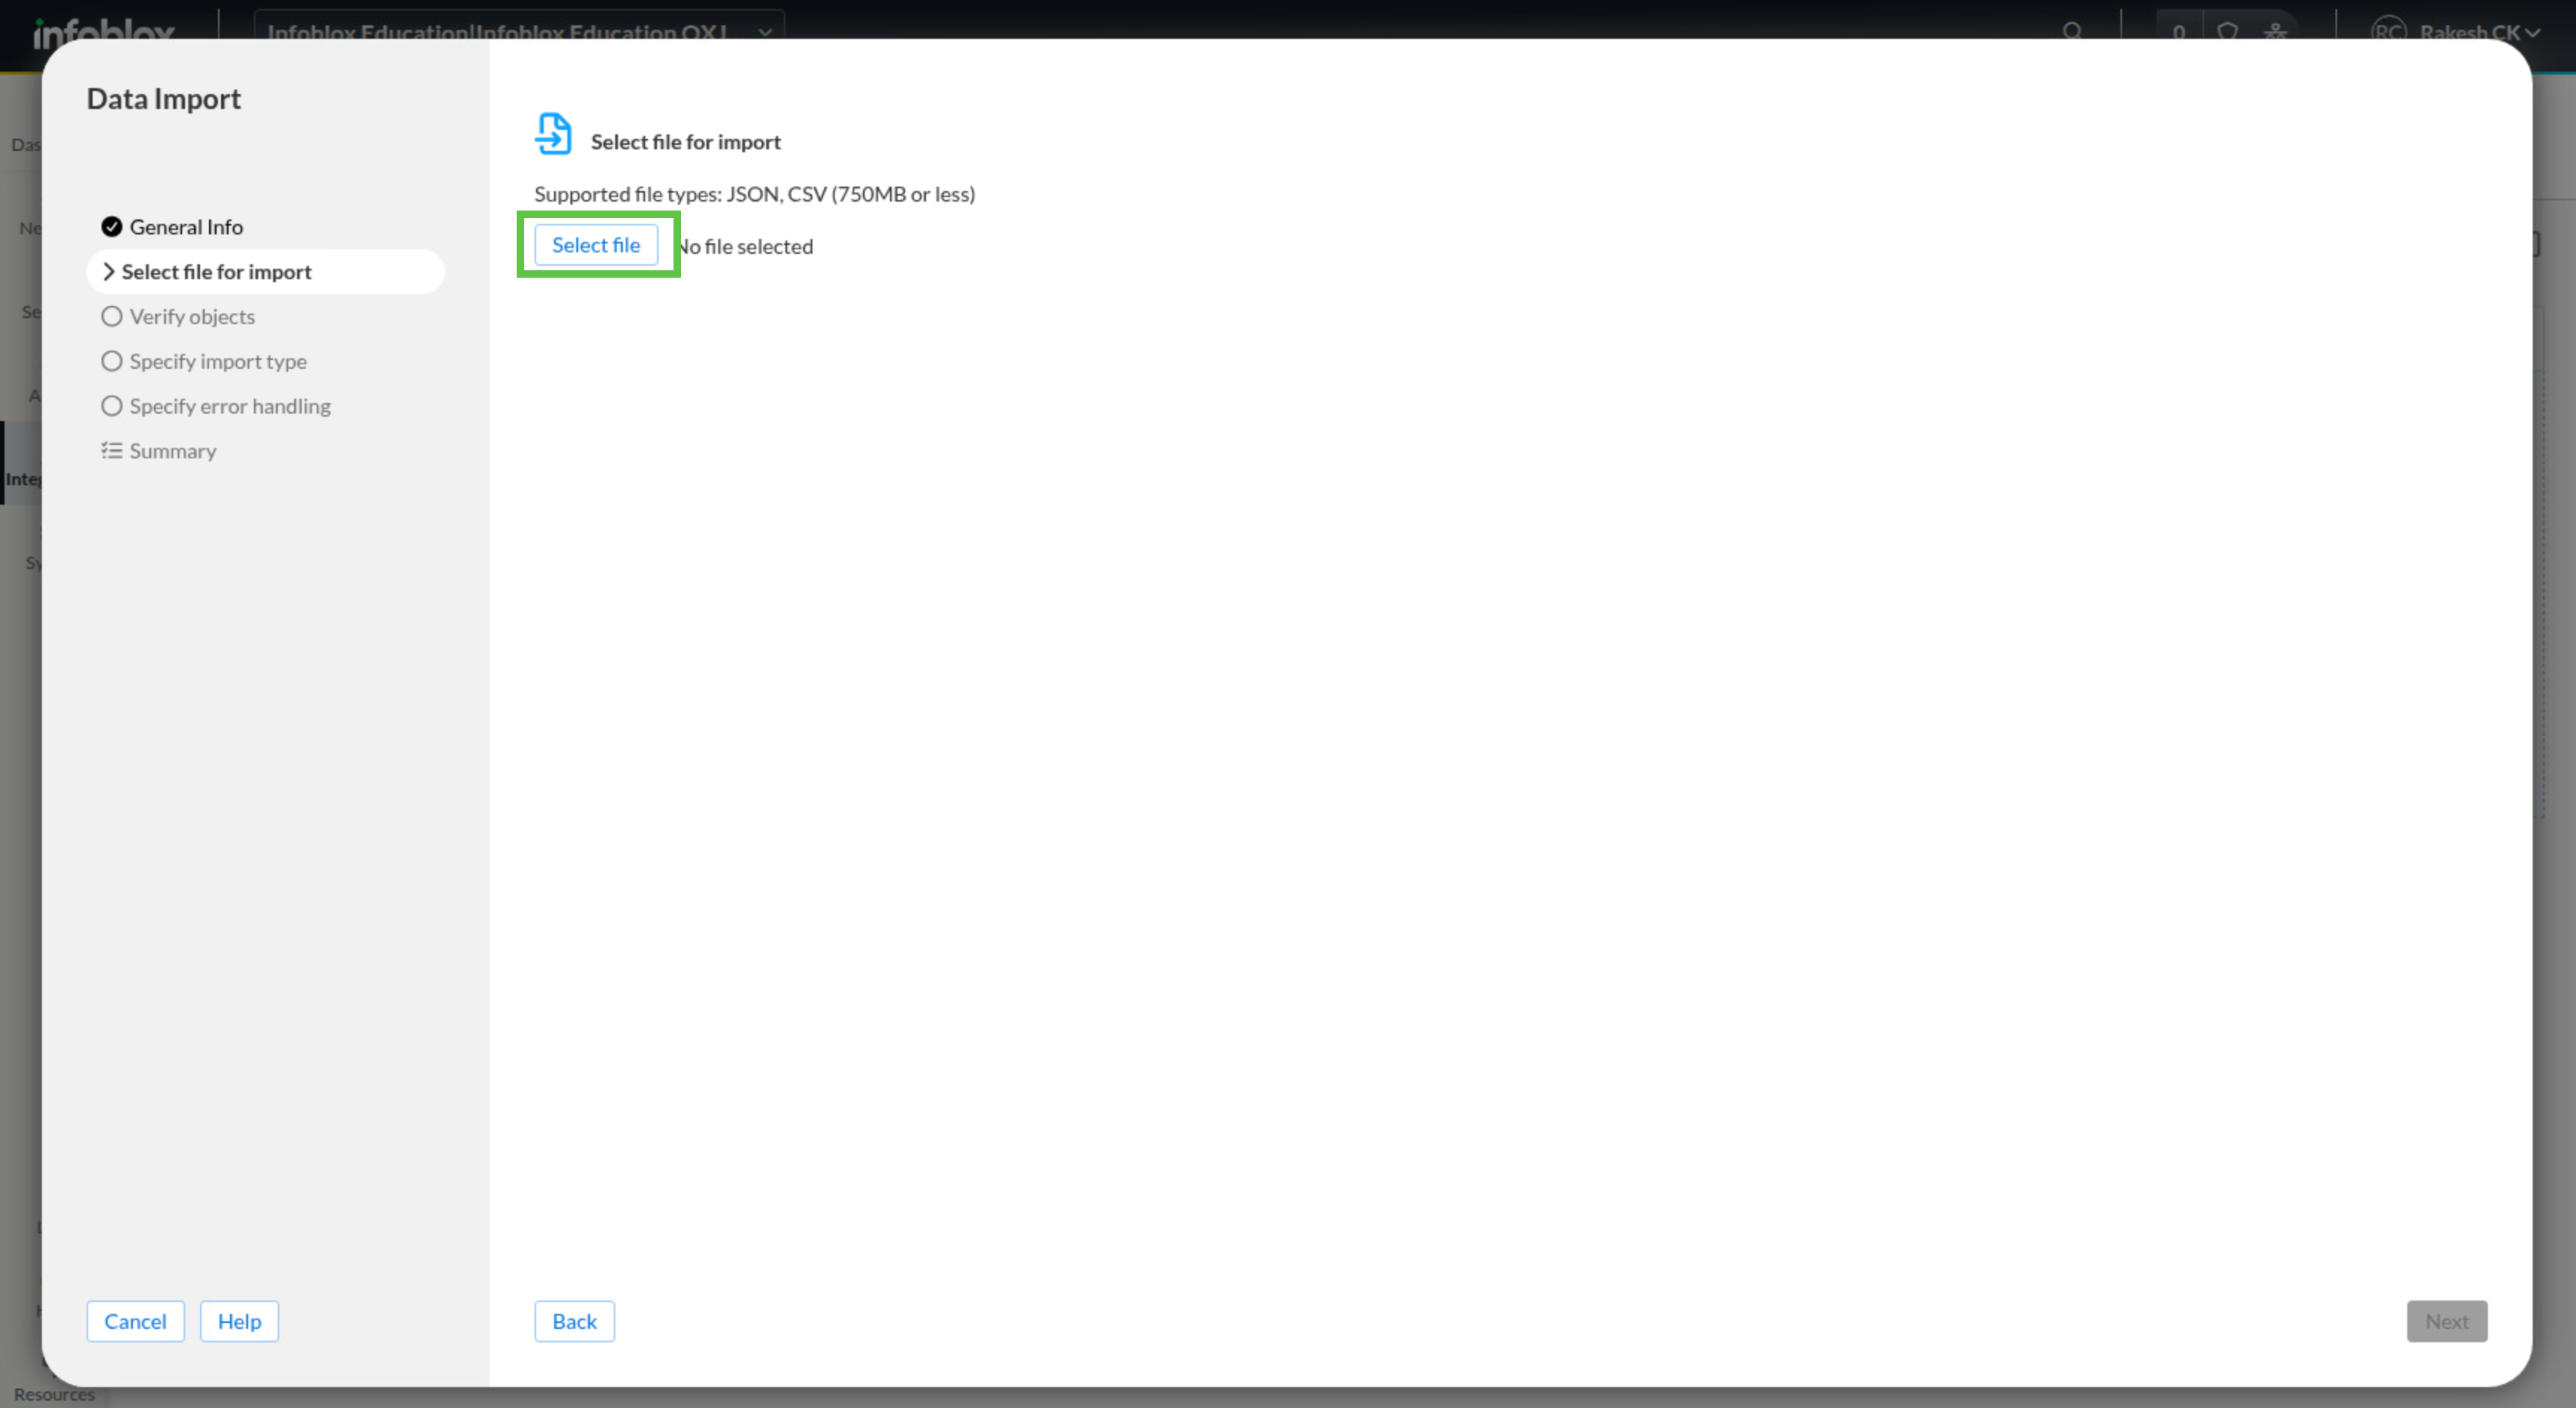
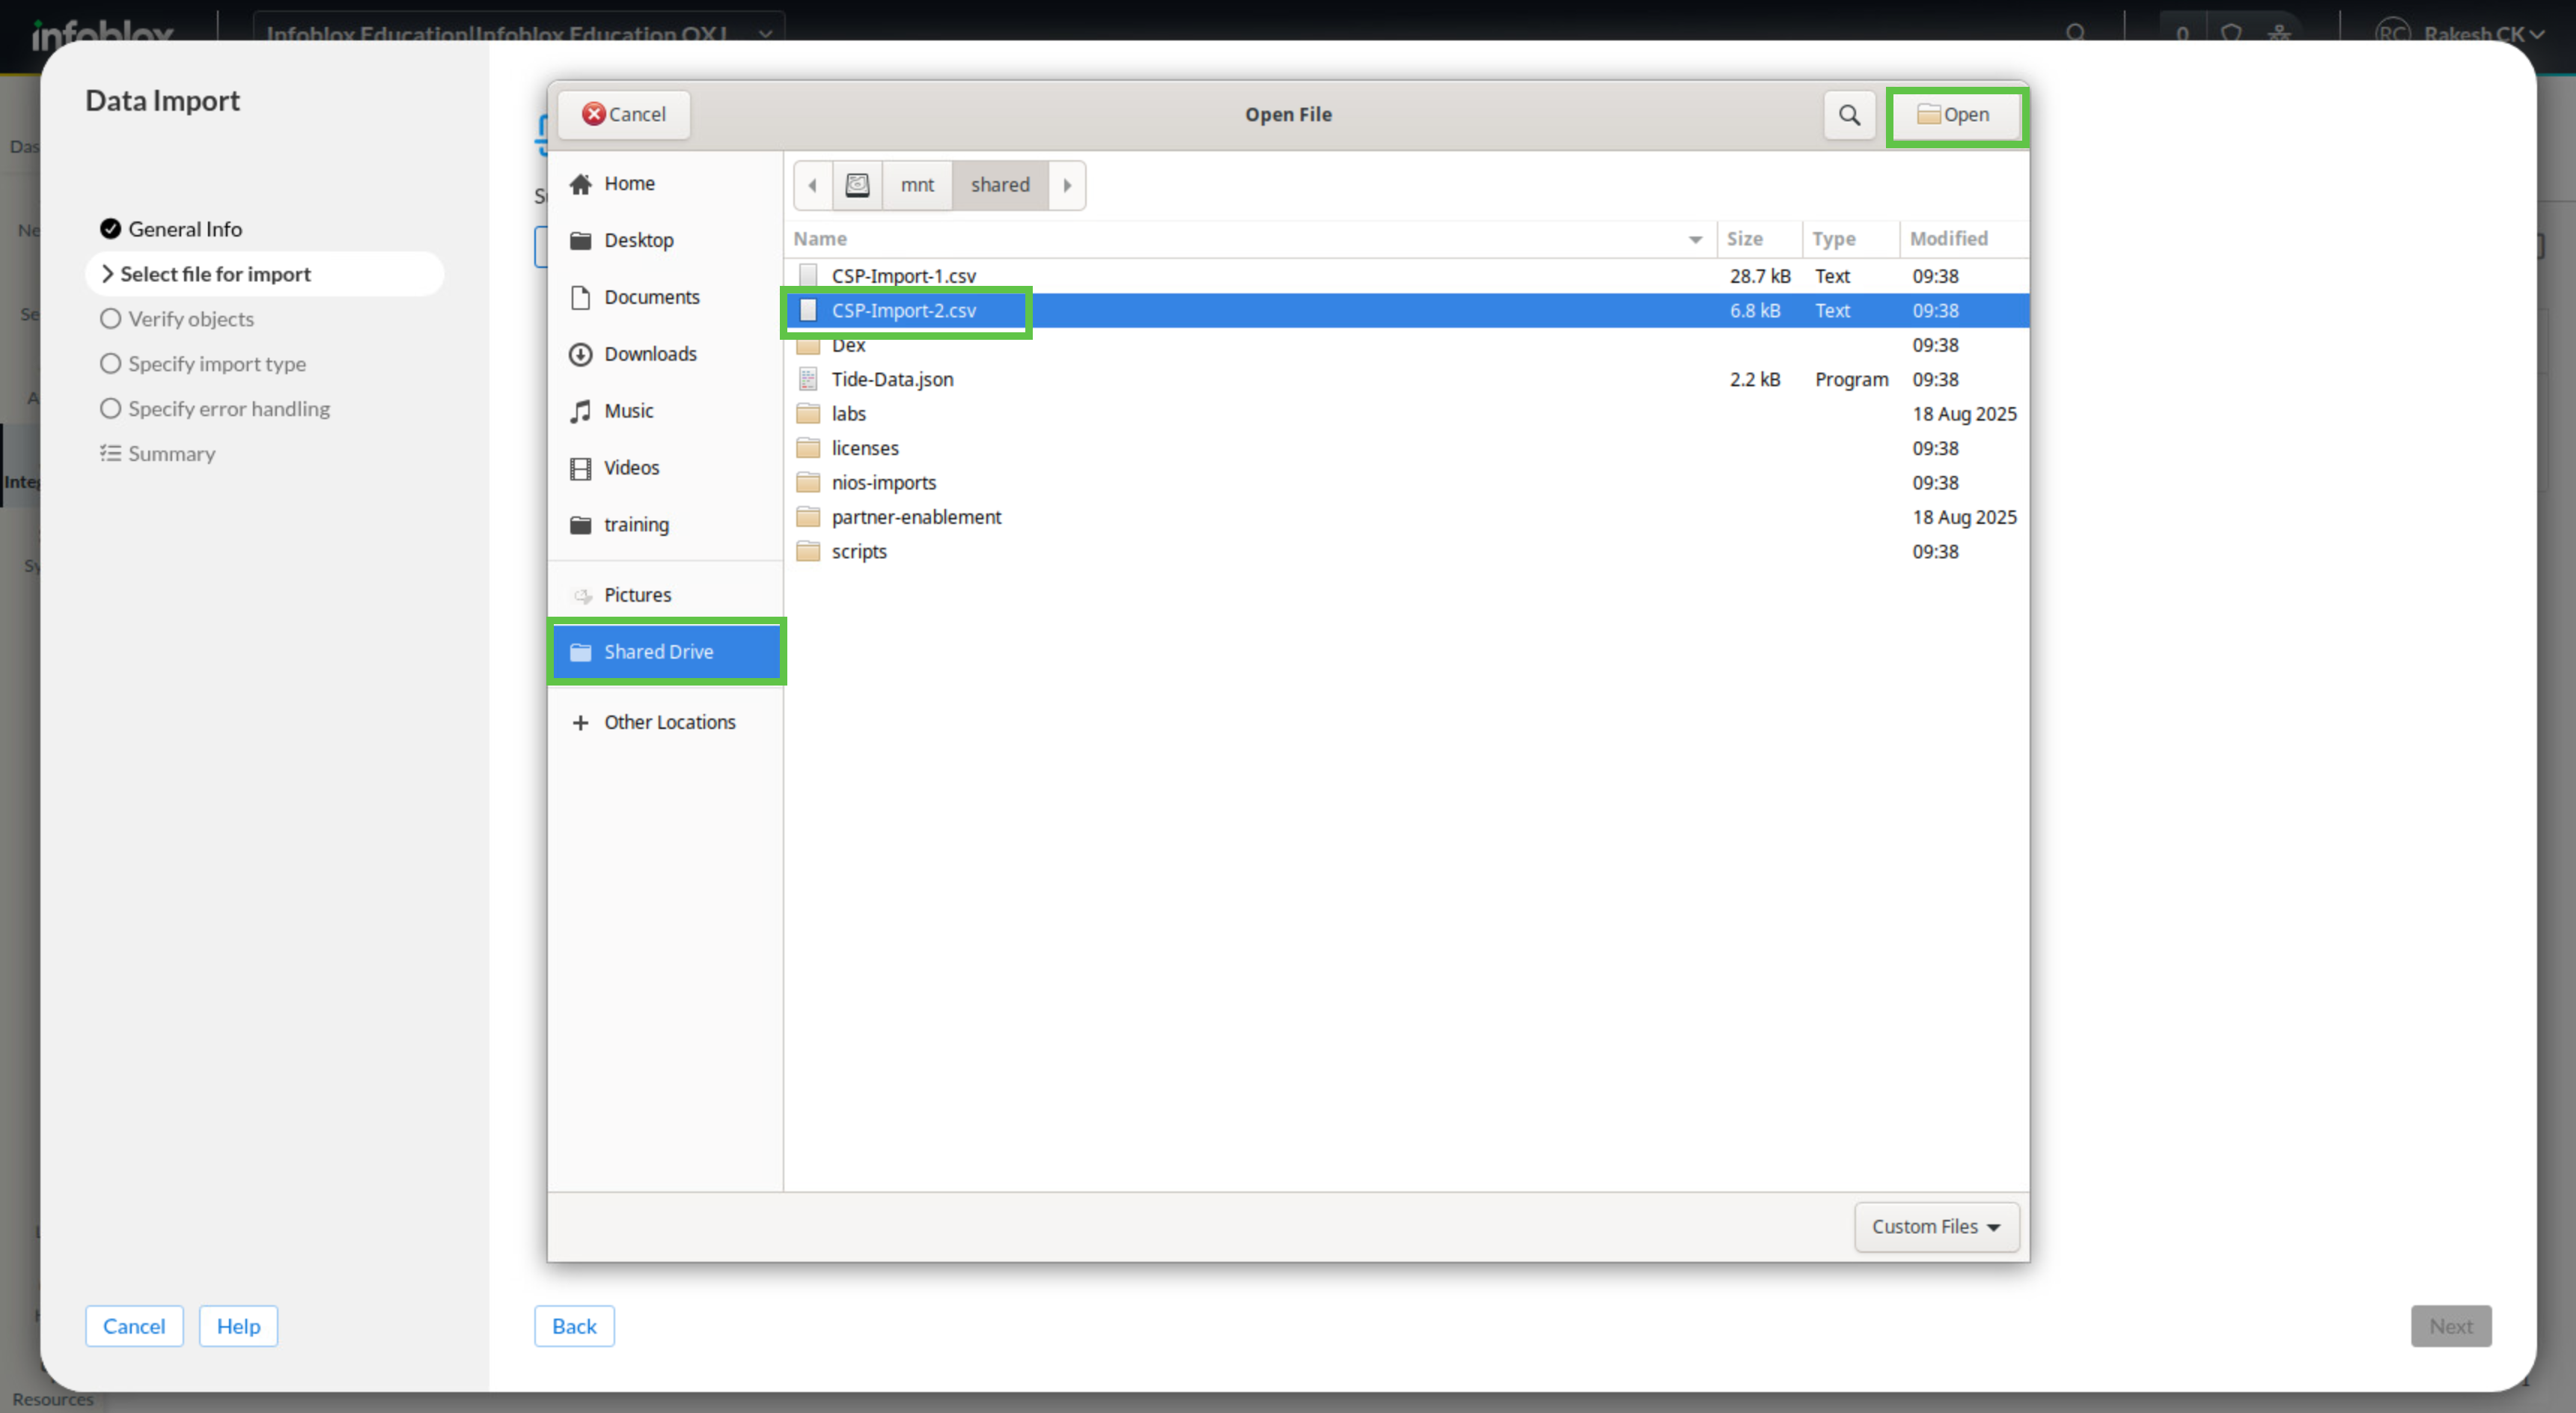
Click Select File.
-
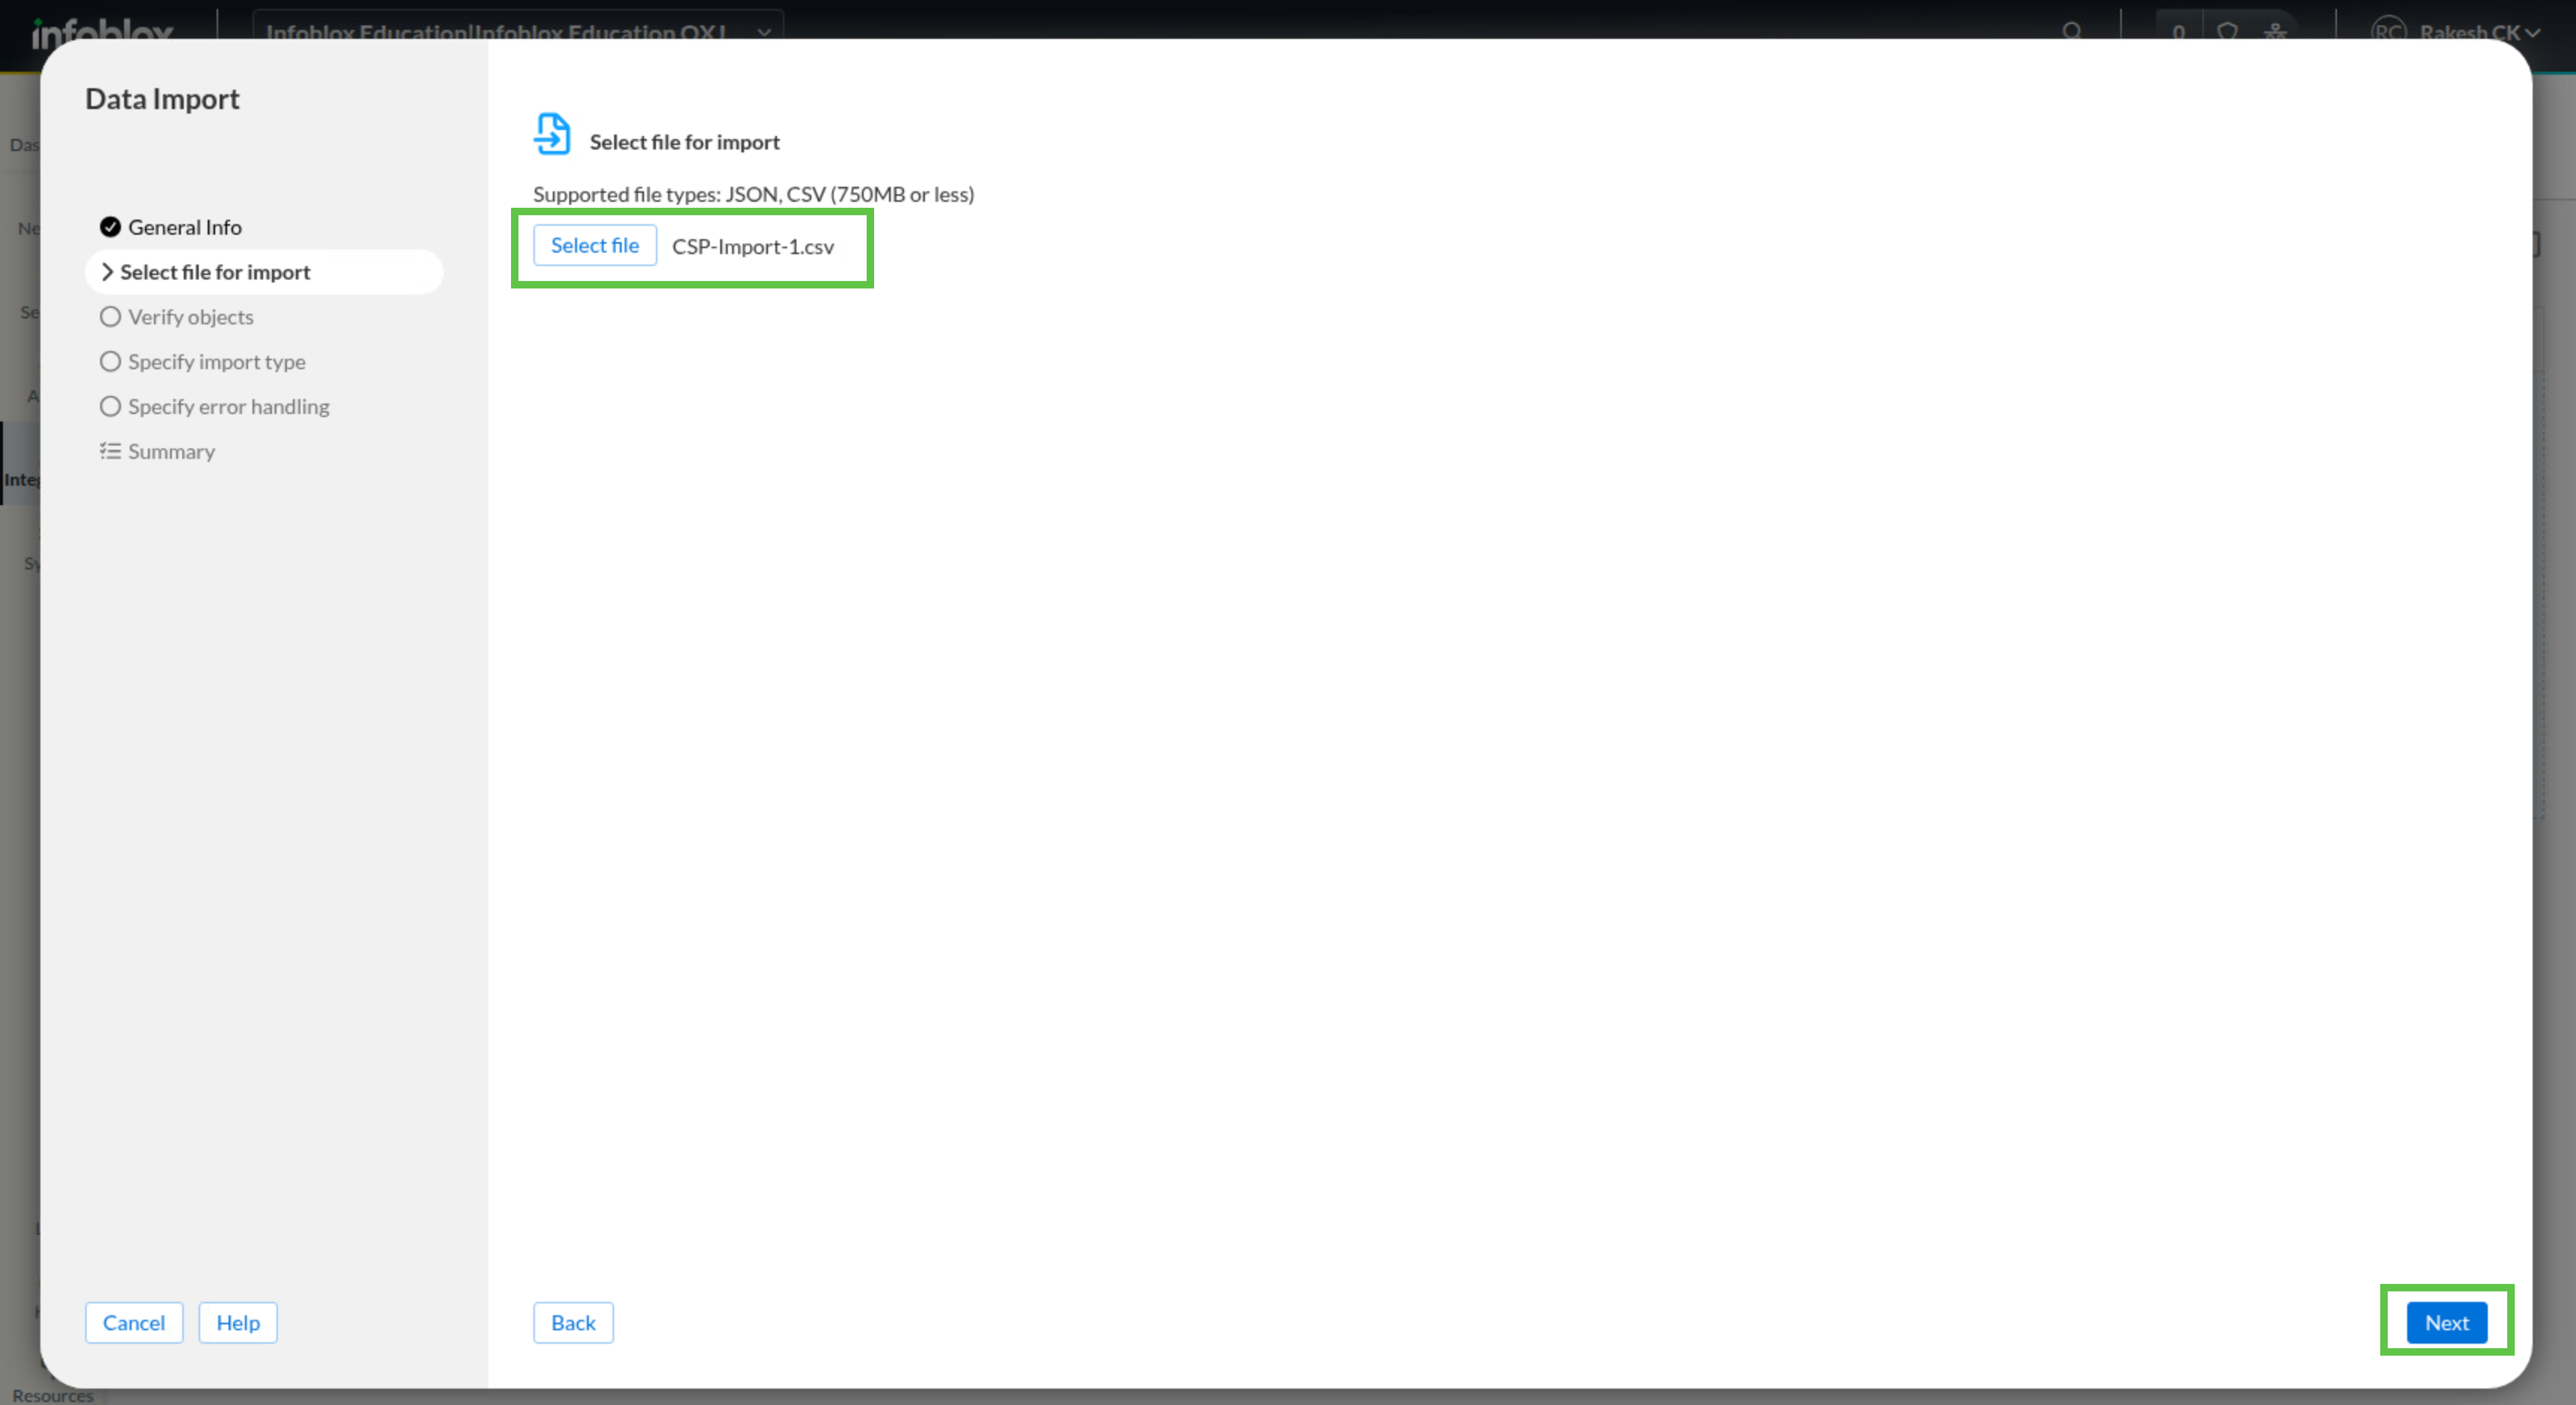
Select CSP-Import-1.csv from the shared drive.

-
Click Next.
-
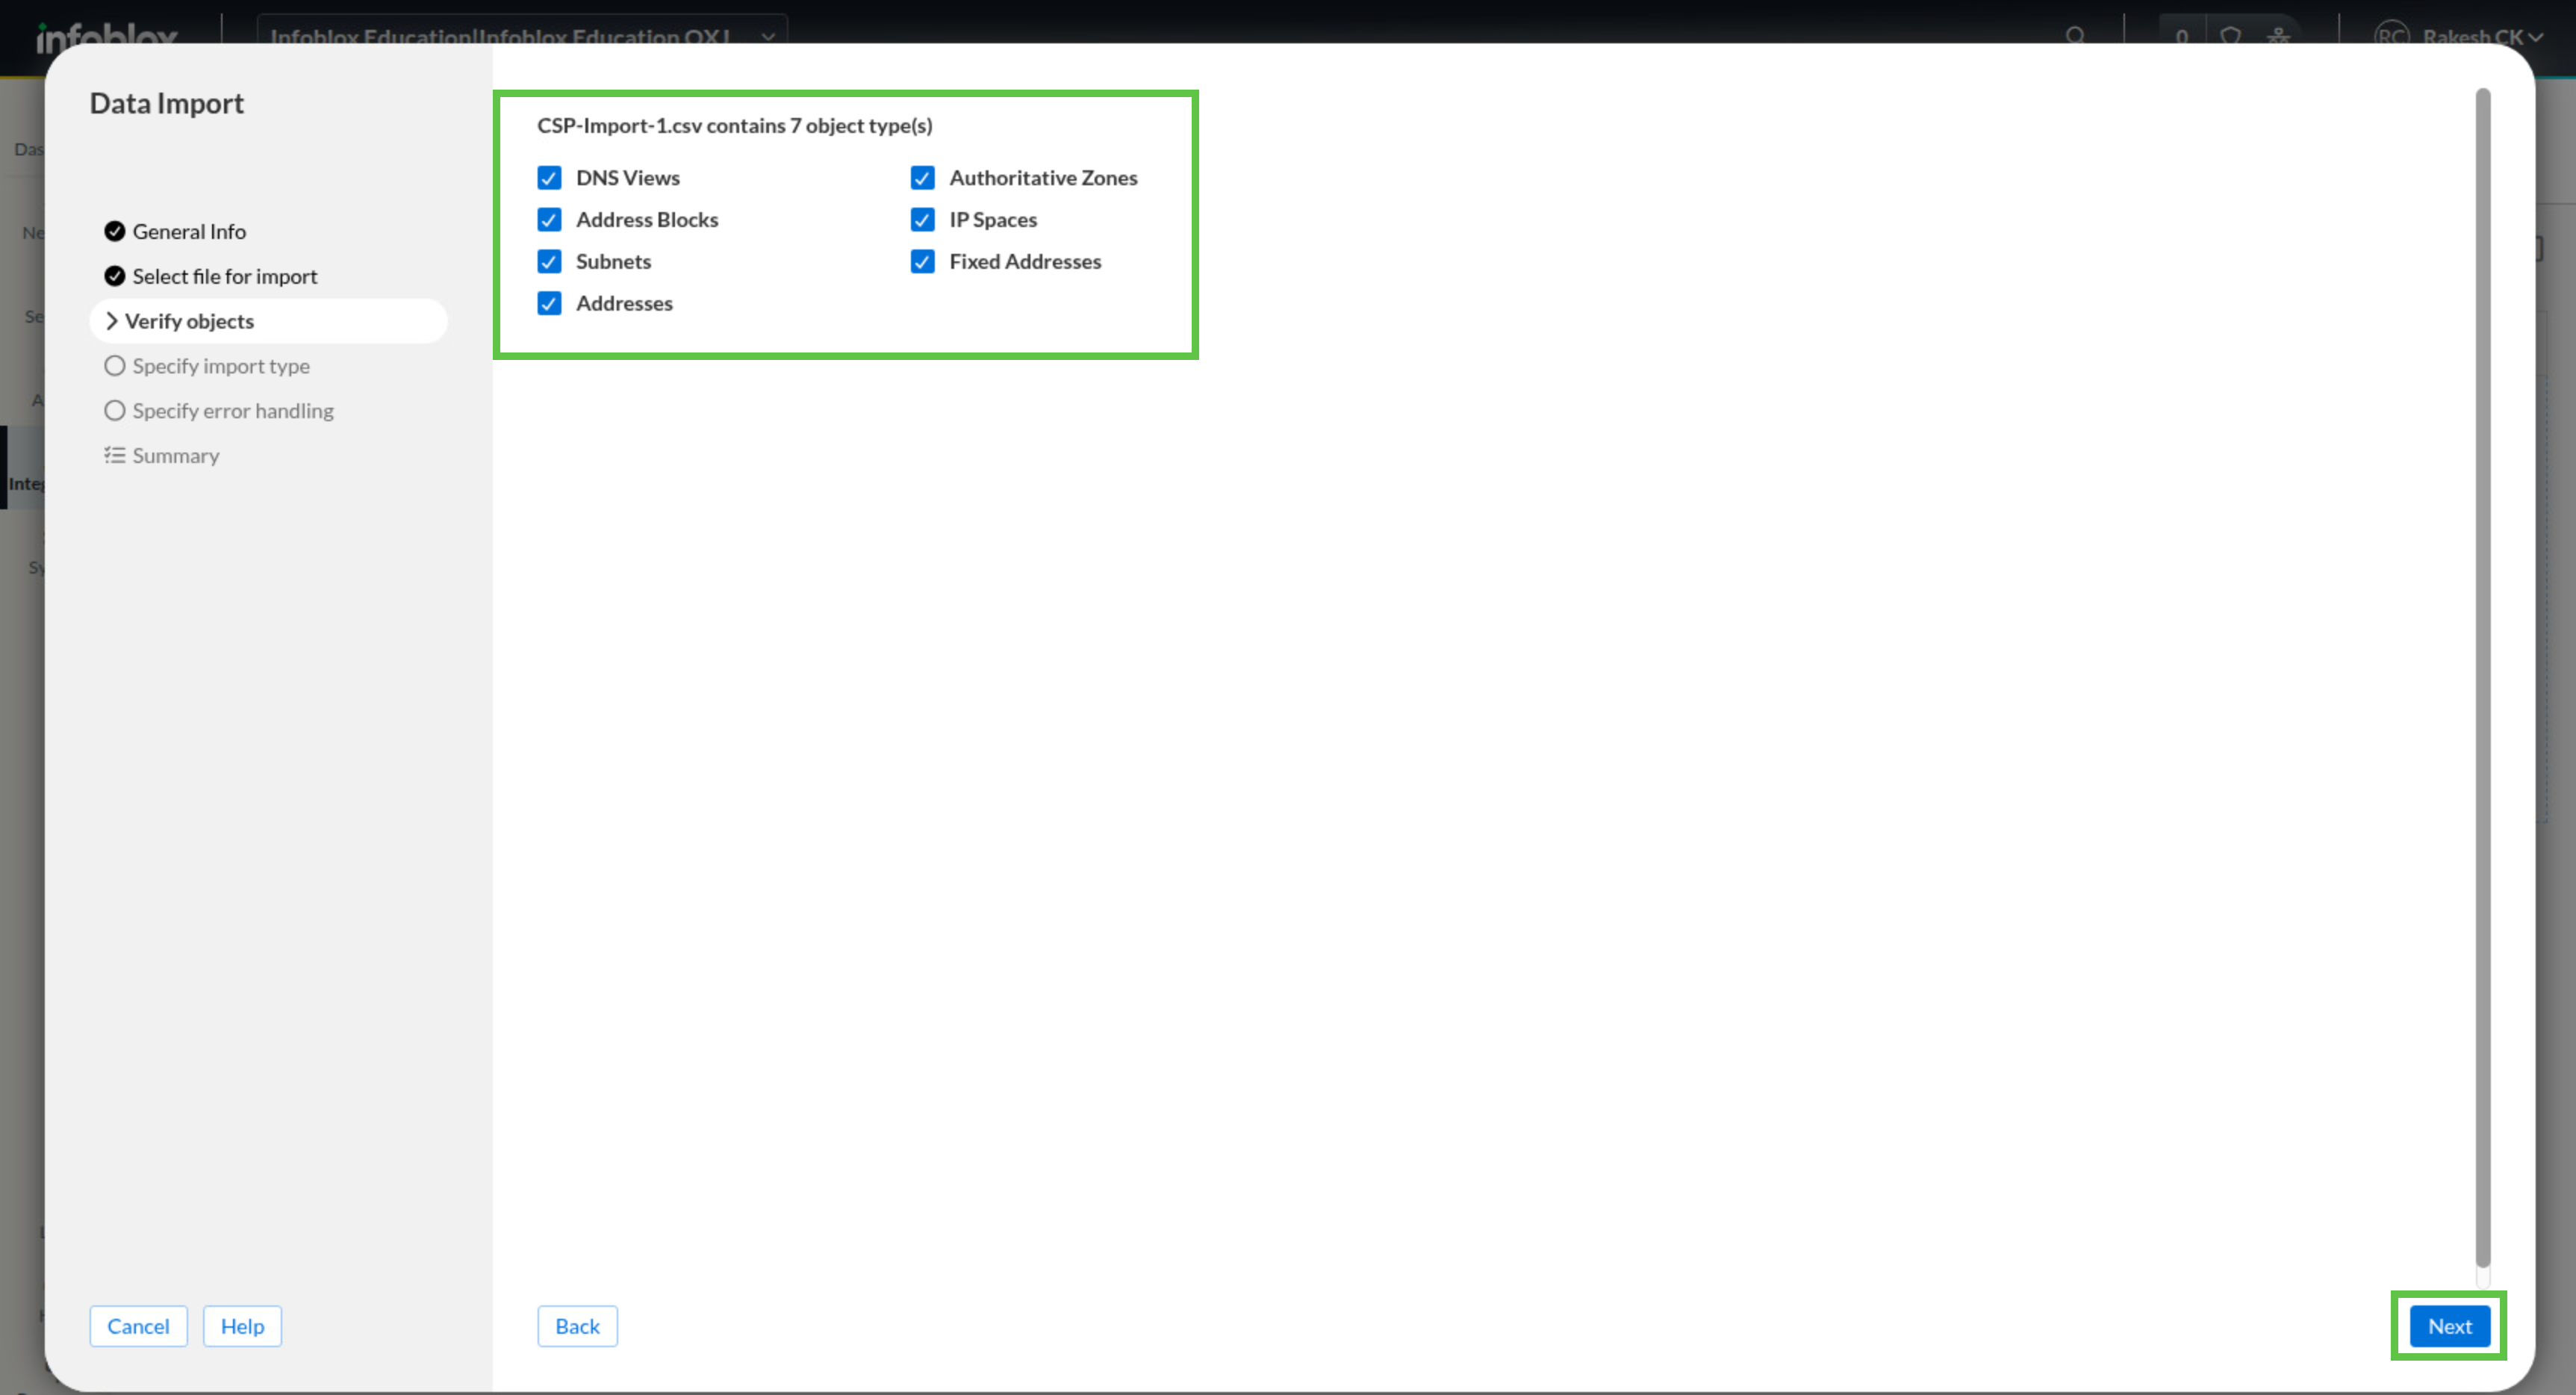
When you review the object selection page, make sure all object types remain selected, then click Next.
-
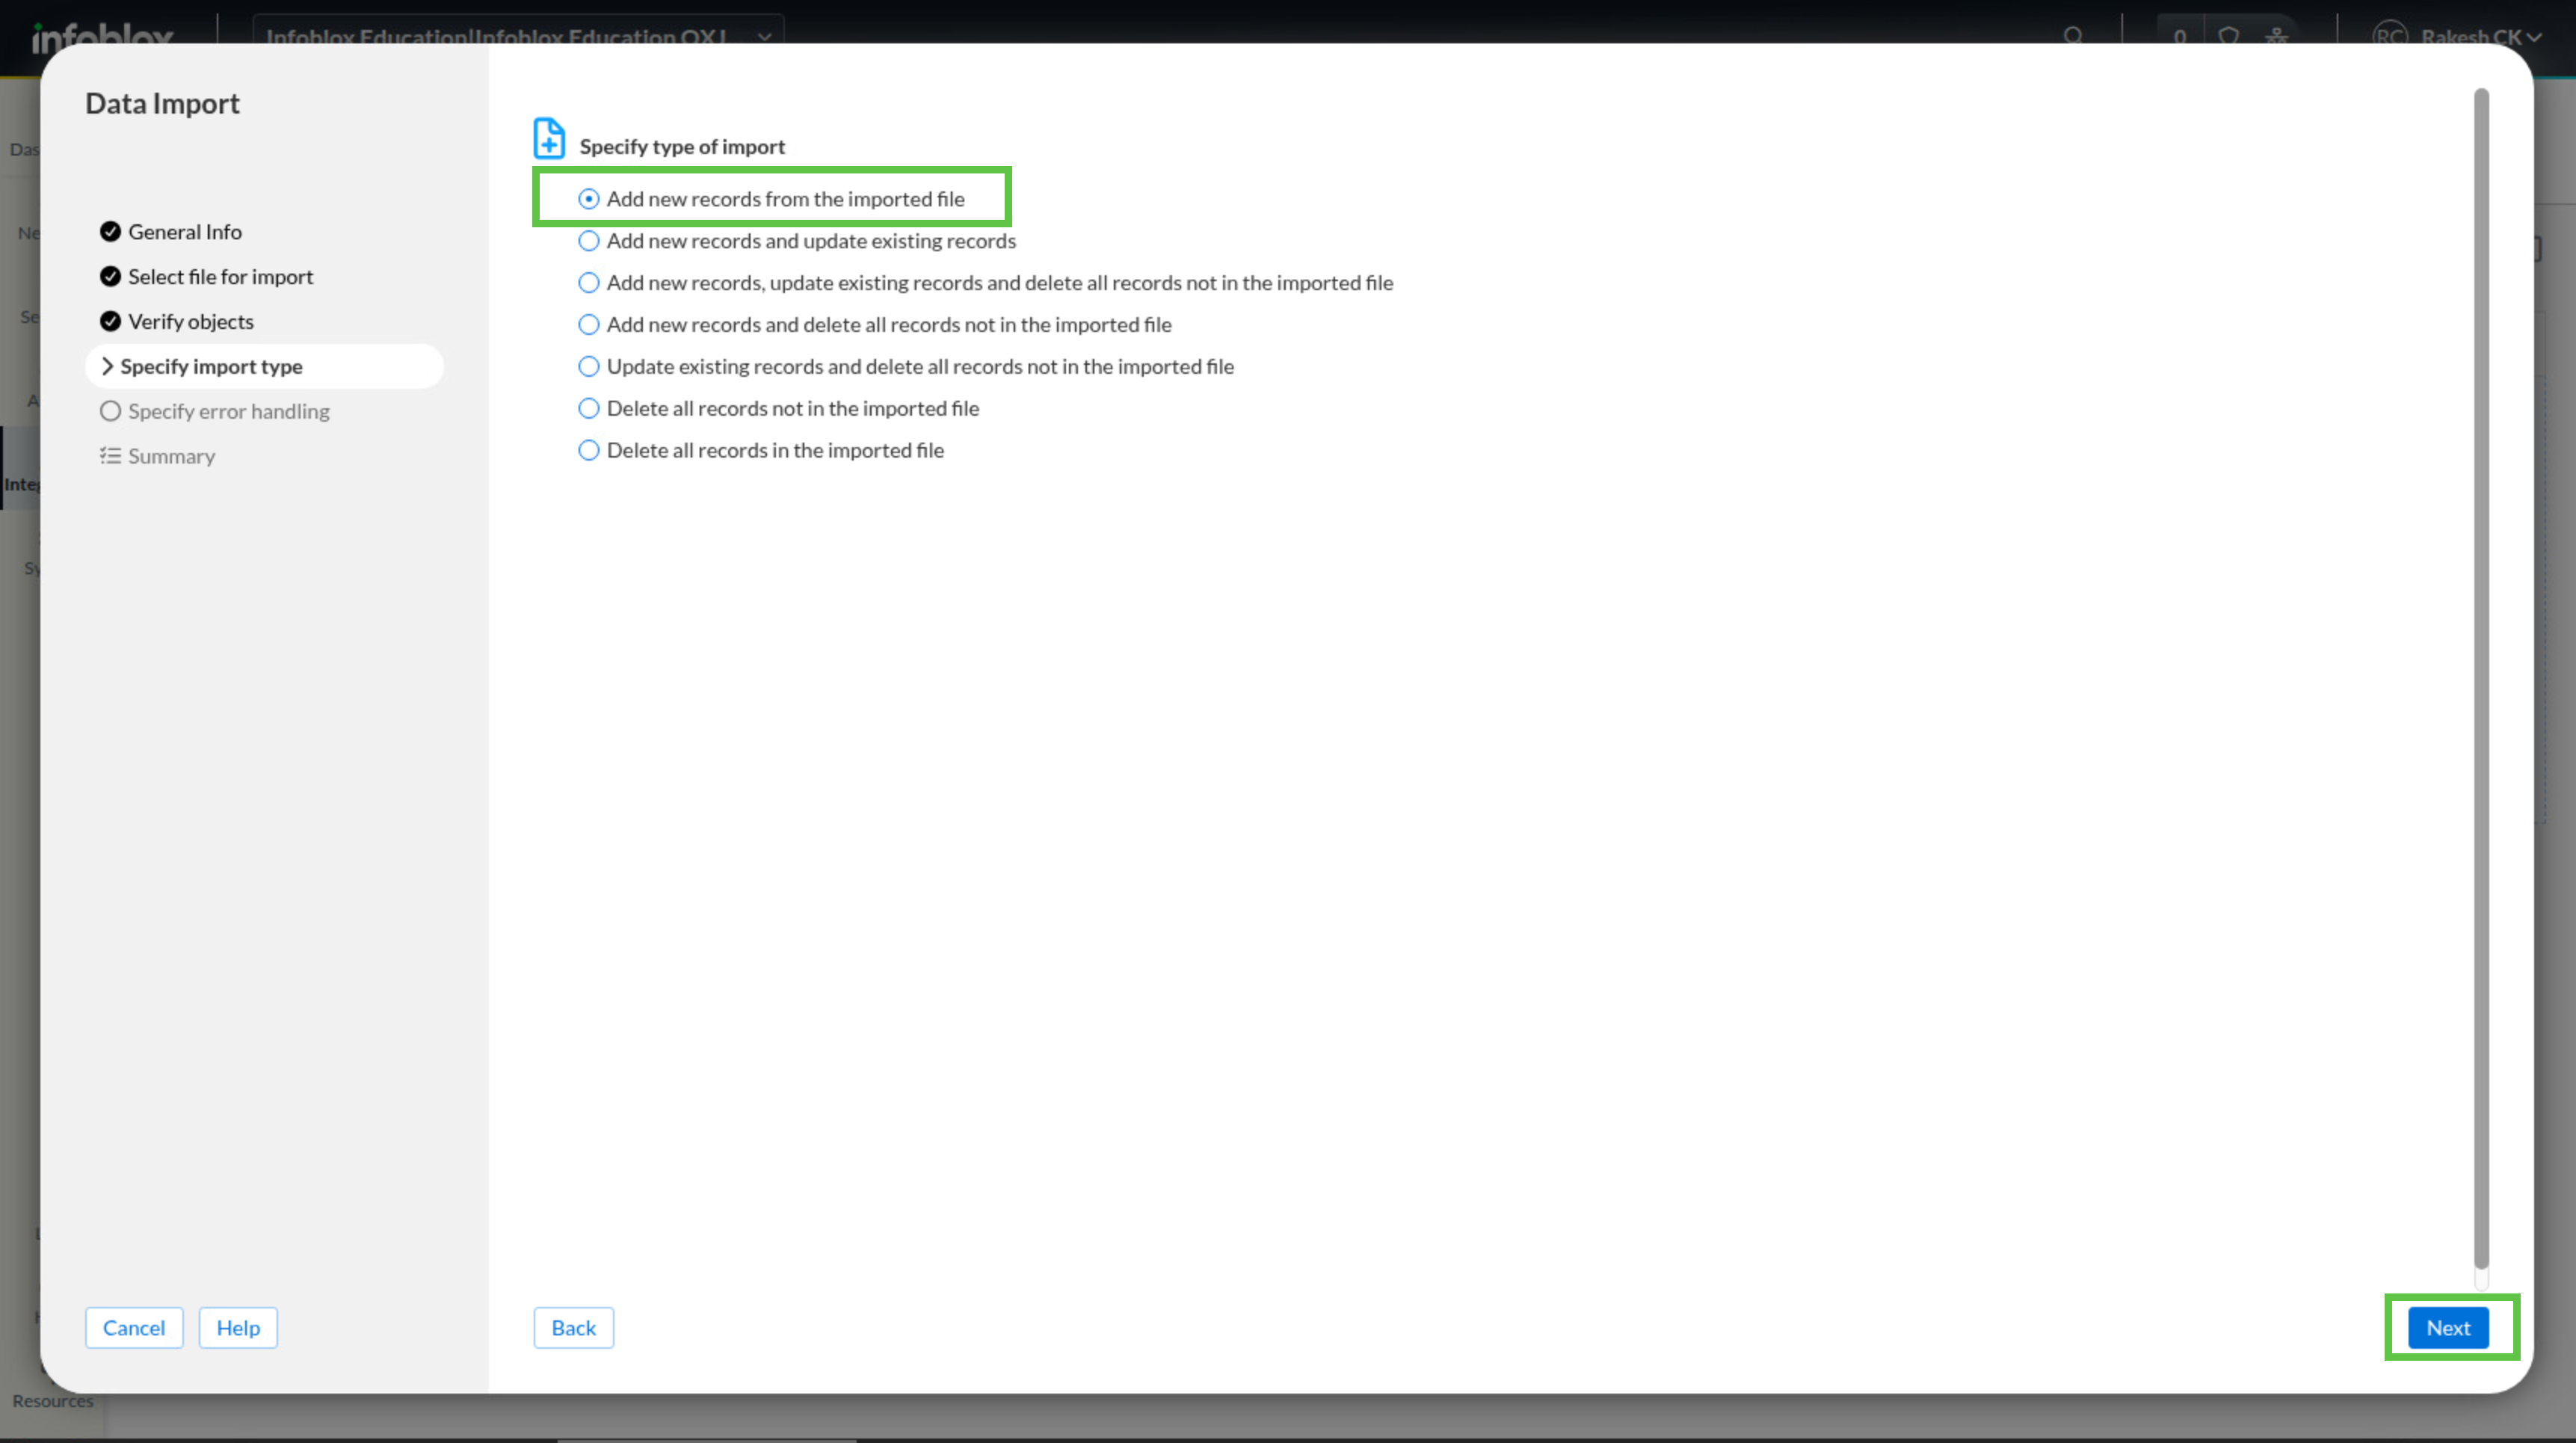
In Specify import type, choose Add new records from the imported file if it is not already selected, then click Next.
-
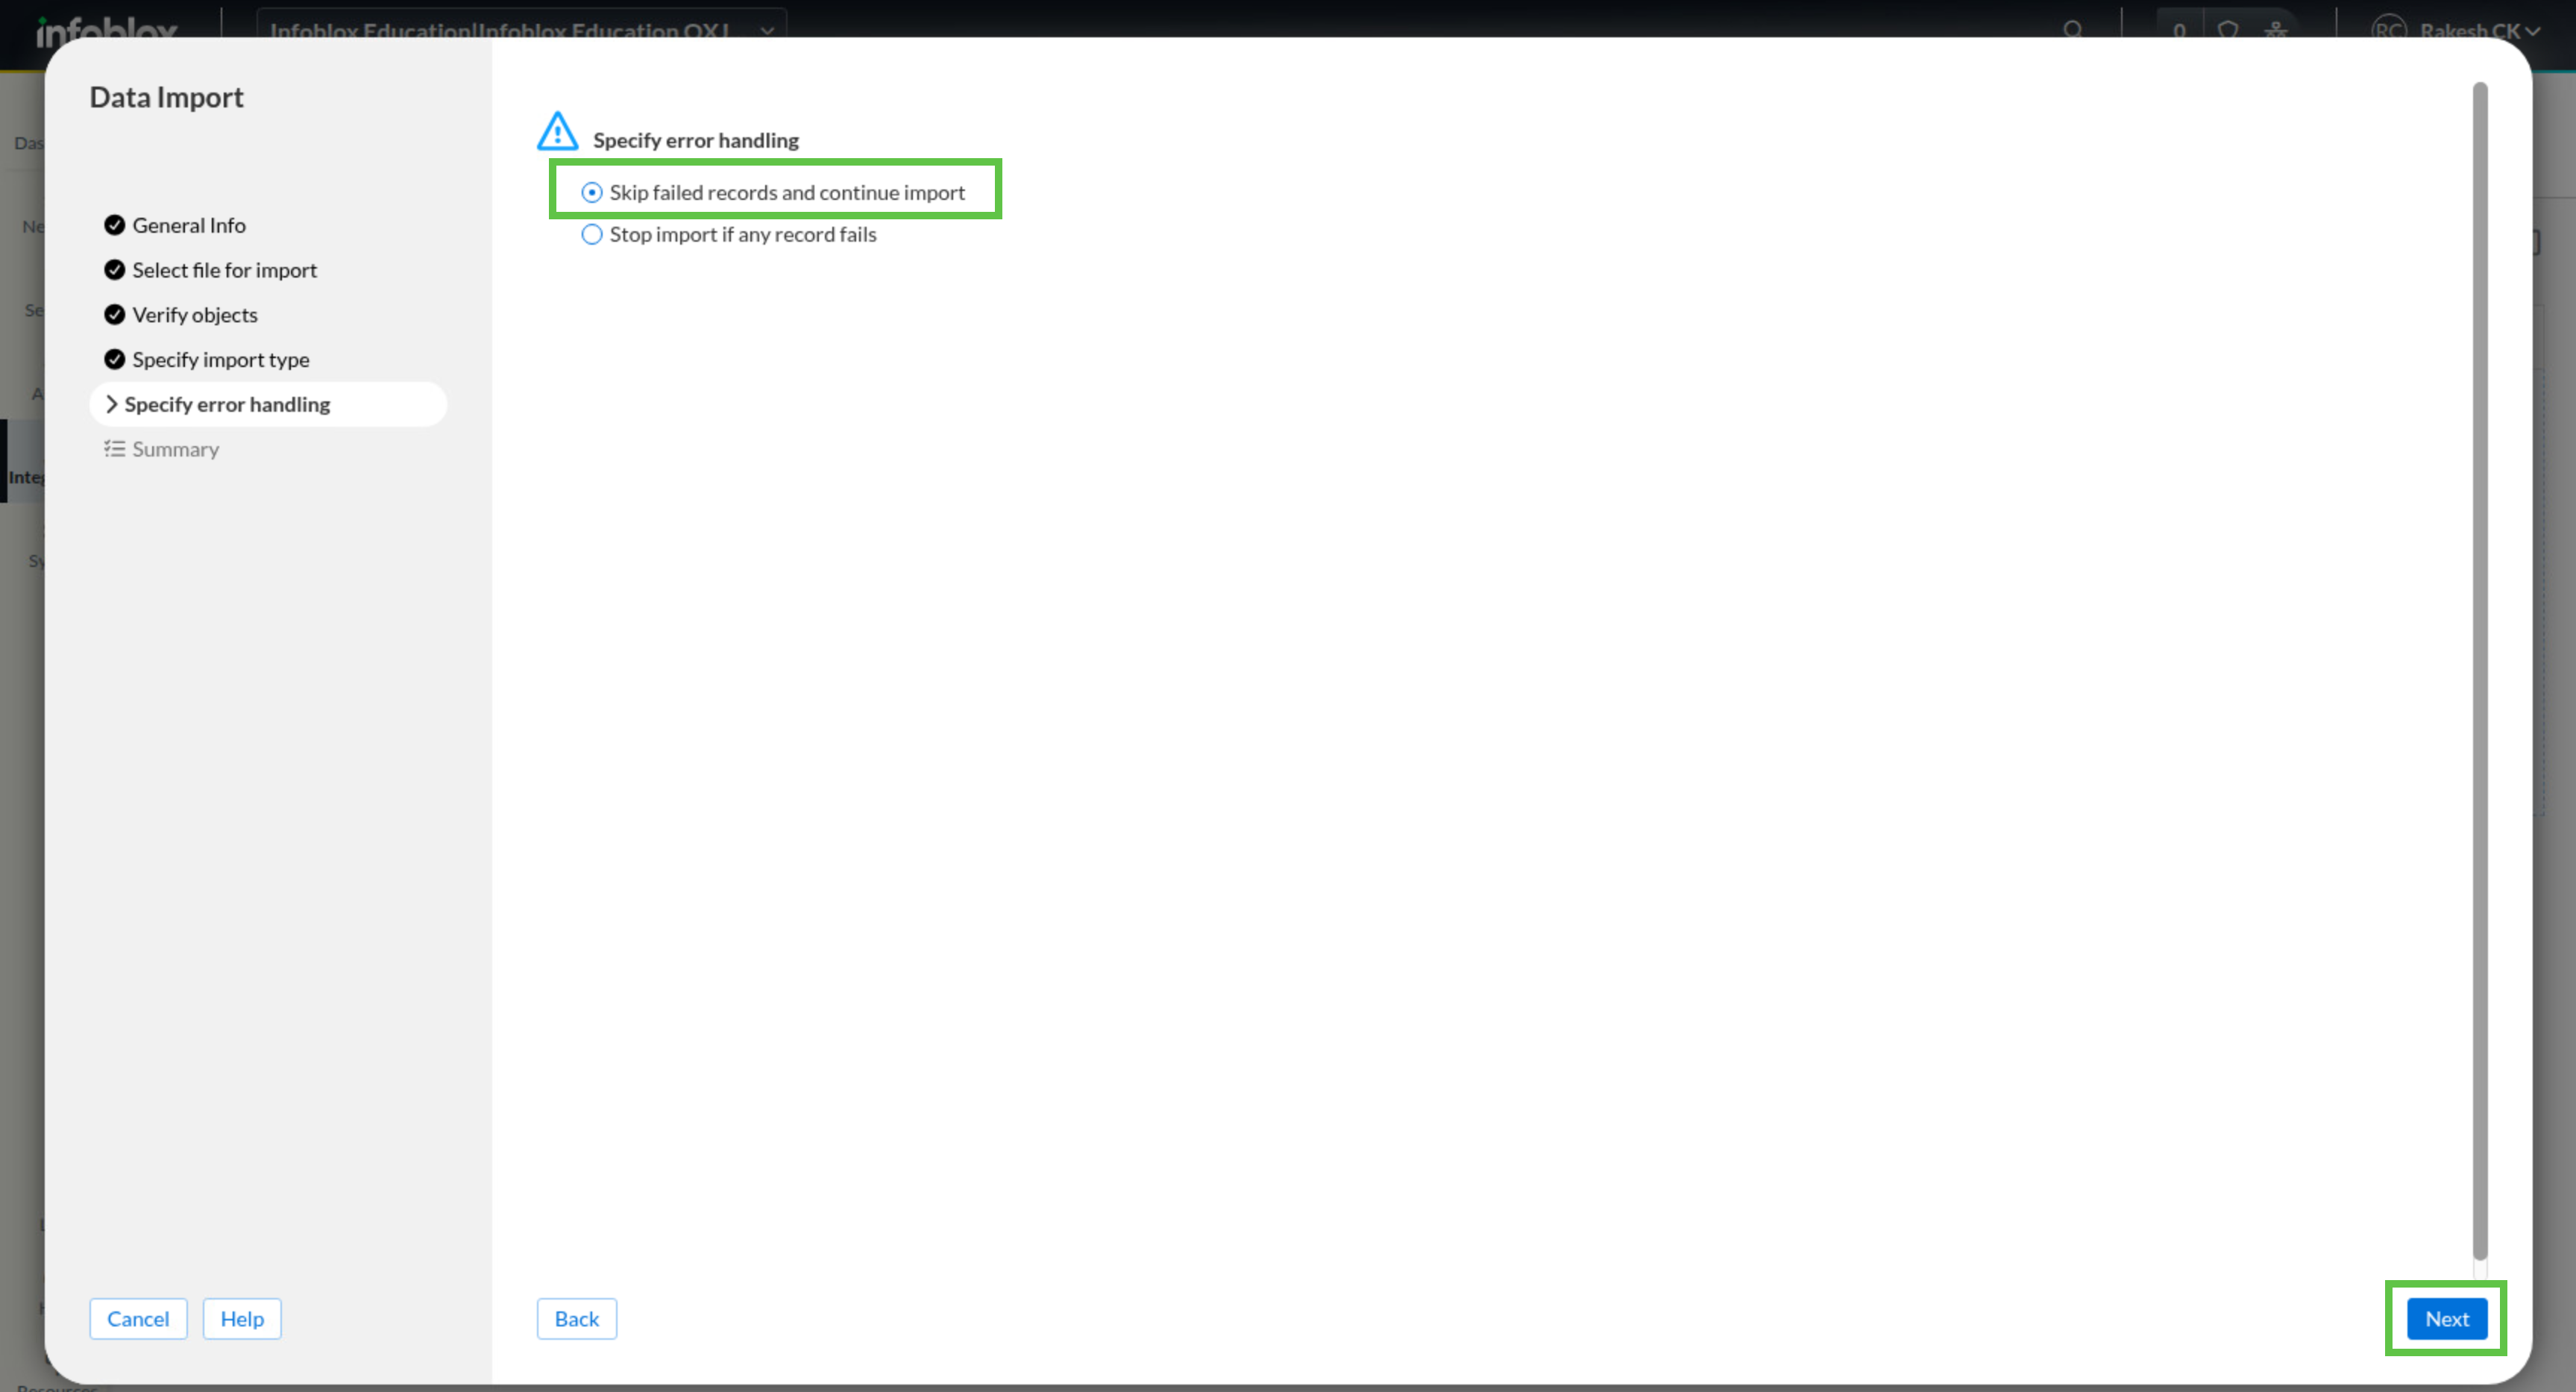
For error handling, choose Skip failed records and continue import, then click Next.
-
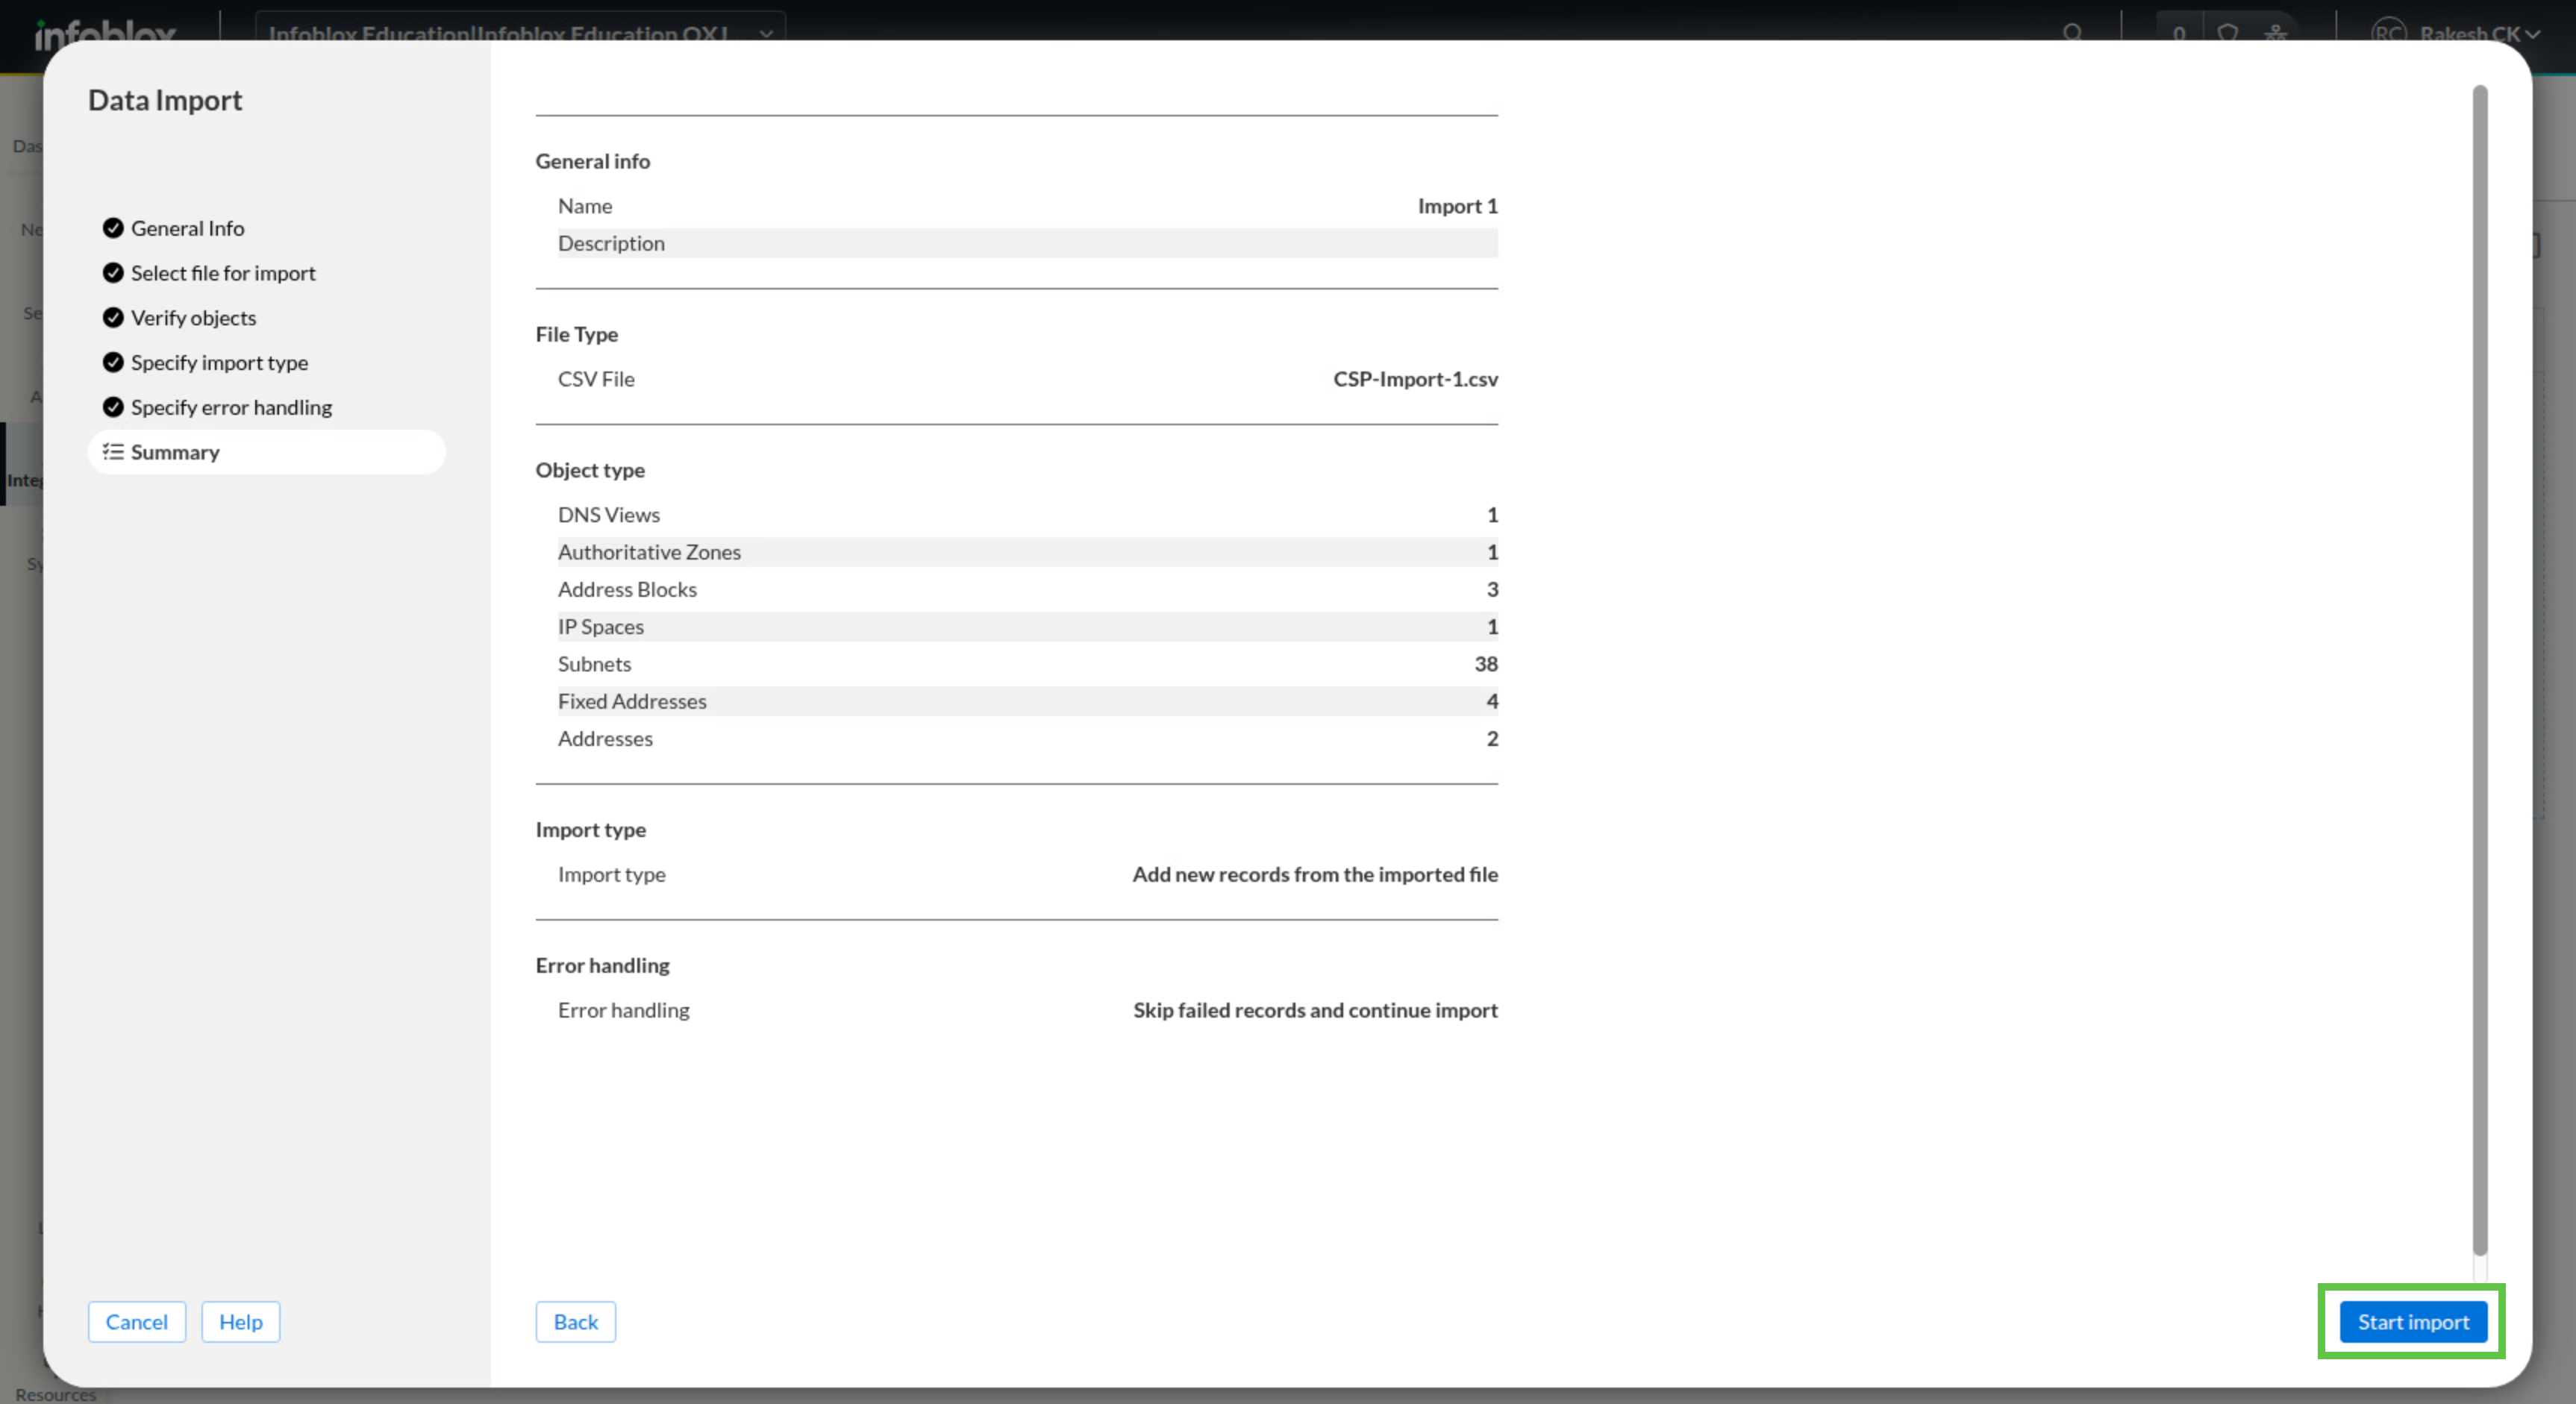
Review the summary and click Start Import.
-
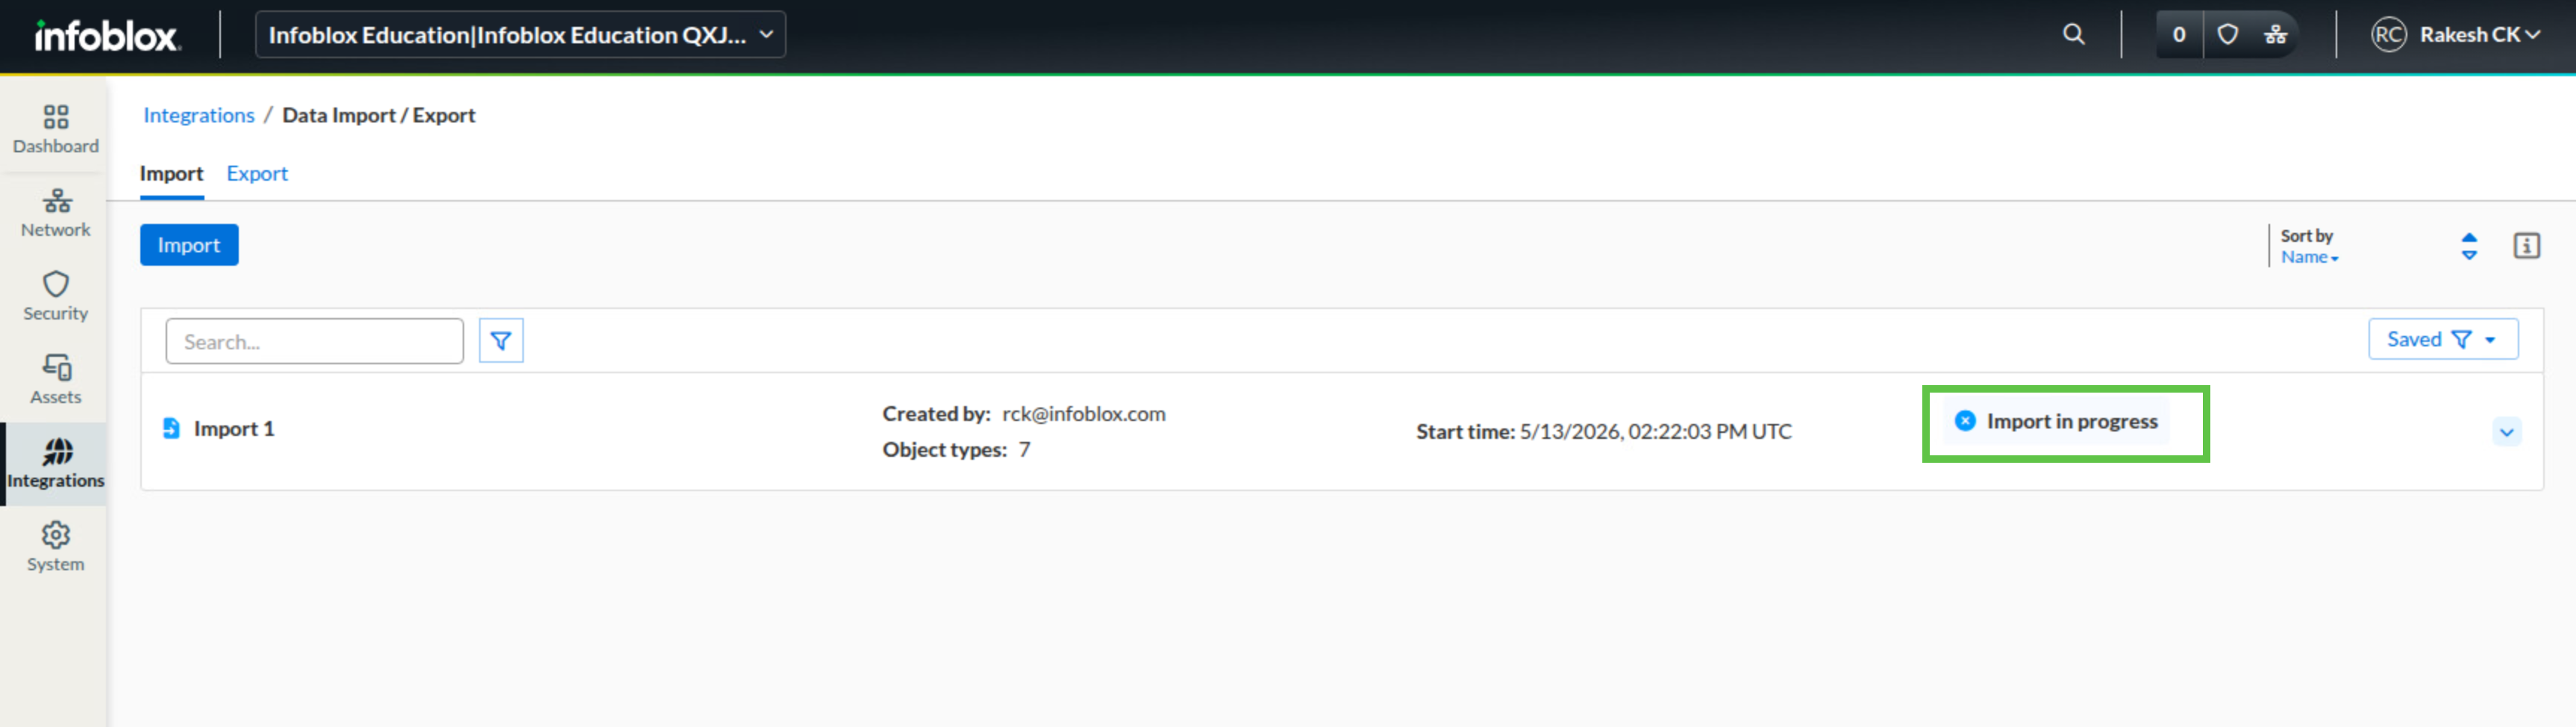
Verify that the job starts successfully.
-
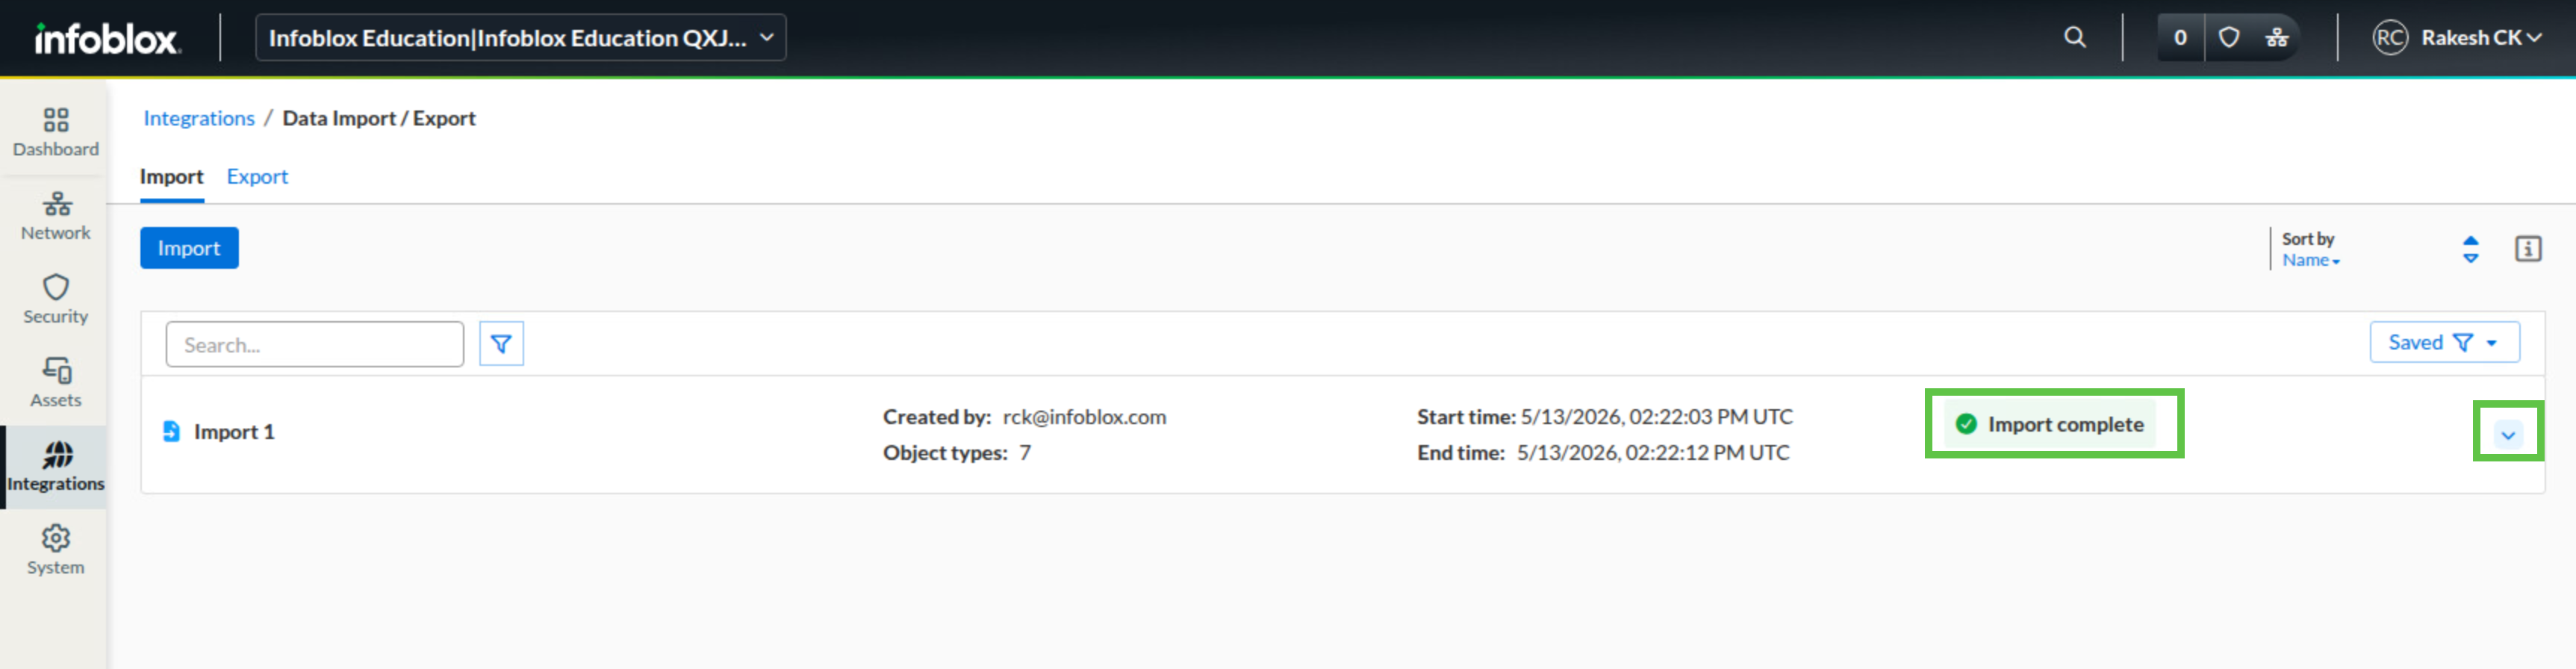
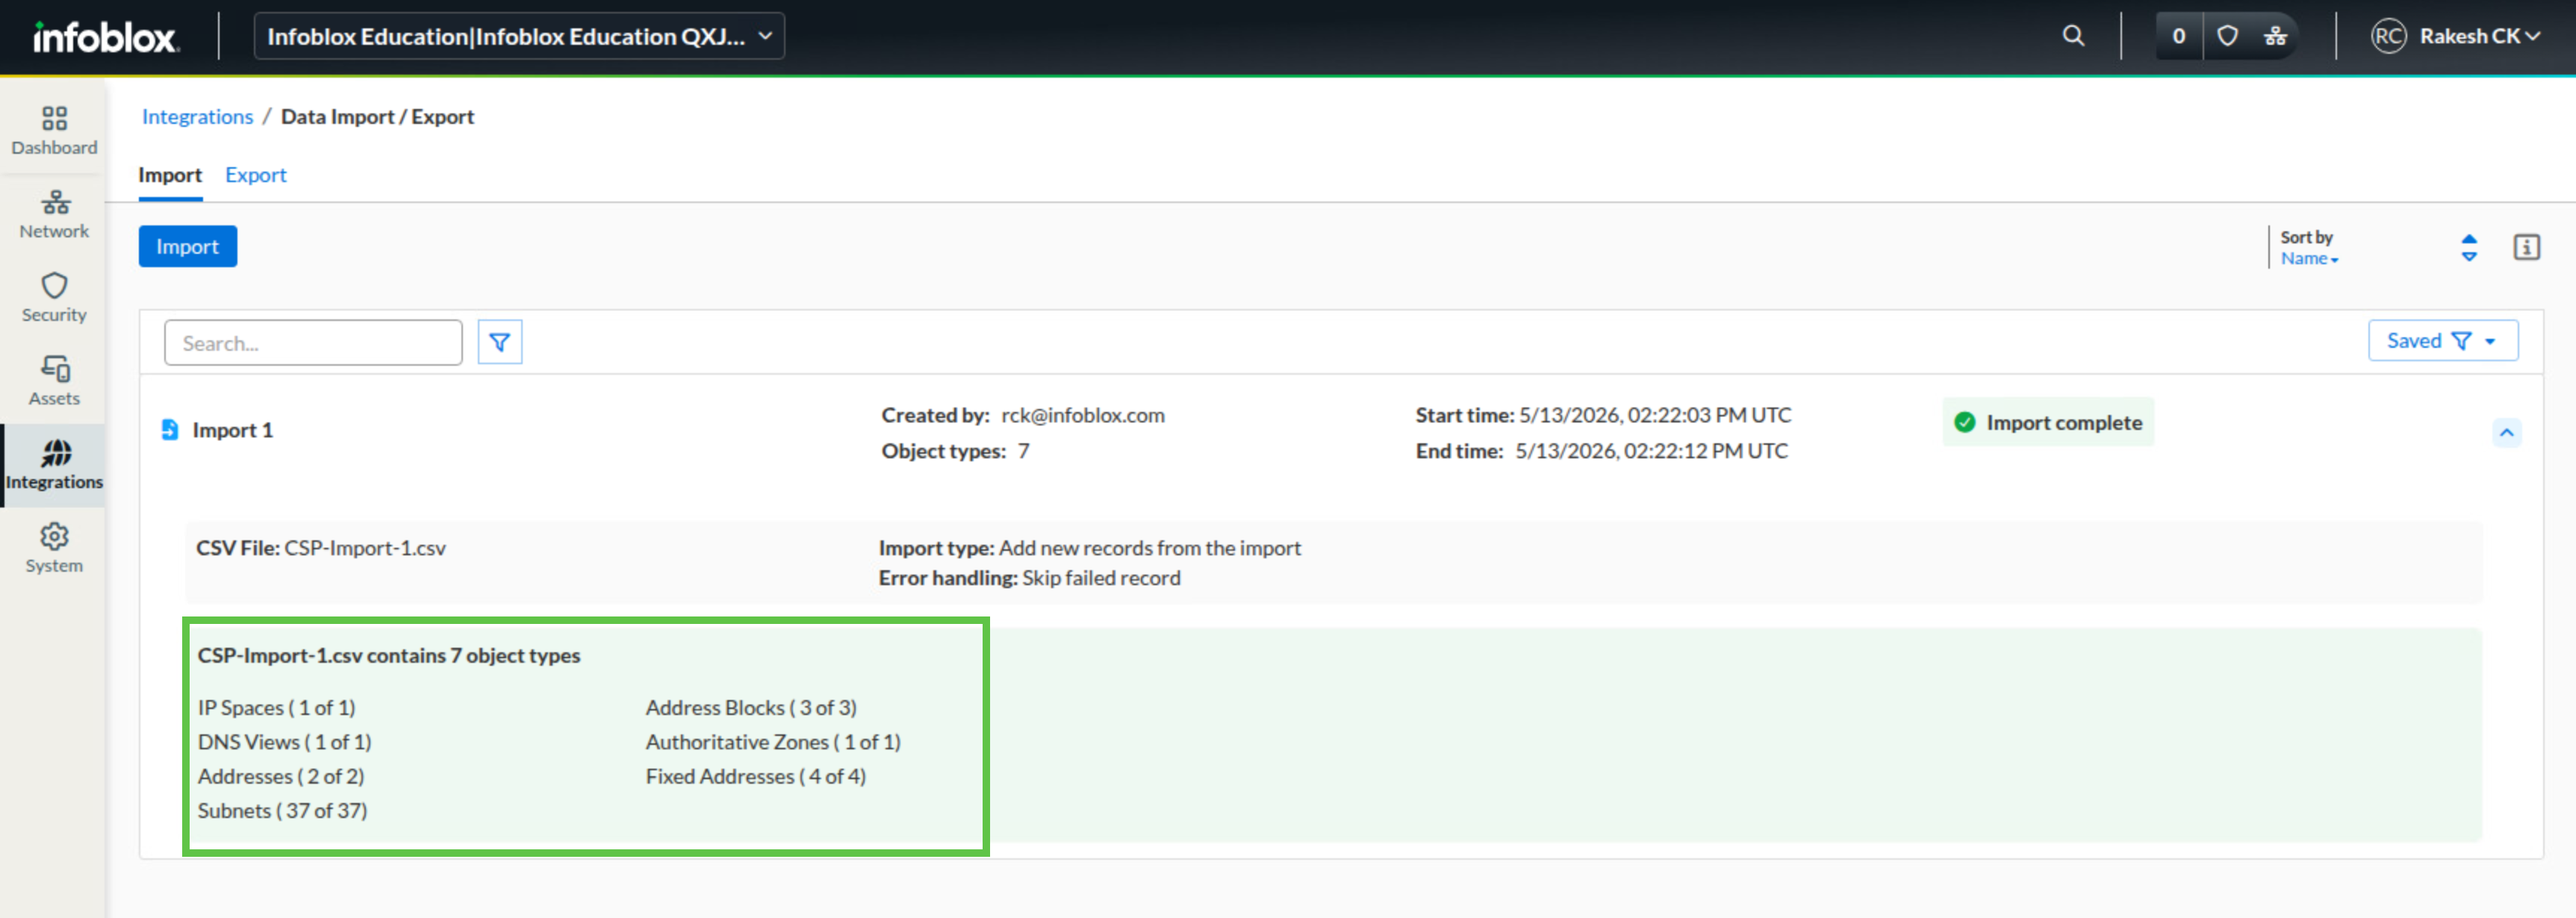
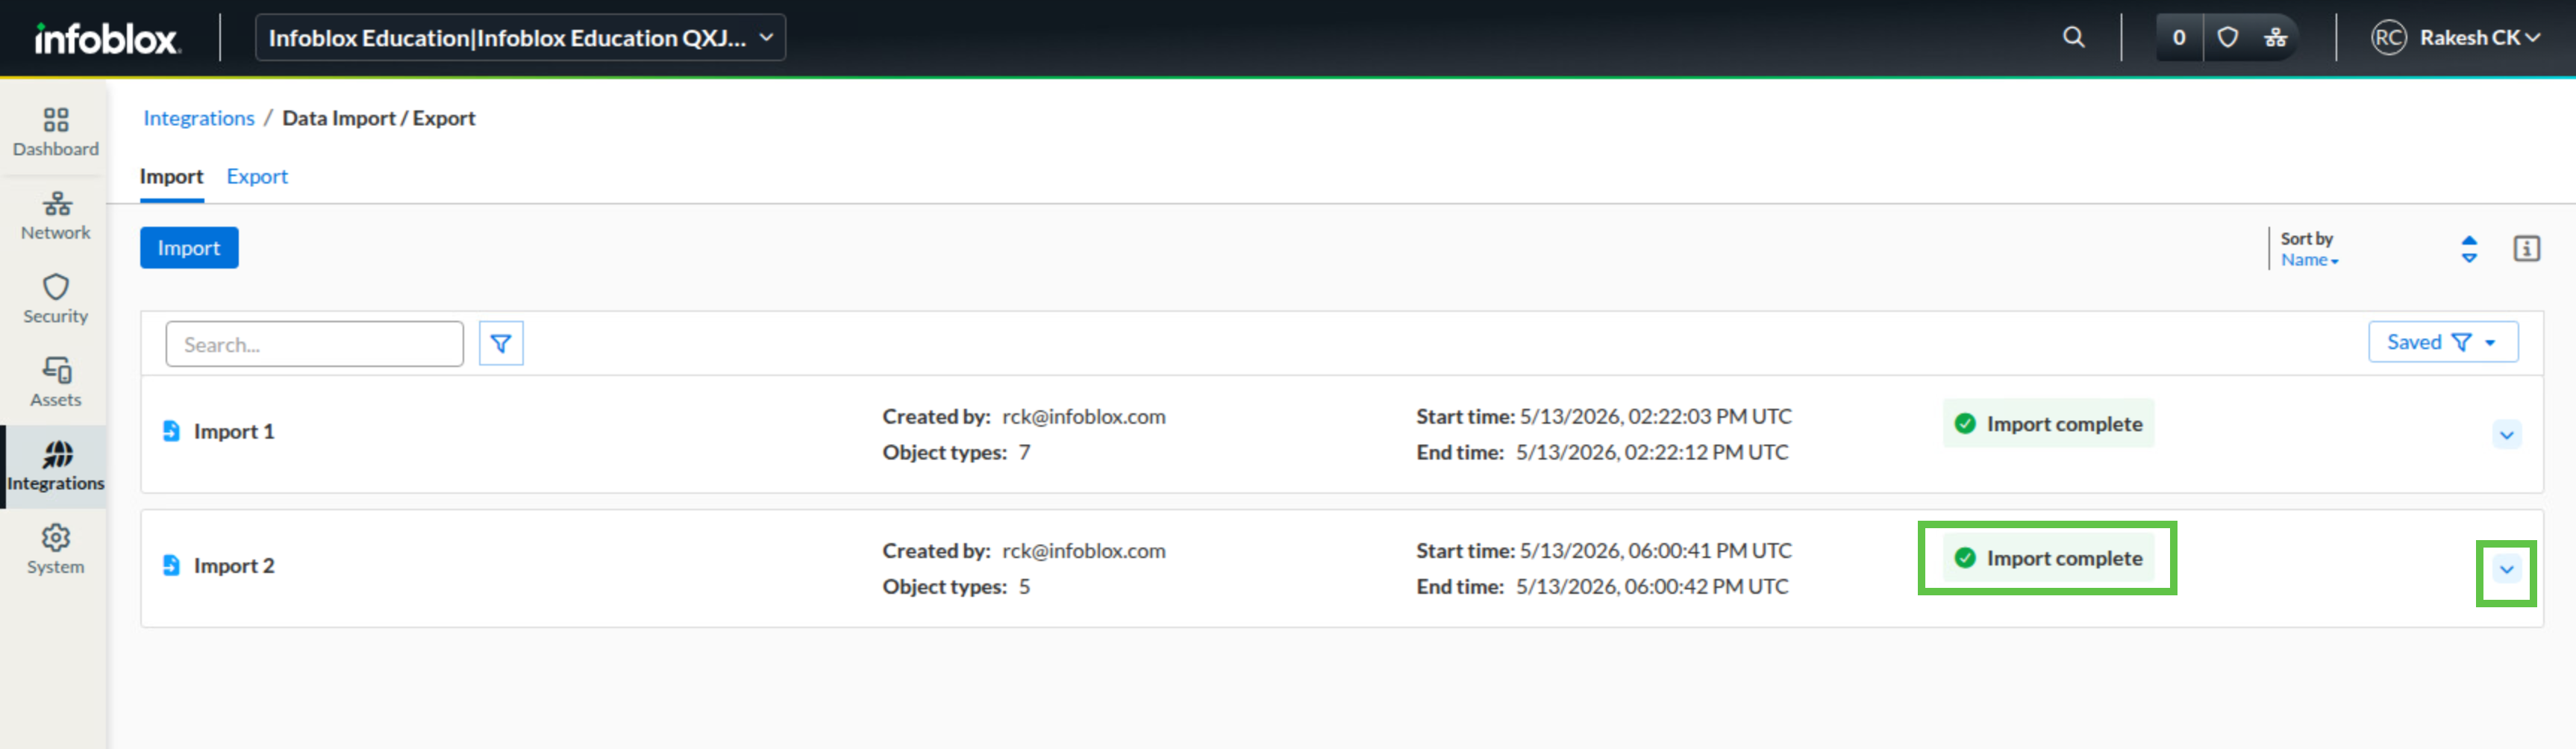
The import status page does not refresh automatically. Navigate to another screen, then return to the import job page and check whether the status has changed to Import completed. Once it has, open the job details dropdown.
-
Confirm that all objects were imported without errors.
Task 3 Solution: Verify core objects
After the first import finishes, verify the imported objects in both IPAM and DNS. This confirms that the foundational data loaded correctly before you add dependent records and ranges with the second CSV file.
-
From jump-desktop, sign in to the Infoblox Portal.
-
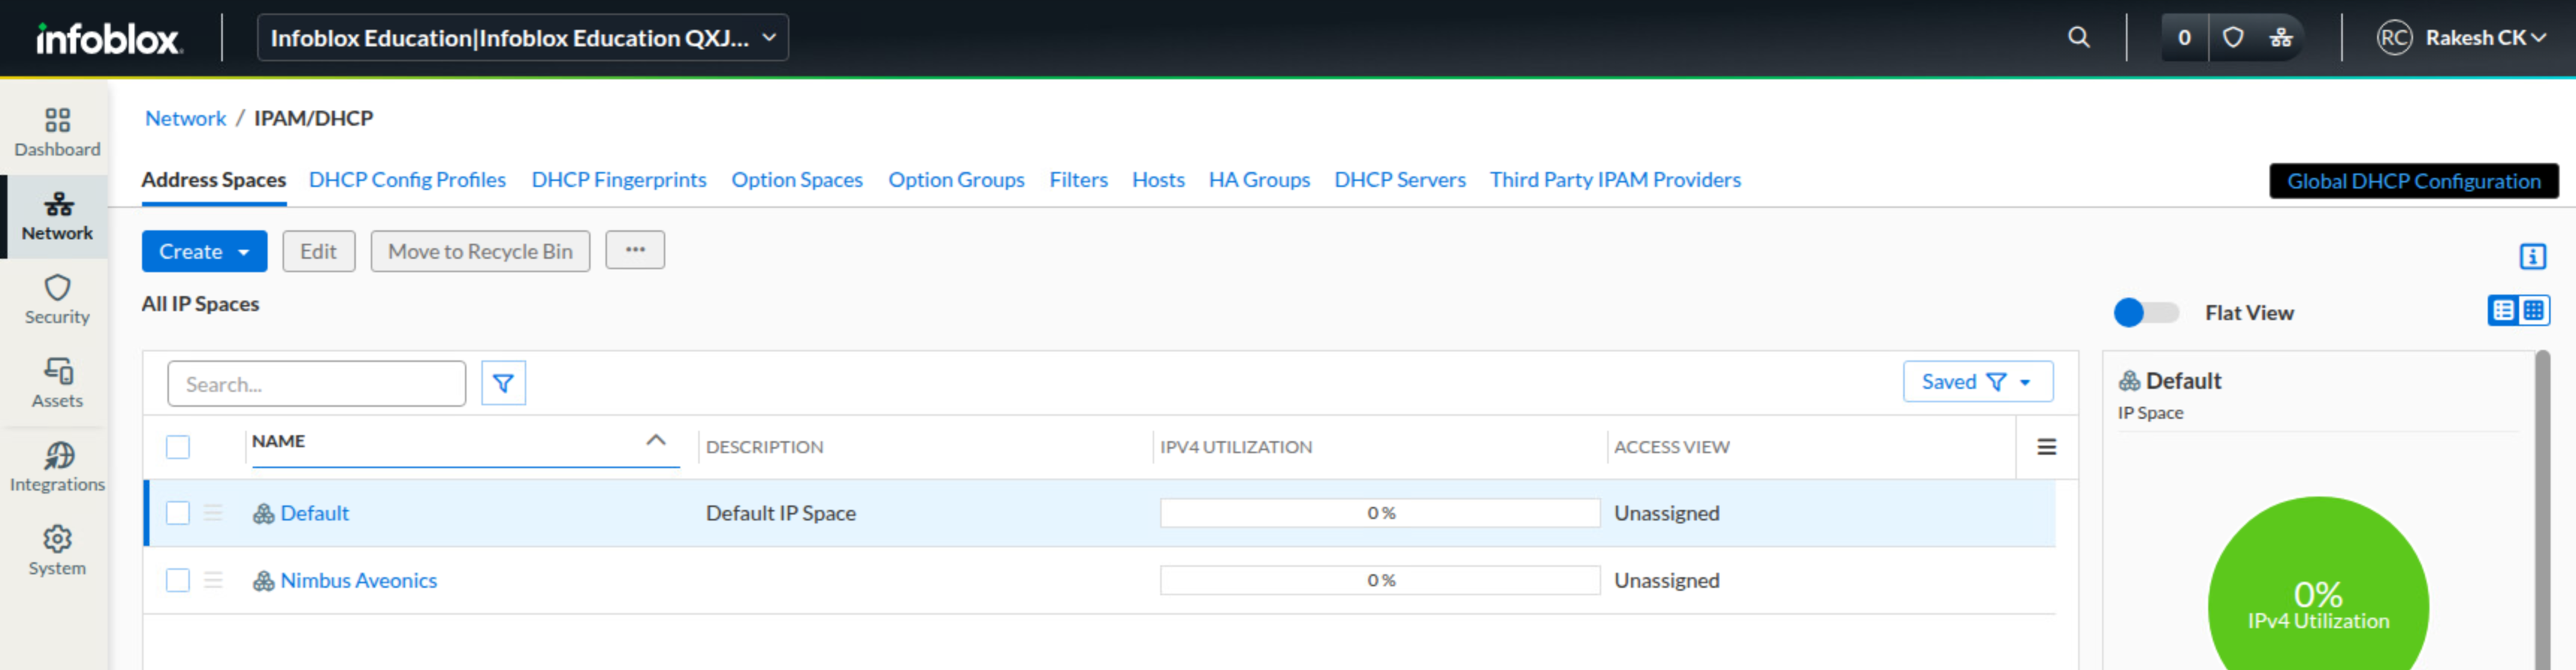
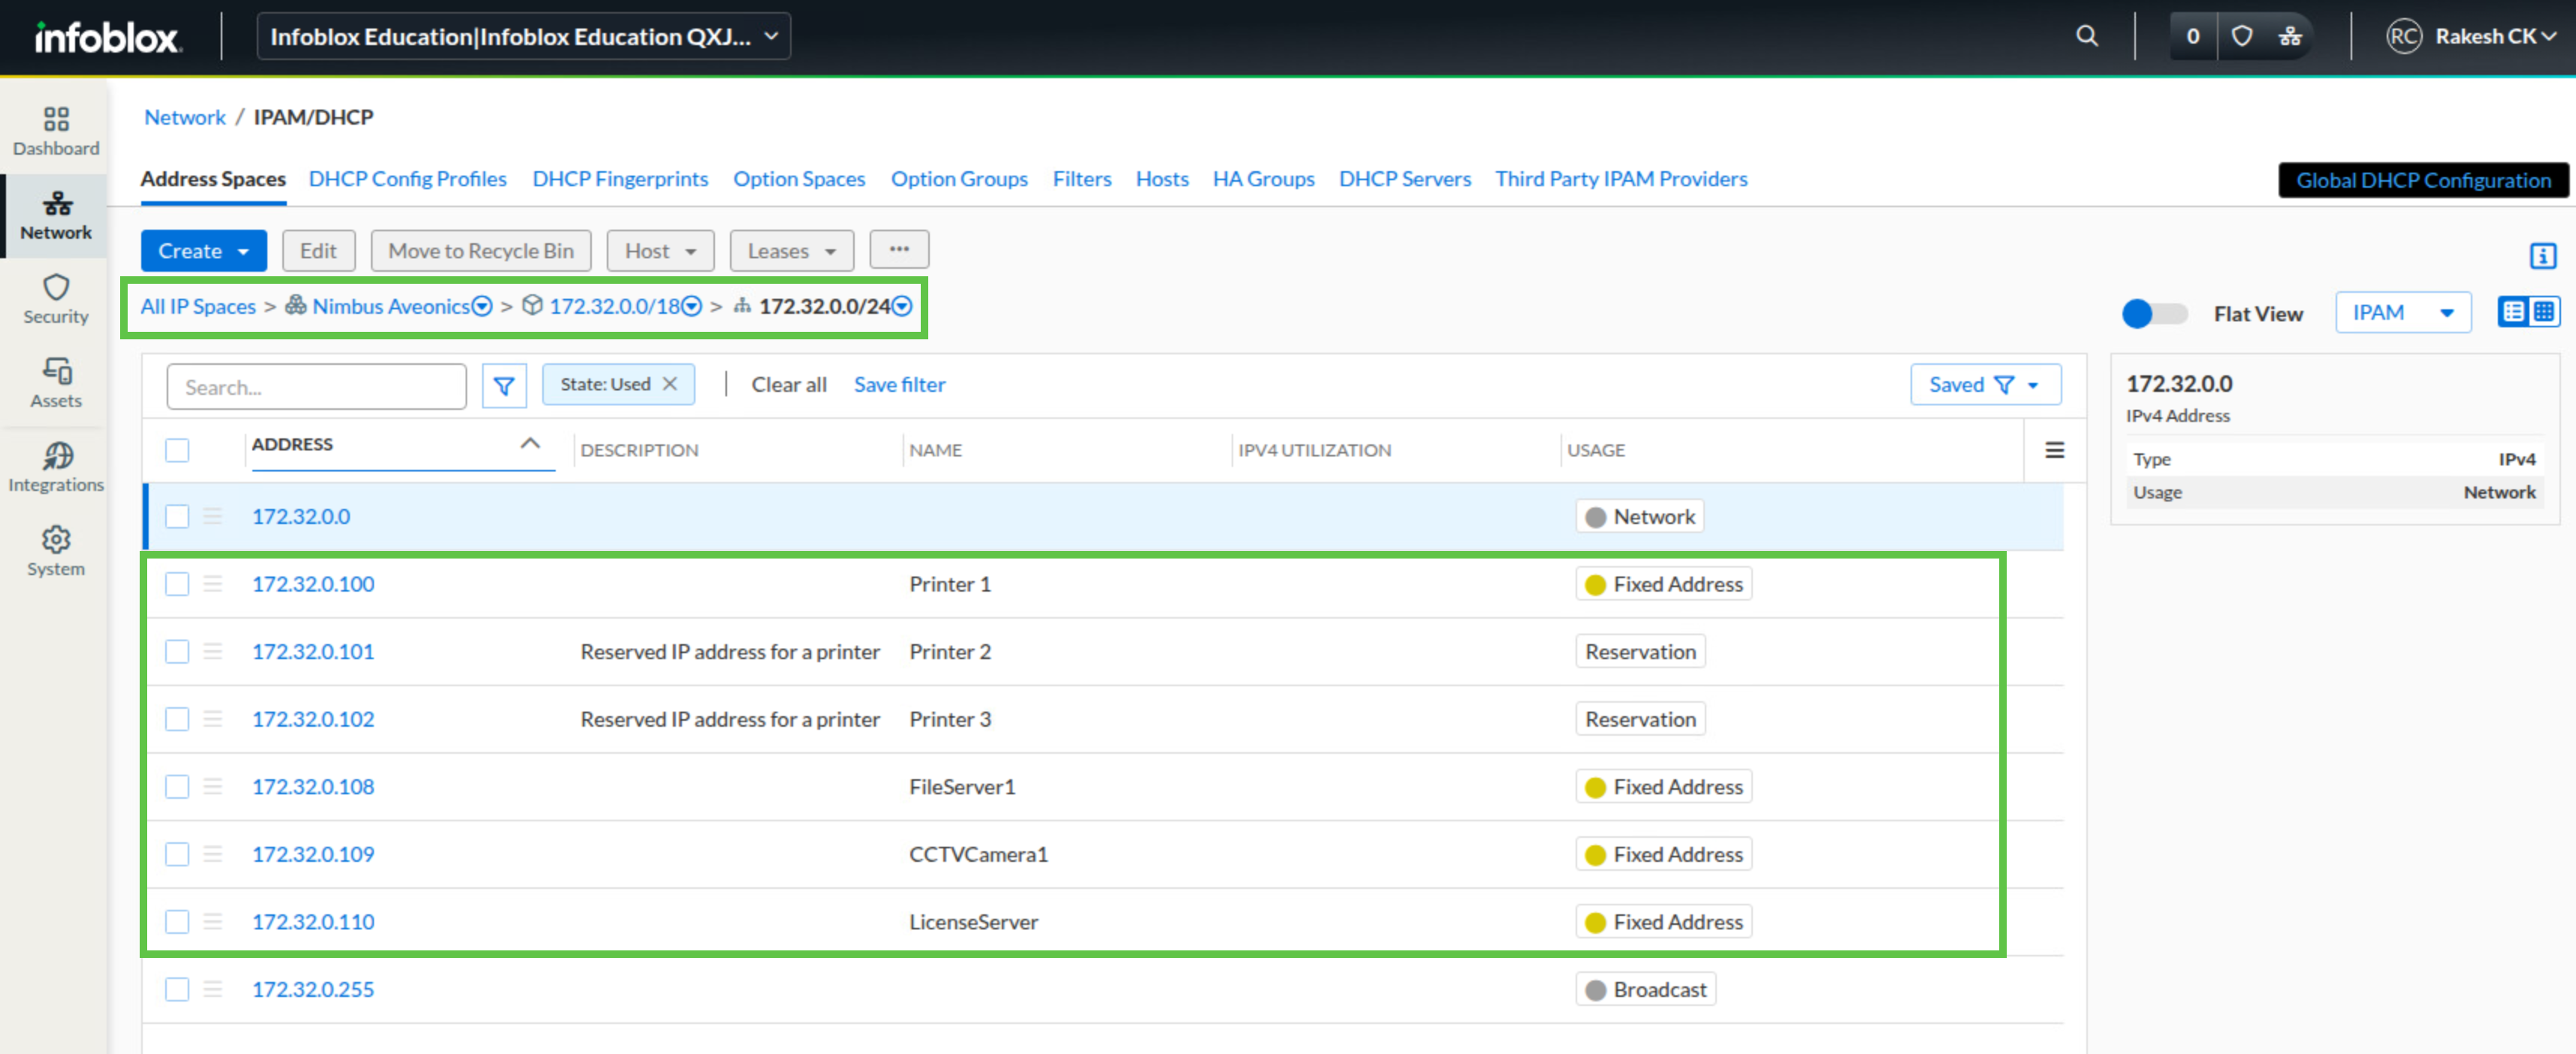
Navigate to Network → IPAM/DHCP.
-
On the Address Spaces tab, verify that the IP space Nimbus Aveonics is listed.
-
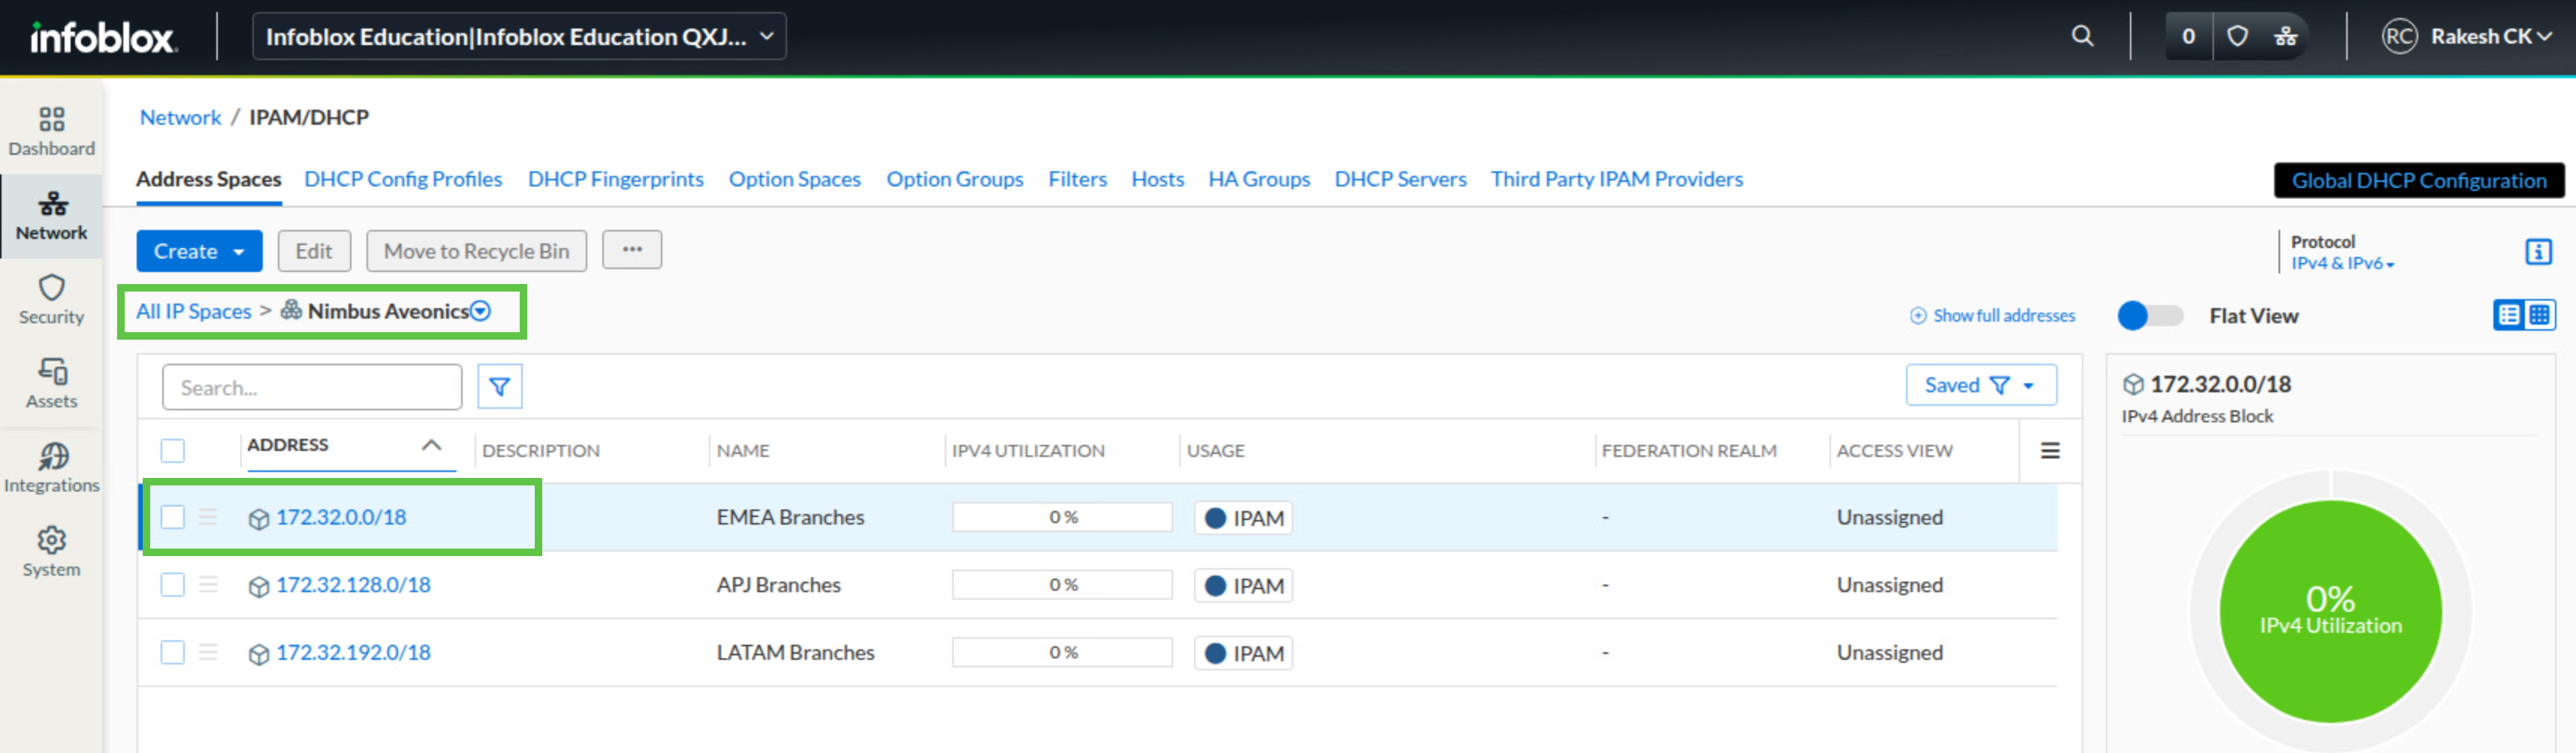
Click Nimbus Aveonics to view its address blocks.
-
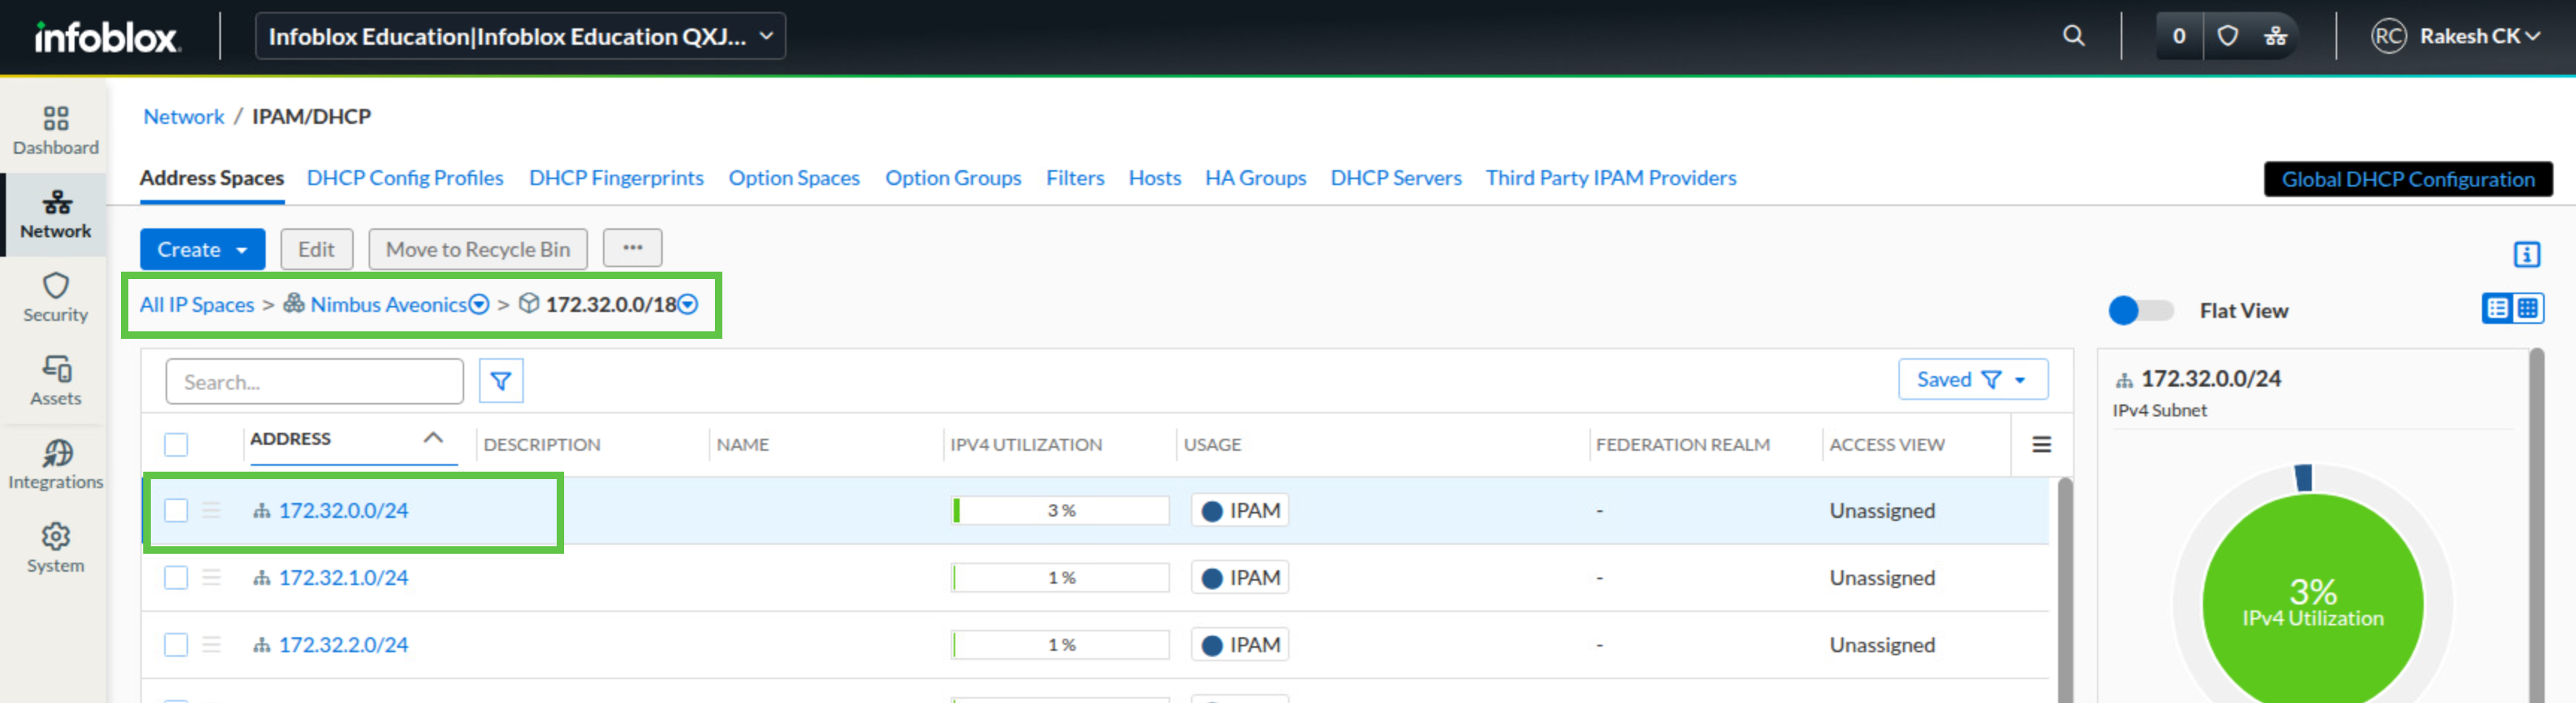
Click the address block 172.32.0.0/18 to view the subnets it contains.
-
Click the subnet 172.32.0.0/24.
-
Verify that fixed addresses and reservations are present.
-
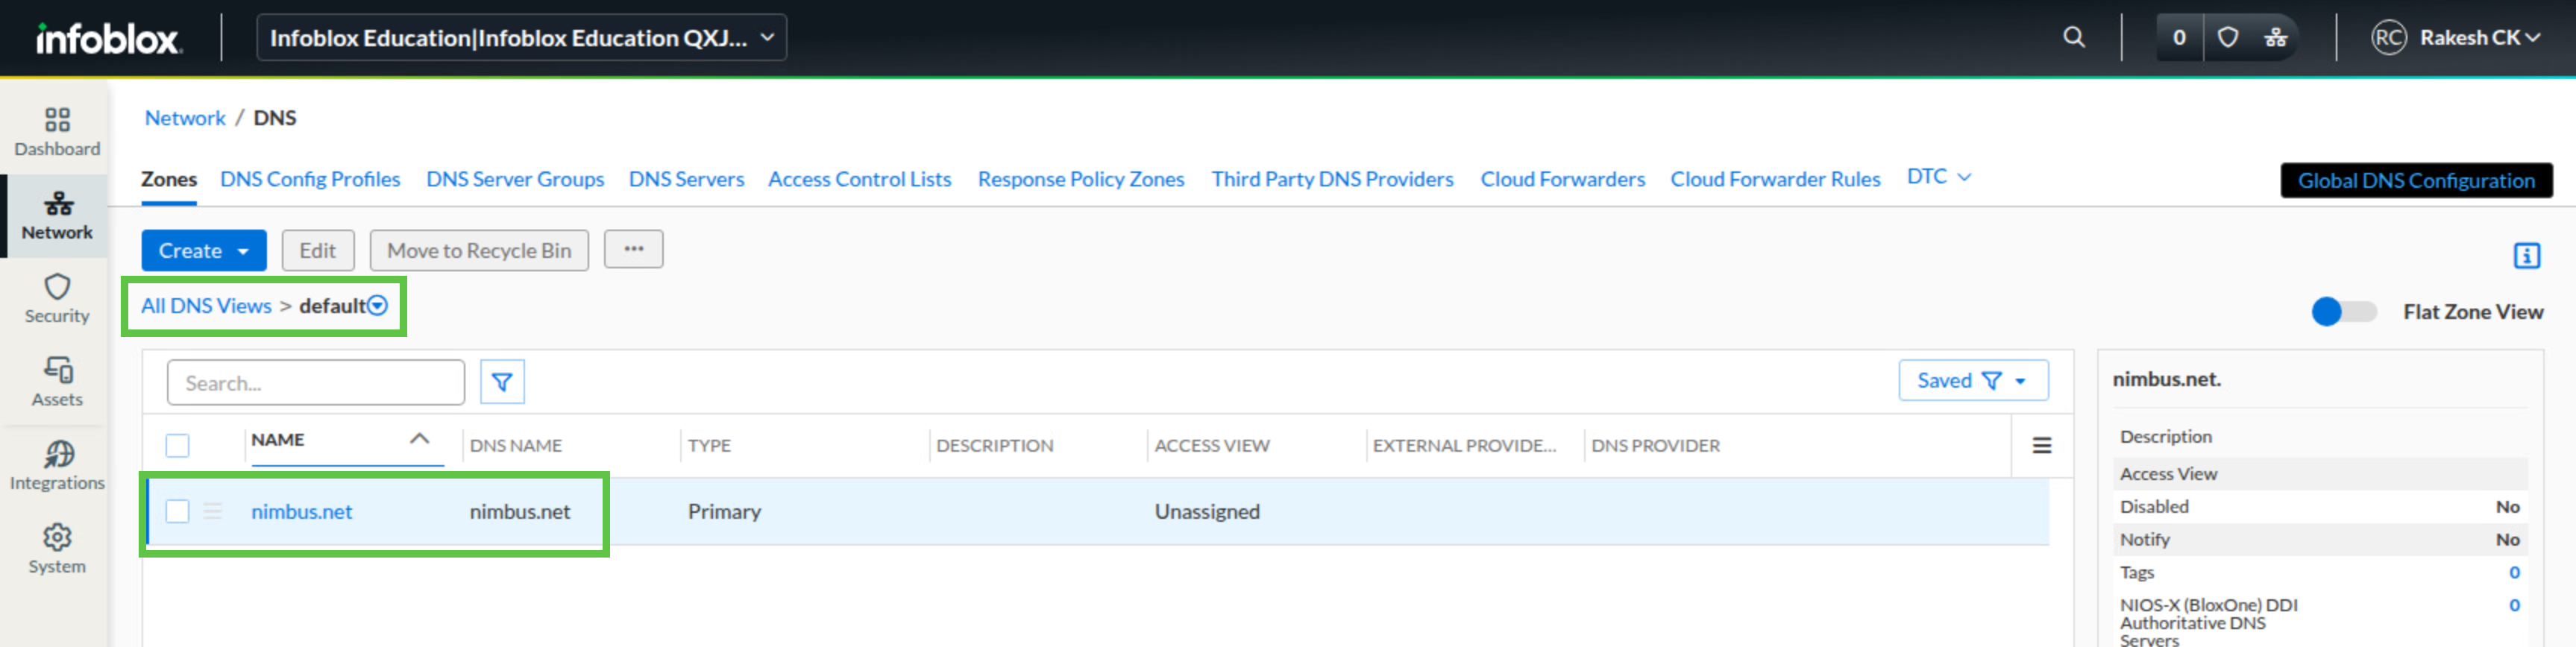
Navigate to Network → DNS.
-
Under the Zones area, click the default DNS view.
-
Verify that the primary zone nimbus.net is listed.
Task 4 Solution: Import additional objects
Import the second CSV file only after the core objects are in place. The additional DNS records, subzones, and DHCP ranges rely on the IP space, subnet, and DNS zone structure created by the first import.
-
From jump-desktop, sign in to the Infoblox Portal.
-
Navigate to Integrations → Data Import / Export.
-
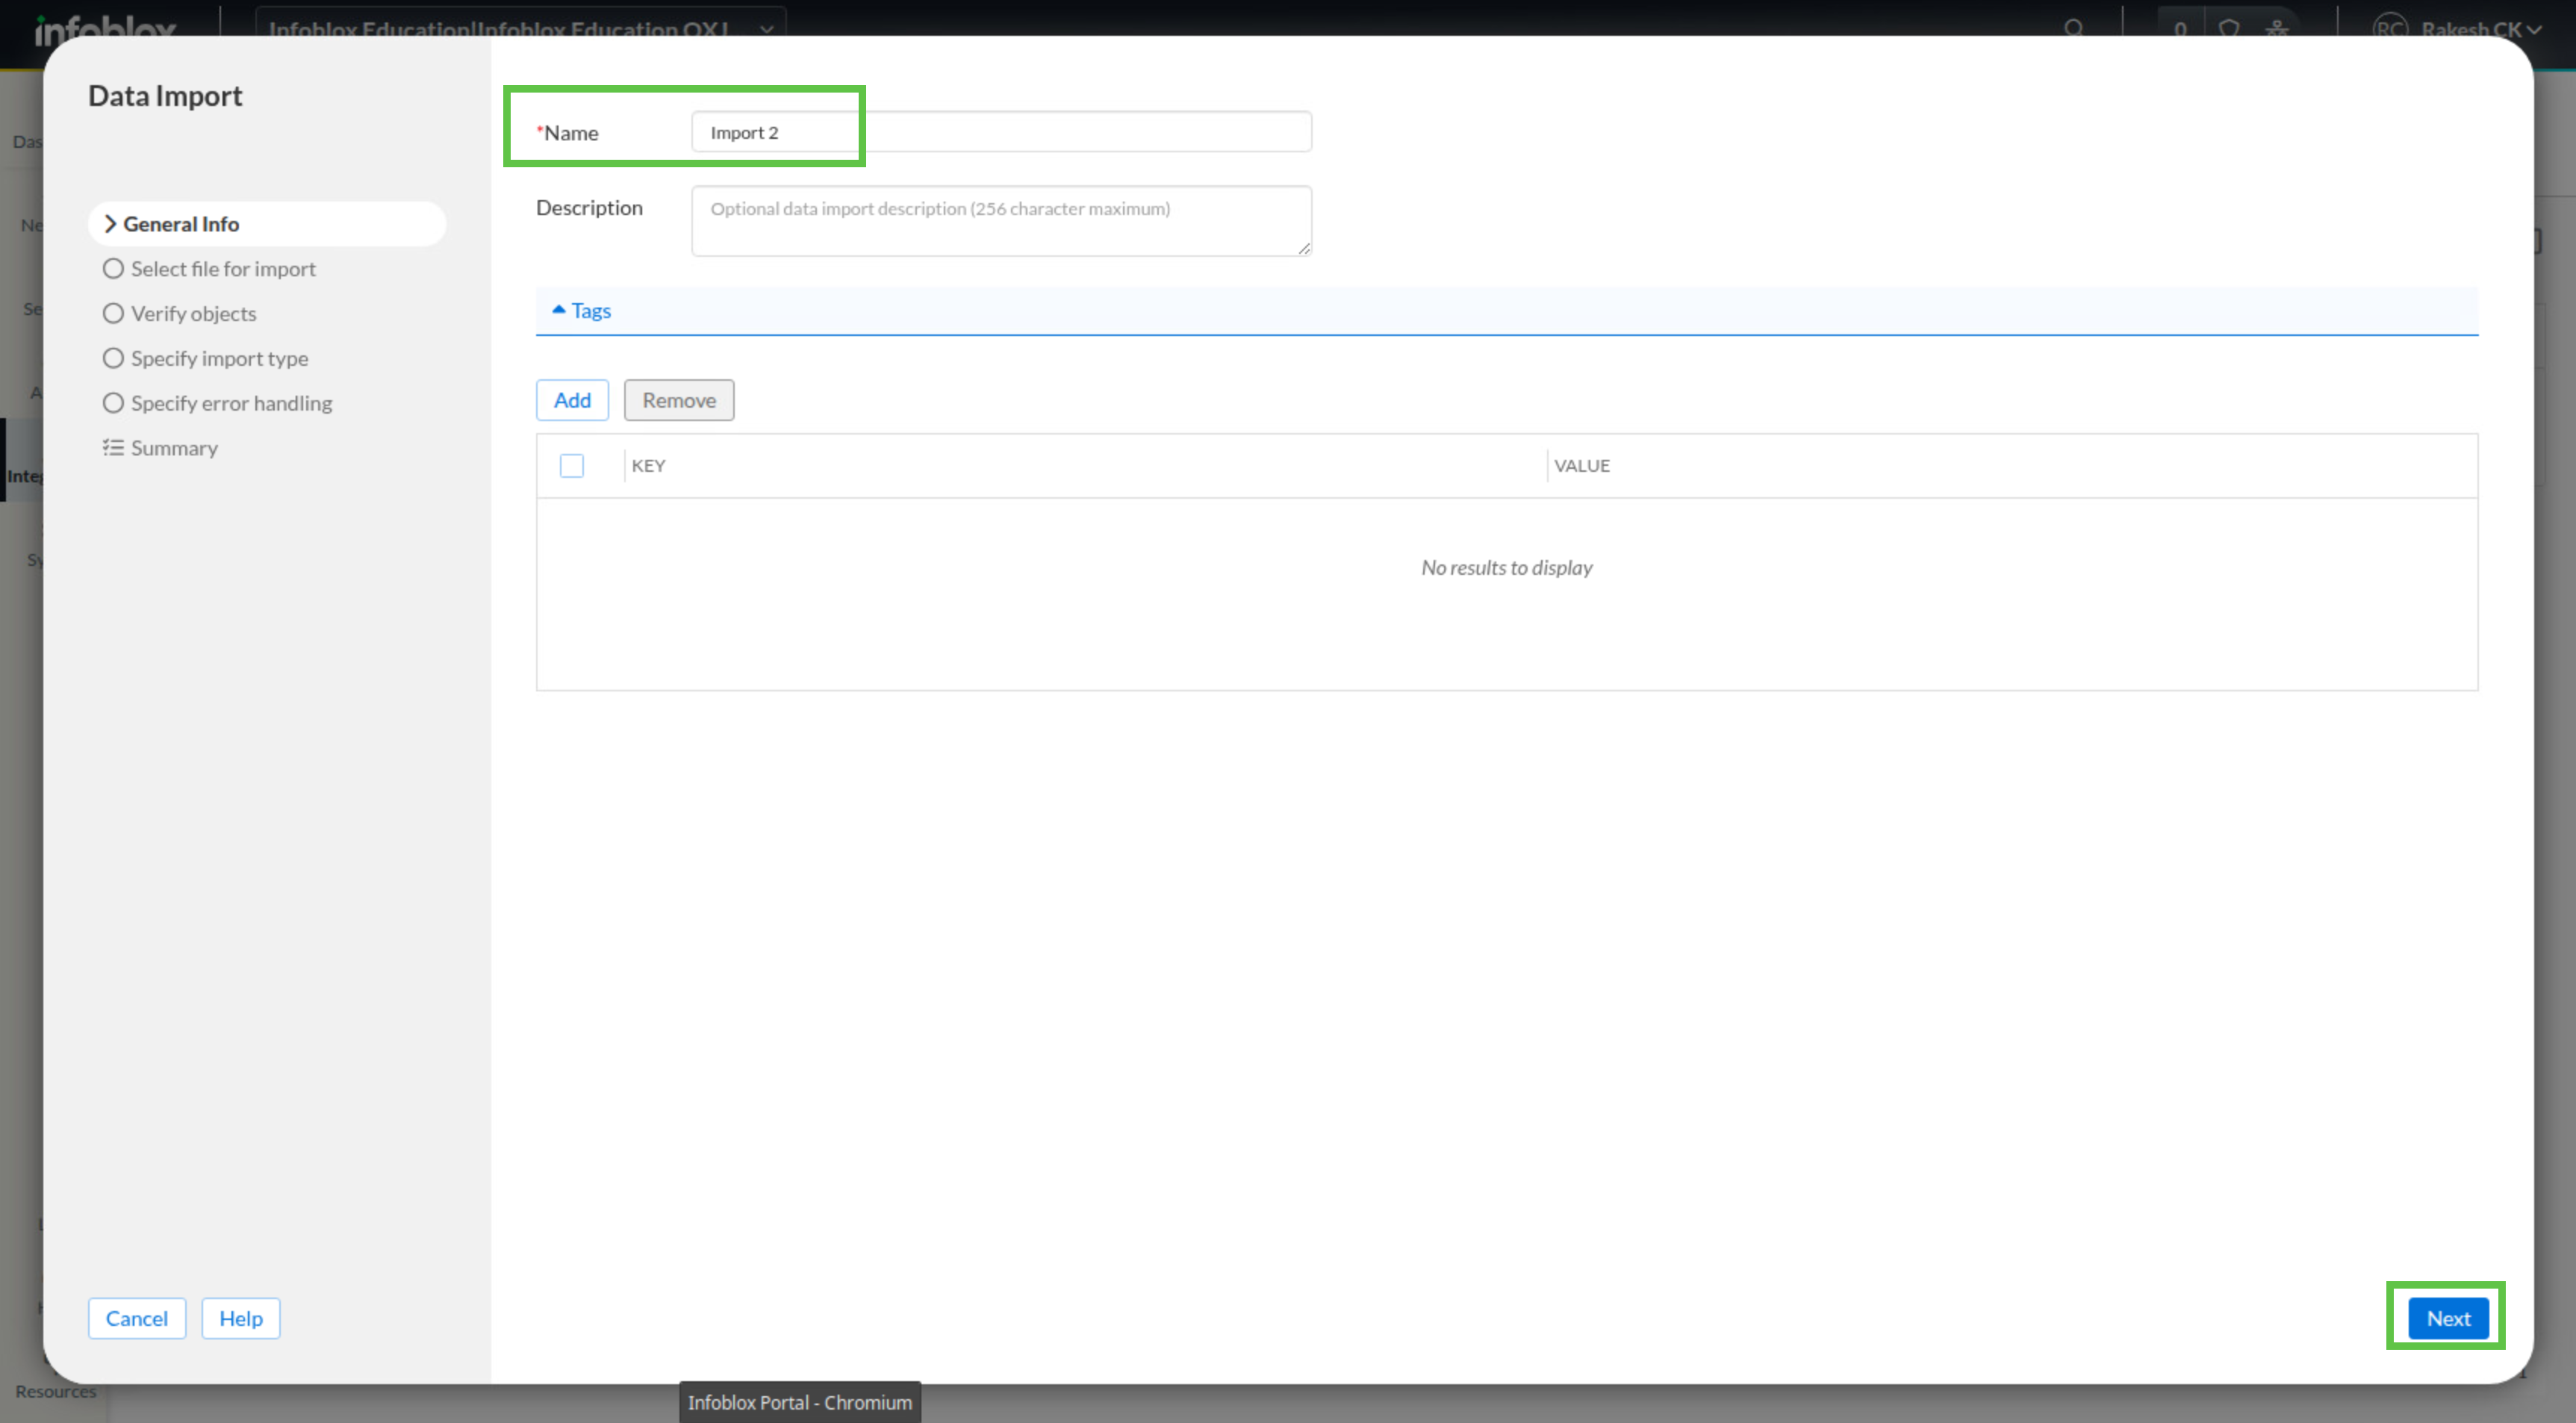
Open the Import submenu and click Import to begin a new import job.
-
In the import name field, enter Import 2, then click Next.
-
Click Select File.
-
Select CSP-Import-2.csv from the shared drive.
-
Click Next.
-
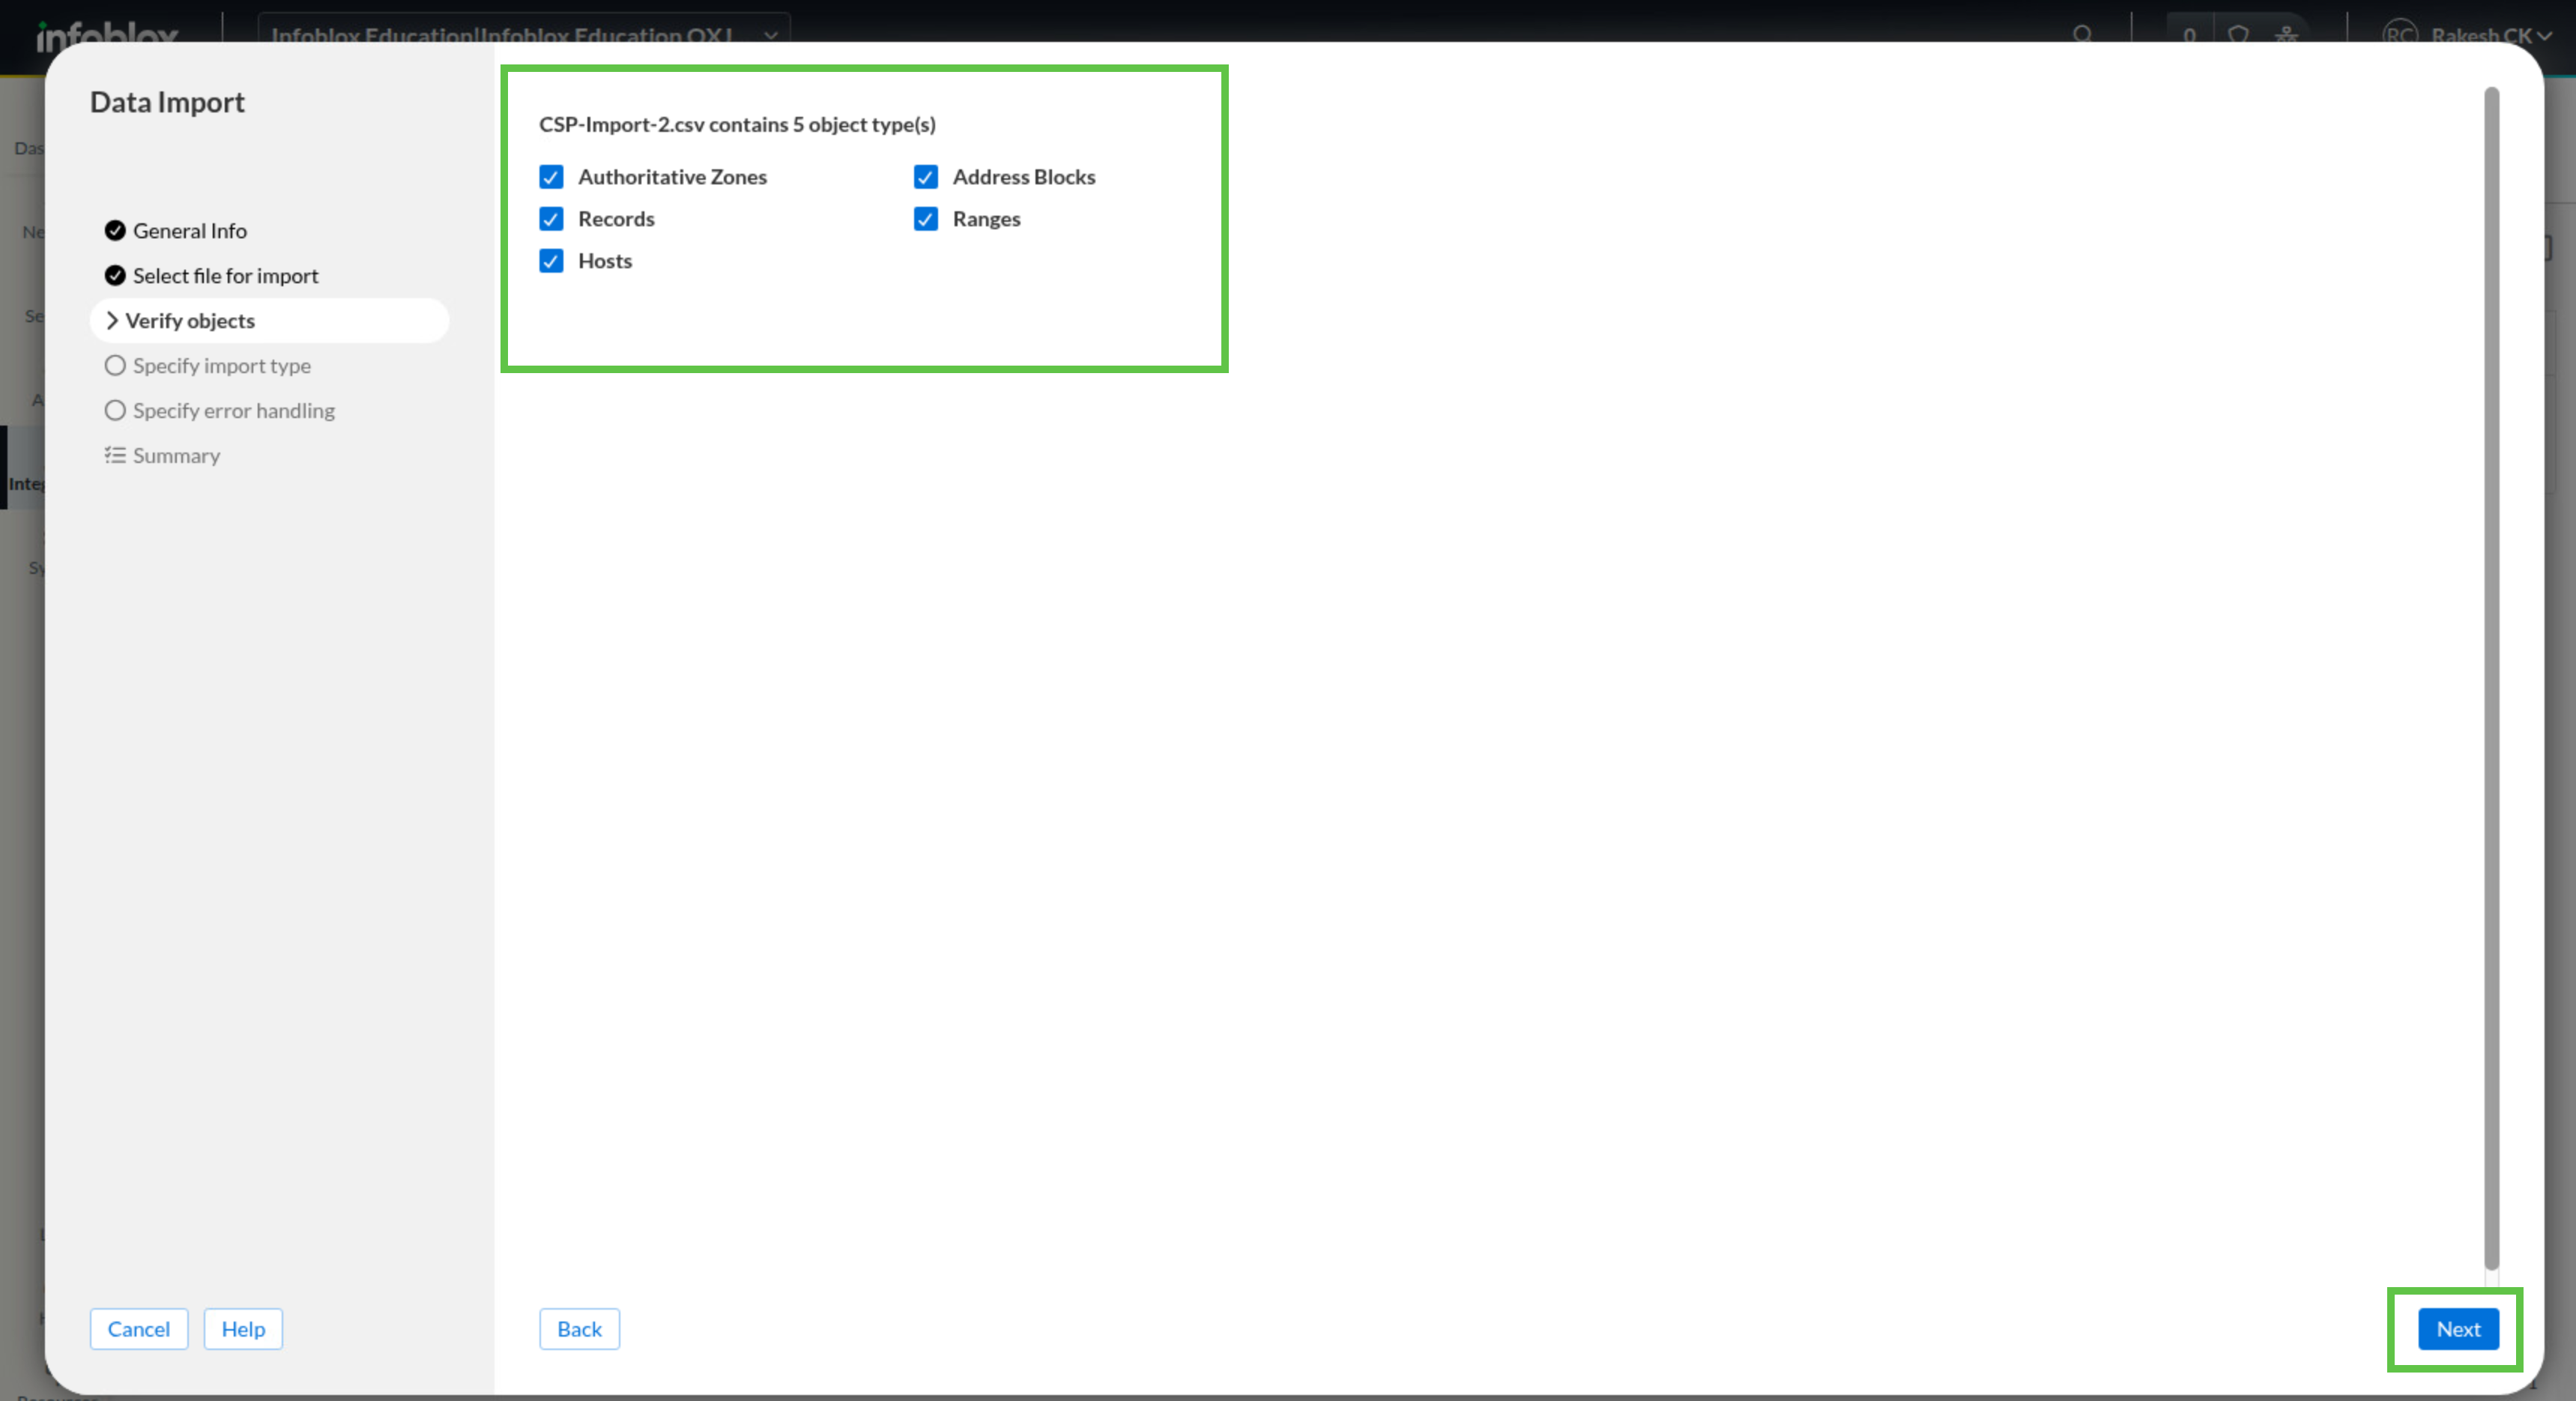
When you review the object selection page, make sure all object types remain selected, then click Next.
-
In Specify import type, choose Add new records from the imported file if it is not already selected.
-
For error handling, choose Skip failed records and continue import, then click Next.
-
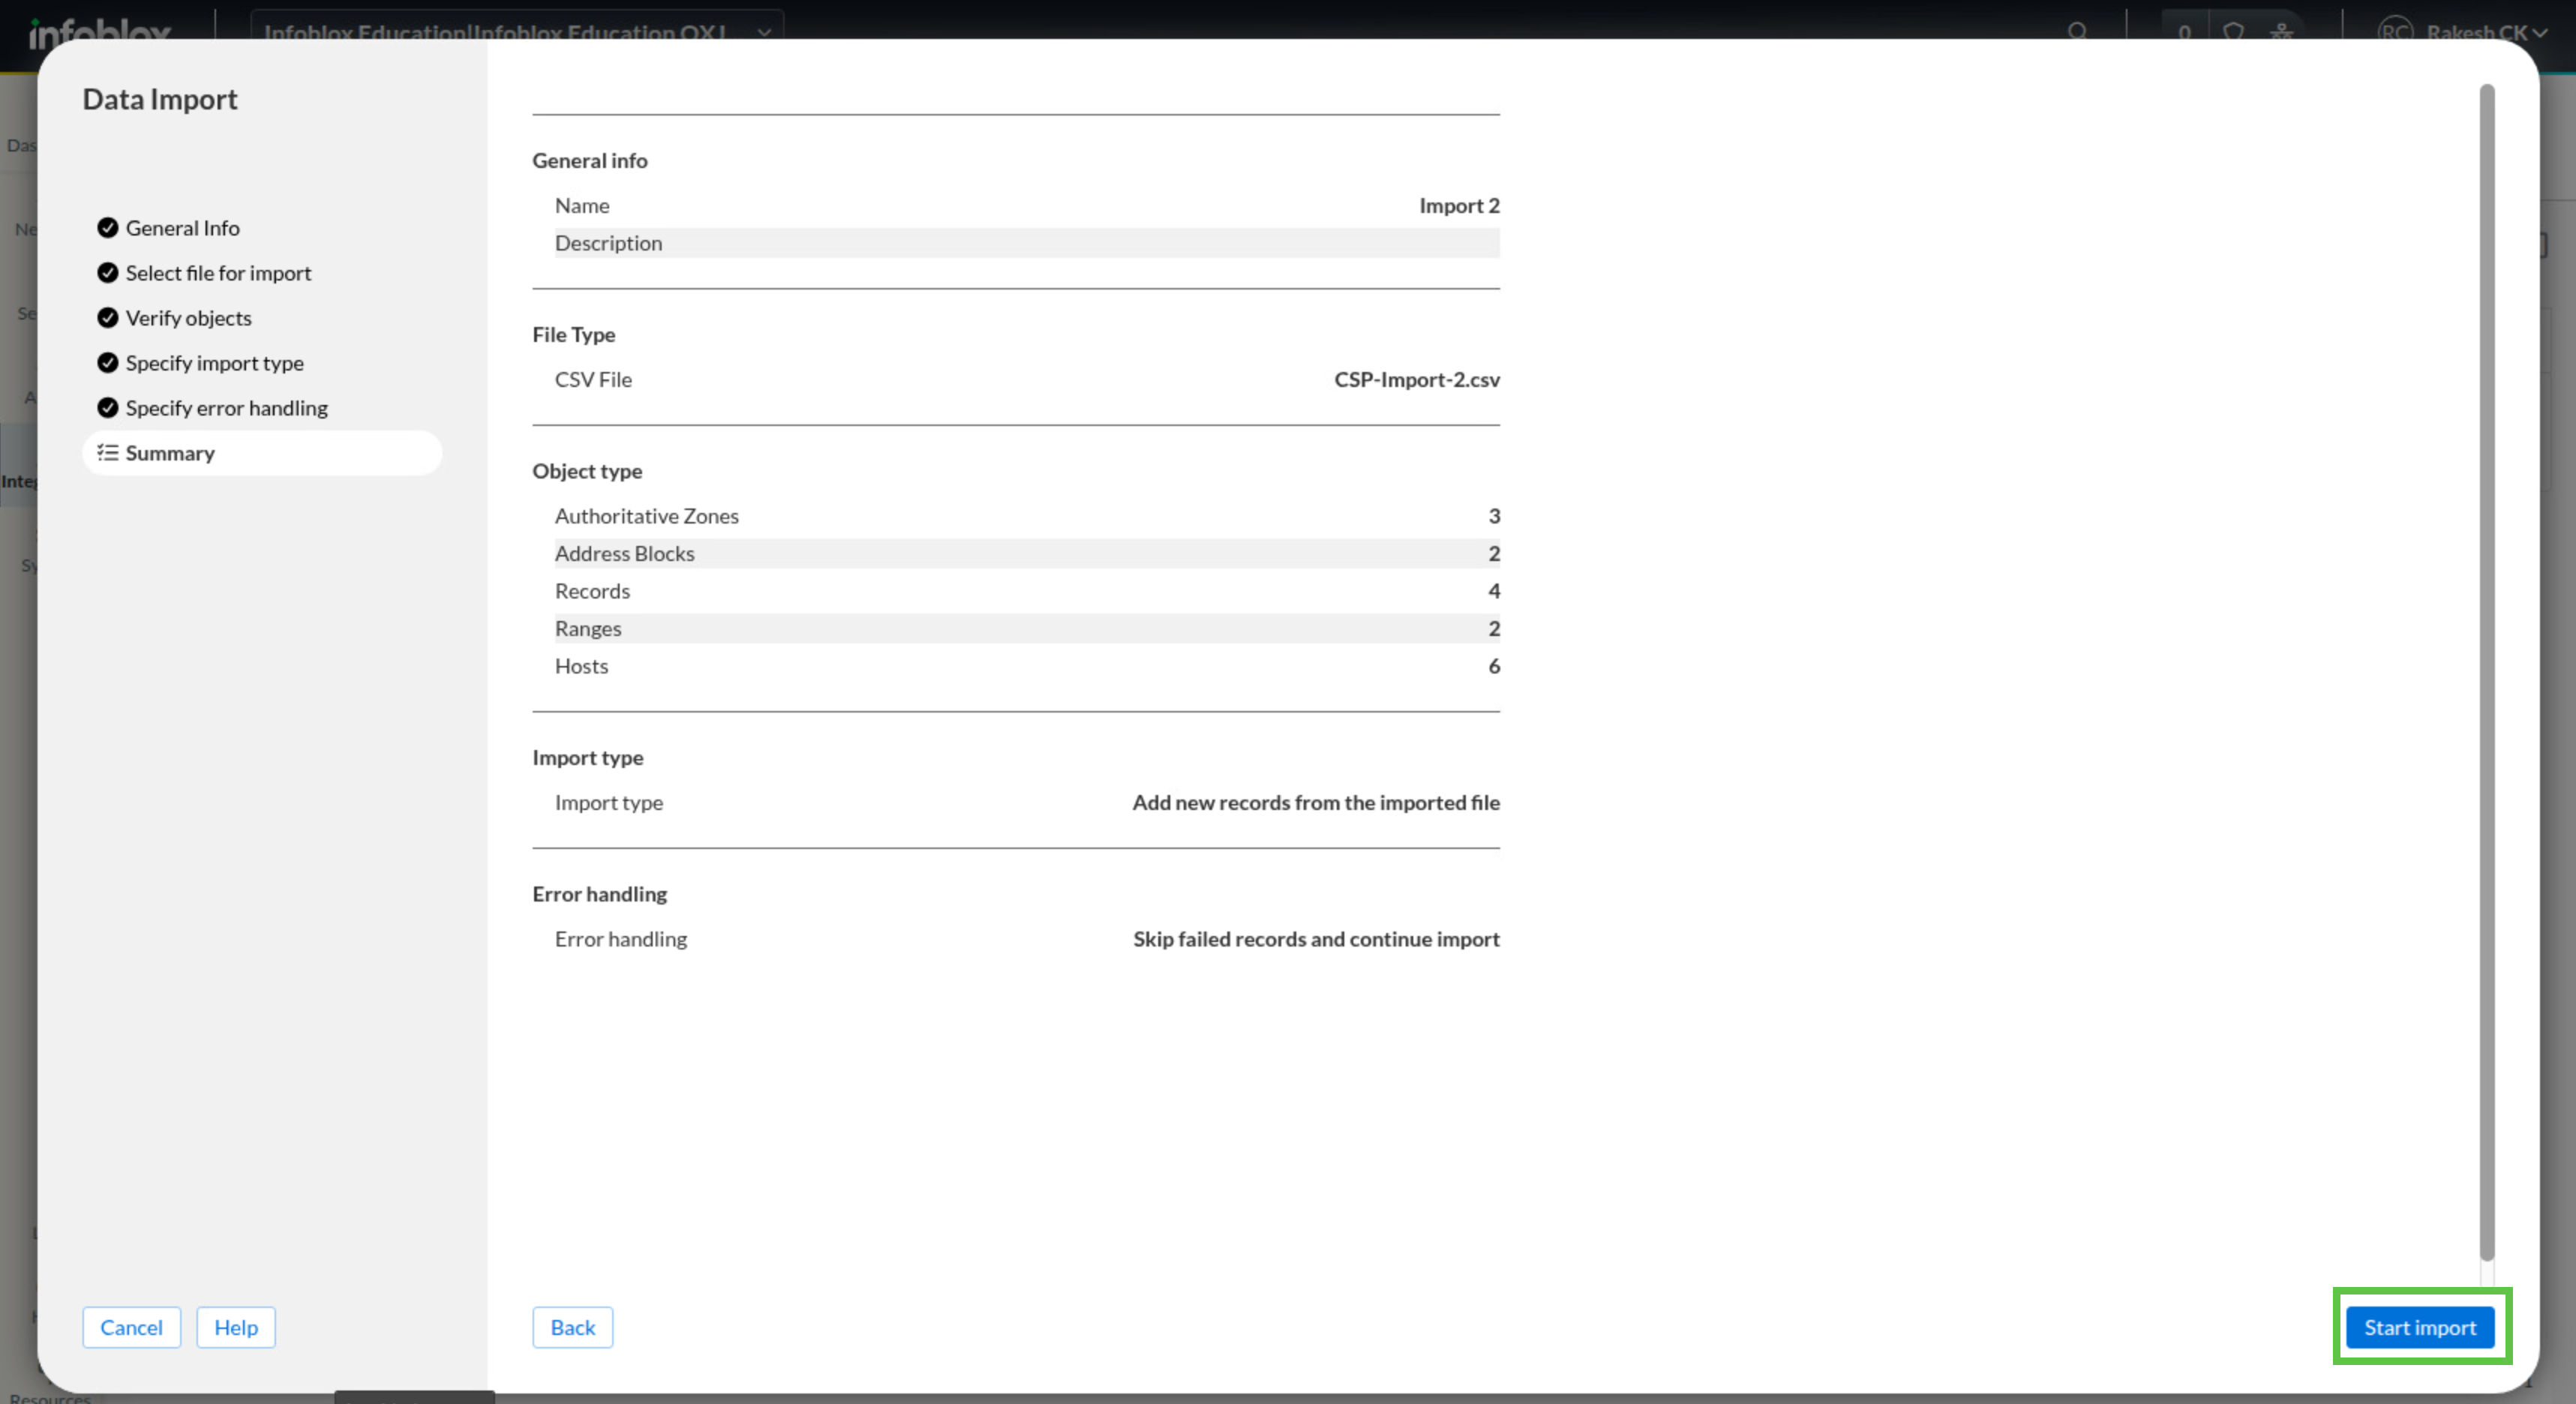
Review the summary and click Start Import.
-
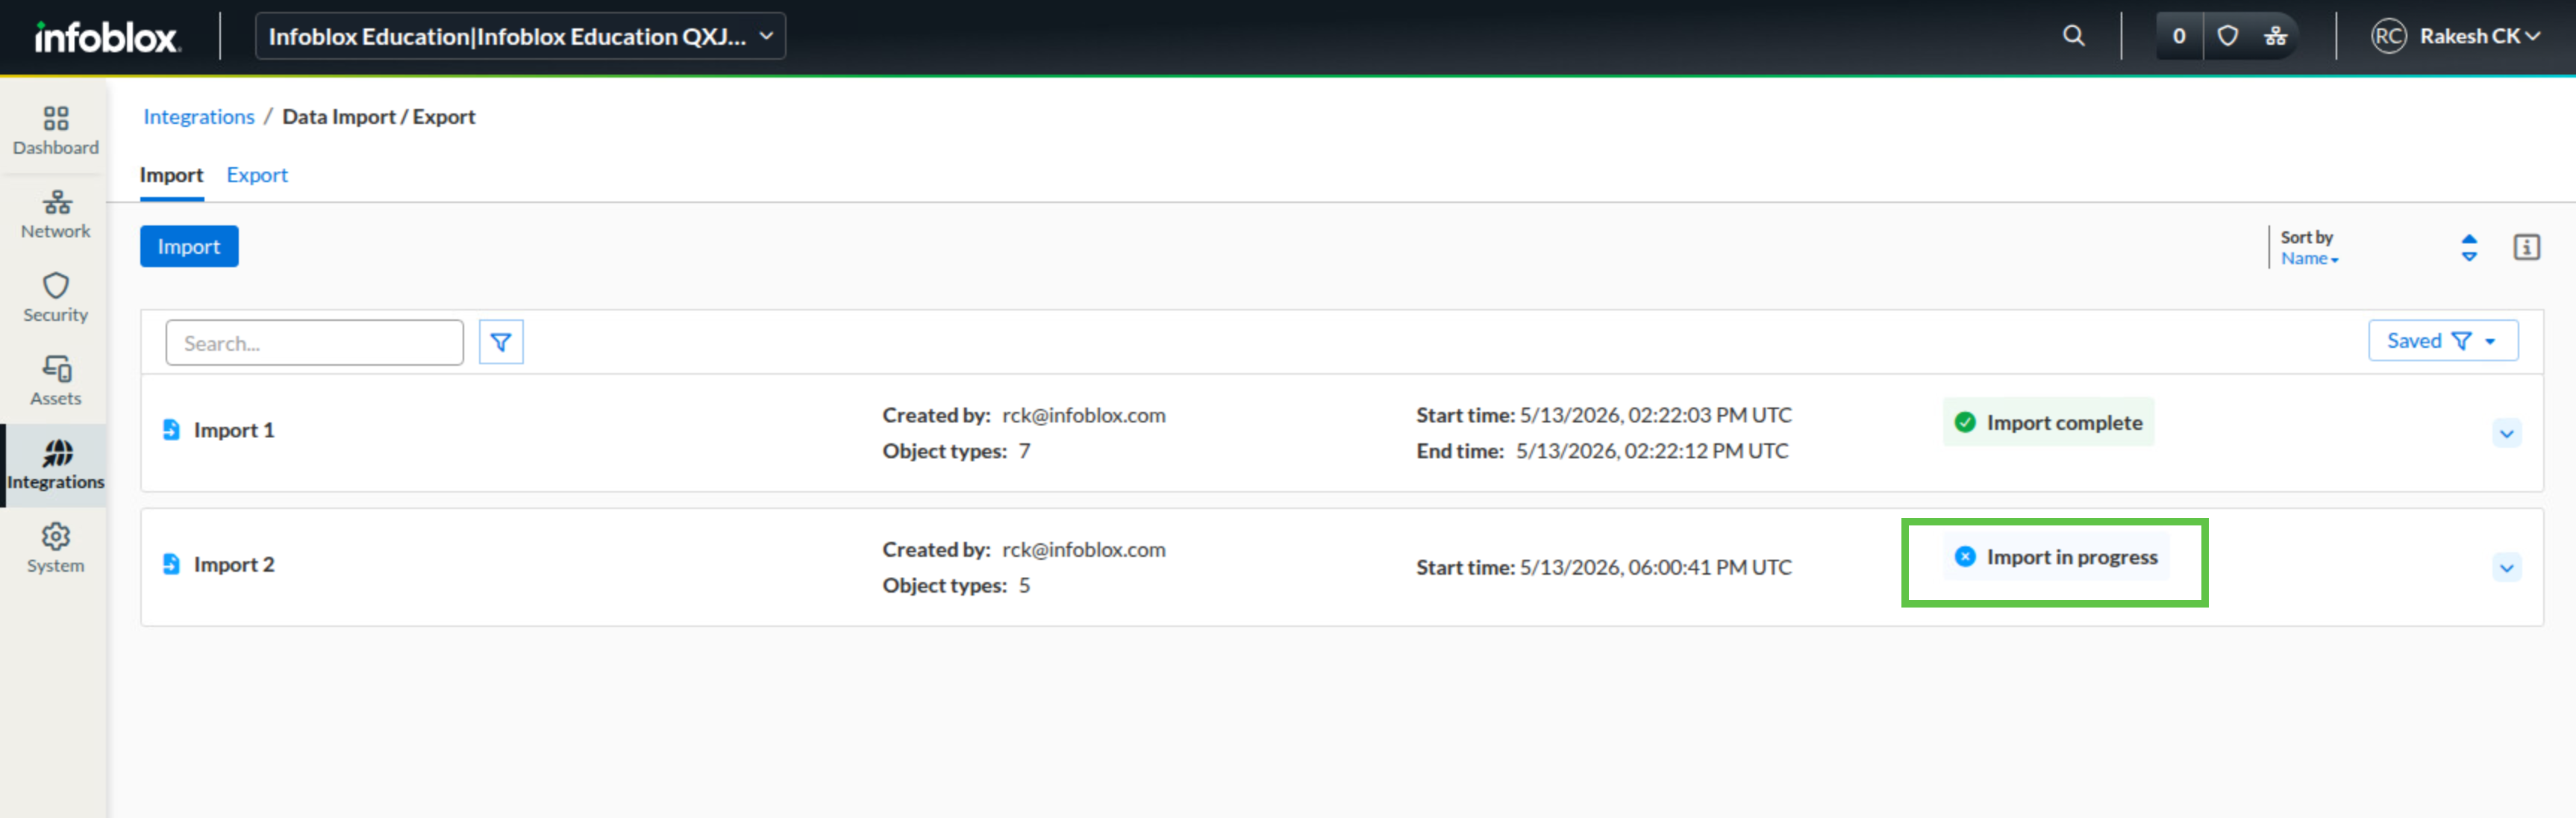
Verify that the job starts successfully.
-
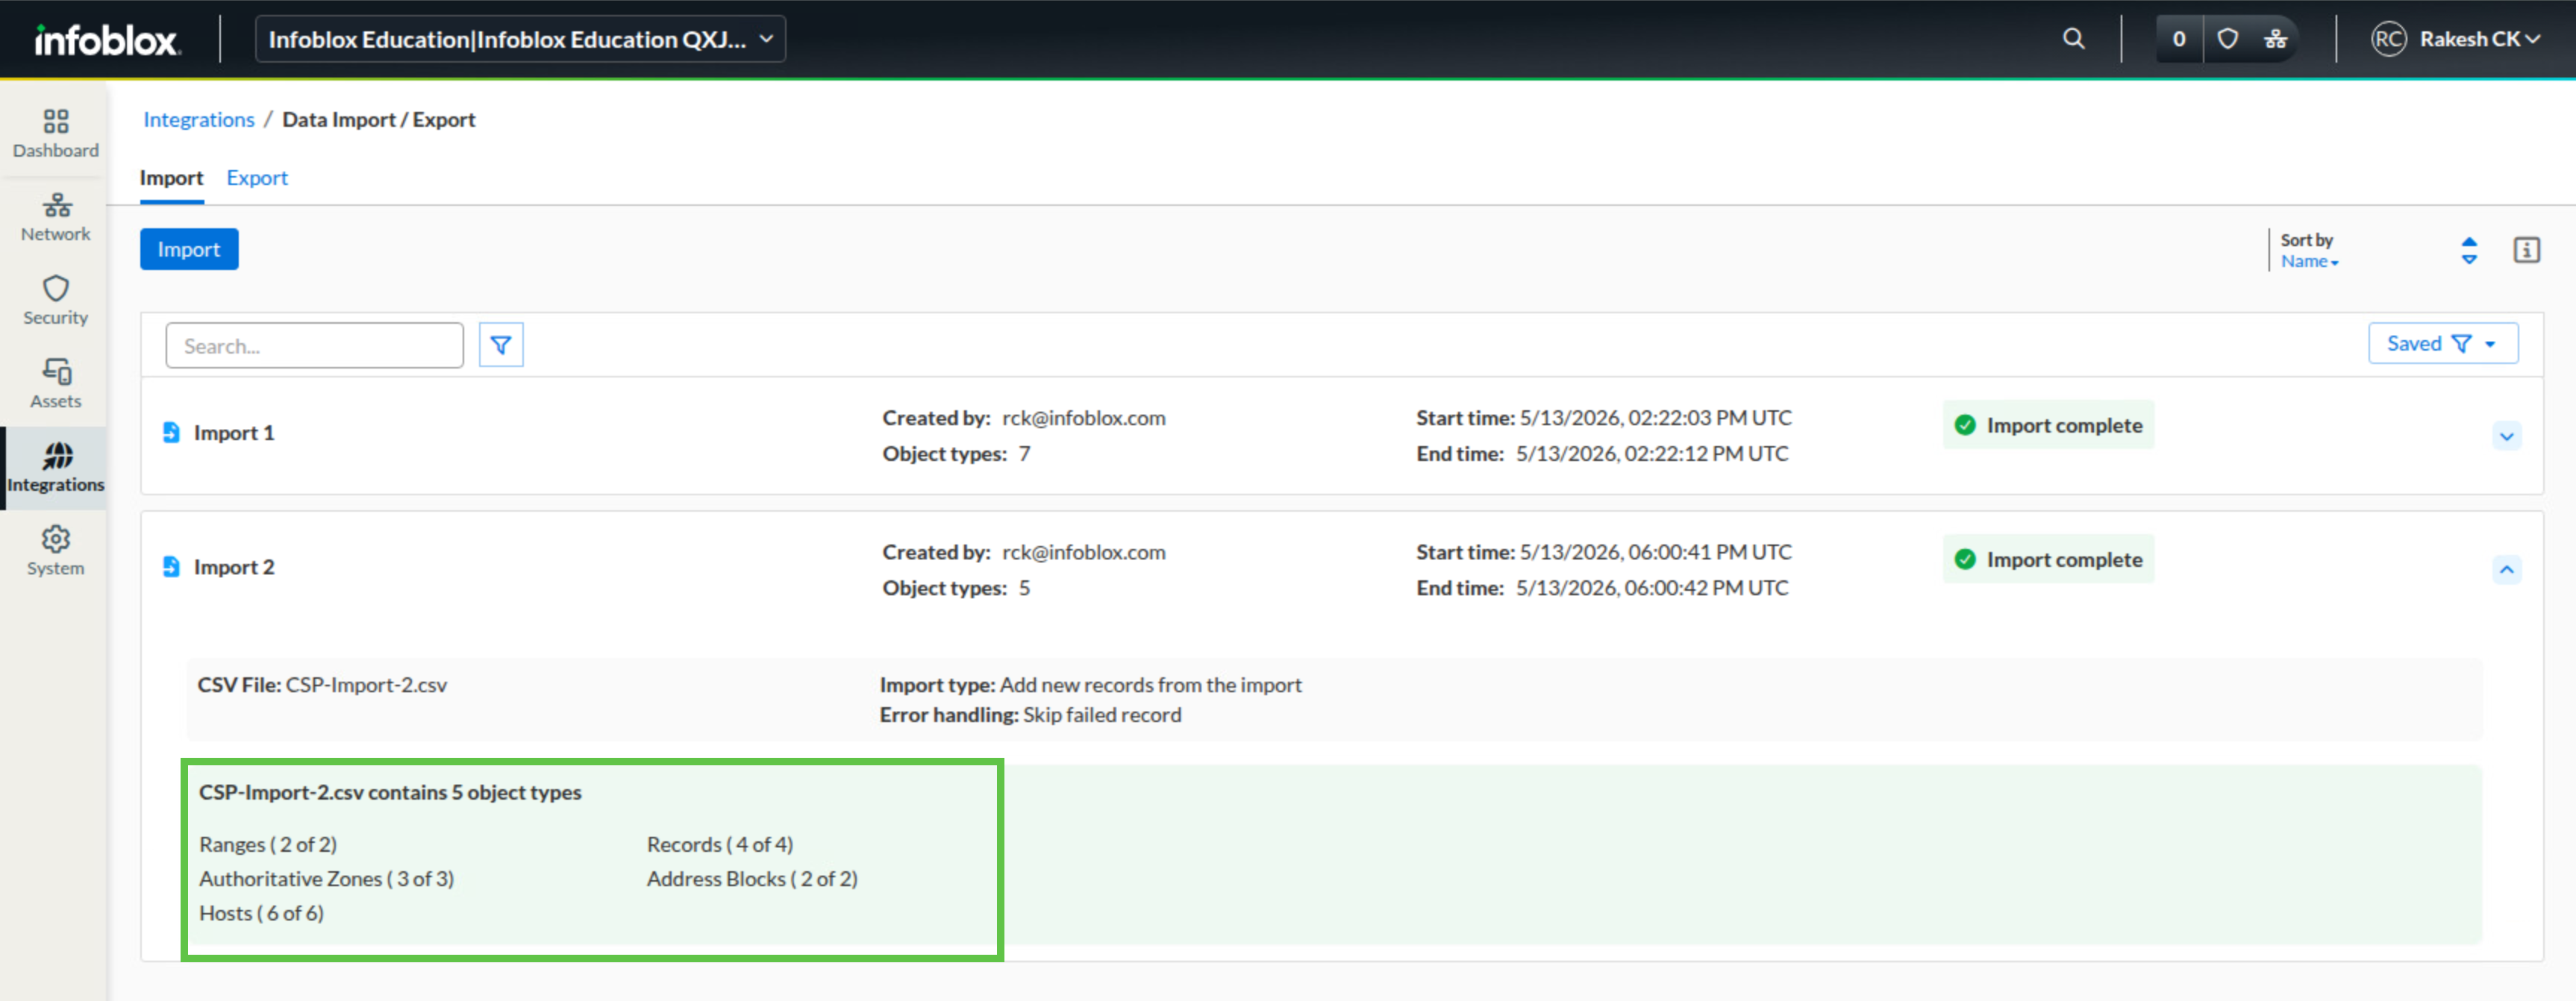
The import status page does not refresh automatically. Navigate to another screen, then return to the import job page and check whether the status has changed to Import completed. Once it has, open the job details dropdown.
-
Confirm that all objects were imported without errors.
Task 5 Solution: Verify additional objects
Finish by checking the DHCP and DNS objects added by the second CSV file. This confirms that the imported records are not only present, but also associated with the expected subnet and DNS zone.
-
Navigate to Network → IPAM/DHCP.
-
Under the Address Spaces tab, open Nimbus Aveonics → 172.32.0.0/18 → 172.32.0.0/24 and verify that the DHCP range 172.32.0.10 - 172.32.0.20 is present.

-
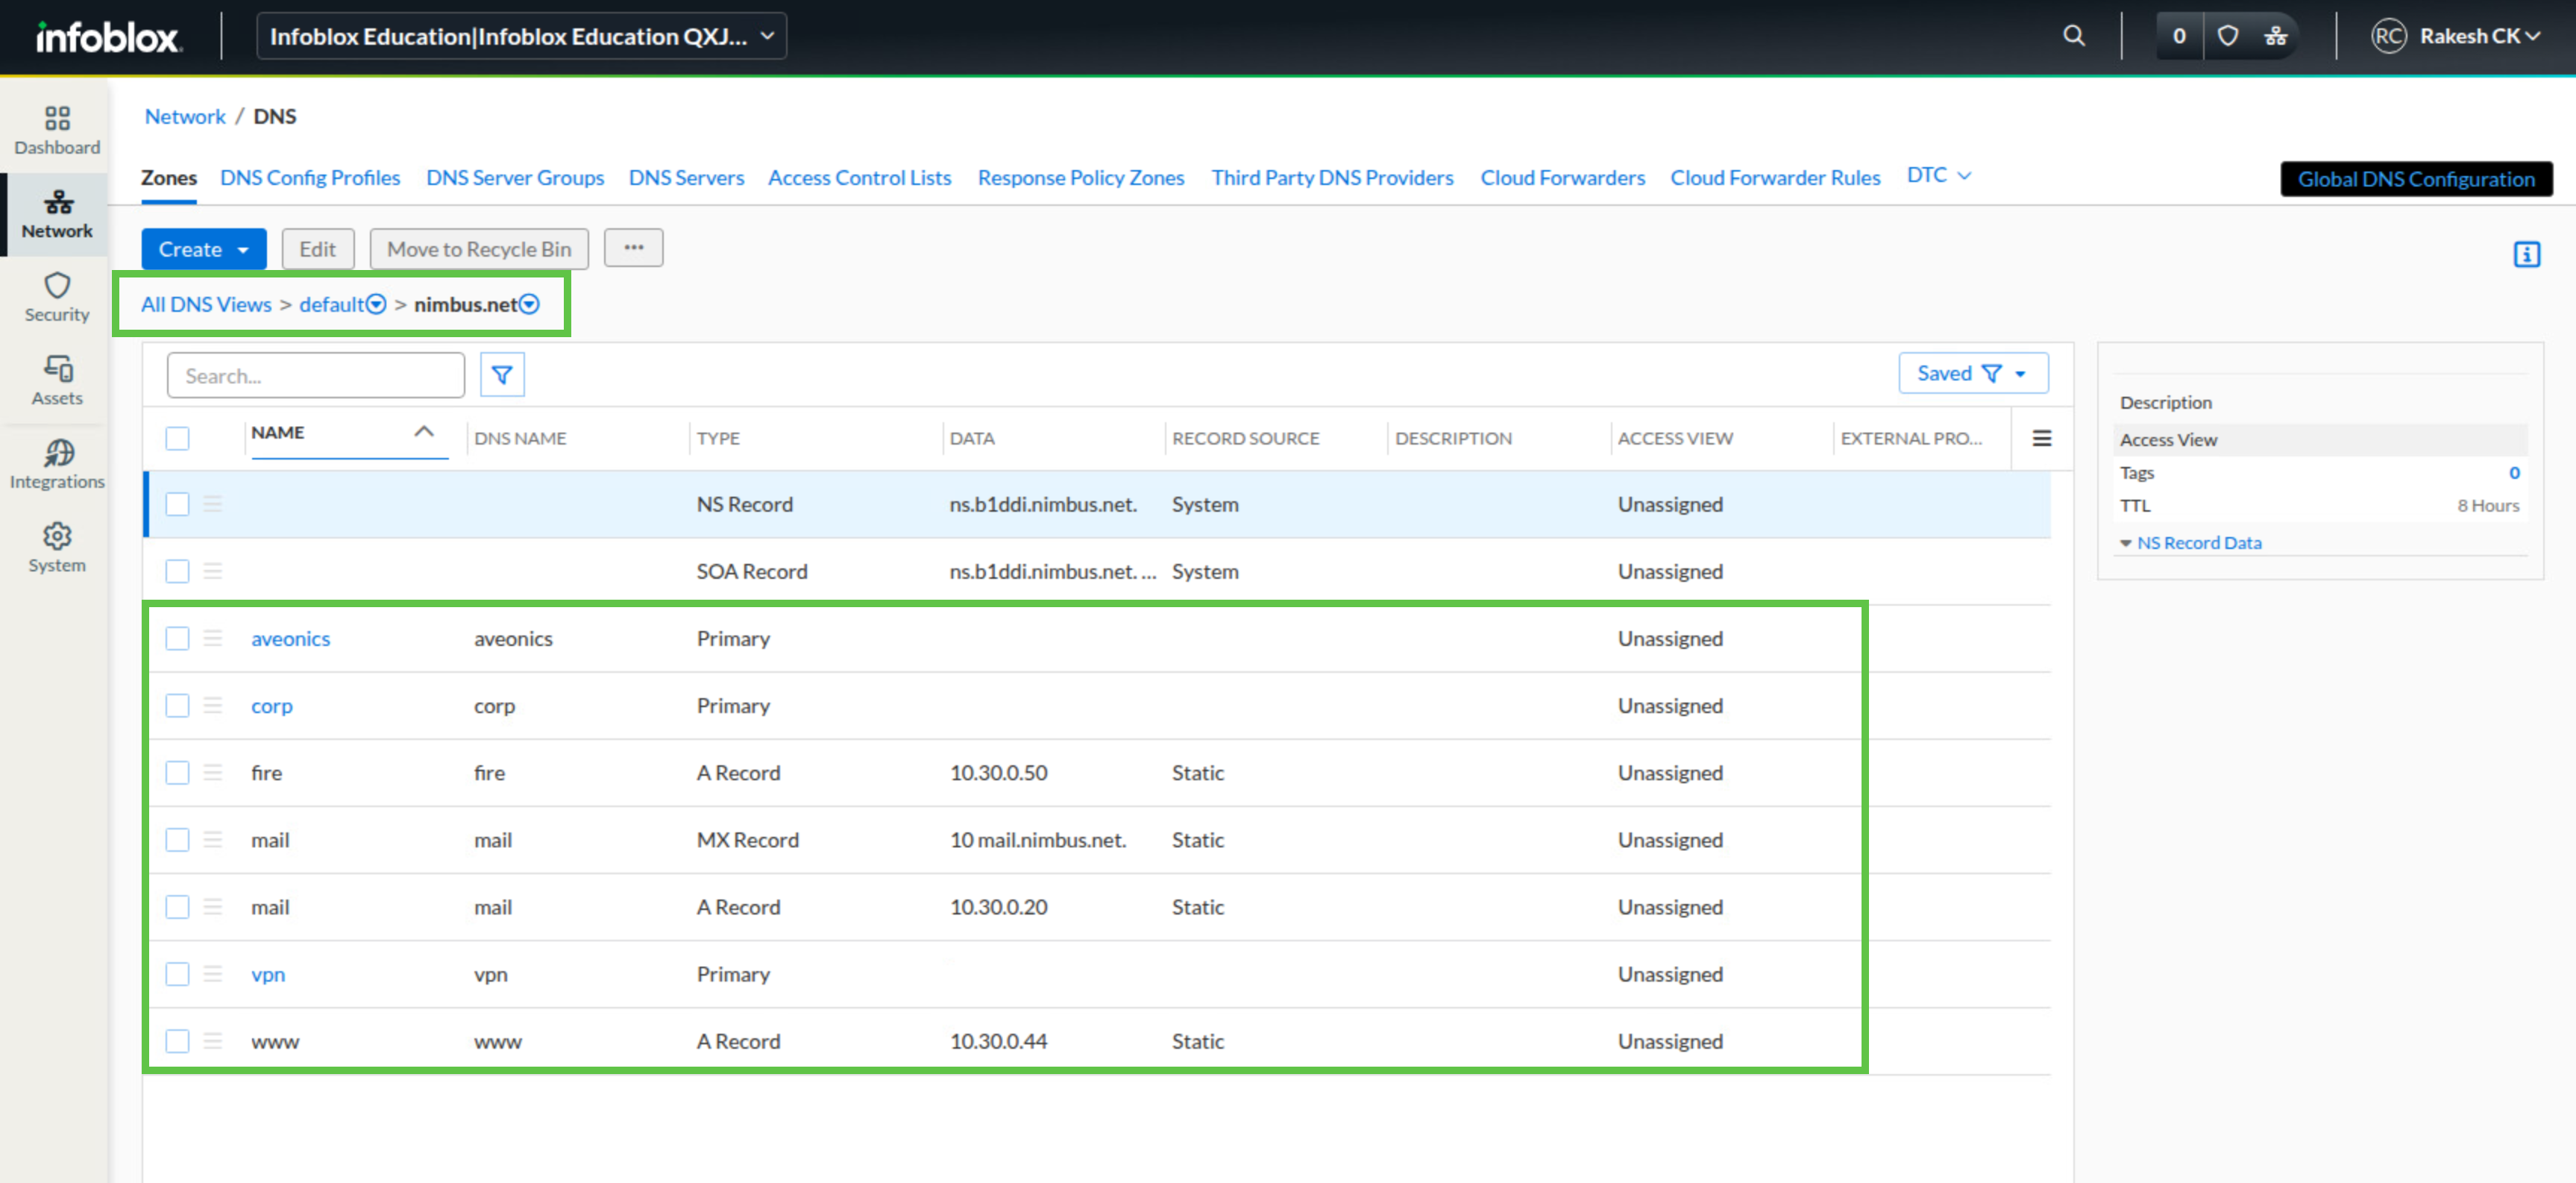
Navigate to Network → DNS.
-
Under the Zones area, open default → nimbus.net and verify that A records, an MX record, and subzones are listed.