Tracing DNSSEC Chain of Trust (2601)
Scenario
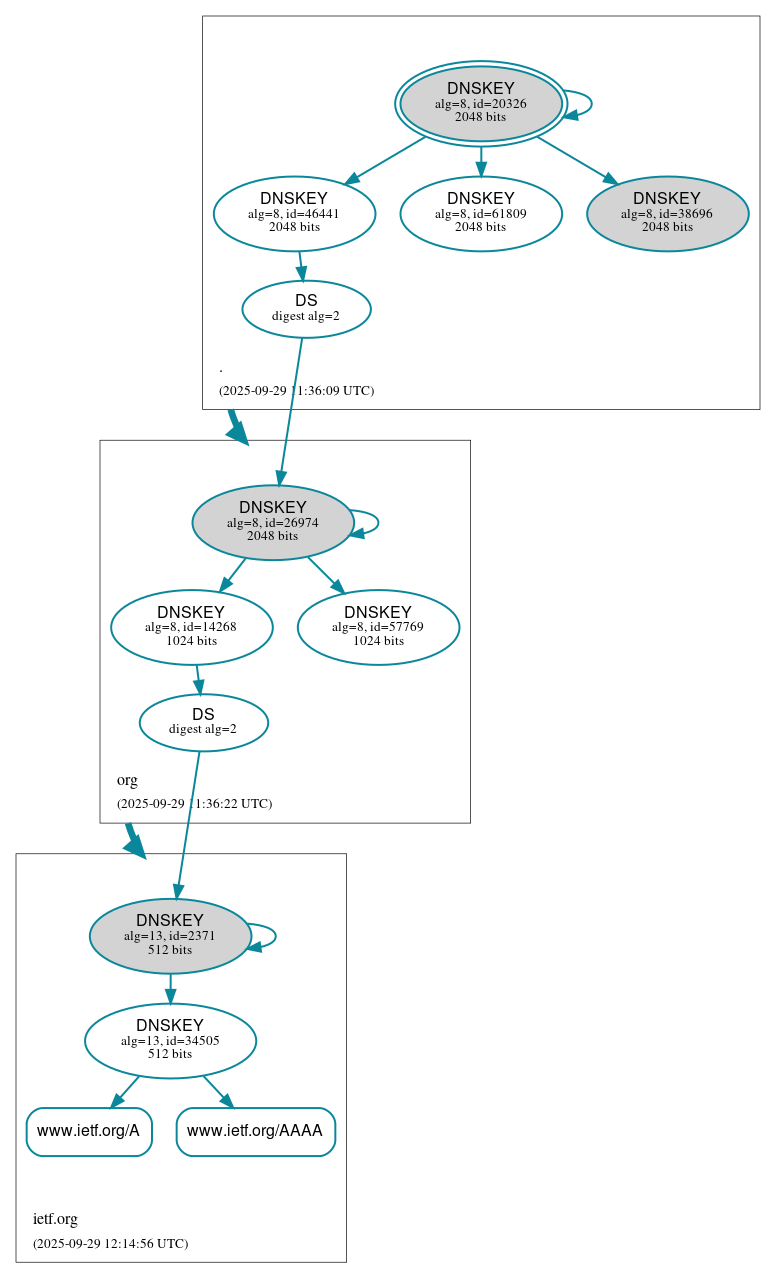
Your organization has recently adopted DNSSEC to align with the latest recommendations for DNS security. You decided to refresh your DNSSEC knowledge and trace the chain of trust for www.ietf.org using various methods to be ready when you need to troubleshoot DNSSEC.
Estimate Completion Time
25 to 40 minutes
Credentials
Description | Username | Password | URL or IP |
|---|---|---|---|
Grid Manager UI | admin | infoblox |
Requirements
1204: DNSSEC Fundamentals
2204: Learning about DNSSEC
Learning Content
Lab Initiation
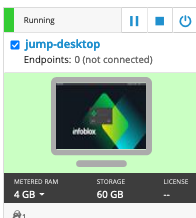
Access jump-desktop
Once the lab is deployed, you can access the virtual machines required to complete this lab activity. To initiate the lab, click on the jump-desktop tile and login to the Linux UI:
Username: training
Password: infoblox
Initiate lab
To initiate the lab, double-click the Launch Lab icon on the Desktop.

Launch Lab
Choose the lab number from the list and click OK.

After clicking OK, you will see a pop-up message with a brief description of the lab task. If the description looks correct, click Yes to continue lab initiation.
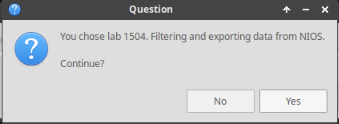
Lab initiation will take a couple of minutes to finish.
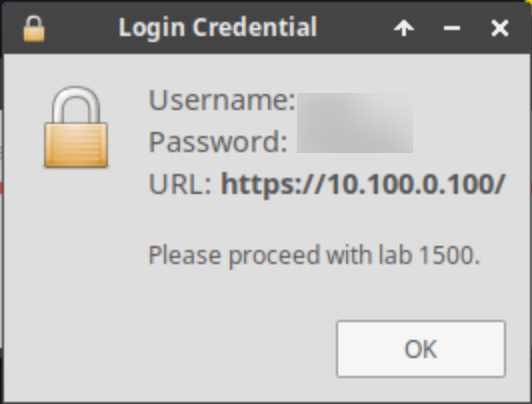
Once complete, you will see another pop-up message with the login credentials and the URL for the Grid Manager’s User Interface. Note that the credentials may differ from those from prior labs.
Tasks
Task 1: Manually Trace the Chain of Trust
Using your dig techniques and the details from studying the packet capture, fill in the commands in the table below needed to manually trace the chain of trust for the domain name www.ietf.org.
Use the local DNS Server 10.100.0.105 as your resolver.
Step Number | dig command | Responses |
|---|---|---|
1 and 2 | dig @10.100.0.105 www.ietf.org. A +dnssec +multi +nocrypto | Receives A record & RRSIG of www.ietf.org |
3 and 4 | Receives DNSKY and RRSIG of DNSKEY, for ietf.org | |
5 and 6 | Receives DS and RRSIG of DS, for ietf.org | |
7 and 8 | Receives DNSKEY and RRSIG of DNSKEY for org | |
9 and 10 | Receives DS and RRSIG of DS for org | |
11 and 12 | Receives DNSKEY and RRSIG of DNSKEY for root |
Task 2: Visual Analysis
Use DNSSEC Analyzer (https://dnssec-analyzer.verisignlabs.com/) to trace the chain of trust for www.ietf.org
Use DNSViz (http://www.dnsviz.net) to perform the same analysis.
Solutions
Task 1 Solution: Manually Trace the Chain of Trust
The necessary dig commands are provided in the table below.
Step Number | dig command | Responses |
|---|---|---|
1 and 2 | dig @10.100.0.105 www.ietf.org. A +dnssec +multi +nocrypto | Receives A record & RRSIG of www.ietf.org |
3 and 4 | dig @10.100.0.105 ietf.org. DNSKEY +dnssec +multi +nocrypto | Receives DNSKY and RRSIG of DNSKEY for ietf.org |
5 and 6 | dig @10.100.0.105 ietf.org. DS +dnssec +multi +nocrypto | Receives DS and RRSIG of DS for ietf.org |
7 and 8 | dig @10.100.0.105 org. DNSKEY +dnssec +multi +nocrypto | Receives DNSKEY and RRSIG of DNSKEY for org |
9 and 10 | dig @10.100.0.105 org. DS +dnssec +multi +nocrypto | Receives DS and RRSIG of DS for org |
11 and 12 | dig @10.100.0.105 . DNSKEY +dnssec +multi +nocrypto | Receives DNSKEY and RRSIG of DNSKEY for root |
Below are sample results of executing each command and highlighting the key ID that makes up the chain of trust.
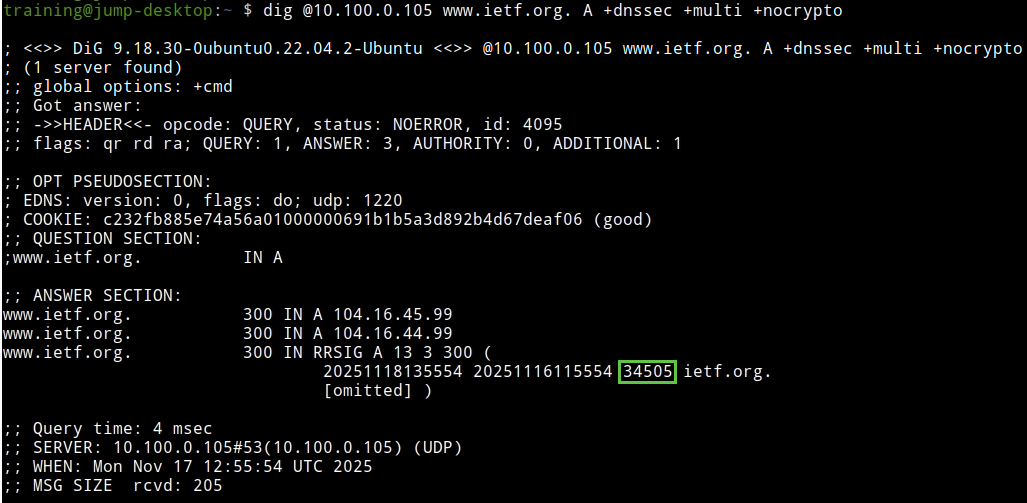
The following figure shows step 1; the RRSIG is signed by the ZSK 34505.
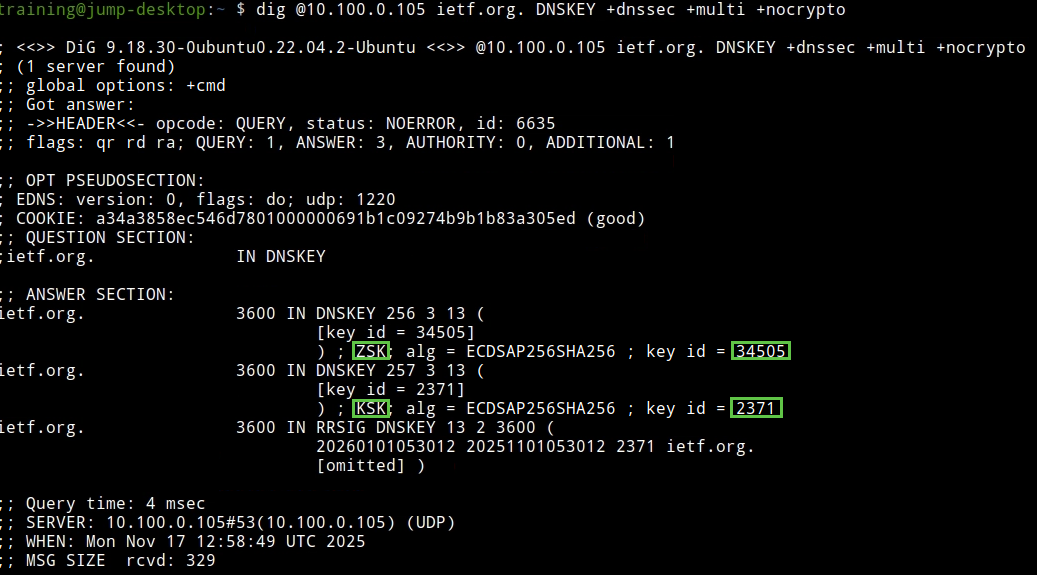
The following figure shows step 3; we spot the ZSK 34505 , signed by KSK 2371
The following figure shows step 5: We receive the DS record for ietf.org. The KSK ID 2371 is present. The DS record has an RRSIG signed by ZSK 37593.
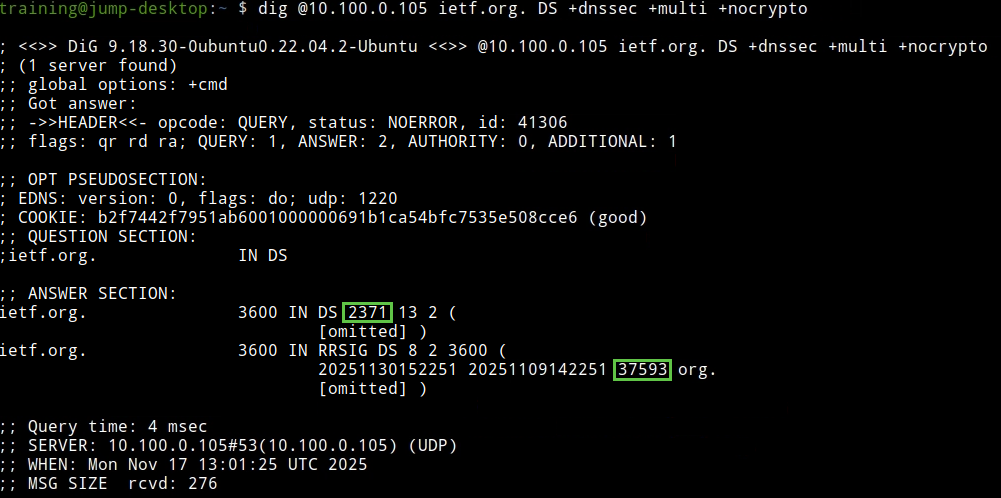
Seeing multiple DNSKEY and DS records is normal, most likely due to key rollover, a topic discussed in a different course.
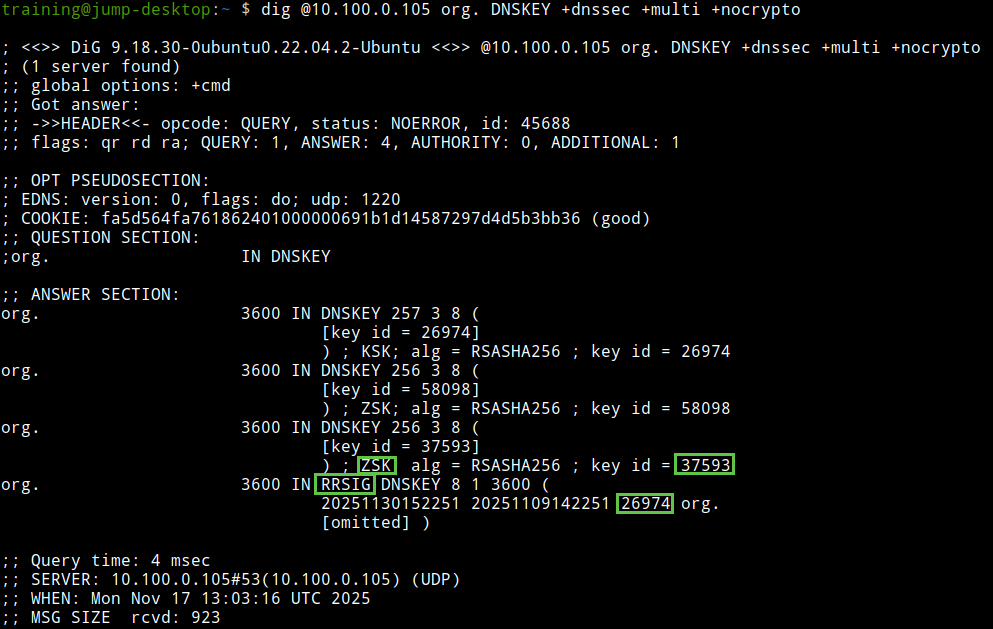
The following figure shows step 7; we spot the org ZSK 37593 with 1 RRSIG, signed by KSK 26974.
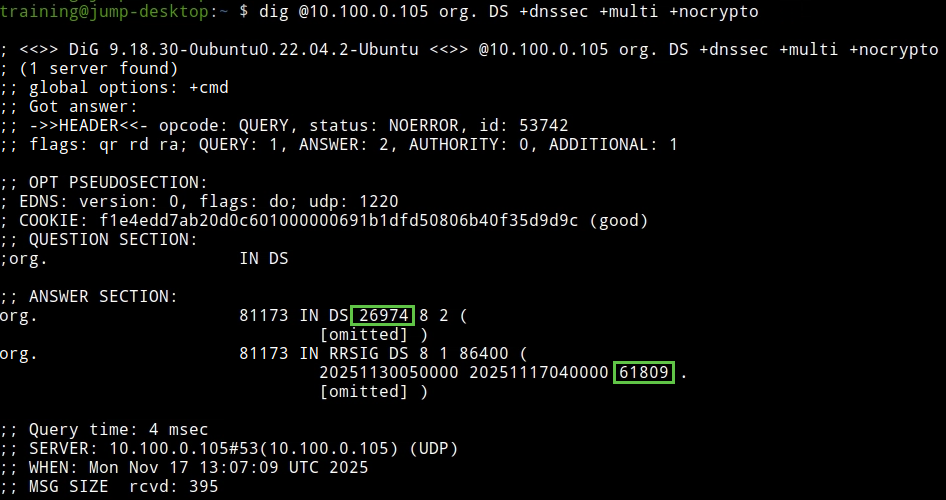
The following figure shows step 9. We see the DS record for 26974 and the RRSIG record signed by 61809.
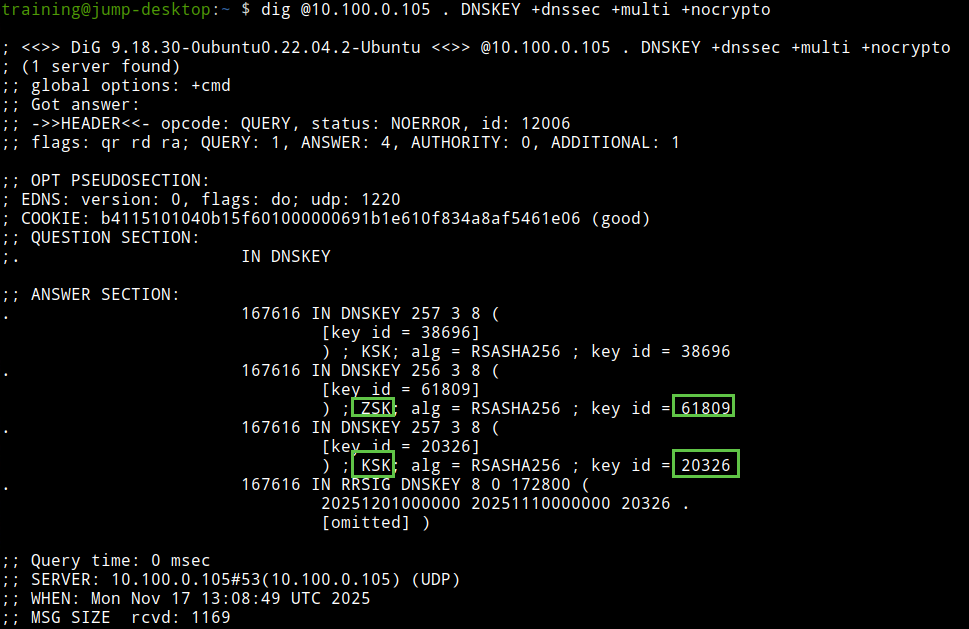
The following figure shows step 11. We see the root ZSK 61809; it has one RRSIG signed by root KSK 20326.
Task 2 Solution: Visual Analysis
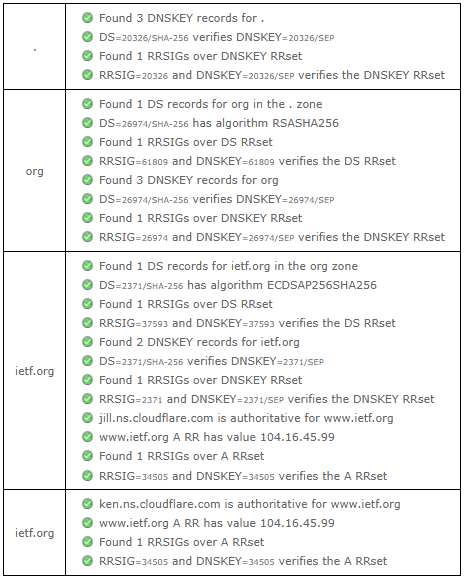
The following figure shows the DNSSEC Analyzer result of www.ietf.org
The following figure shows the DNSViz output of www.ietf.org
