Scenario
You have decided to enable DNSSEC validation for your NIOS Grid, so that all of your users can take advantage of DNSSEC to protect their recursive queries. Please perform the necessary steps to enable DNSSEC recursive validation in the NIOS Grid and verify that it is working.
Estimate Completion Time
-
25 to 30 minutes
Credentials
|
Description |
Username |
Password |
URL or IP |
|---|---|---|---|
|
Grid Manager UI |
admin |
infoblox |
Requirements
-
Administrative access to the NIOS Grid
Learning Content
Lab Initiation
Access jump-desktop
Once the lab is deployed, you can access the virtual machines required for this activity. To begin, select VM List from the navigation bar at the top, locate jump-desktop, and click the green play icon to open its console. Log in to the Linux UI.

Username: training
Password: infoblox
Initiate lab
To initiate the lab, double-click the Launch Lab icon on the Desktop.

Choose the lab number from the list and click OK.

After clicking OK, you will see a pop-up message with a brief description of the lab task. If the description looks correct, click Yes to continue lab initiation.

Lab initiation will take a couple of minutes to finish.
Once complete, you will see another pop-up message with the login credentials and the URL for the Grid Manager’s User Interface. Note that the credentials may differ from those from prior labs.

Tasks
-
Task 1: Validate recursion is working and DNSSEC validation is not enabled yet.
-
Task 2: Obtain the current root trust anchor.
-
Task 3: Enable DNSSEC validation and install the trust anchor.
-
Task 4: Verify DNSSEC signed domains are now correctly validated.
Task 1: Verify recursion is enabled on the Grid
-
Verify recursion is enabled on DNS members.
Task 2: Query a known signed domain to check validation status
-
Query a known domain that has DNSSEC enabled (signed). Observe that no DNSSEC validation is being performed.
Task 3: Obtain the current root trust anchor
-
Use dig to query DNSKEYs for root (.) using a trusted DNS server.
-
Save the key information for later use.
Task 3: Enable DNSSEC validation and install the trust anchor
-
Enable DNSSEC validation on the Grid.
-
Install the root trust anchor.
Task 4: Verify DNSSEC signed domains are now validated
-
Use lookup tools to verify that DNSSEC validation is working correctly.
Solutions
Task 1 Solution: Verify recursion is enabled on the Grid
-
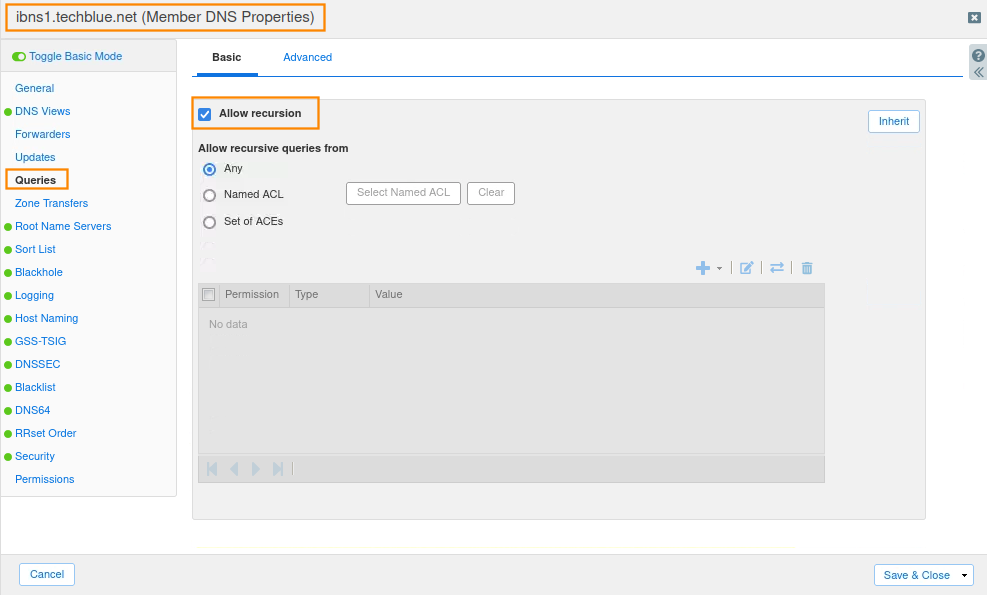
Login to NIOS Grid UI (https://10.100.0.100) with the credentials admin/infoblox.
-
Navigate to Data Managment → DNS → Members.
-
Click the menu icon and choose to Edit the members ibns1.techblue.net and ibns2.techblue.net one at a time.
-
In the Member DNS Properties dialog, select Queries tab on the left, verify the Allow recursion option is enabled. Do this for both members ibns1.techblue.net and ibns2.techblue.net.
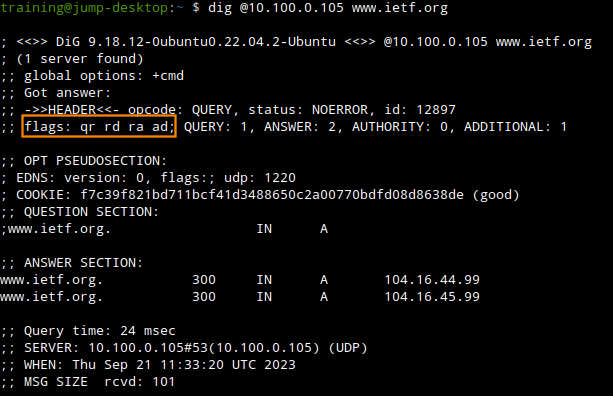
Task 2 Solution: Query a known signed domain to check validation status
-
Choose a domain that has been signed, or has authoritative DNSSEC enabled. We can verify the domain is signed by querying for its DNSKEY, as shown below:
-
Next, query the same domain and observe that the DNS responses do not include the AD flag. This verifies that while recursion is working (RA flag is present), there is no DNSSEC validation (no AD flag).
Task 3 Solution: Obtain the current root trust anchor
There are several methods to obtain root trust anchors. The easiest way is to query a public DNSSEC validating resolver. You may also query for the entire root zone file and extract the key (https://www.internic.net/domain/root.zone), or use a dedicated tool such as get-trust-anchor: https://github.com/iana-org/get-trust-anchor
-
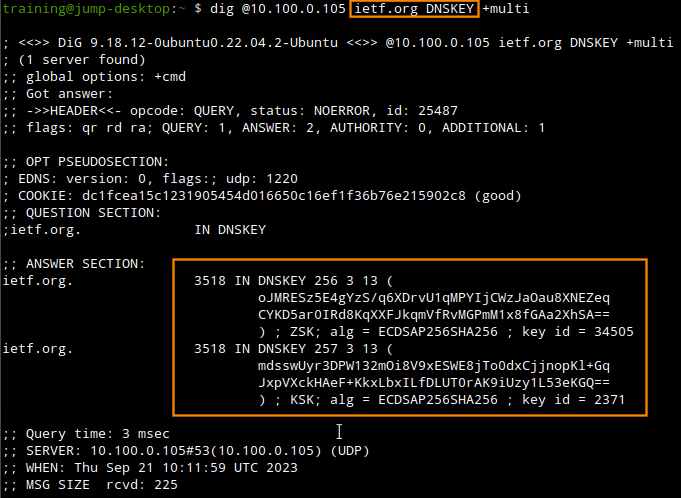
Query Google Public DNS, which has DNSSEC validation enabled. Use this dig command to query for the root (.) key:
dig @8.8.8.8 . DNSKEY -
The output will display multiple keys. We are looking for the Key Signing Key (KSK) with the key type 257.
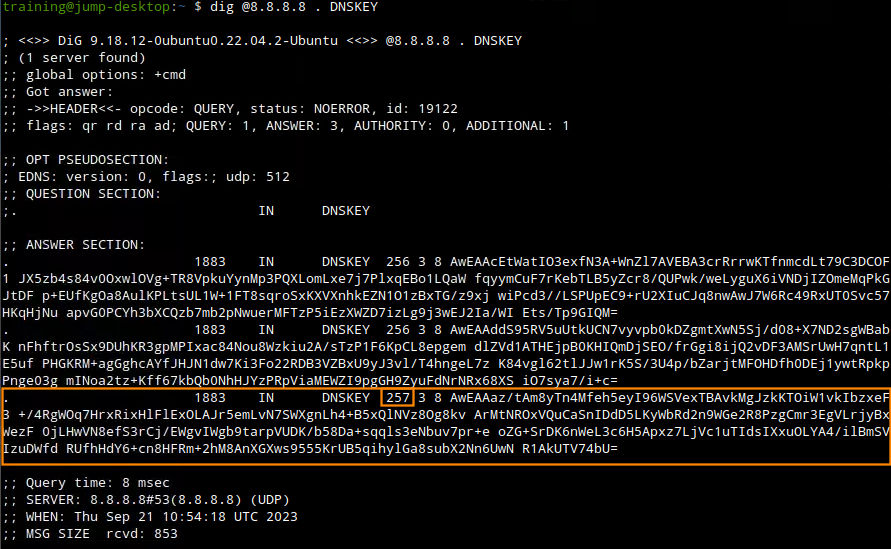
-
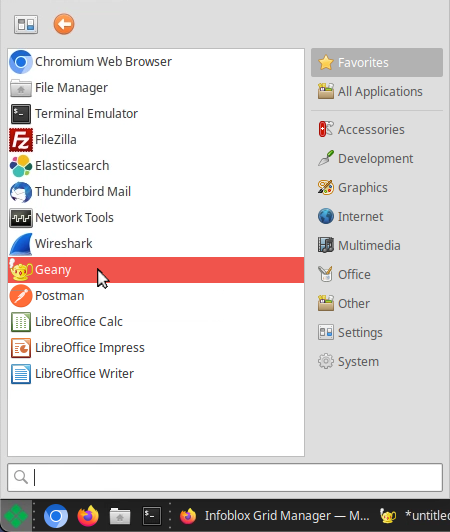
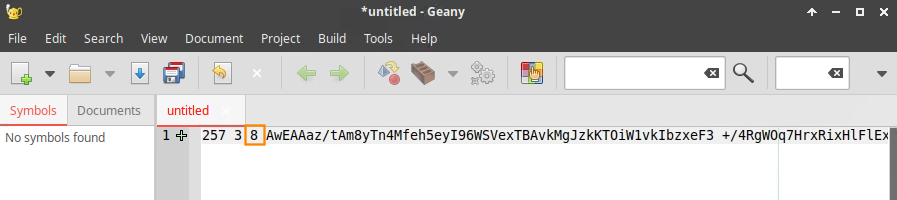
Open the application Geany from the applications menu.
-
Copy the Key Signing Key (KSK) into Geany to add later into NIOS.

Task 4 Solution: Enable DNSSEC Validation and Install the trust anchor
-
Login back to NIOS Grid UI (https://10.100.0.100) with the credentials admin/infoblox.
-
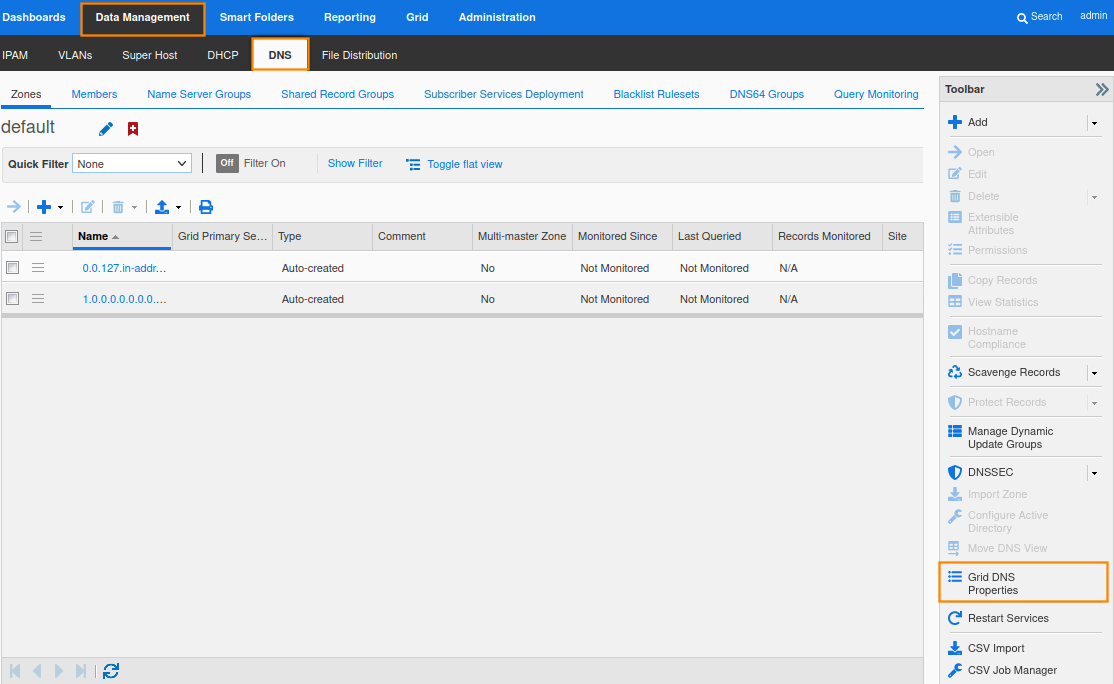
Navigate to Data Managment → DNS, then click Grid DNS Properties from the Toolbar.
-
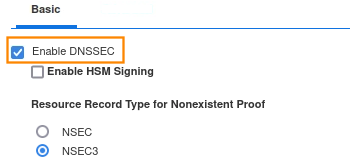
Toggle Advanced mode, and select DNSSEC.
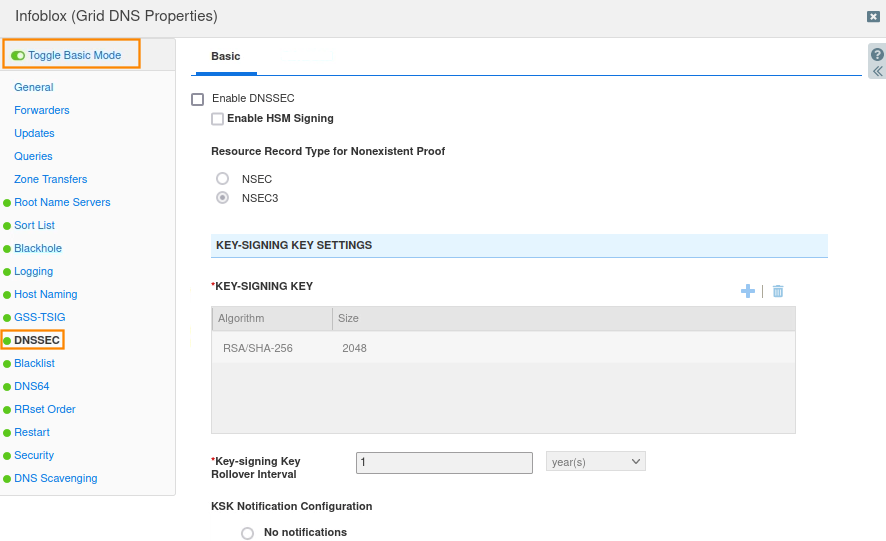
-
Select Enable DNSSEC, scroll down and select Enable DNSSEC Validation. Both of these options are enabled by default in NIOS, but they are not functional until at least one trust anchor has been installed.

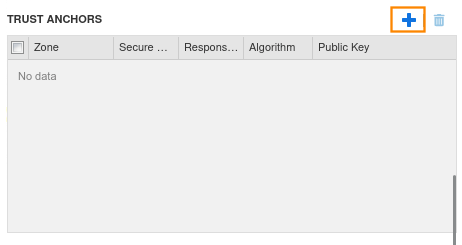
-
Click the + next to TRUST ANCHORS
-
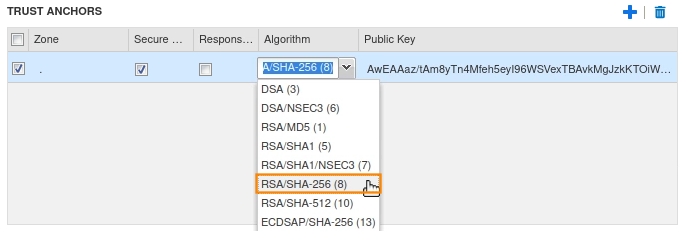
Copy the key string we saved earlier into the public key section.

-
Take a note of the key algorithm used for the KSK we copied into Geany, and select the same key algorithm under the Algorithm section.
-
Save and Close, then restart the service when prompted.
Task 5 Solution: Verify DNSSEC signed domains are now validated
-
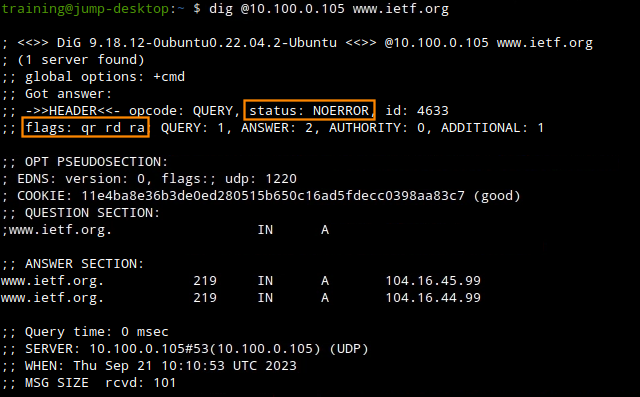
In a terminal window, use dig to query the same domain (www.ietf.org) we tested earlier. If DNSSEC validation has been enabled correctly on the member with the correct root trust anchor, you should see the AD flag present in the response.