CSP Overview for BloxOne (2900)
Cloud Services Portal (CSP) is now Infoblox Portal
In early September, Cloud Services Portal (CSP) became Infoblox Portal with a new look-and-feel, and a new URL (https://portal.infoblox.com). As a result of this change, the layout and organization of several menus have been updated.
Unfortunately, this means that our video courseware and lab guides no longer match the new user interface. However, we are currently in the process of updating them, and they should be ready soon.
In the meantime, we have some resources to help you navigate the new interface:
We have created a mapping of the previous menu locations and their new breadcrumb location.
Additionally, you can find a walkthrough video of the new User Interface on Launchpad.
We apologize for any inconvenience this may cause and kindly ask for your patience as we work through this transition.
Scenario
You have been given administrative access to the Infoblox CSP and you will be expected to start deploying BloxOne hosts to service your DDI and Threat Defense needs. You have some time to get familiar with the interface so that you can plan your work. This process should help you become more familiar with the CSP interface and the location of commonly used elements for configuring your network services.
Estimate Completion Time
10 to 15 minutes
Prerequisites
Administrative access to the BloxOne CSP
Course References
1110 BloxOne CSP Overview
Tasks
To complete this lab, you need to perform the following tasks.
Log onto the BloxOne CSP
Locate and configure your own user profile
Locate the Dashboards and Help panel
Locate the Infrastructure configuration section
Locate more configuration sections
Task 1: Log onto the BloxOne CSP
First, check the current status of the Cloud Service Portal (CSP) and scheduled maintenance of the BloxOne platform at status.infoblox.com.Then, log in to the BloxOne CSP web interface using the Infoblox lab-provided tenant information.
Task 2: Locate and configure your own user profile
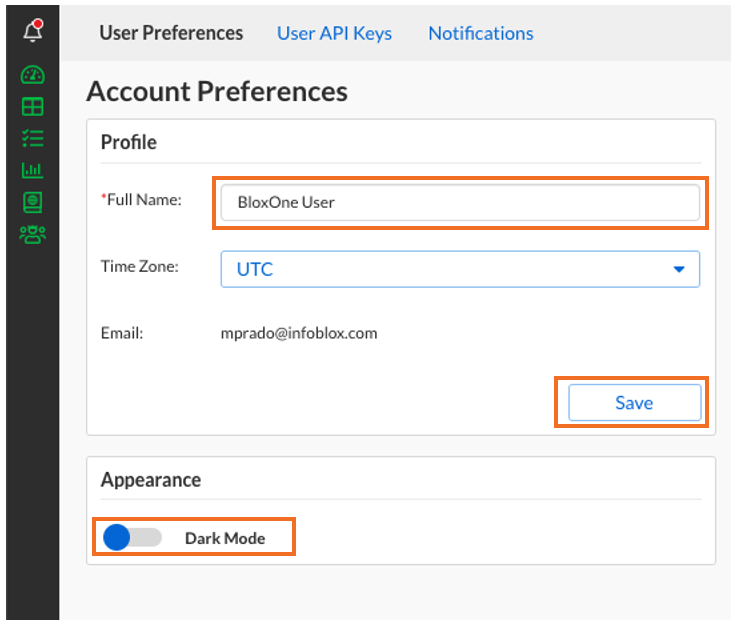
Locate your user configuration section. Change the Time Zone to something appropriate. Change the Dark/Light mode to your preference.
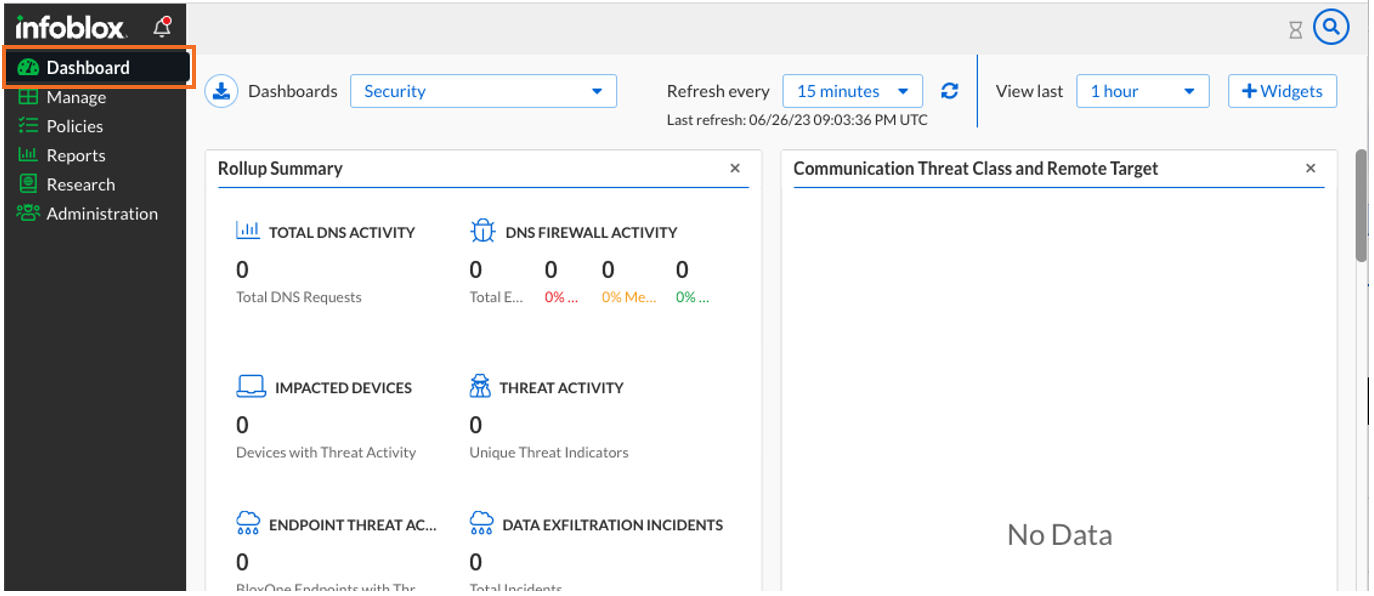
Task 3: Locate the Dashboards and Help panel
Locate the Dashboards to confirm the initial statistics. Open the context-sensitive Help panel while you're here to see helpful information about the Dashboards panel.
You can pin the Help panel to your workspace, and it will update its content based on which menu and sub-menu you are working with. Look for the 
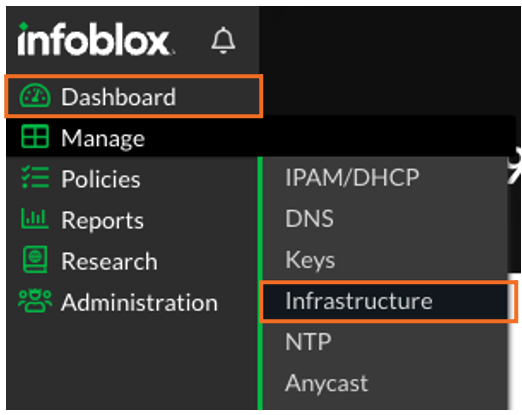
Task 4: Locate the Infrastructure configuration section
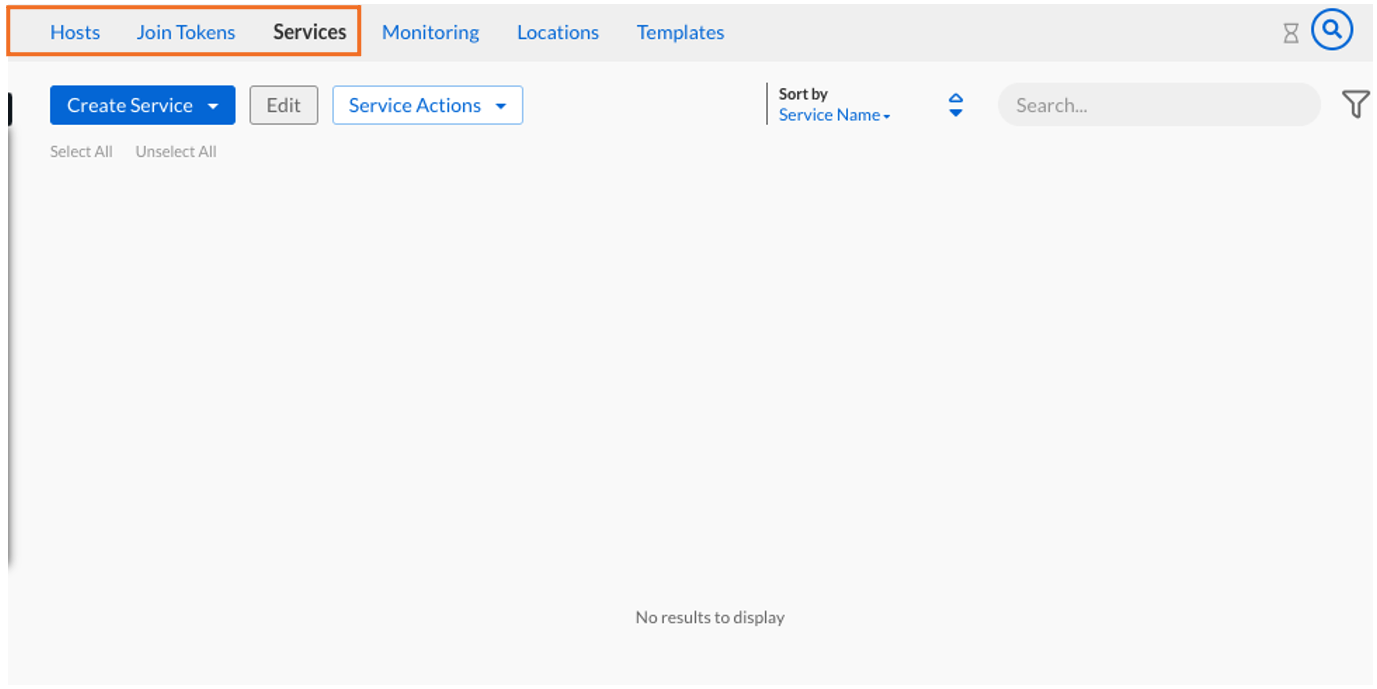
You'll soon be adding BloxOne Hosts and Services to the network. Locate the Infrastructure section where we will be configuring these. Find the Hosts, Join Tokens, and Services sub-menus.
Task 5: Locate more Configuration Sections
There are a few other sections in the CSP we need to be familiar with. Locate the configuration sections listed in Table 2900-1 below.
Table 2900-1
UI Section | Purpose |
|---|---|
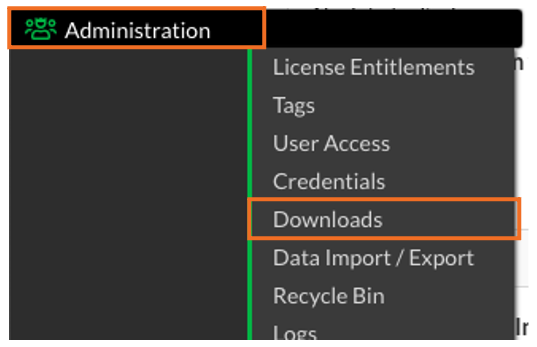
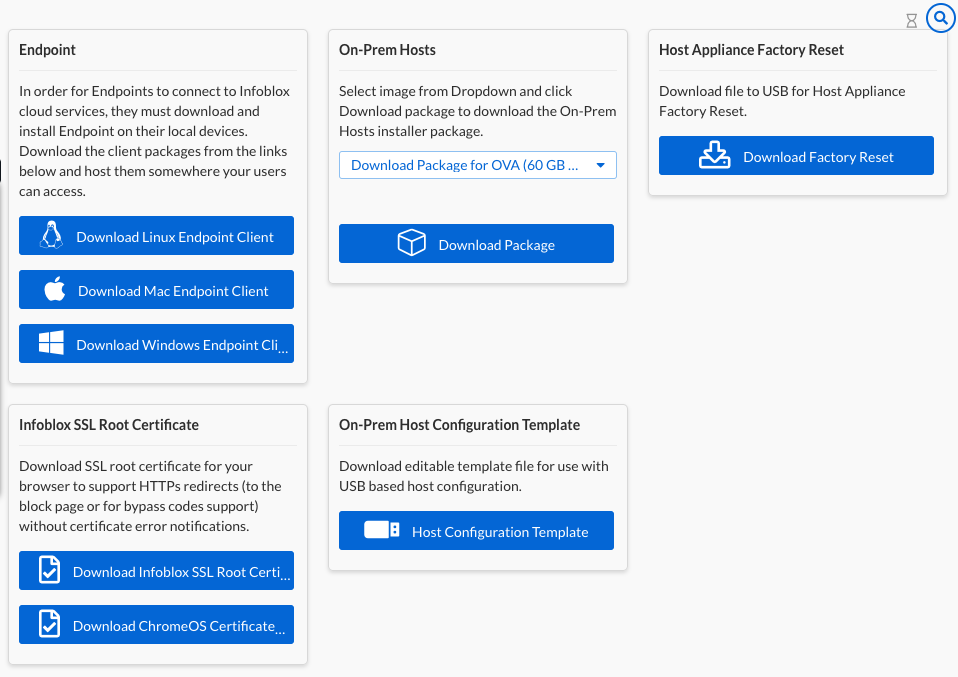
Downloads | Download software for Endpoints and Hosts |
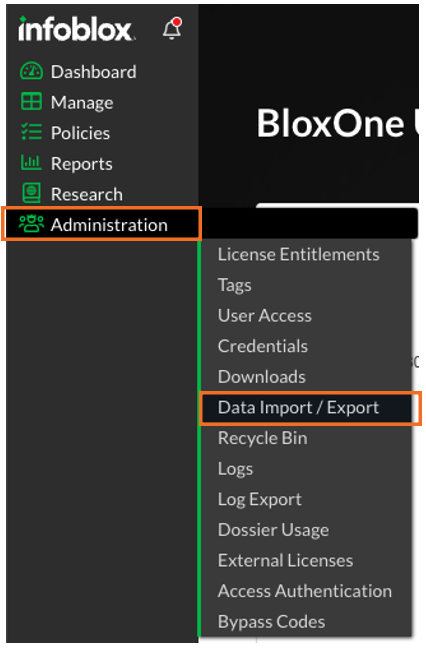
Data Import / Export | Import and Export network objects for migration, maintenance, or bulk changes |
Recycle Bin | Manage deleted objects |
User Access | Configure user accounts and roles for network administrators and operators |
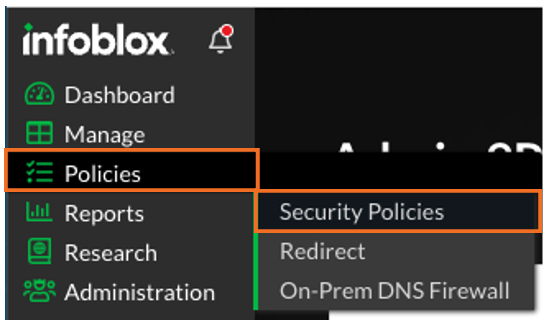
Security Policies | Define sets of rules and actions for access and network security |
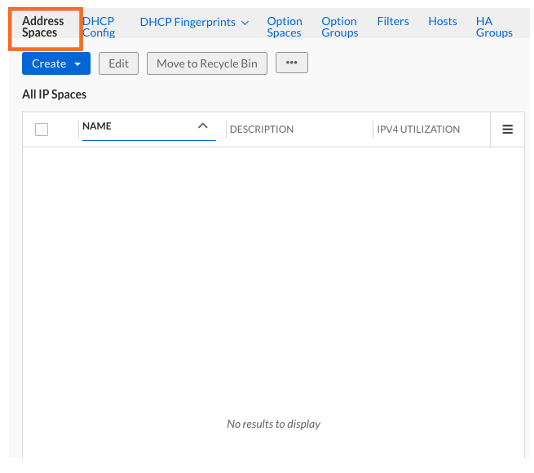
Address Spaces | Create and navigate the network definitions used by DHCP services and IP Address Management (IPAM) |
Solutions
Task 1 Solution: Log onto the BloxOne CSP
It's good practice to check in on the latest maintenance updates and status of the BloxOne Cloud platform. Open a web browser in your lab or any internet-connected web browser and go to status.infoblox.com. Expand the BloxOne DDI tab to see if CSP is operational

Log into the BloxOne CSP web interface using the Infoblox lab-provided tenant information. Go to csp.infoblox.com - This may forward automatically to auth.infoblox.com for the login portion.

Task 2 Solution: Locate and configure your own user profile
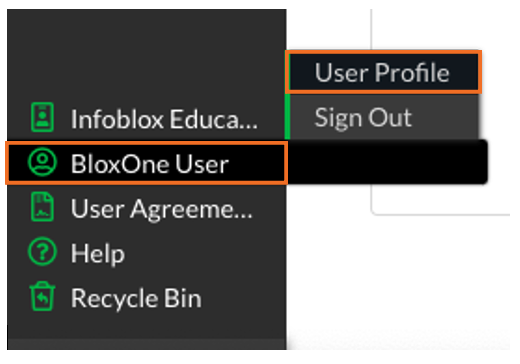
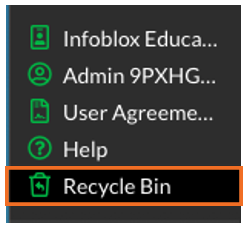
Navigate to your username, on the bottom-left above the User Agreement. In this example, the username is BloxOne User, so we'll go to BloxOne User → User Profile
In the User Preferences sub-menu is Account Preferences. Adjust the Time Zone if you like, and use the Dark/Light mode toggle to see what you prefer. Click Save when you are done.
Task 3 Solution: Locate the Dashboards and Help panel
On the main menu, select Dashboard. Since we have no services configured yet, there will likely be No Data.
On the main menu panel, select Help
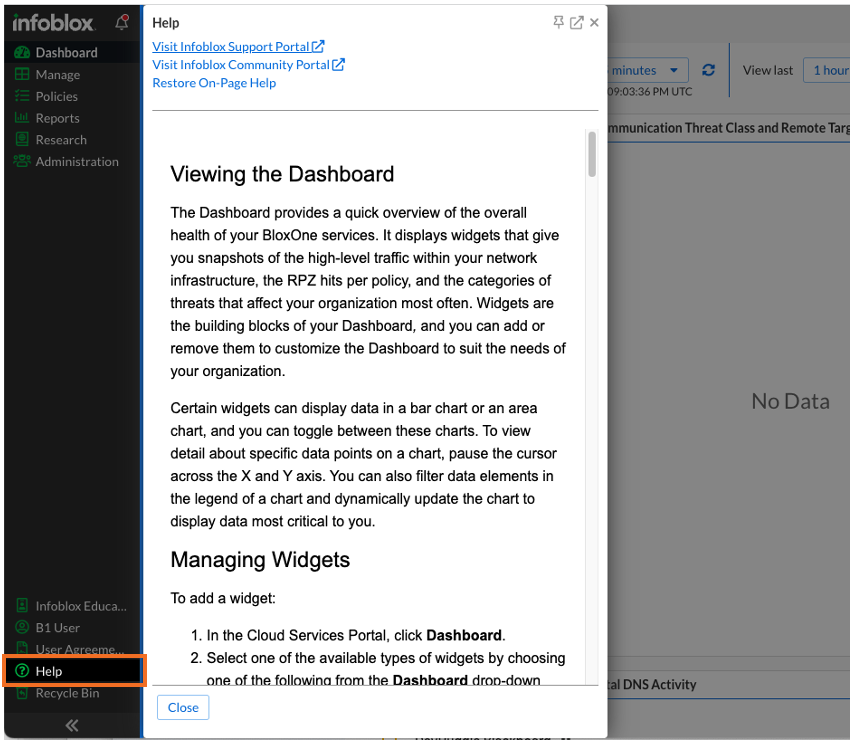
We can lock this Help panel in place by selecting the
icon.
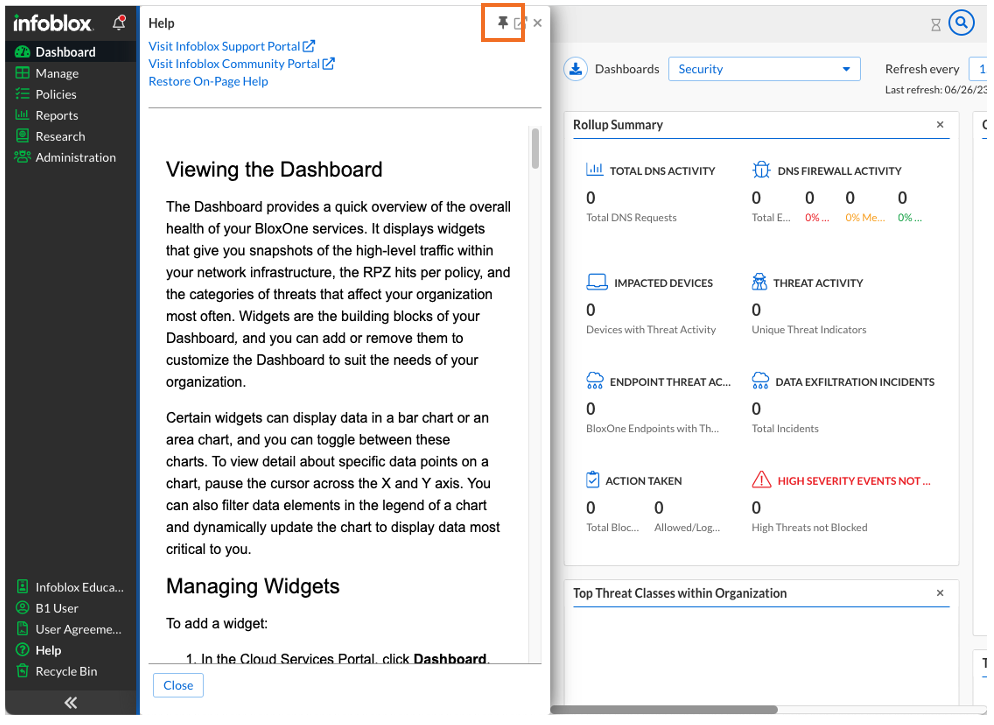
Notice how the content of this panel will change as we move between main menus and sub-menus.
Un-Pin the panel with the
icon if you want more space on the screen for the other panels.
Task 4 Solution: Locate the Infrastructure configuration section
On the main menu panel select Manage → Infrastructure
Click each submenu to see where we will need to configure our Hosts, Join Tokens, and Services. If you have not deployed any Hosts or Services yet, there will be no results listed.
Task 5 Solution: Locate more Configuration Sections
Downloads is where we will go to get software for Endpoints and Hosts. In a future lab, this is where we will get our BloxOne Host container package. Go to Administration → Downloads.
You may need to Import data for migration, maintenance, or bulk changes. Go to Administration → Data Import / Export.
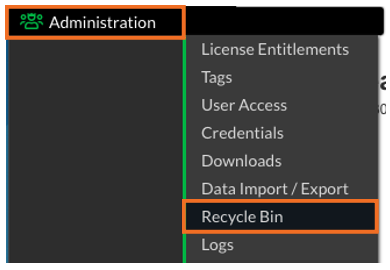
Recycle Bin is where objects go when we delete them. Go to Administration → Recycle Bin or click on Recycle Bin at the bottom left of the main menu panel.
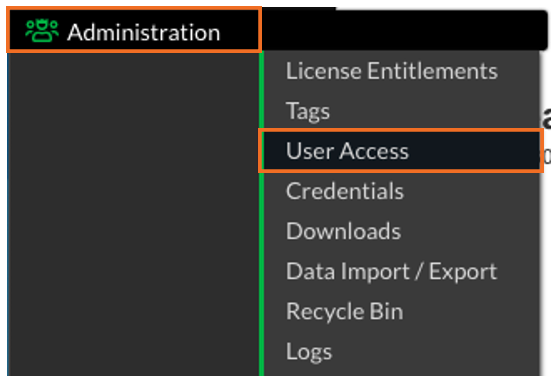
User Access is where we will go to configure other user accounts and roles for our network administrators and operators. Go to Administration → User Access.
Security Policies is where we will go to define sets of network security rules and actions for access and constraints. Go to Policies → Security Policies.
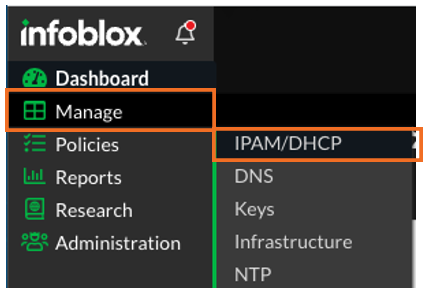
Address Spaces is where we create and navigate the network definitions used by our DHCP services and IP Address Management (IPAM). Go to Manage → IPAM/DHCP and click on the Address Spaces sub-menu.