Exporting and Importing in BloxOne (2901)
Cloud Services Portal (CSP) is now Infoblox Portal
In early September, Cloud Services Portal (CSP) became Infoblox Portal with a new look-and-feel, and a new URL (https://portal.infoblox.com). As a result of this change, the layout and organization of several menus have been updated.
Unfortunately, this means that our video courseware and lab guides no longer match the new user interface. However, we are currently in the process of updating them, and they should be ready soon.
In the meantime, we have some resources to help you navigate the new interface:
We have created a mapping of the previous menu locations and their new breadcrumb location.
Additionally, you can find a walkthrough video of the new User Interface on Launchpad.
We apologize for any inconvenience this may cause and kindly ask for your patience as we work through this transition.
Scenario
You have just started to build your BloxOne deployment and you have been provided with an object definitions file that you can use to get started. You'll need to import these objects and verify they were imported correctly.
Estimate Completion Time
10 to 15 minutes
Prerequisites
Administrative access to the CSP
Course References
2154 BloxOne Exporting and Importing
Tasks
To complete this lab, you need to perform the following tasks.
Import an Infoblox CSV objects file
Verify the objects were imported with no errors
Task 1: Import an Infoblox CSV Object File
Login to the CSP interface in a web browser in your lab environment. You will need to do this in the lab environment because the import file is located in a folder on your lab desktop. Import the file in Shared Drive named B1-Import.csv. This will be importing an initial Branches IP Space with several IP Address blocks and subnets.
Whether you will be working with DDI or BloxOne Threat Defense Cloud, you may be using Importing and Exporting features
Task 2: Verify the objects were imported with no errors
Using the Import / Export Job Manager, you can see all the Import and Export jobs that have been executed. Look at the Import process you started and verify that it is complete and that there were no errors.
Bonus Task
Find the objects you just imported (The details of IP Space objects are covered in another lab).
Solutions
Task 1 Solution: Import an Infoblox CSV Object File
Login to the CSP interface in a web browser in your lab environment. You will need to do this in the lab environment because the import file is located in a folder on your lab desktop.
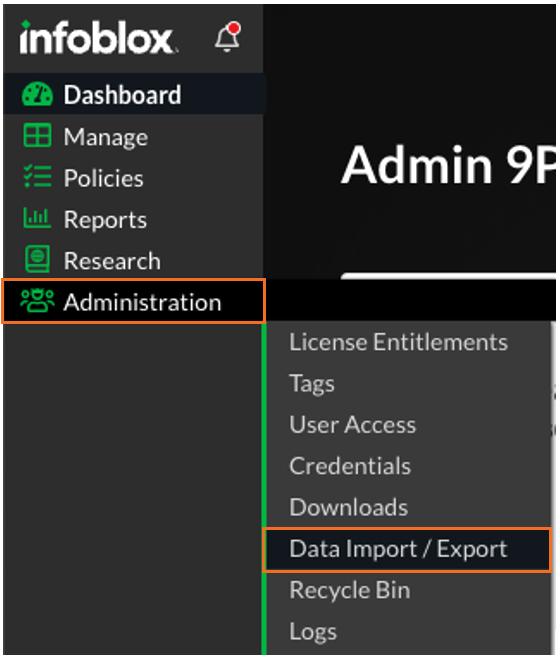
Navigate to Administration → Data Import / Export
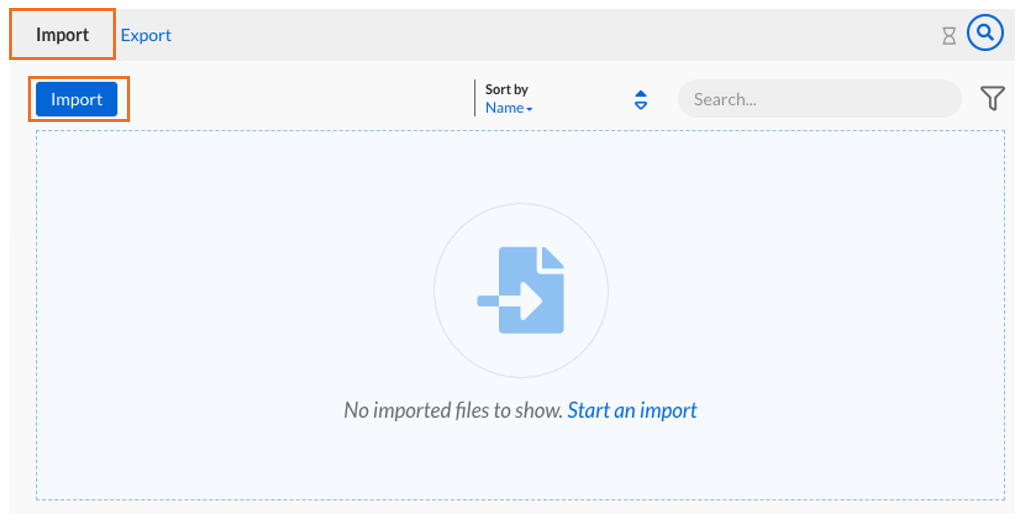
Click on the Import submenu, and click the Import button to start configuring an Import process
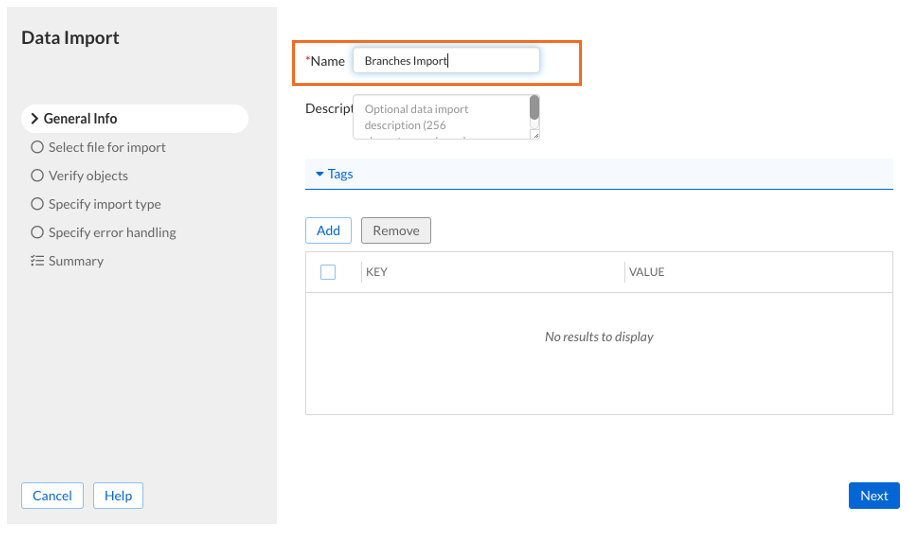
Give the Data Import the name Branches Import and click Next
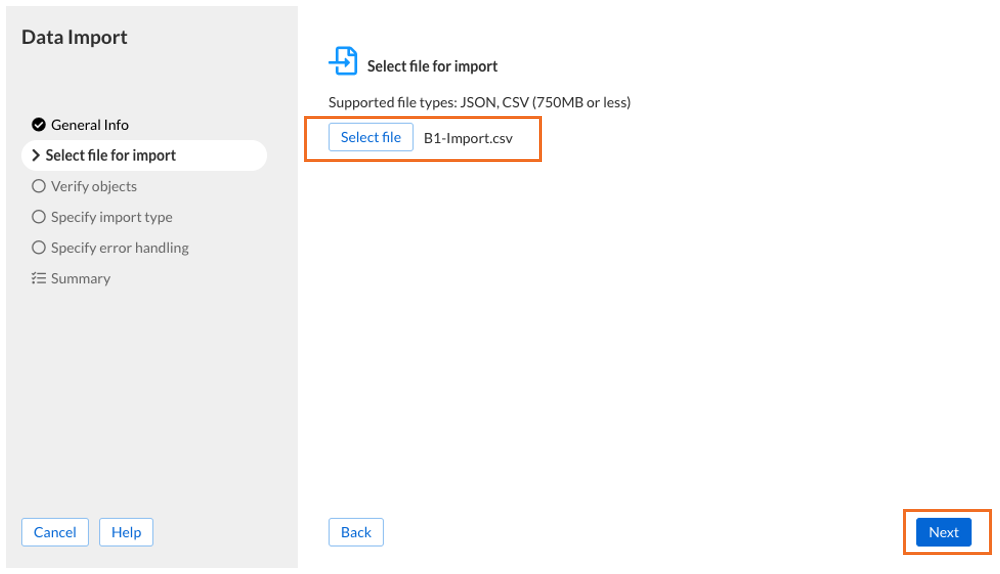
Click Select File and select the CSV file in Shared Drive named B1-Import.csv and click Next
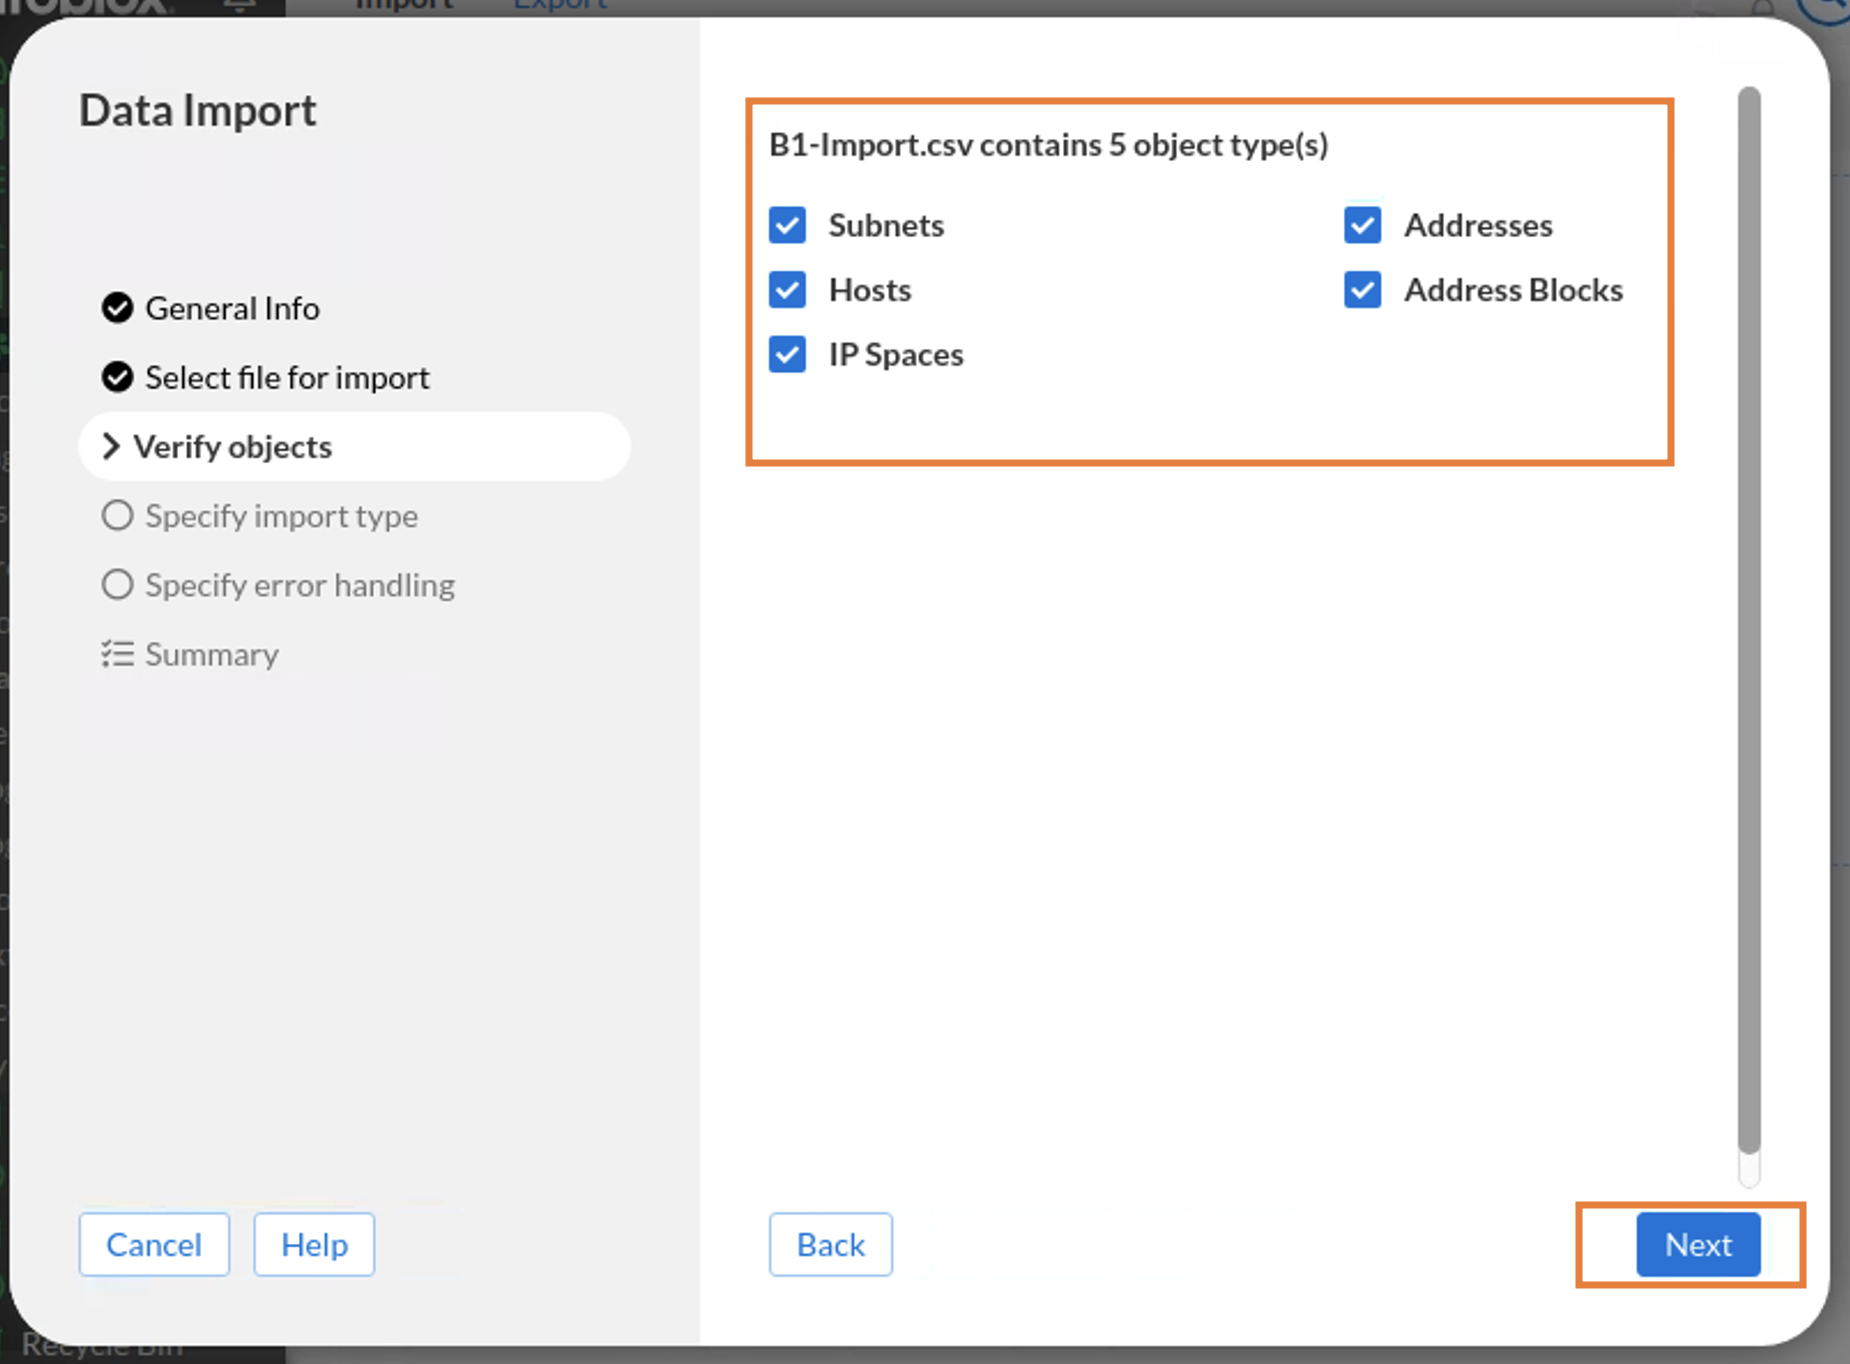
Our next step is to verify the objects we are importing. This gives us a chance to be selective about which objects we want to import. Make sure that all object types are checked, and click Next
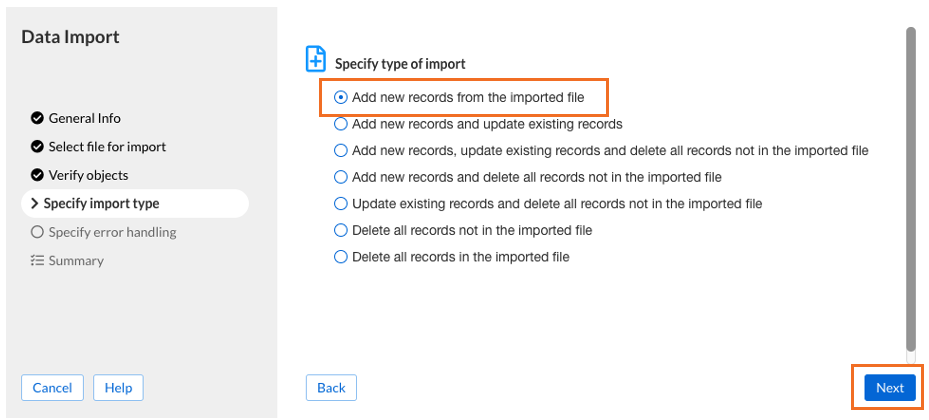
In the Specify import type section, we can select the action to take for each entry in the CSV import file. Since we are adding these objects, and not updating or deleting, choose Add new records from the imported file (if it is not already selected)
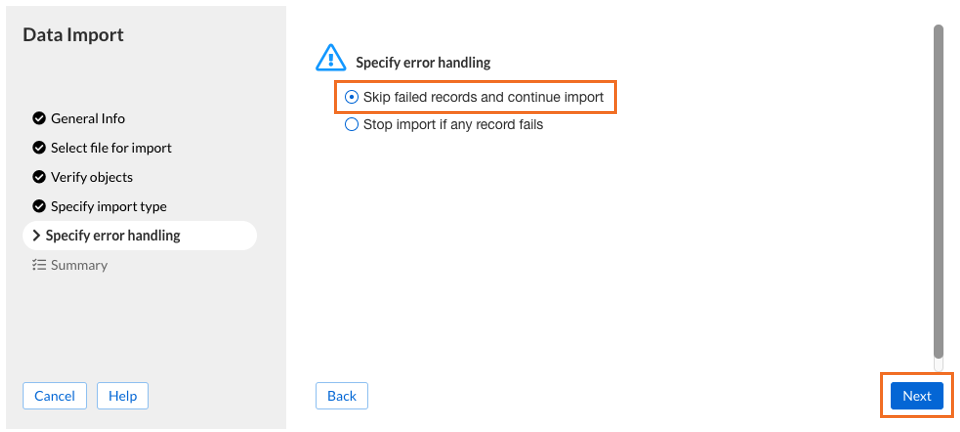
We now specify what action to take if there is an error. Select Skip failed records and continue import and click Next
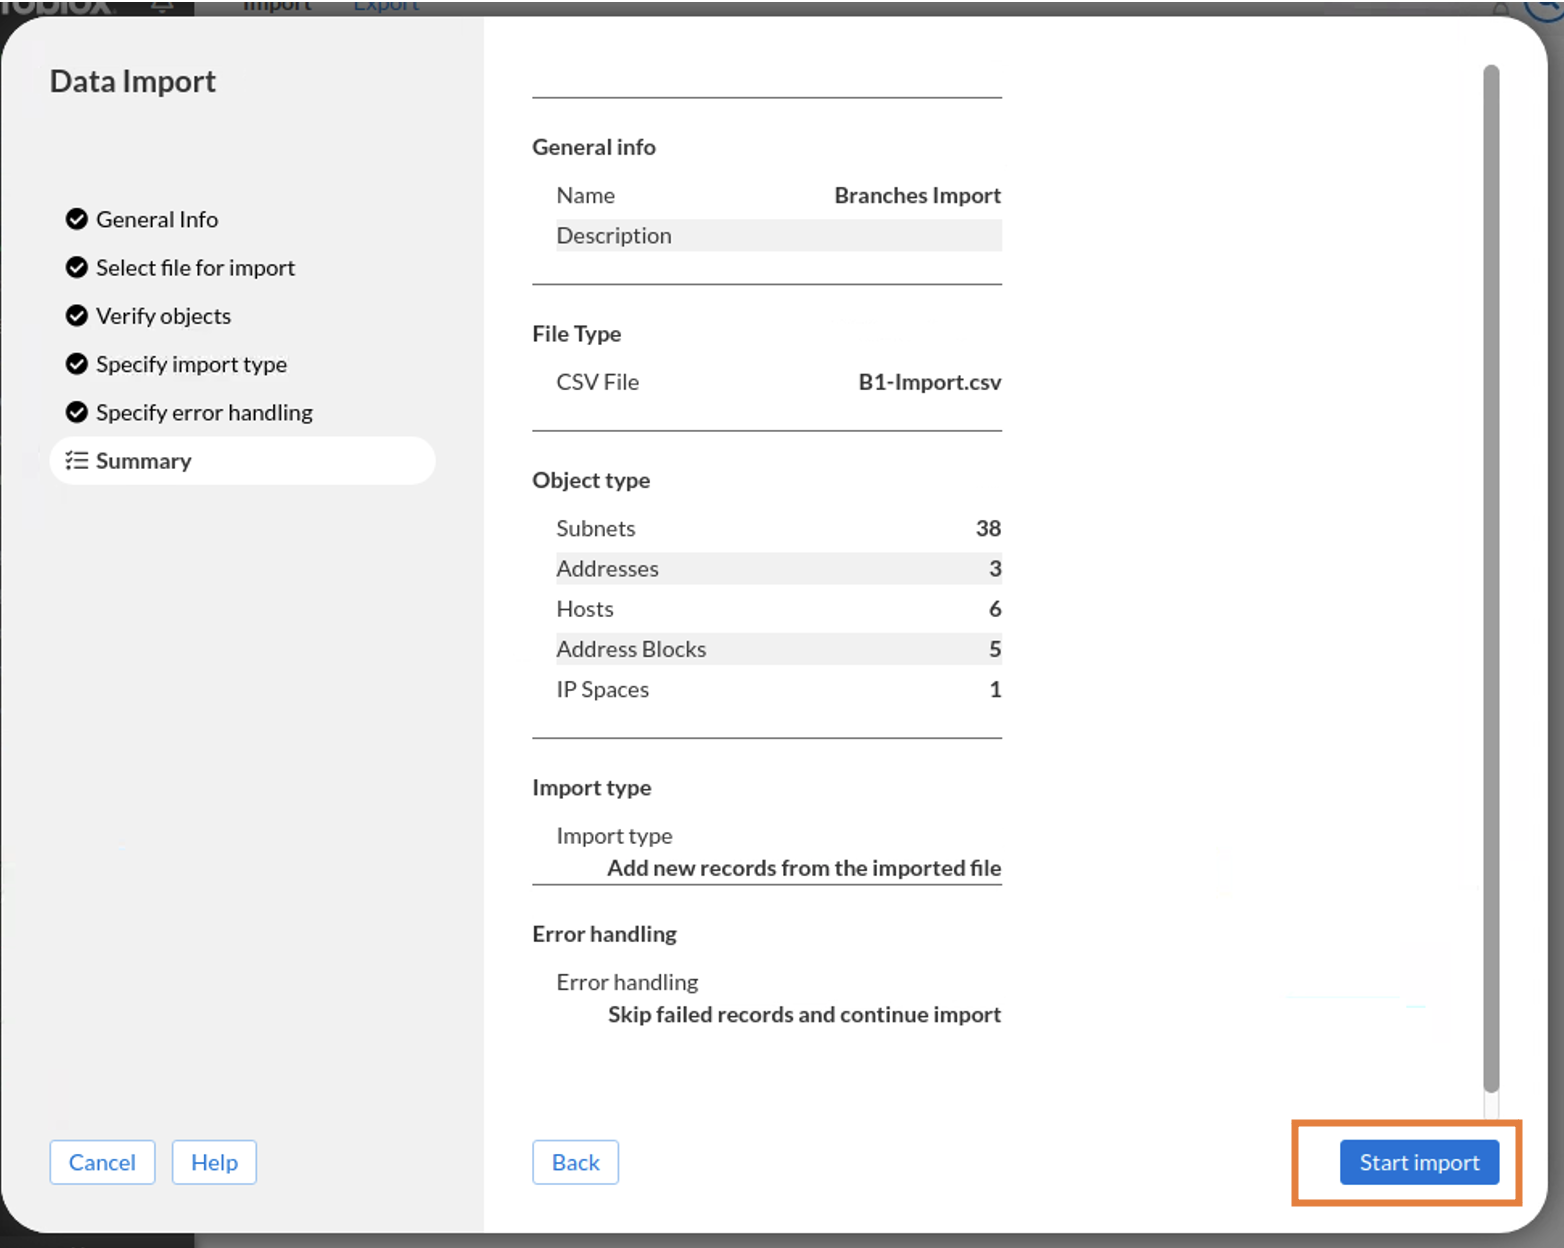
Review the Summary and click Start Import
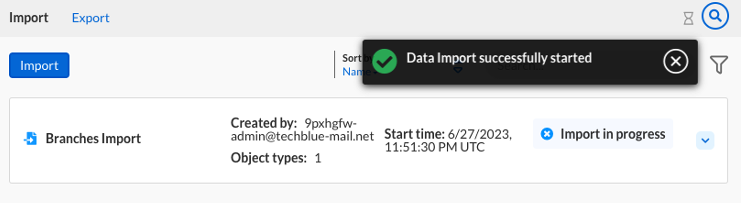
Verify that the job started
Task 2 Solution: Verify the objects were imported with no errors
The Import / Export Job Manager is what you landed on in the first part of Task 1.
Navigate to Administration → Data Import / Export and click on the sub-menu for Import (if it is not already selected)
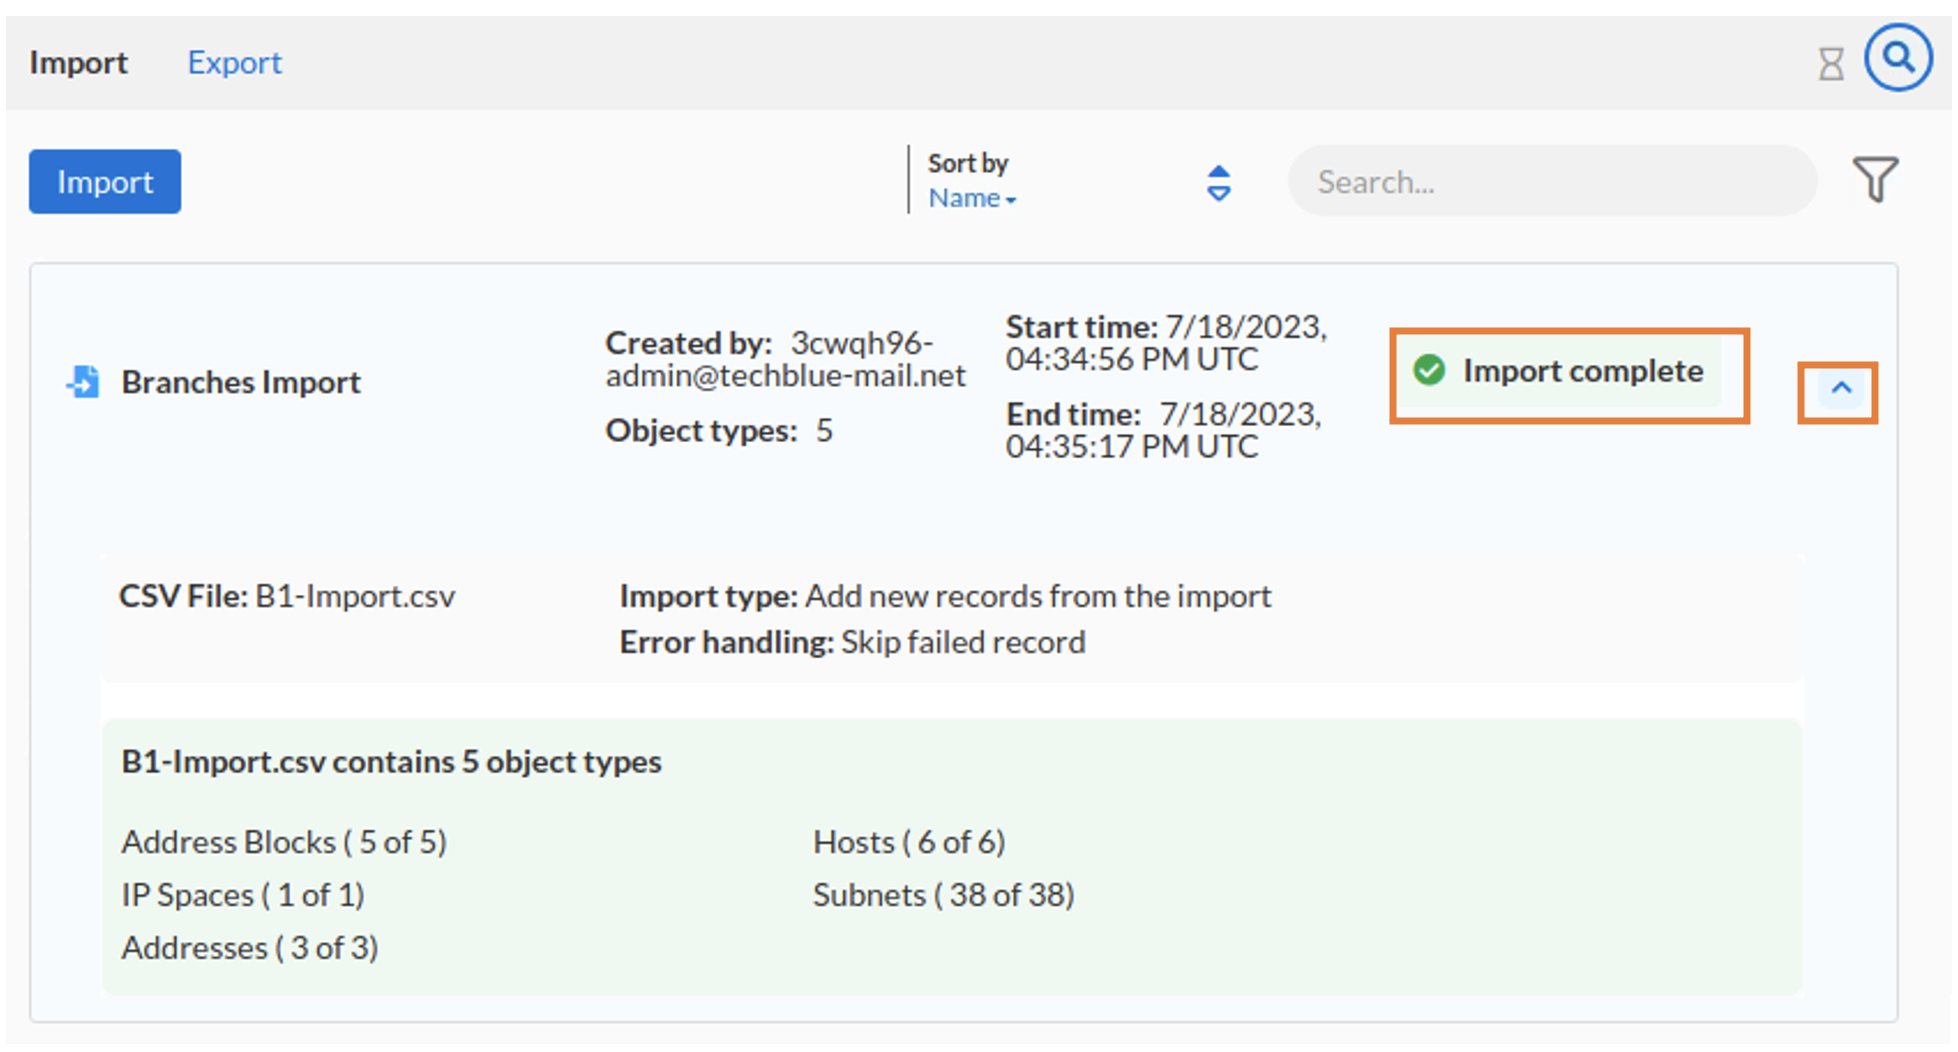
You should see the Branches Import job you ran in Task 1. You may need to refresh the web page if it still shows Import in progress. Confirm that it shows a green Import Complete
Expand the entry and examine the details