Using Recycle Bin in BloxOne (2903)
Cloud Services Portal (CSP) is now Infoblox Portal
In early September, Cloud Services Portal (CSP) became Infoblox Portal with a new look-and-feel, and a new URL (https://portal.infoblox.com). As a result of this change, the layout and organization of several menus have been updated.
Unfortunately, this means that our video courseware and lab guides no longer match the new user interface. However, we are currently in the process of updating them, and they should be ready soon.
In the meantime, we have some resources to help you navigate the new interface:
We have created a mapping of the previous menu locations and their new breadcrumb location.
Additionally, you can find a walkthrough video of the new User Interface on Launchpad.
We apologize for any inconvenience this may cause and kindly ask for your patience as we work through this transition.
Scenario
You have a list of imported IPAM Hosts to delete so you proceed to remove them. However, you realize later that you needed to keep a few. Rather than re-import from a csv or json file or drill down menus to recreate the missing network objects, you still have time to recover them from the Recycle Bin. While we're at it, you want to check the Recycle Bin grace period and clean up the Recycle Bin.
Estimate Completion Time
10 to 15 minutes
Prerequisites
Administrative access to the CSP
Lab 2901 BloxOne Exporting and Importing
Lab 2902 BloxOne Using Global Search
Course References
1108 BloxOne Recycle Bin
Tasks
To complete this lab, you need to perform the following tasks.
Delete IPAM Host objects in Table 2903-1
Find the deleted objects from Table 2903-2 in the recycle bin and recover them
Verify the deleted objects are back
Verify the recycle bin grace period and permanently delete the remaining IPAM Host objects
Task 1: Delete IPAM Hosts
Table 2903-1
IPAM Hosts to remove |
|---|
APJ Host 1 |
APJ Host 2 |
APJ Host 3 |
EMEA Host 1 |
EMEA Host 2 |
EMEA Host 3 |
Task 2: Find and recover deleted objects
Whoops! We received a request to use 4 of the hosts we deleted. Go to the Recycle Bin or use Global Search to find the IPAM Hosts we deleted. Perform the operations necessary to reverse the delete procedure.
Table 2903-2
IPAM Hosts to recover |
|---|
APJ Host 1 |
APJ Host 2 |
EMEA Host 1 |
We can recover multiple selected objects at one time
Task 3: Verify the deleted objects are back
Navigate to the list of IPAM Hosts or use Global Search to make certain the IPAM Host objects are back in our network
Task 4: Verify the recycle bin grace period and permanently delete the remaining IPAM Host objects
Find the Recycle Bin Grace period settings and make sure it's set for 30 days. In this view, we can also select the remaining IPAM Host objects APJ Host 3, EMEA Host 2 and EMEA Host 3 and permanently delete them.
Solutions
Task 1 Solution: Delete IPAM hosts
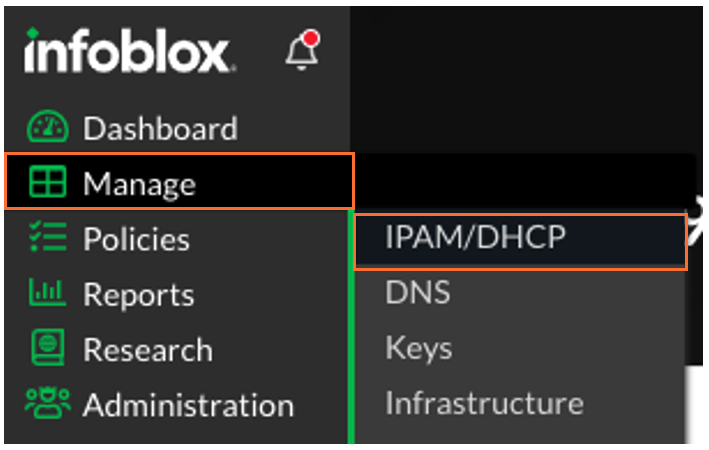
There are a few different ways to find our IPAM Hosts to delete, but a quick way to get them all in one view is to go to Manage → IPAM/DHCP → Hosts.
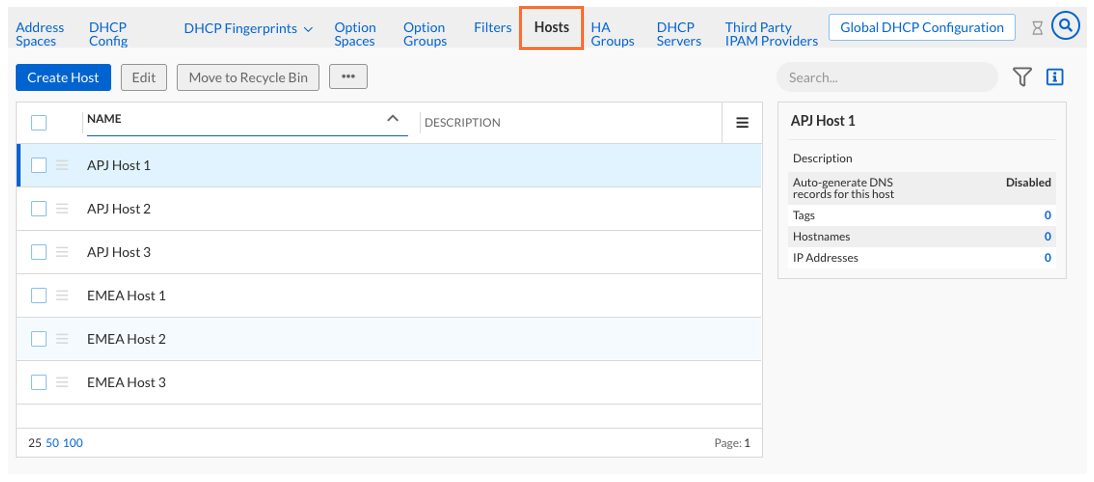
Click on the Hosts sub-menu. We can see a list of IPAM Hosts here (If the list is too long, you can use the pagination at the bottom to select a page or use the Search field)
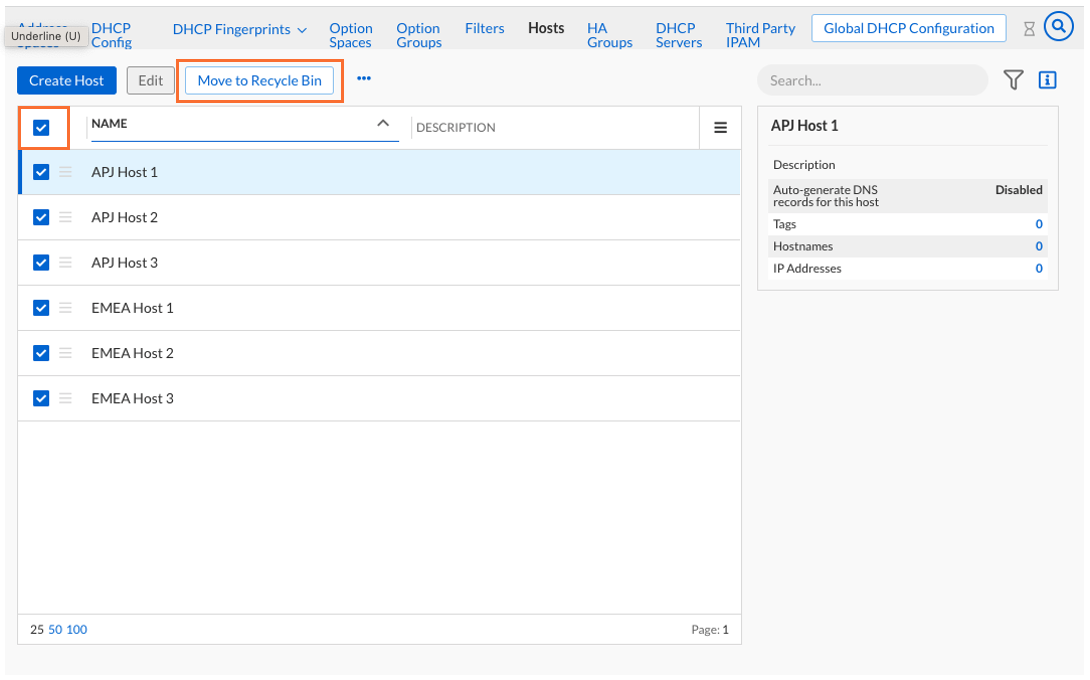
We can select each object individually, but if we have all the objects we want on one view then we can check the top left box to select all. Now we can click Move to Recycle Bin to delete them.
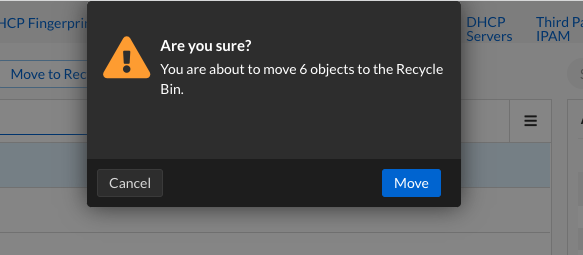
We have a chance to consider our actions and confirm that we are moving these objects to the Recycle Bin. Click Move to complete the action.
Task 2 Solution: Find and recover deleted objects
Whoops! Looks like we need to go back and recover a few of the objects we deleted. As long as we are still within our Recycle Bin Grace period, we should be able to find our objects there.
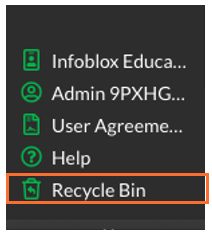
Click on Recycle Bin on the lower left of the main menu panel. This will give us quick access to the recently deleted items.
We initially have a list of recently deleted objects. Since we need to recover just a few objects that we recently deleted and they are on our screen right now, we can select them now and click Restore.
(Your list of recently deleted objects may not exactly match the lab screen example here)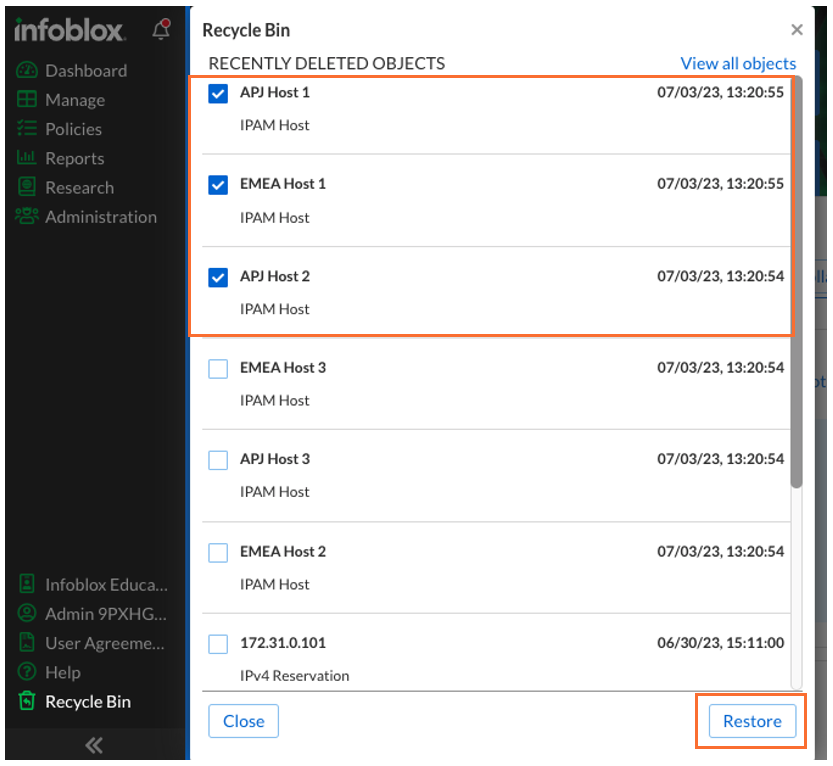
You should see a popup notification for the Restore operation. Note that you will need to reload the page for updated information.

Task 3 Solution: Verify the deleted objects are back
We deleted objects and restored a few of them. We want to double-check that they are back in our network.
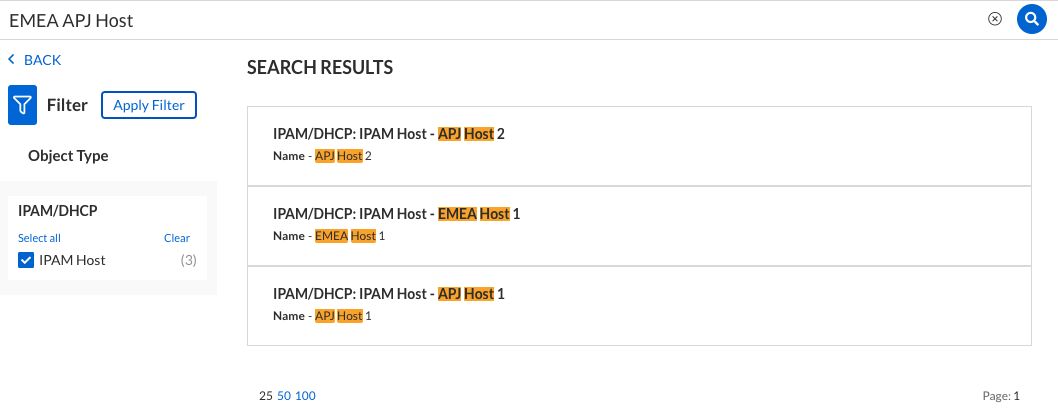
We can go back to where we were in Task 1 by navigating to Manage → IPAM/DHCP → Hosts. Or, we can also use Global Search as in this example where we use a search string APJ EMEA Host and click on VIEW ALL RESULTS, filtering by all IPAM Hosts.
Task 4 Solution: Verify the recycle bin grace period and permanently delete the remaining IPAM Host objects
Now that we've recovered the requested IPAM Hosts, we want to make sure the grace period for the Recycle Bin is adequate and we also feel comfortable removing the last few IPAM Hosts permanently.
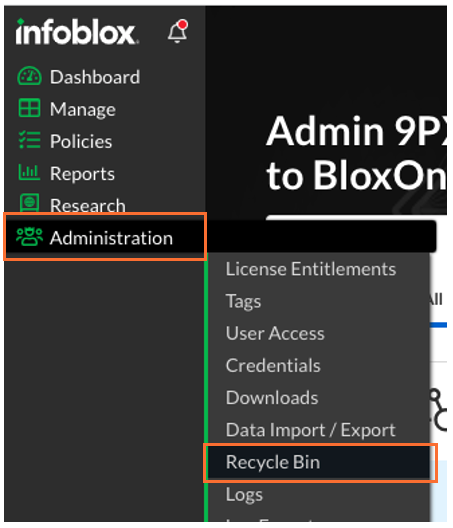
We can get to the main Recycle Bin with access to the settings by going to Administration → Recycle Bin
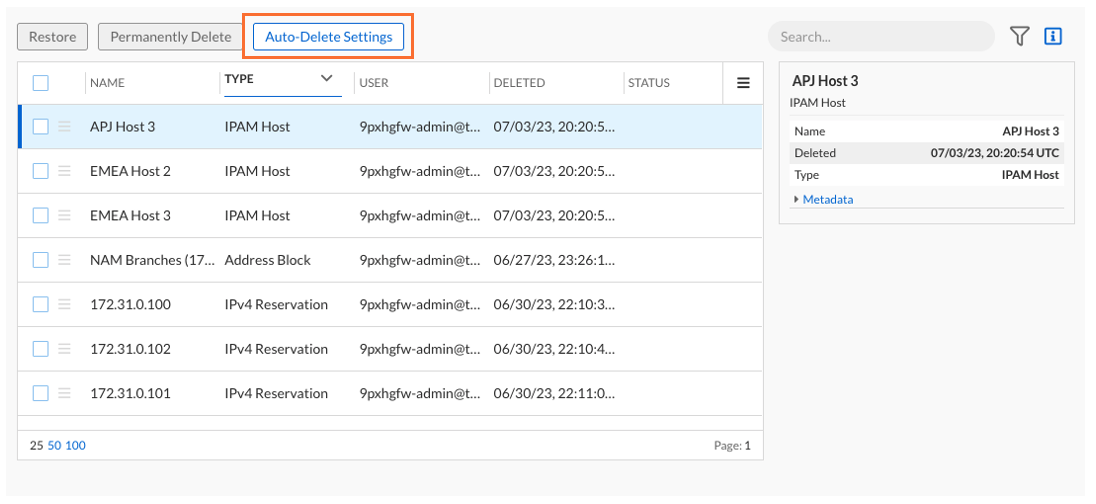
At the top, we can check the Recycle-Bin grace period by clicking on Auto-Delete Settings.
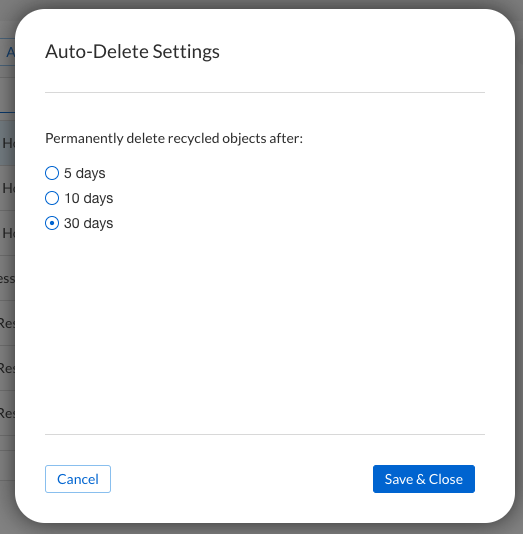
By default, this is set to 30 days but we can change this to a shorter period if we like. For now, let's set it to 30 days and click Save & Close.
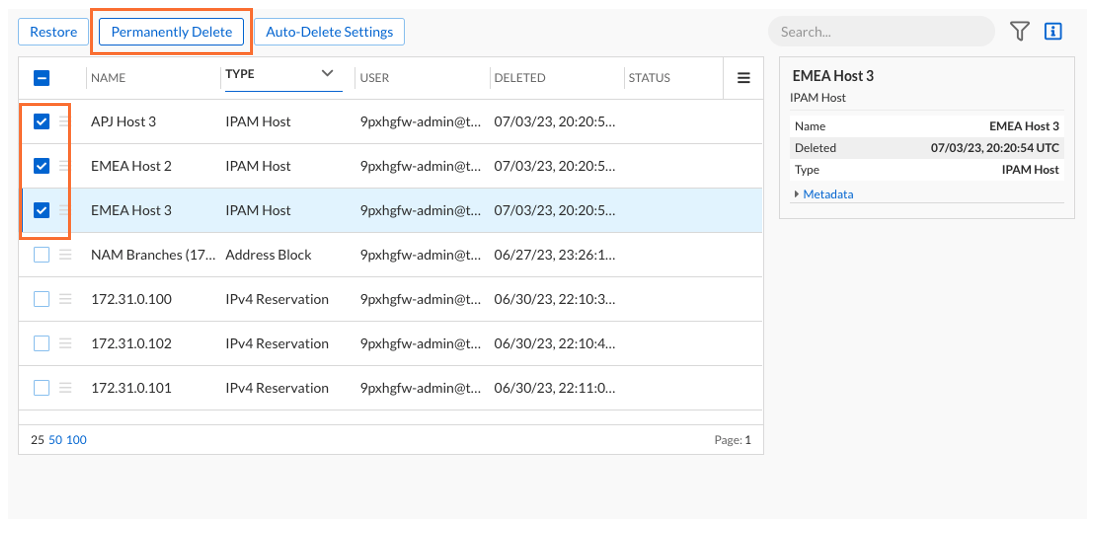
Now we are ready to clear out the remaining IPAM Hosts that we had moved to the Recycle Bin. Back at the Recycle Bin panel, we can see the remaining IPAM Hosts we deleted earlier, or we can search specifically for them. Select the check boxes for these objects and click Permanently Delete.
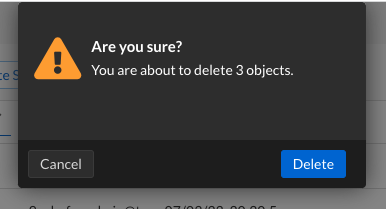
Confirm that we understand we are about to delete these objects permanently and click Delete. Note the notification pop-up.
