Managing Role-Based Access Control in BloxOne (2904)
Cloud Services Portal (CSP) is now Infoblox Portal
In early September, Cloud Services Portal (CSP) became Infoblox Portal with a new look-and-feel, and a new URL (https://portal.infoblox.com). As a result of this change, the layout and organization of several menus have been updated.
Unfortunately, this means that our video courseware and lab guides no longer match the new user interface. However, we are currently in the process of updating them, and they should be ready soon.
In the meantime, we have some resources to help you navigate the new interface:
We have created a mapping of the previous menu locations and their new breadcrumb location.
Additionally, you can find a walkthrough video of the new User Interface on Launchpad.
We apologize for any inconvenience this may cause and kindly ask for your patience as we work through this transition.
Scenario
You have been setting up your BloxOne environment and you have a team member, Daniel, who will be an administrator for BloxOne Threat Defense Cloud but will also need view-only access to a few pieces of DDI. They should not be given full administrative rights to the system but will need their own login and role permissions. As the administrator, you have the means to provide this.
Estimate Completion Time
20 to 25 minutes
Prerequisites
Administrative access to the CSP
Learning Content
Tasks
To complete this lab, you need to perform the following tasks.
Create a new User Group and add the user
Examine the available built-in User Roles
Create a custom user role
Verify the user's access
Task 1: Create a User Group
You want to account for the possibility of other users having the same roles as your current team member, so create a user group that will contain these users.
Task 2: Create a User and Add them to the new User Group
You have been provided with user login email addresses in the Infoblox LMS. Add the Daniel user to your new user group.
Task 3: Examine the available built-in User Roles
There are already some pre-configured roles in the BloxOne system. Find and examine these to get an idea of what Roles are available and what you may need in a custom role.
Task 4: Create a custom user role for the user group
Since our new user will be performing a few roles not collected in a default role, create a custom role for the user based on the feature needs in Table 2904-1
Table 2904-1
Feature Category | Feature |
|---|---|
Account | No features |
BloxOne Cloud | No features |
BloxOne DDI | B1DDI DNS View |
BloxOne DDI | B1DDI IPAM / DHCP View |
BloxOne DDI | B1DDI DHCP Reports |
BloxOne DDI | B1DDI DNS Reports |
BloxOne Threat Defense | All Features |
Task 5: Create an Access Policy for the User Group and custom Role
Now that we have the user, the user group, and the role, bring them together with an Access Policy.
Task 6: Verify the user's access
Now that the user should have a policy in place, you should verify the user's access by logging in as the user. Confirm that they have full admin access to BloxOne Threat Defense, but limited view-only access to BloxOne DDI DHCP and DNS features.
Solutions
Task 1 Solution: Create a User Group
We need a user group in which to put our new user and any other users with the same responsibilities and limitations.
Navigate to Administration → User Access
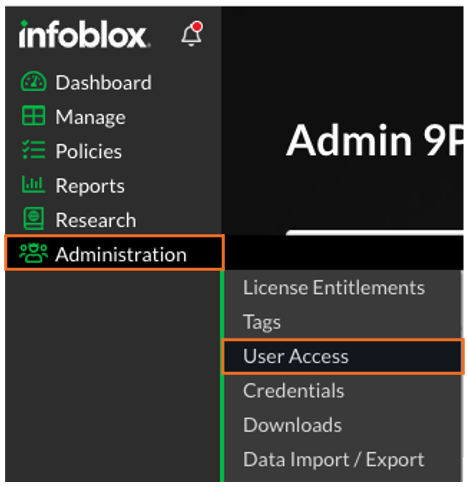
Click on the User Groups sub-menu to see all the existing User Groups
Click Create User Group
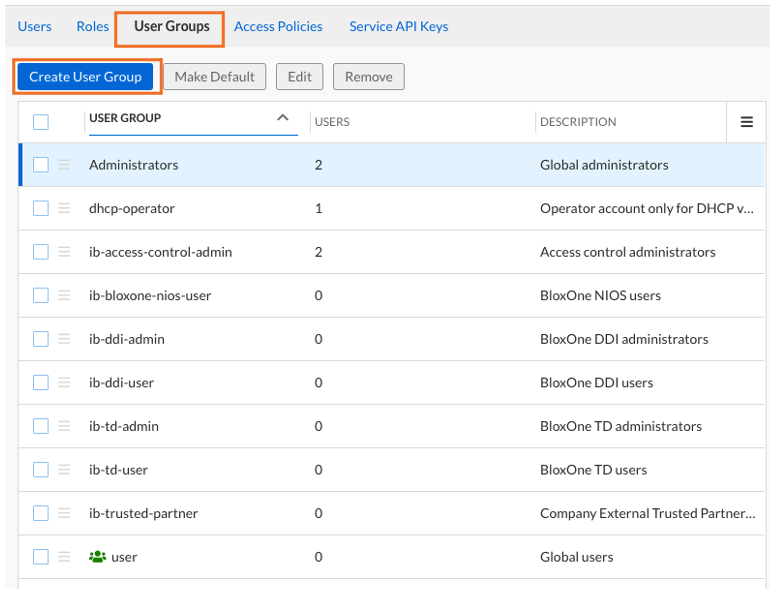
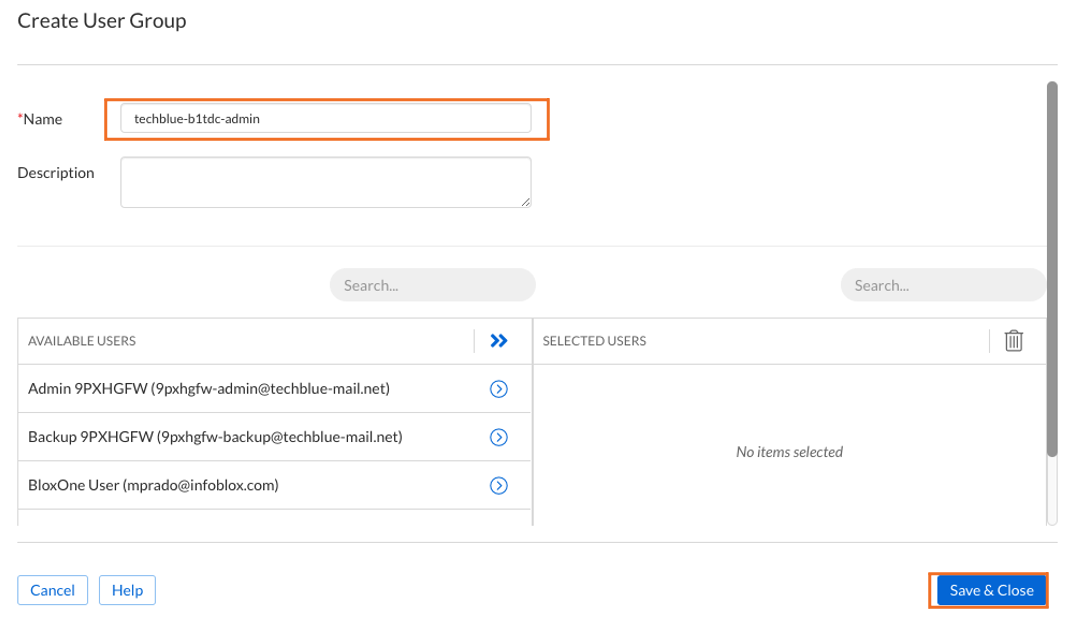
Name the user group techblue-b1tdc-admin and click Save & Close
Task 2 Solution: Create a User Add and them to the new User Group
Your Infoblox CSP admin lab login was provided in the Infoblox Education LMS. You have also been provided with user logins. We want to add the Daniel user to this user group. This user's email address name will be a combination of your lab user code and the name daniel. For example, Admin user 9pxhgfw-admin@techblue-mail.net will have a user available named something like 9pxhgfw-daniel@techblue-mail.net
Use your own CSP tenant accounts from your CSP access page in the LMS. Do not copy the above email address as the username.
Click on the Users sub-menu and click Create User
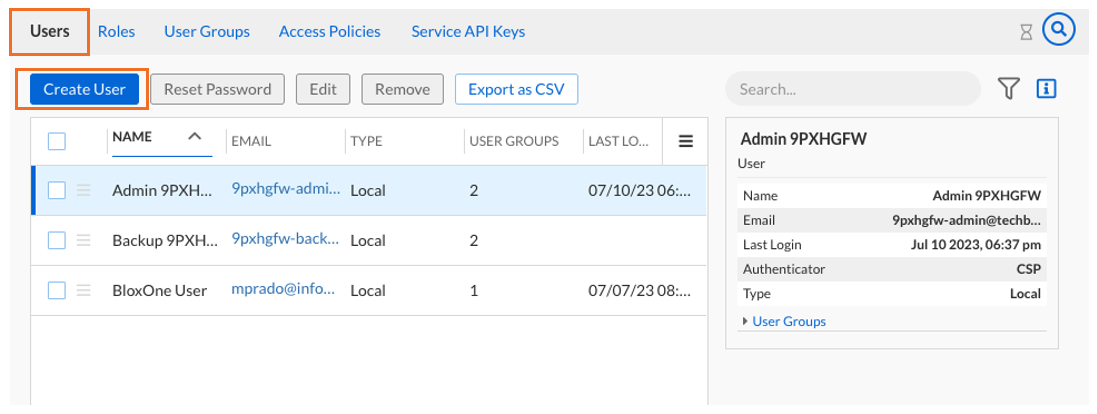
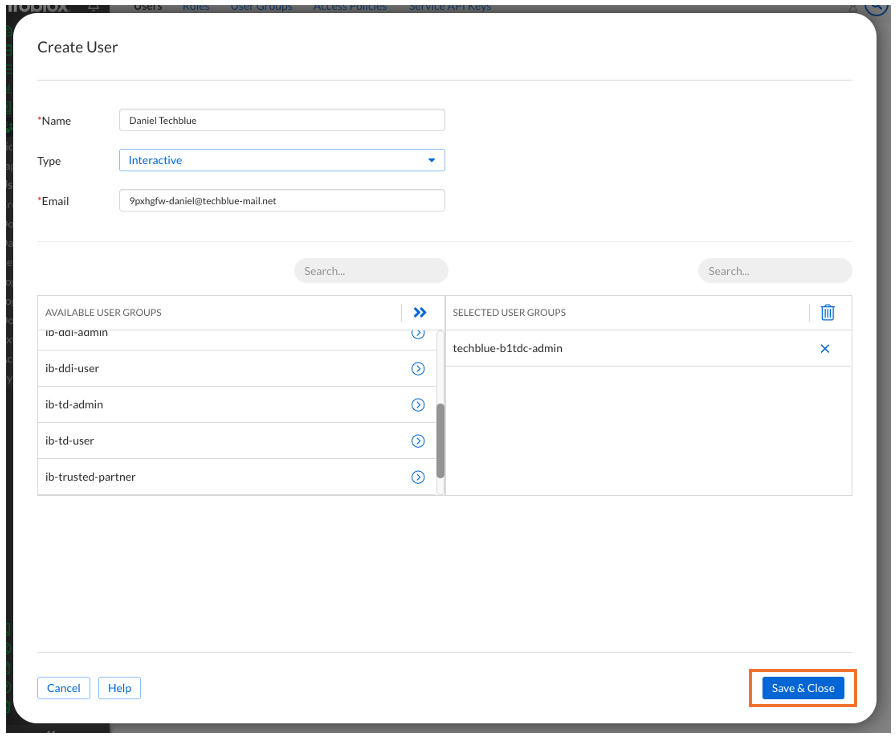
Fill out the new user information:
Name the user Daniel Techblue
The email address will be the one provided by your lab CSP tenant details, as mentioned earlier. In this example screenshot we are using
9pxhgfw-daniel@techblue-mail.netUnder Available Groups we can see the User Group we created. Click the arrow next to the group to add this user to the group.
Remove this user from the general group user by clicking the X next to that group in Selected User Groups
The end result should look like this screenshot. Click Save & Close to finish.
Task 3 Solution: Examine the available built-in User Roles
Just to get an idea of what types of roles are already available, we can show the list of User Roles and what features each contains
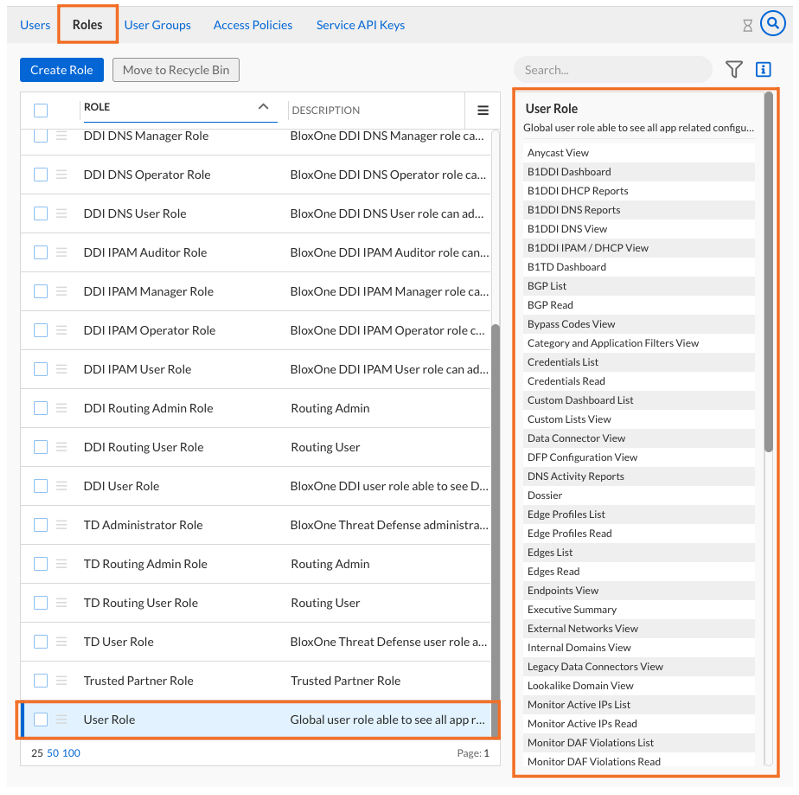
Click on the Roles sub-menu to see all the Roles
Click on roles of interest and examine User Role the panel to the right to see what features this role has access to. For instance, the User Role includes features only for Read and View operations, and the DDI Routing Admin Role contains features regarding administration of BGP, OSPF, RIP and routing protocol configurations.
Task 4 Solution: Create a custom user role for the user group
Since we want our user to have specific access to a variety of roles, listed in Table 2904-1, we can create a Role specifically for the user's group.
In the Roles sub-menu, click Create Role
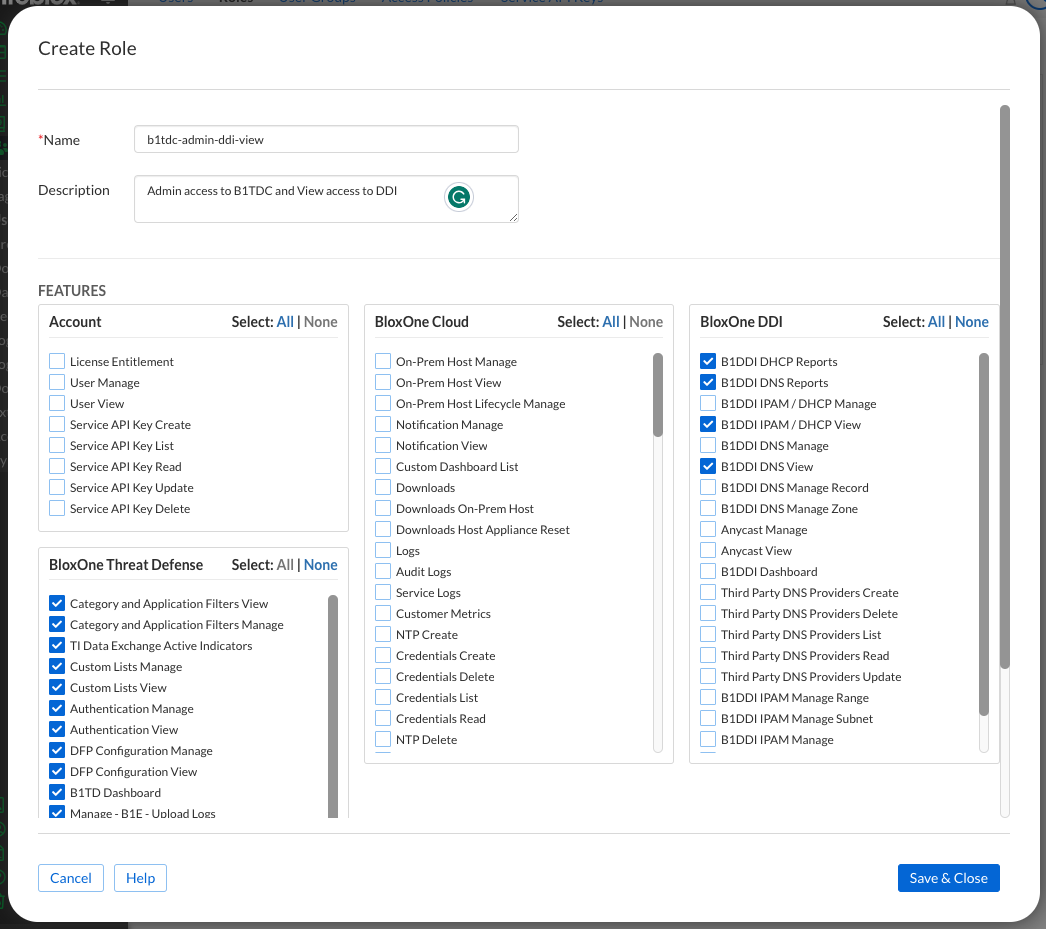
Set a name b1tdc-admin-ddi-view with a description of Admin access to B1TDC and View access to DDI
Select the check boxes for the features listed in Table 2904-1.
If any checkboxes are filled for Account and BloxOne Cloud, then click None for these.
Click All for the BloxOne Threat Defense feature section. Make sure that all the checkboxes in this section are checked.
Check the following features in the BloxOne DDI section: B1DDI DNS View, B1DDI IPAM / DHCP View, B1DDI DHCP Reports, and B1DDI DNS Reports.
Click Save & Close
Task 5 Solution: Create an Access Policy for the User Group and custom Role
Now we can bring together the custom role we created and the user group for the user.
Click on the Access Policies sub-menu to see all the access policies
Click on Create Access Policy

Name the Access Policy BloxOne Threat Defense Cloud Admin with DDI
Under Policy Details, choose the Role you created and the User Group you created

Click Save & Close
Task 6 Solution: Verify the user's access
Now that we've set up this user for success, let's check that they will be able to see what we're expecting when they log in.
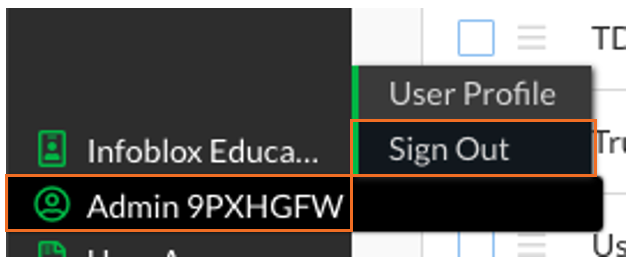
On the bottom left of the main menu panel on the left, hover over your own username and select Sign Out.
Log back into the CSP using the Daniel user's username and password
As an administrator, when you created the new user Daniel, an email was sent to the email address you used for this lab and tenant. This is the email address you used to login to the CSP is forwarded to the email address you are registered under for this class.
Check the above email account for a new message from Infoblox with the subject Infoblox user account activation.
Click on Activate Account in the email - This will launch a web page for changing the password for this user Daniel. This is an email that the user Daniel may use to activate their account securely.
Set a password and confirm the password for this user account.
Choose an image to help visually connect this user to their login information and click Create My Account.

Go back to your CSP login page and log in as the Daniel user, using the full email address you used for this new account.
If the AUP agreement comes up, agree to the AUP to proceed.
Now let's test some simple changes that this user should NOT be able to do: Make changes to DHCP and DNS
Navigate to Manage→ IPAM/DHCP

On the top right, click on Global DHCP Configuration

In the dialog box, we won't make any changes but we will attempt to click on Save & Close
Note the error notification pop-up:
Request Forbidden: not authorized.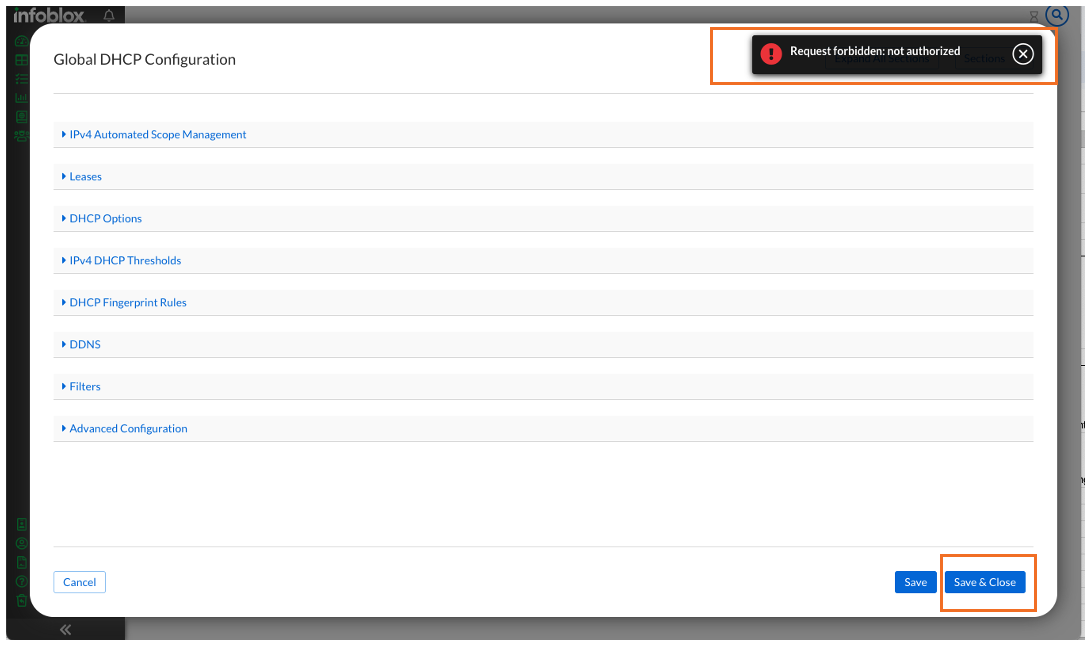
Click Cancel to exit from this configuration page
Now let's do the same with DNS. Navigate to Manage → DNS
On the top right, click on Global DNS Configuration

In the dialog box, we won't make any changes but we will attempt to click on Save & Close
Note the error notification pop-up:
Request Forbidden: not authorized.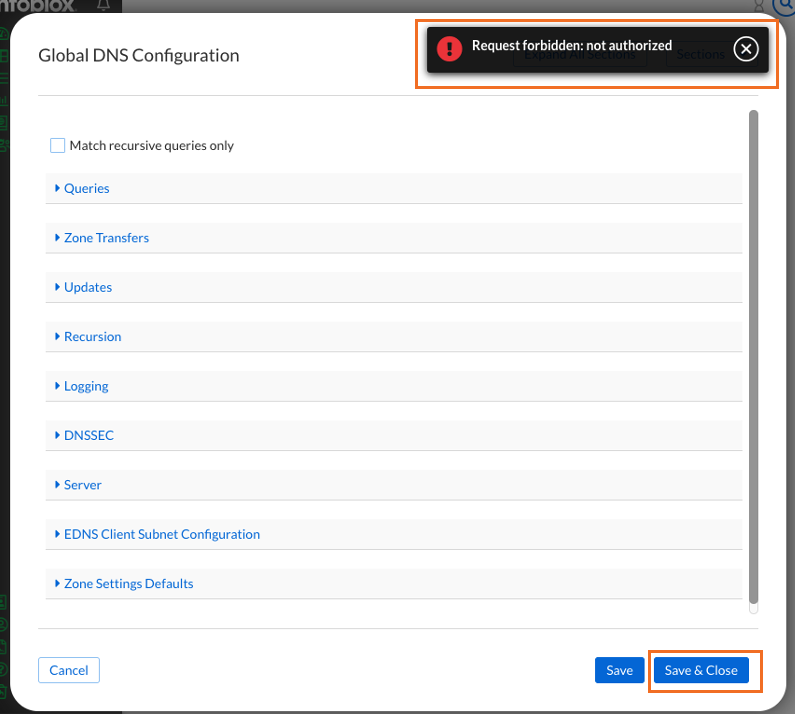
This confirms that this user can view DNS and DHCP Configurations but cannot make changes
Let's verify that this user has full admin access to BloxOne Threat Defense Cloud.
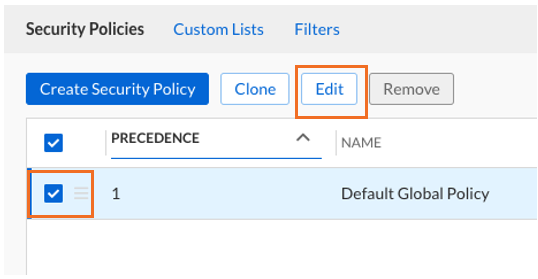
Navigate to Policies → Security policies

Edit the Default Global Policy by selecting its checkbox and clicking Edit
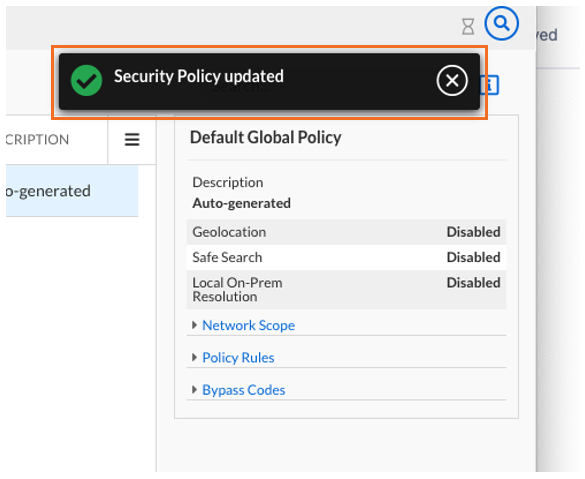
We are not making any changes, but we will test whether we can save a BloxOne Threat Defense Cloud change as this user. Click Finish and then Save and Close.


Notice the banner reporting a successful save. This means that this user can change this policy, which confirms the user’s permissions as a Threat Defense Cloud administrator.
Don’t forget to log out as user Daniel and log back into the CSP as an administrator to continue these lab exercises.