Scenario
You are a DNS administrator at a coffee company. The internal name space includes an authoritative zone coffee.corp on the server NS1 (10.100.0.111) and a delegated zone zone kona.coffee.corp on server NS2 (10.100.0.222).
The branch office have previously implemented NSEC as proof of non-existence. They have decided to change to NSEC3 for the zone kona.coffee.corp.
Please assist them to perform the configuration on the child zone kona.coffee.corp as well as whatever configuration is necessary on the parent zone coffee.corp. Then show how this update prevents zone enumeration.
Estimate Completion Time
-
45 to 60 minutes
Credentials
|
Description |
Username |
Password |
URL or IP |
|---|---|---|---|
|
Grid Manager UI |
admin |
infoblox |
Learning Content
Lab Initiation
Access jump-desktop
Once the lab is deployed, you can access the virtual machines required for this activity. To begin, select VM List from the navigation bar at the top, locate jump-desktop, and click the green play icon to open its console. Log in to the Linux UI.

Username: training
Password: infoblox
Initiate lab
To initiate the lab, double-click the Launch Lab icon on the Desktop.

Choose the lab number from the list and click OK.

After clicking OK, you will see a pop-up message with a brief description of the lab task. If the description looks correct, click Yes to continue lab initiation.

Lab initiation will take a couple of minutes to finish.
Once complete, you will see another pop-up message with the login credentials and the URL for the Grid Manager’s User Interface. Note that the credentials may differ from those from prior labs.

Tasks
Task 1: Changing to NSEC3
-
Changing the proof of non-existence from NSEC back to its default of NSEC3 is the first step, and this task will walk us through it
-
Login to NS2(10.100.0.22):
-
navigate to Data Management → DNS
-
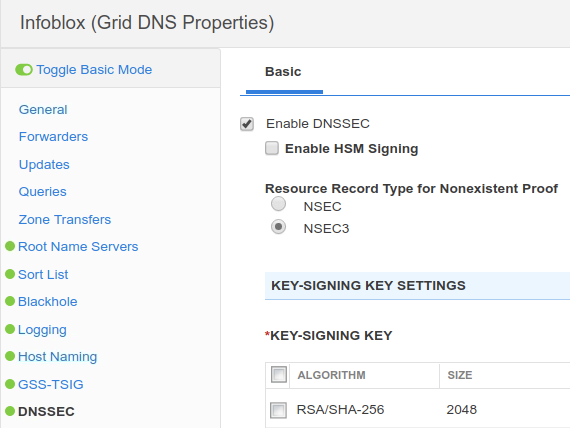
in the Toolbar, Select Grid DNS Properties → DNSSEC
-
change the Resource Record Type for Nonexistance Proof to NSEC3
-
-
Task 2: Unsign the zone kona.coffee.corp
-
In this task we usign the child zone kona.coffee.corp so we can resign it again with NSEC3.
-
Login to NS2 (10.100.0.222):
-
navigate to Data Managment → DNS → Zones
-
select kona.coffee.corp.
-
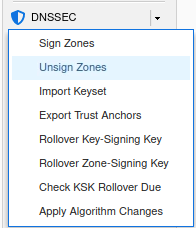
on the Toolbar, click DNSSEC → Unsign Zones
-
Restart Services when prompted.
-
-
Task 3: Resign the zone kona.coffee.corp
-
In this task we will resign the child zone kona.coffee.corp now with NSEC3
-
Log in to NS2 (10.100.0.222):
-
Navigate to Data Management → DNS → Zones
-
select kona.coffee.corp.
-
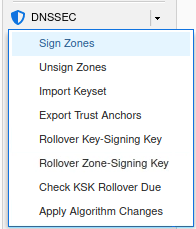
on the Toolbar, click DNSSEC → Sign Zones
-
Restart Services when prompted.
-
-
Task 4: Upload the DS record to the parent zone
-
Resigning the zone requires uploading the new DS records to the parent zone. We will perform that in this task.
-
Export the trust anchor from the delegated child zone.
-
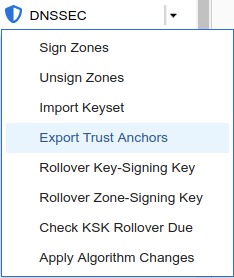
Login to NS2, navigate to Data Management → DNS → Zones, click on kona.coffee.corp. In the Toolbar, select DNSSEC → Export Trust Anchors
-
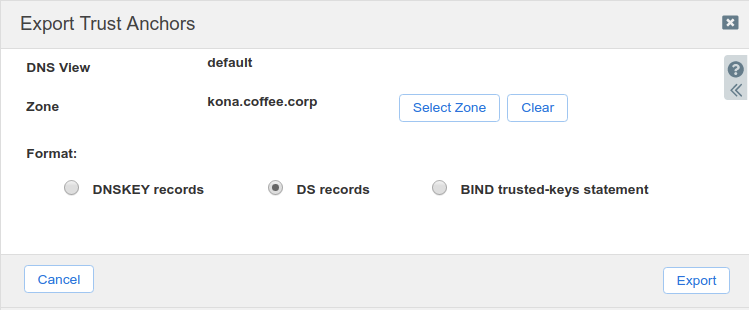
Export Trust Anchors dialog appears, select DS records and click Export.
-
Save the exported trust anchor to local file. It doesn't matter what you save the file name as. For our example, the file name is ds_records.txt.
-
Open the file in editor and leave the editor open. We will need this information for the next step.
-
-
Import the exported trust anchor into the parent zone.
-
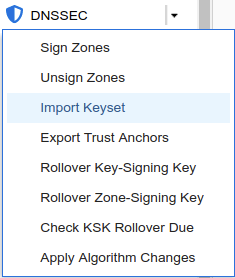
Login to NS1 (10.100.0.111), navigate to Data Management → DNS → Zones, click on coffee.corp. In the Toolbar, select DNSSEC → Import Keyset.
-
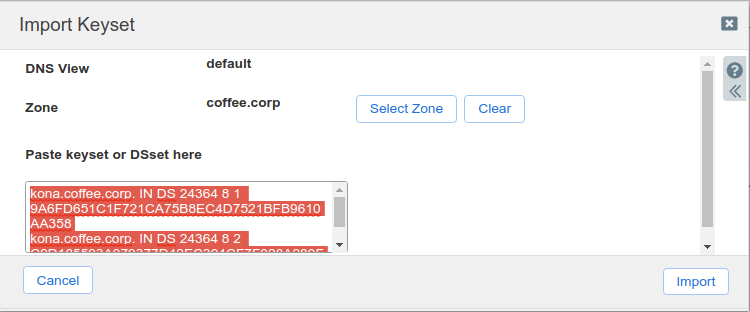
The Import Keyset dialog appears. Copy and paste the DS record text from text editor (ds_records.txt in our example) and click Import.
-
-
Task 5: Verify the zone is signed and NSEC3 is used
-
In this task we will use dig to verify that our configuration was successful.
-
Execute the following dig command to validate that kona.coffee.corp has been resigned properly (look for the AD flag).
dig @10.100.0.100 sweet.kona.coffee.corp. A -
What query should you execute to verify that NSEC3 records are properly in place?
-
Because we must unsign the zone and sign it again to change between NSEC and NSEC3, a side effect is old DNSKEY records are removed when we unsign, and new DNSKEY records are created when we sign again. This allows the validating resolvers to cache the DNSKEY for 48 hours. A zone cannot have both NSEC and NSEC3 at the same time. If you plan to change between NSEC and NSEC3, treat it like an emergency key rollover, and take the immutable 48-hour TTL into consideration.
Task 6: Analyzing NSEC3PARAM with NSEC3HASH
-
In this task we practice using the tool NSEC3HASH to figure out the mapping between the NSEC3 records and domain names.
-
Query for the NSEC3PARAM record of kona.coffee.corp.
-
What is the iteration number?
-
What is the salt field
-
-
Use the nsec3hash command line tool, produce the hash value for the following domain names:
FQDN
Hashed Value (First 4 characters)
kona.coffee.corp
a.kona.coffee.corp
blend.kona.coffee.corp
drink.kona.coffee.corp
light.kona.coffee.corp
peaberry.kona.coffee.corp
sweet.kona.coffee.corp
-
Use dig to generate commands for those domains we used in the previous step and verify that both hashes do match.
-
Task 7: ZSK Rollover
-
In this task we perform a ZSK rollover on NS2 for kona.coffee.corp, and see observe it affects NSEC3PARAM.
-
Log in to NS2 (10.100.0.222):
-
Navigate to Data Management → DNS → Zones
-
select kona.coffee.corp.
-
on the Toolbar, click DNSSEC → Rollover Zone-Signing Key
-
Restart Services when prompted.
-
-
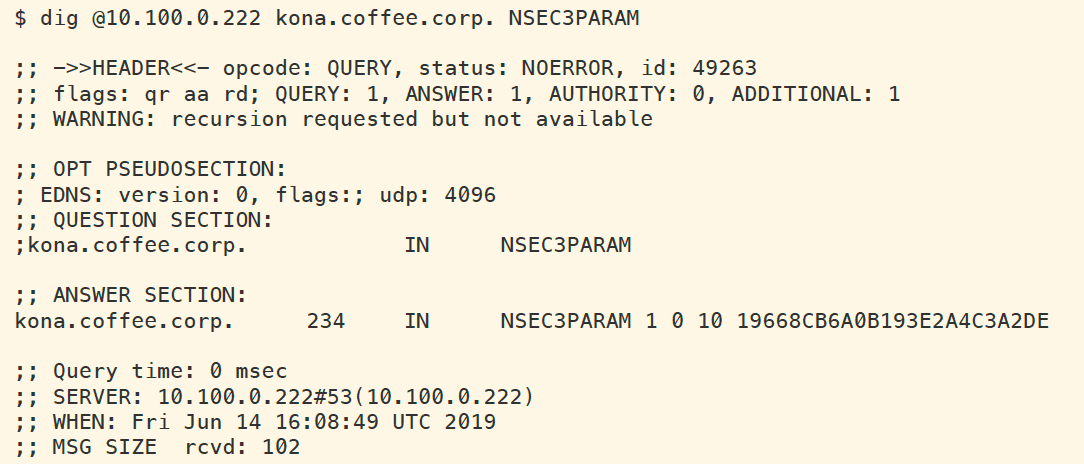
Query for the NSEC3PARAM record of kona.coffee.corp. against NS2 (10.100.0.222) to bypass any caching issue, with the following command:
dig @10.100.0.222 kona.coffee.corp. NSEC3PARAM-
What is the iteration number?
-
What is the salt field?
-
What changed?
-
-
Solutions
Task 1 solution: Changing to NSEC3
-
Login to NS2(10.100.0.22):
-
navigate to Data Management → DNS
-
in the Toolbar, Select Grid DNS Properties → DNSSEC
-
change the Resource Record Type for Nonexistance Proof to NSEC3
-
Task 2 solution: Unsign the zone kona.coffee.corp
-
Login to NS2 (10.100.0.222):
-
navigate to Data Managment → DNS → Zones
-
select kona.coffee.corp.
-
on the Toolbar, click DNSSEC → Unsign Zones
-
Restart Services when prompted.
-
Task 3 solution: Resign the zone kona.coffee.corp
-
Log in to NS2 (10.100.0.222):
-
Navigate to Data Management → DNS → Zones
-
select kona.coffee.corp.
-
on the Toolbar, click DNSSEC → Sign Zones
-
Restart Services when prompted.
-
Task 4 solution:Upload the DS record to the parent zone
-
Export the trust anchor from the delegated child zone.
-
Login to NS2, navigate to Data Management → DNS → Zones, click on kona.coffee.corp. In the Toolbar, select DNSSEC → Export Trust Anchors
-
Export Trust Anchors dialog appears, select DS records and click Export.
-
Save the exported trust anchor to local file. It doesn't matter what you save the file name as. For our example, the file name is ds_records.txt.
-
Open the file in editor and leave the editor open. We will need this information for the next step.

-
-
Import the exported trust anchor into the parent zone.
-
Login to NS1 (10.100.0.111), navigate to Data Management → DNS → Zones, click on coffee.corp. In the Toolbar, select DNSSEC → Import Keyset.
-
The Import Keyset dialog appears. Copy and paste the DS record text from text editor (ds_records.txt in our example) and click Import.
-
Task 5 solution: Verify the zone is signed and NSEC3 is used
-
We changed the zone kona.coffee.corp from NSEC to NSEC3. In NIOS, we need to unsign the zone, and sign it again for this to take effect. Normal key rollover will not affect NSEC/NSEC3 records. After performing all of the steps to change the zone from NSEC to NSEC3, we may see the error message shown below:
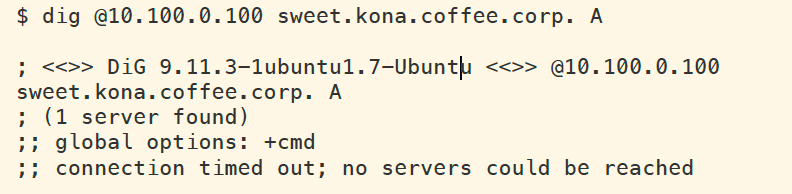
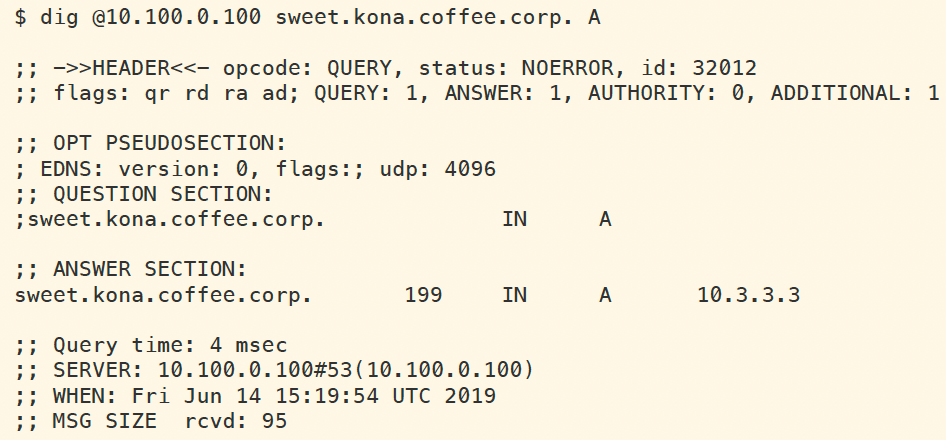
The reason is because the DNSKEY have 48 hours of TTL, and the validating resolver has cached old DNSKEY (used during NSEC). Clear the cache on validating resolver ADA (10.100.0.100), execute the same query again. This time, we should see a properly validating answer as shown below (note the AD flag):
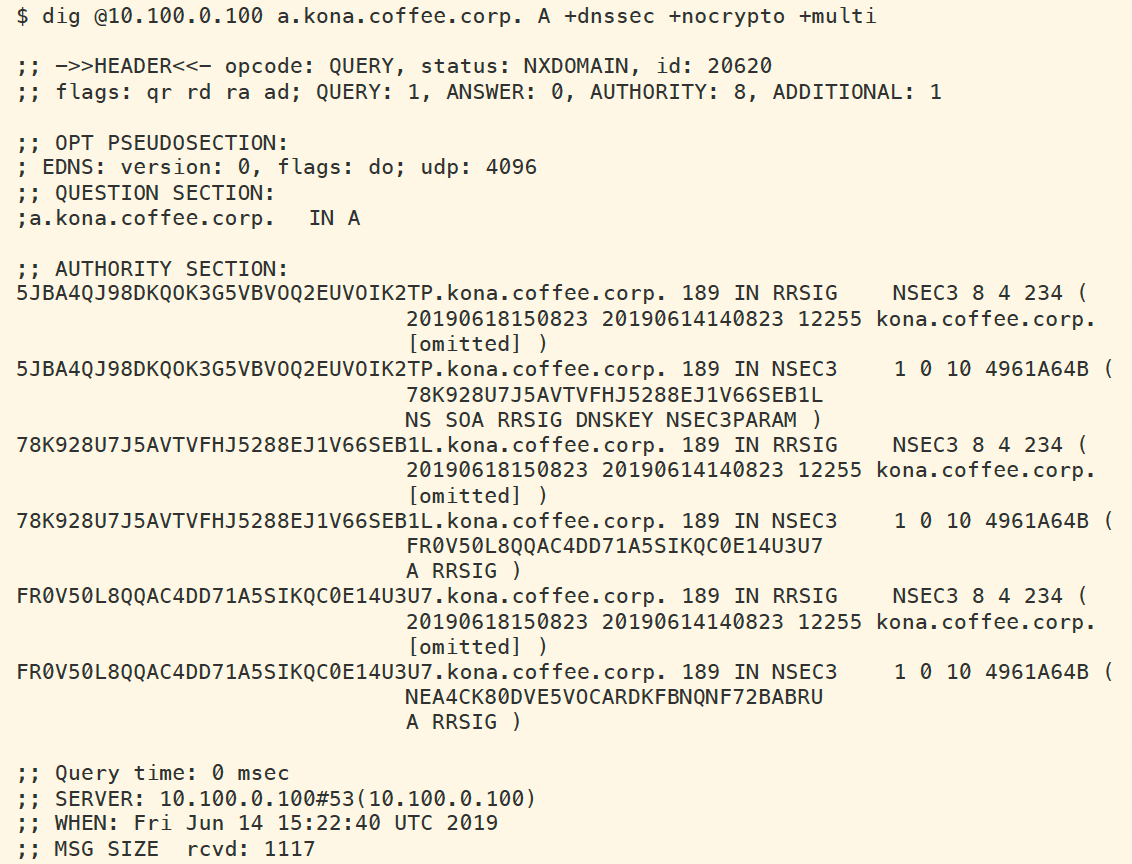
To see a NSEC3 record, we query for a non-existing name such as a.kona.coffee.corp. The following figure shows a sample query and response with SOA record removed for better display.
Task 6 solution: Analyzing NSEC3PARAM with NSEC3HASH
-
We look a little deeper into the NSEC3 and NSEC3PARAM details in this task. These are similar steps a (very) curious user could perform on her own, to slowly figure out what each hash (NSEC3 record) maps to. There are more sophisticated methods, such as rainbow table, than the simple method we are using in this task. What we are showing is that, NSEC3 gets us the same level of "protection" as traditional DNS. With traditional, insecure DNS, curious users can still guess commonly used domain names, and just see if it exists; with NSEC3, it is just about as difficult as guessing commonly used names. There is no easy zone enumeration like it existed for NSEC.
The following figure shows us retrieving the NSEC3PARAM record for kona.coffee.corp. The algorithm is 1 (SHA1), iteration is 10, and salt is 4961A64B. The salt is generated each time ZSK is created, so your system will have a different salt than the example shown below.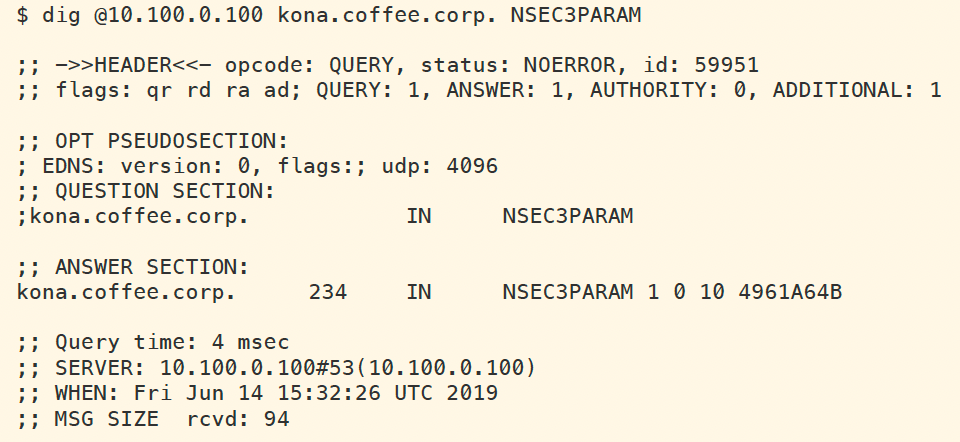
With this information, we can now use the nsec3hash command line tool to produce hashes from the domain names we know. The following figure shows the commands and output of computing hashes from these names.
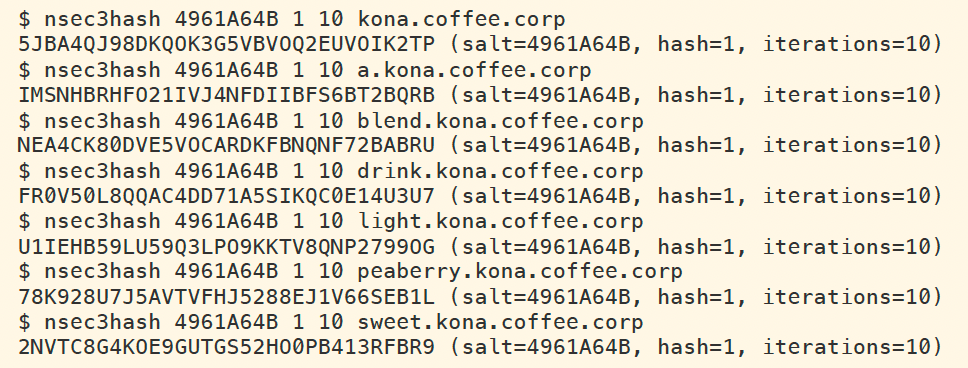
With this information, we can fill out the table with just the first 4 characters of the hash, so we may use it to read:
|
FQDN |
Hashed Value (First 4 characters) |
|---|---|
|
kona.coffee.corp |
5JBA |
|
a.kona.coffee.corp |
IMSN |
|
blend.kona.coffee.corp |
NEA4 |
|
drink.kona.coffee.corp |
FR0V |
|
light.kona.coffee.corp |
U1IE |
|
peaberry.kona.coffee.corp |
78K9 |
|
sweet.kona.coffee.corp |
2NVT |
We queried the non-existent name a.kona.coffee.corp earlier, whose hash (IMSN) fits between FR0V and NEA4. From an earlier NSEC3 lookup, we can spot this response below among the other entries (edited for better display):

Task 7 solution: ZSK Rollover
-
After performing ZSK rollover on the zone kona.coffee.corp, not only new ZSK DNSKEY records are generated, but new salt (thus new NSEC3PARAM) has been generated as well. To see the new NSEC3PARAM record, we query directly against the authoritative server NS2 (10.100.0.222) to sidestep any caching issues, as shown in below. The salt is generated randomly, your system will have a different salt field than the one shown.
ZSK rollover happens automatically in NIOS, the default is every month. The old DNSKEY are kept in the zone data as the new DNSKEY records are published, to ensure both the old and new DNSKEY records are cached by validating resolvers. You can test in this lab to verify that indeed all names resolve during a ZSK rollover, even when some records are cached. Compared to KSK rollover, ZSK is not only fully automated, it also carries less risk of breaking validation.