

Network Connectivity Issues
If you are running into network connectivity issues within the lab environment, there are two common causes:
1. Systems are still powering on
Cause: It can take up to 20 minutes for all lab systems to become active and accessible.
Action: Please wait a little longer and try again.
2. Issue with the underlying networking
Cause: We have seen this issue happen where the underlying networking has not connected the VMs correctly.
Action: Use the CloudShare networking reset option:
-
Navigate to: Environment → Operations
-
Click Refresh Networking
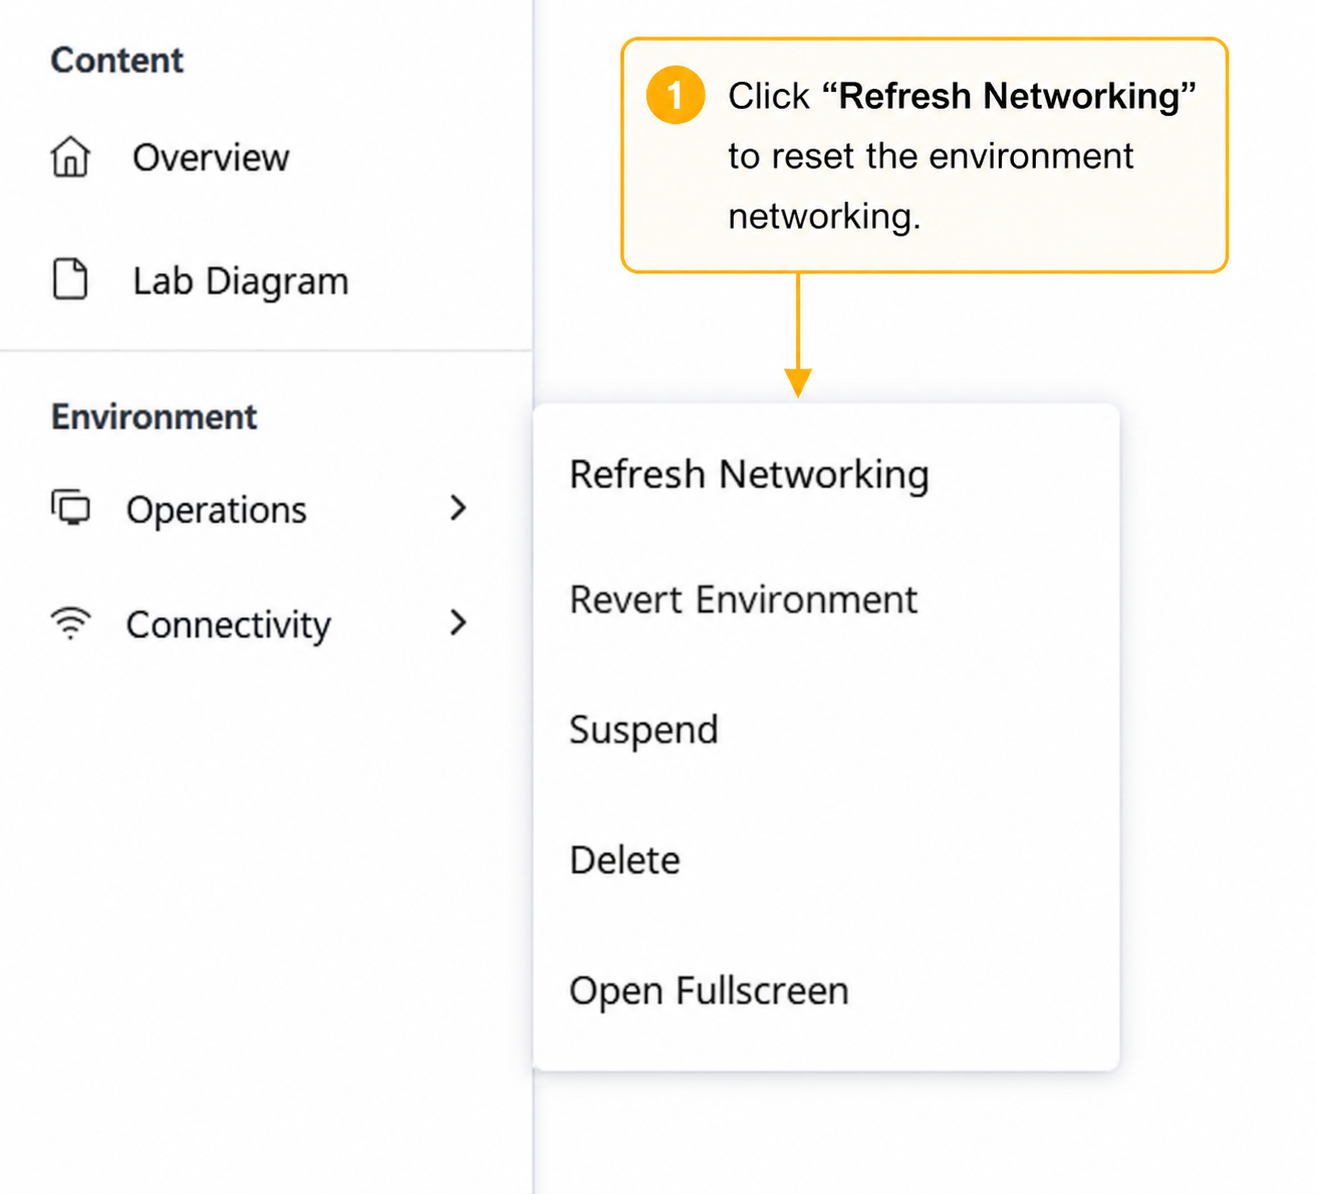
This will reinitialize the network connections between all VMs in the environment.
If the issue persists:
-
Navigate to: Environment → Operations
-
Click Suspend
-
Wait for the environment to suspend
-
Reopen the lab using the Launch link in Launchpad
How do I Suspend or Delete my Lab Environment?
-
While in the lab environment:
-
Navigate to: Environment → Operations
-
Select Suspend or Delete as needed
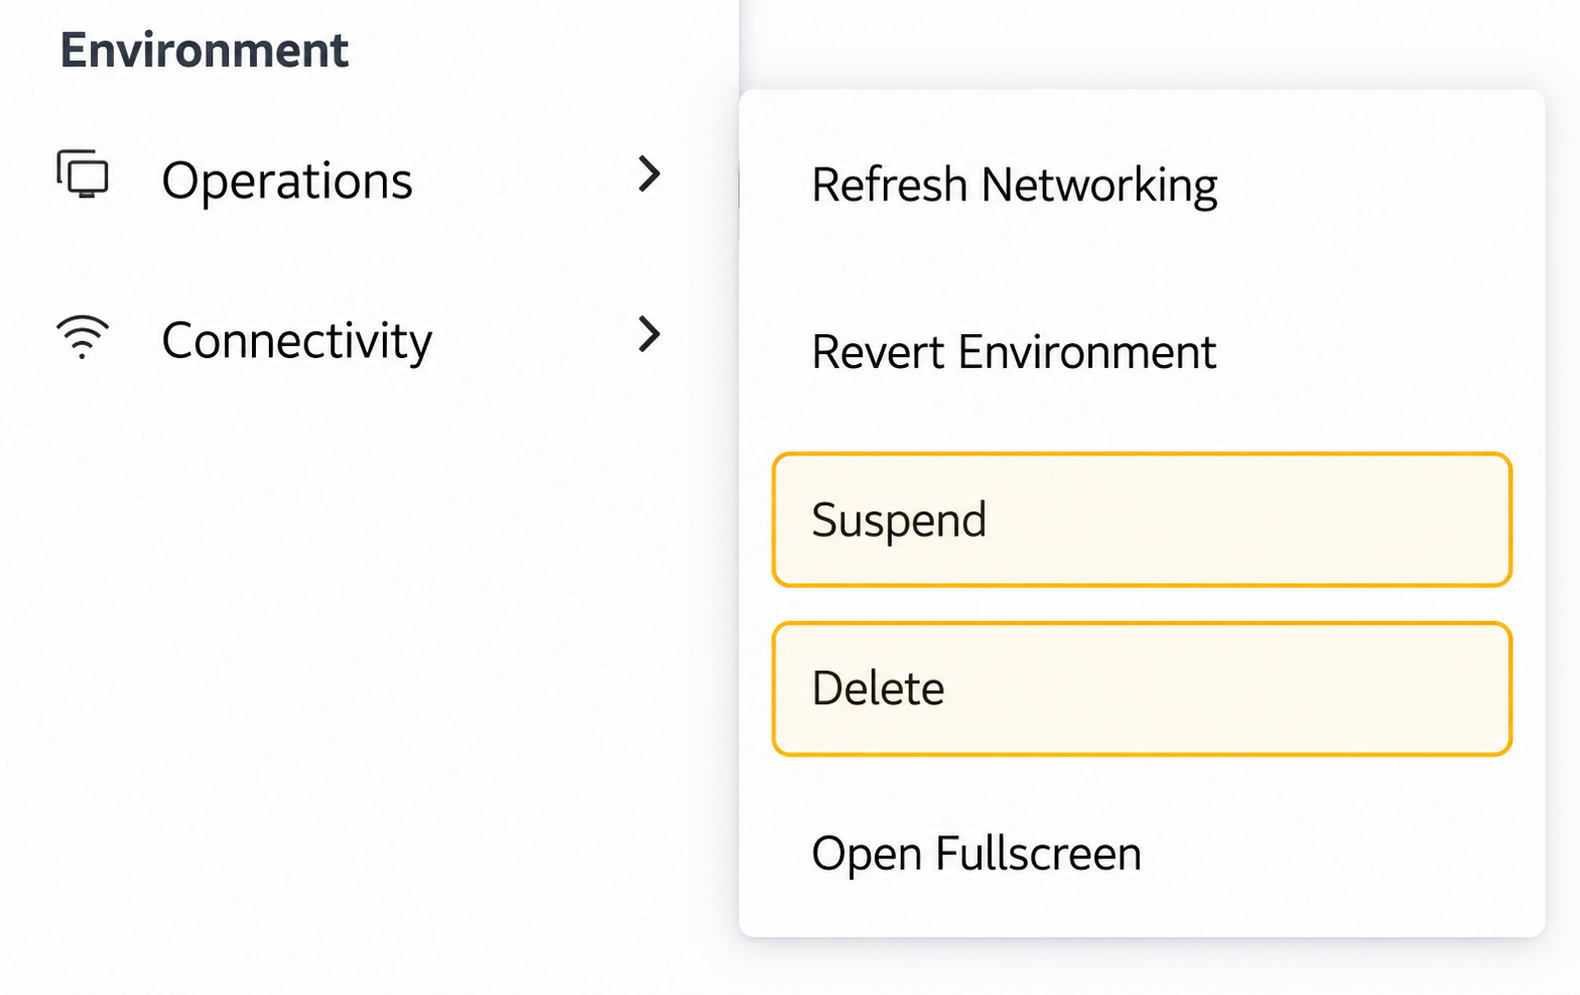
To resume a suspended lab or create a new environment after deletion, use the Launch button in Launchpad for the corresponding lab.
-
When Does My Lab Environment Expire?
You can view the remaining runtime and scheduled deletion time for your lab environment in the top-right corner of the lab interface.
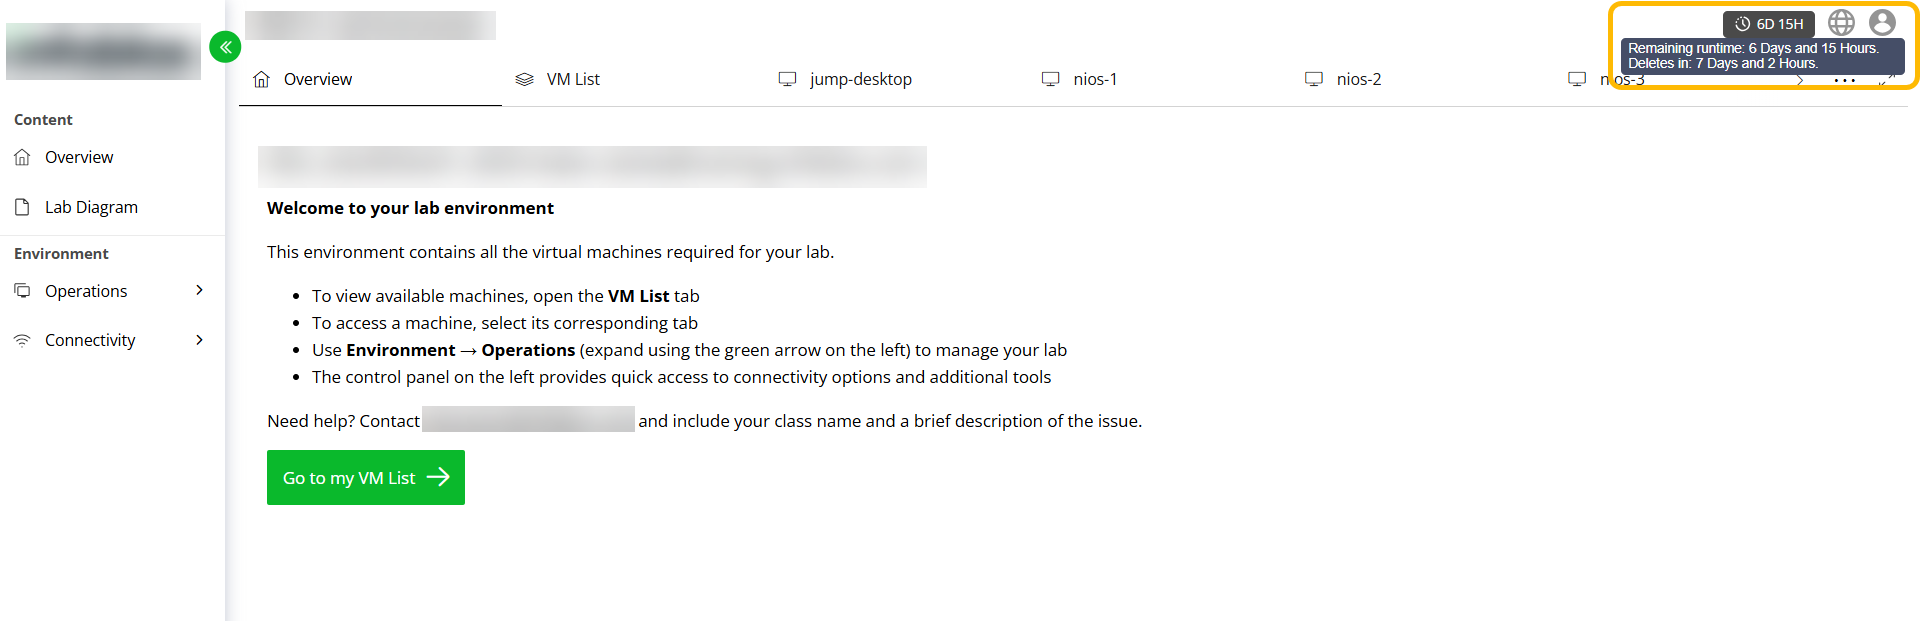
How do I Copy and Paste Text into a Remote VM?
CloudShare provides two methods for sending text from your local computer to a remote VM.
1. Send Text via Text Buffer
The Send Text option allows you to paste text into a popup text buffer and send it to the remote VM as a series of keystrokes.
To send text using the text buffer:
-
Navigate to: Machine → Actions → Keyboard → Send Text
-
Paste the required text into the popup window using:
-
Ctrl-V / Cmd-V
-
Right-click → Paste
-
-
Click Send
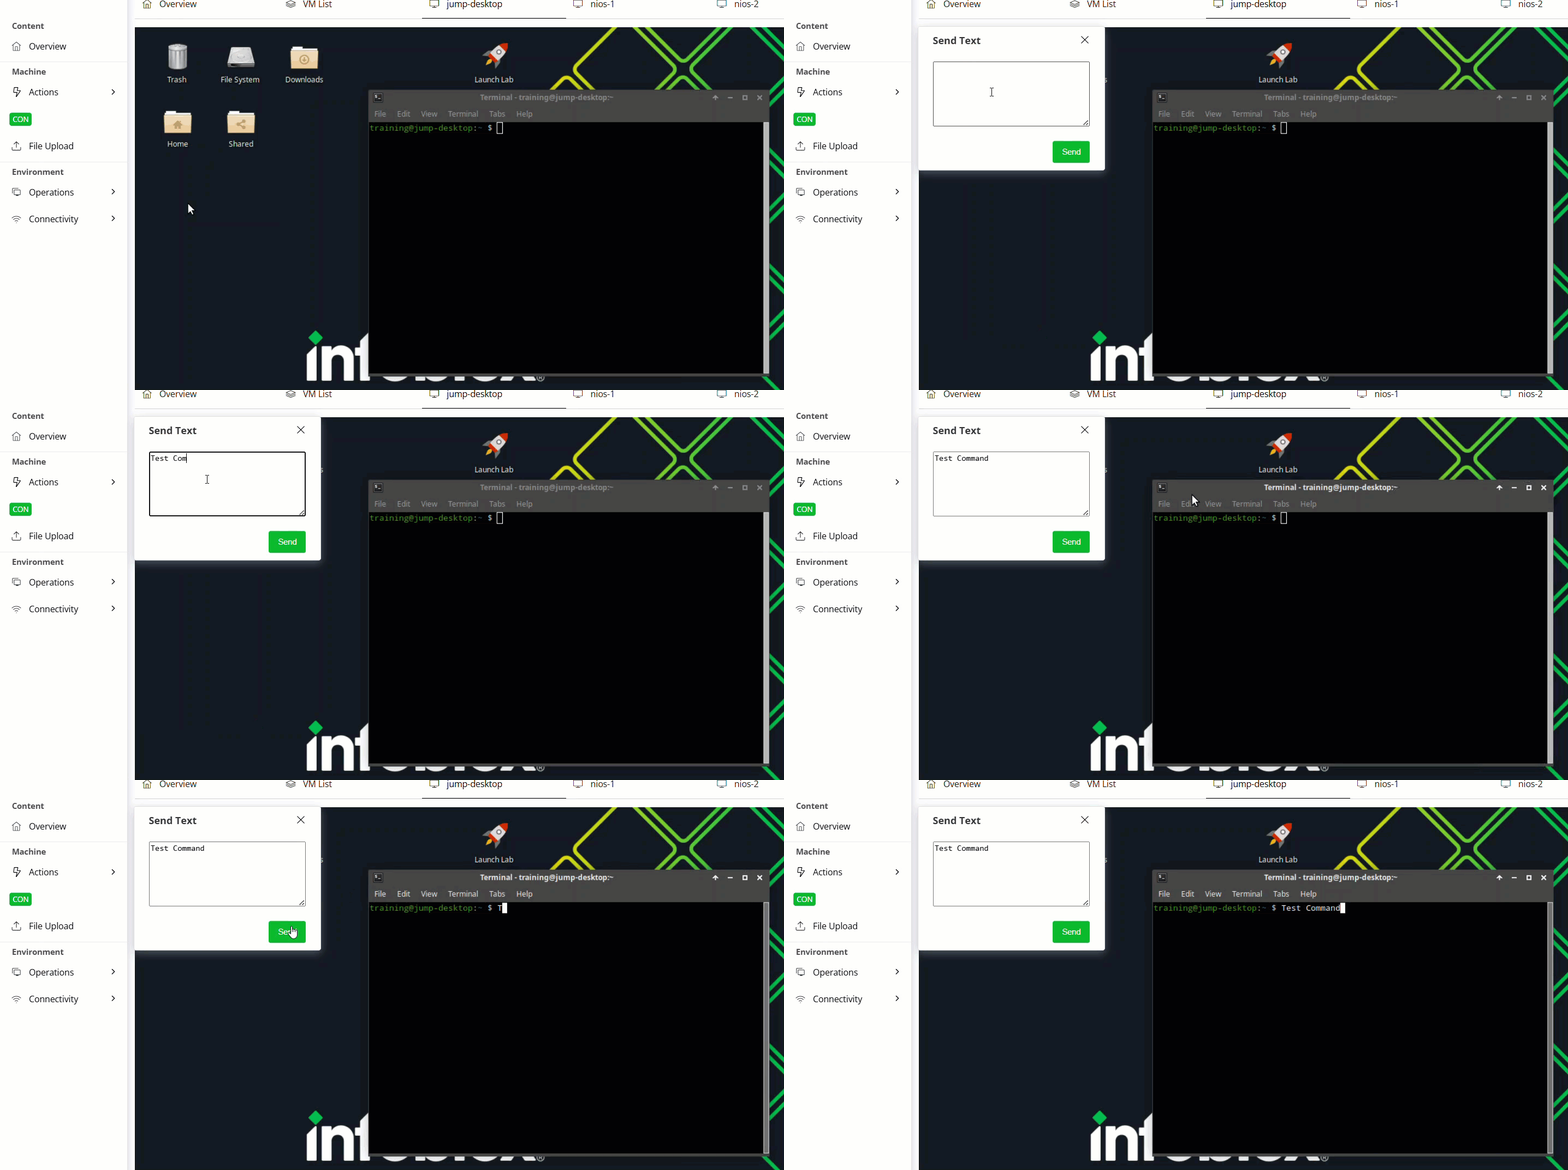
The text is transmitted to the remote VM as a series of keystrokes and can be used in terminals, login prompts, text editors, command consoles, or other applications inside the VM.
Note: Send text supports standard ASCII characters only. Non-ASCII or Unicode characters, such as –, @, or smart quotes, may not be entered correctly in the remote VM. Use plain ASCII equivalents where possible, such as -, @, and straight quotation marks.
2. Send Text with Ctrl-V
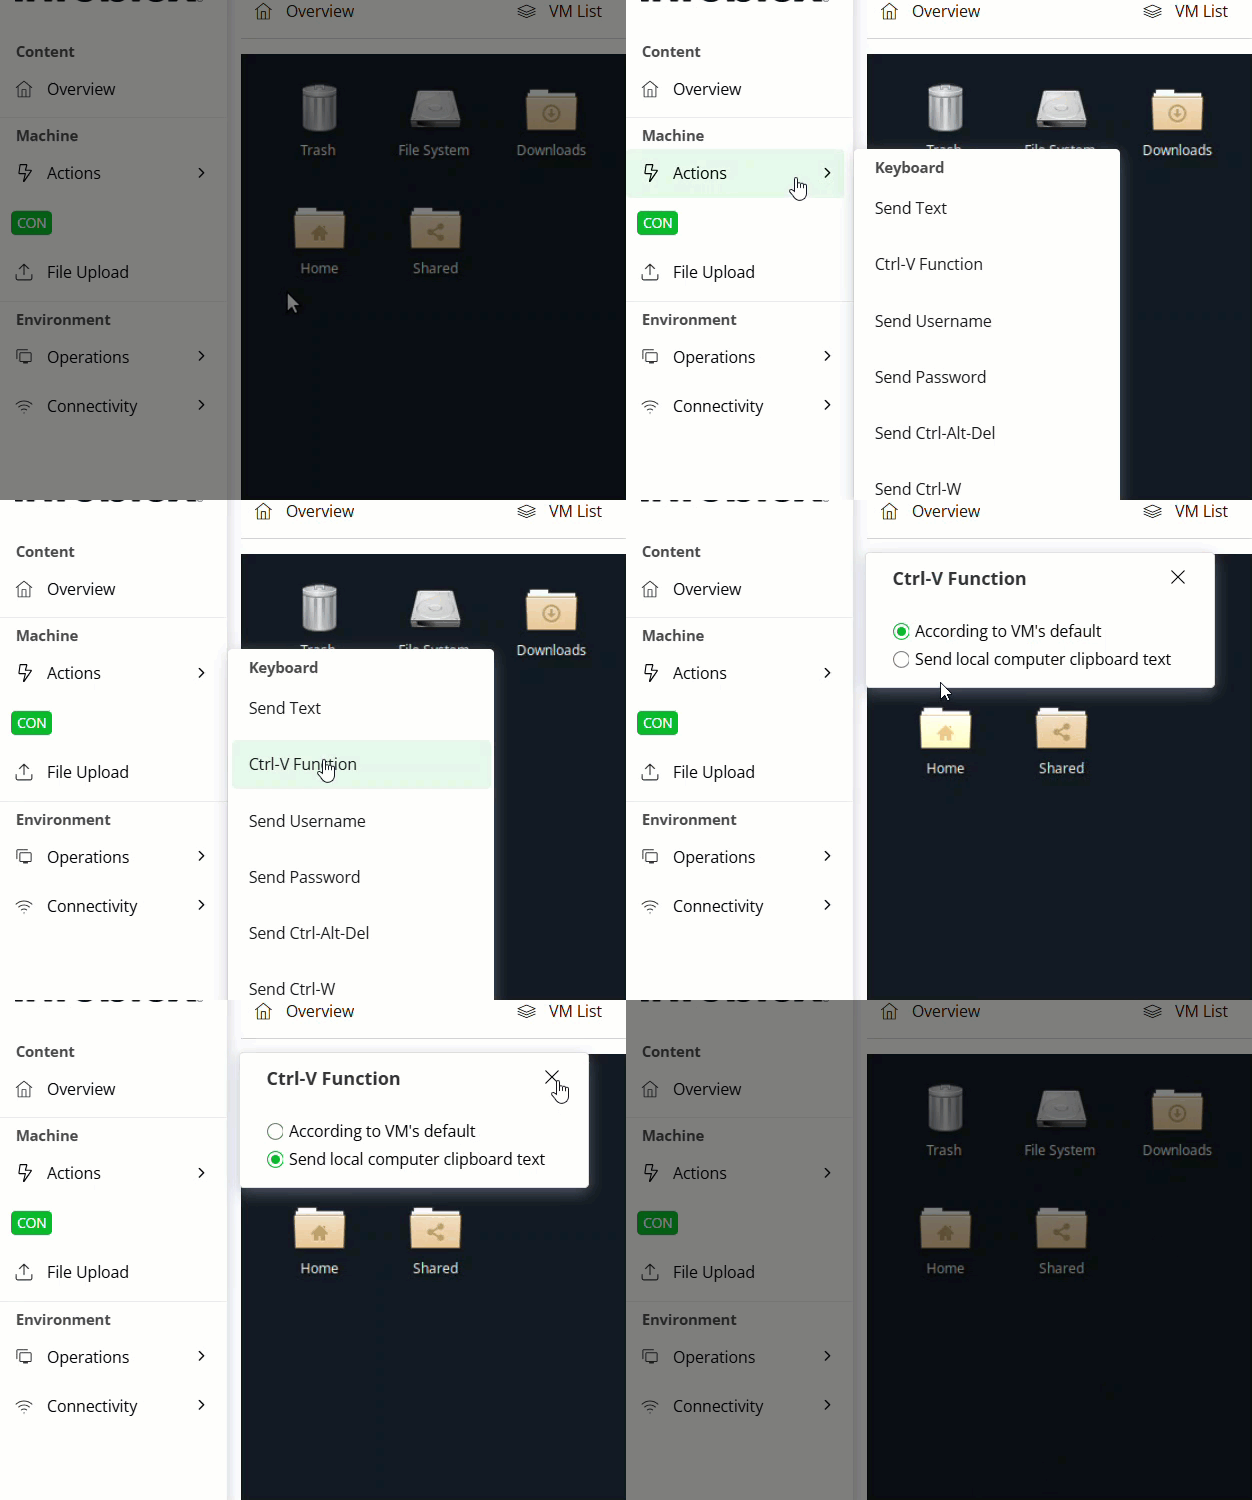
The Ctrl-V Function option allows you to send plain text from your local computer clipboard to the remote VM using the Ctrl-V keyboard shortcut on Windows/Linux or Cmd-V on Mac systems.
To enable the Ctrl-V / Cmd-V override:
-
Navigate to: Machine → Actions → Keyboard → Ctrl-V Function
-
Select Send local computer clipboard text
-
Use Ctrl-V or Cmd-V inside the remote VM to send text from your local clipboard
The clipboard contents are transmitted to the remote VM as plain text and can be used in terminals, login prompts, text editors, command consoles, or other applications inside the VM.
How do I Extend a Lab Environment?
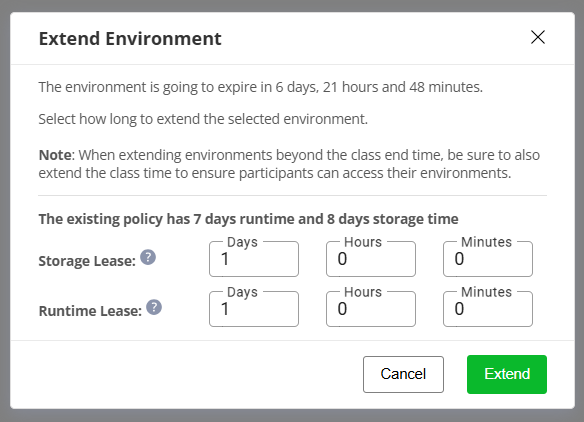
Certain lab environments support extending the environment runtime and storage lease if additional time is required.
-
To extend your lab environment:
-
Navigate to: Environment → Operations → Extend
-20260525-102925.png?cb=54b049199ffc83b57fe4767deb496163)
-
Select the additional time required for:
-
Runtime Lease
-
Storage Lease
-
-
Click Extend
Note: Environments may be extended for a maximum total period of 30 days. Any extension beyond this limit will be automatically adjusted to 30 days.
How do I switch between virtual machines?
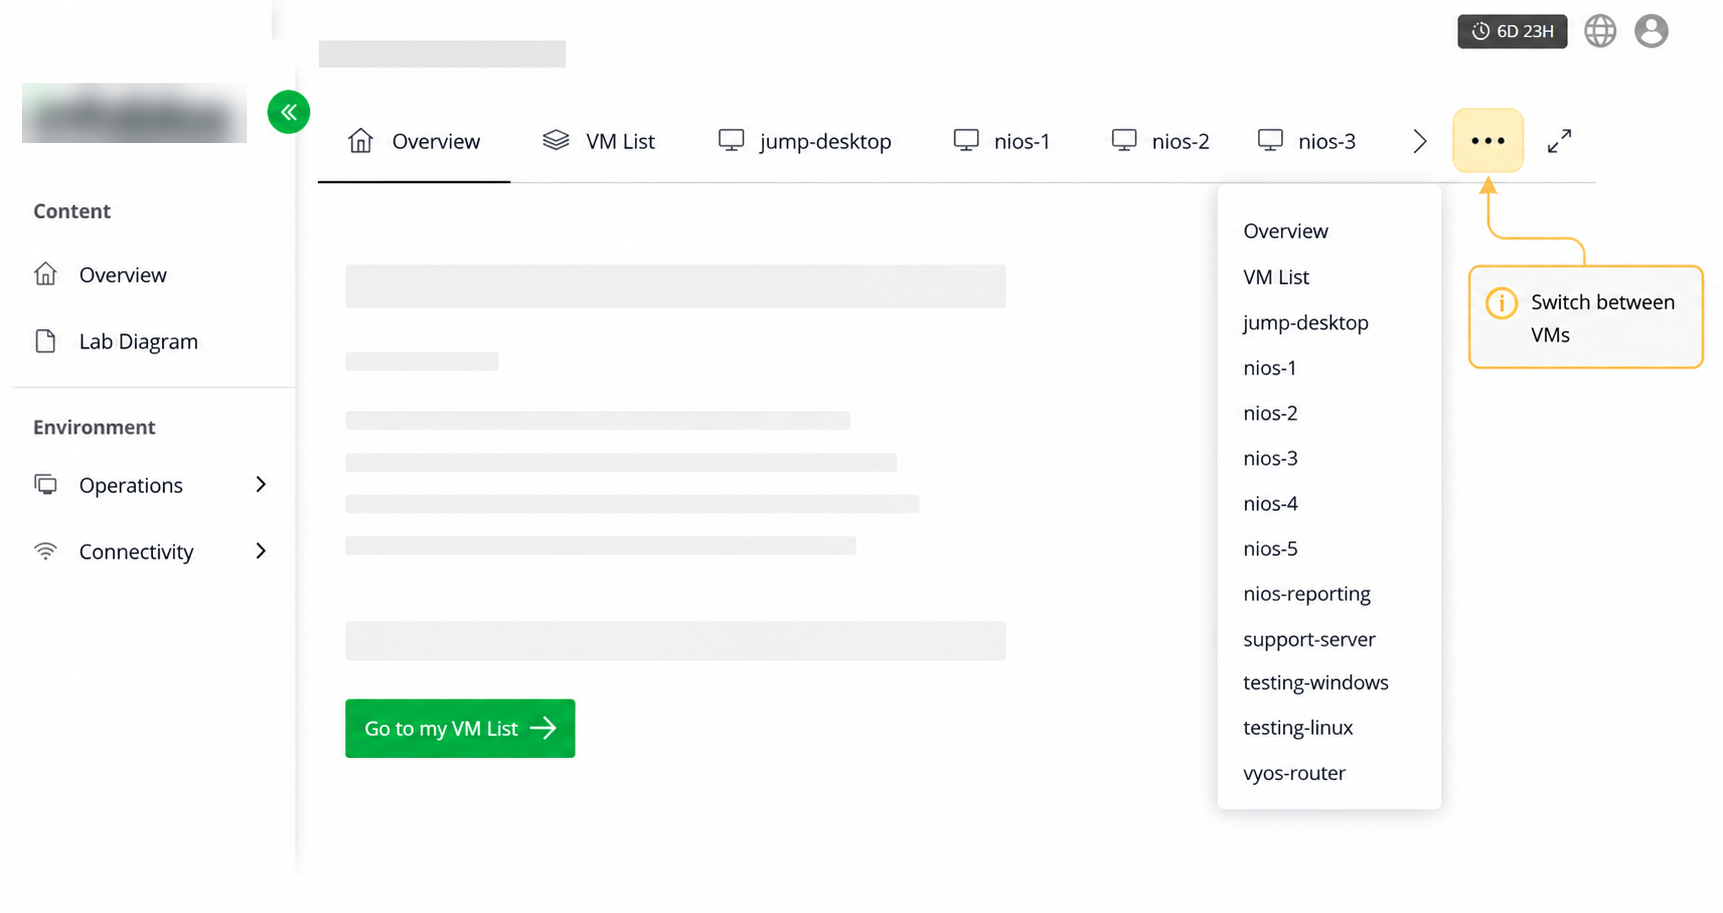
To switch between virtual machines in the lab environment:
-
Use the VM tabs in the top menu to select the required VM.
or
-
Click the … ellipsis menu in the top menu and select the required VM from the list.
How do I shut down or power off a VM in the lab environment?
Shutting down or powering off a VM is optional and is generally only required when instructed in the lab guide or when troubleshooting an issue in the lab environment.
To shut down or power off a virtual machine:
-
Select VM List from the top menu.
-
Locate the required VM.
-
Click the … ellipsis icon next to the VM.
-
Select Shut Down or Power Off.
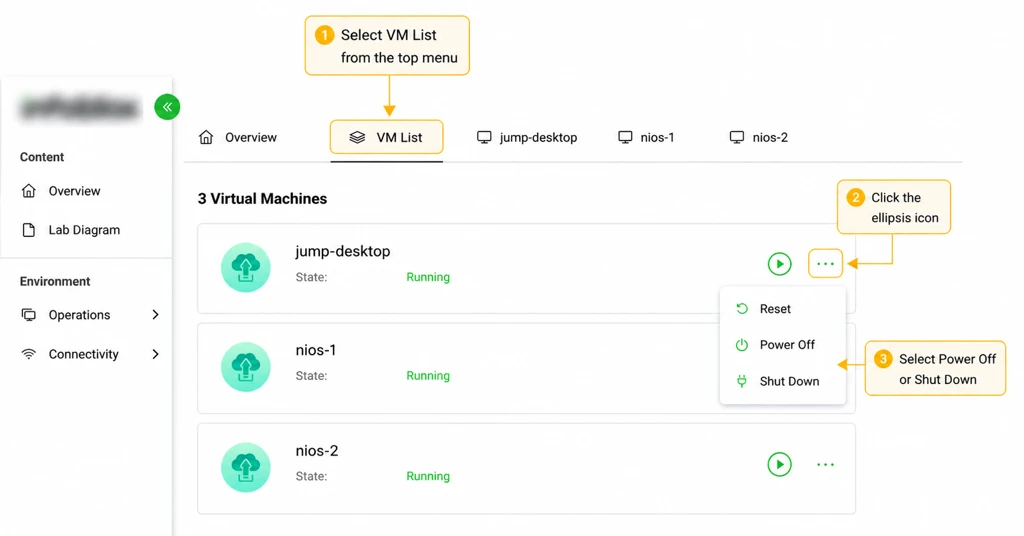
Note: Shut Down performs a graceful shutdown of the VM. Power Off immediately stops the VM.
Lab Access Requirements
To view VM desktops you must meet the following additional requirements.
|
Web Browser |
CloudShare requires a modern web browser that supports HTML WebSocket technology. Supported browsers include in the latest versions of:
|
|---|---|
|
Bandwidth |
Minimum download speed of |
|
Latency |
Latency of 250ms or less is strongly recommended. Latencies over |
Running the Lab Connectivity Checker
To run the Connectivity Checker:
-
Navigate to the Cloudshare Remote Access Test Page
-
Use the table below to determine the correct region.
|
Your Location |
CloudShare Data Center |
|---|---|
|
North and South America |
US-EAST (Miami) |
|
Europe |
EU (Amsterdam) |
|
Africa and Middle East |
EU (Amsterdam) |
|
Asia |
Asia Pacific (Singapore) |
|
Australia and New Zealand |
Asia Pacific (Singapore) |
-
From the Data Center dropdown list, select the Data Center with which you want to run your connectivity tests:
-
Canvas Support and WebSocket Connection tests should complete successfully before you proceed to the next step.
-
In the Speed Test section of the panel, click Run.
Resolving Lab Connectivity Test Failures
1. Supported browser test failed
Download and install a browser that supports HTML5. Your Connectivity Checker results will tell which browser version you are currently using. To download the latest version of a supported browser, use the links below:
-
Download Chrome: https://www.google.com/chrome
-
Download Firefox: https://www.mozilla.org/firefox
After switching to a supported browser, retry the Cloudshare Remote Access Test Page.
2. Client connection test failed
Your network connection may be blocked by a firewall rule or other restriction. Work with your network administrator to ensure outbound access over TCP 443 (HTTPS/WebSockets) is allowed to the following
-
*.cloudshare.com -
*.cld.sr -
*.chime.aws -
echo.websocket.org
If IP allowlisting is required, refer to the CloudShare IP Ranges page
3. Latency is over 250ms
You will probably experience a noticeable lag when connecting to your Lab, however, it will still work. To improve performance:
-
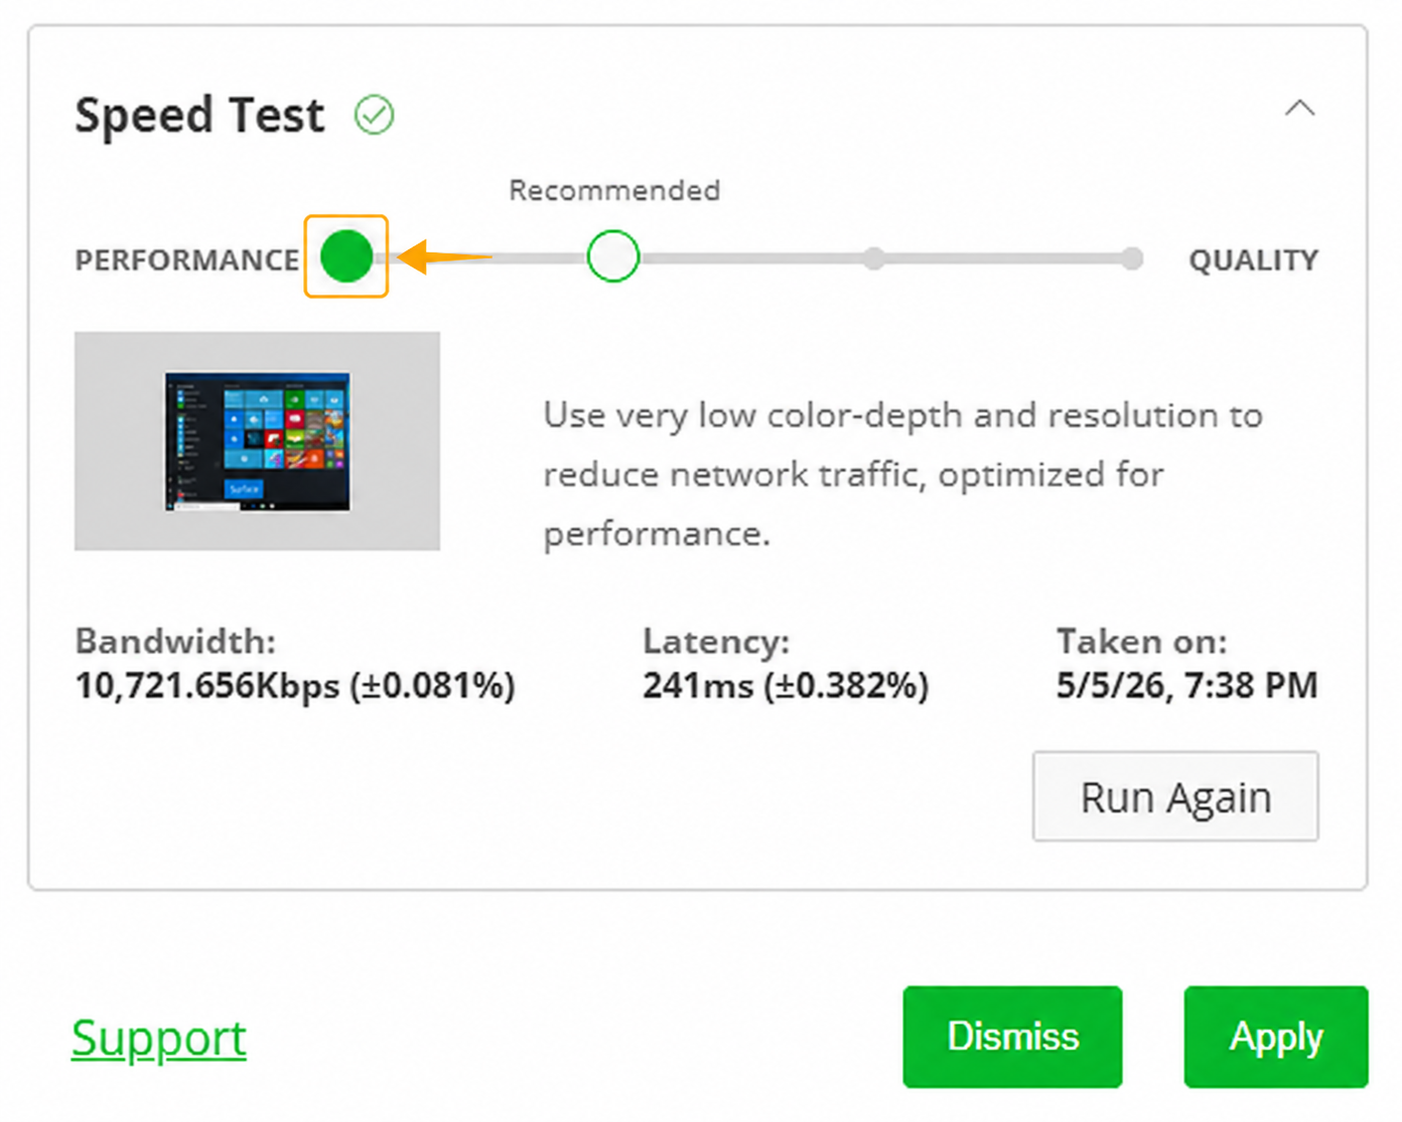
From within the lab environment, navigate to: Environment → Connectivity → Connectivity Test
-
Run the speed test
-
Move the slider towards Performance (left side) to reduce quality
-
Click Apply
This reduces display quality and improves responsiveness over slower connections.
Where can I find the virtual machine credentials?
VM credentials can be viewed from inside the lab environment.
To view credentials:
-
Select the required VM from the top menu.
-
Navigate to Environment → Connectivity.
-
Click Connection Details.
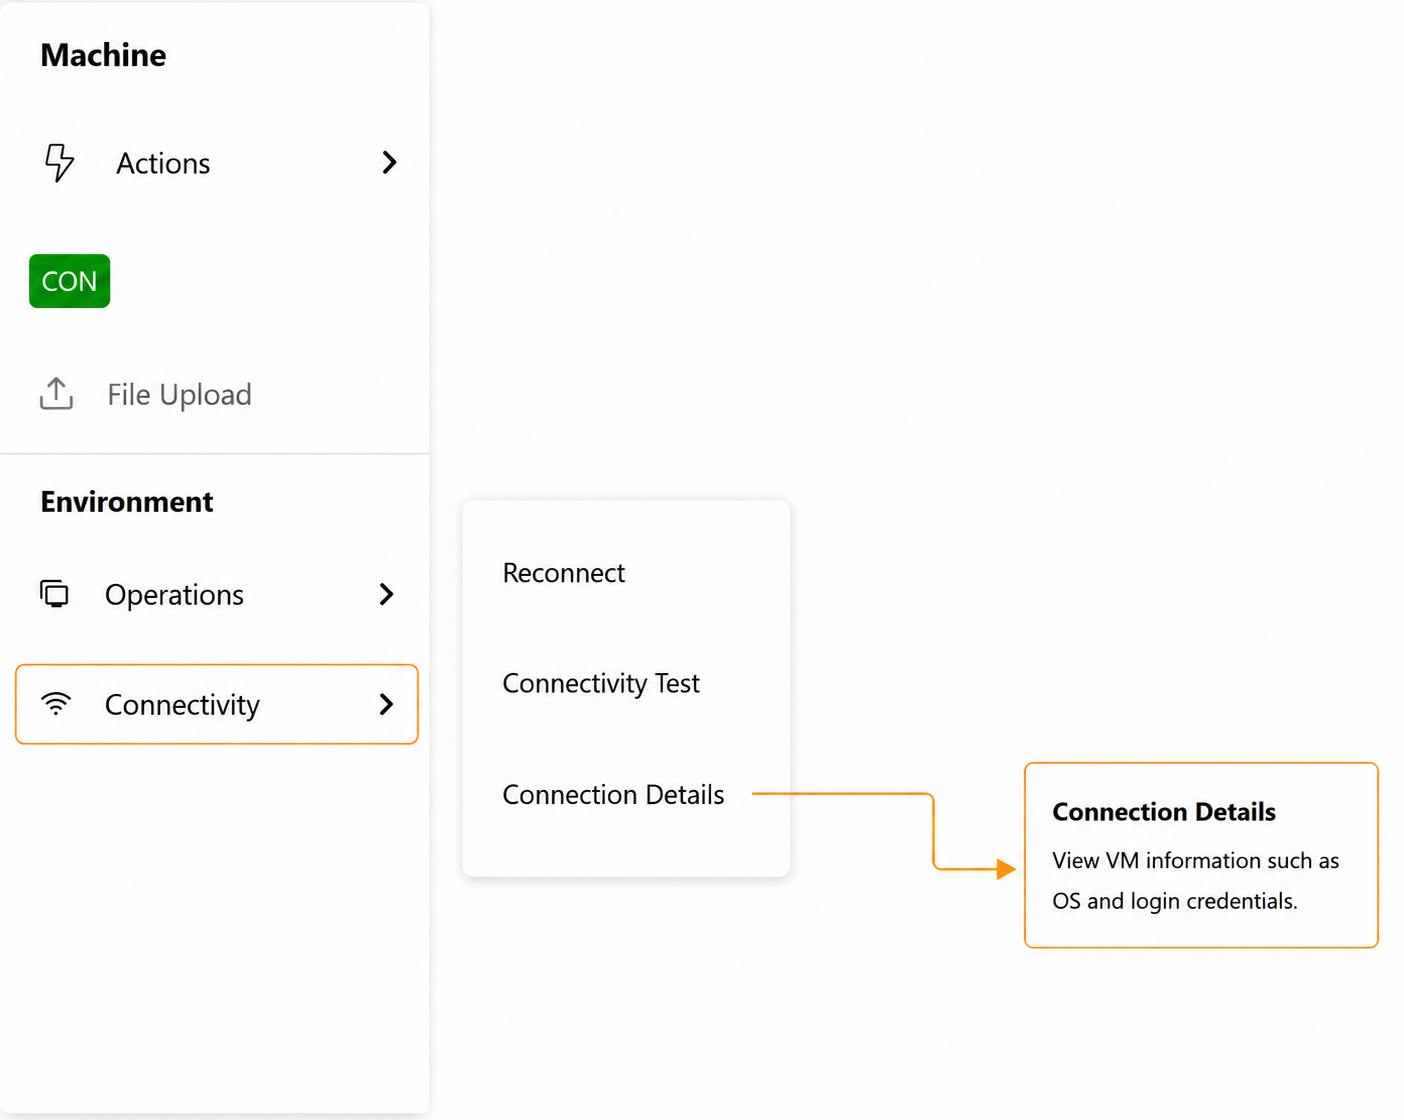
The connection details panel displays the operating system information and credentials for the selected VM.
Default VM Credentials (Username/Password)
Default credentials for the lab environment virtual machines are as follows:
|
Linux/Jump Desktop |
Username |
|
|---|---|---|
|
Password |
|
|
|
sudo |
|
|
|
Linux/Support Server |
Username |
|
|
Password |
|
|
|
sudo |
|
|
|
Infoblox NIOS VMs |
Username |
|
|
Password |
|
|
|
Infoblox NetMRI VM |
Username |
|
|
Password |
|
|
|
BloxOne Host / OPH |
Username |
|
|
Password |
|
|
|
sudo |
|
|
|
VyOS Router |
Username |
|
|
Password |
|
|
|
Windows / Wec Server |
Username |
|
|
Password |
|
Please Note: some lab tasks may instruct you to change the password, please read the lab guide instructions carefully and use the updated password where necessary.
Virtual machine screen freezes or does not respond to keyboard/mouse
-
Use your main web browser’s refresh button to refresh the full display.
Virtual machine is powered on but screen is black
-
Click on the VM screen with your mouse.
-
Press the enter key a few times to wake the screen up.
Unable to type specific characters like @
-
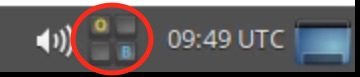
You can access the on-screen keyboard by clicking on the keyboard icon on the taskbar.
-
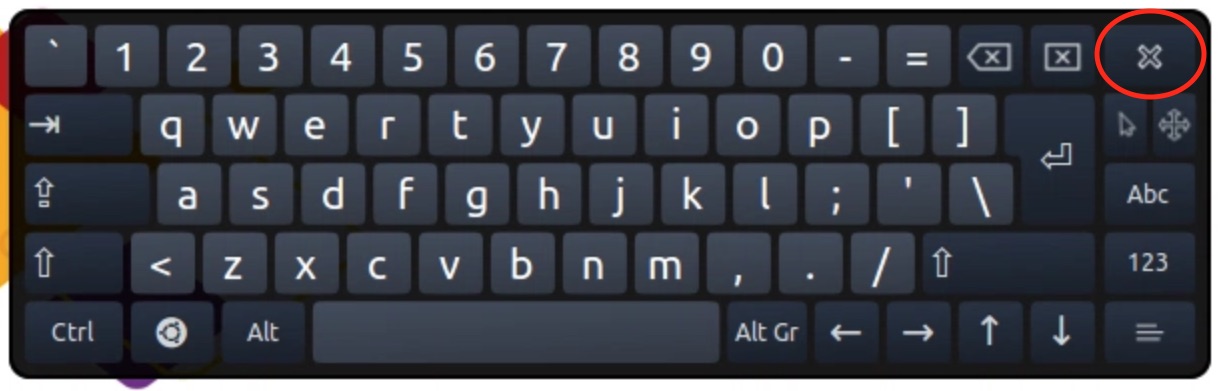
This will load the on-screen keyboard, click the X button in the top right corner to dismiss the keyboard.
Keyboard number keypad does not work
-
Click on the Terminal icon either on the task bar at the bottom or from the start menu.
-
To toggle Num Lock, type the command:
-
fixnumlockorFIXNUMLOCKand press enter
-
Numlock/Capslock is stuck
-
Click on the Terminal icon either on the task bar at the bottom or from the start menu.
-
To toggle Caps Lock, type the command:
-
fixcapslockorFIXCAPSLOCKand press enter
-
-
To toggle Num Lock, type the command:
-
fixnumlockorFIXNUMLOCKand press enter
-
Change Keyboard Layout
If you have a non-US keyboard you might want to change the jump-desktop/linux-desktop keyboard layout to match your local keyboard.
-
Click on the Start Menu
-
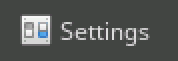
Click on the side menu option for Settings
-
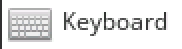
Select Keyboard from the Settings menu
-
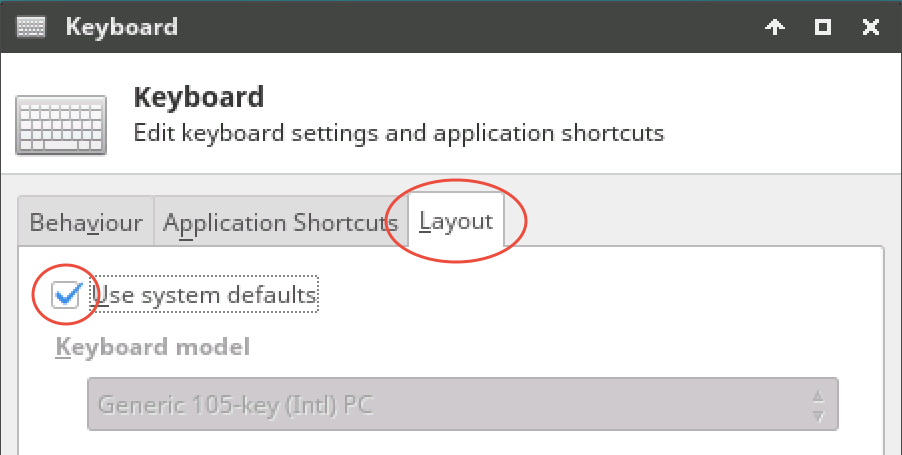
When the Keyboard settings panel opens, click on the Layout tab.
-
Uncheck the option for Use system defaults
-
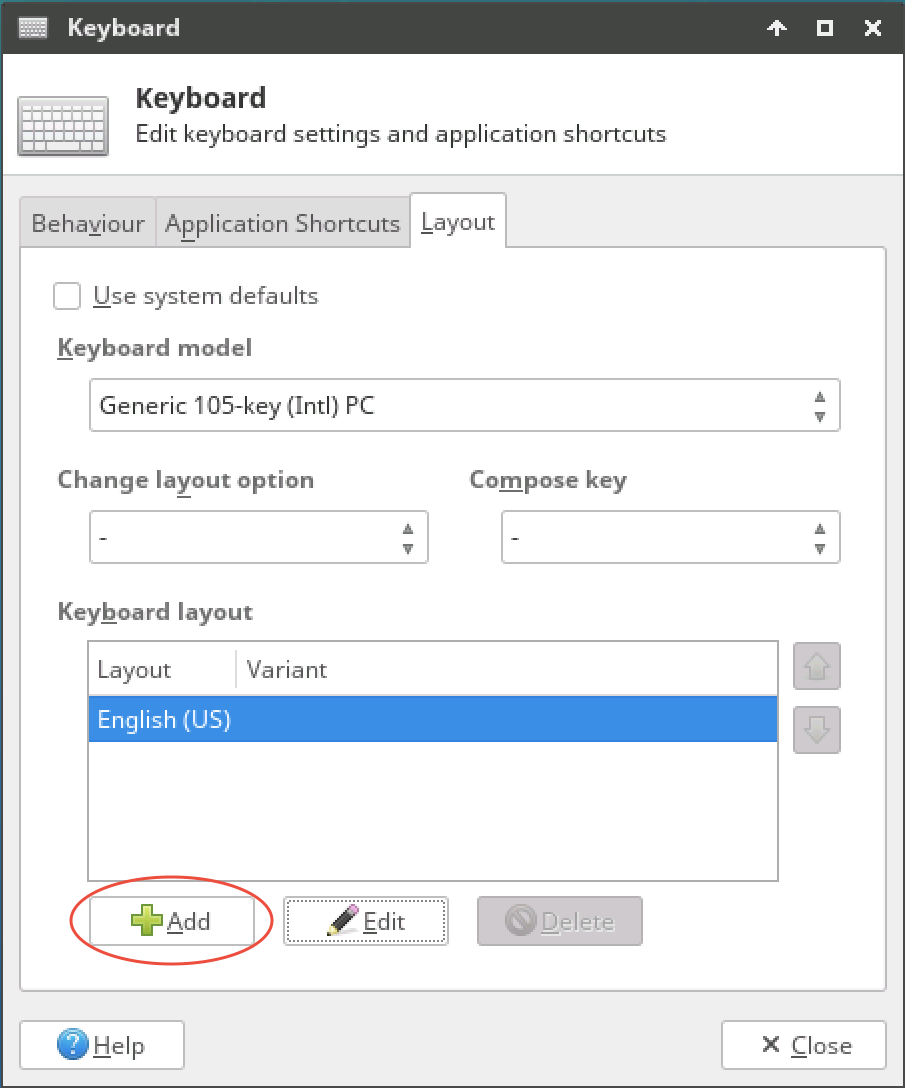
Change your Keyboard Model if required (try with the standard Generic 105-key (Intl) PC first)
-
To add a new keyboard layout, click on the Add button
-
Select your keyboard layout from the list, and click OK
You can click on the triangle icon next to the language to select keyboard variants e.g. Mac variants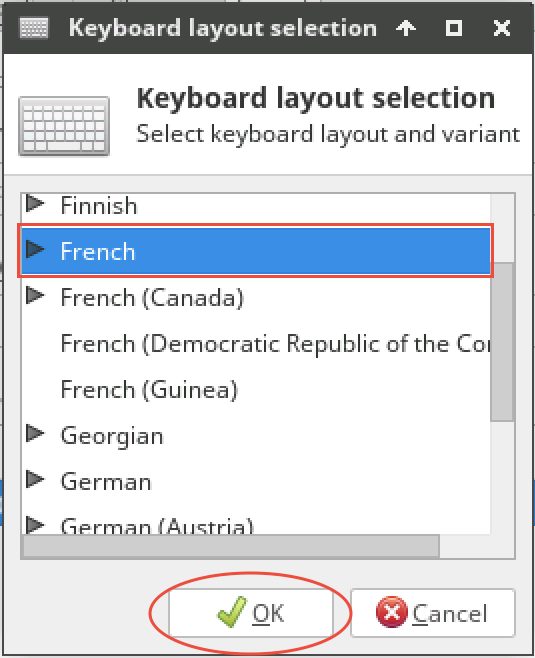
-
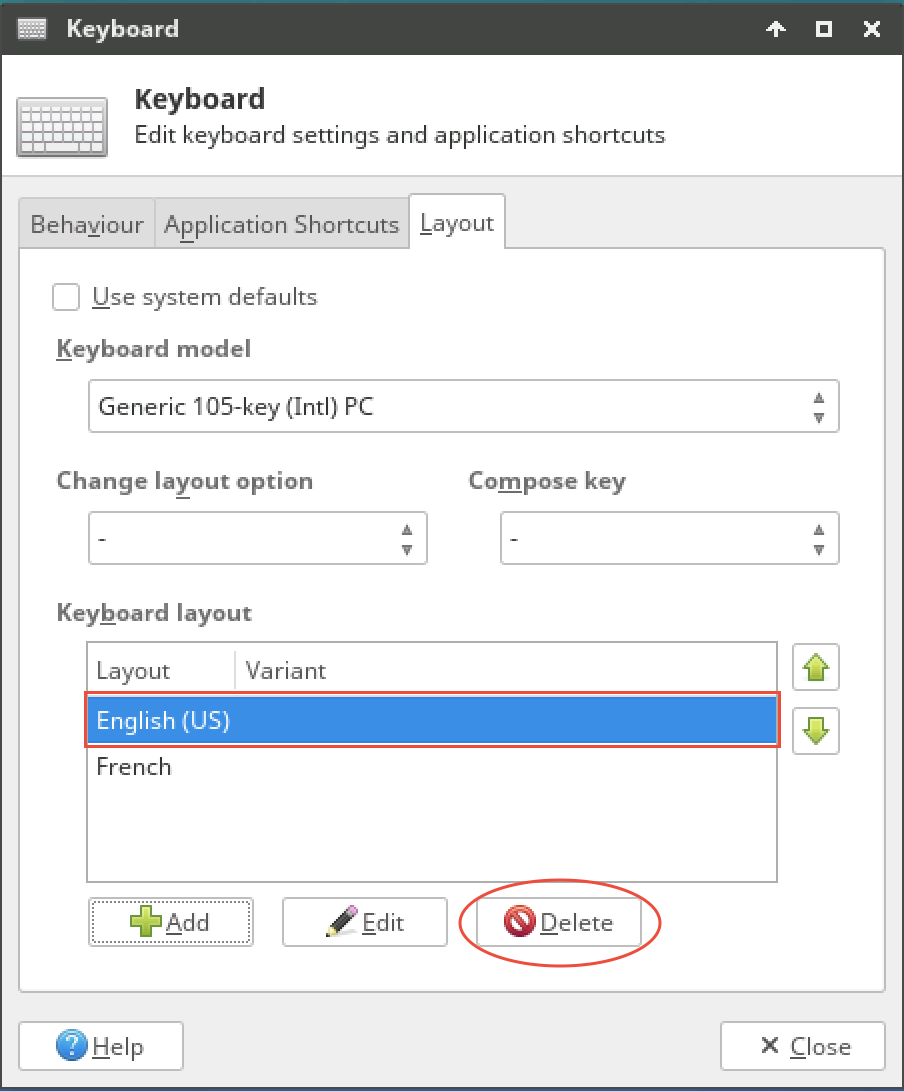
Select the English (US) keyboard layout, and click Delete
-
Click Close and your new layout should be active