Scenario
A request ticket was submitted to delete the Host record named server1.techblue.net with the IP address 10.200.0.65. Please search for this entry, delete it from the Grid, and verify the deletion.
Estimate Completion Time
-
10 to 20 minutes
Credentials
|
Description |
Username |
Password |
URL or IP |
|---|---|---|---|
|
Grid Manager UI |
ops |
infoblox |
Requirements
-
Read-write access to DNS records
-
Access to command-line tools such as dig
Learning Content
Lab Initiation
Access jump-desktop
Once the lab is deployed, you can access the virtual machines required for this activity. To begin, select VM List from the navigation bar at the top, locate jump-desktop, and click the green play icon to open its console. Log in to the Linux UI.

Username: training
Password: infoblox
Initiate lab
To initiate the lab, double-click the Launch Lab icon on the Desktop.

Choose the lab number from the list and click OK.

After clicking OK, you will see a pop-up message with a brief description of the lab task. If the description looks correct, click Yes to continue lab initiation.

Lab initiation will take a couple of minutes to finish.
Once complete, you will see another pop-up message with the login credentials and the URL for the Grid Manager’s User Interface. Note that the credentials may differ from those from prior labs.

Tasks
Task 1: Searching for the entry
Login to the GM web interface. Use the search function to ensure that the requested name server1.techblue.net is not already in use by another A record. Perform the same search for the IPv4 address 10.200.0.65 and its PTR record.
Task 2: Deleting the entry
Delete the Host record for the name server1.techblue.net with the IPv4 address 10.200.0.65.
Task 3: Verifying object deletion in GM
Navigate through the user interface to verify the Host record is moved to the recycle bin.
Solutions
Task 1 Solution: Searching for the entry
As best practice, we should search for the object to make sure we are not deleting associated entries instead of the intended object.
-
Login to NIOS GM web interface
-
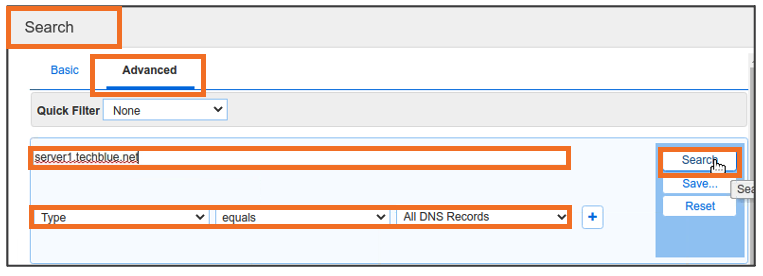
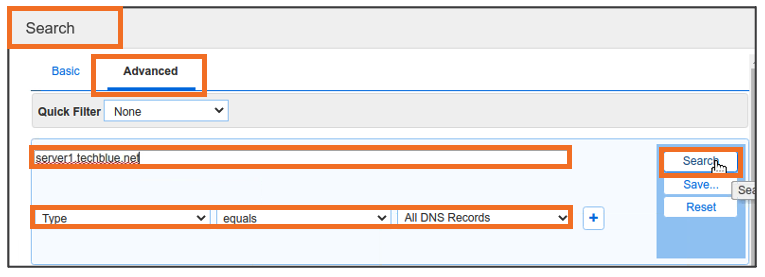
Navigate to Global Search → Advanced and provide server1.techblue.net as a search string then click Search for Type equals All DNS Records
-
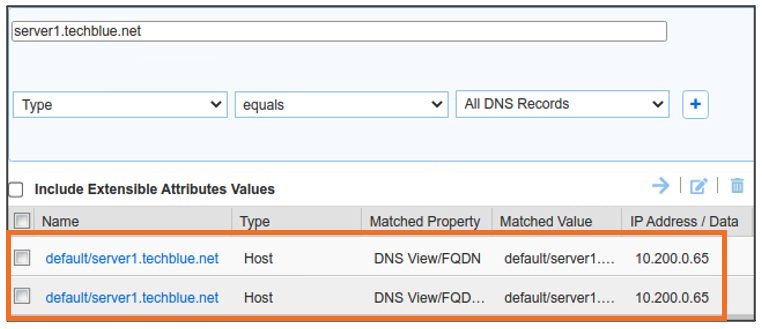
The results show that there is only one Host Record with the name server1.techblue.net and it has the IP Address 10.200.0.65.
Task 2 Solution: Deleting the entries
There are multiple ways to delete this object. The first method is easier since we already searched and found the object. It is possible to make changes to objects and even delete them from the search window itself. To delete the object that we found:
-
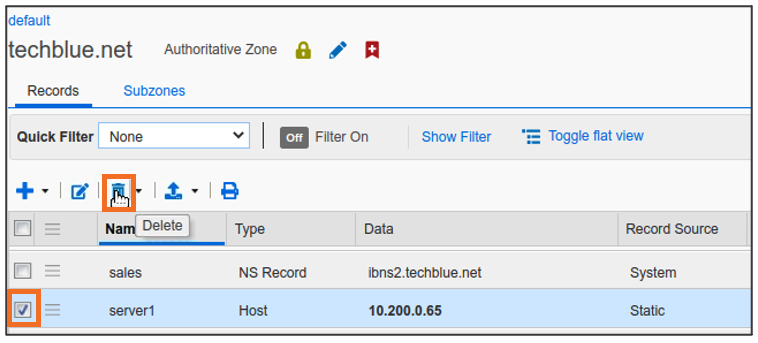
Select the object by checking the box next to the object name, and click Delete

-
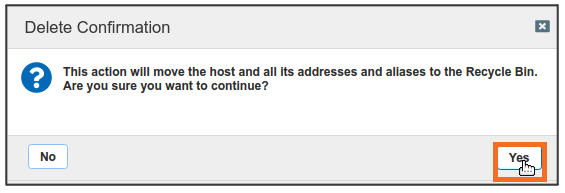
Read the Delete Confirmation message and click Yes to confirm
Alternatively, you can delete the object from the zone:
-
Login to NIOS GM web interface
-
Navigate to Data Management → DNS → Zones
-
Click on the zone name techblue.net to enter the zone

-
Inside the zone, switch to the Records tab and use the Go to field to search for server1
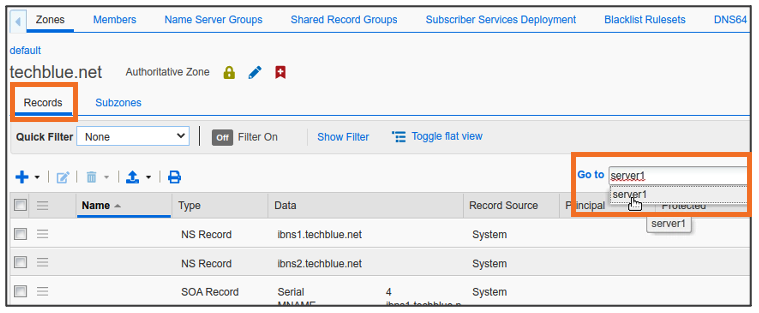
-
Click on the first match in the Go to field to select server1
-
Click Delete
-
Read the Delete Confirmation message and click Yes to confirm.

Task 3 Solution: Verifying object deletion in GM
To make sure that the object is deleted, we can use the Go to field to search for the record again.
-
Login to NIOS GM web interface
-
Navigate to Data Management → DNS → Zones
-
Click on the zone name techblue.net to enter the zone
-
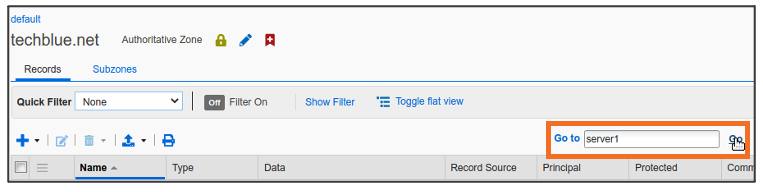
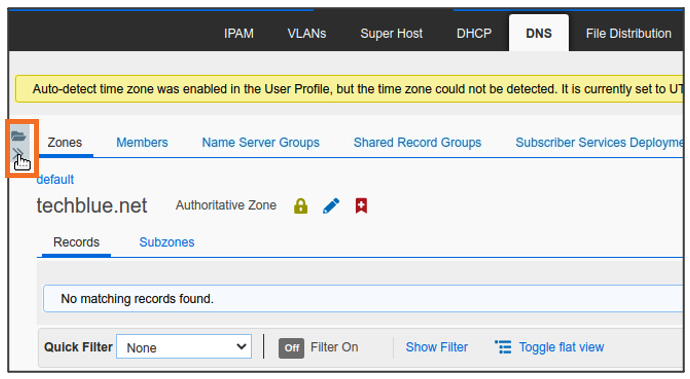
Inside the zone, switch to the Records tab and use the Go to field to search for server1
-
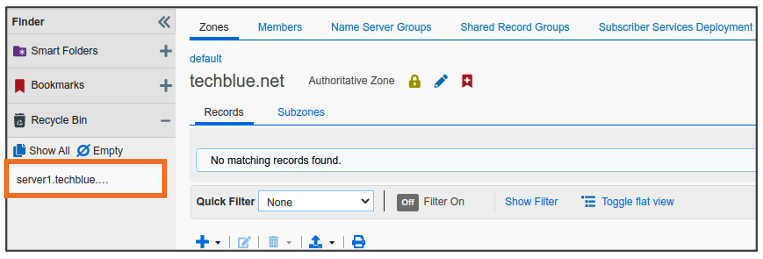
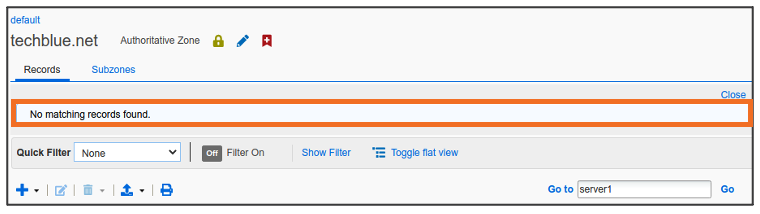
This time, the message tells us there are No matching records found
-
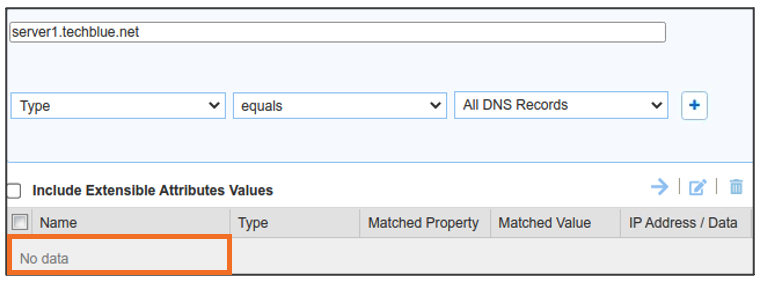
Global Search may confirm the same information. Navigate to Global Search → Advanced and provide server1.techblue.net as a search string then click Search for Type equals All DNS Records
-
The Advanced Search returns no results, as expected
As the Delete Confirmation message indicated, the object that was deleted has been moved into the Recycle Bin
-
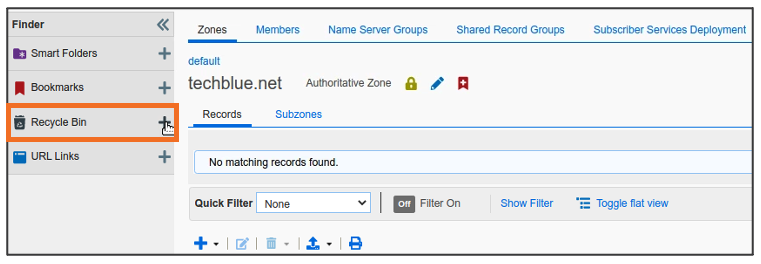
Navigate to Data Management → DNS
-
Expand the Finder panel (If not expanded already)
-
Expand Recycle Bin by clicking +
-
The deleted object is found within Recycle Bin