Scenario
You’re tasked with initiating the DNS Infrastructure Protection service in your environment for the first time. In this lab, your goal will be to start the DNS Infrastructure Protection service on extibns.techblue.net.
To achieve that, you will load the DNS Infrastructure Protection license into the Grid, manually upload an initial ruleset, set the service to monitor-mode to establish a baseline for our environment, ensure that there are no unintended effects on network traffic, and finally enable the service.
Estimate Completion Time
-
30 to 35 minutes
Prerequisites
Credentials
|
Description |
Username |
Password |
URL or IP |
|---|---|---|---|
|
Grid Manager UI |
admin |
infoblox |
Requirements
-
Administrative access to the Grid
-
Usage of the NIOS Lab Environment (with DNS Infrastructure Protection) Lab environment
Learning Content
Tasks
-
Load DNS Infrastructure Protection License Files to the Grid
-
Upload an Initial Ruleset
-
Configure Rule Update and Ruleset Download Policies
-
Set DNS Infrastructure Protection Service to monitor-mode
-
Start the DNS Infrastructure Protection Service
Task 1: Load DNS Infrastructure Protection License Files to the Grid
Advanced DNS Protection (ADP) is an older name for the DNS Infrastructure Protection (DNS-IP) service; some system files still use the old name.
Add the DNS Infrastructure Protection license by navigating to Shared Drive/Licenses. Select the ADP.lic file
Task 2: Upload an Initial Ruleset
In this task, you upload a ruleset. Initially, an older ruleset is uploaded, allowing you to update to the latest ruleset later. Use the ruleset ruleset-20260113.bin2 from the Shared Drive file from the Shared Drive/NIOS-Imports folder.
Task 3: Configure Rule Update and Ruleset Download Policies
Set the Rule Update Policy to Manual, Enable Automatic Ruleset Downloads, and test the connection to ensure it works.
Task 4: Set DNS Infrastructure Protection Service to monitor-mode
Advanced DNS Protection (ADP) is an older name for the DNS Infrastructure Protection (DNS-IP) service; some system commands still use the old name.
Configure the DNS Infrastructure Protection service to use monitor-mode.
Task 5: Start the DNS Infrastructure Protection Service
Start the DNS Infrastructure Protection service on the extibns.techblue.net member, and restart the service if required
Solutions
Task 1 Solution: Load DNS Infrastructure Protection License Files to the Grid
In this task, we will load the DNS Infrastructure Protection license into the Grid. There should be two licenses bundled into the file. The first “DNS Infrastructure Protection” license enables the service on the Grid, while the second “DNS Infrastructure Protection Update” license allows the Grid to download and install the latest rule sets.
-
On the jump-desktop machine, open a browser window to https://10.100.0.100.
-
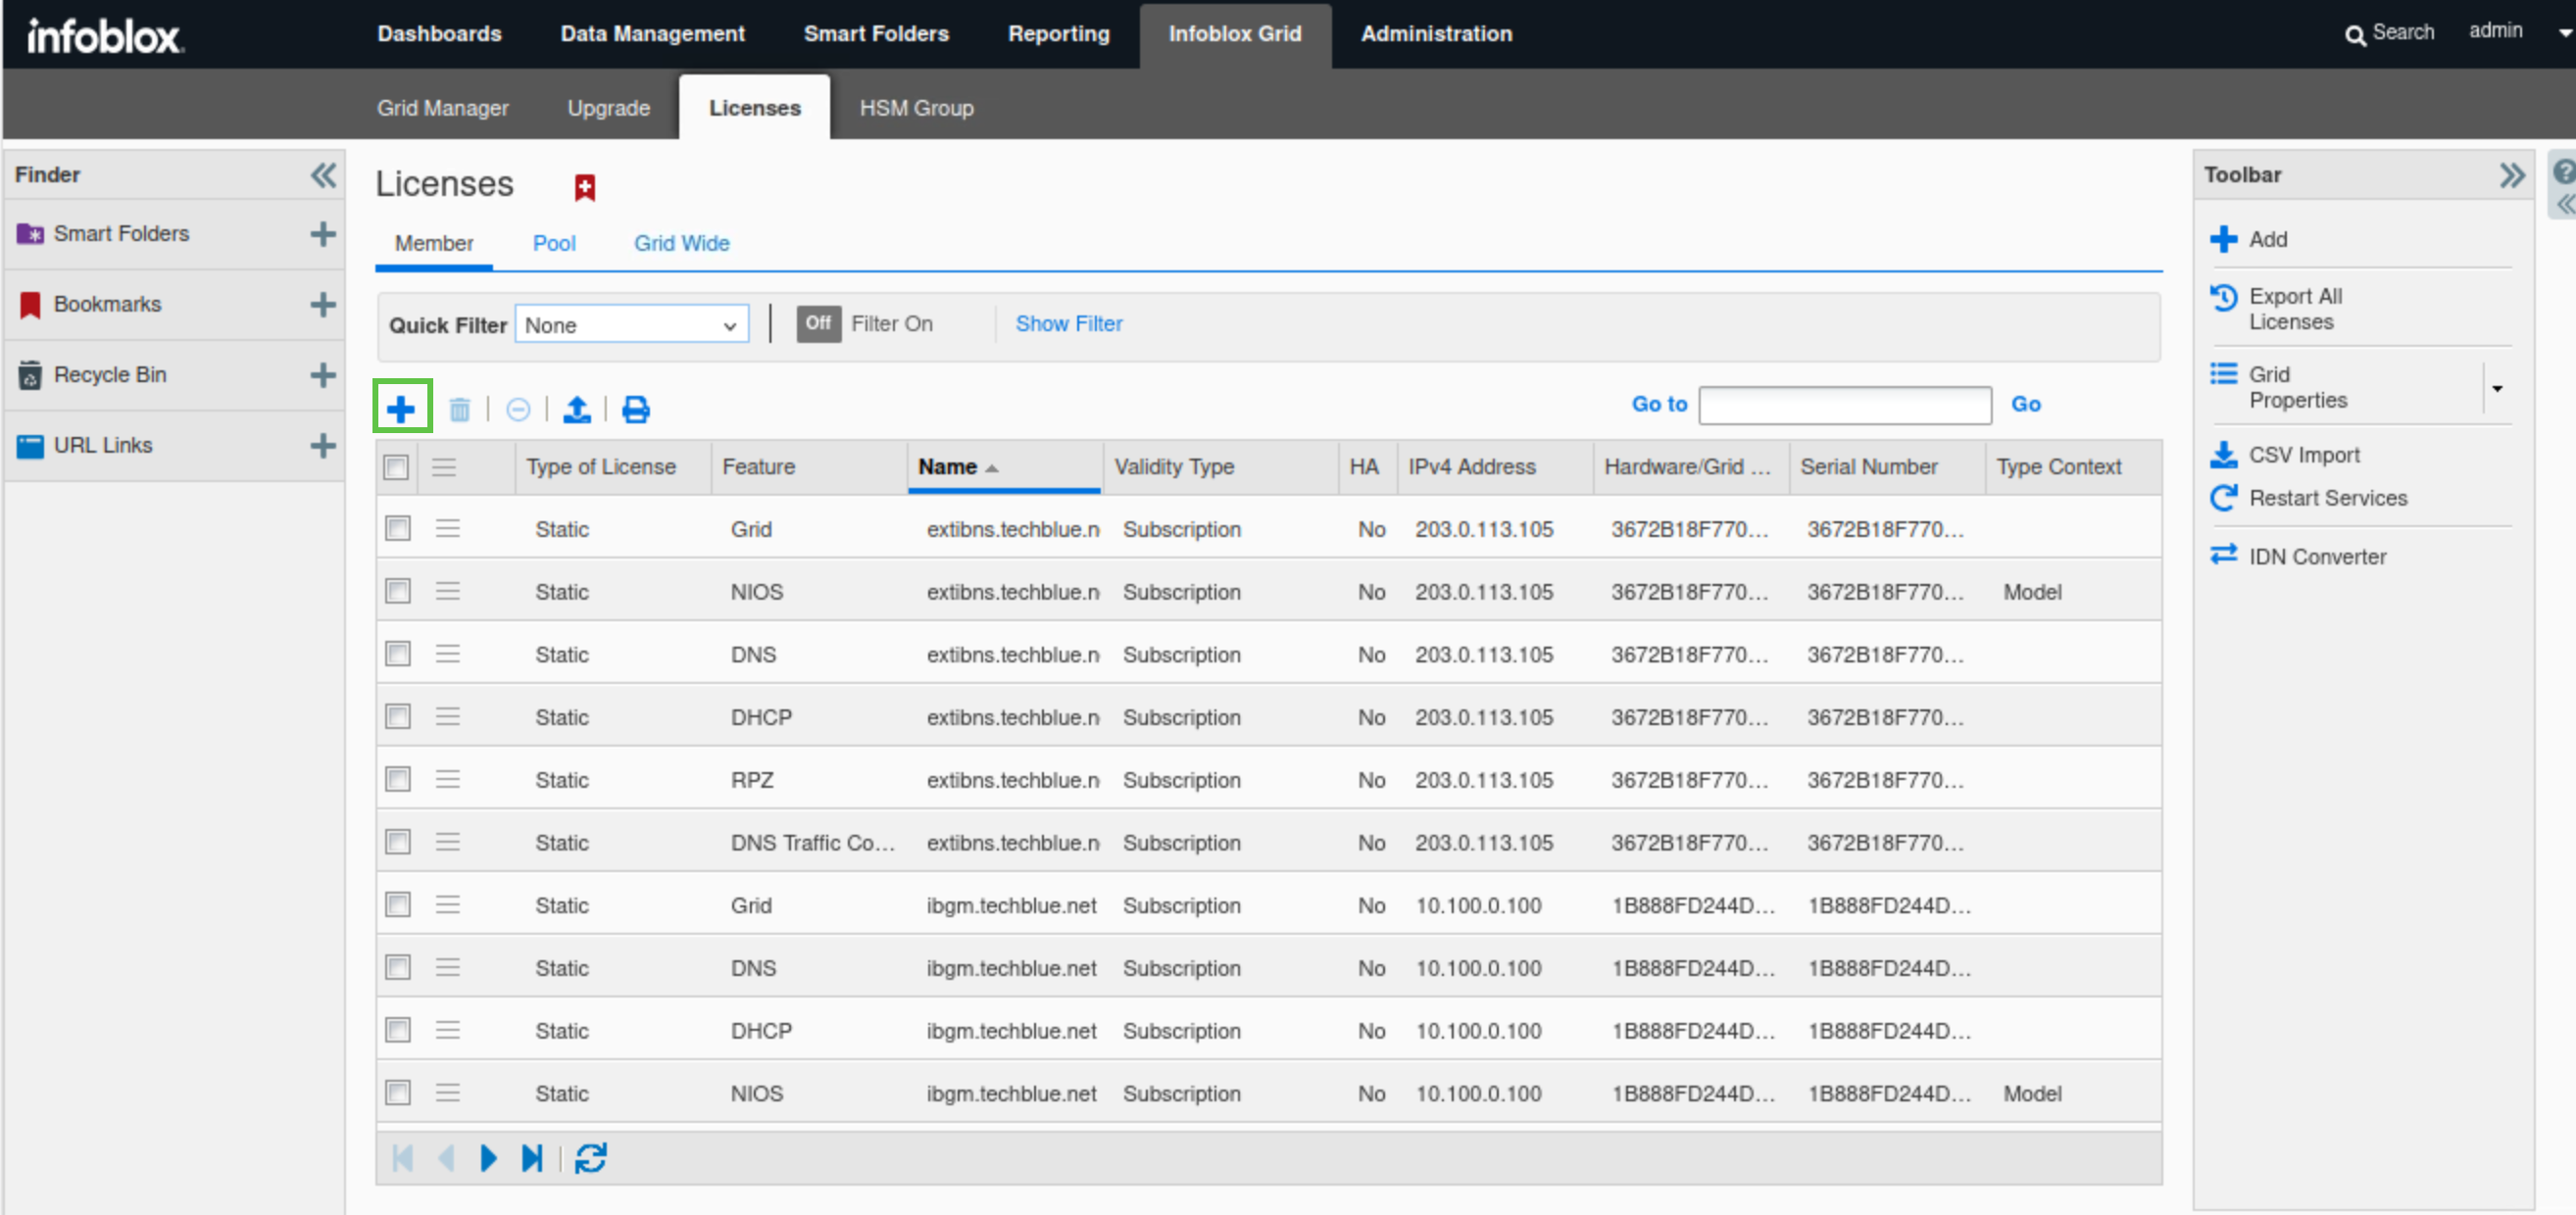
Navigate to Infoblox Grid → Licenses → Members.
-
Click the plus (+) symbol to add a new license.
-
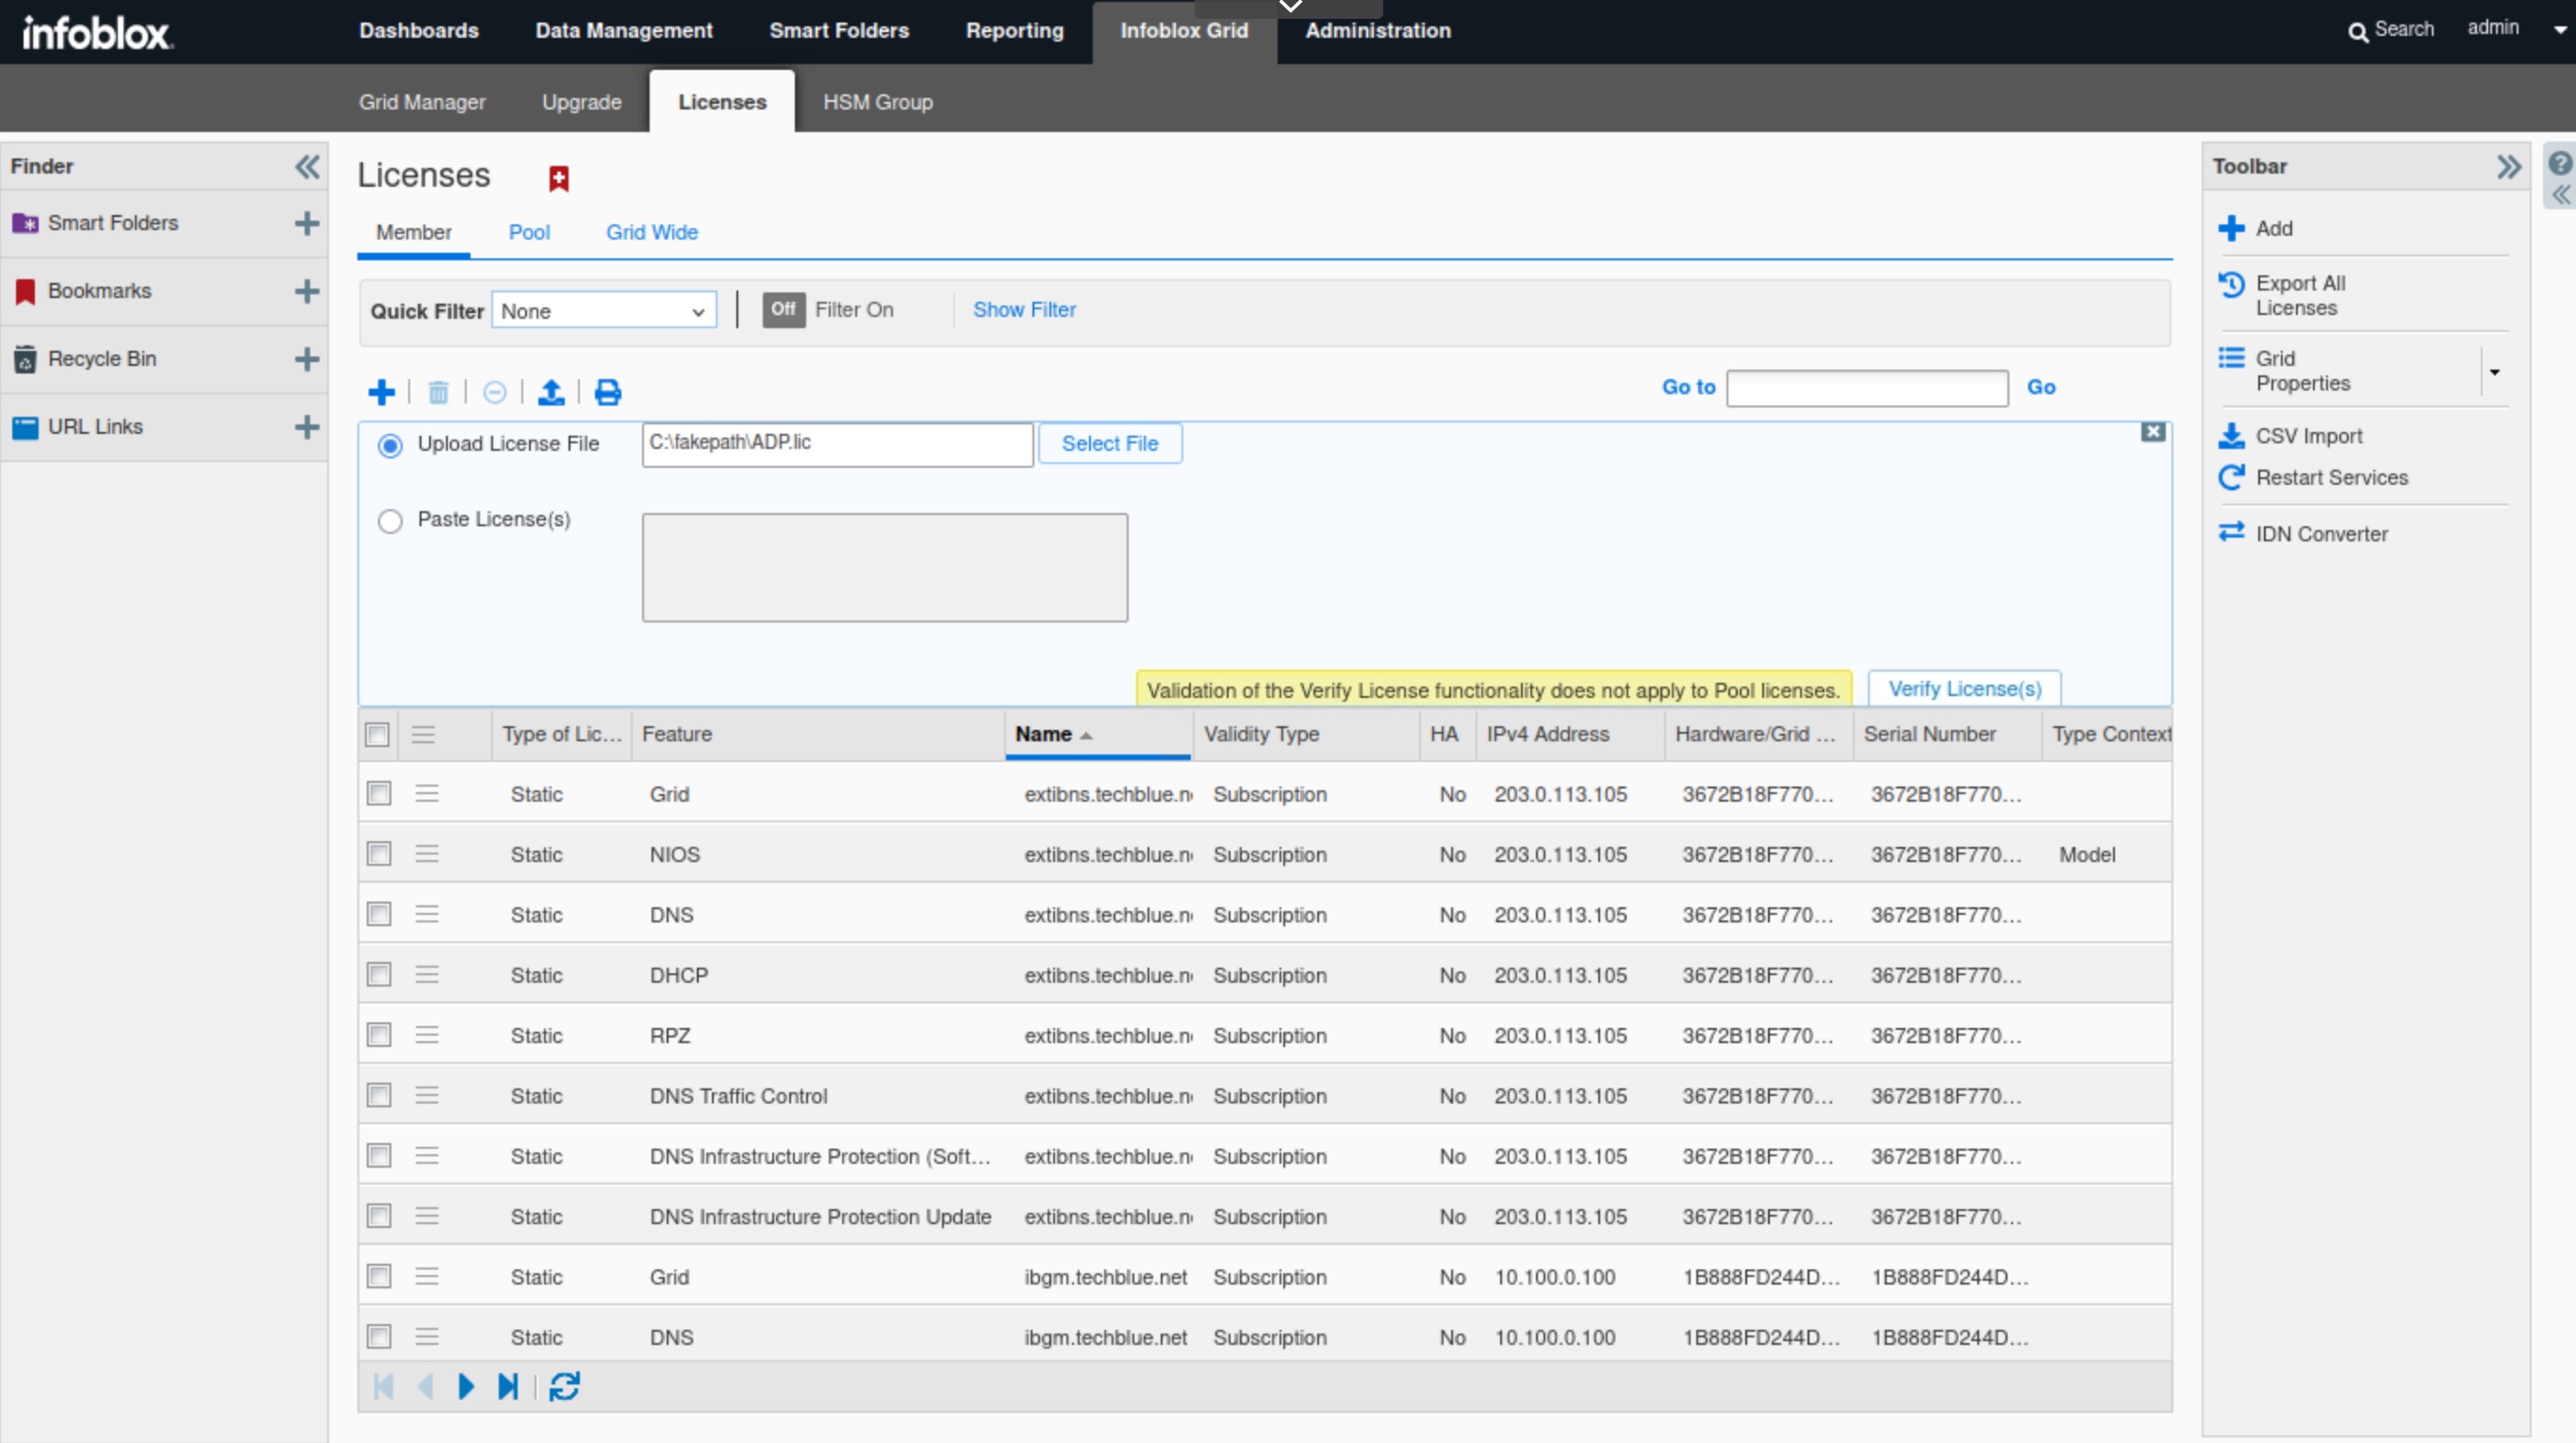
Click Select File to upload the license file.
-
Navigate to
Shared Drive/Licenses/9.0. -
Select the ADP.lic file and click Open.
-
Advanced DNS Protection (ADP) is an older name for the DNS Infrastructure Protection (DNS-IP) service; some system files still use the old name.
-
-
Click Verify License(s), then Save All Valid Licenses.
-
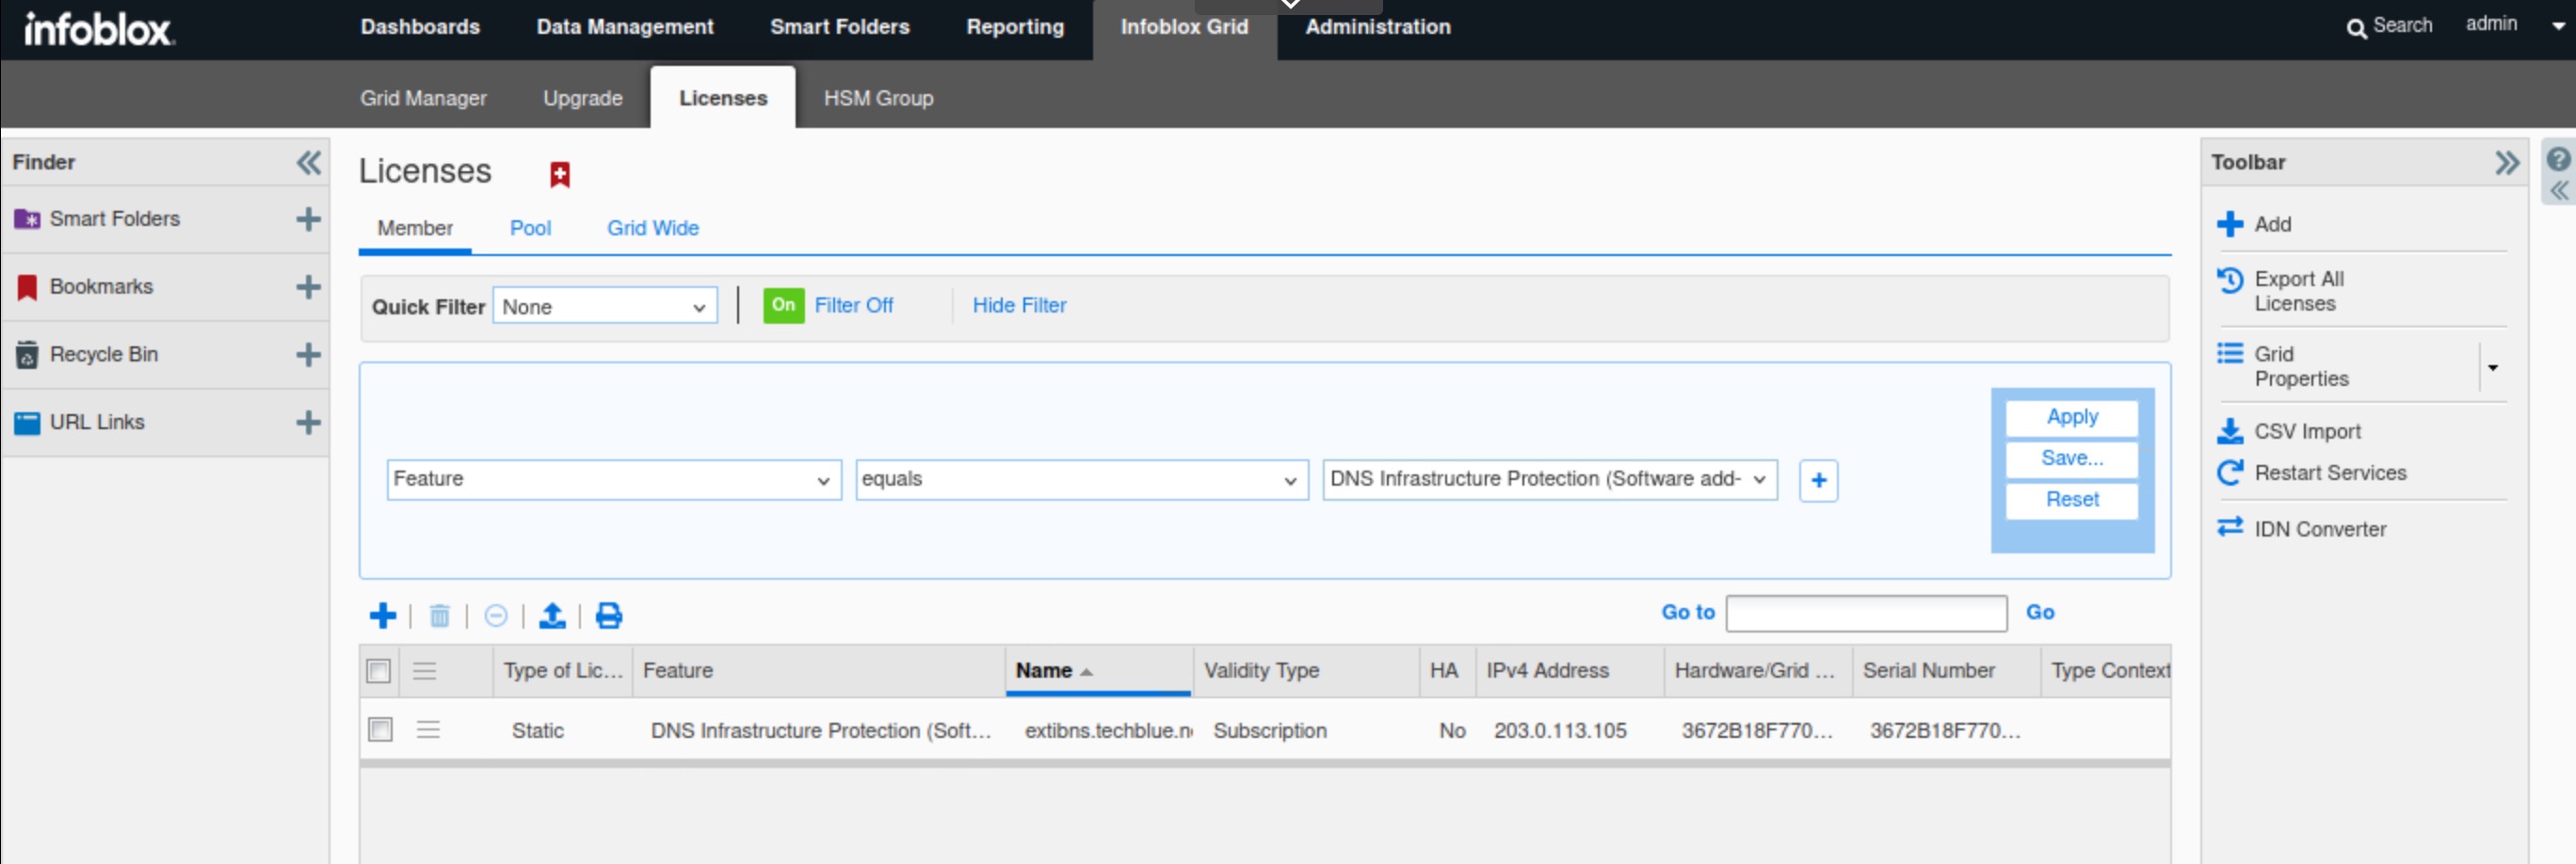
Click on the Show Filter link
-
Select Feature equals DNS Infrastructure Protection (software add-on), then click Apply.
-
Since DNS Infrastructure Protection in this lab runs on a virtual machine rather than a physical appliance, it is a software add-on rather than dedicated hardware.
-
-
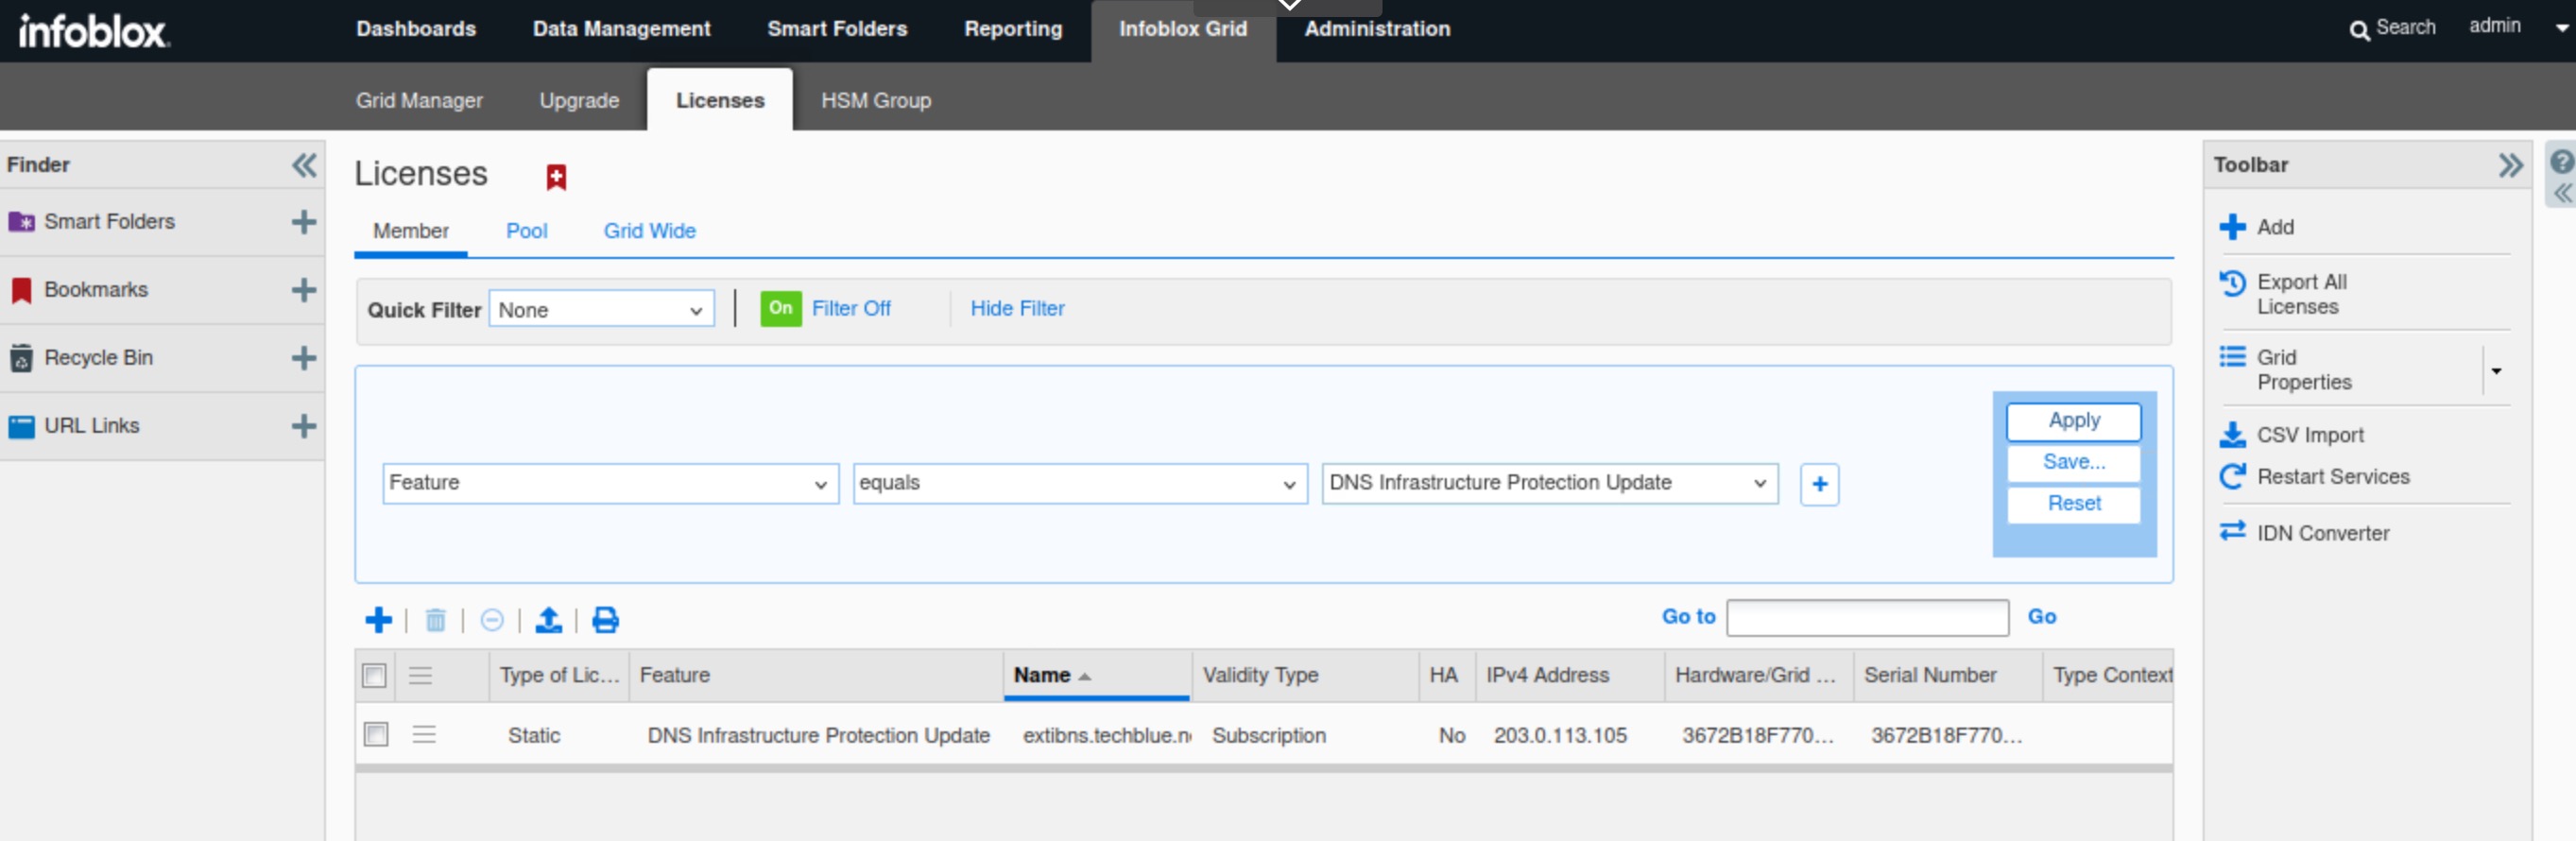
Select Feature equals DNS Infrastructure Protection update, then click Apply.
-
This license allows DNS Infrastructure Protection rulesets to be automatically updated when configured.
-
Task 2 Solution: Upload Initial Ruleset
In this task, we will start by manually uploading an older ruleset. This is done to demonstrate how it can be done and to allow for the automatic download of the latest ruleset in a later task.
For the DNS Infrastructure Protection service to start, at least one ruleset must be active. We can either manually download the latest ruleset from the Infoblox support portal or set the Grid to automatically download it and wait for it to finish downloading before we can start the service.
-
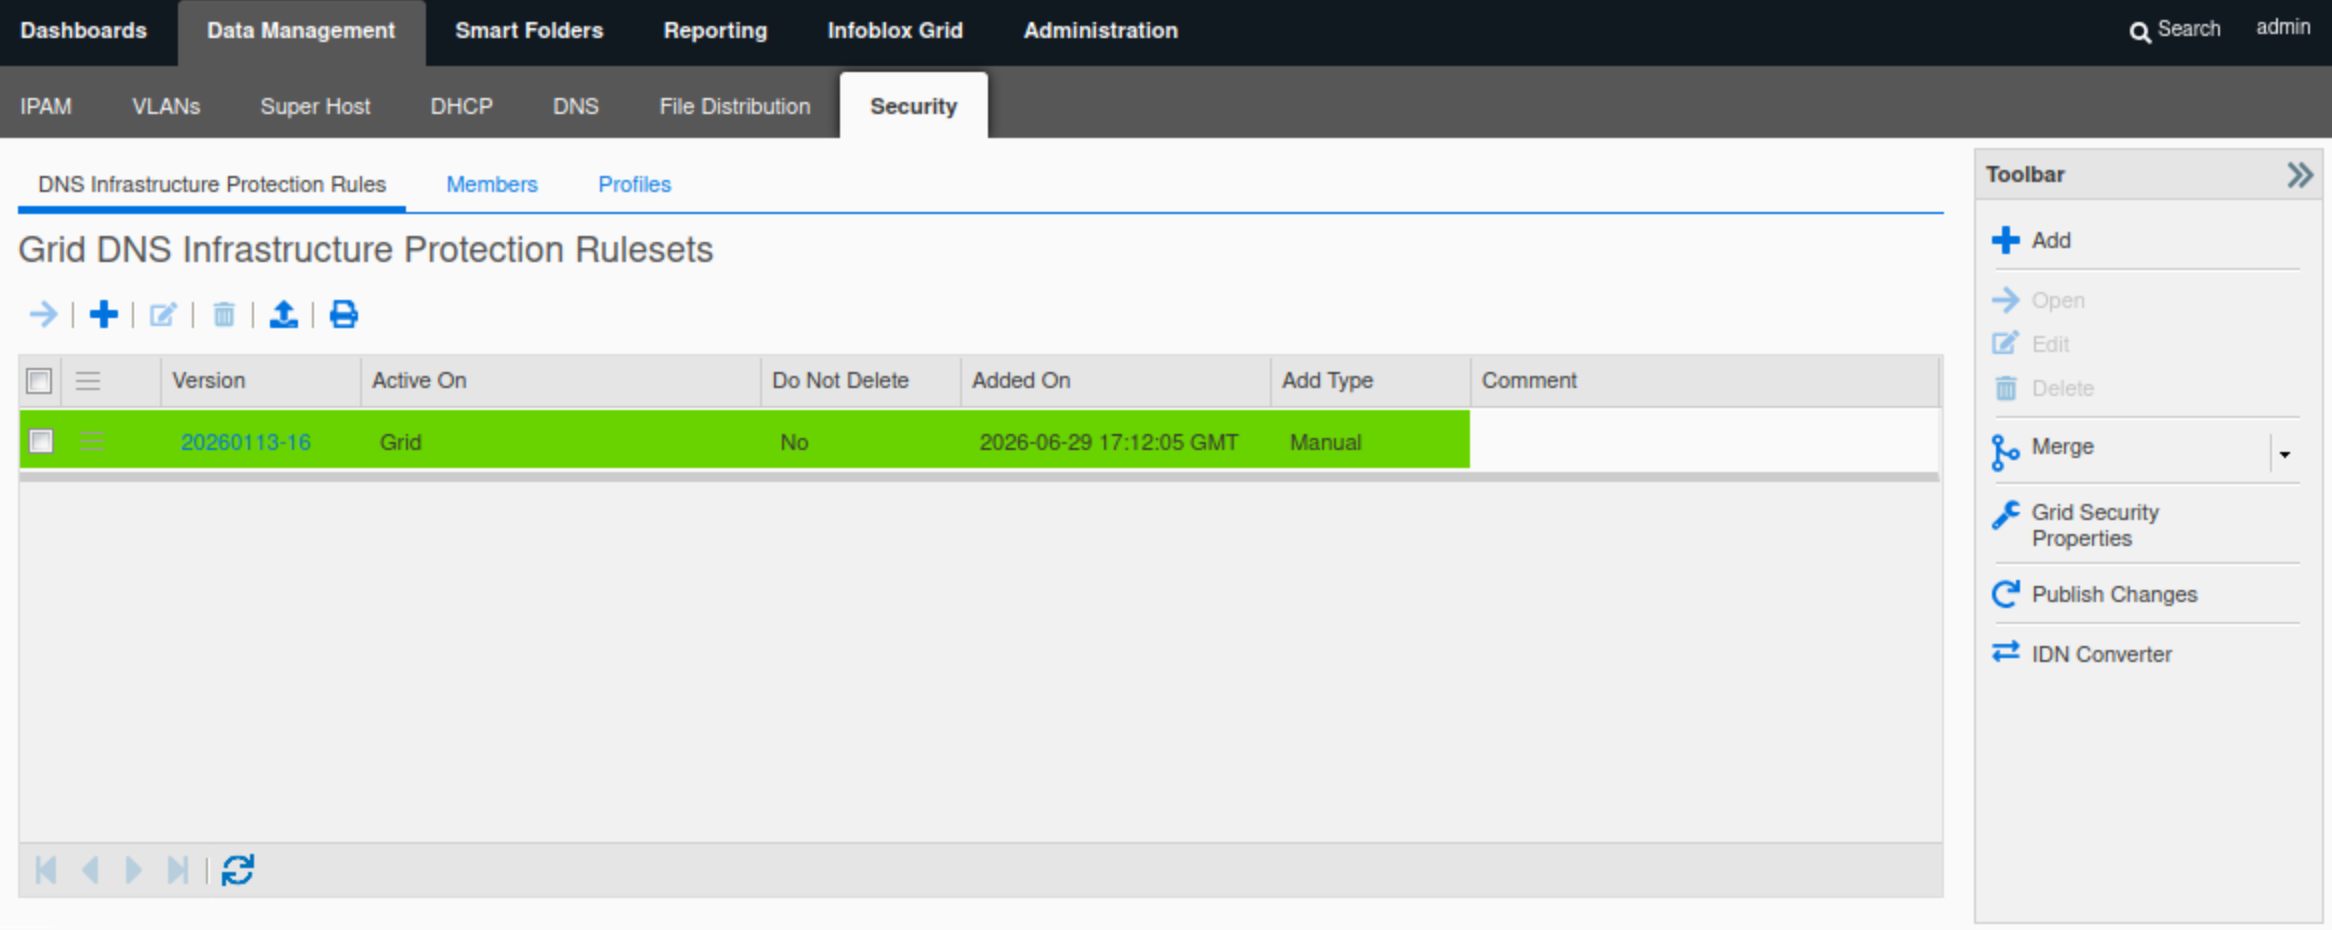
Navigate to Data Management → Security → DNS Infrastructure Protection Rules.
-
Click the plus (+) symbol to add a ruleset.
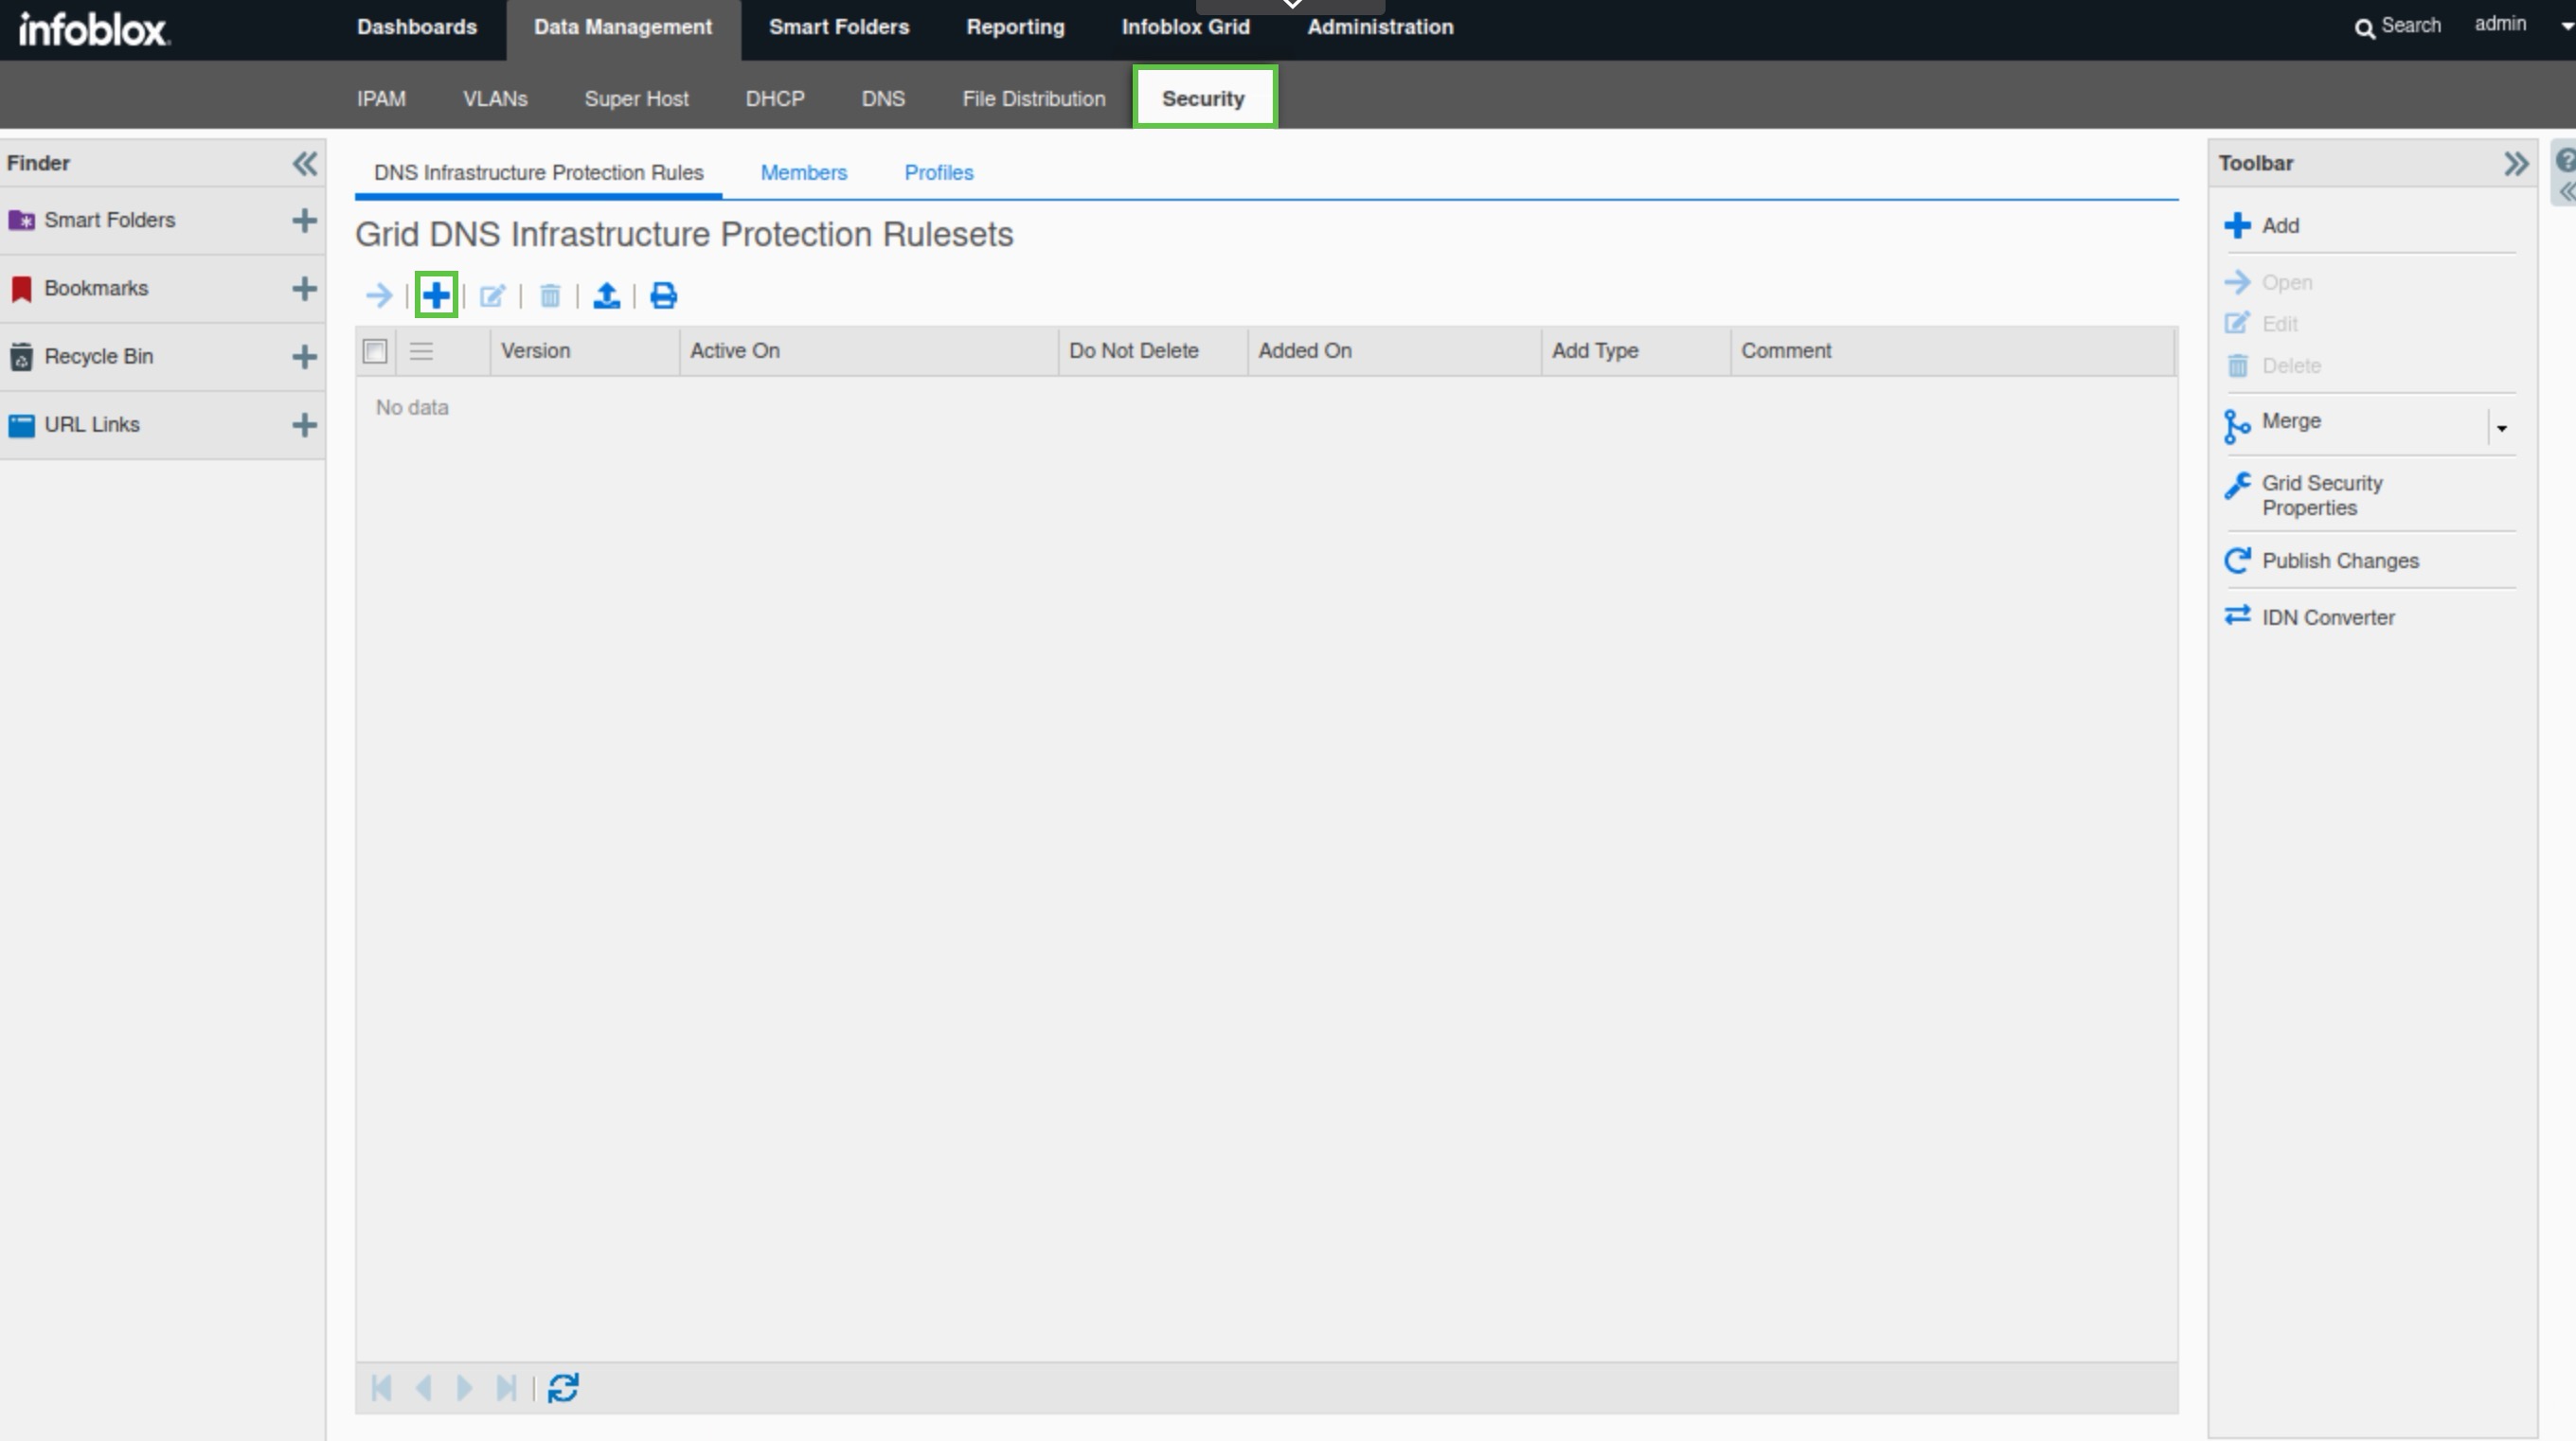
-
Click Select to upload a file.
-
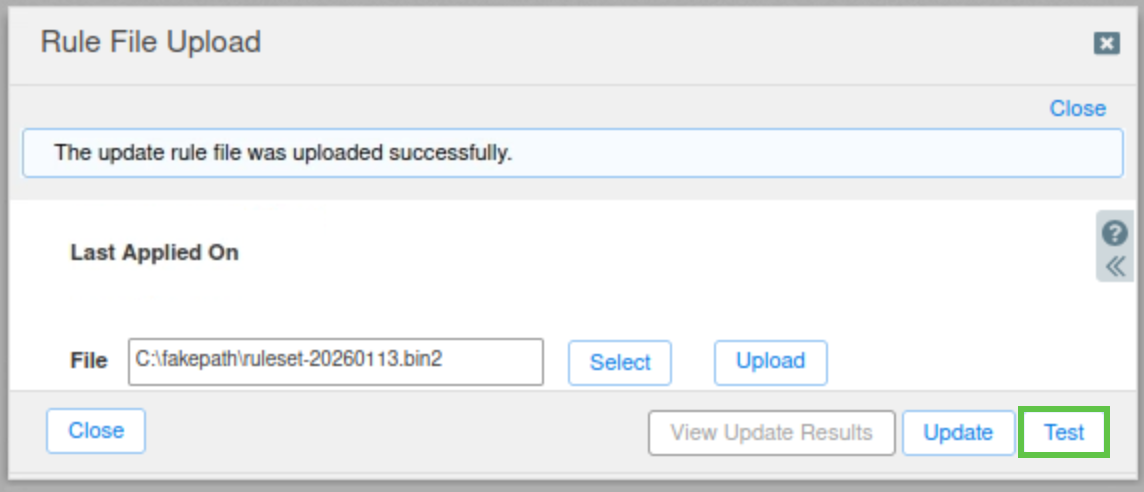
Select the ruleset-20260113.bin2 file from the
Shared Drive/NIOS-Importsfolder. -
Click Upload.
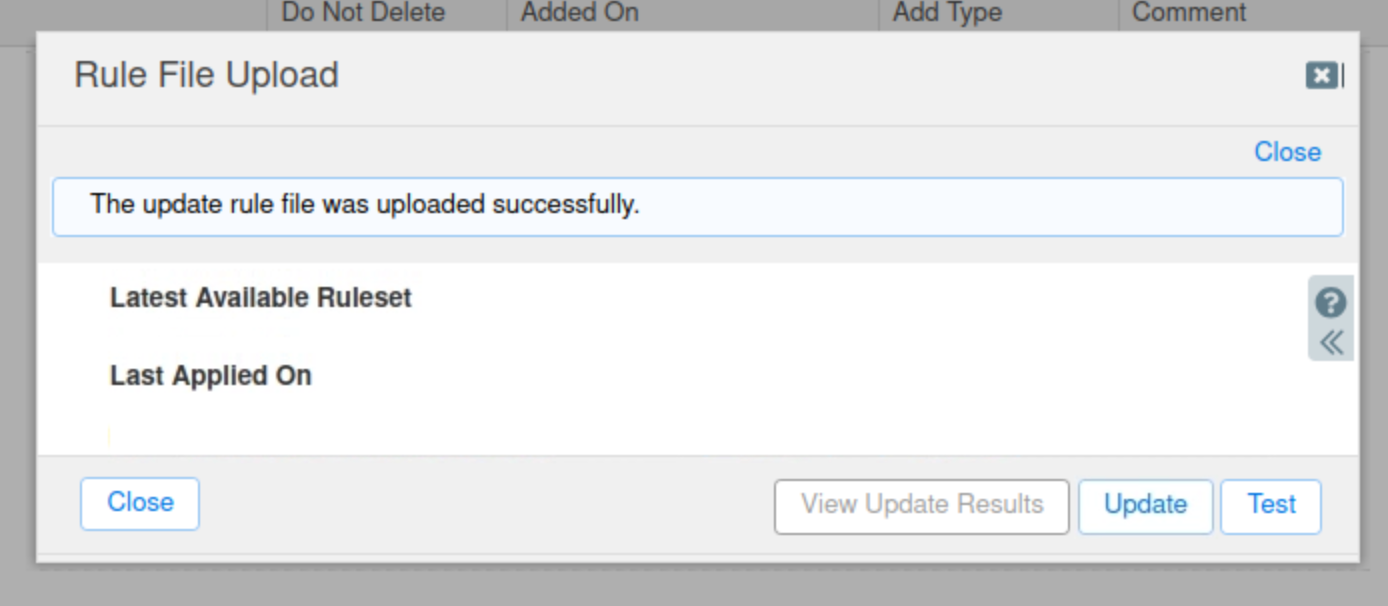
-
Click Test to verify that the ruleset file is not corrupted.
-
Click Update to update the rules.
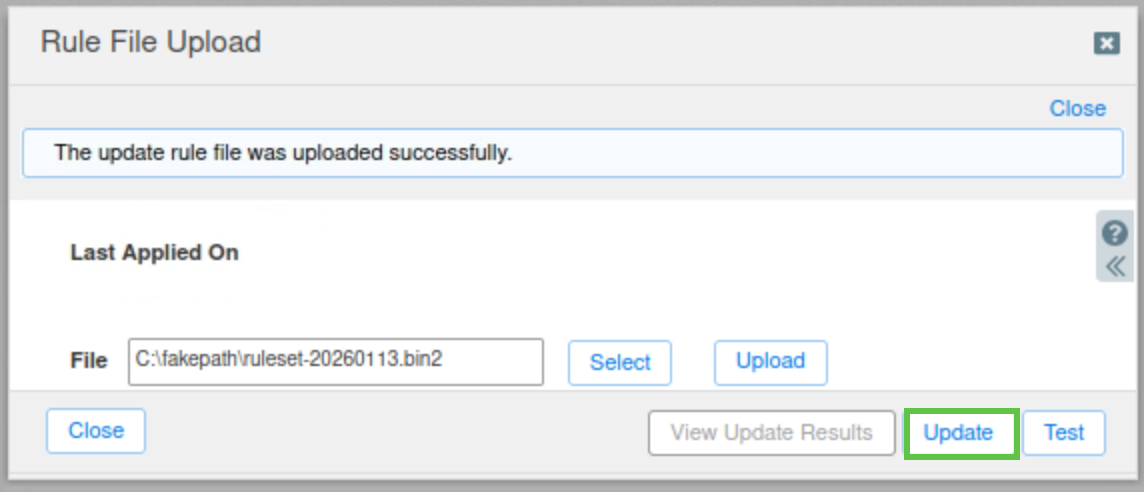
-
Close the Rule File Upload window.
-
The uploaded ruleset has become the active ruleset.
-
Task 3 Solution: Configure Rule Update and Ruleset Download Policies
In this task, we will test our Grid’s connection to the DNS Infrastructure Protection ruleset update servers and download the latest available ruleset for our use. We won't be activating it yet.
-
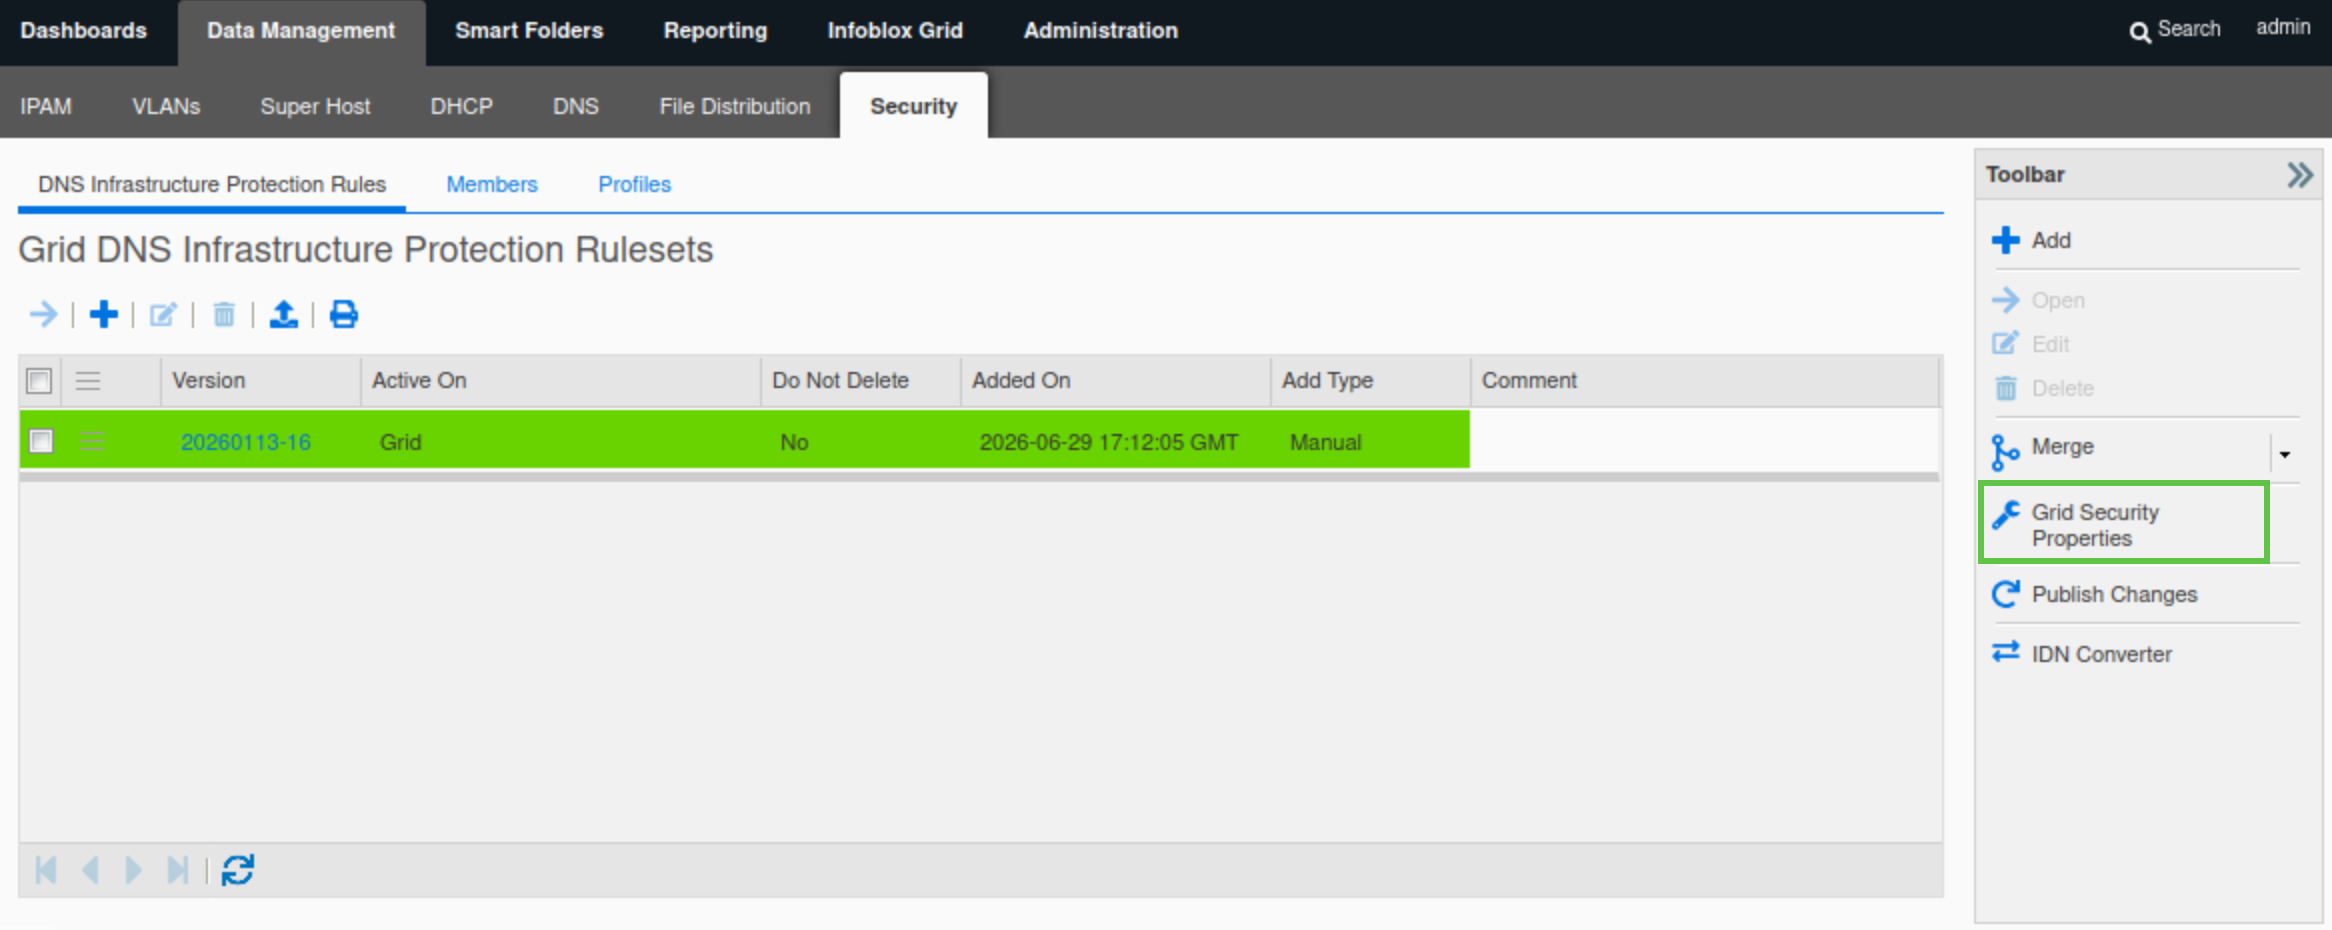
Navigate to Data Management → Security → DNS Infrastructure Protection Rules.
-
Select Grid Security Properties from the Toolbar.
-
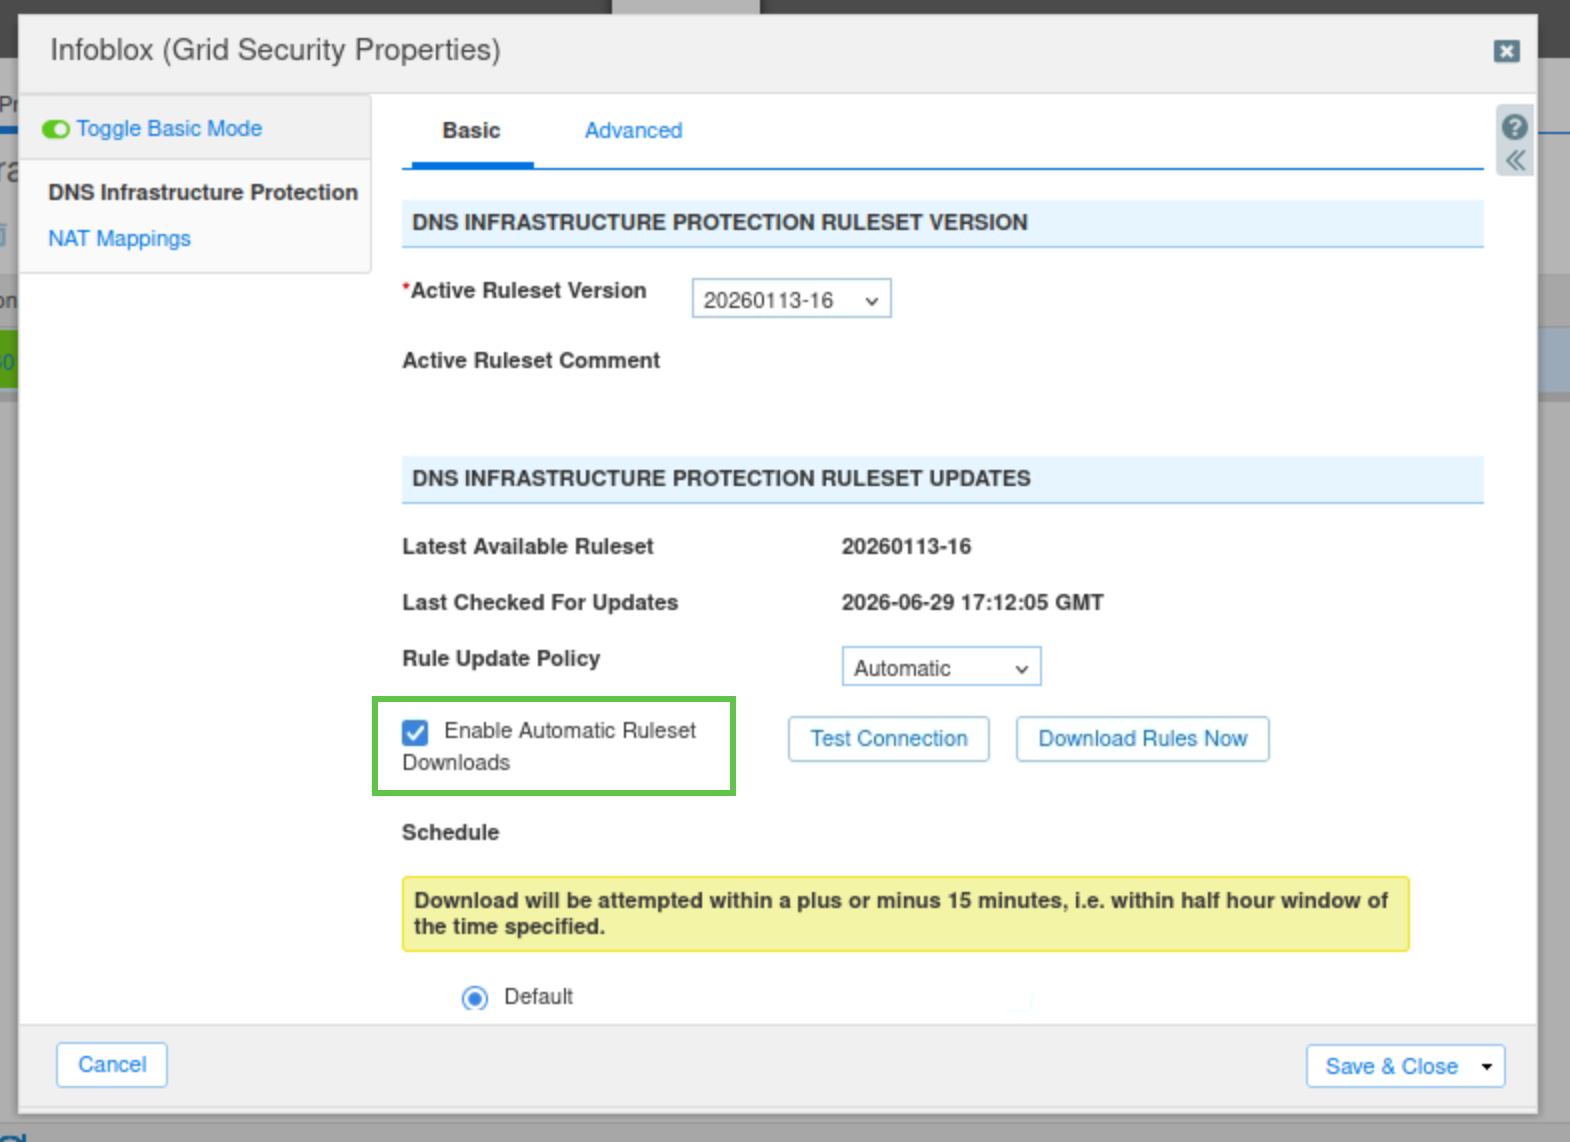
Under DNS Infrastructure Protection → Basic, Set the Rule Update Policy to Manual.
-
Select the checkbox labeled "Enable Automatic Ruleset Downloads”.
-
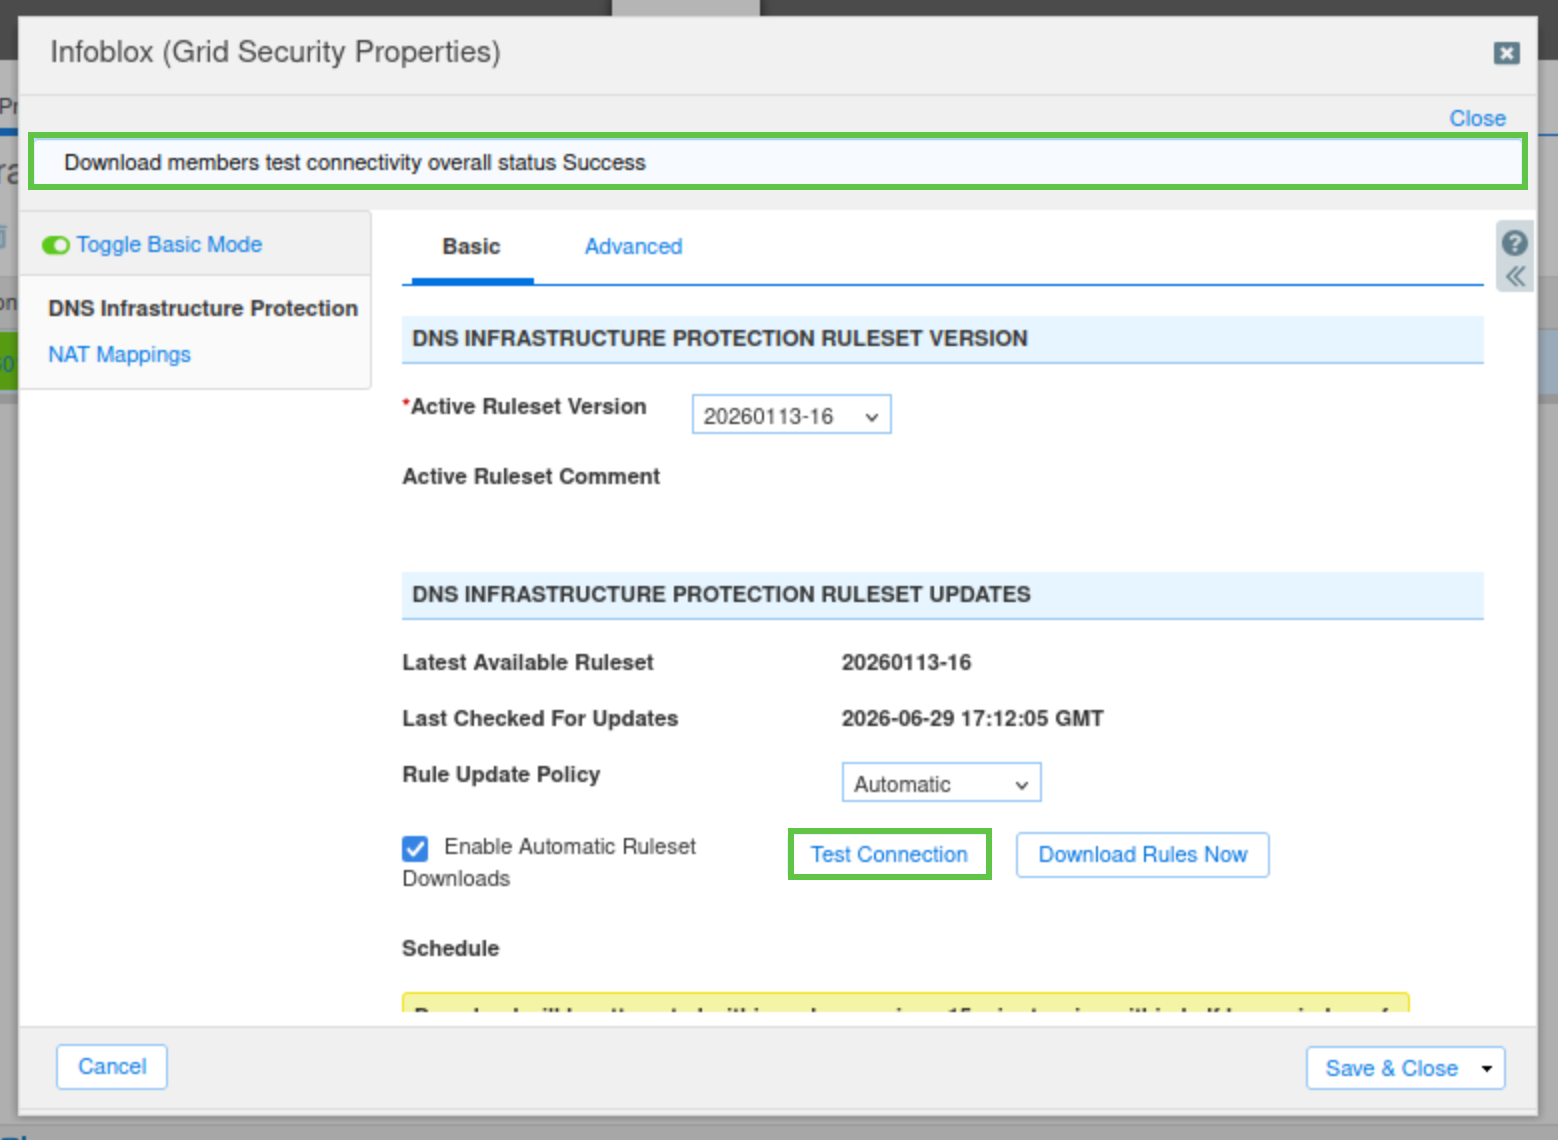
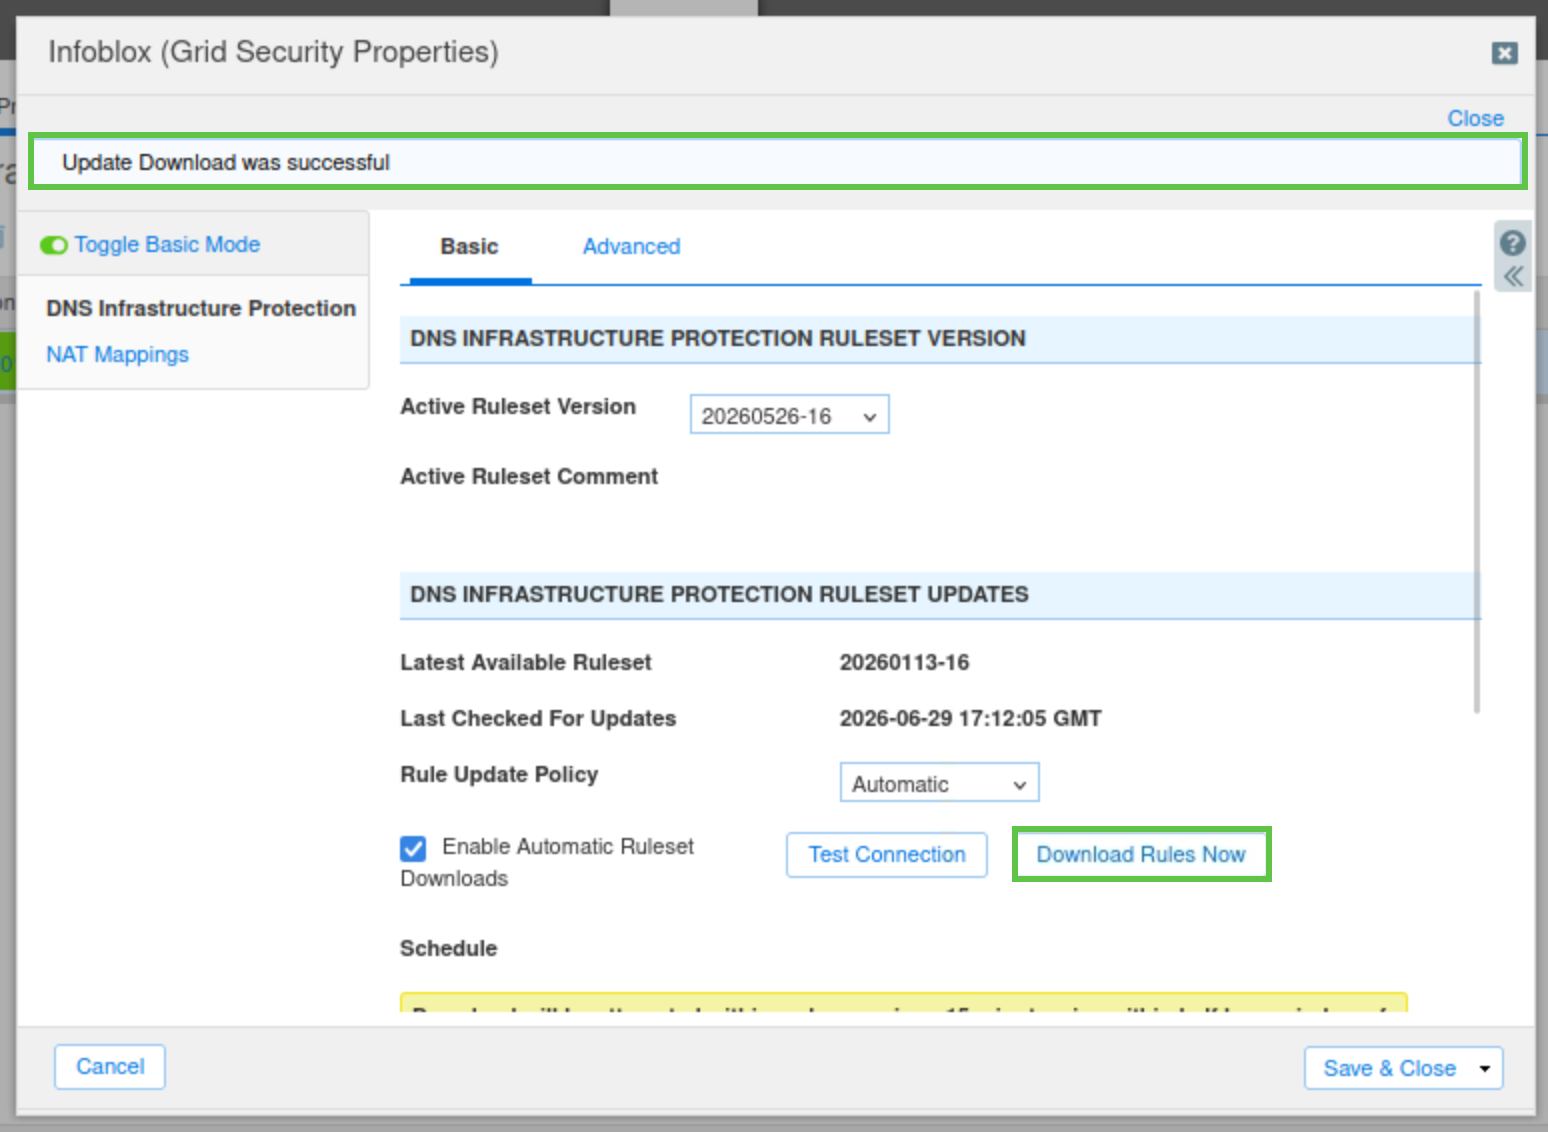
Click Test Connection. When the test is successful, a blue banner displays at the top of the current window. Ensure the connection works.
-
Click Download Rules Now.
-
Click Save & Close.
-
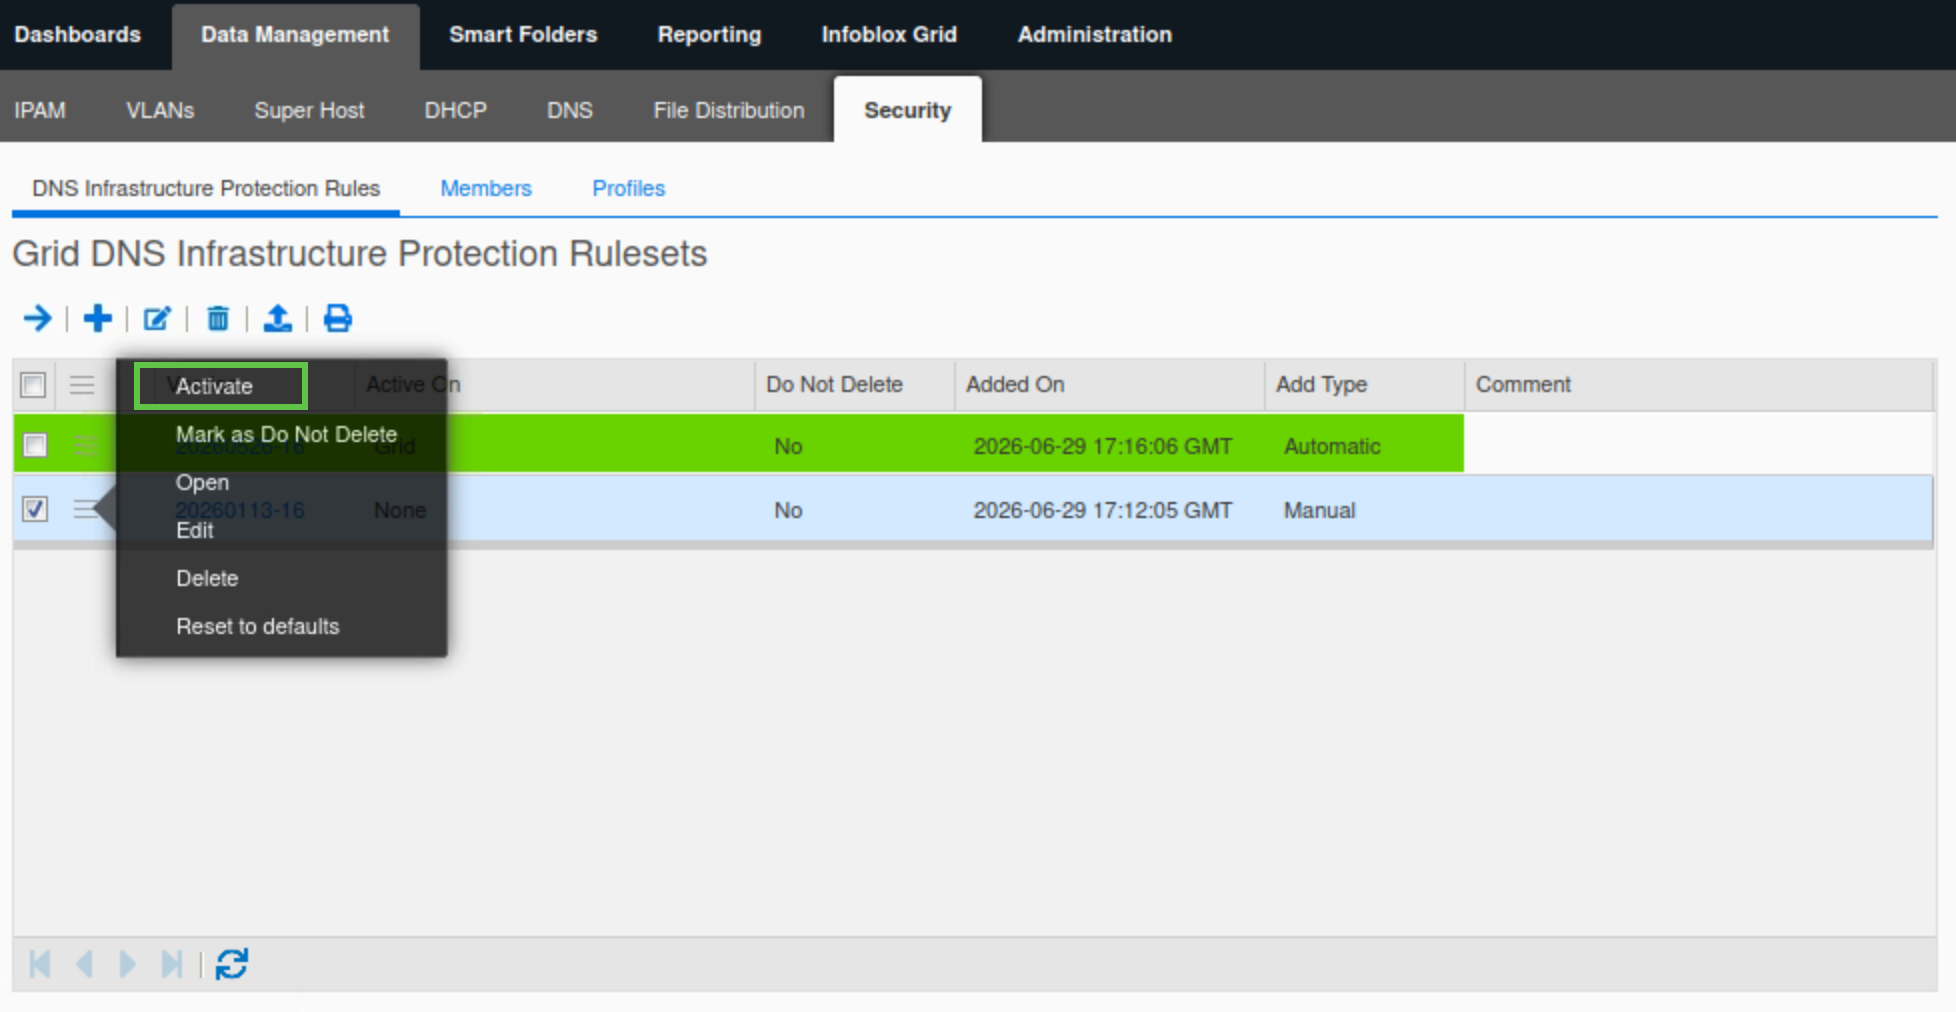
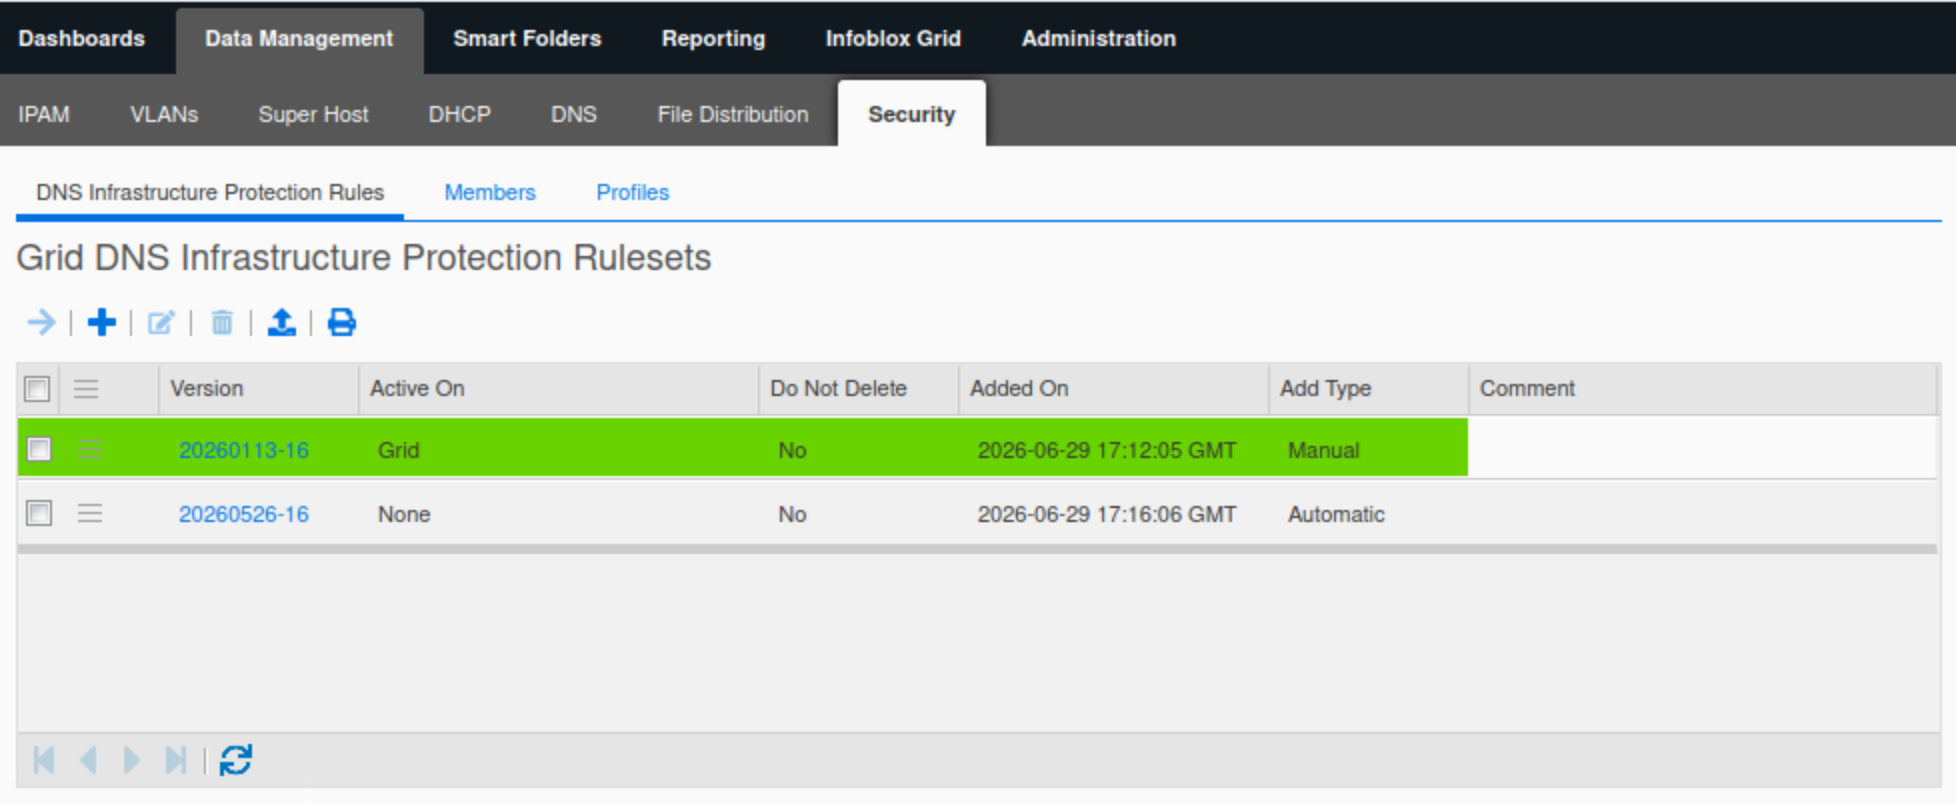
There should be two rulesets.
-
Click the hamburger icon next to the old ruleset 20260113-16 and choose Activate from the list.
-
The system will use the latest ruleset version by default. We will manually change the active ruleset in this lab because in a later lab, we will use other rulesets and profiles after customizing and tuning them.
-
Task 4 Solution: Set DNS Infrastructure Protection Service to monitor-mode
In this task, we configure the DNS Infrastructure Protection service to use monitor-mode. This enables us to establish a baseline for our environment and ensure that there are no unintended effects on network traffic.
The best practice is to always run DNS Infrastructure Protection in monitor mode for at least a week to establish traffic patterns.
-
Switch to nios-4 VM to access its console
-
Log in using the default username admin, default password infoblox
-
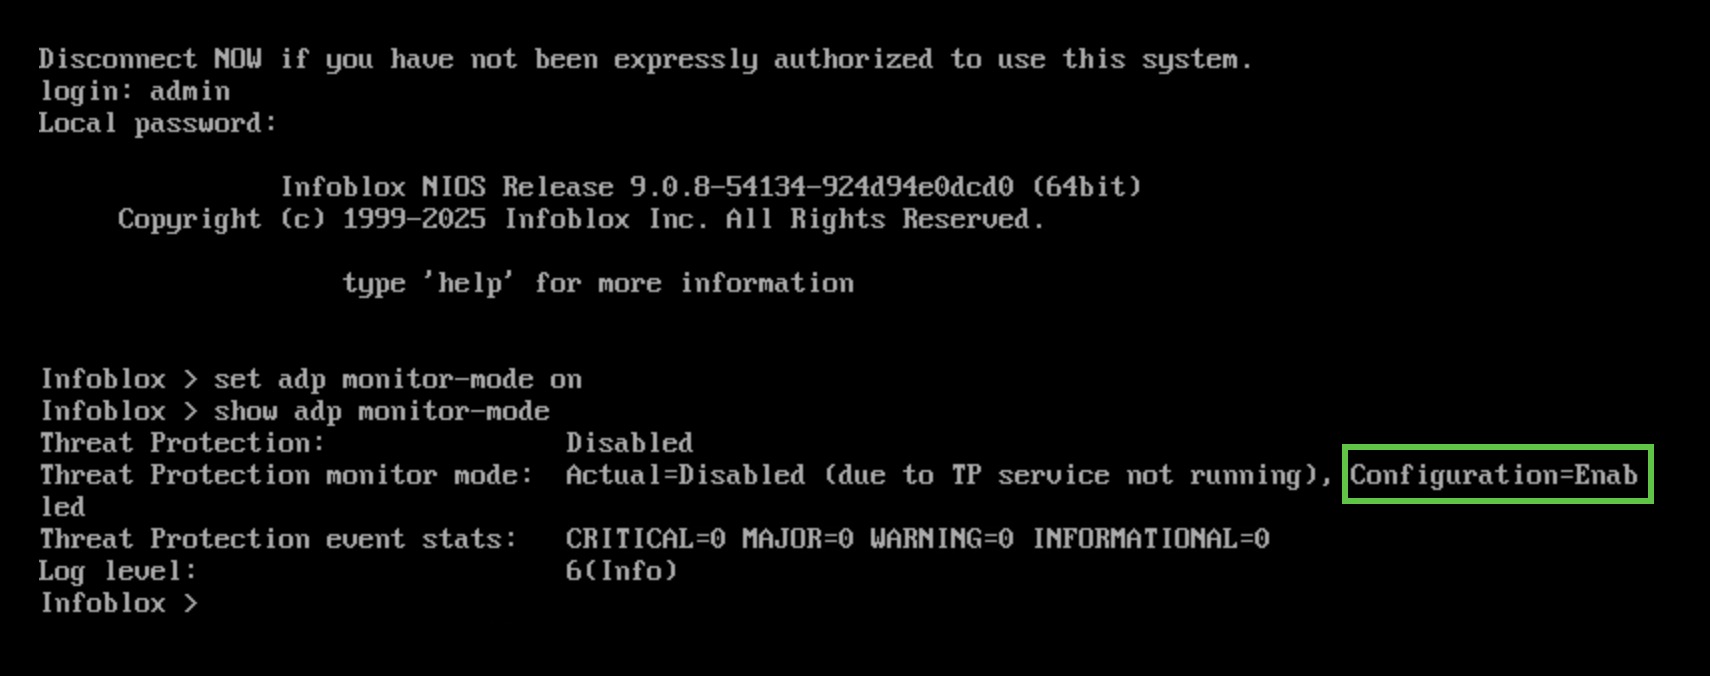
Issue the
setadpmonitor-mode oncommand.-
This command will switch the DNS Infrastructure Protection service mode on extibns.techbue.net to monitor mode.
-
Advanced DNS Protection (ADP) is an older name for the DNS Infrastructure Protection (DNS-IP) service; some CLI commands still use the old name.
-
-
Issue the
showadpmonitor-modecommand.-
You should see that monitor mode is enabled, but the DNS Infrastructure Protection service is disabled. This is because we have not yet started the service on extibns.techblue.net.
-
Task 5 Solution: Start the DNS Infrastructure Protection Service
In this task, we will start the DNS Infrastructure Protection service on extibns.techblue.net. This process will take several minutes.
-
Switch back to jump-desktop.
-
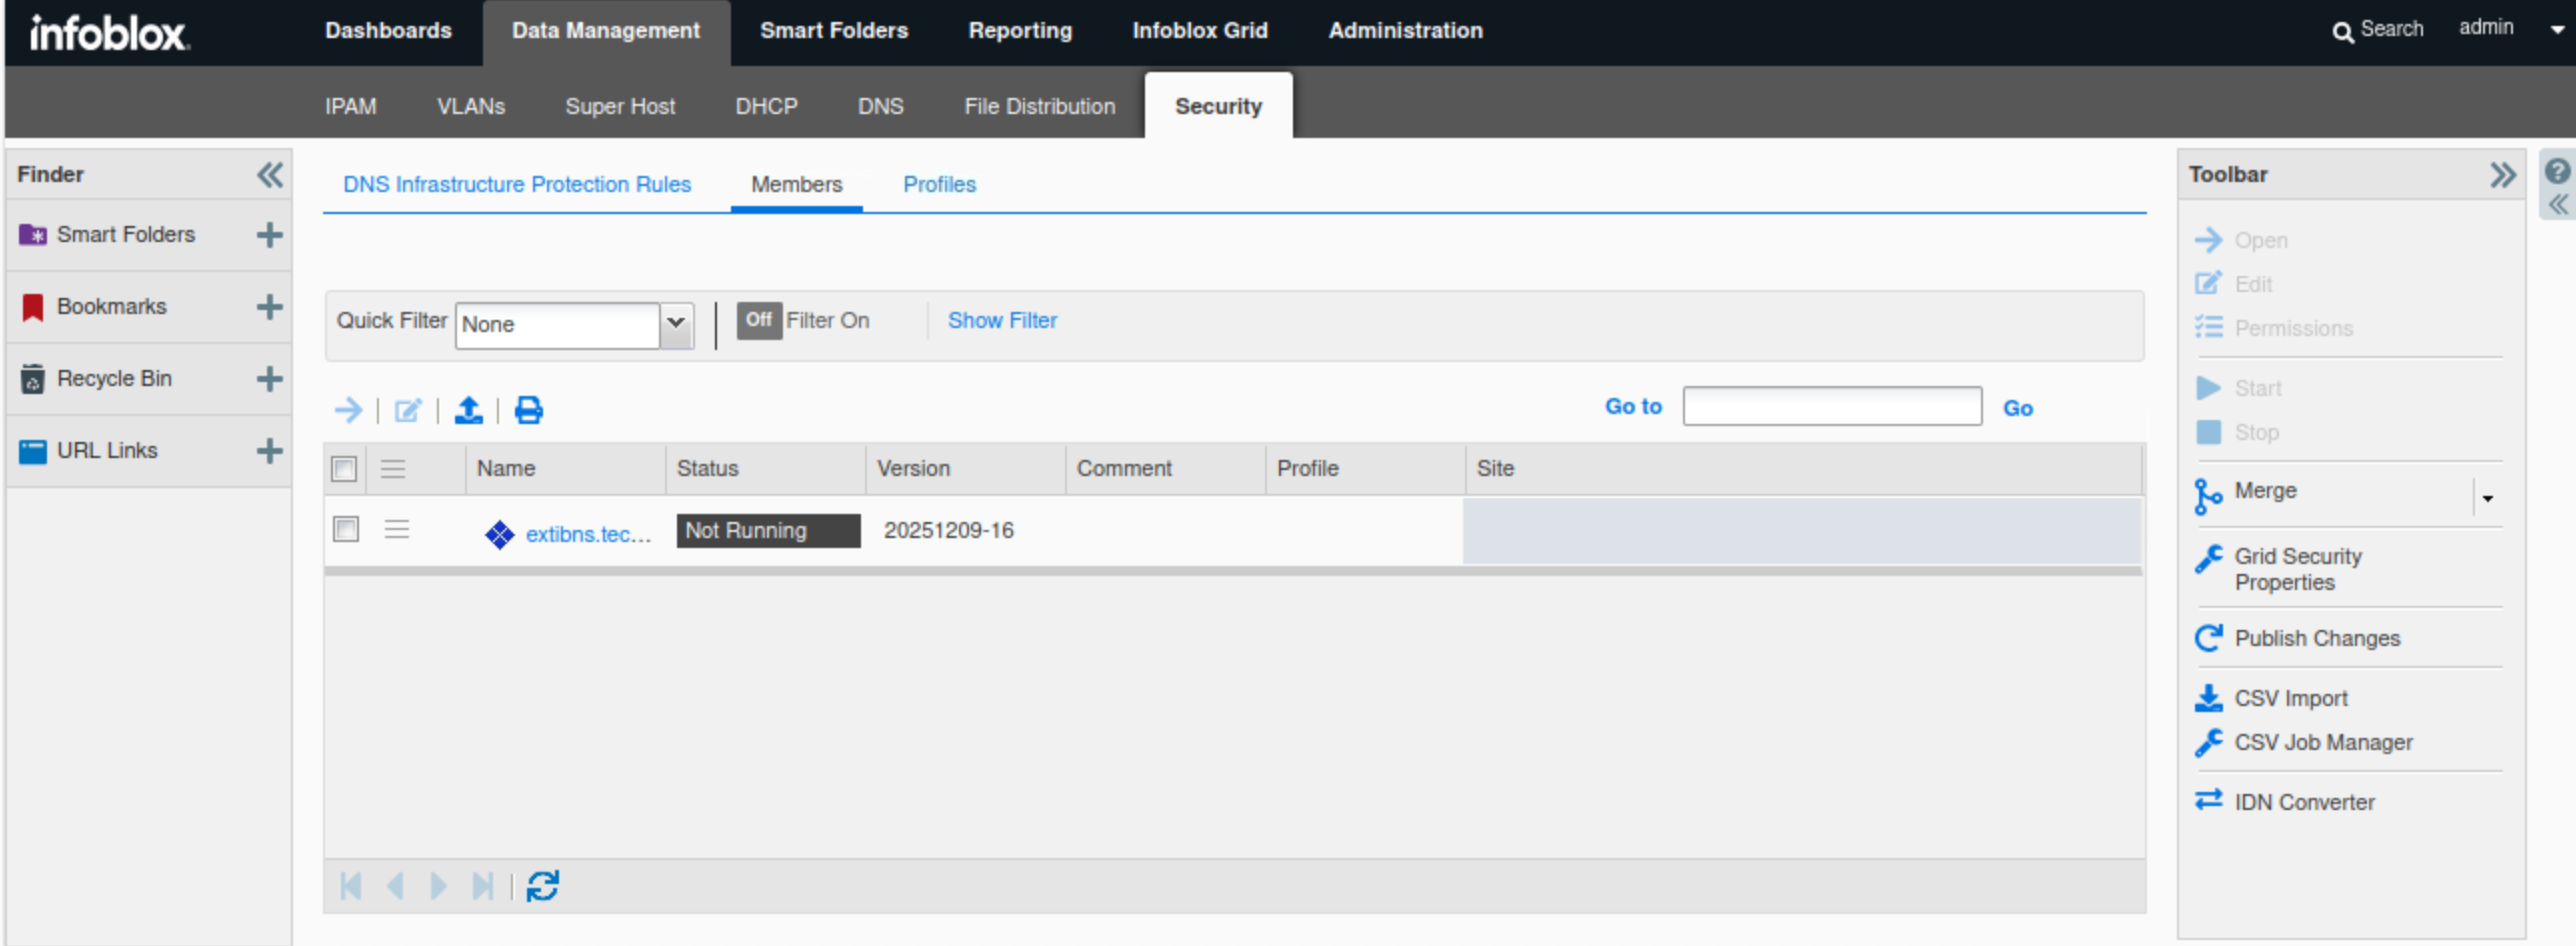
Navigate to Data Management → Security → Members.
-
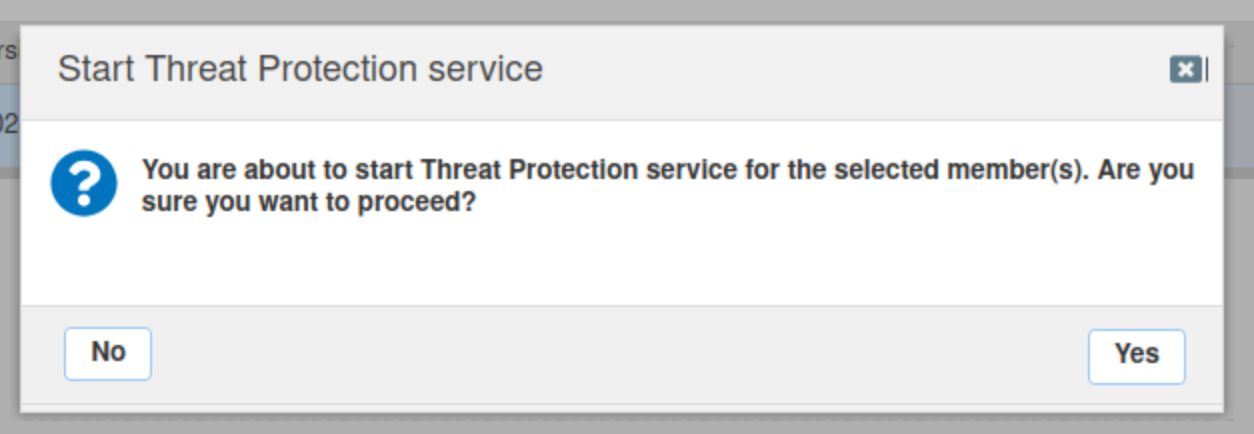
Select extibns.techblue.net and click Start in the Toolbar.
-
Click Yes to confirm starting the service.
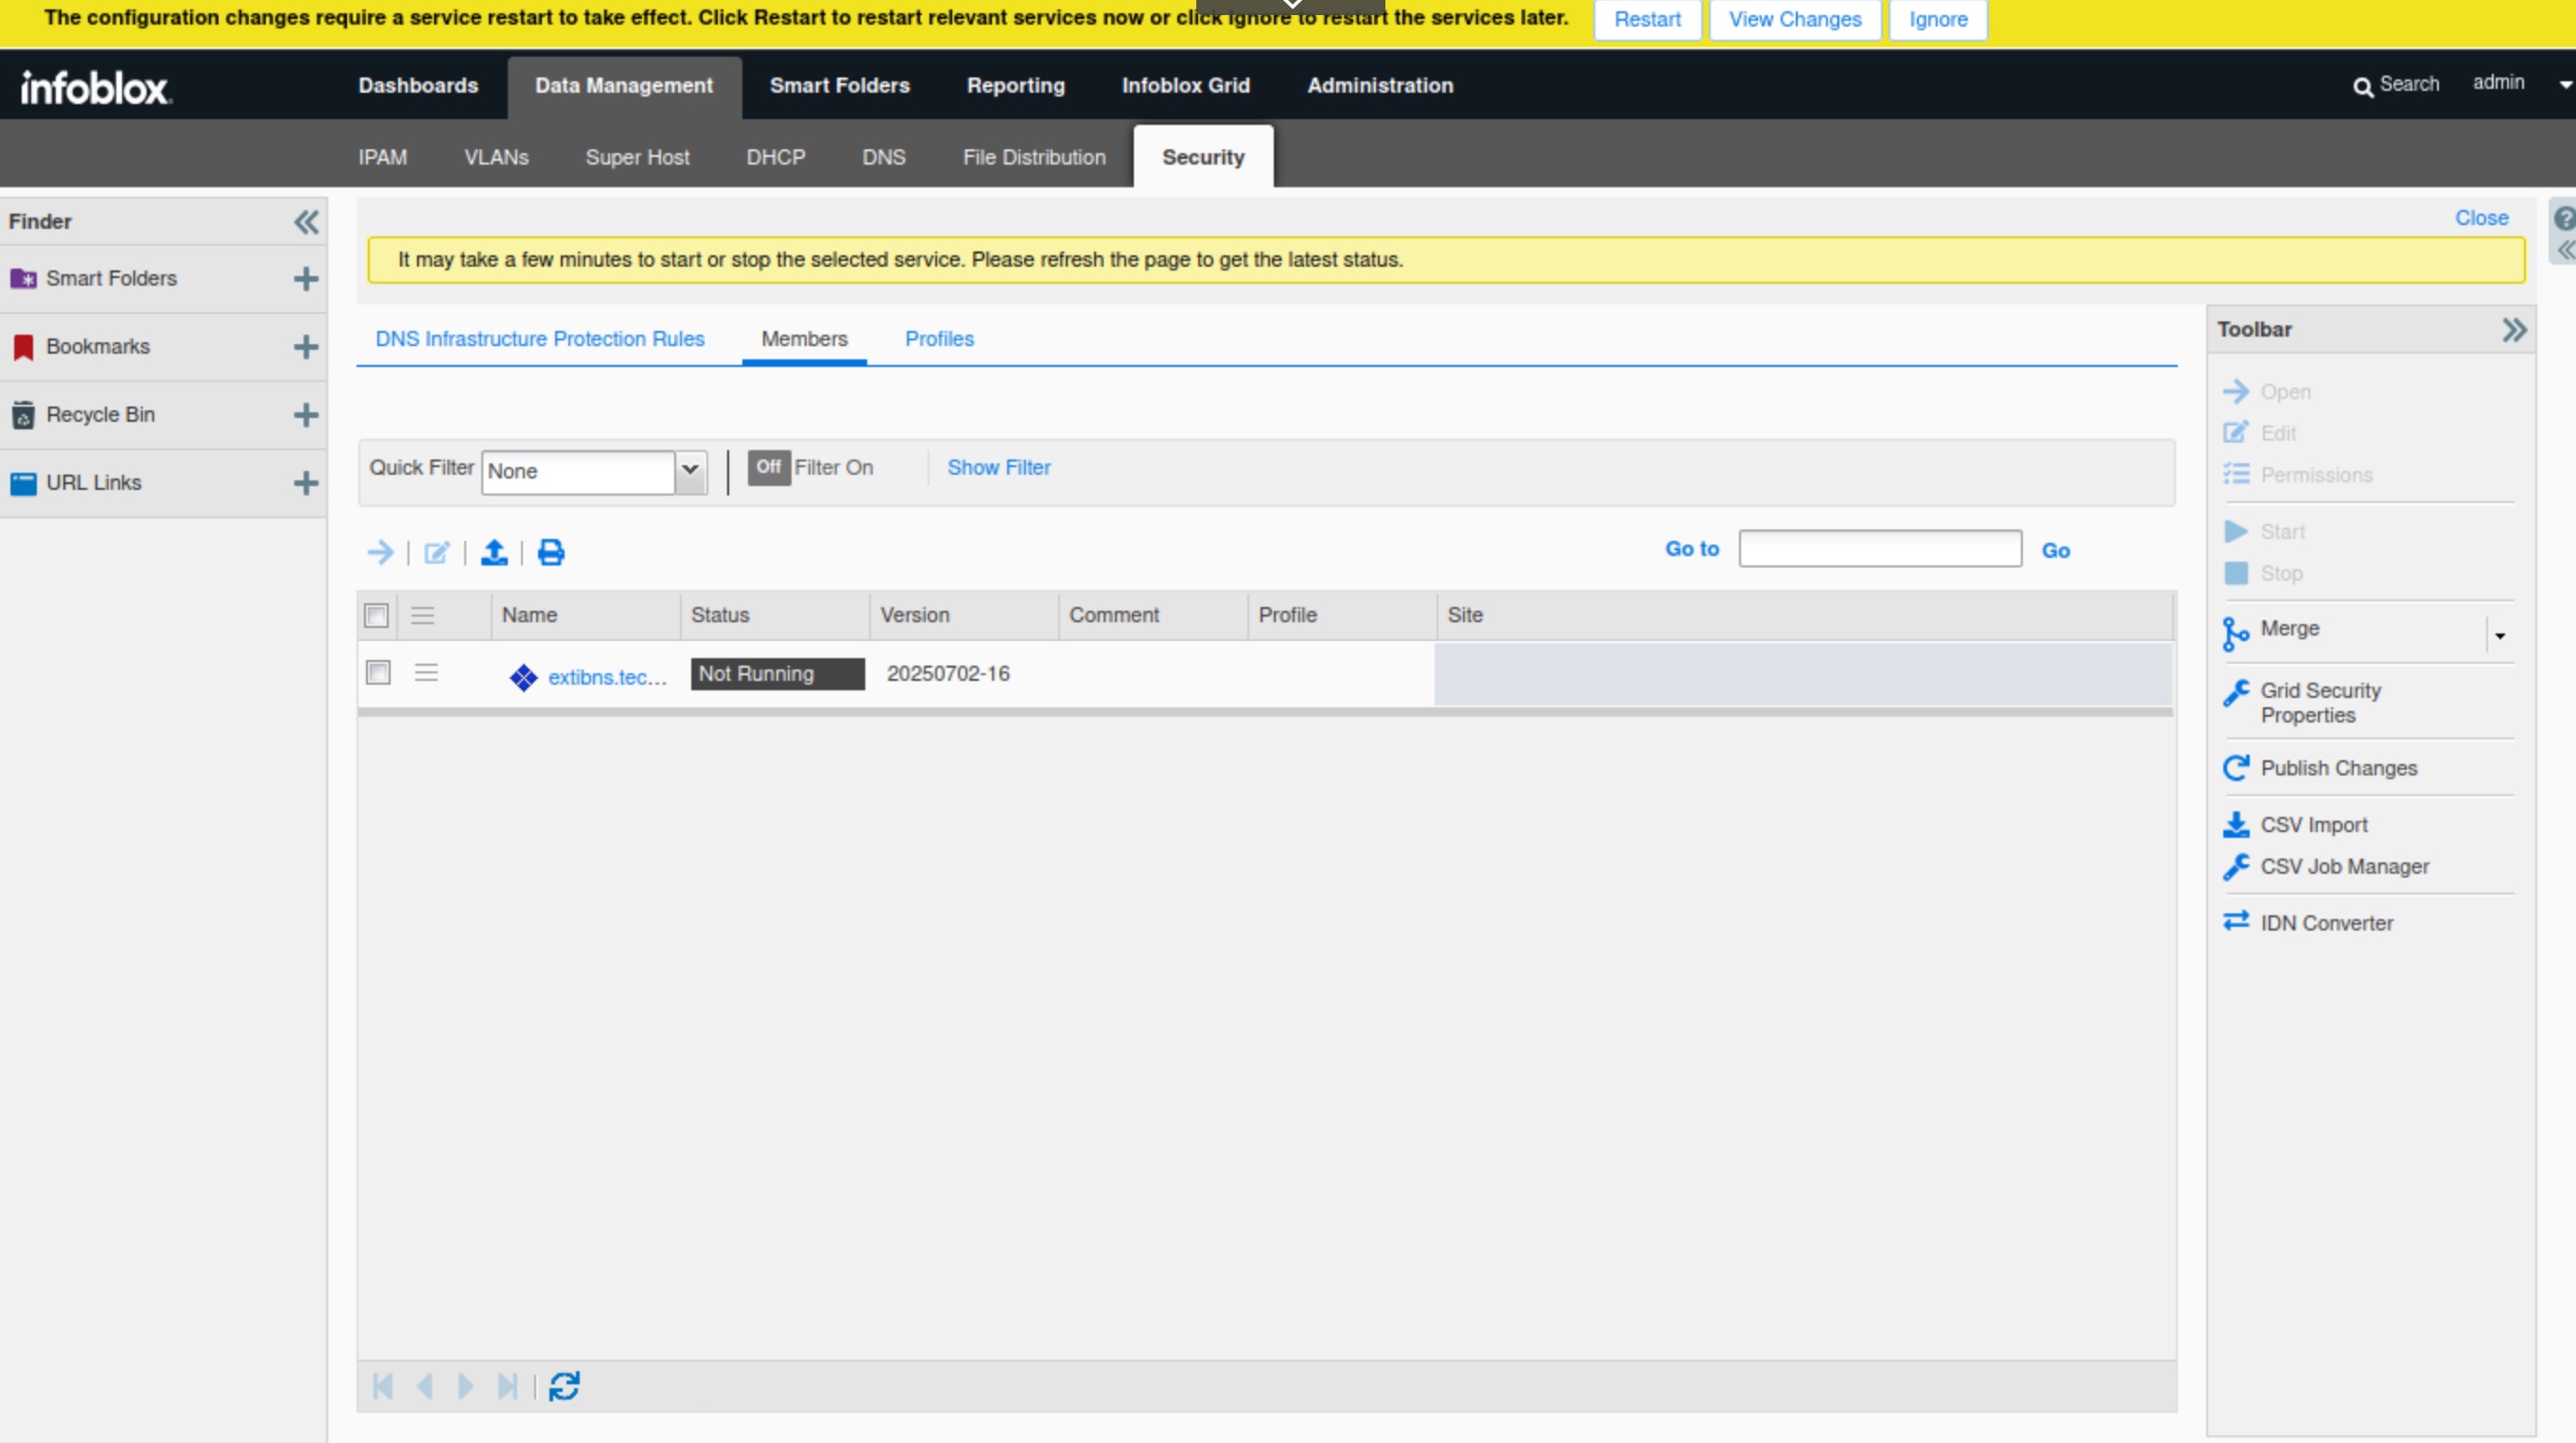
-
Restart services when prompted.
-
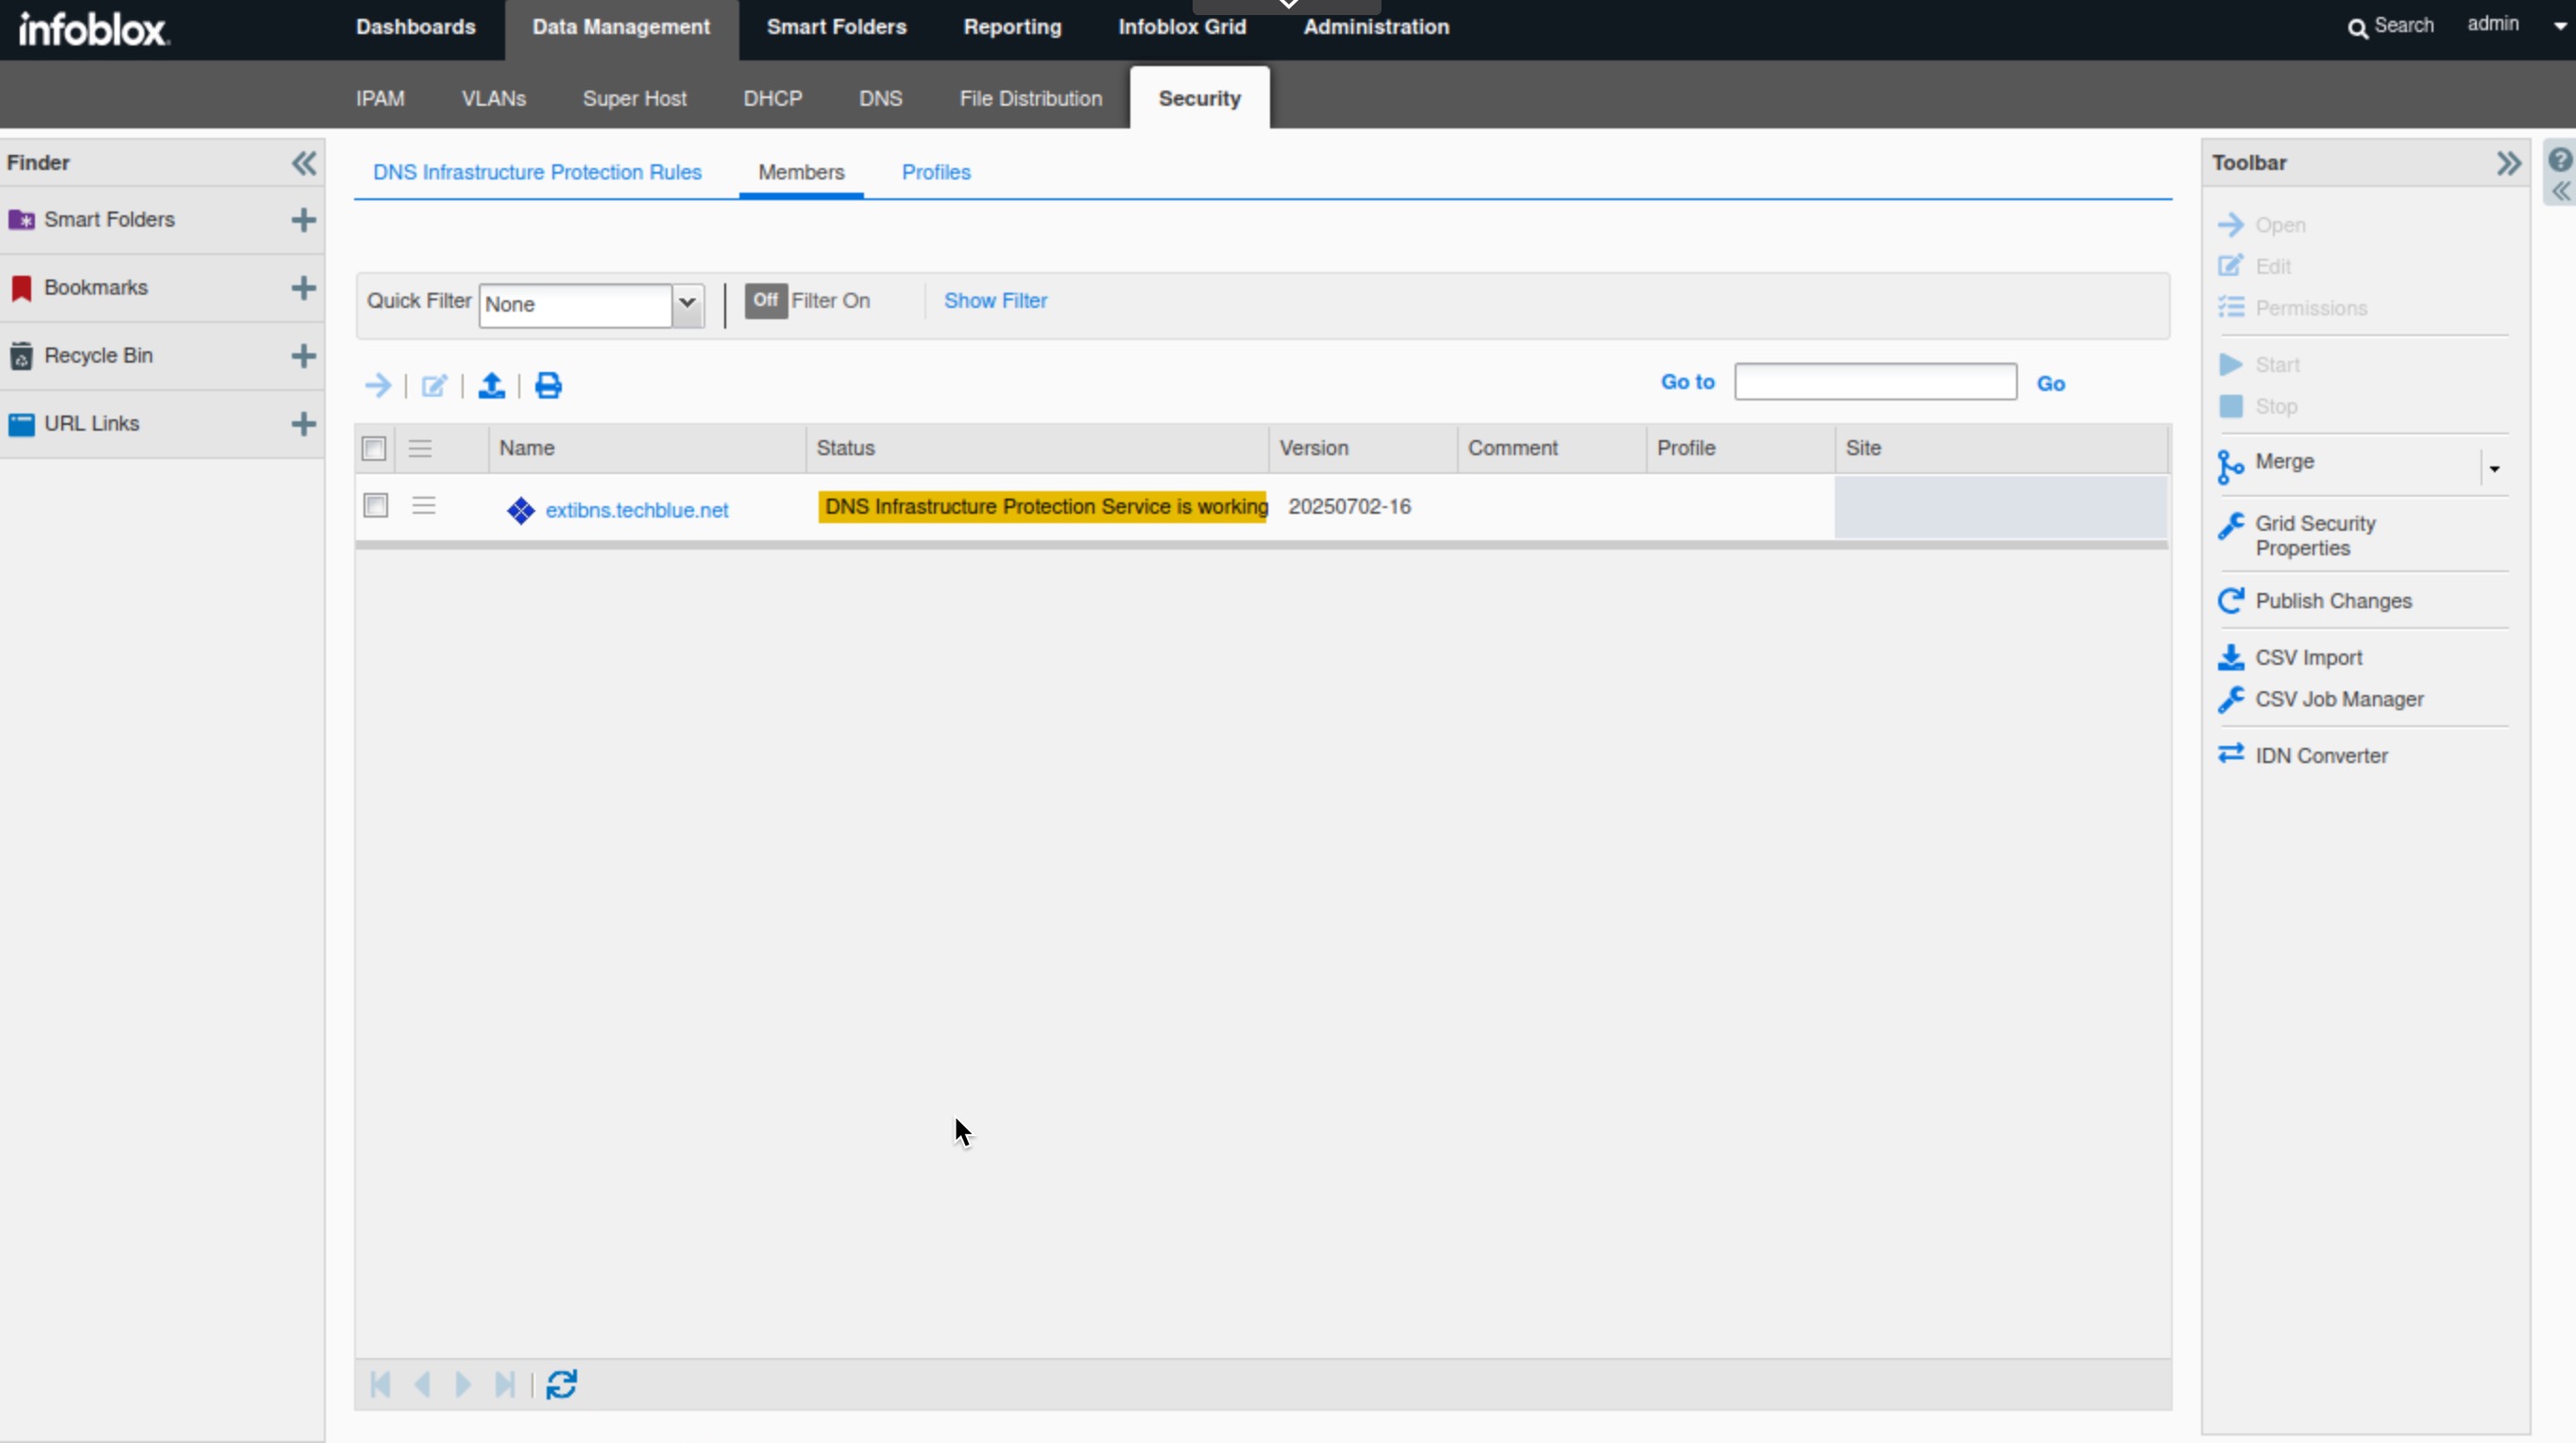
Refresh the page to view the latest status for extibns.techblue.net.
-
The status is in yellow, because extibns.techblue.net is in monitoring mode.
-
It takes several minutes for the DNS Infrastructure Protection service to start
-