Scenario
You are preparing DHCP service for a Techblue branch environment in Universal DDI. Before clients can use DHCP, you must enable DHCP service instances on two NIOS-X servers, define the branch-specific DHCP options the clients should receive, create a DHCP configuration profile for that branch, and apply that profile to the correct service instance. Your goal is to build the initial DHCP service configuration for the Techblue NYC Branch while leaving the second service instance unused for now.
Estimated Completion Time
-
25 to 35 minutes
Prerequisites
-
Administrative access to the Infoblox Portal
Learning Content
Tasks
-
Enabling DHCP service Instances.
-
Creating an Option Group.
-
Configuring the DHCP Config Profile.
-
Applying the DHCP Config Profile.
Task 1: Enabling DHCP service instances.
Create DHCP service instances for oph1.techblue.net and oph2.techblue.net. Name them Techblue DHCP Service 1 and Techblue DHCP Service 2 so the branch DHCP services are ready to receive configuration.
Task 2: Creating an Option Group.
Create an IPv4 Option Group named Techblue NYC Branch and populate it with the DHCP options required by the branch clients from the table below:
|
Type |
Space |
Name (code) |
Value(s) |
|---|---|---|---|
|
Option |
DHCPv4 |
domain-name-servers (6) |
10.100.0.110,10.200.0.110 |
|
Option |
DHCPv4 |
domain-name (15) |
techblue.net |
|
Option |
DHCPv4 |
ntp-servers (42) |
10.100.0.10 |
|
Option |
DHCPv4 |
routers (3) |
172.31.101.1 |
Task 3: Configuring the DHCP Config Profile.
Create a DHCP Config Profile named Techblue NYC Branch with a short lease time of 4 minutes, support for unknown clients, and use the DHCP Option group that was created in Task 2.
Task 4: Applying the DHCP Config Profile.
Apply the Techblue NYC Branch DHCP Config Profile to Techblue DHCP Service 1 only. Do not assign it to Techblue DHCP Service 2 yet.
Solutions
Task 1 Solution: Enabling DHCP service instances.
Before you can deliver DHCP configuration to clients, you must first enable DHCP service instances on the two NIOS-X servers prepared for this lab.
Expect the service status to move from Stopped toward Online during startup. It may briefly show Error while the service initializes, and it can take 3 to 5 minutes before the service shows Online.
-
Log in to your lab’s jump-desktop.
-
Use the Education Infoblox Portal credentials to sign in to the Infoblox Portal.
-
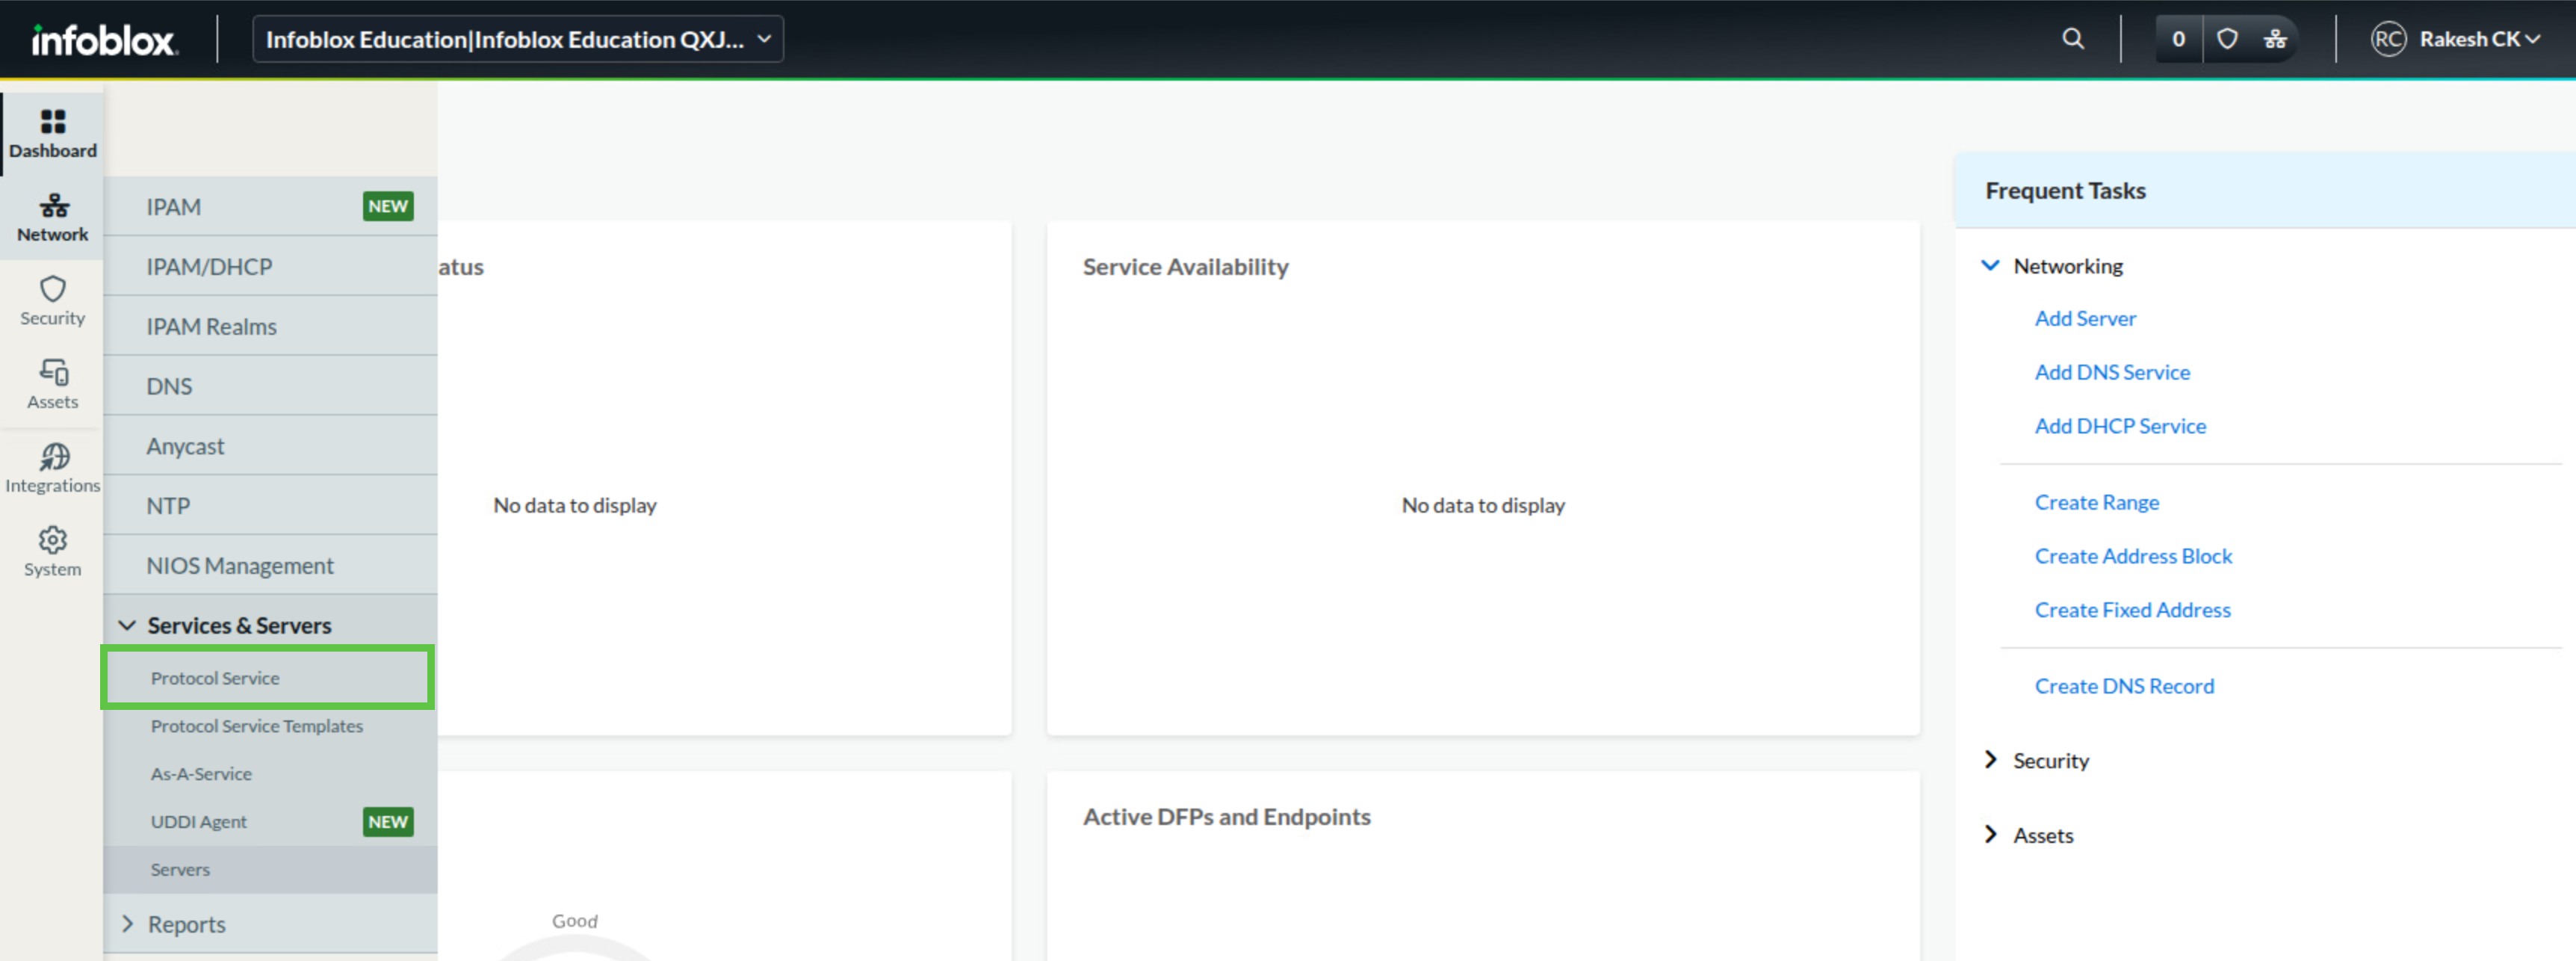
Navigate to Network → Services & Servers → Protocol Service.
-
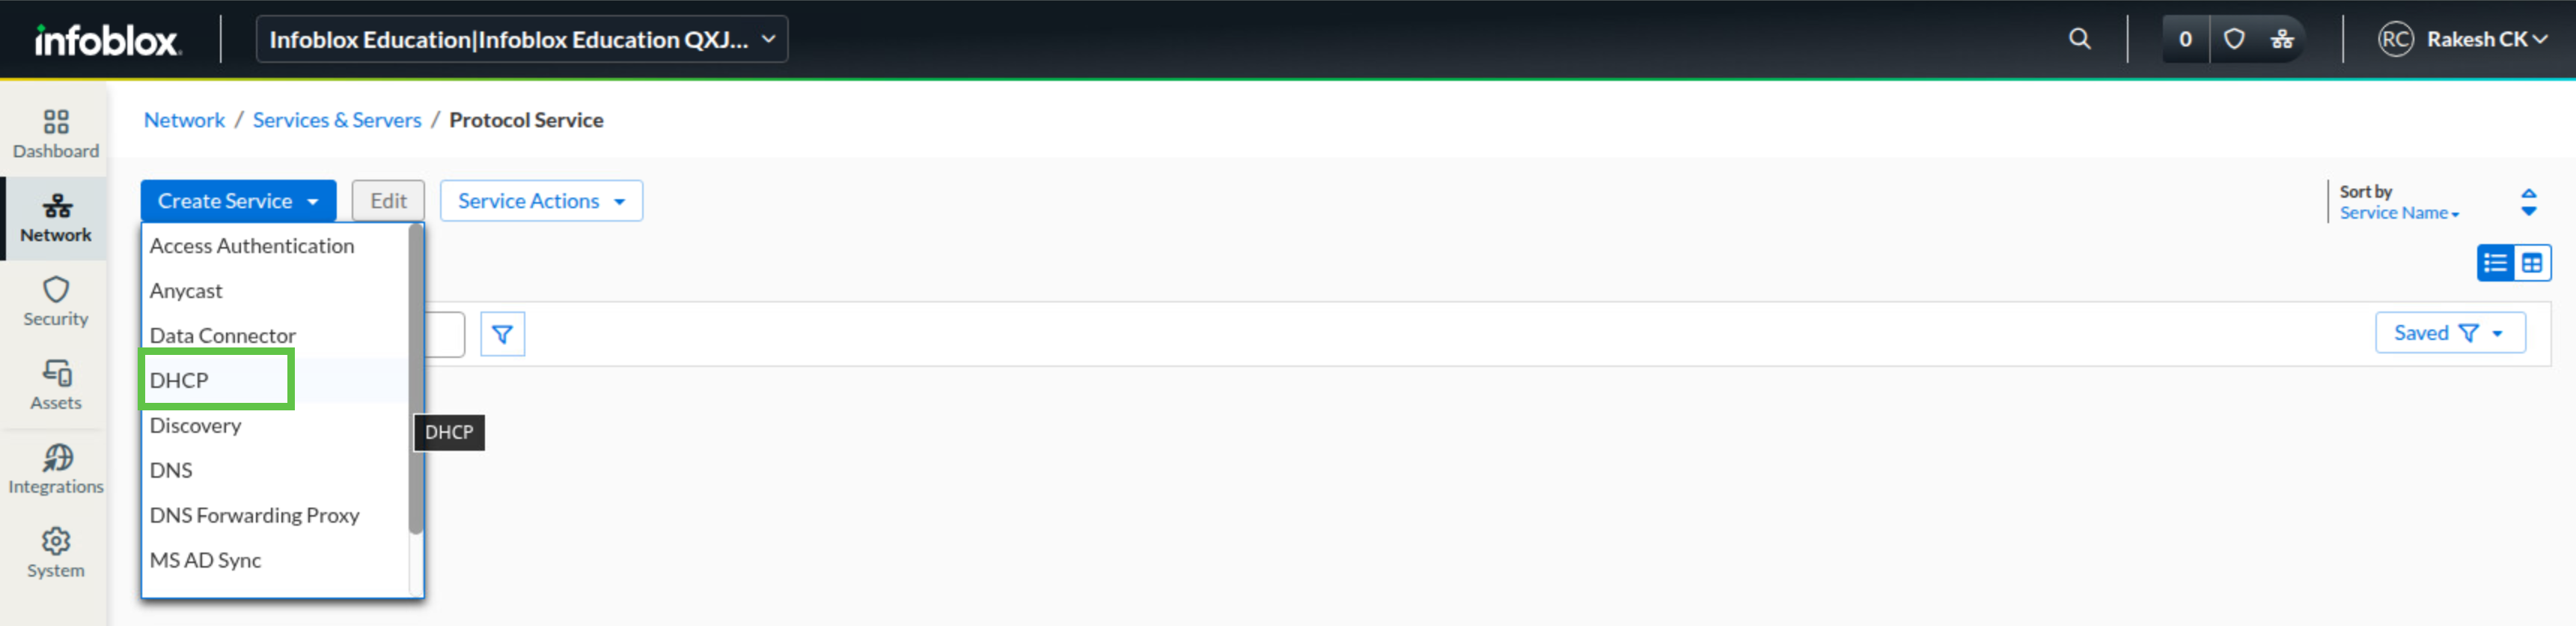
Click Create Service and choose DHCP.
-
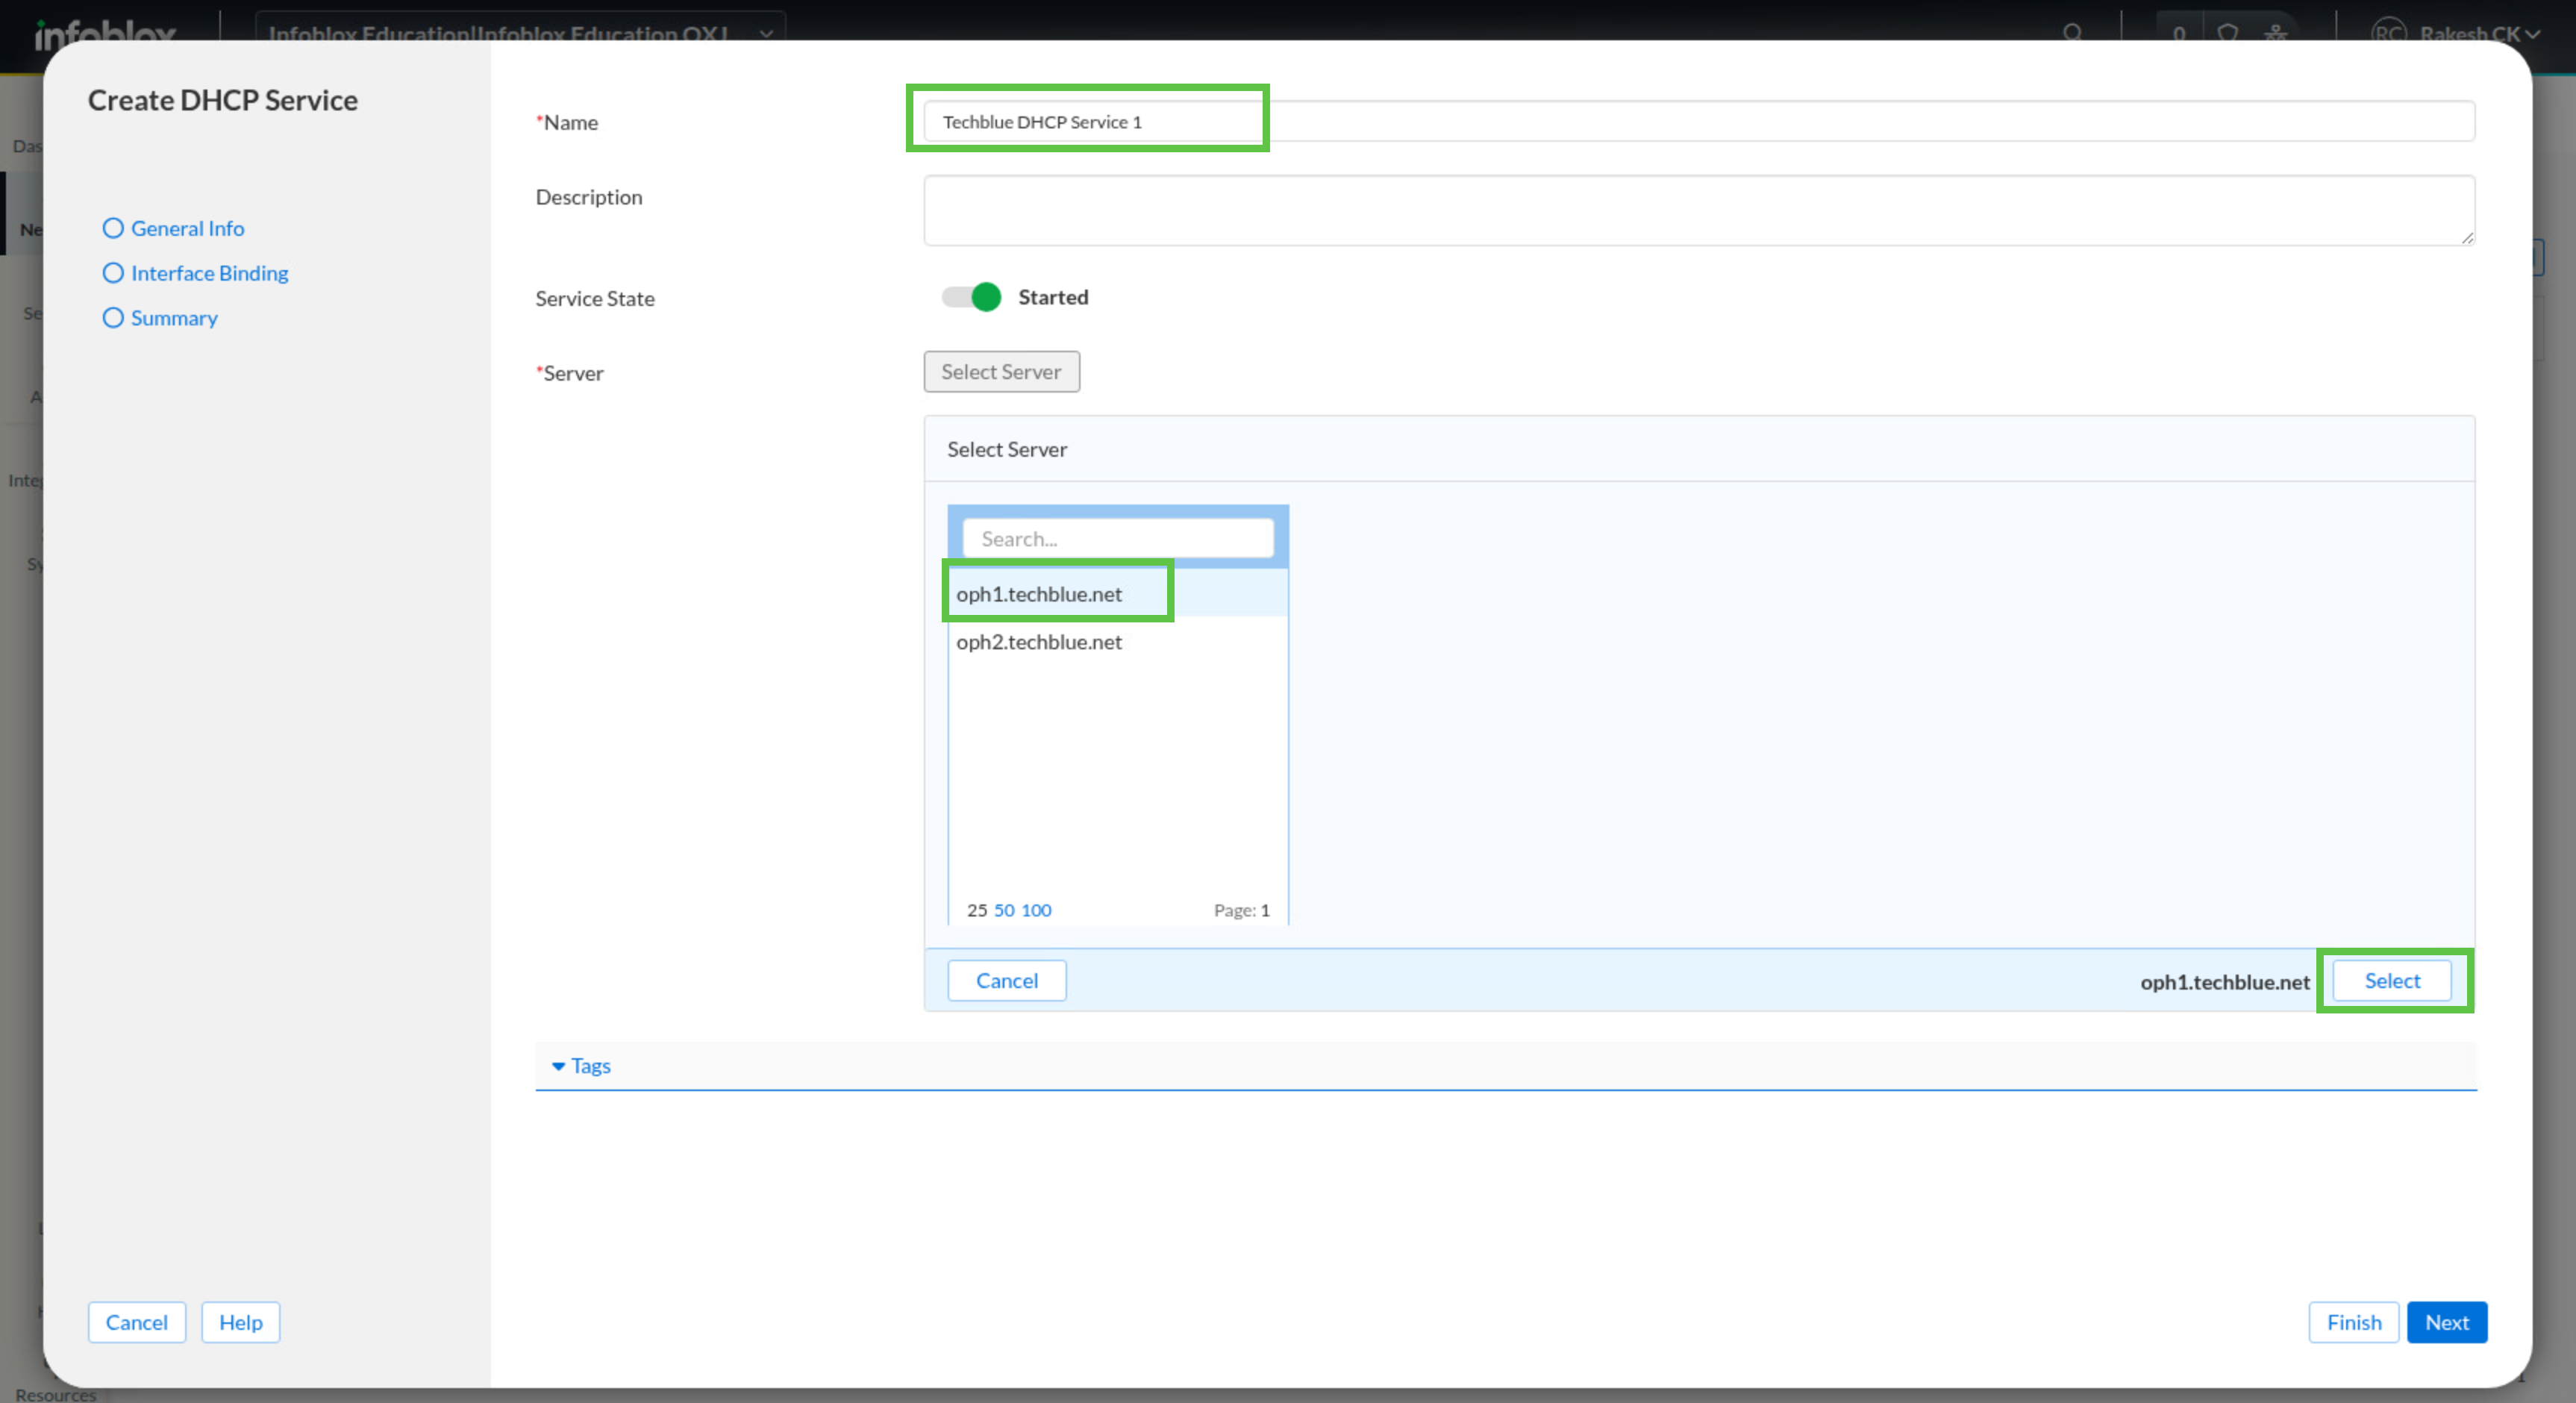
In the service name field, enter Techblue DHCP Service 1.
-
Click Select Server and locate oph1.techblue.net.
-
If oph1.techblue.net is not listed, review the NIOS-X deployment lab and confirm that the server names were updated correctly.
-
Select the server and click Select.
-
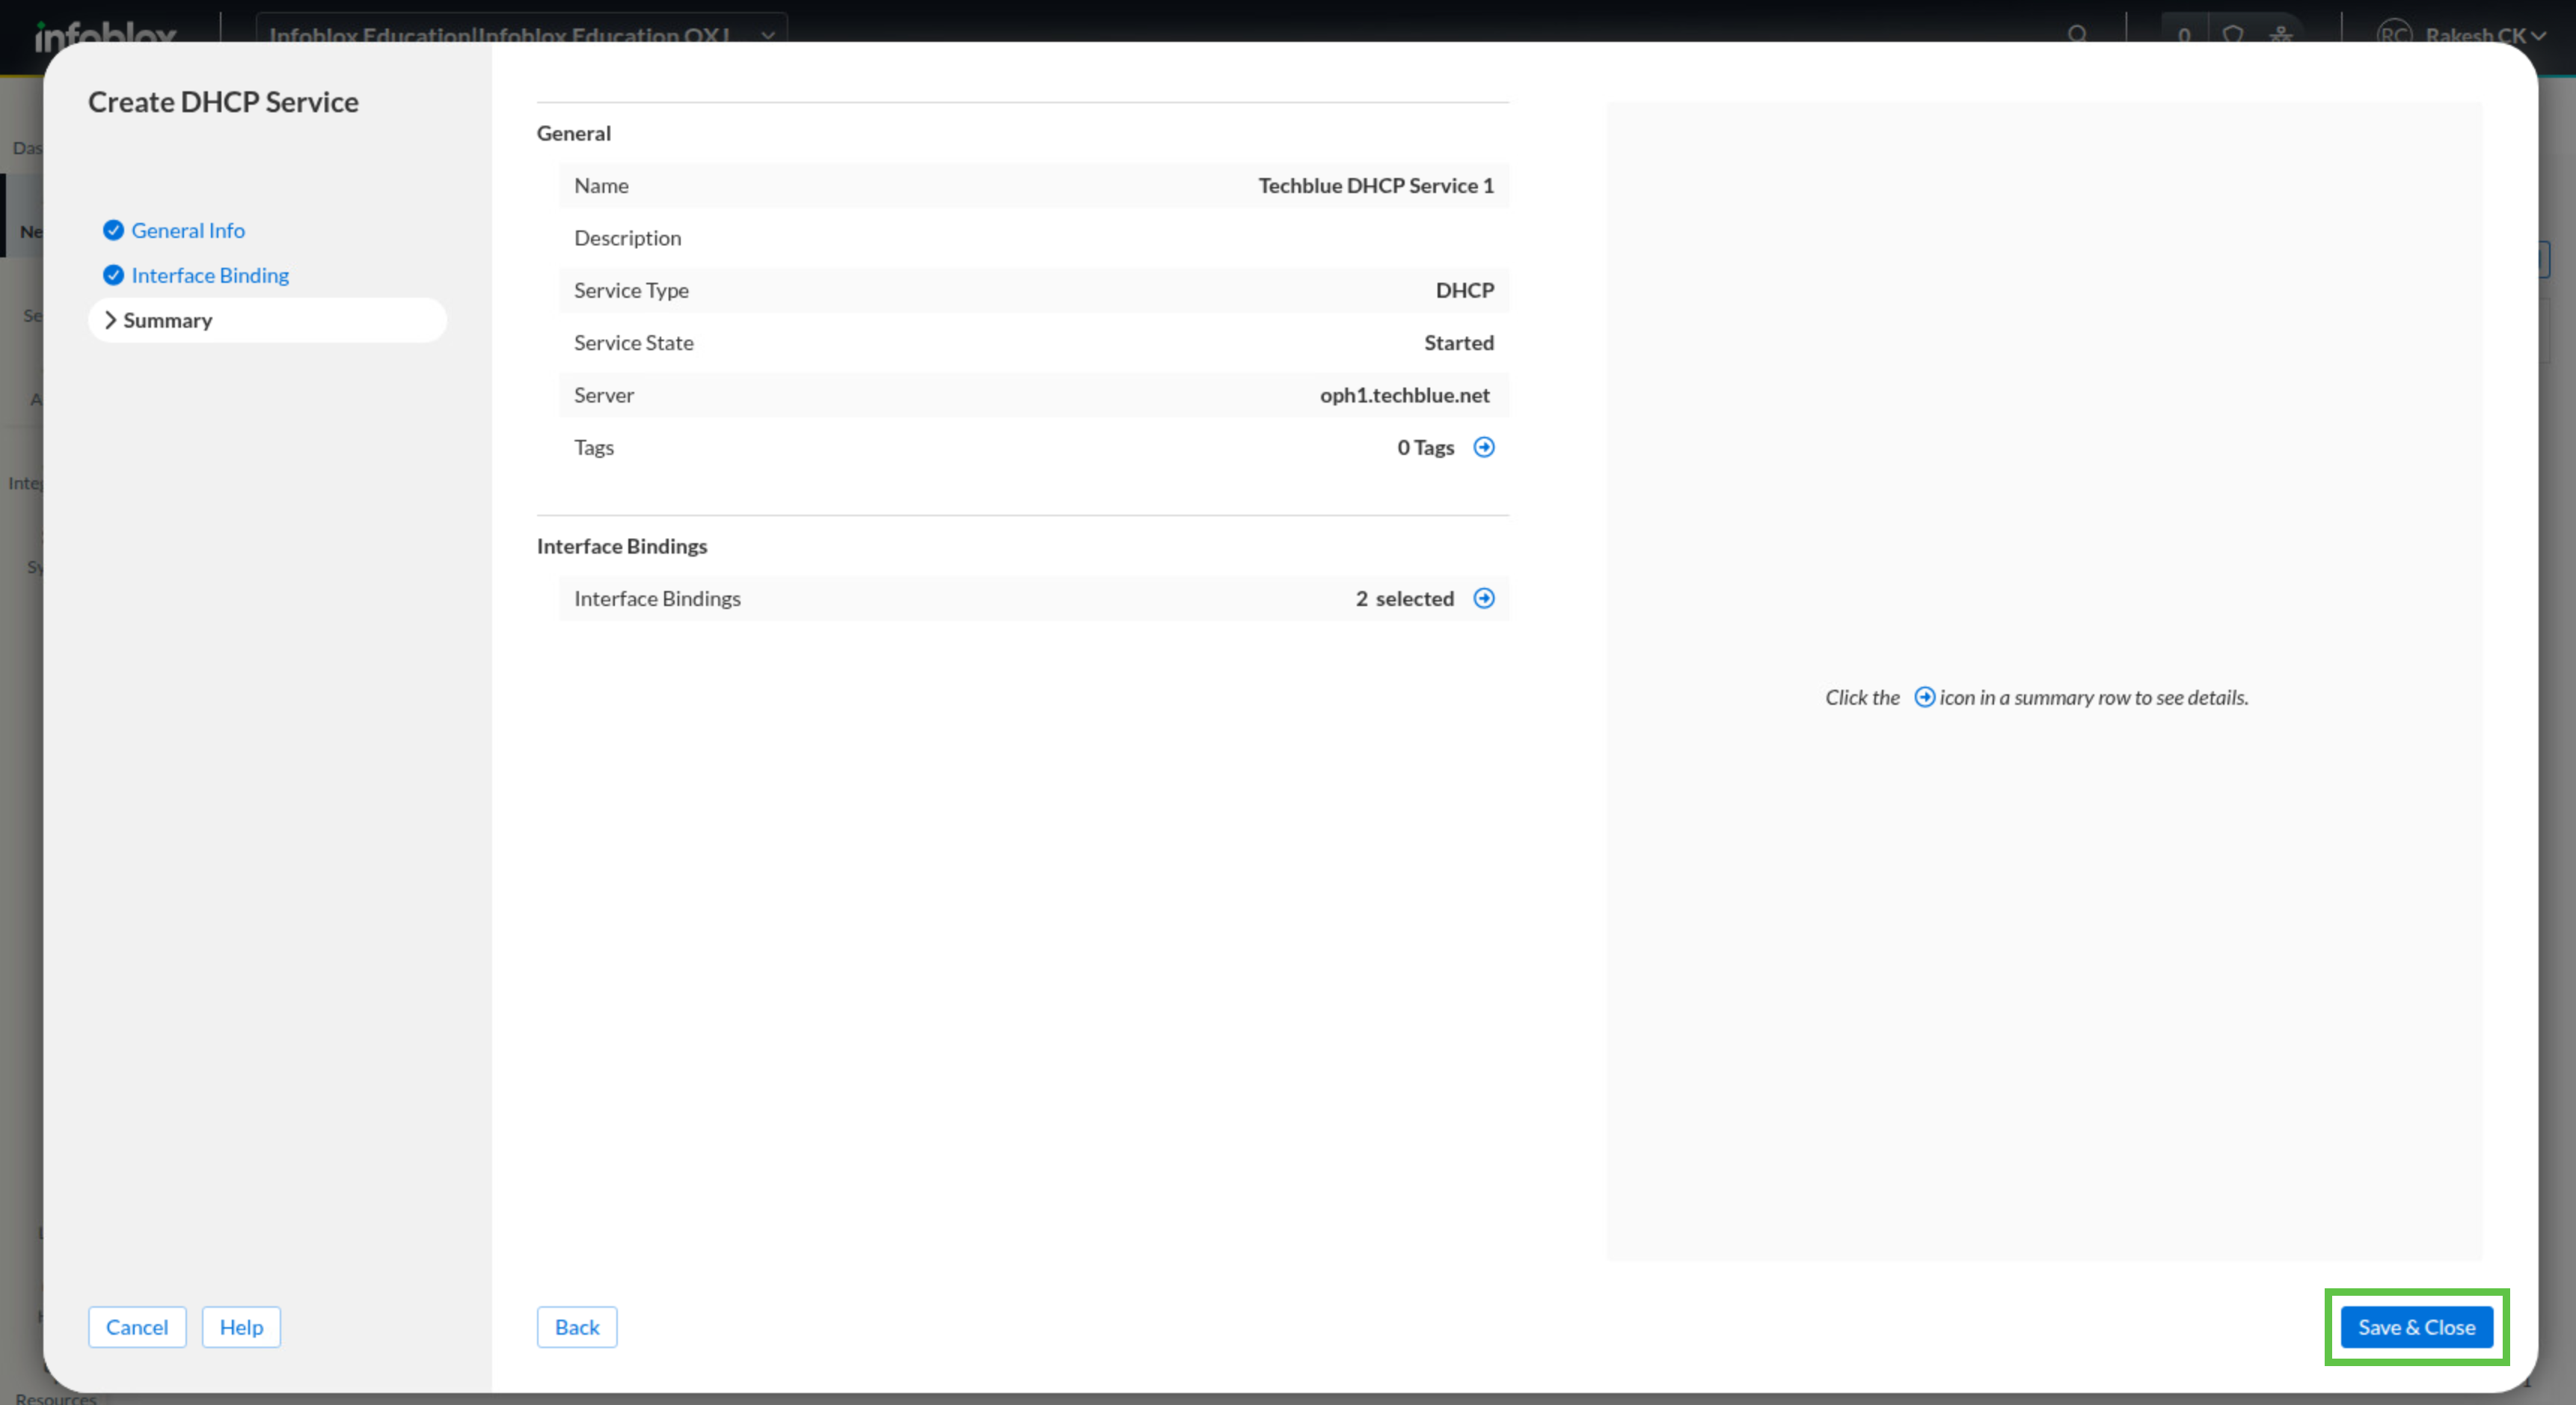
Click Next, confirm the selected server, then click Finish and Save & Close.
-
Repeat the same process to create Techblue DHCP Service 2 on oph2.techblue.net.
-
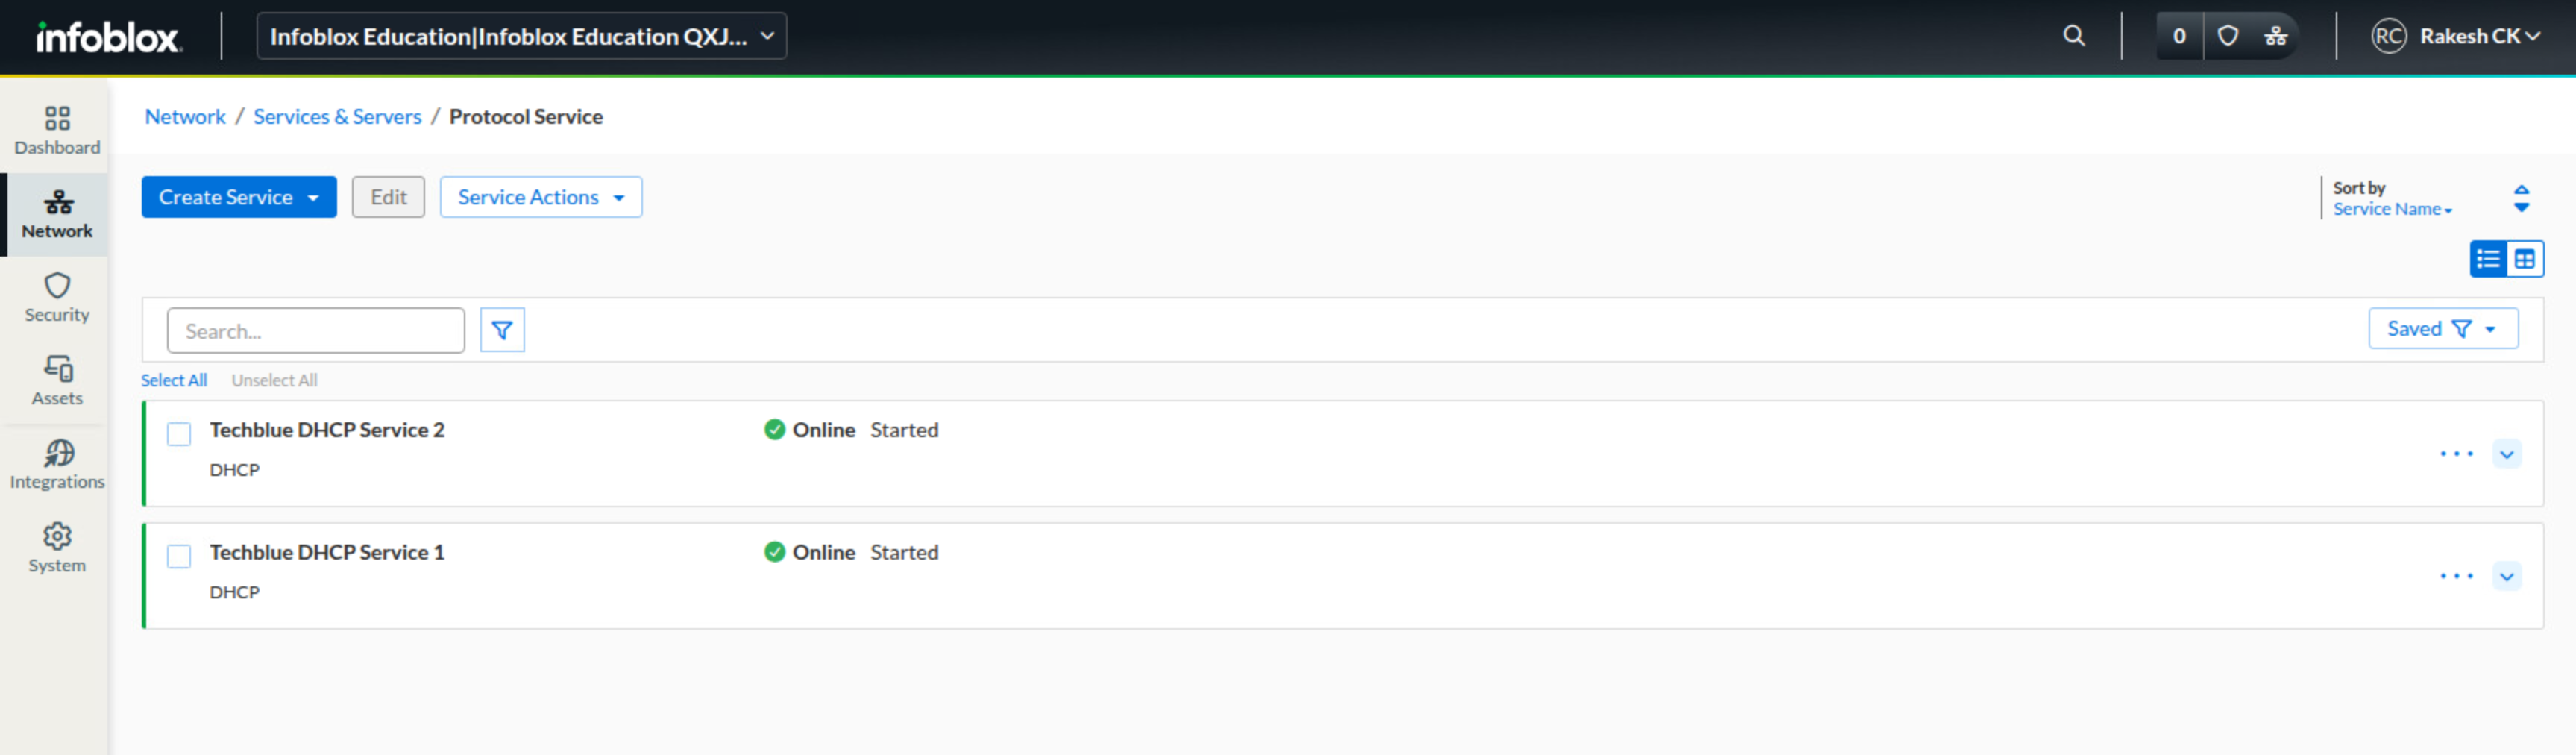
Refresh the page until both services show Online.
-
If a service remains Stopped, select it and use the Service Actions menu to restart it.
Task 2 Solution: Creating an Option Group.
The Option Group defines the DHCP option values that clients in the Techblue NYC Branch should receive. Creating it separately makes the branch settings reusable and easier to attach to a DHCP Config Profile later. We will use the specification from the table below:
|
Type |
Space |
Name (code) |
Value(s) |
|---|---|---|---|
|
Option |
DHCPv4 |
domain-name-servers (6) |
10.100.0.110,10.200.0.110 |
|
Option |
DHCPv4 |
domain-name (15) |
techblue.net |
|
Option |
DHCPv4 |
ntp-servers (42) |
10.100.0.10 |
|
Option |
DHCPv4 |
routers (3) |
172.31.101.1 |
-
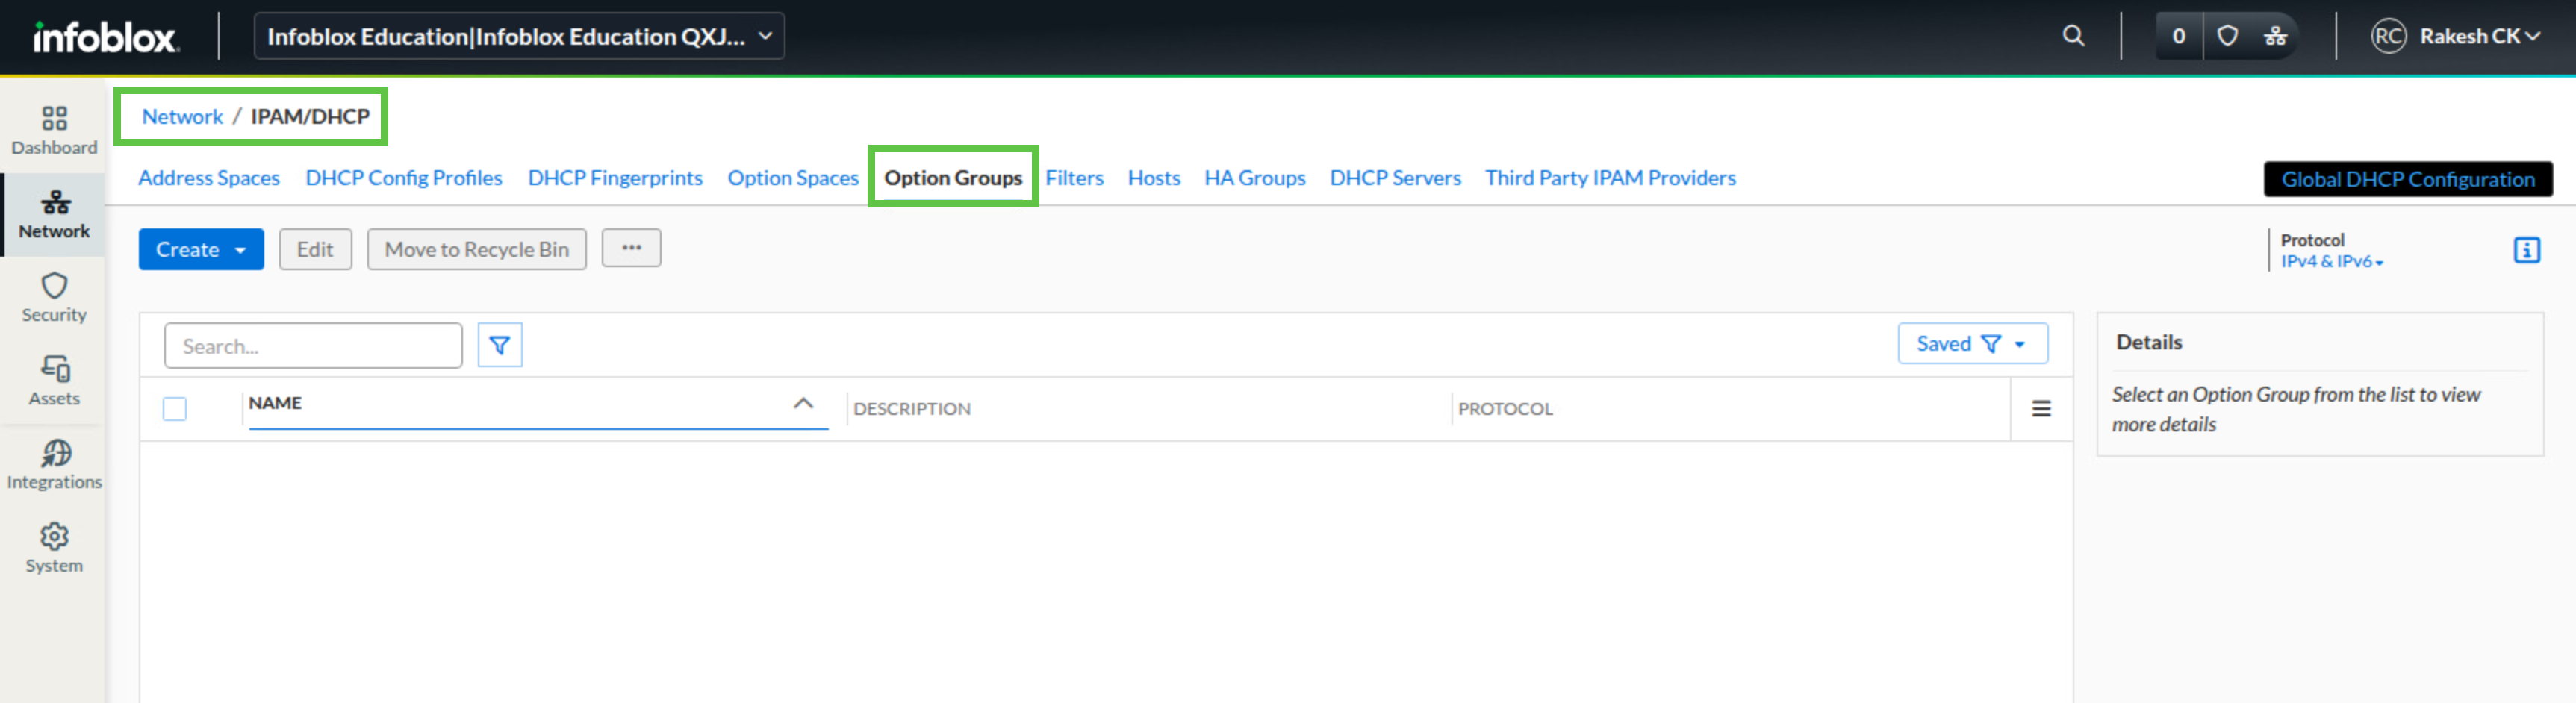
Navigate to Network → IPAM/DHCP.
-
Select the Option Groups tab.
-
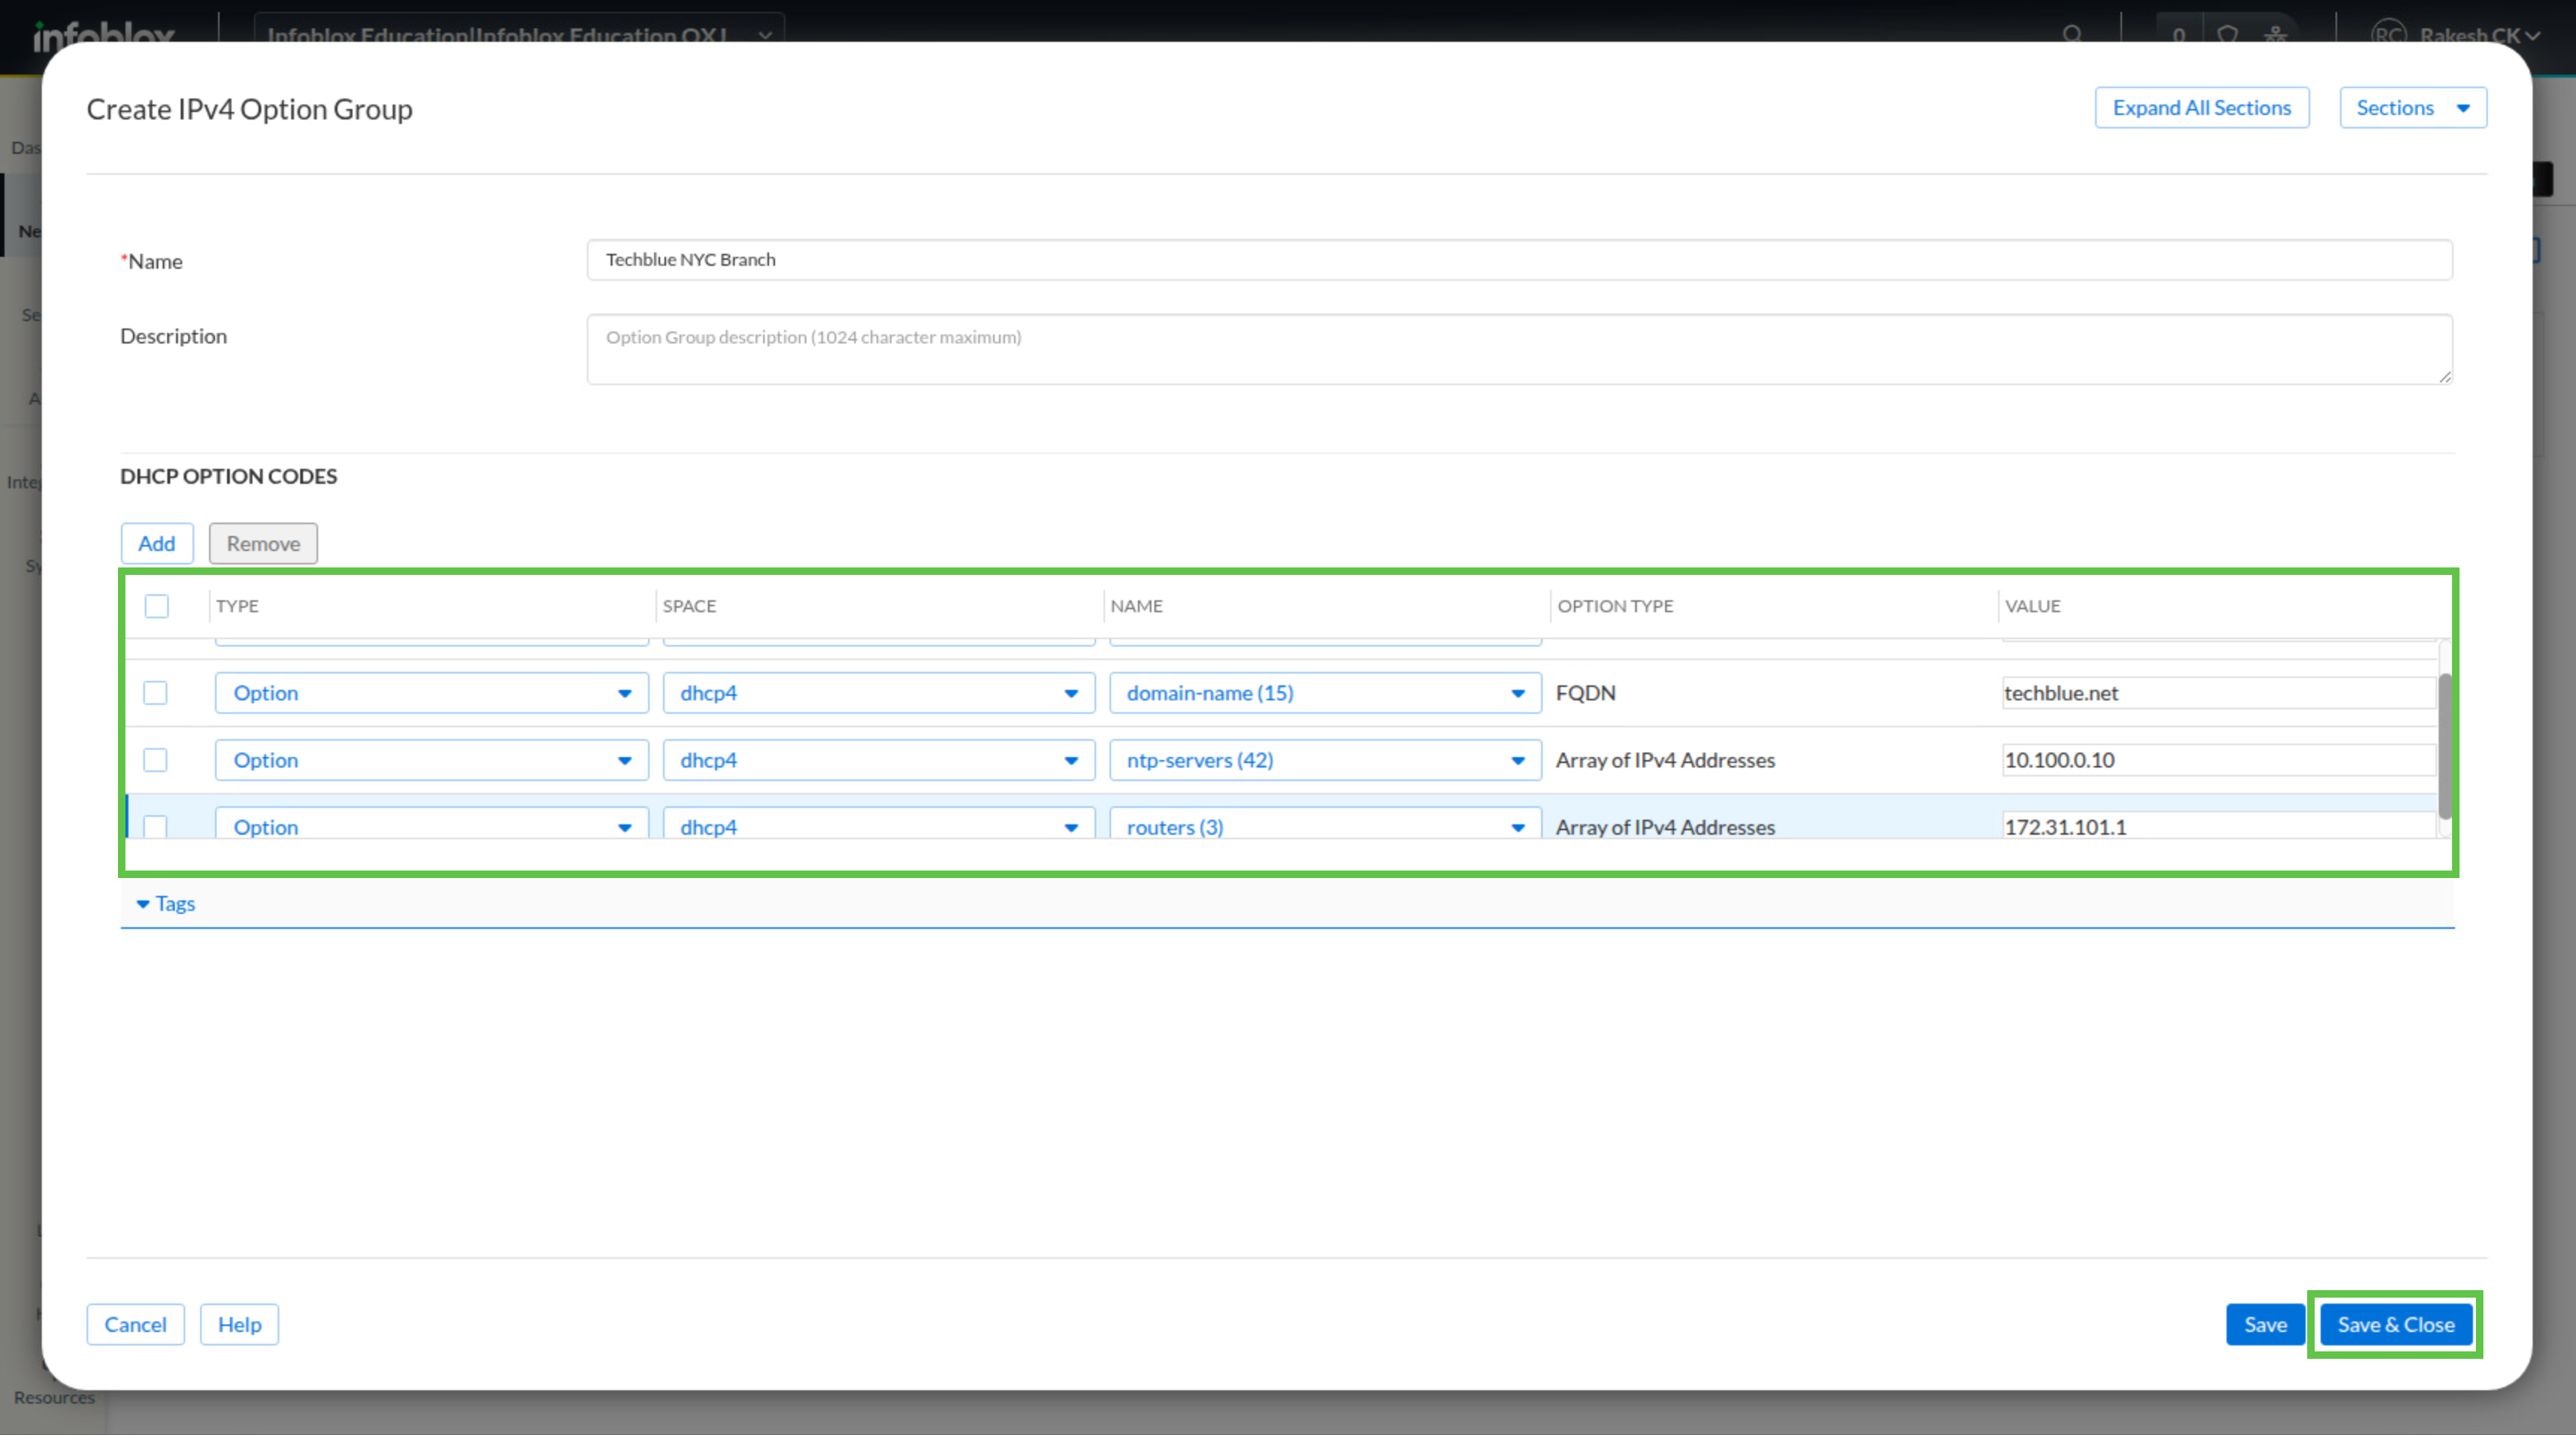
Click Create and choose IPv4 Option Group.

-
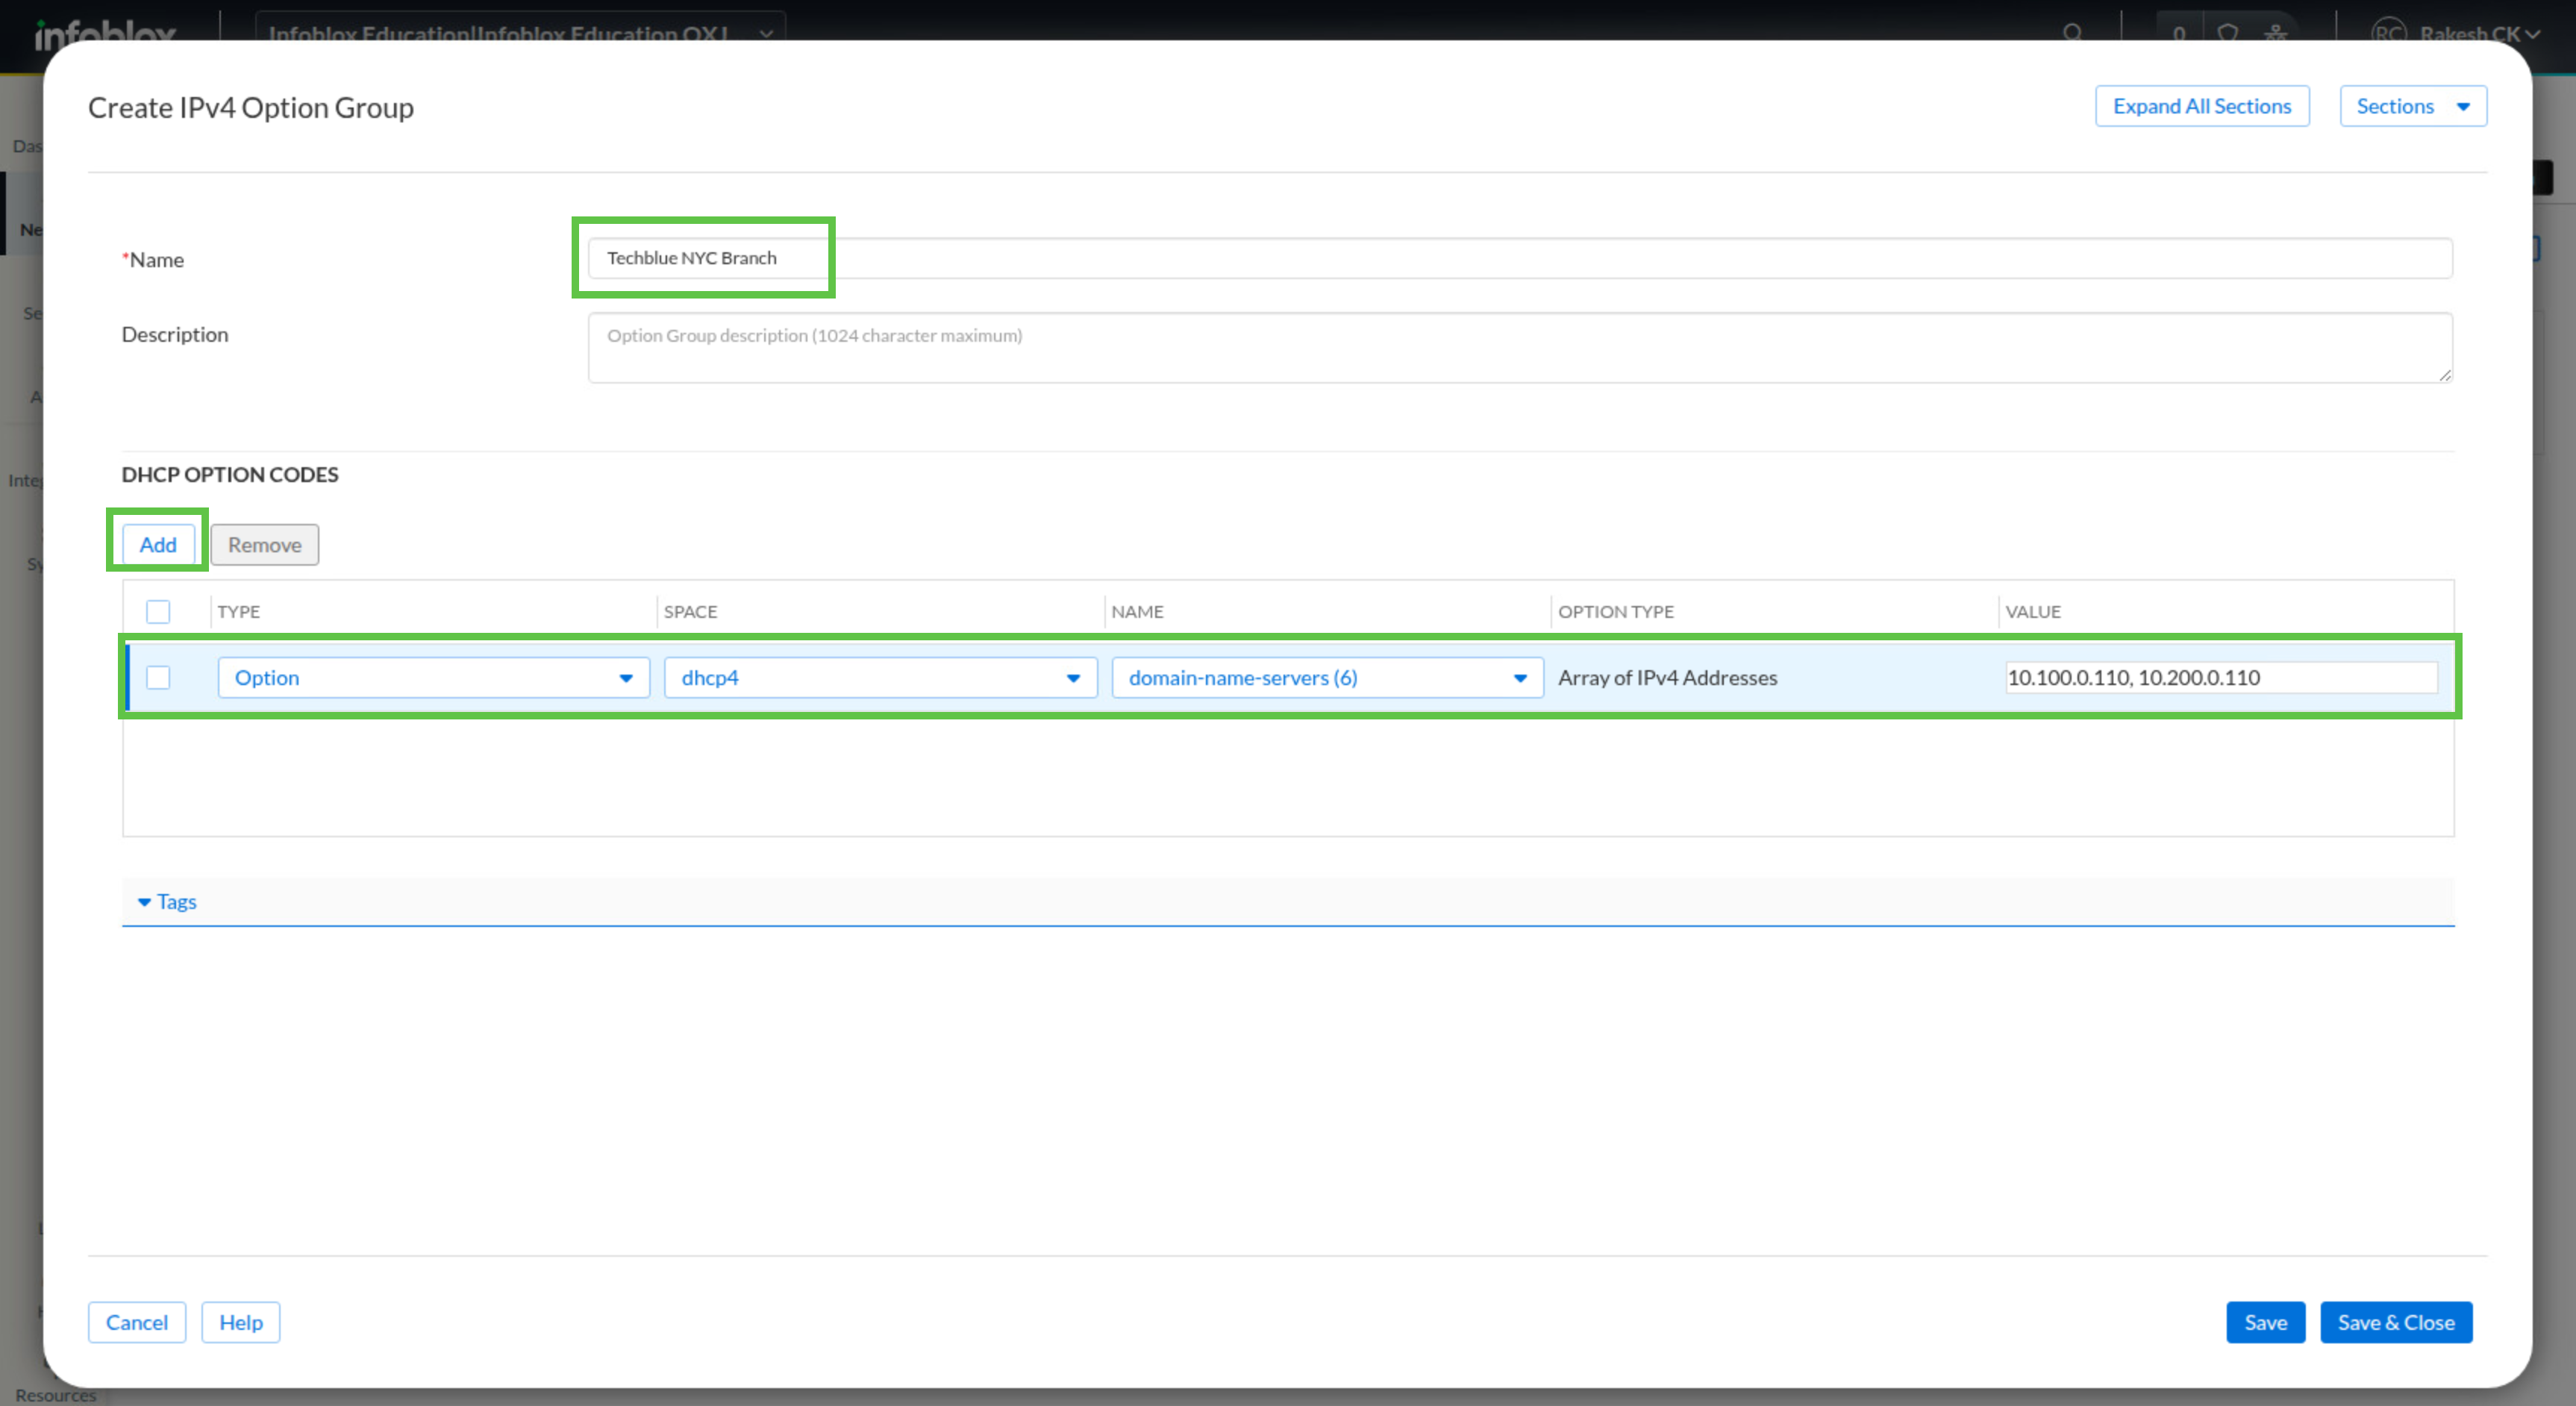
In the name field, enter Techblue NYC Branch.
-
Under DHCP Option Codes, click Add.
-
Set Type to Option, Space to dhcp4, and Name to domain-name-servers (6).
-
In Value, enter 10.100.0.110, 10.200.0.110.
-
Under DHCP Option Codes, click Add again.
-
Set Type to Option, Space to dhcp4, and Name to domain-name (15).
-
In Value, enter techblue.net.
-
Under DHCP Option Codes, click Add again.
-
Set Type to Option, Space to dhcp4, and Name to ntp-servers (42).
-
In Value, enter 10.100.0.10.
-
Under DHCP Option Codes, click Add again.
-
Set Type to Option, Space to dhcp4, and Name to routers (3).
-
In Value, enter 172.31.101.1.
-
Click Save & Close.
Task 3 Solution: Configuring the DHCP Config Profile.
We want to use our new Option Group with the Techblue NYC Branch DHCP clients and be able to designate specific settings for the Techblue NYC Branch DHCP service that may differ from the Global Configuration. We can do this with a DHCP Config Profile. Create a new DHCP Config Profile named Techblue NYC Branch with a short lease time of 4 minutes to accommodate DHCP client testing. We also want to allow leases for unknown clients. For DHCP Options, we want to use the IPv4 DHCP Option Group we created called Techblue NYC Branch.
-
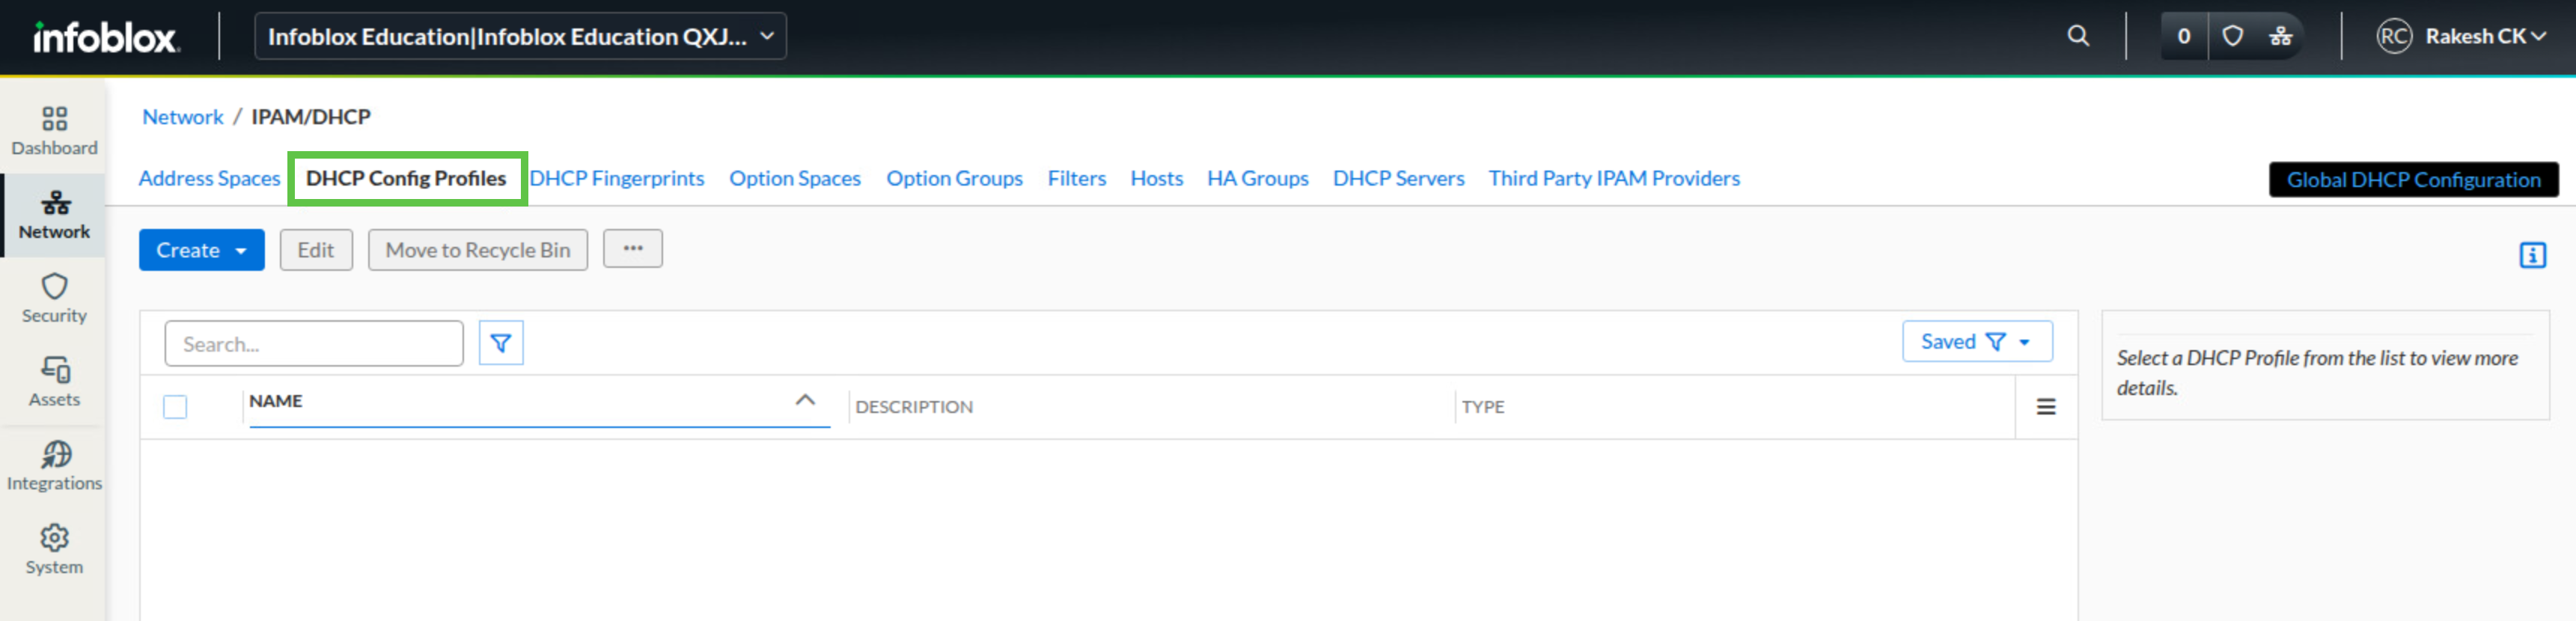
Navigate to Network → IPAM/DHCP.
-
Select the DHCP Config Profiles tab.
-
Click Create DHCP Config Profile.

-
In the name field, enter Techblue NYC Branch.
-
Under DHCP Configuration, expand the Leases section.
-
Set Lease Time to 4 minutes. Use the Override toggle if needed to override the default setting.
-
Enable Allow Leases for Unknown Clients. Use the Override toggle if needed to override the default setting.

-
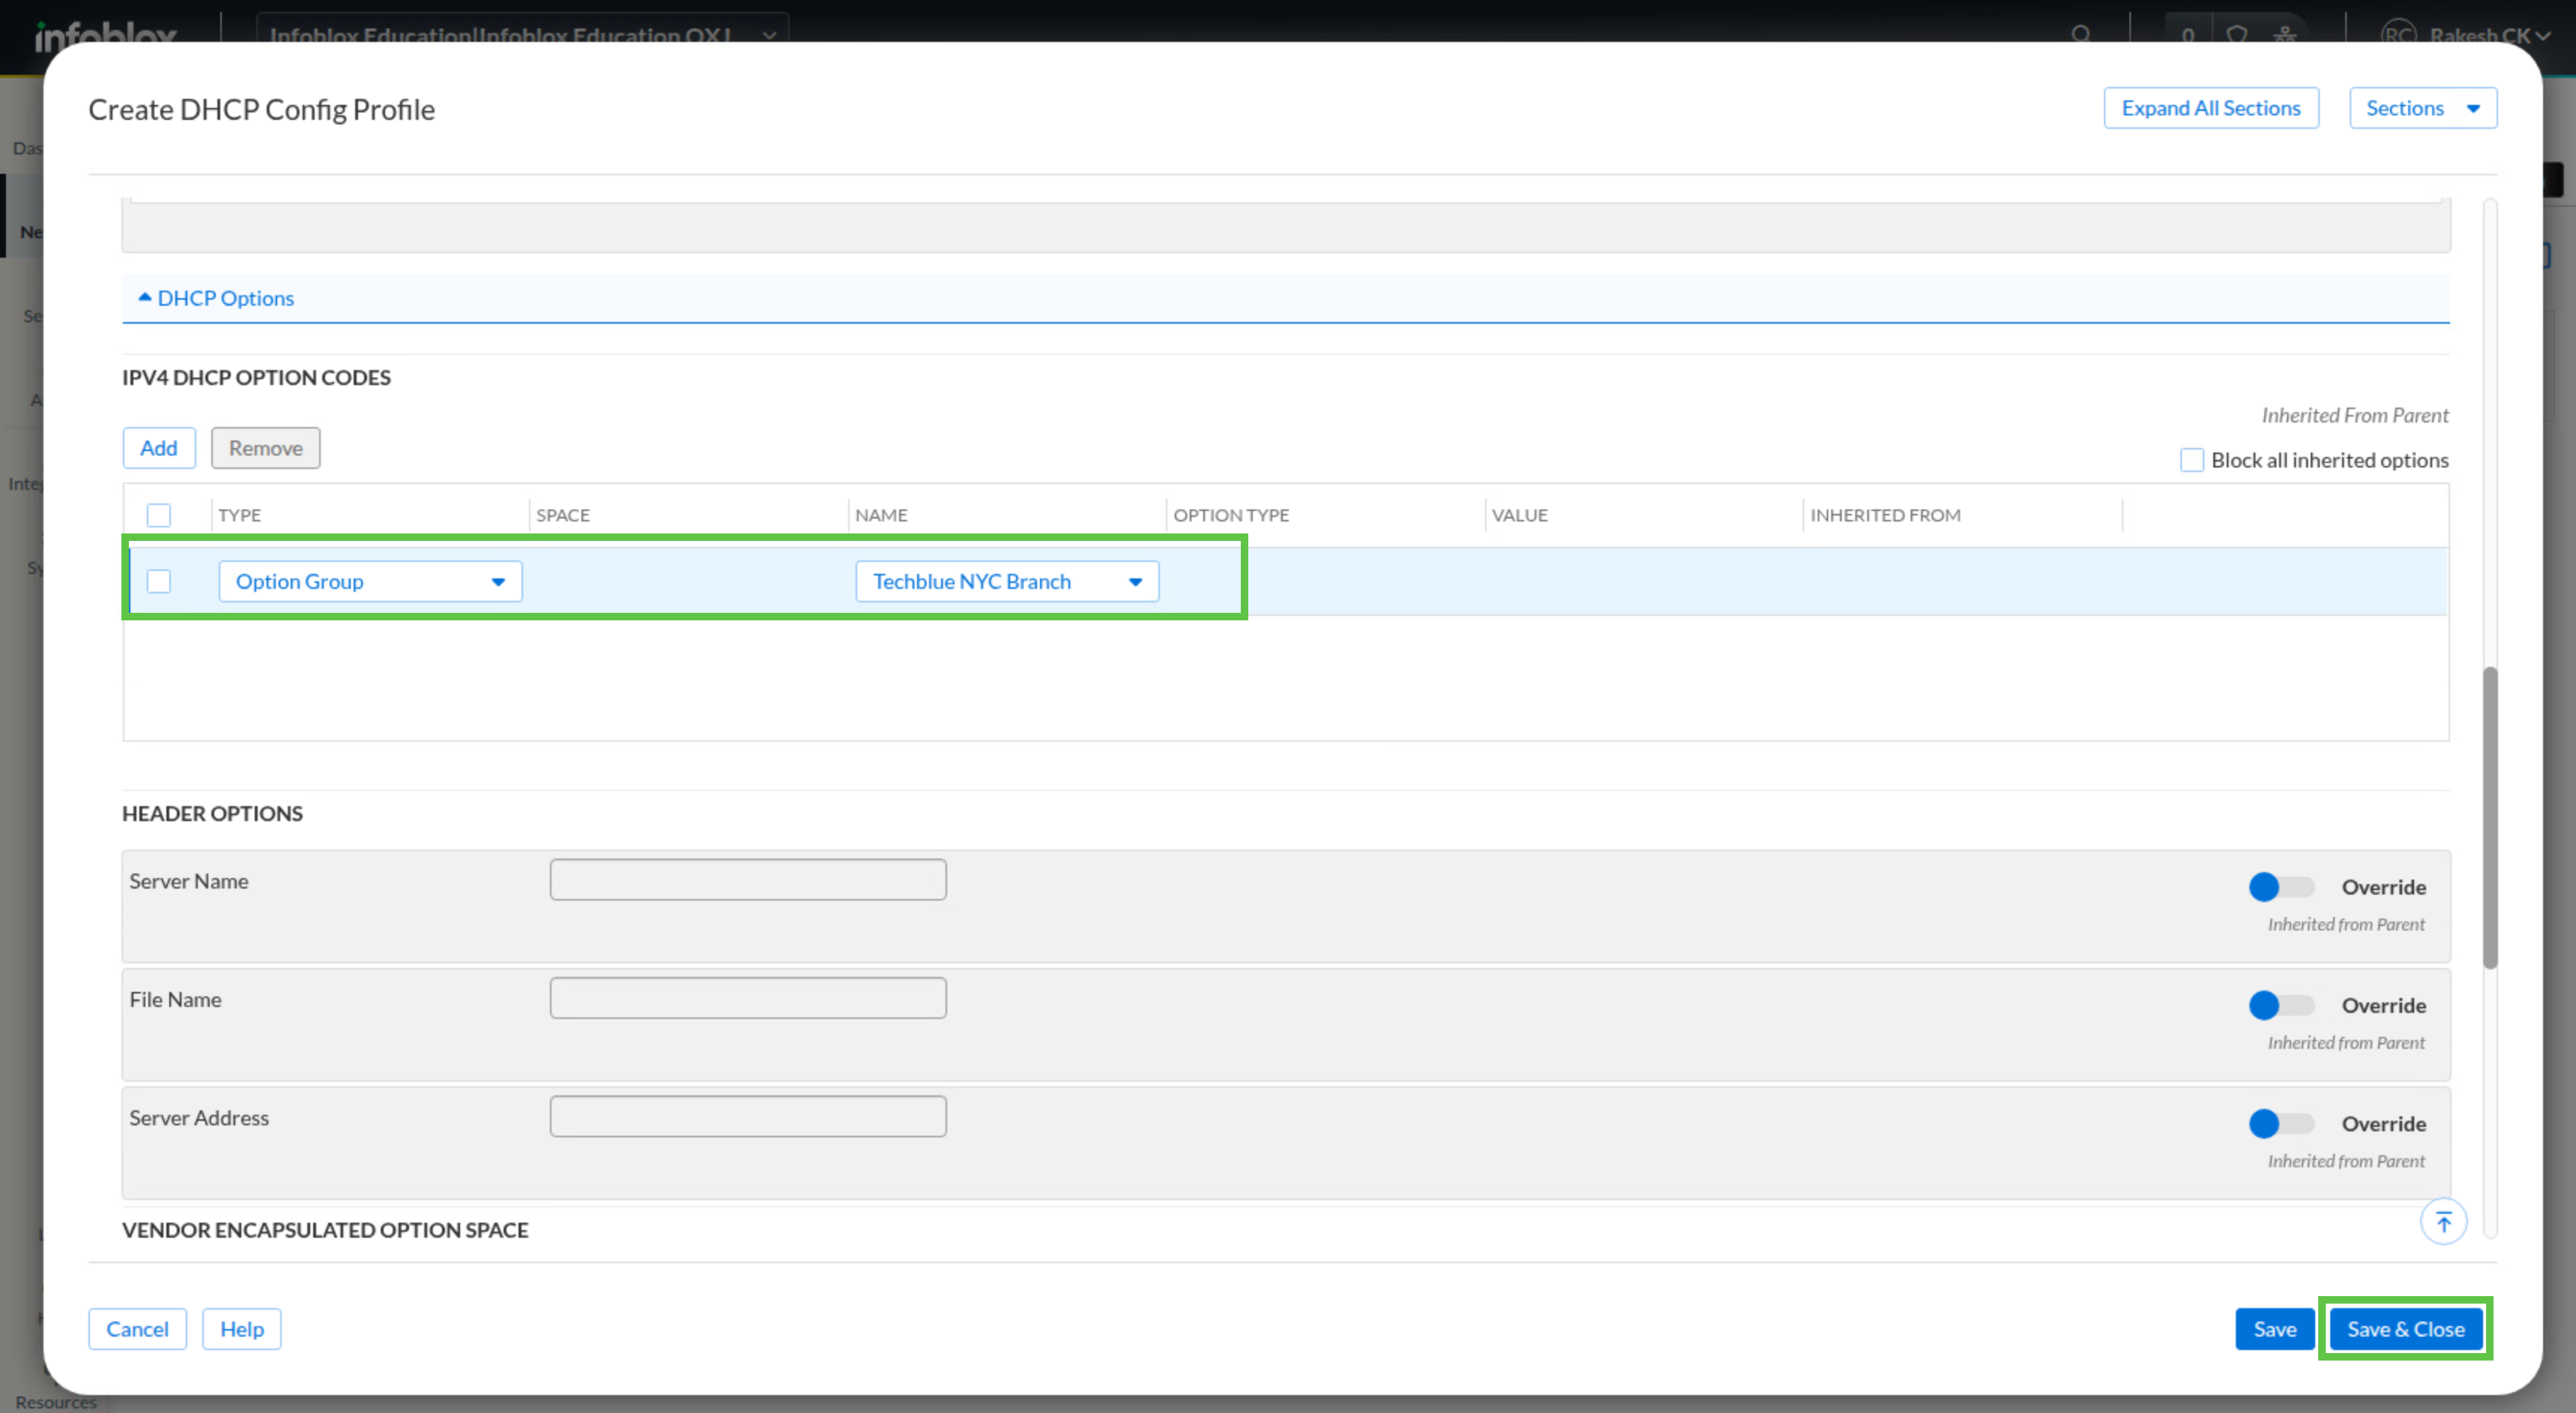
Collapse the Leases section and expand the DHCP Options section.
-
Under DHCP Option Codes, click Add.
-
Set Type to Option Group.
-
In Name, select Techblue NYC Branch.
-
Click Save & Close.
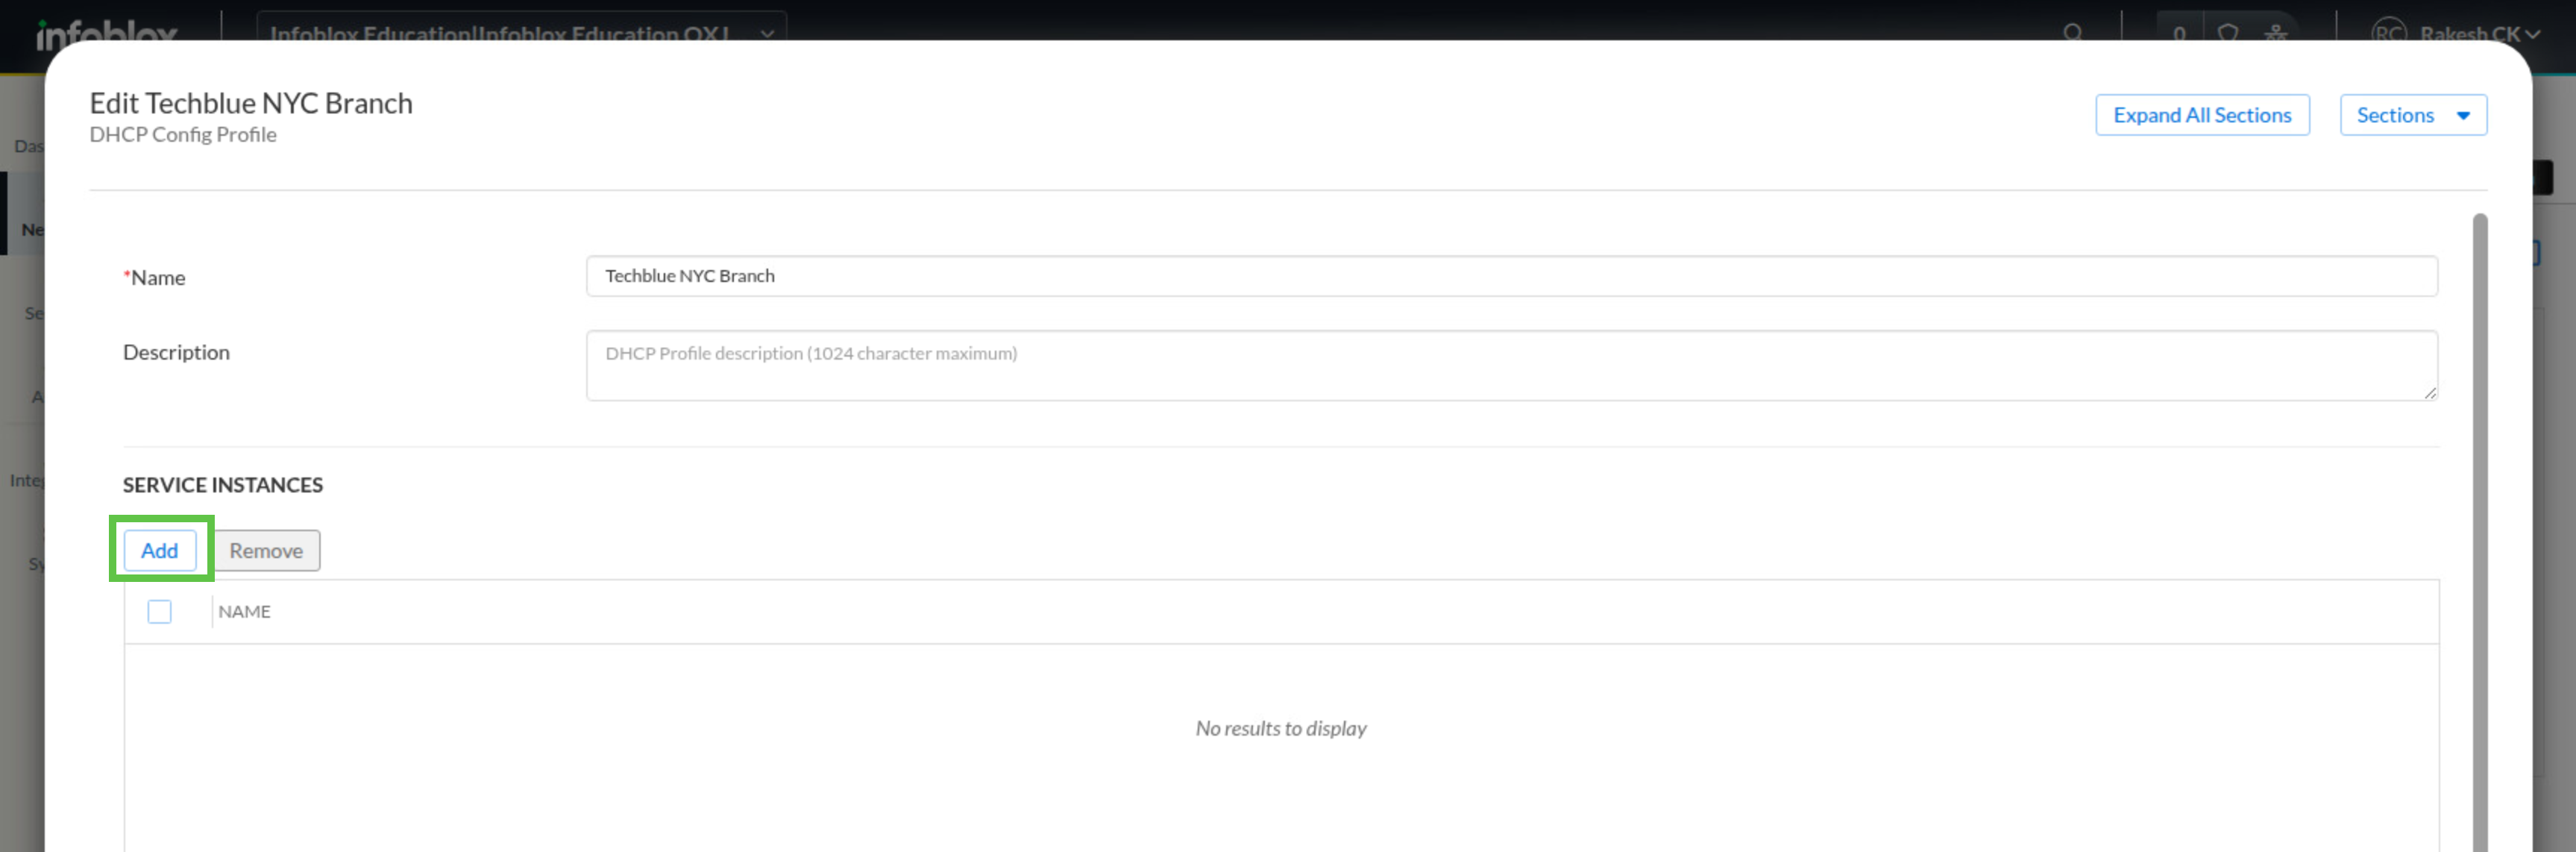
Task 4 Solution: Applying the DHCP Config Profile.
Creating the DHCP Config Profile does not affect any service until you assign it to a service instance. In this lab, you apply the profile only to Techblue DHCP Service 1.
-
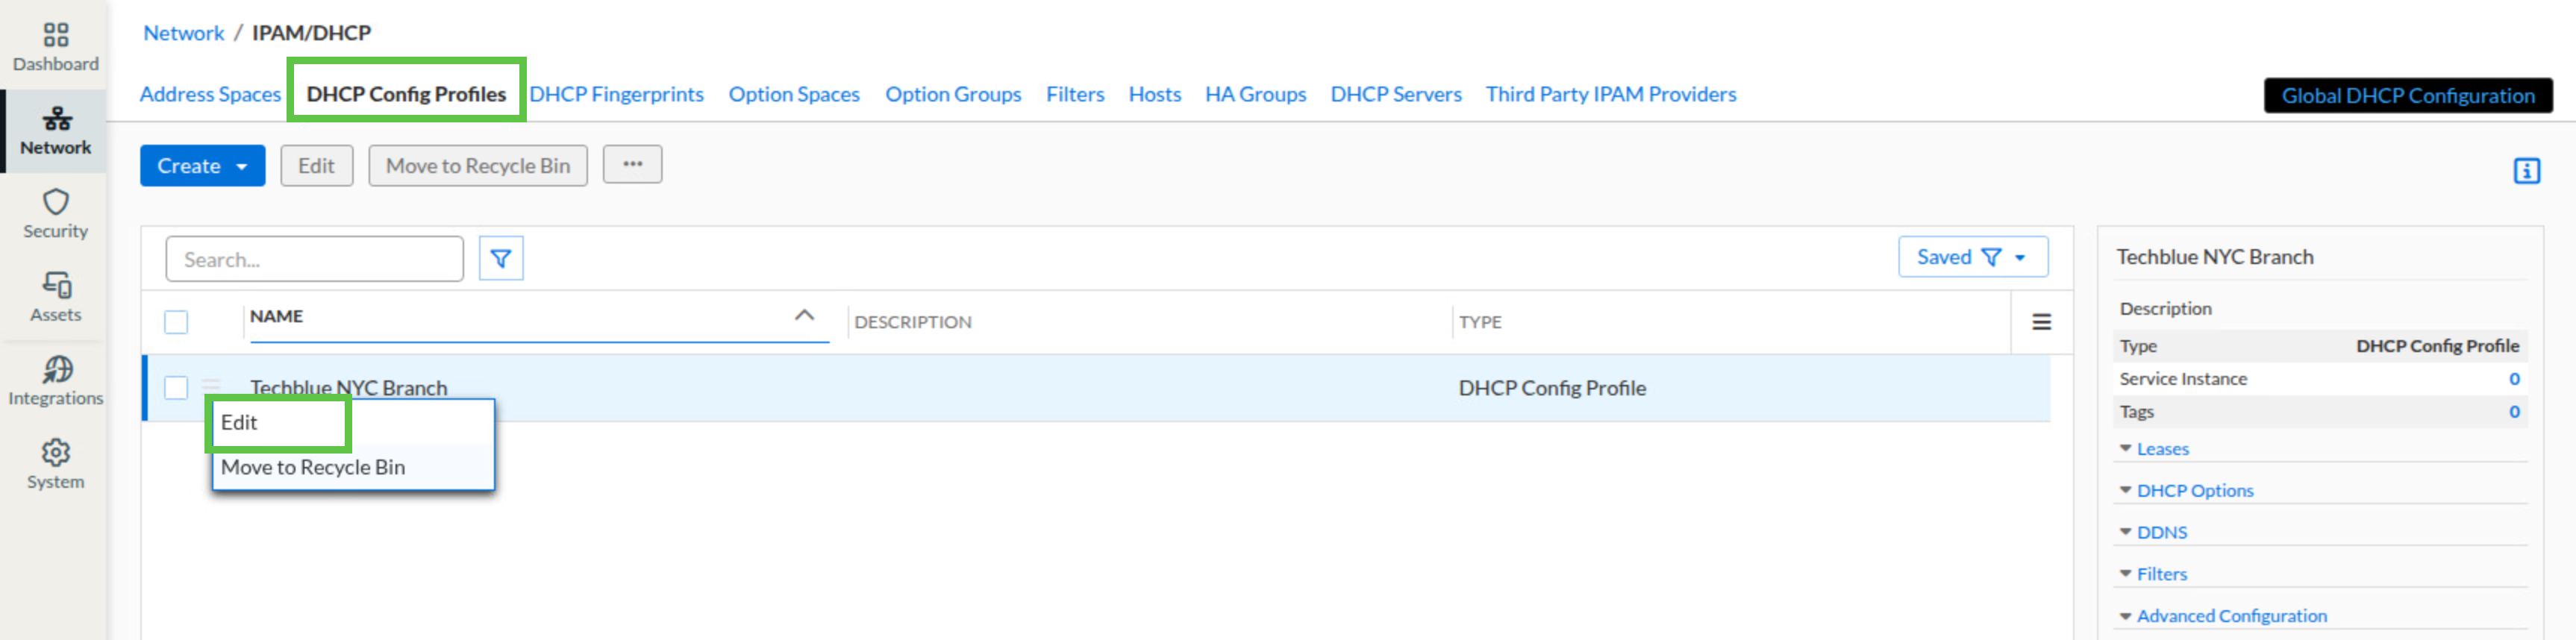
Navigate to Network → IPAM/DHCP.
-
Select the DHCP Config Profiles tab.
-
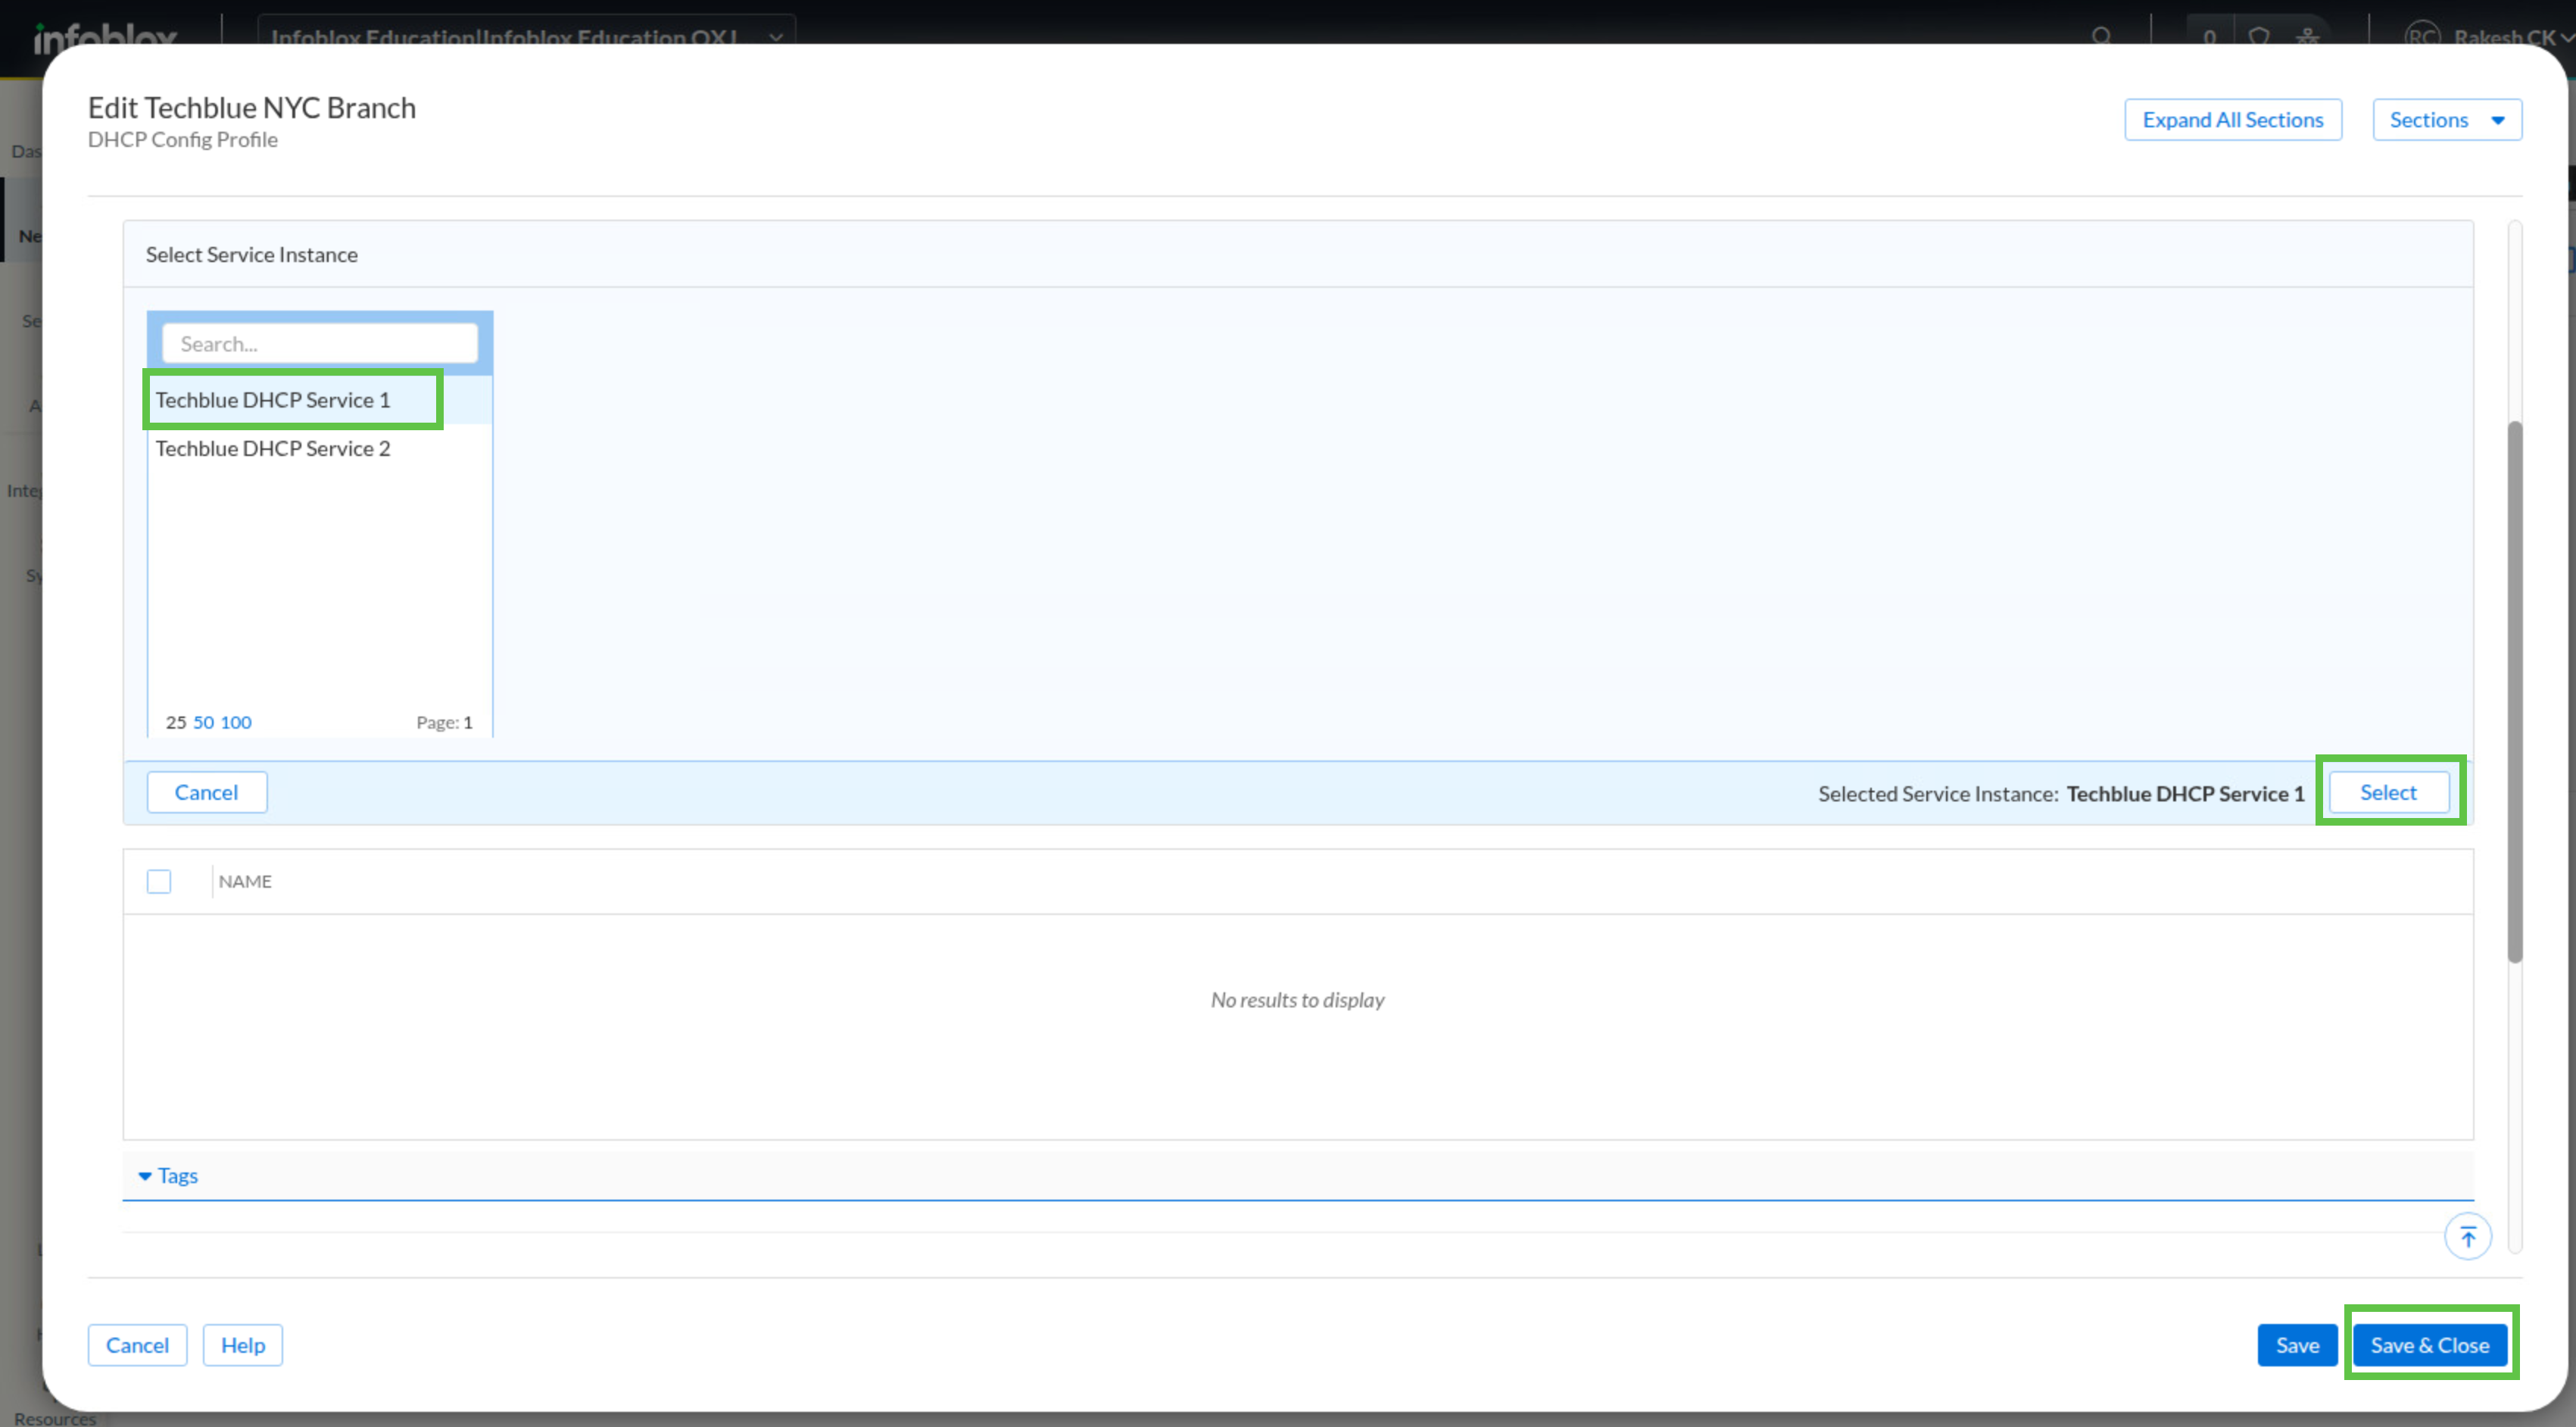
Open the menu next to Techblue NYC Branch and click Edit.
-
Under Select Service Instance, click Add.
-
Select Techblue DHCP Service 1 and click Select.
-
Do not add Techblue DHCP Service 2 yet.
-
Click Save & Close.