Scenario
You have already deployed two NIOS-X servers, oph1.techblue.net and oph2.techblue.net, and now you need to enable DNS service so client systems can resolve external names such as training.infoblox.com. Because these DNS servers will provide recursive resolution, you also need to restrict recursion so only trusted internal subnets can use the service. Your goal is to create DNS service instances on both servers, configure a shared DNS policy, and verify that a client can perform recursive lookups successfully.
Estimated Completion Time
-
20 to 30 minutes
Prerequisites
-
Administrative access to the Infoblox Portal
Tasks
-
Create DNS Service Instances.
-
Configure DNS hostnames.
-
Create Named ACL.
-
Create DNS Config Profile.
-
Associate DNS Config Profile.
-
Verify recursive DNS resolution.
Task 1: Create DNS Service Instances
Create DNS service instances for oph1.techblue.net and oph2.techblue.net. Name them Techblue DNS Service 1 and Techblue DNS Service 2 so both NIOS-X servers are ready to provide DNS service.
Task 2: Configure DNS hostnames
Update each DNS service instance so its DNS name matches the server it runs on. Use oph1.techblue.net for Techblue DNS Service 1 and oph2.techblue.net for Techblue DNS Service 2.
Task 3: Create Named ACL
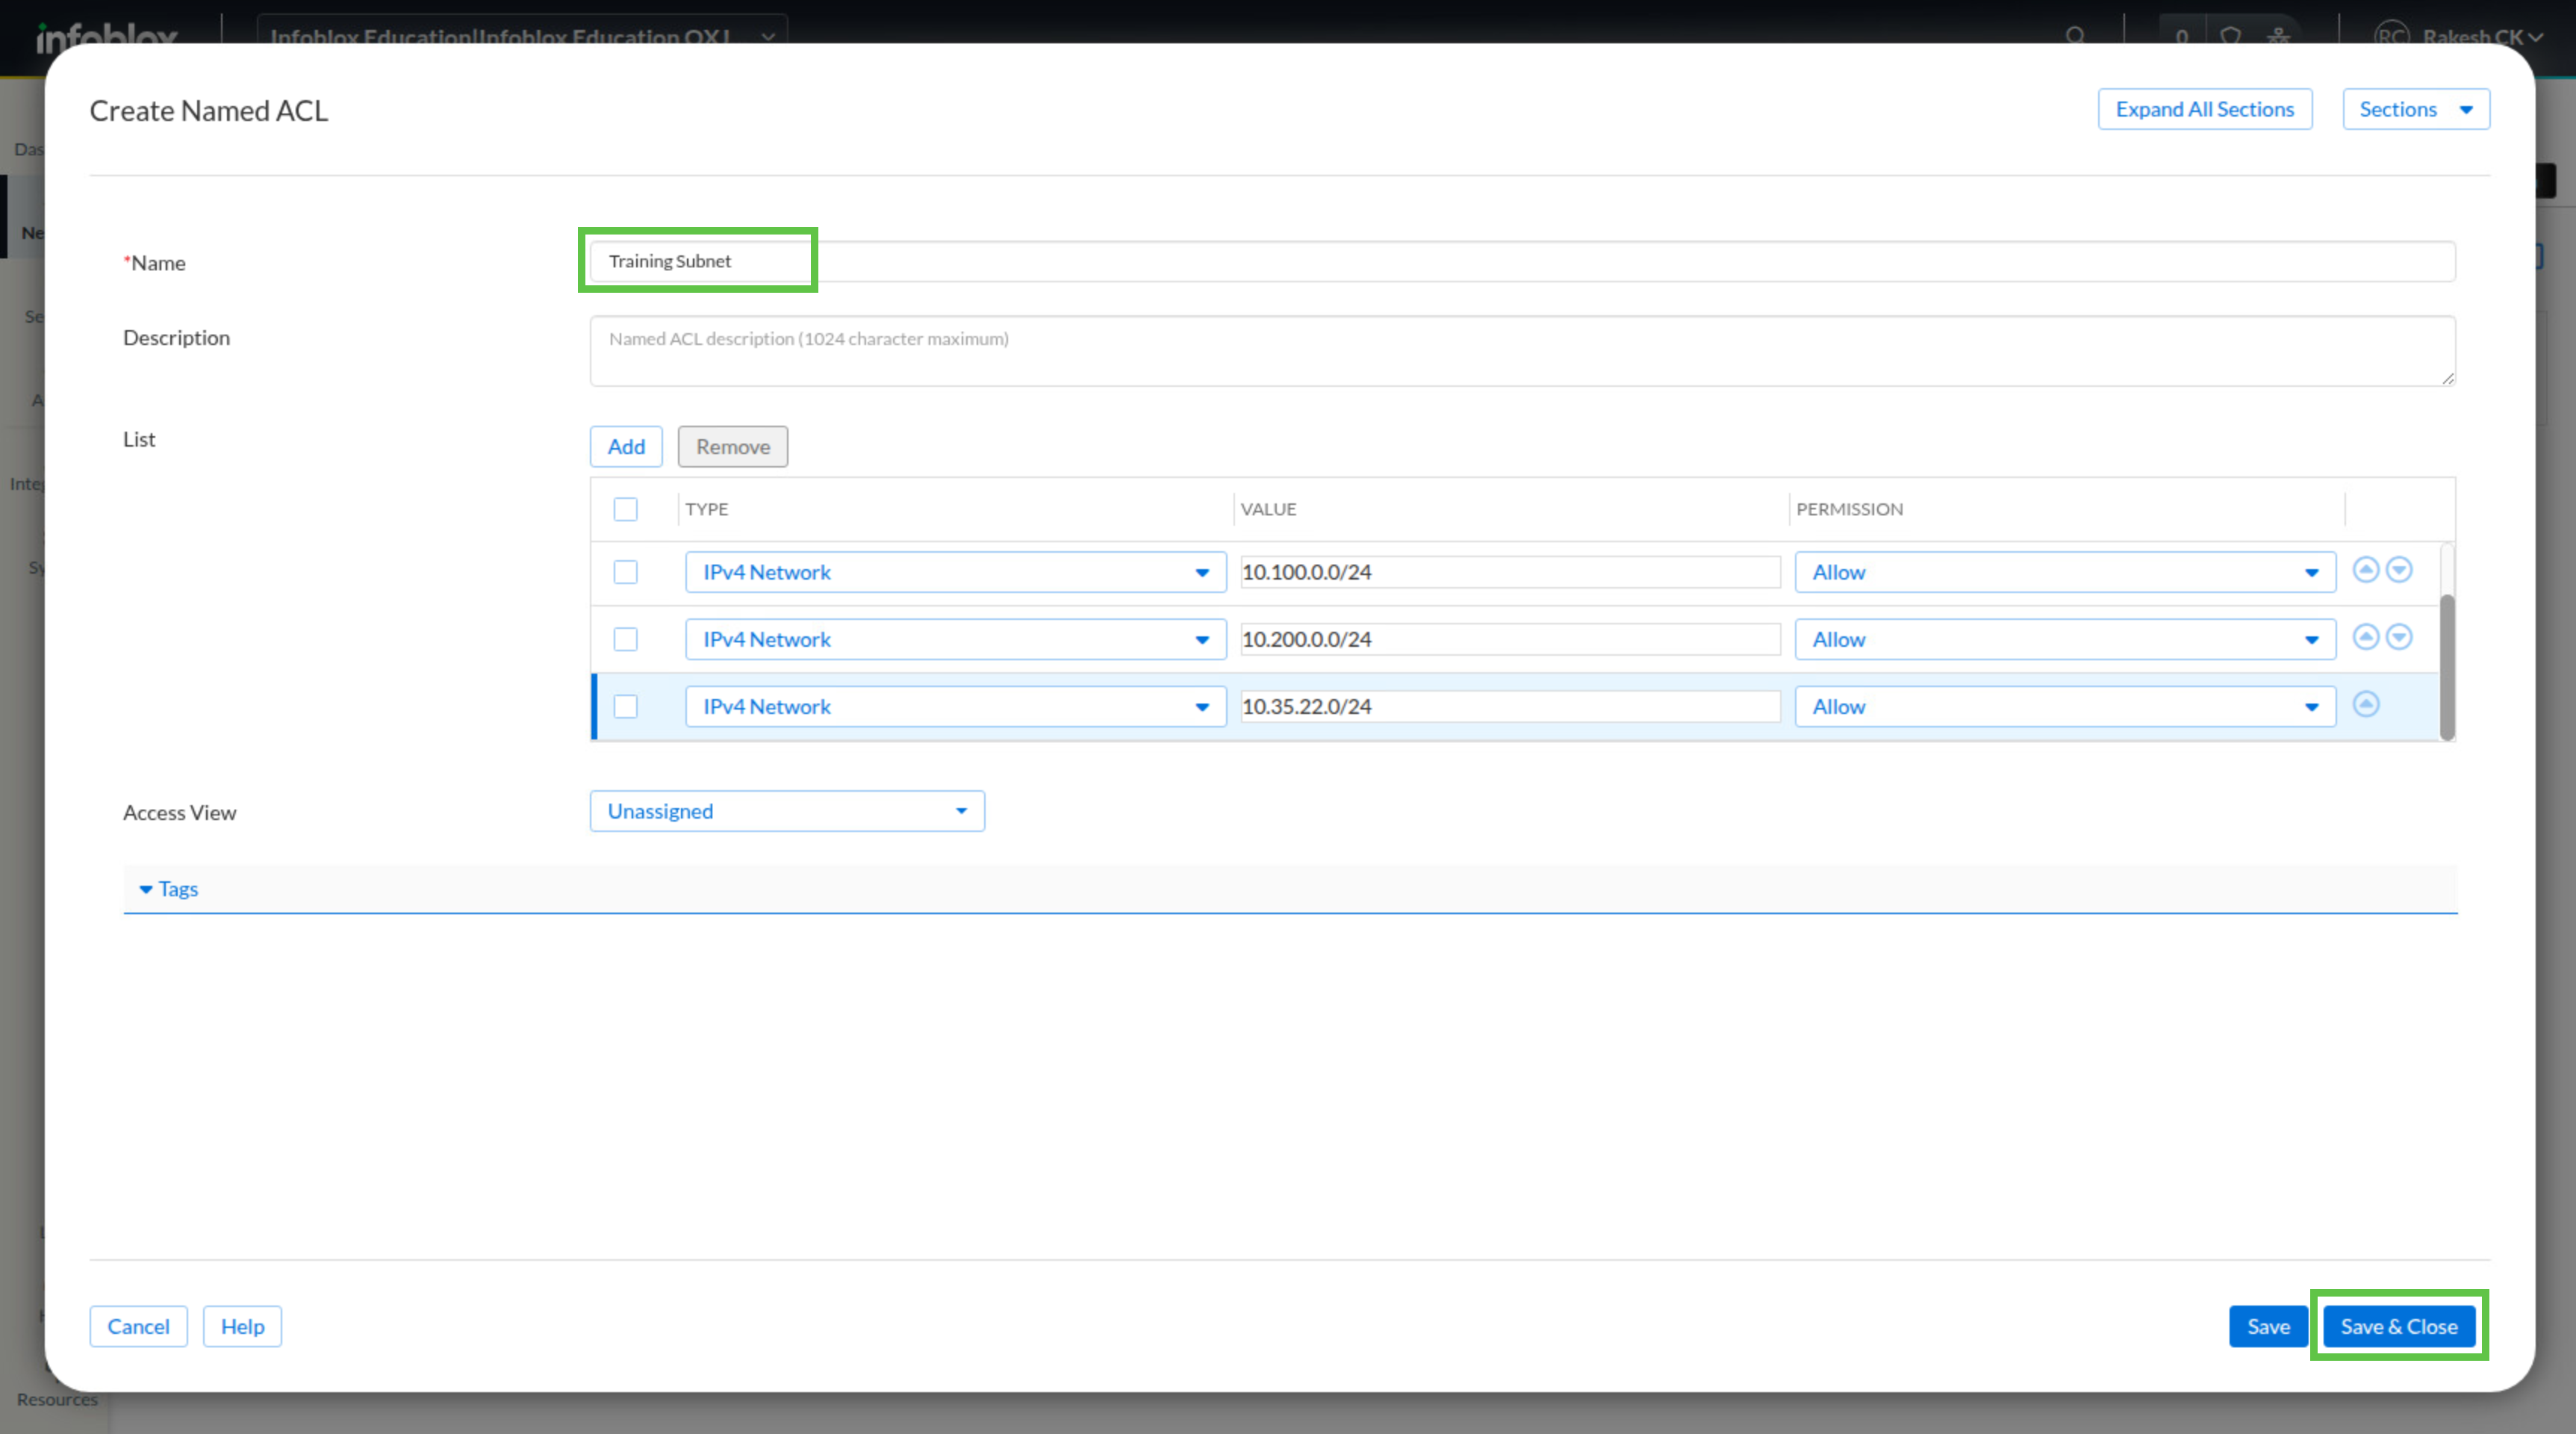
Create a Named ACL called Training Subnets that contains the internal networks allowed to use recursive DNS lookups.
|
Type |
Value |
Permission |
|---|---|---|
|
IPv4 Network |
172.31.0.0/16 |
Allow |
|
IPv4 Network |
10.100.0.0/24 |
Allow |
|
IPv4 Network |
10.200.0.0/24 |
Allow |
|
IPv4 Network |
10.35.22.0/24 |
Allow |
Task 4: Create DNS Config Profile
Create a DNS Config Profile called Techblue NYC Branch. Configure it to allow queries from Training Subnets, enable recursion, and allow recursive queries from the same Named ACL.
Task 5: Associate DNS Config Profile
Associate the Techblue NYC Branch DNS Config Profile with both DNS service instances so both servers enforce the same recursion settings and ACL policy.
Task 6: Verify recursive DNS resolution
Use testing-linux to verify that both DNS servers return recursive answers for an external name and confirm the response includes recursion available in the query results.
Solutions
Task 1 Solution: Create DNS Service Instances
Start by creating DNS service instances for the two NIOS-X servers you deployed earlier. These service instances provide the service-to-server mapping that lets Universal DDI use oph1.techblue.net and oph2.techblue.net as DNS servers for clients. When the services start for the first time, they can briefly show an Error state. Refresh the page after a few minutes and confirm that the services come online before continuing.
-
Log in to your lab’s jump-desktop.
-
Use the Education Infoblox Portal credentials to sign in to the Infoblox Portal.
-
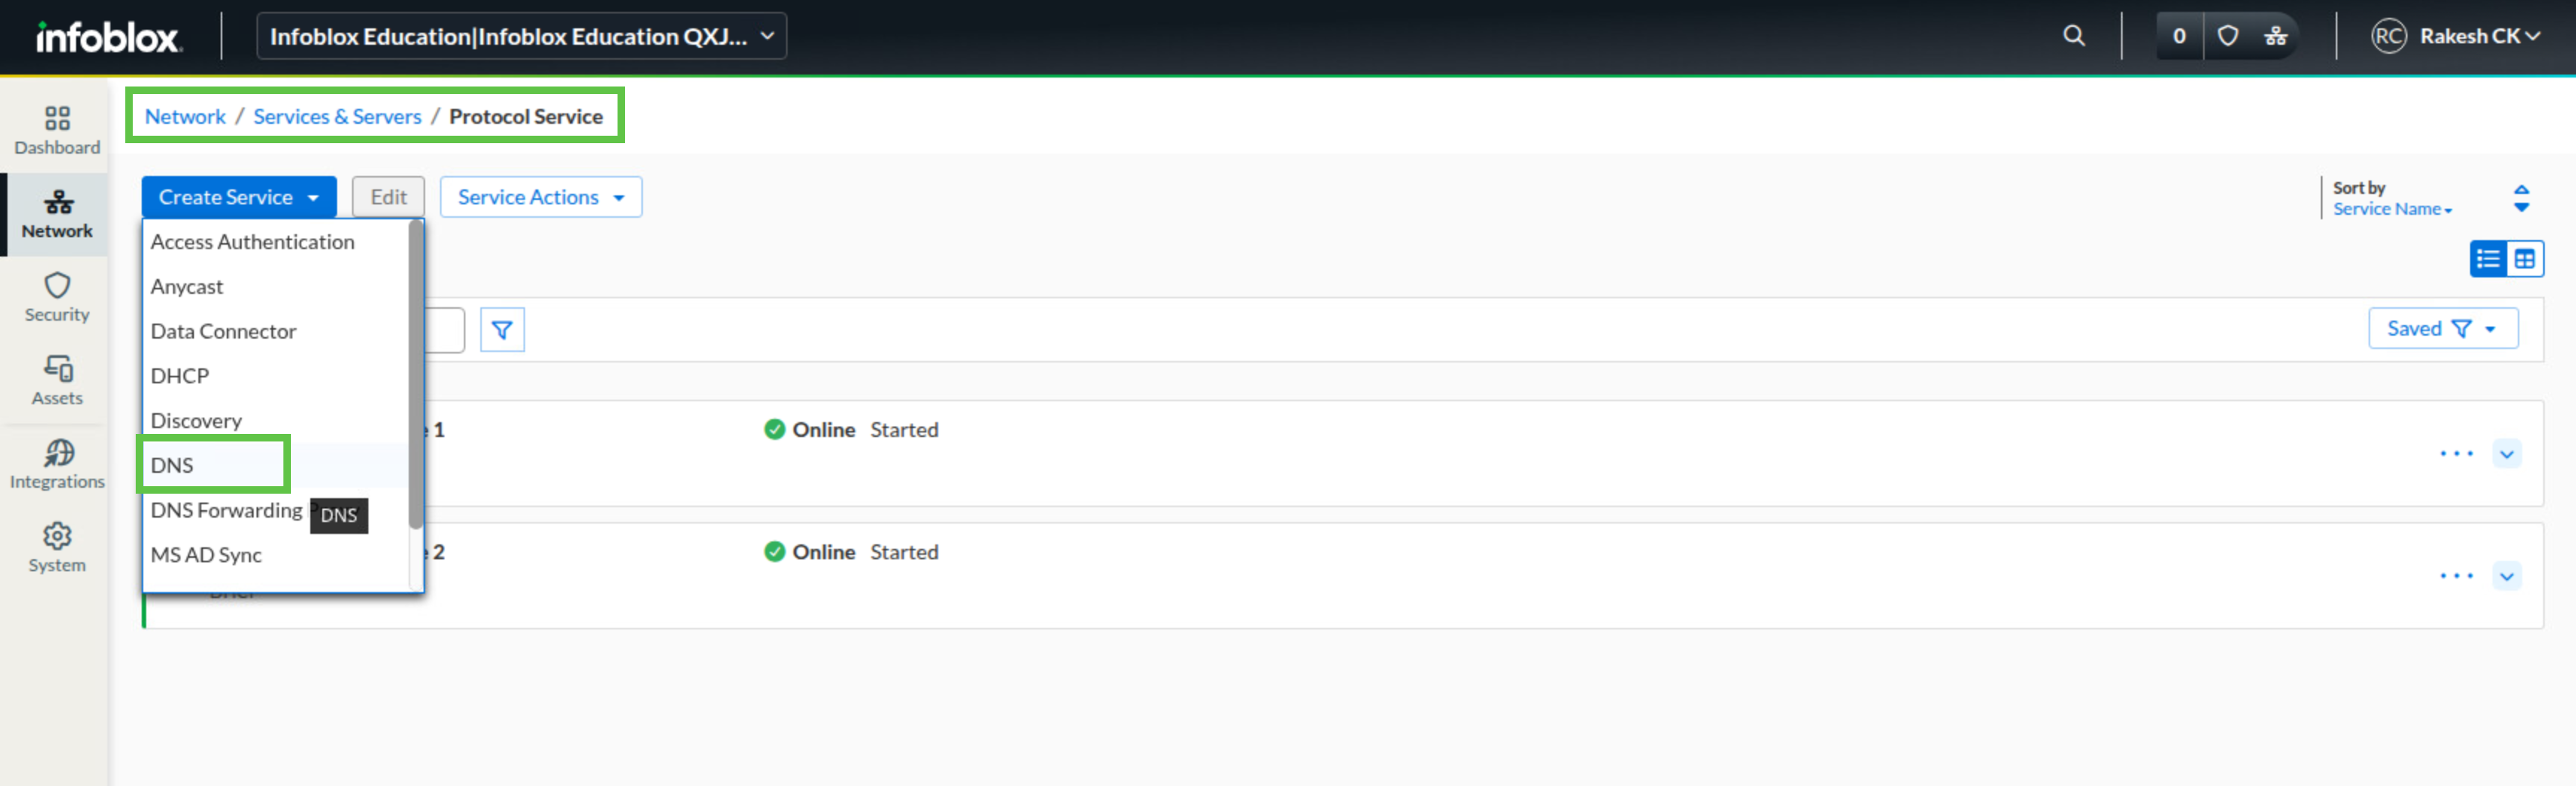
Navigate to Network → Services & Servers → Protocol Service.
-
Click Create Service and choose DNS.
-
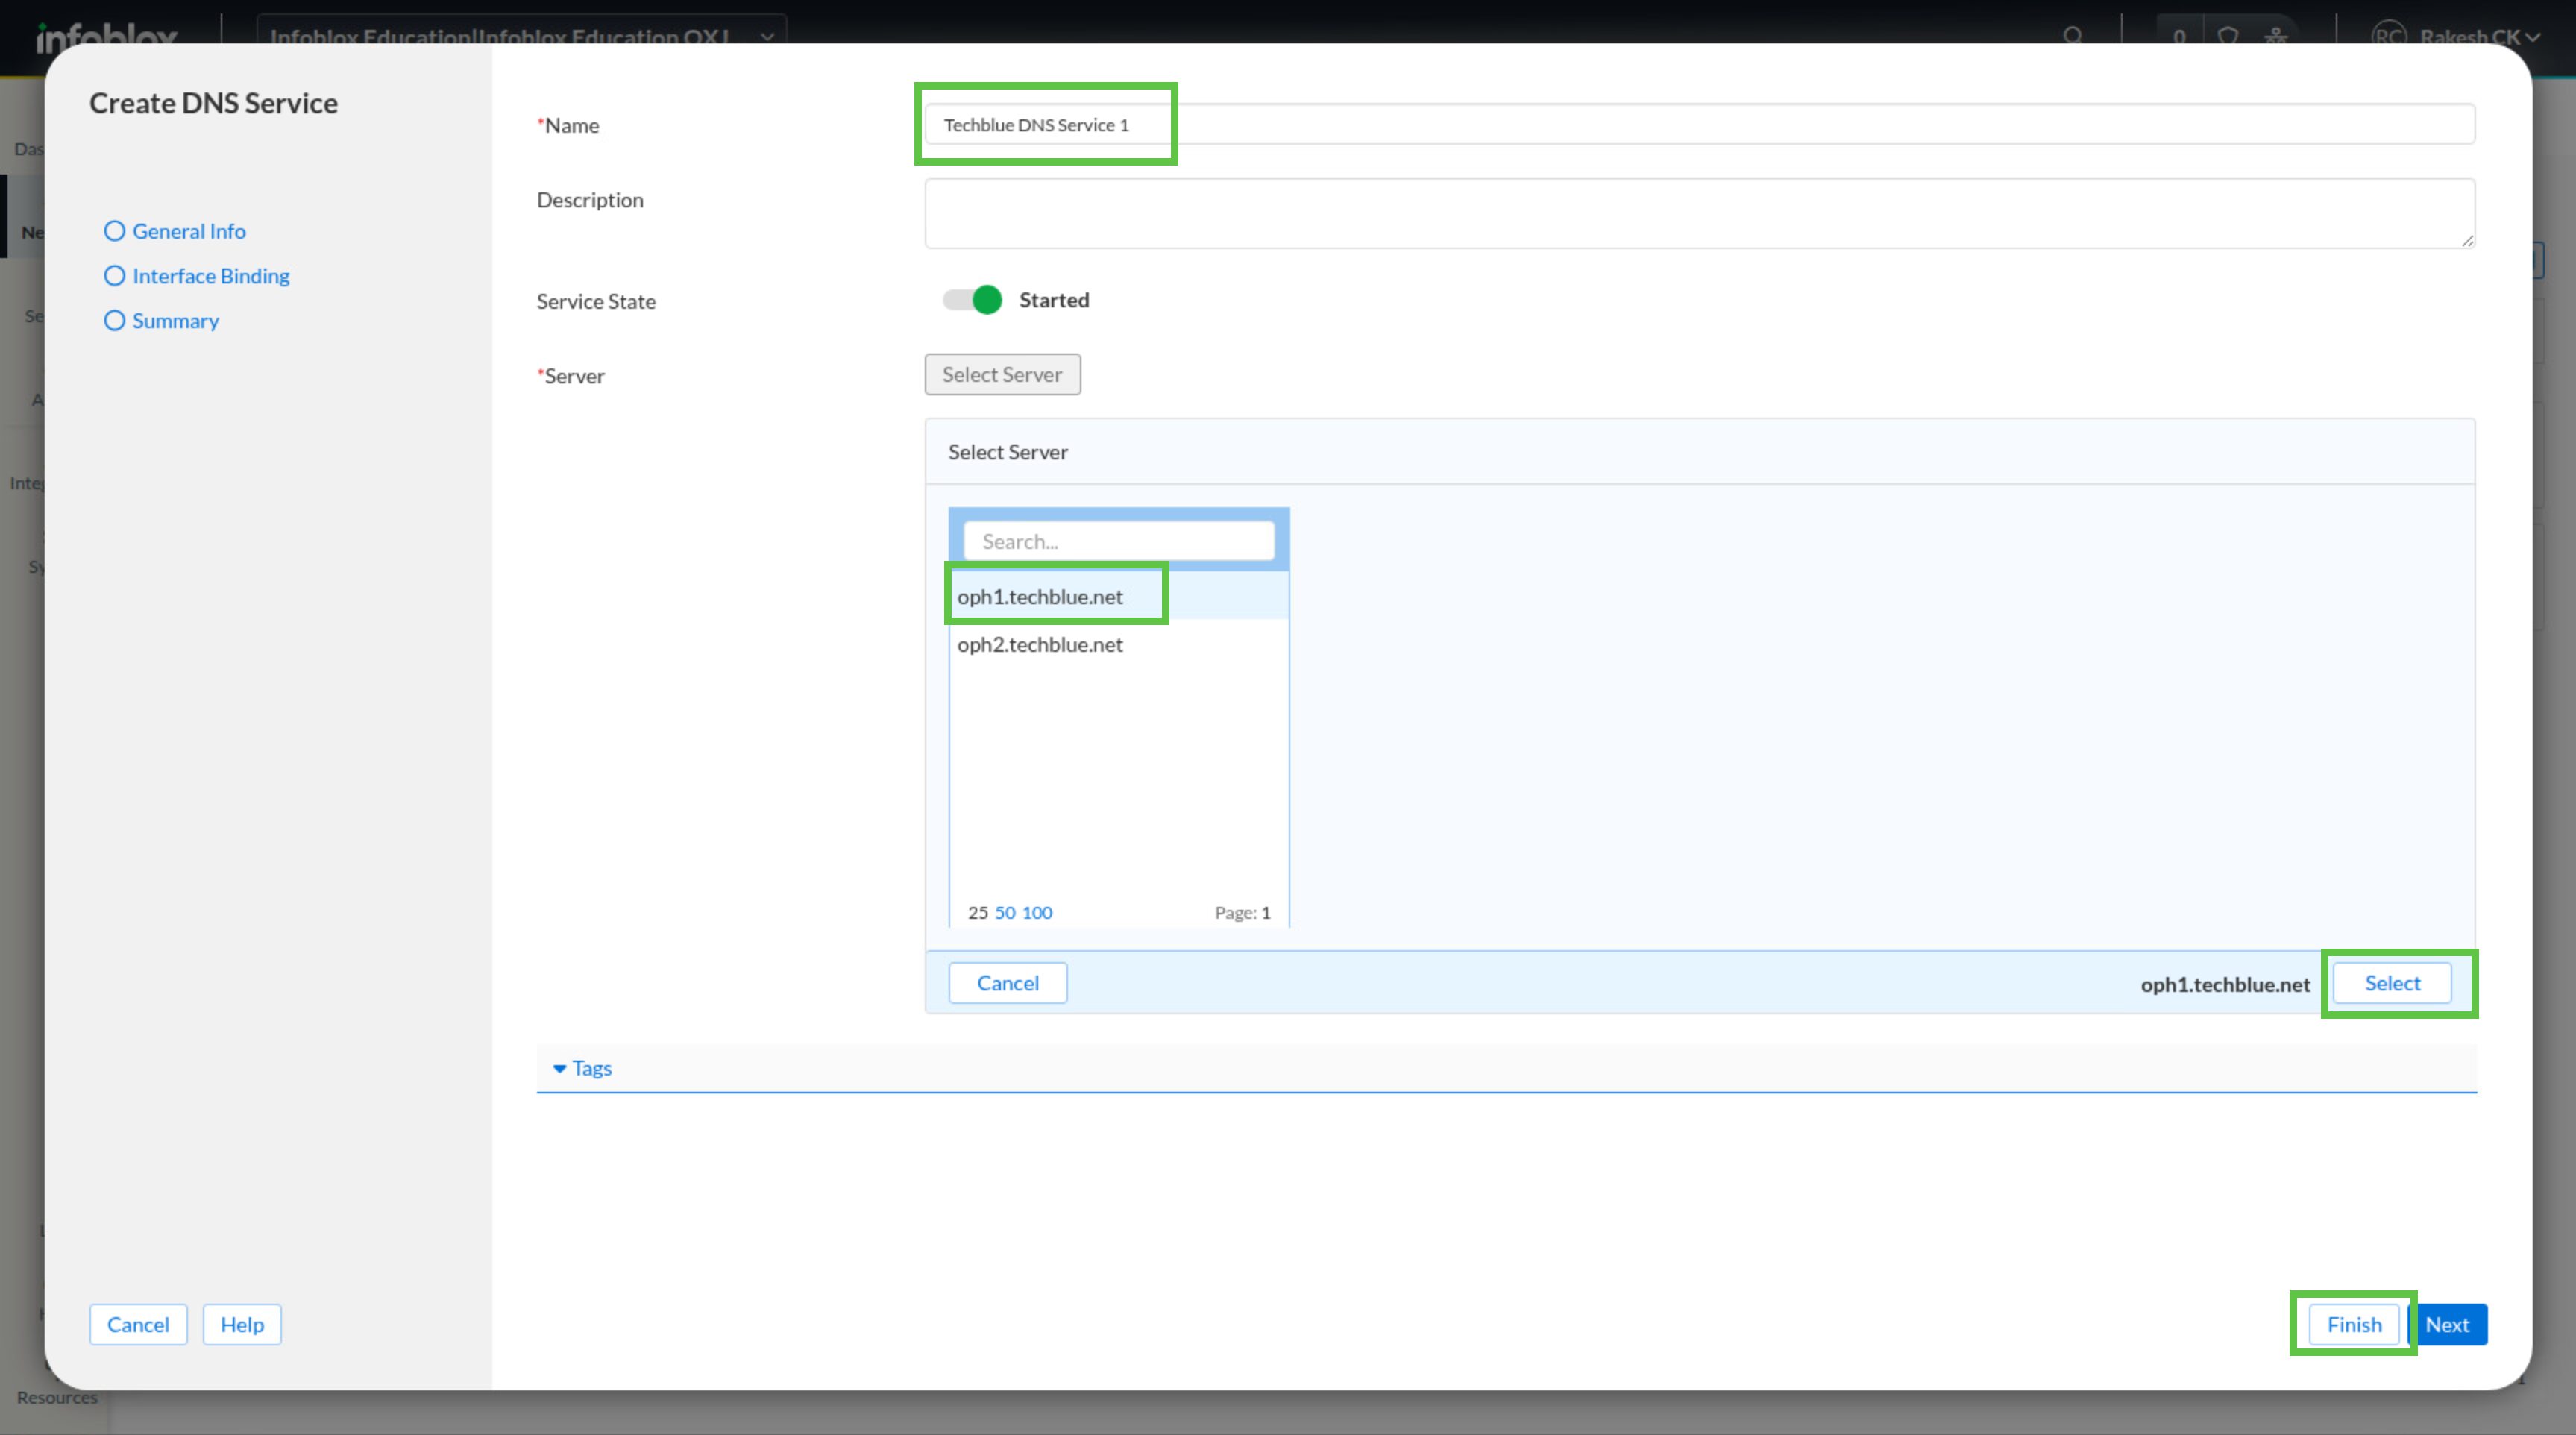
In the Create DNS Service dialog window, enter Techblue DNS Service 1 in the Name field.
-
Click Select Server, choose oph1.techblue.net, and click Select.
-
Click Finish.
-
Review the settings and click Save & Close.
-
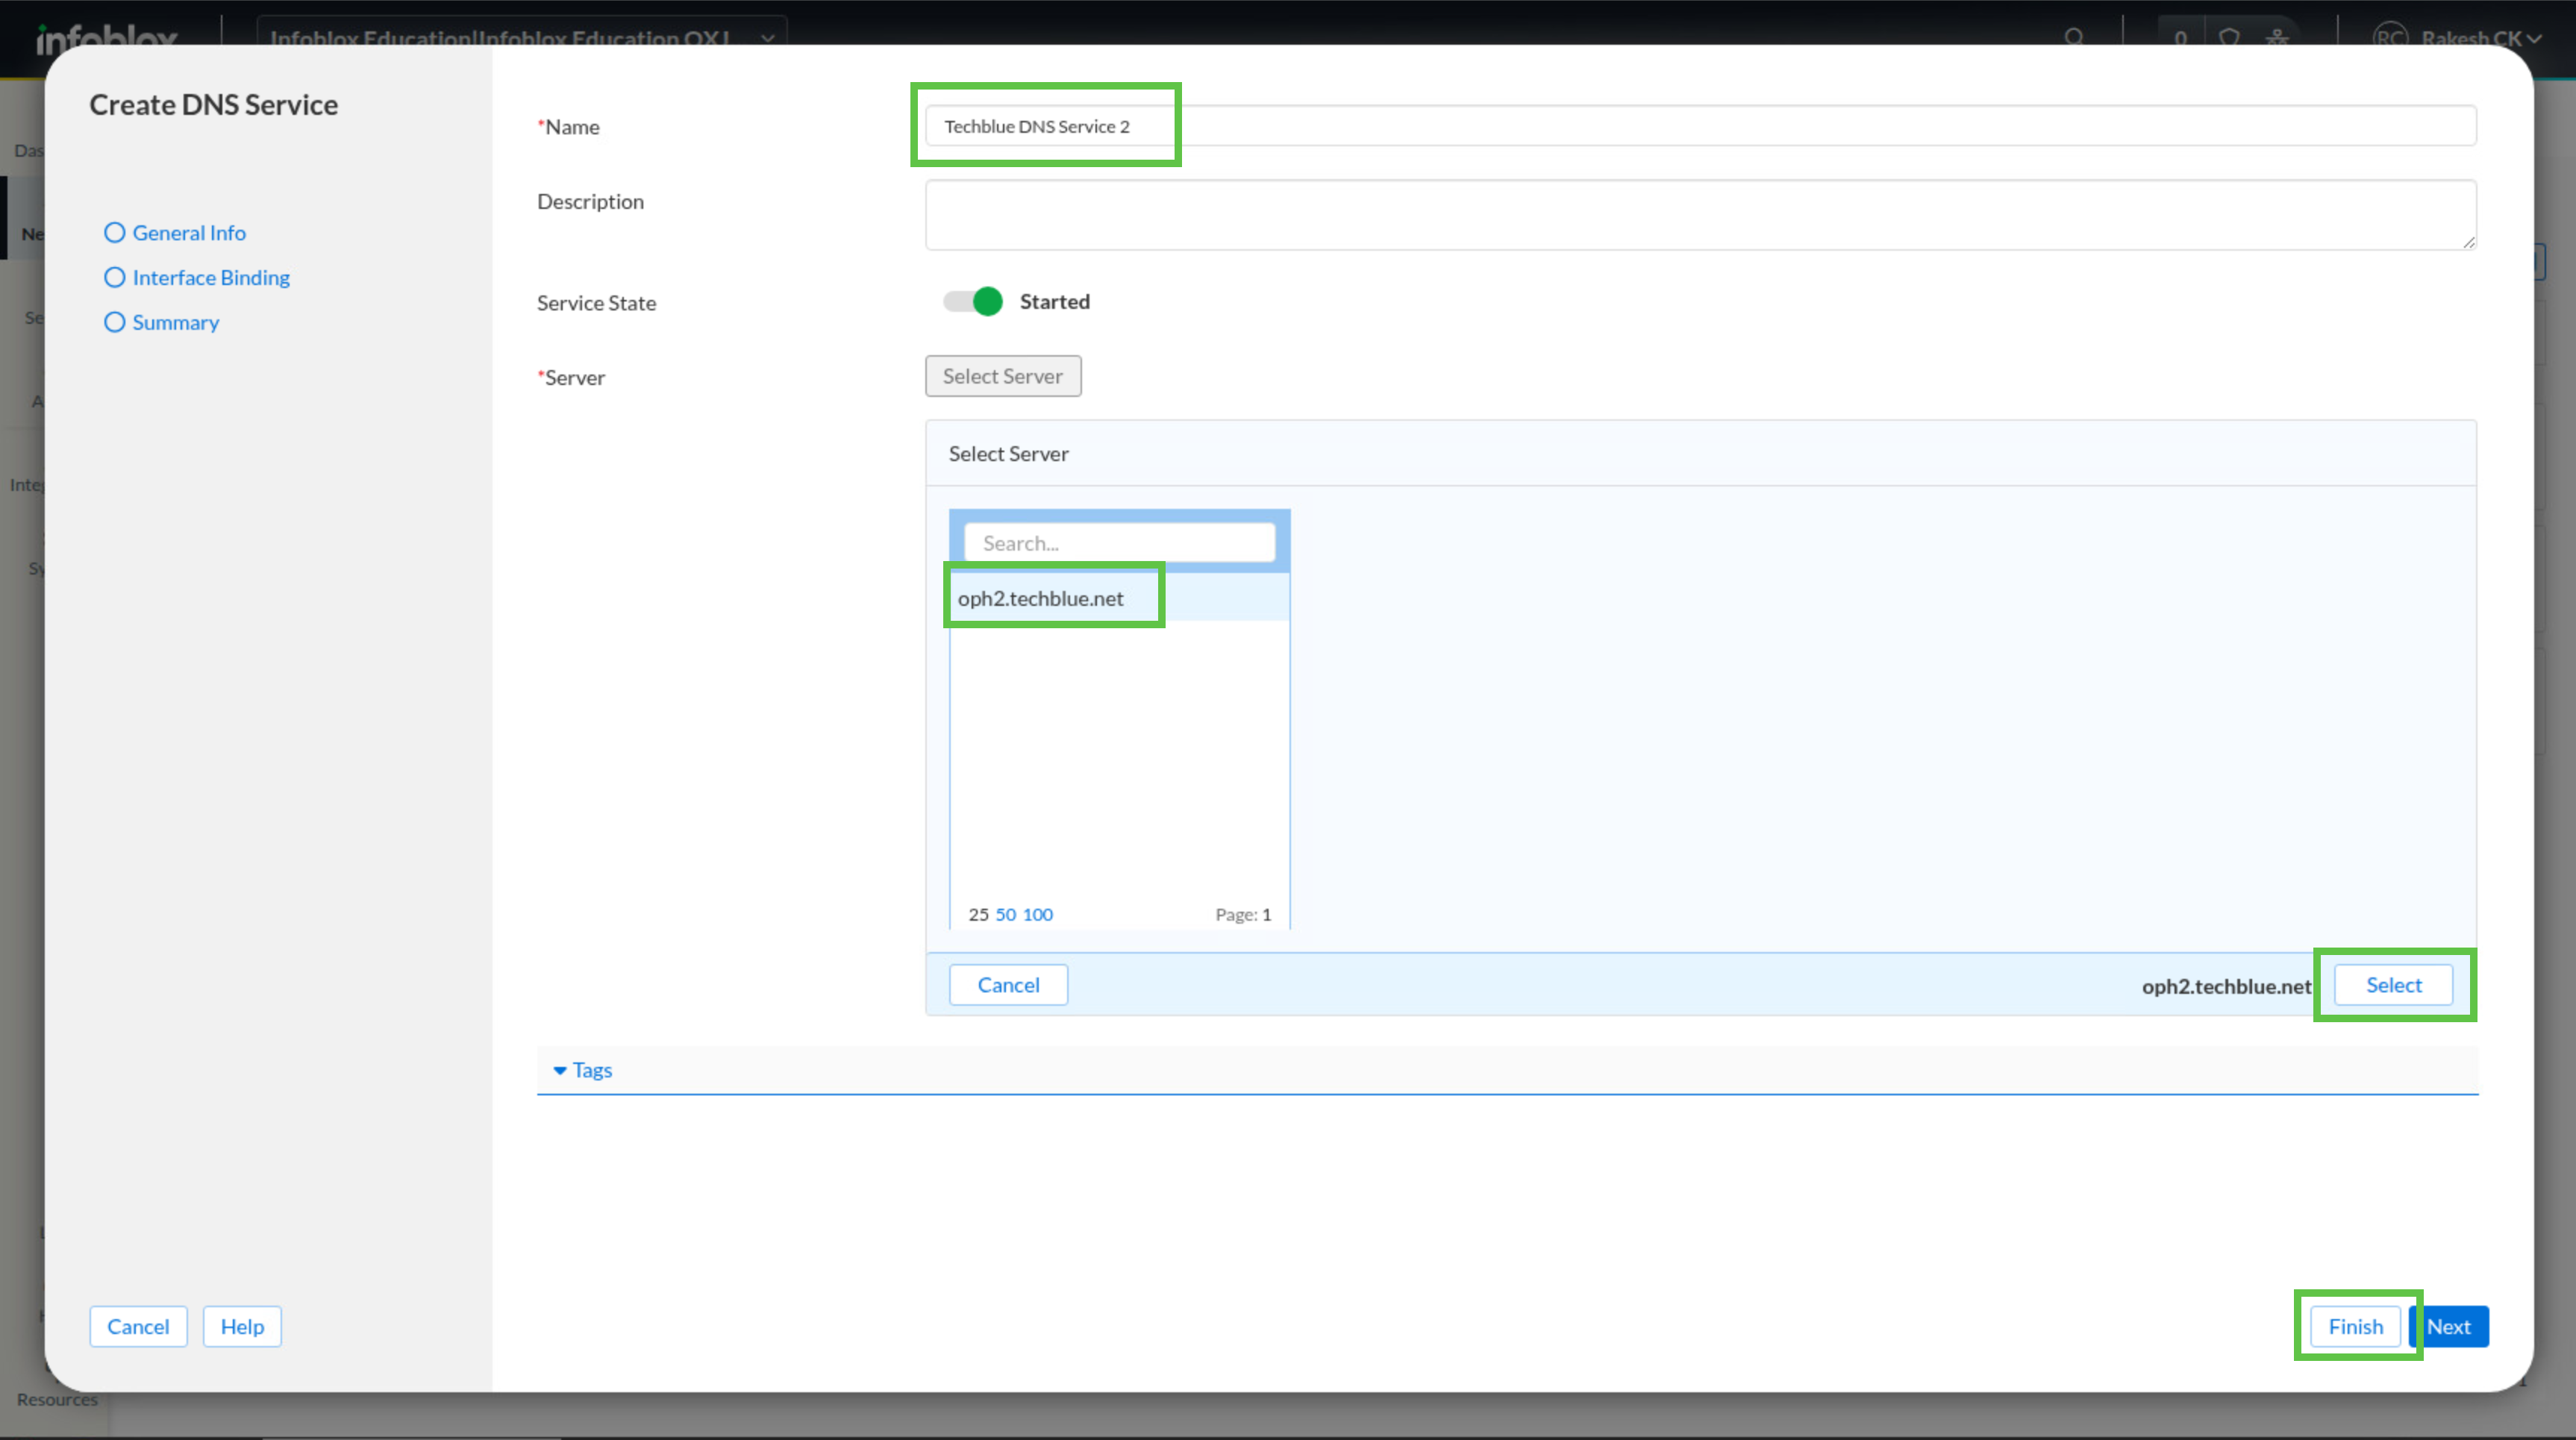
Repeat steps 4 through 8 to create Techblue DNS Service 2 for oph2.techblue.net.
-
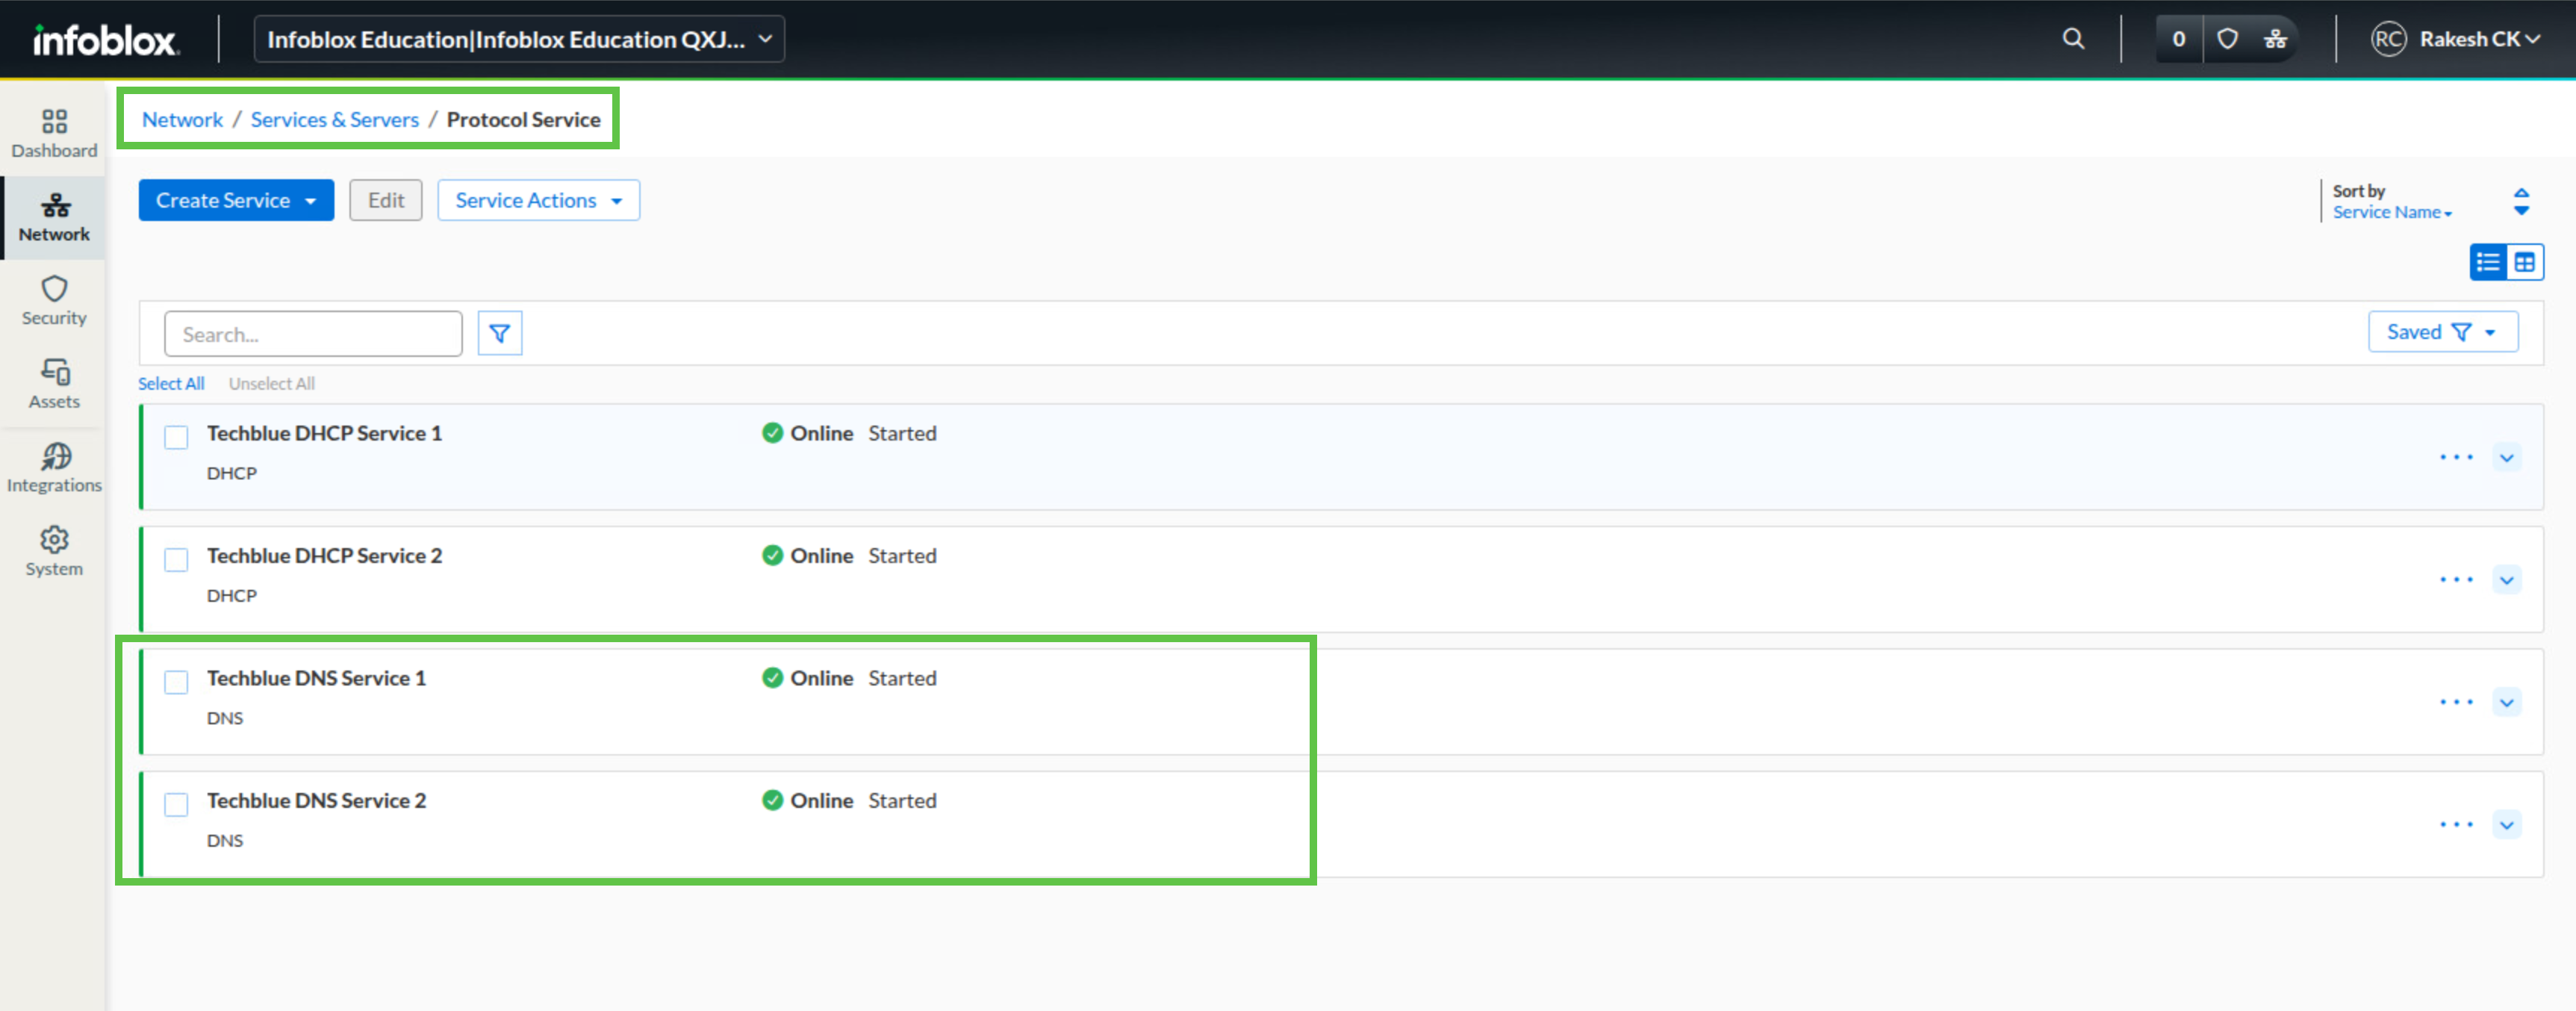
Refresh the page after a few minutes and confirm that both DNS services are online.
Task 2 Solution: Configure DNS hostnames
The service instances now exist, but each one still needs a resolvable DNS hostname. Configure the DNS name for each service instance now so the service configuration matches the underlying NIOS-X server names you prepared earlier.
-
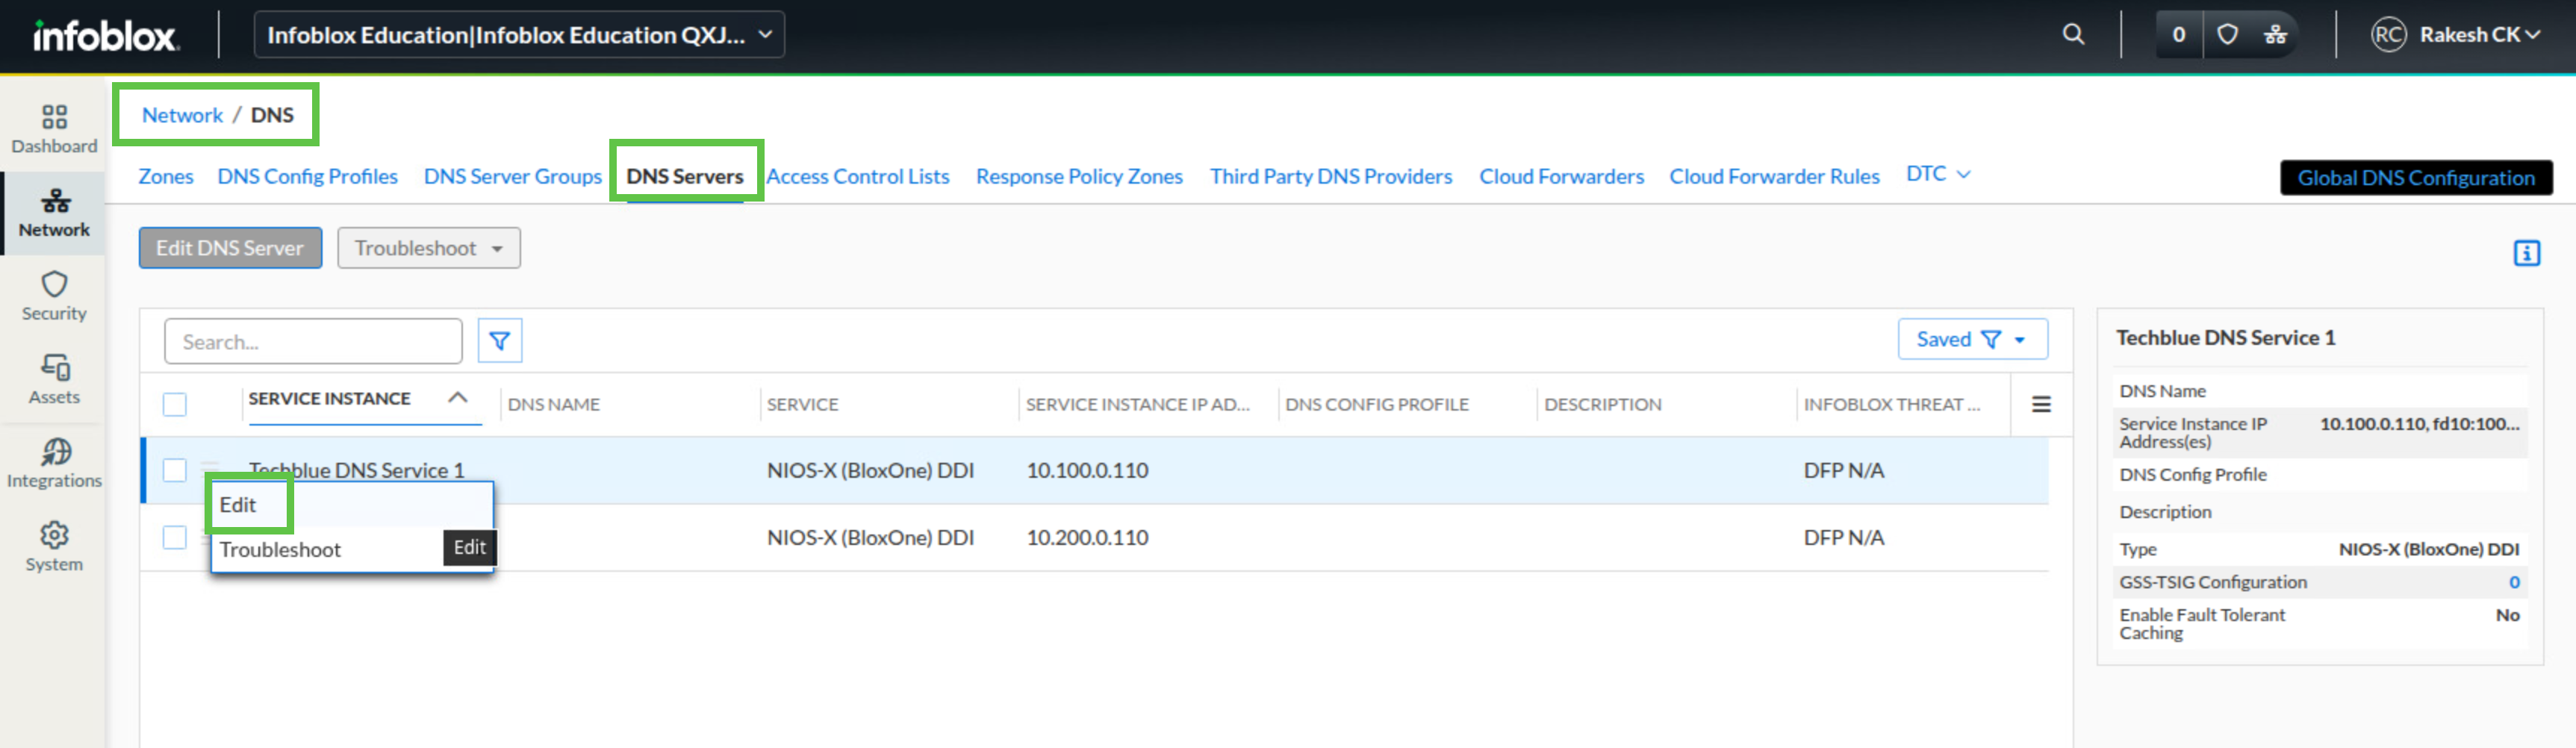
In the Infoblox Portal, navigate to Network → DNS.
-
Select the DNS Servers tab.
-
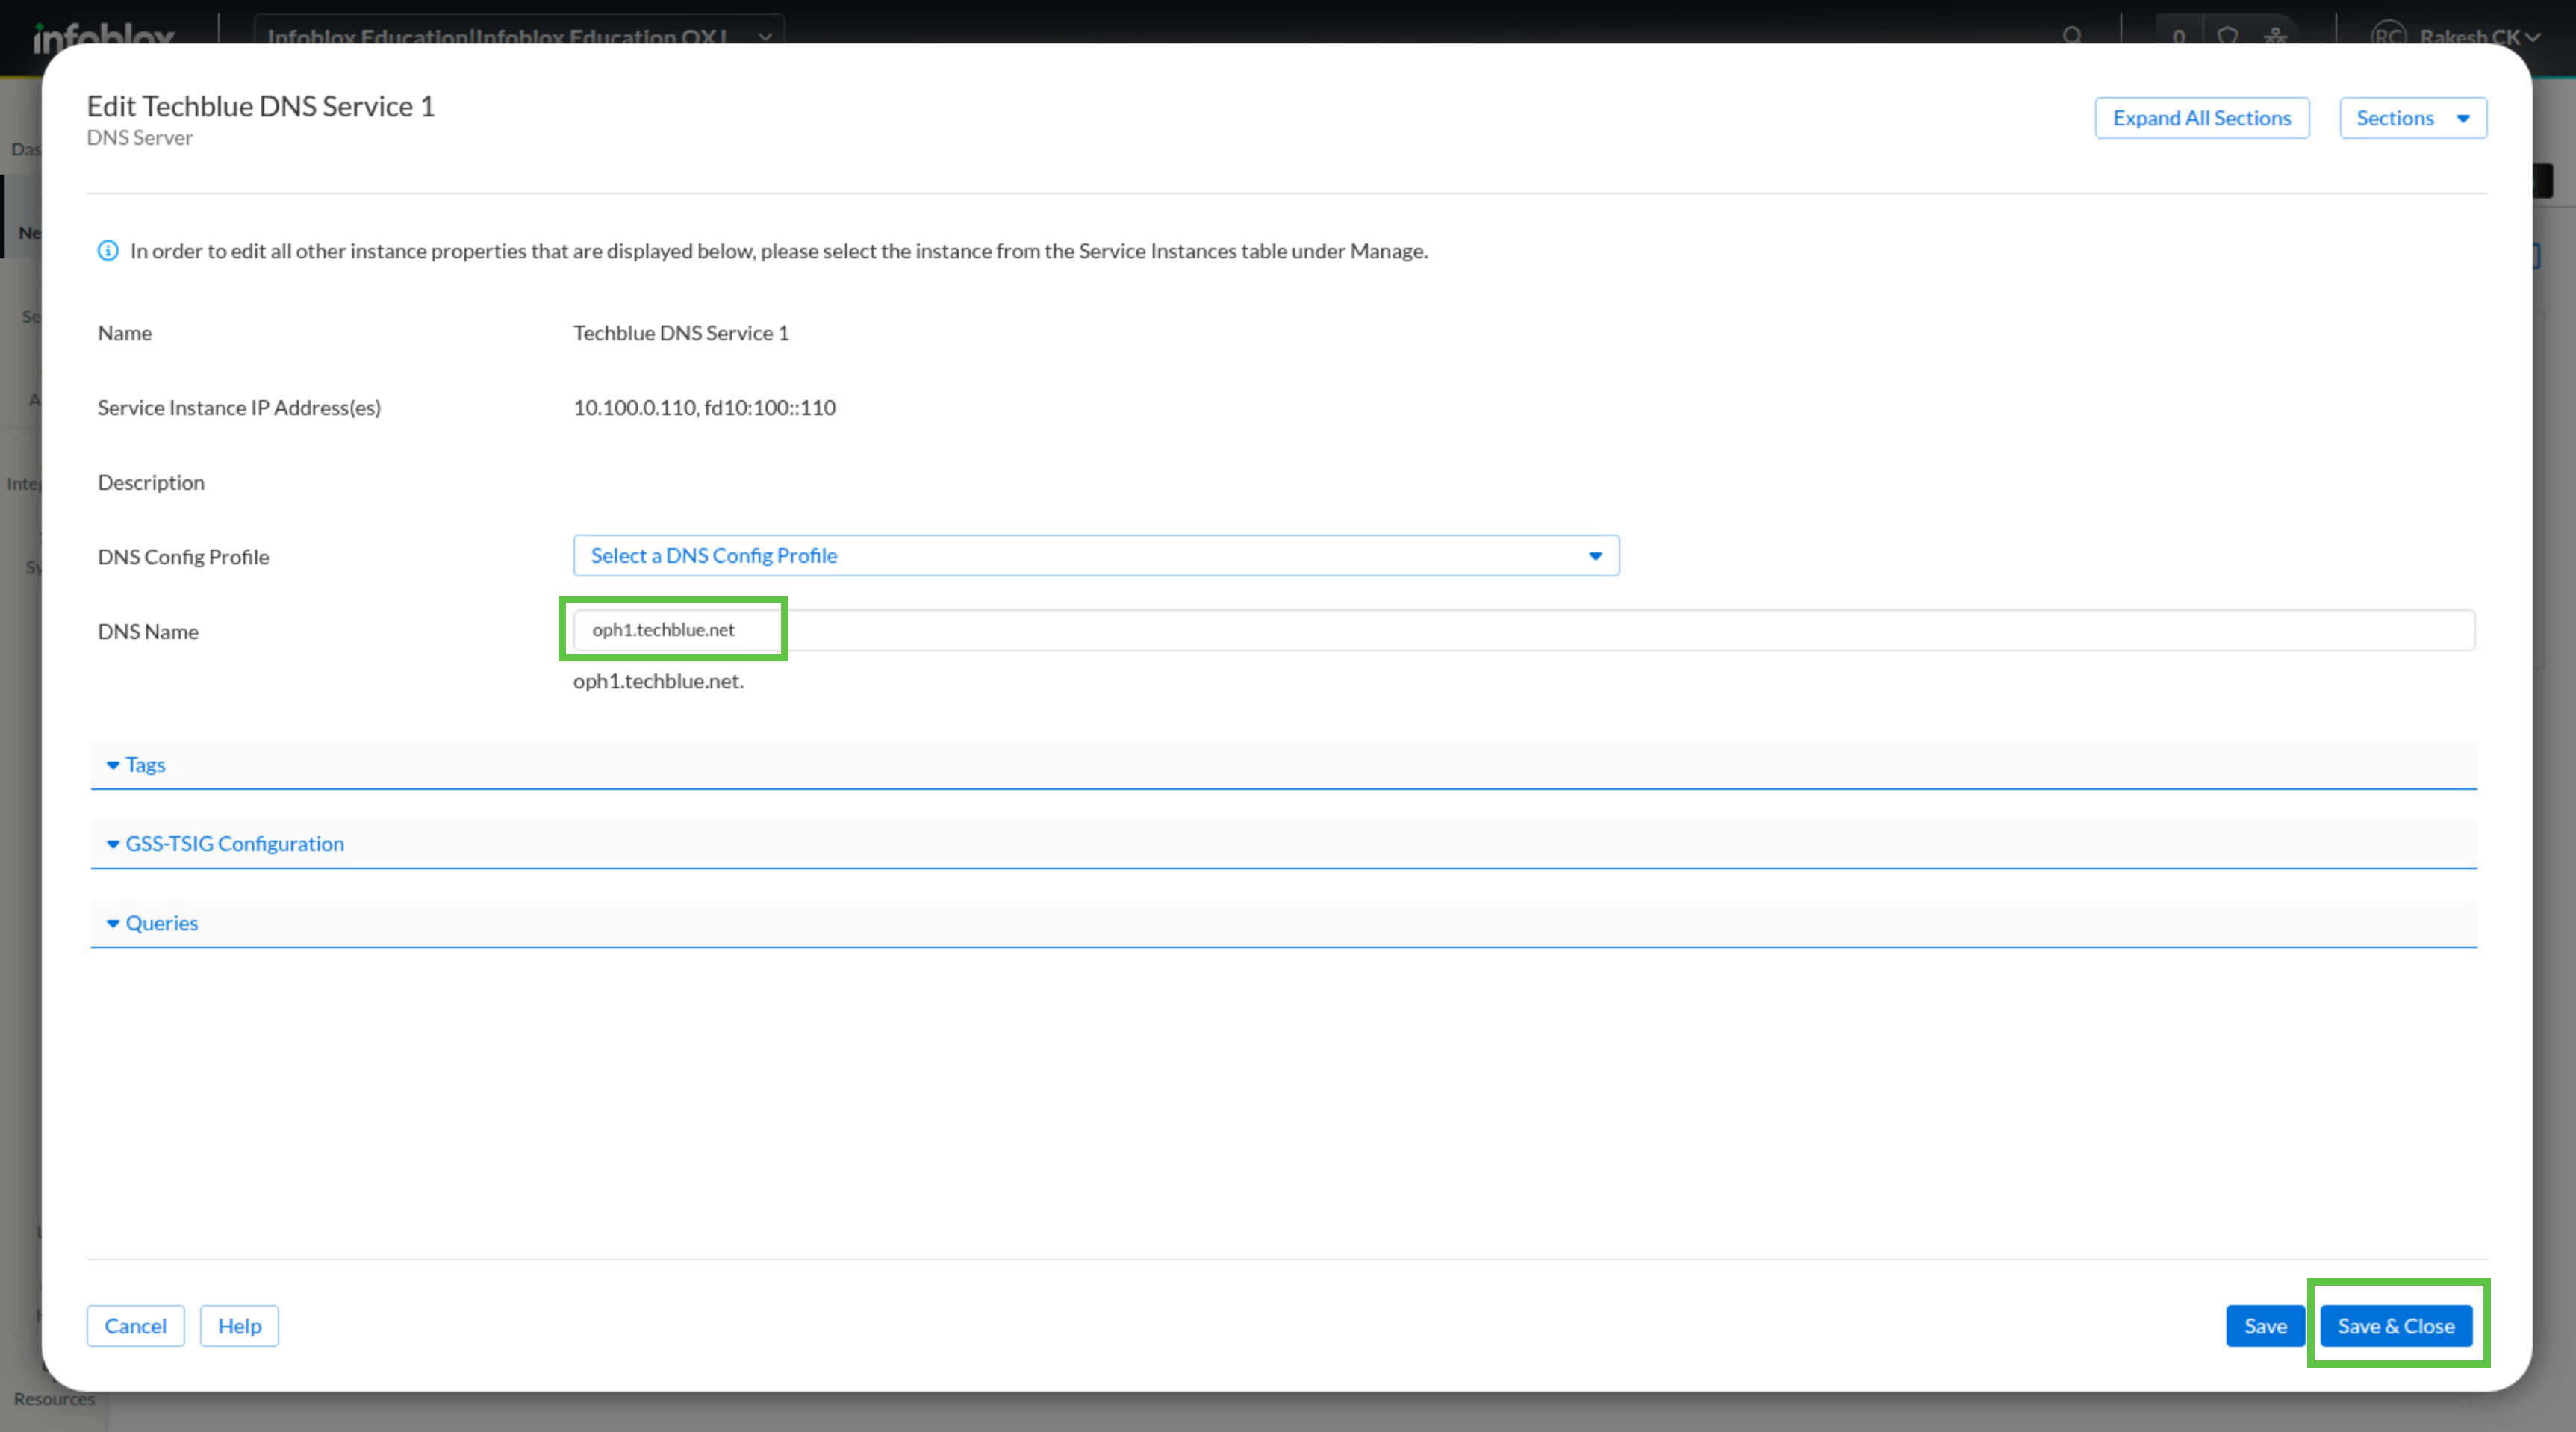
Open the menu next to Techblue DNS Service 1 and click Edit.
-
In the DNS Name field, enter oph1.techblue.net.
-
Click Save & Close.
-
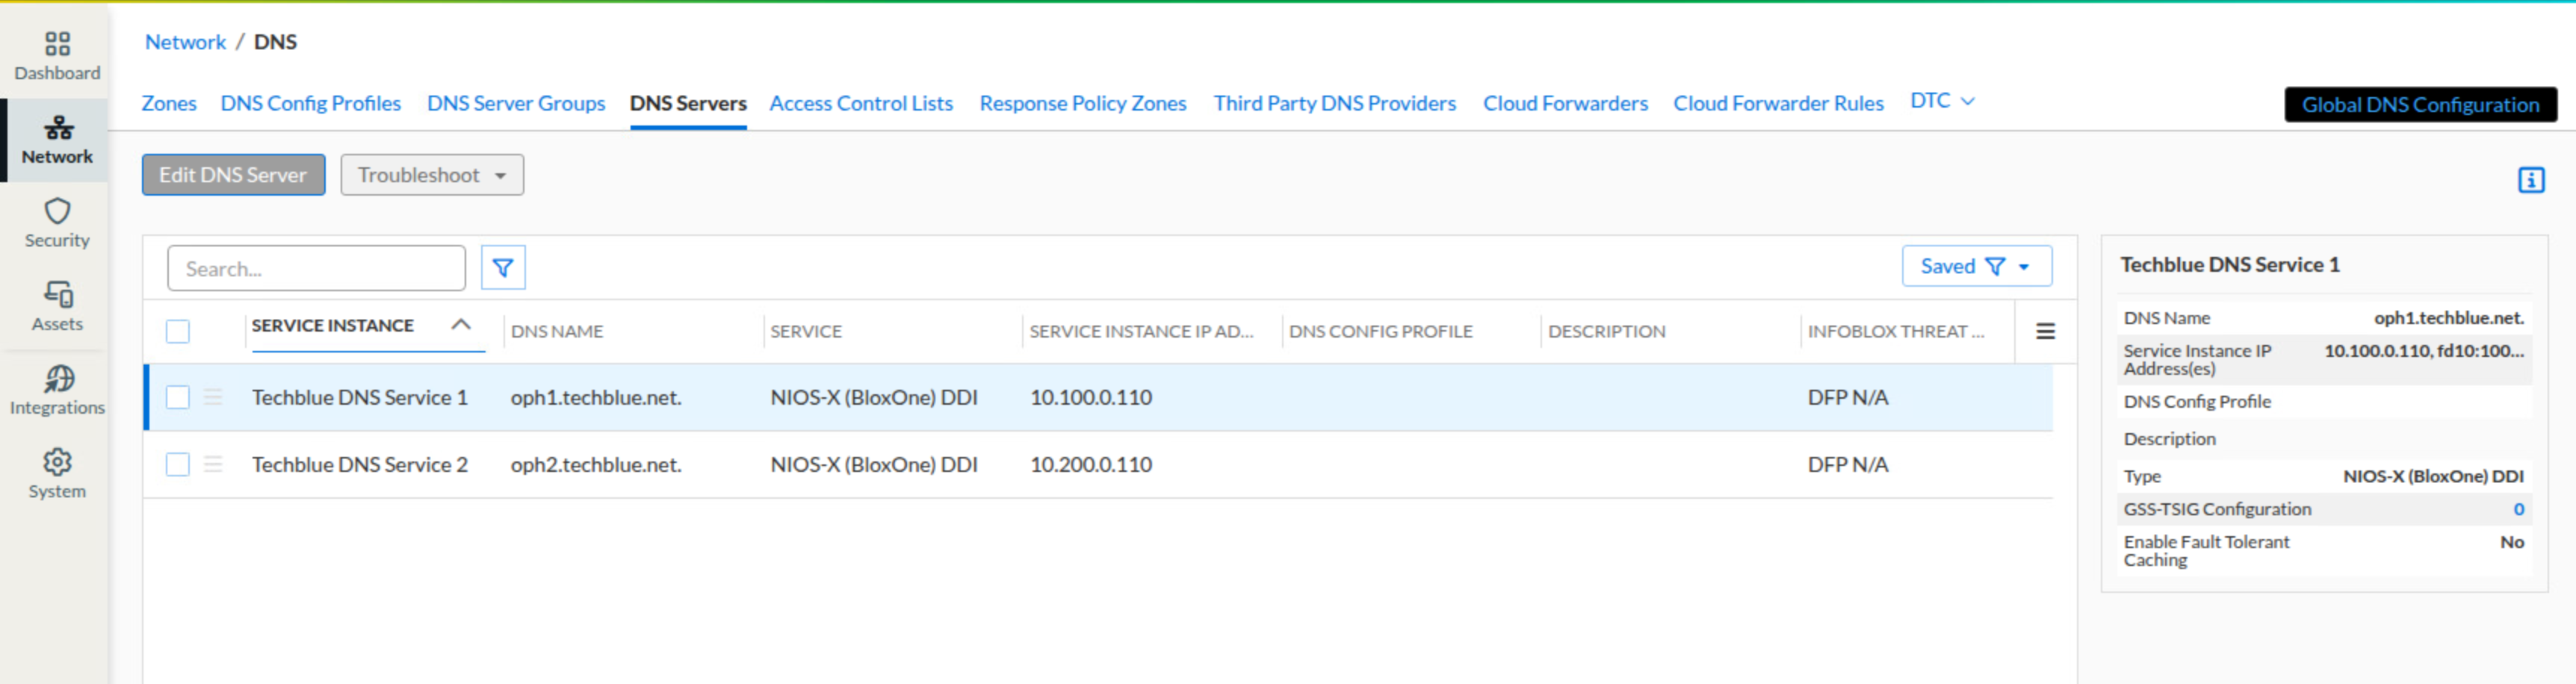
Repeat steps 3 through 5 for Techblue DNS Service 2, using oph2.techblue.net as the DNS name.
Task 3 Solution: Create Named ACL
Because these DNS servers will provide recursion, restrict access to trusted internal networks before you enable the policy on the servers. The Named ACL gives you a reusable object that defines exactly which subnets are allowed to use recursive DNS lookups.
-
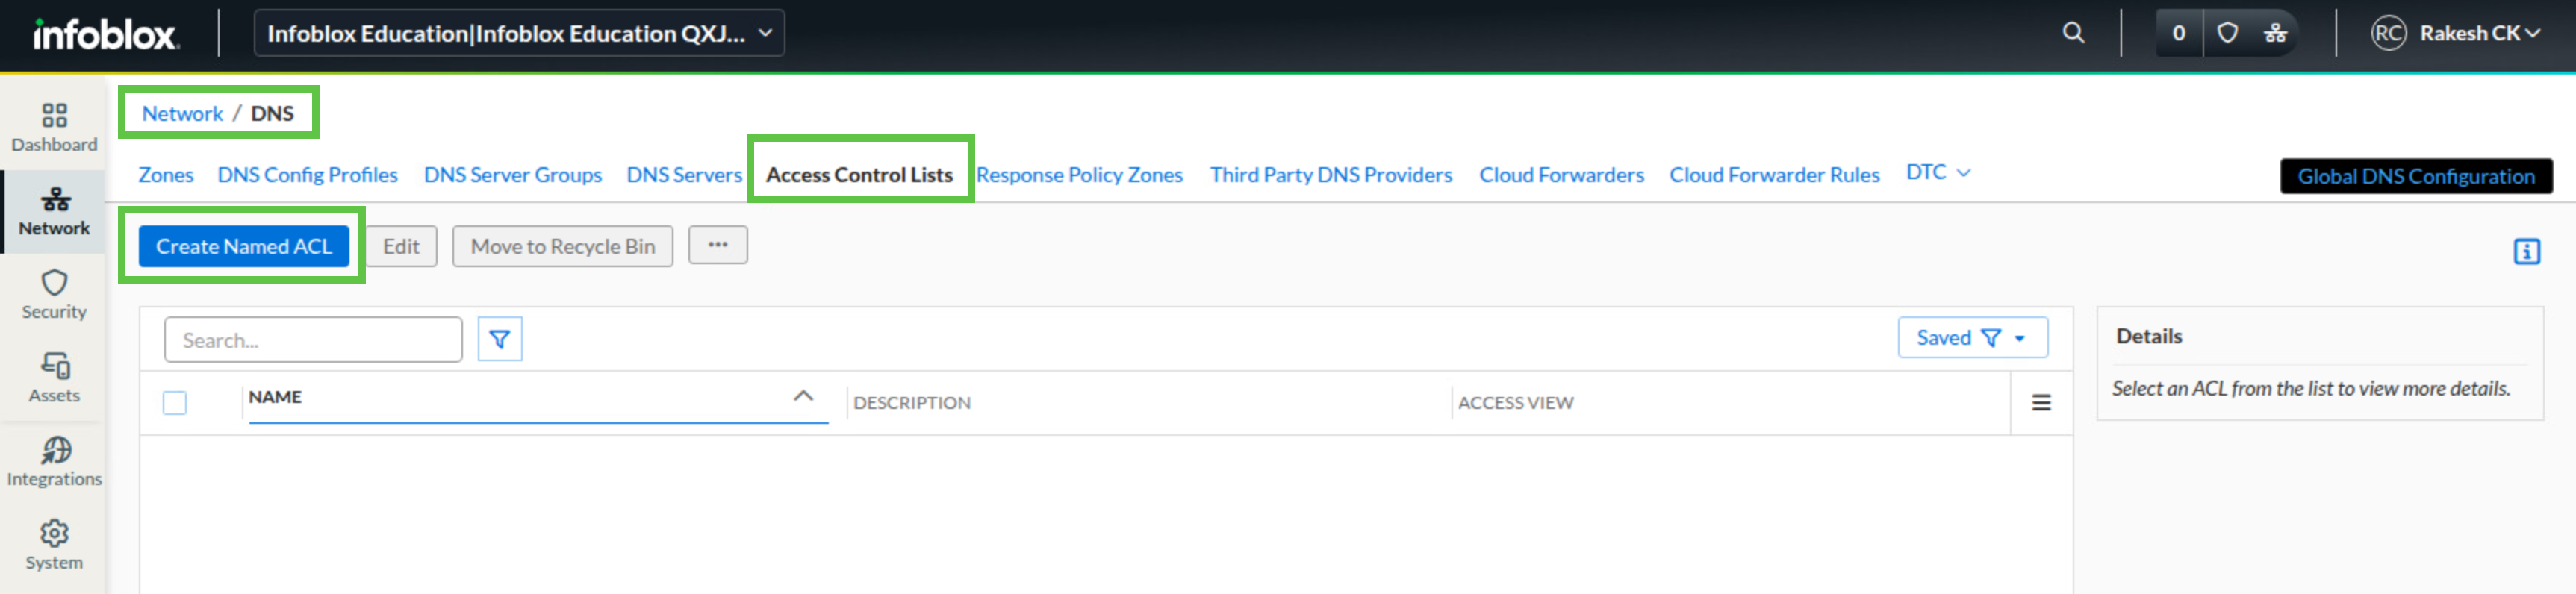
In the Infoblox Portal, navigate to Network → DNS.
-
Select the Access Control Lists tab.
-
Click Create Named ACL.
-
In the Create Named ACL dialog window, enter Training Subnets in the Name field.
-
In the List section, click Add and create an entry with Type IPv4 Network, Value 172.31.0.0/16, and Permission Allow.
-
Click Add and create an entry with Type IPv4 Network, Value 10.100.0.0/24, and Permission Allow.
-
Click Add and create an entry with Type IPv4 Network, Value 10.200.0.0/24, and Permission Allow.
-
Click Add and create an entry with Type IPv4 Network, Value 10.35.22.0/24, and Permission Allow.
-
Review the settings and click Save & Close.
Task 4 Solution: Create DNS Config Profile
After the Named ACL is created, create the shared DNS policy that uses it. In this task, you allow general queries from Training Subnets, enable recursion, and restrict recursive queries to the same ACL, so both DNS servers use a consistent, controlled policy.
-
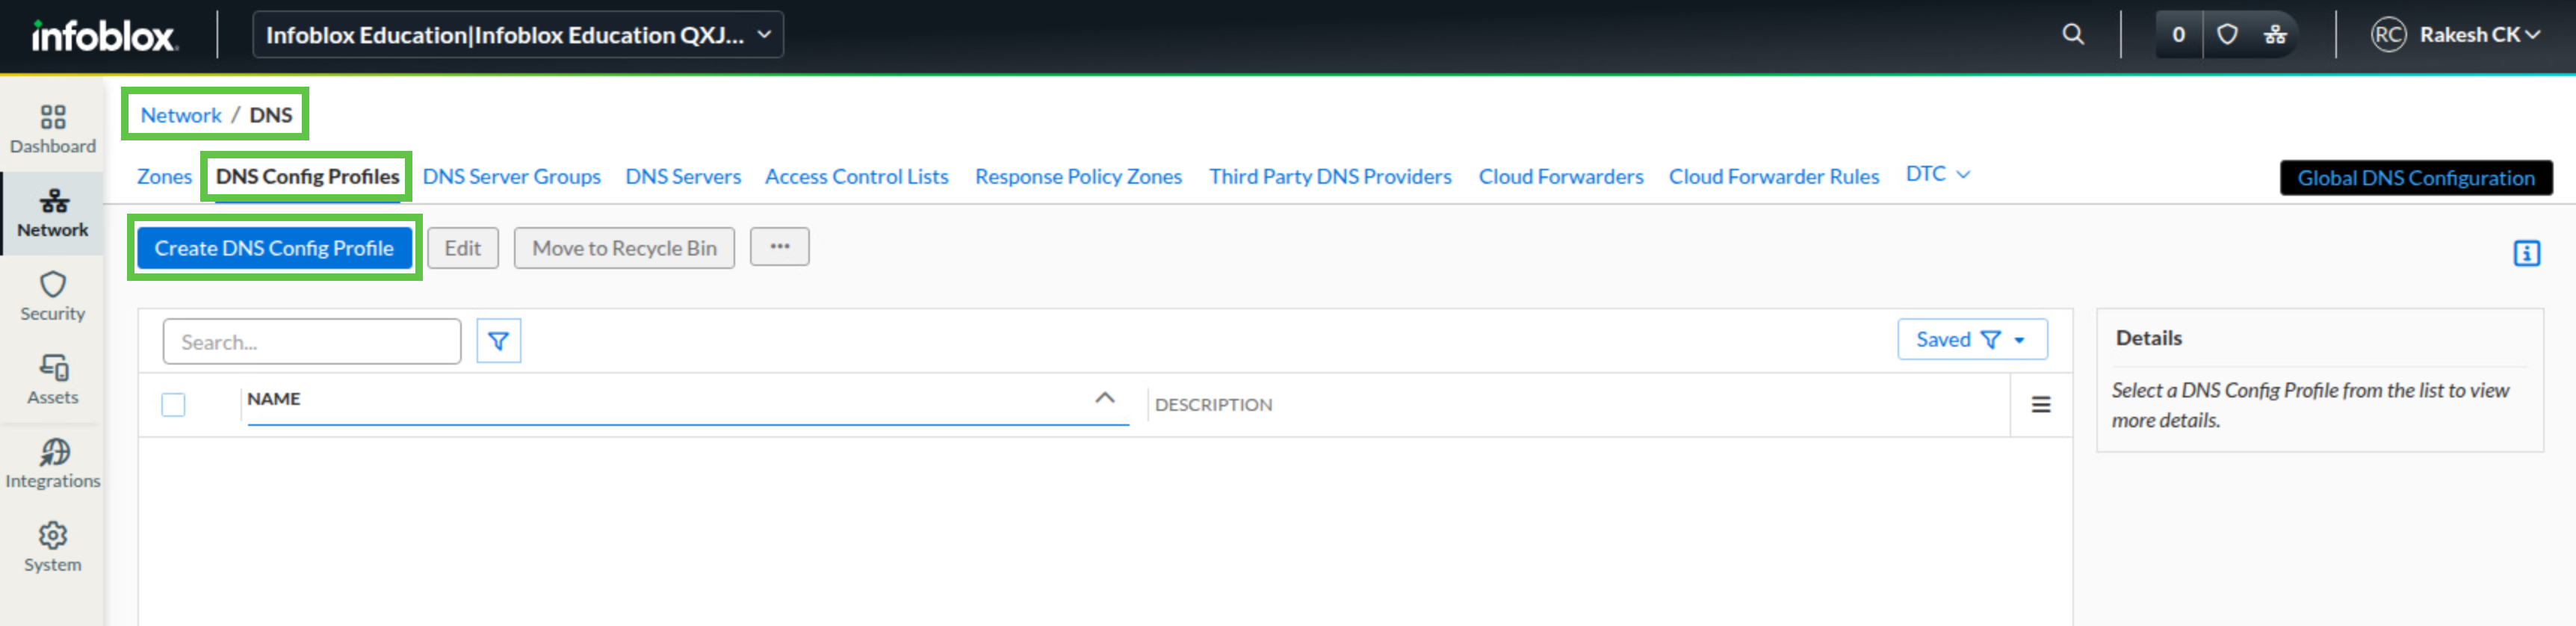
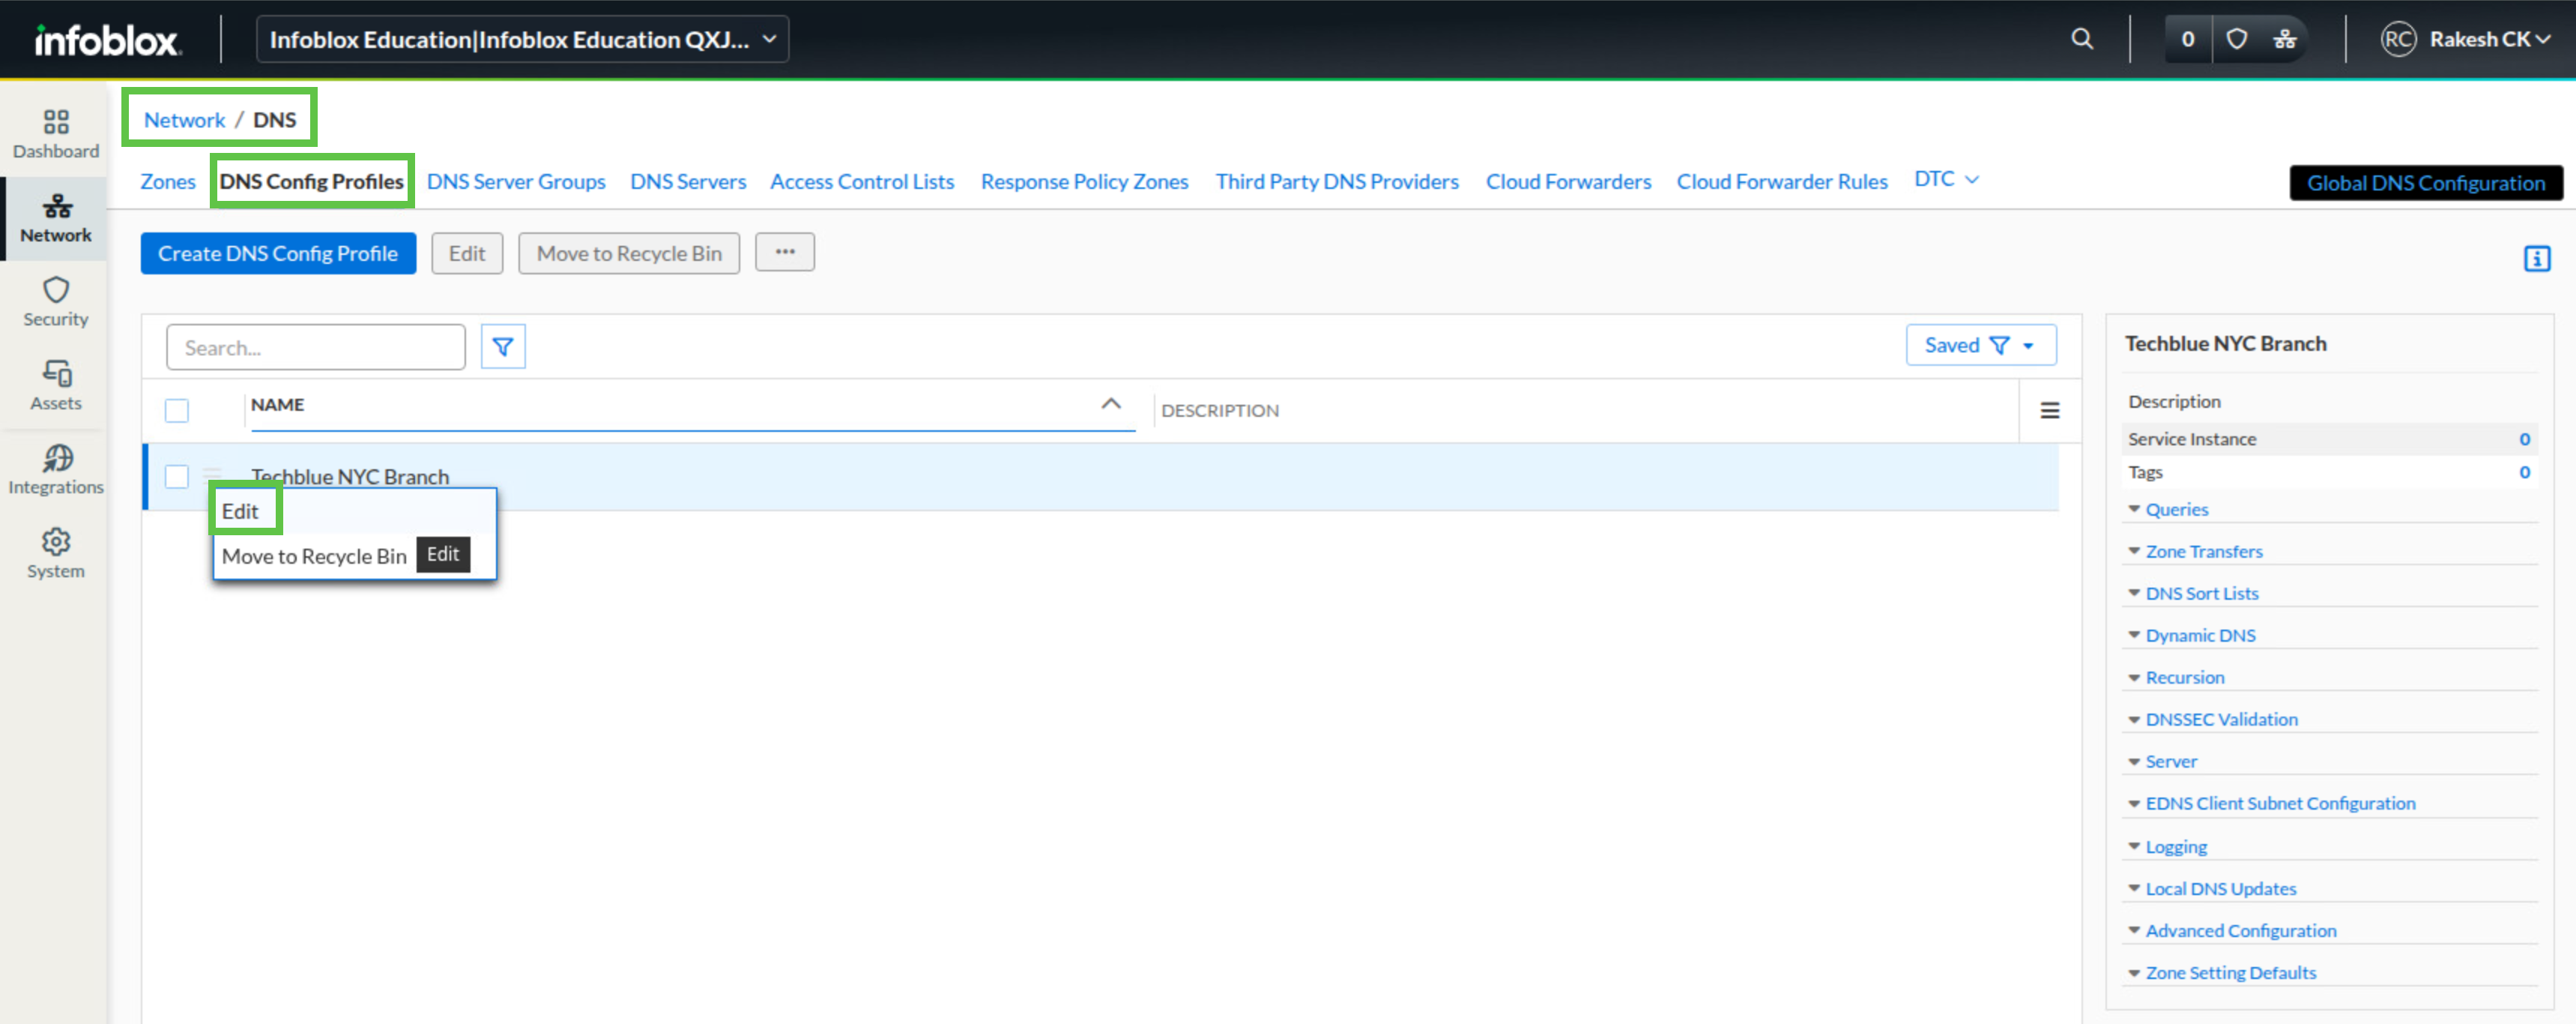
In the Infoblox Portal, navigate to Network → DNS.
-
Select the DNS Config Profiles tab.
-
In the Create DNS Config Profile dialog window, enter Techblue NYC Branch in the Name field.
-
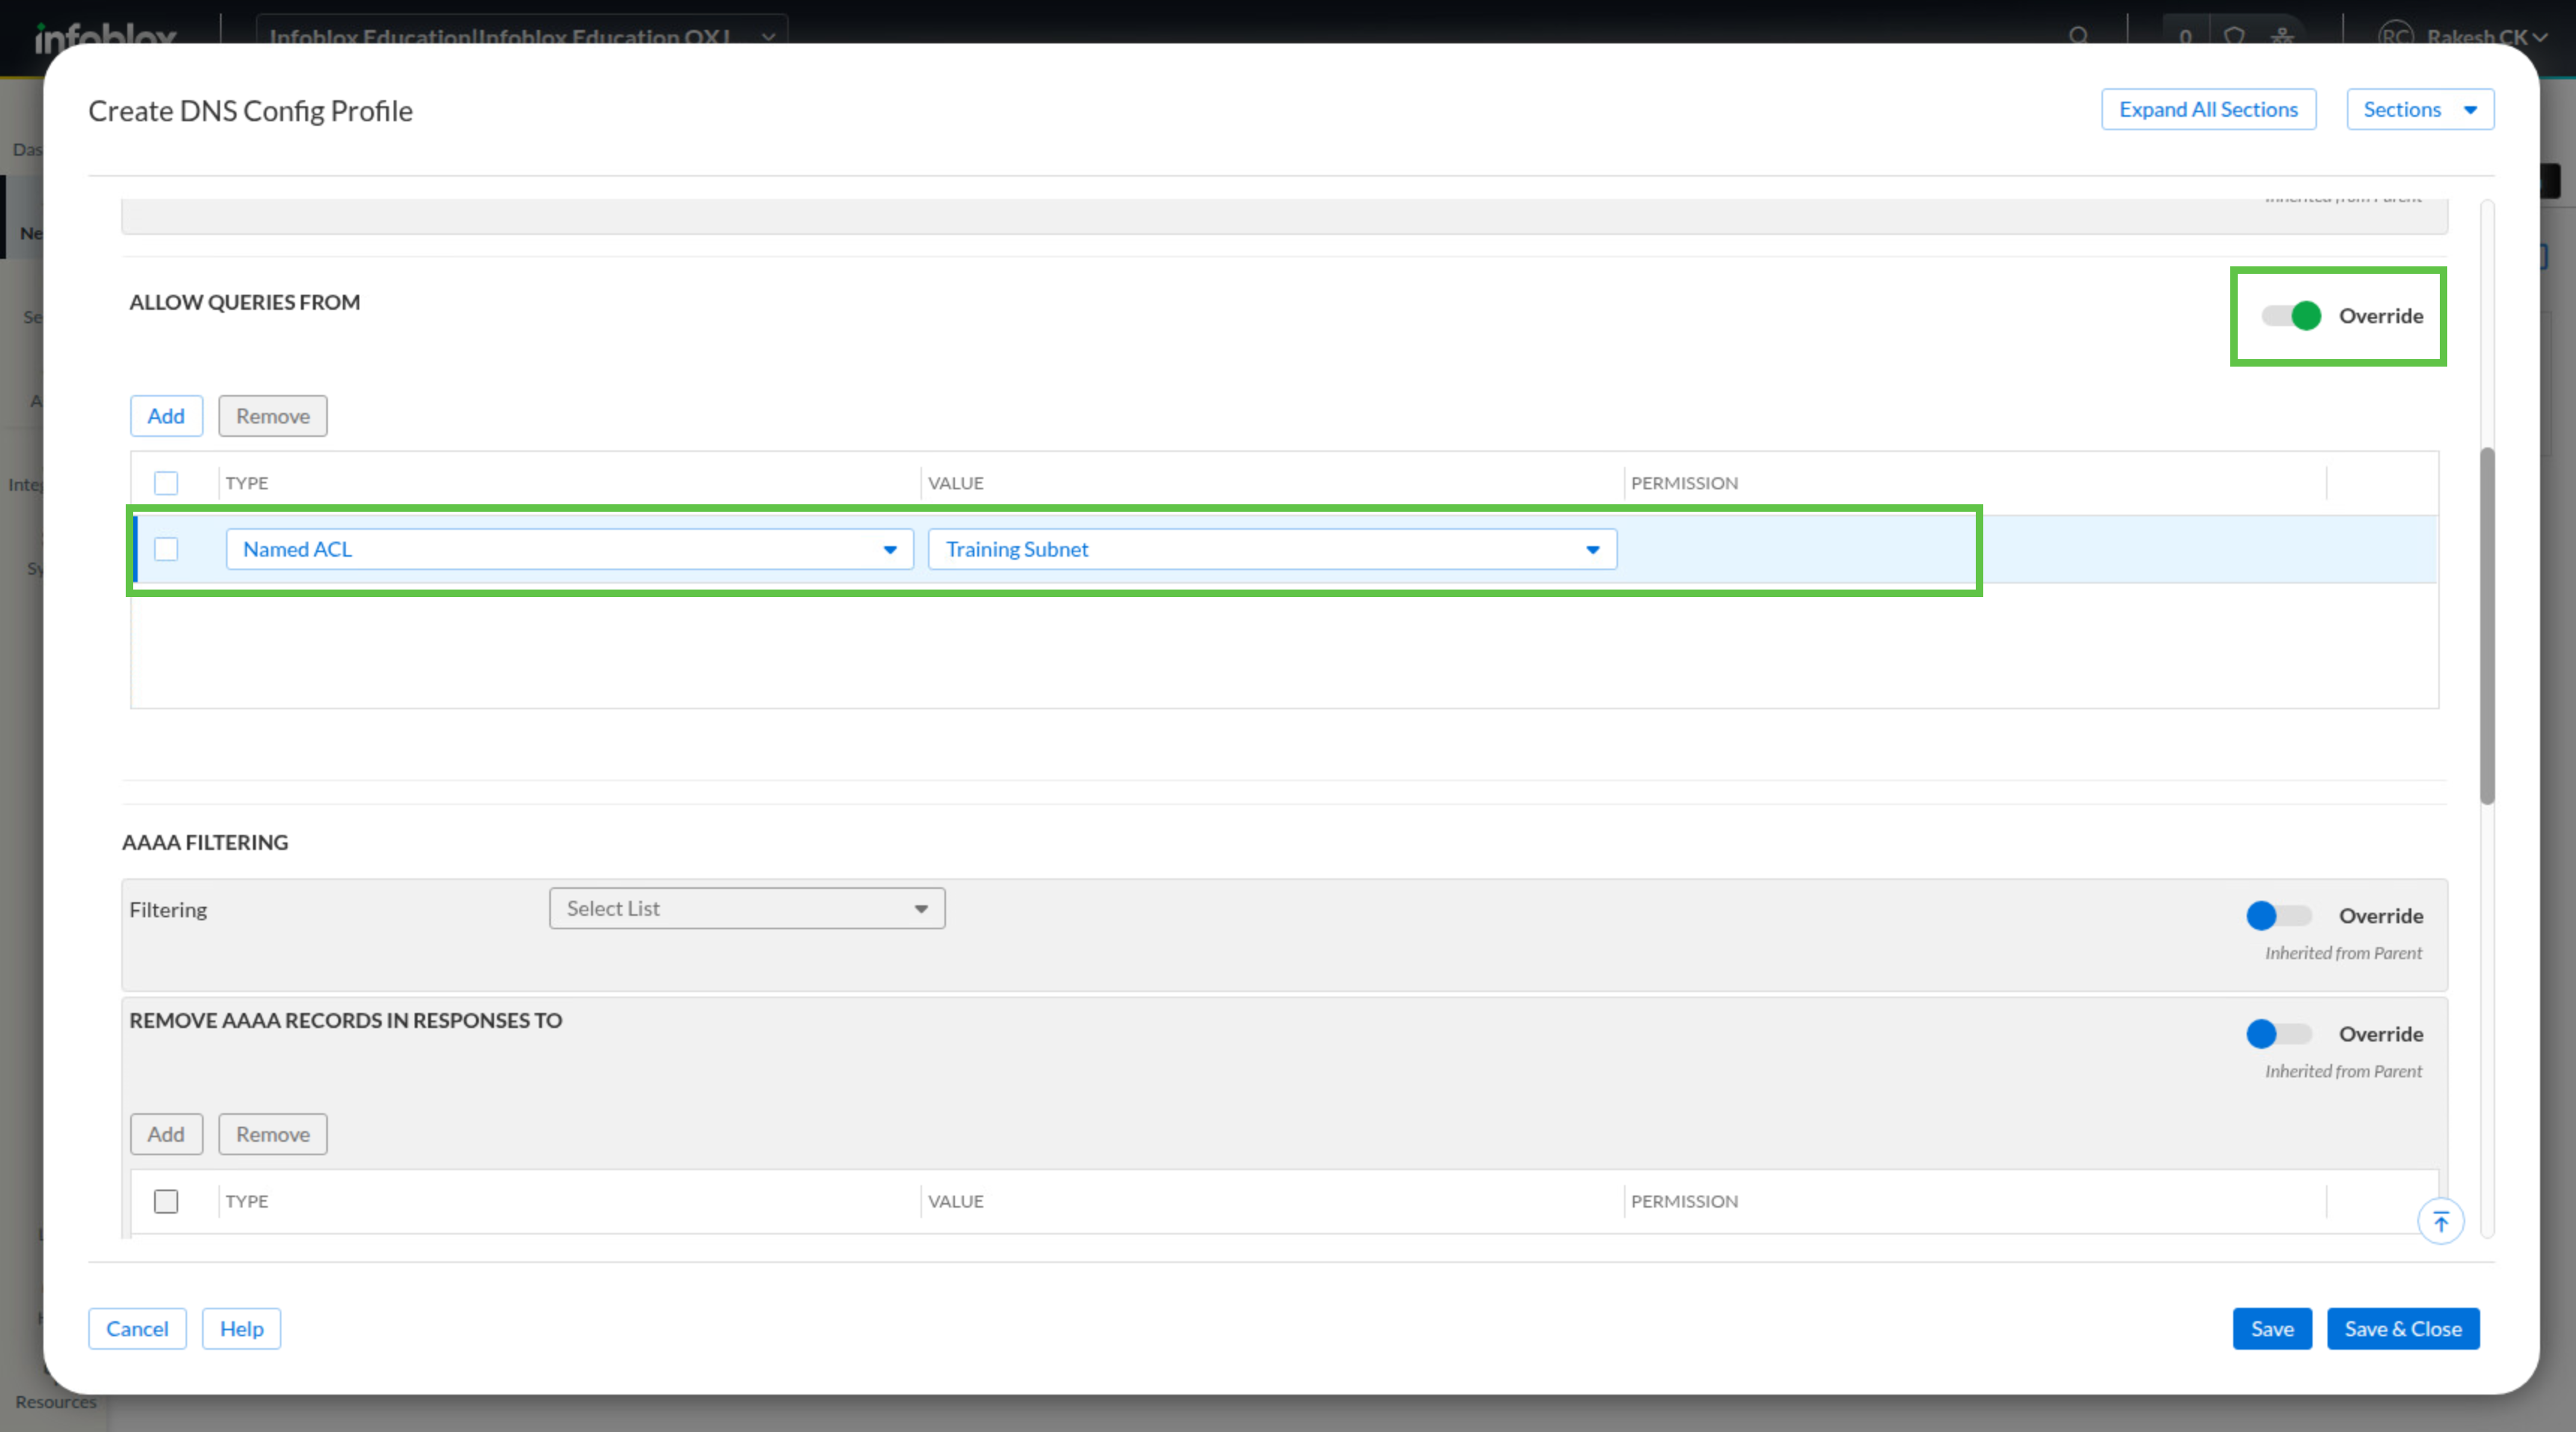
Expand the Queries section and scroll to Allow Queries From.
-
Turn on the Override toggle.
-
Click Add and create an entry with Type Named ACL and Value Training Subnets.
-
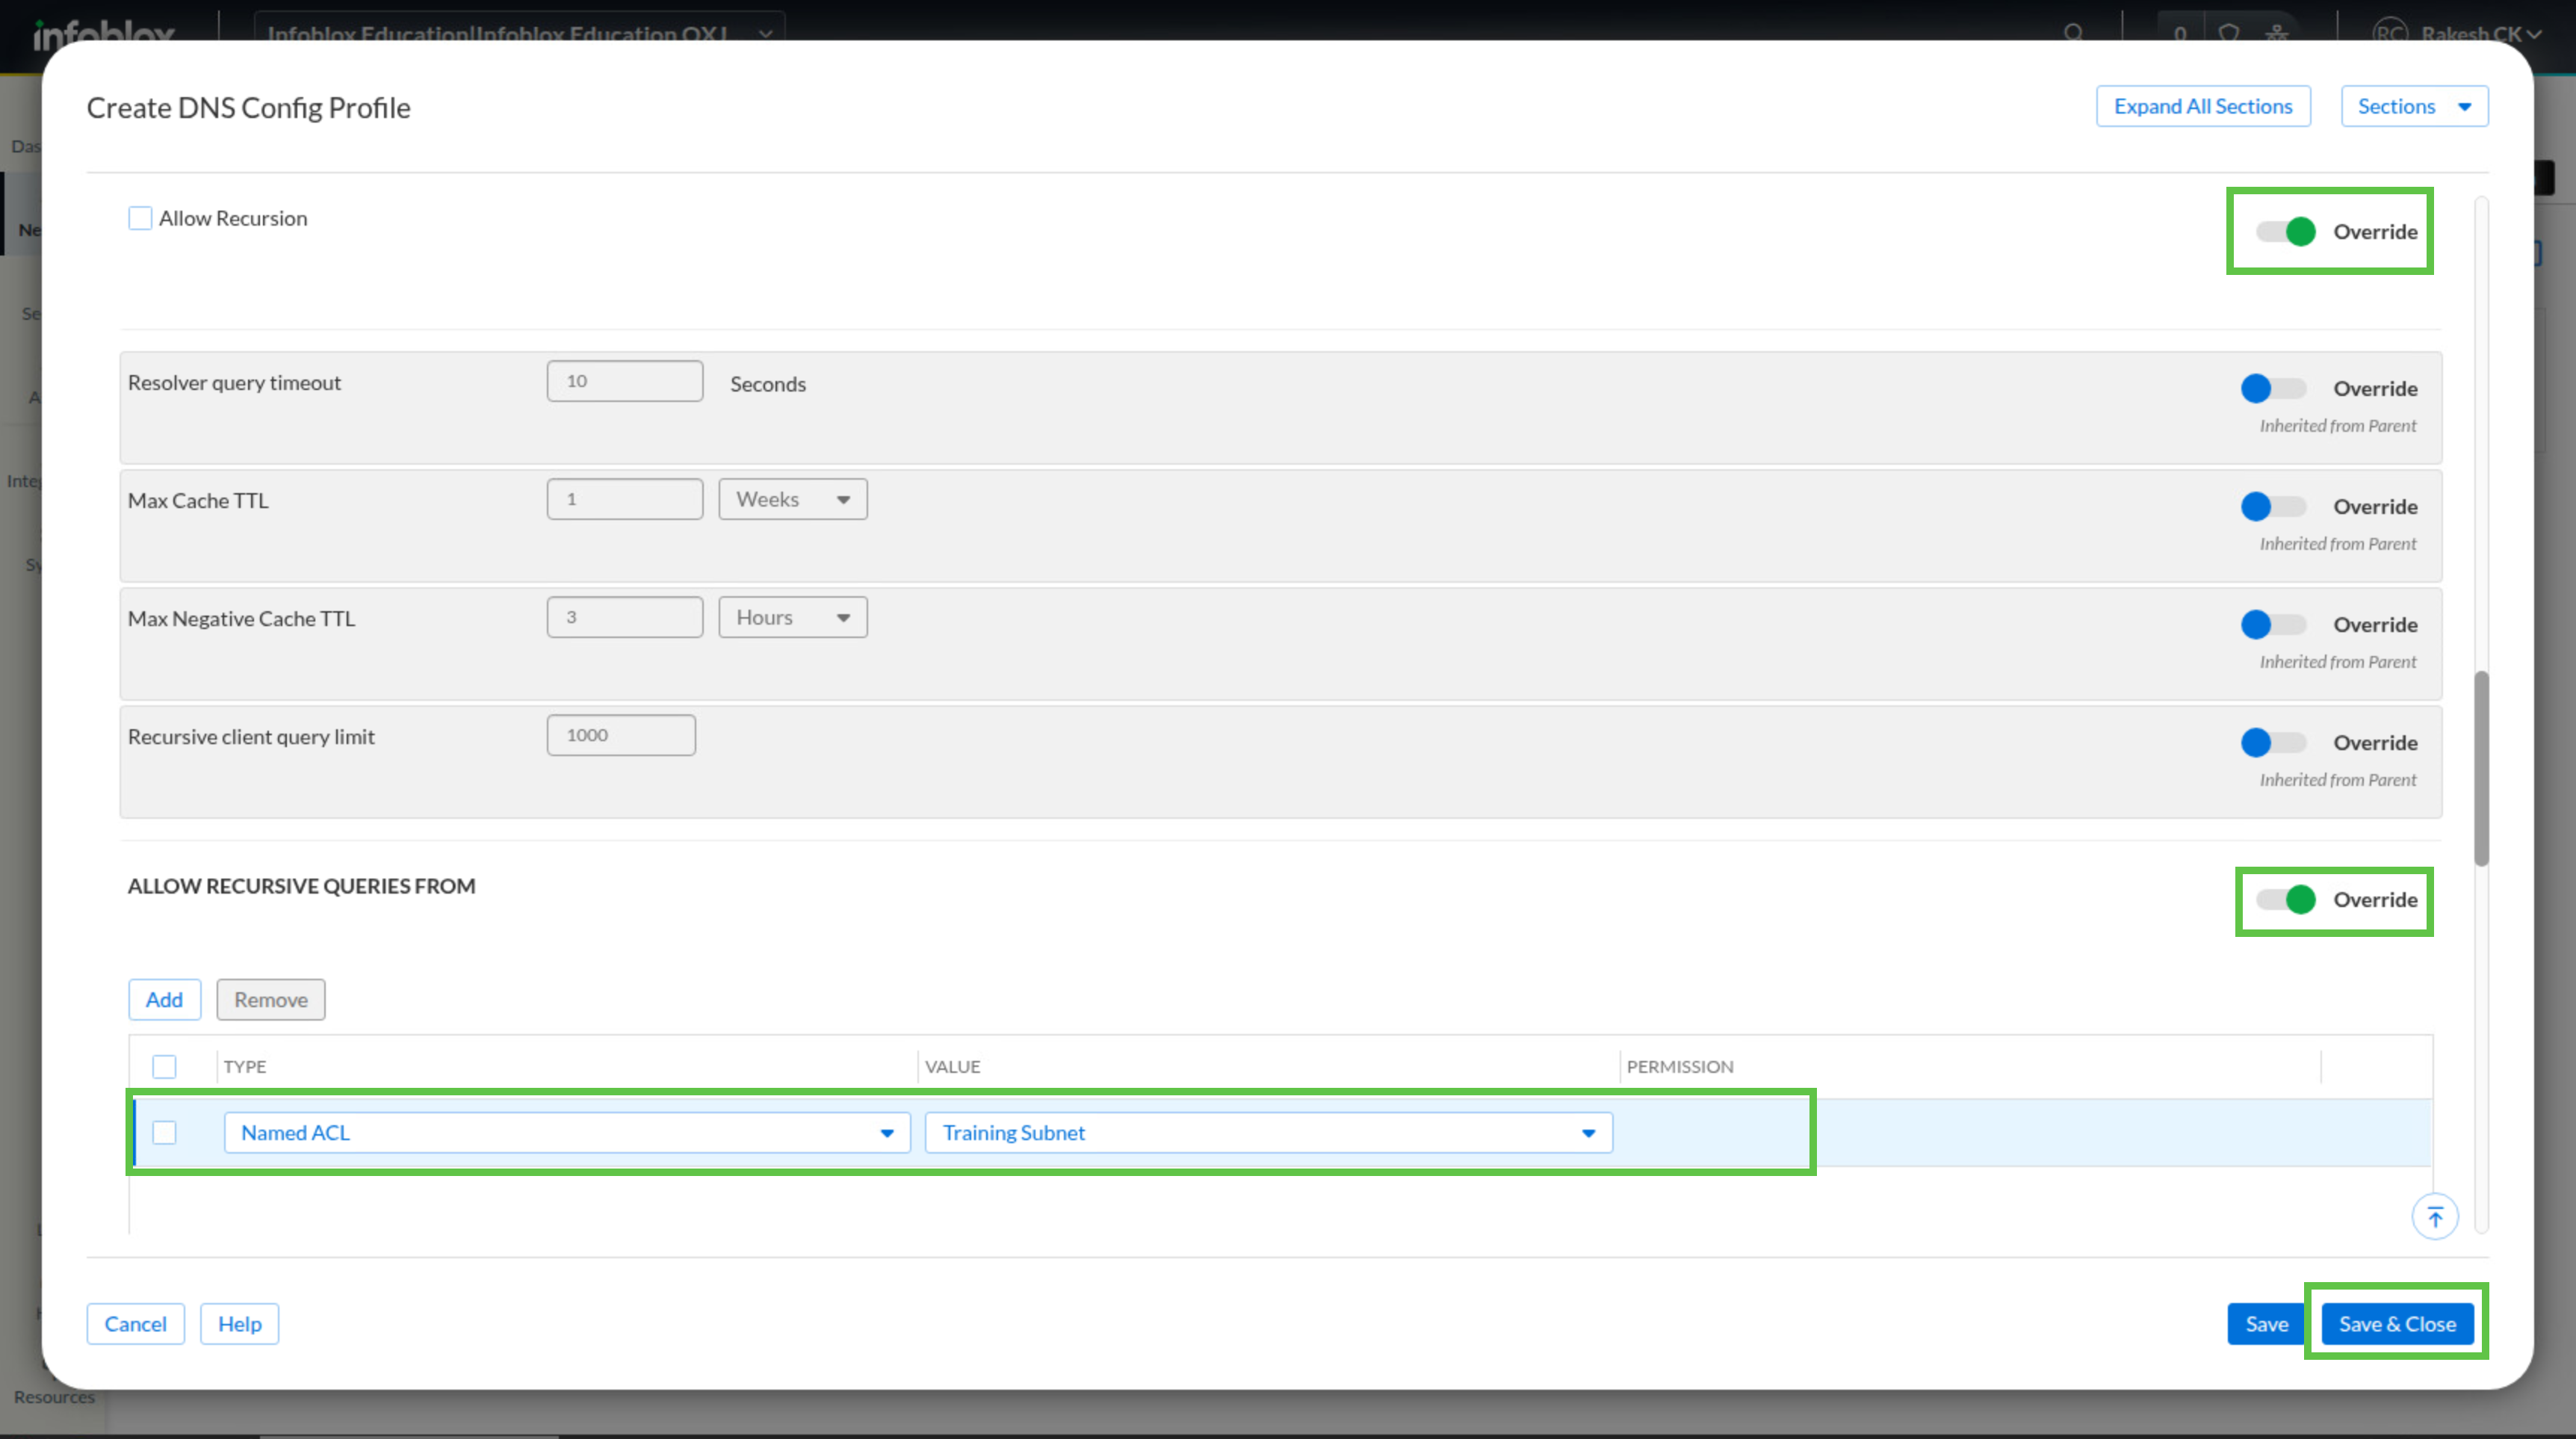
Expand the Recursion section.
-
Turn on the Override toggle and enable Allow Recursion.
-
Scroll to Allow Recursive Queries From, turn on the Override toggle, and click Add.
-
Create an entry with Type Named ACL and Value Training Subnets.
-
Click Save & Close.
Task 5 Solution: Associate DNS Config Profile
The DNS Config Profile does not affect service behavior until you assign it to service instances. Apply it to both DNS services now so both servers enforce the same ACL and recursion settings for client queries.
-
While still in the DNS Config Profiles view, open the menu next to Techblue NYC Branch and click Edit.
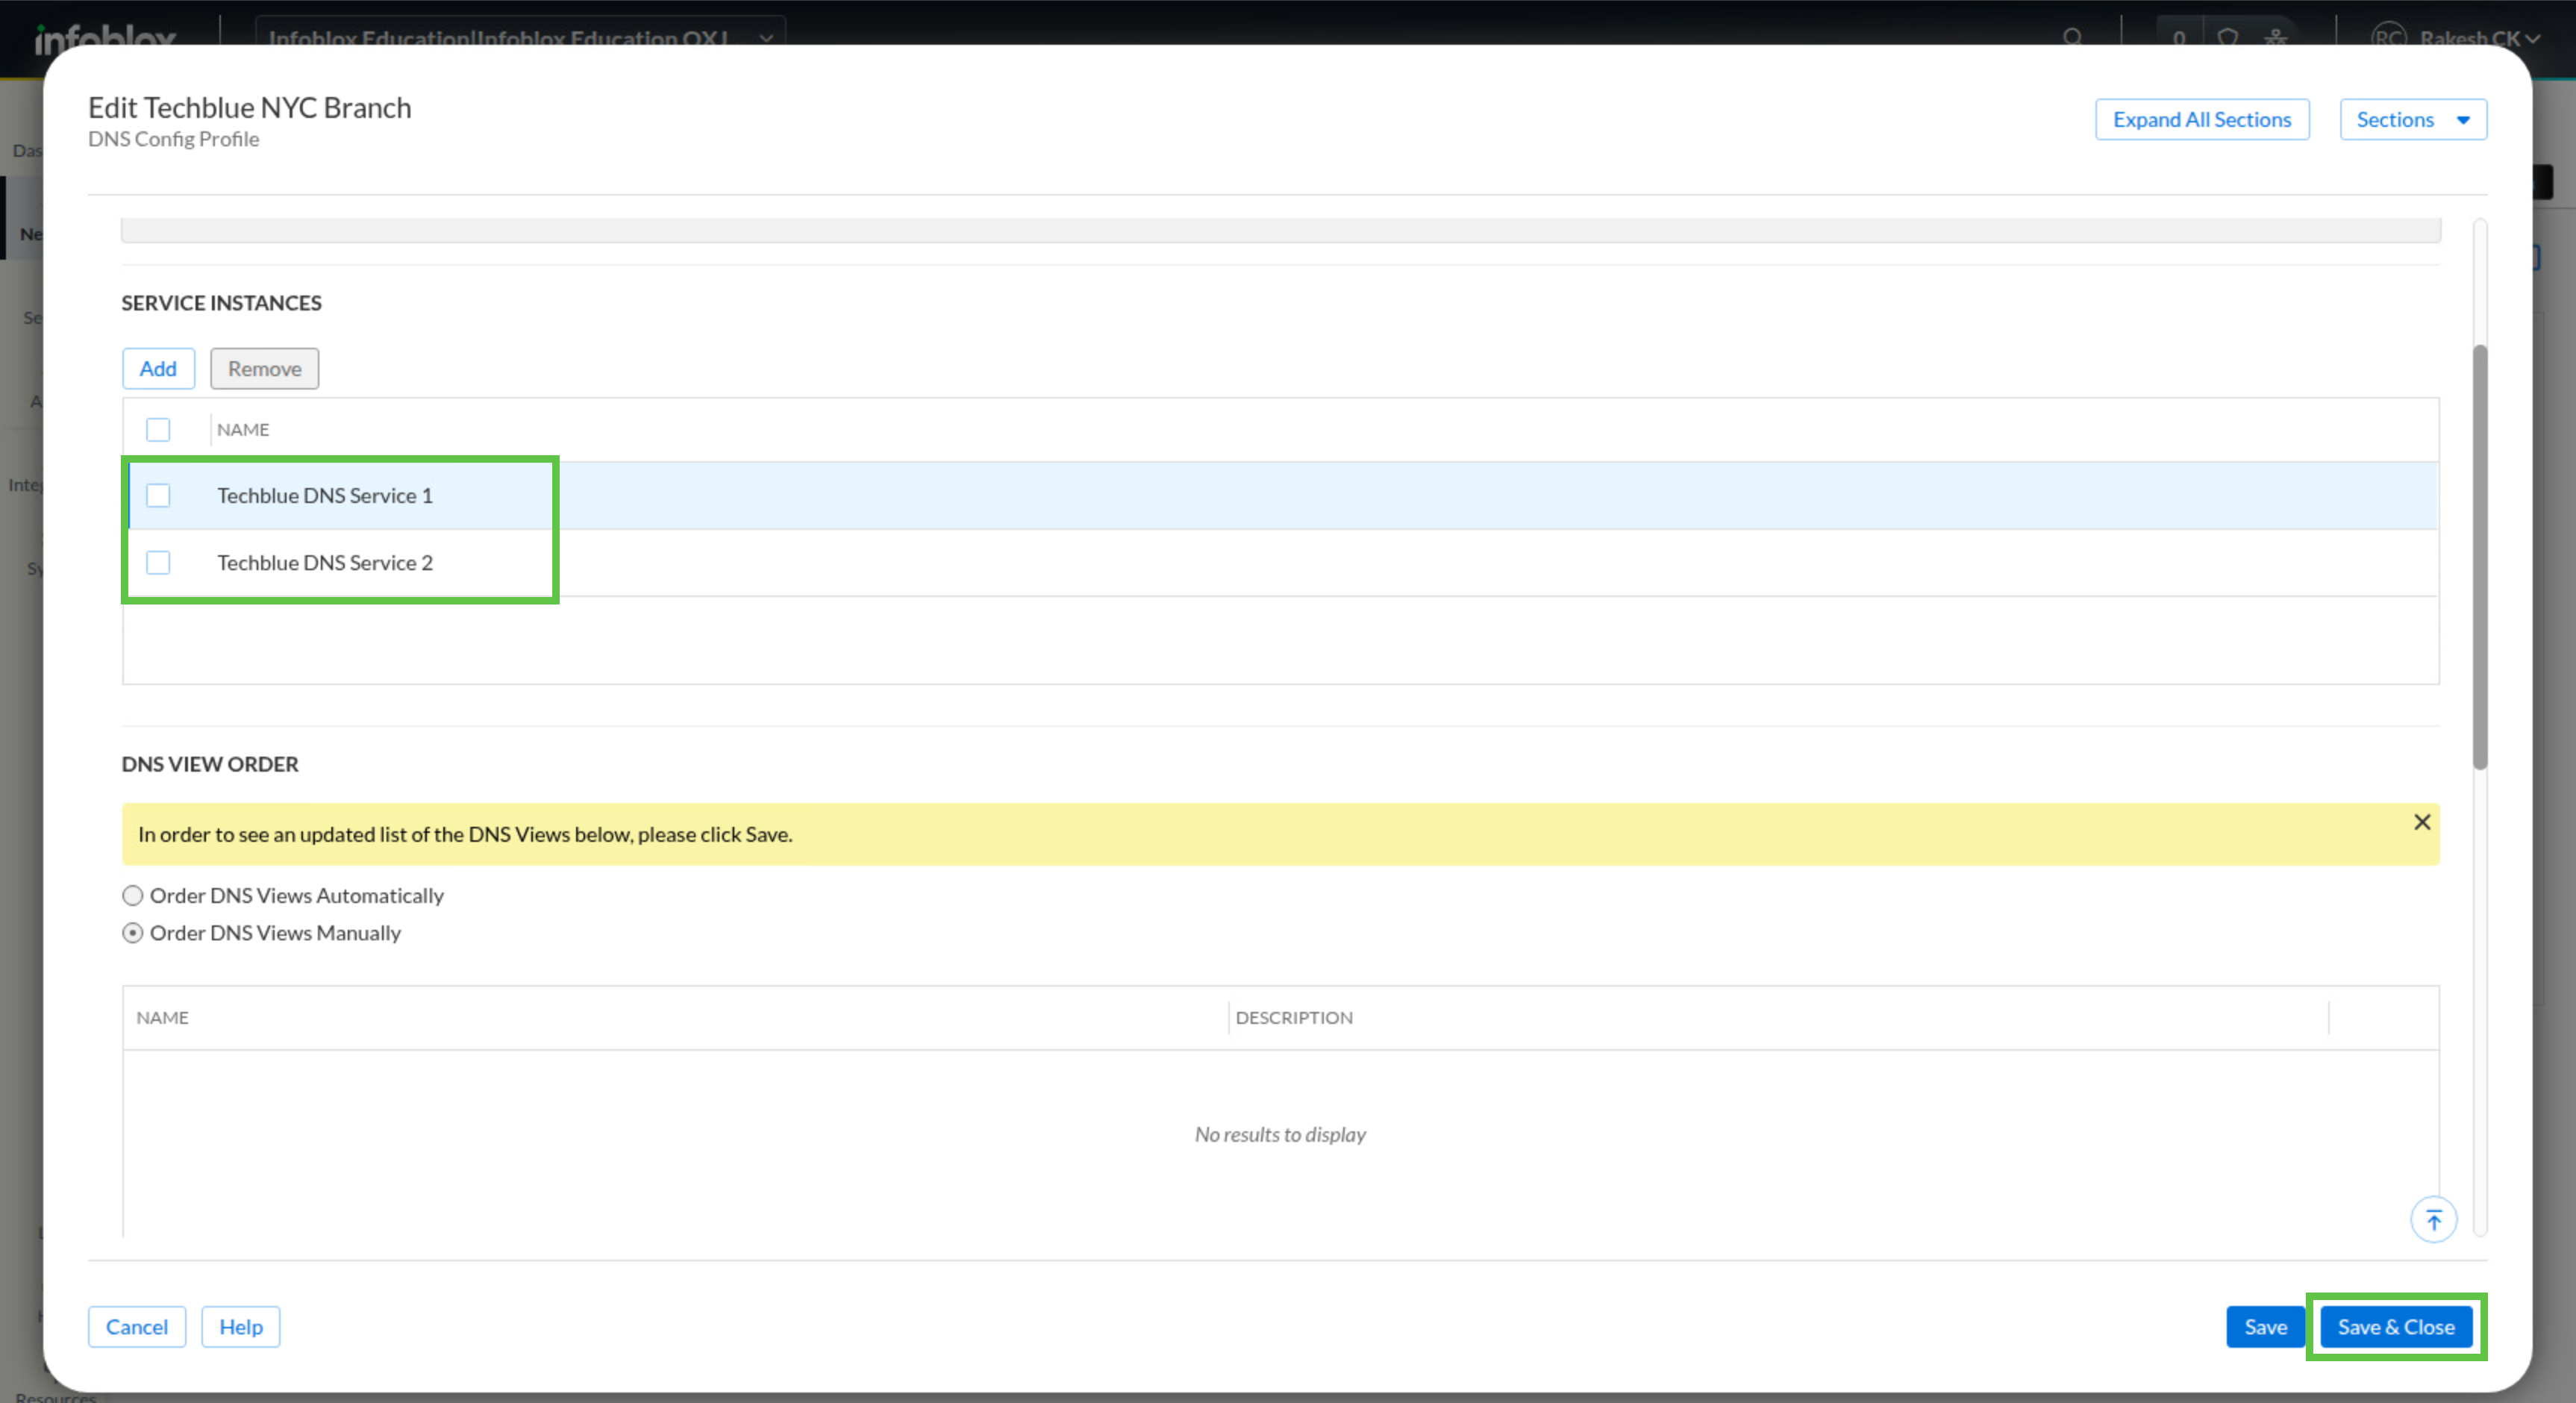
In the Service Instances section, click Add.
-
Choose Techblue DNS Service 1 and click Select.
-
Click Add again.
-
Choose Techblue DNS Service 2 and click Select.
-
Review the settings and click Save & Close.
Task 6 Solution: Verify recursive DNS resolution
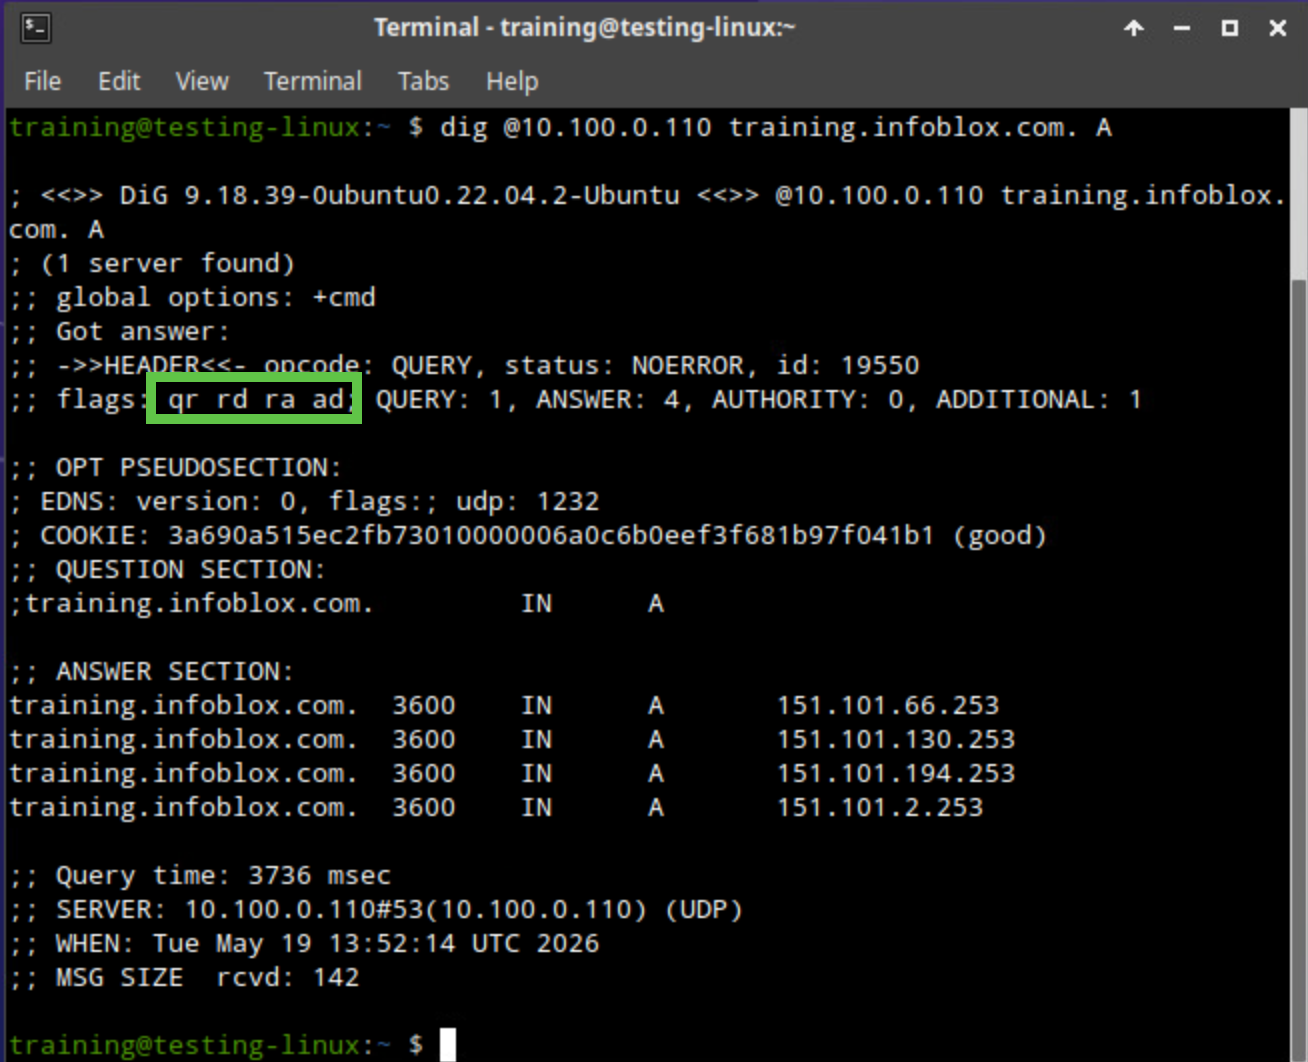
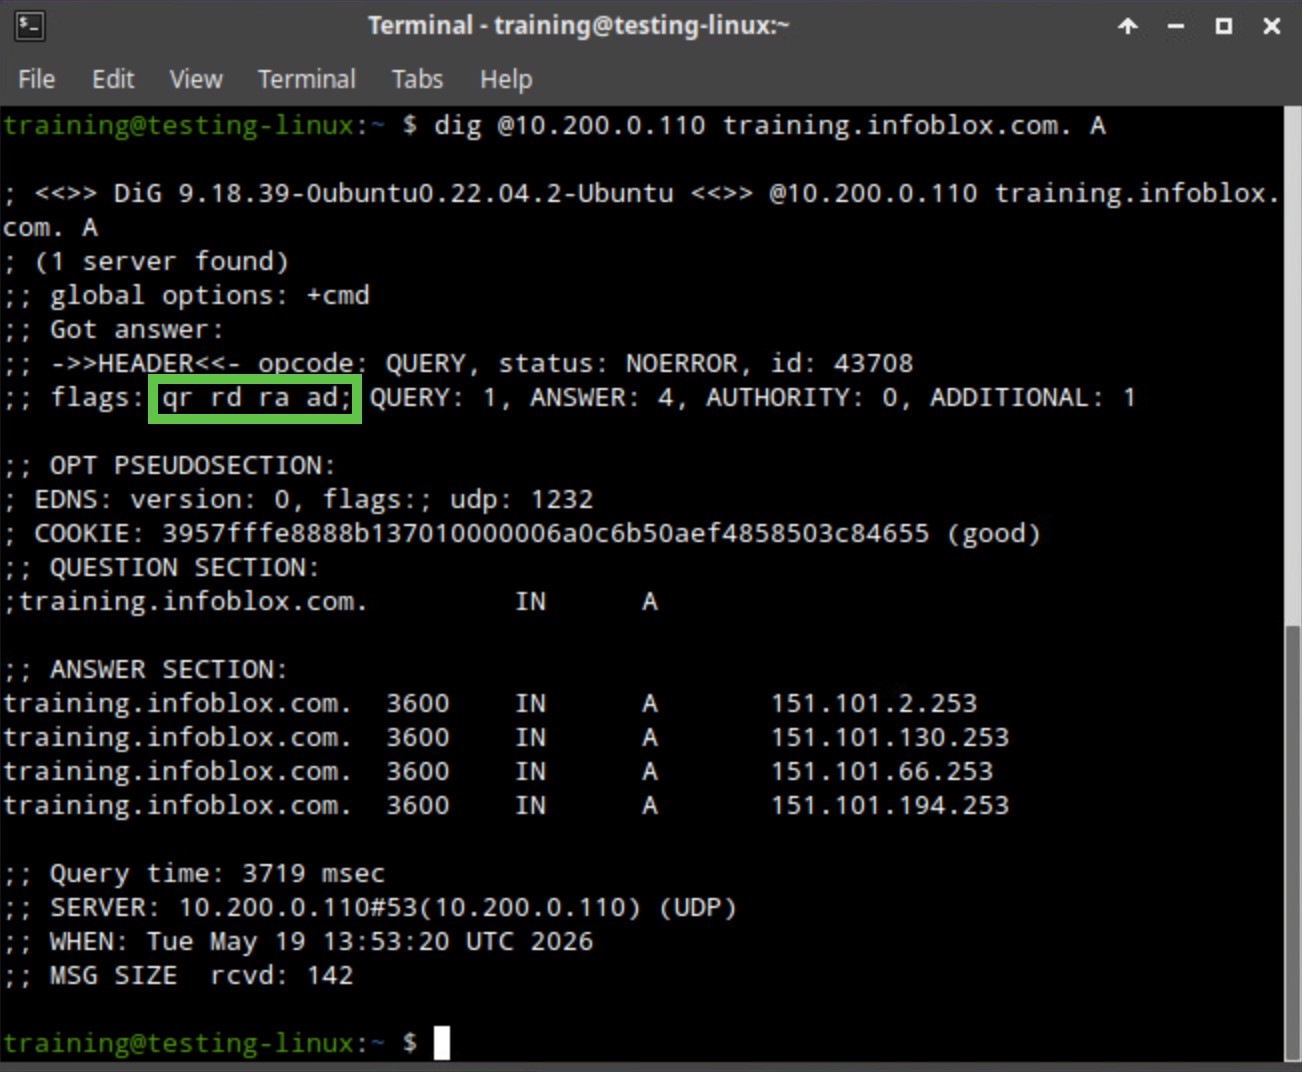
Finish by testing the configuration from testing-linux. Configure the client with a static address so DHCP does not affect the test, then query both DNS servers directly for an Internet name. If you see ra in the flags section of each response, that confirms the answer was obtained through recursion.
-
Switch to the virtual machine testing-linux and open a terminal window.
-
Run sudo set-network-static-bloxone to configure the machine with a static IP address.
-
Run dig @10.100.0.110 training.infoblox.com. A.
-
Run dig @10.200.0.110 training.infoblox.com. A.
-
Examine both results and confirm that ra appears in the flags section of the output.