Scenario
You now have some network objects in your deployment, but you need to make a few targeted changes without drilling through multiple menus. An address block needs to be renamed, the LATAM Branch network needs to be updated to a new AR-BR Branch naming convention, and the fixed address for a printer in the EMEA branch needs a new MAC address. Your goal is to use Global Search to find these objects quickly and update them directly from the search results.
Estimate Completion Time
-
15 to 20 minutes
Prerequisites
-
Administrative access to the Infoblox Portal
Learning Content
Tasks
To complete this lab, you need to perform the following tasks.
-
Find and update the objects with Global Search
Task 1: Find and update the objects with Global Search
Use Global Search to find the objects listed below and complete the required change for each one. The goal is to use search terms and result filtering to identify the correct object quickly, then edit it directly from the results list.
|
Object Name |
Object Type |
Action |
|---|---|---|
|
172.32.128.0/18 Address Block |
IPAM/DHCP: Address Block |
Rename to APAC Branches |
|
LATAM Branches |
IPAM/DHCP: Address Block |
Rename to AR-BR Branches |
|
Printer 1 |
IPAM/ DHCP: Fixed Address |
Change MAC address to 89:35:B2:24:CB:92 |
You can edit the found objects from the search results list
Solutions
Task 1 Solution: Find and update the objects with Global Search
Global Search is useful when you already know something about the object you need to change, such as part of its name, an address, or a region. Instead of navigating through IPAM and DHCP menus, you can search from the top-right corner of the Portal, narrow the results if needed, and edit the correct object directly from the results list.
-
Click Global Search at the top right of any screen in the Infoblox Portal.

-
Verify that the search field opens at the top of the screen and that recent searches are displayed below it.
-
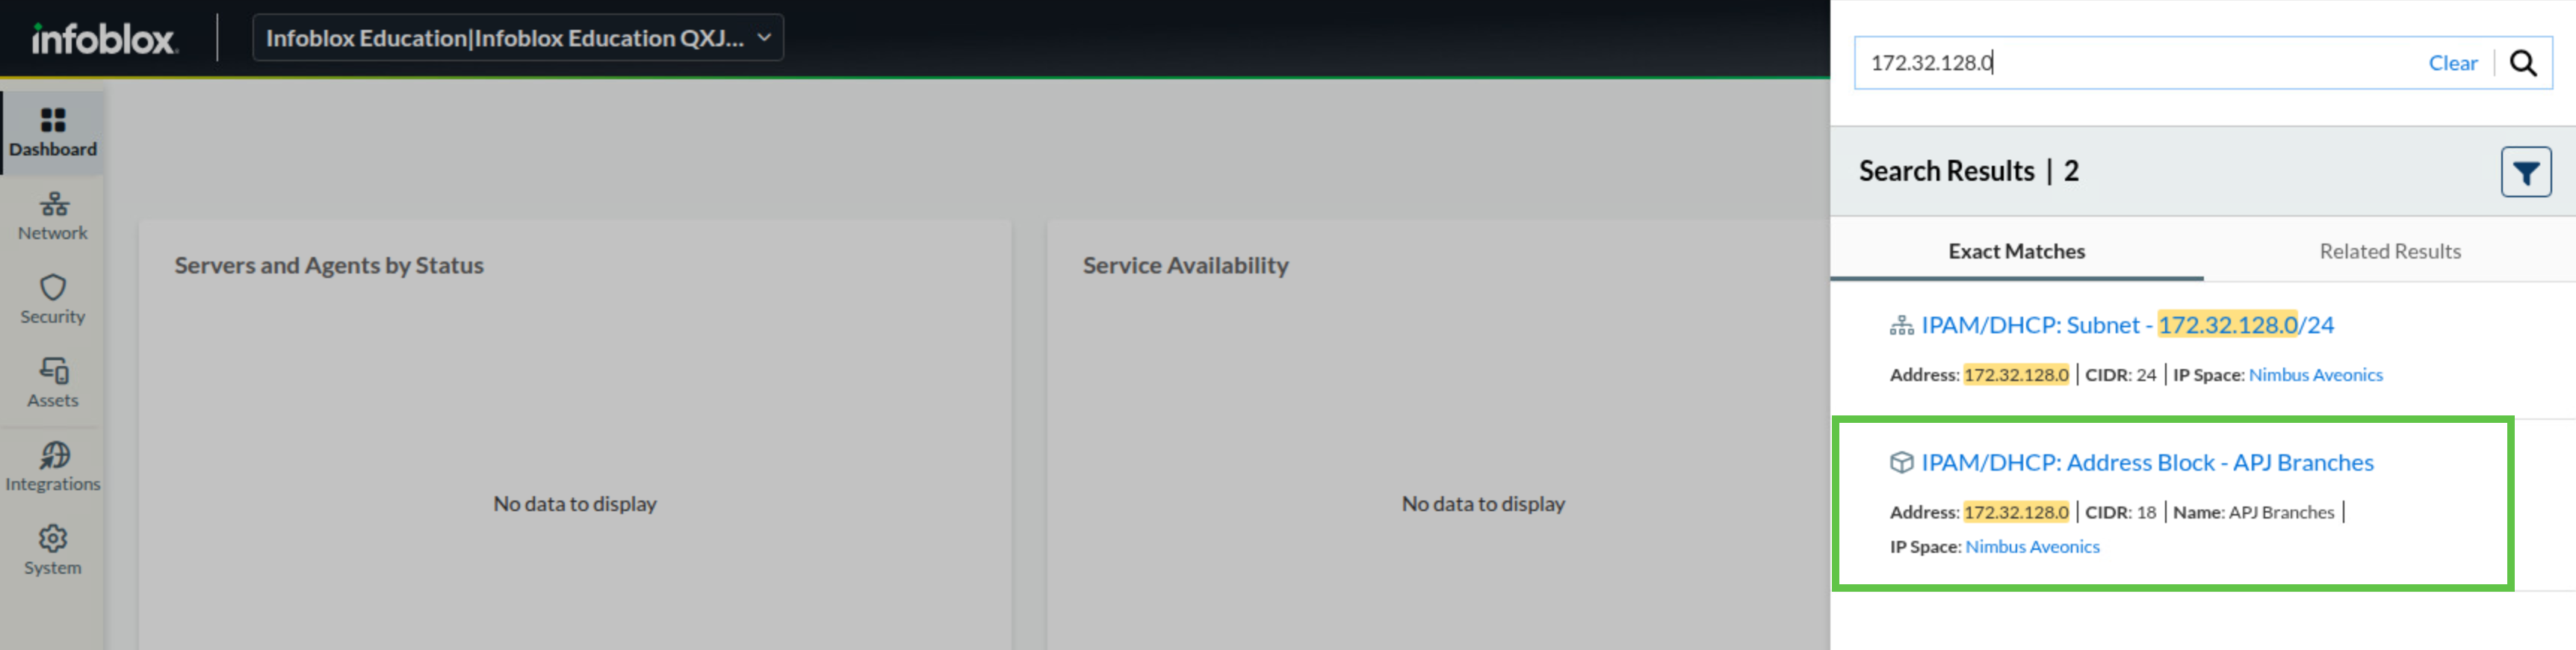
Search for 172.32.128.0 and run the search.

-
Review the results and identify the Address Block result for the full /18 object rather than the subnet entry.
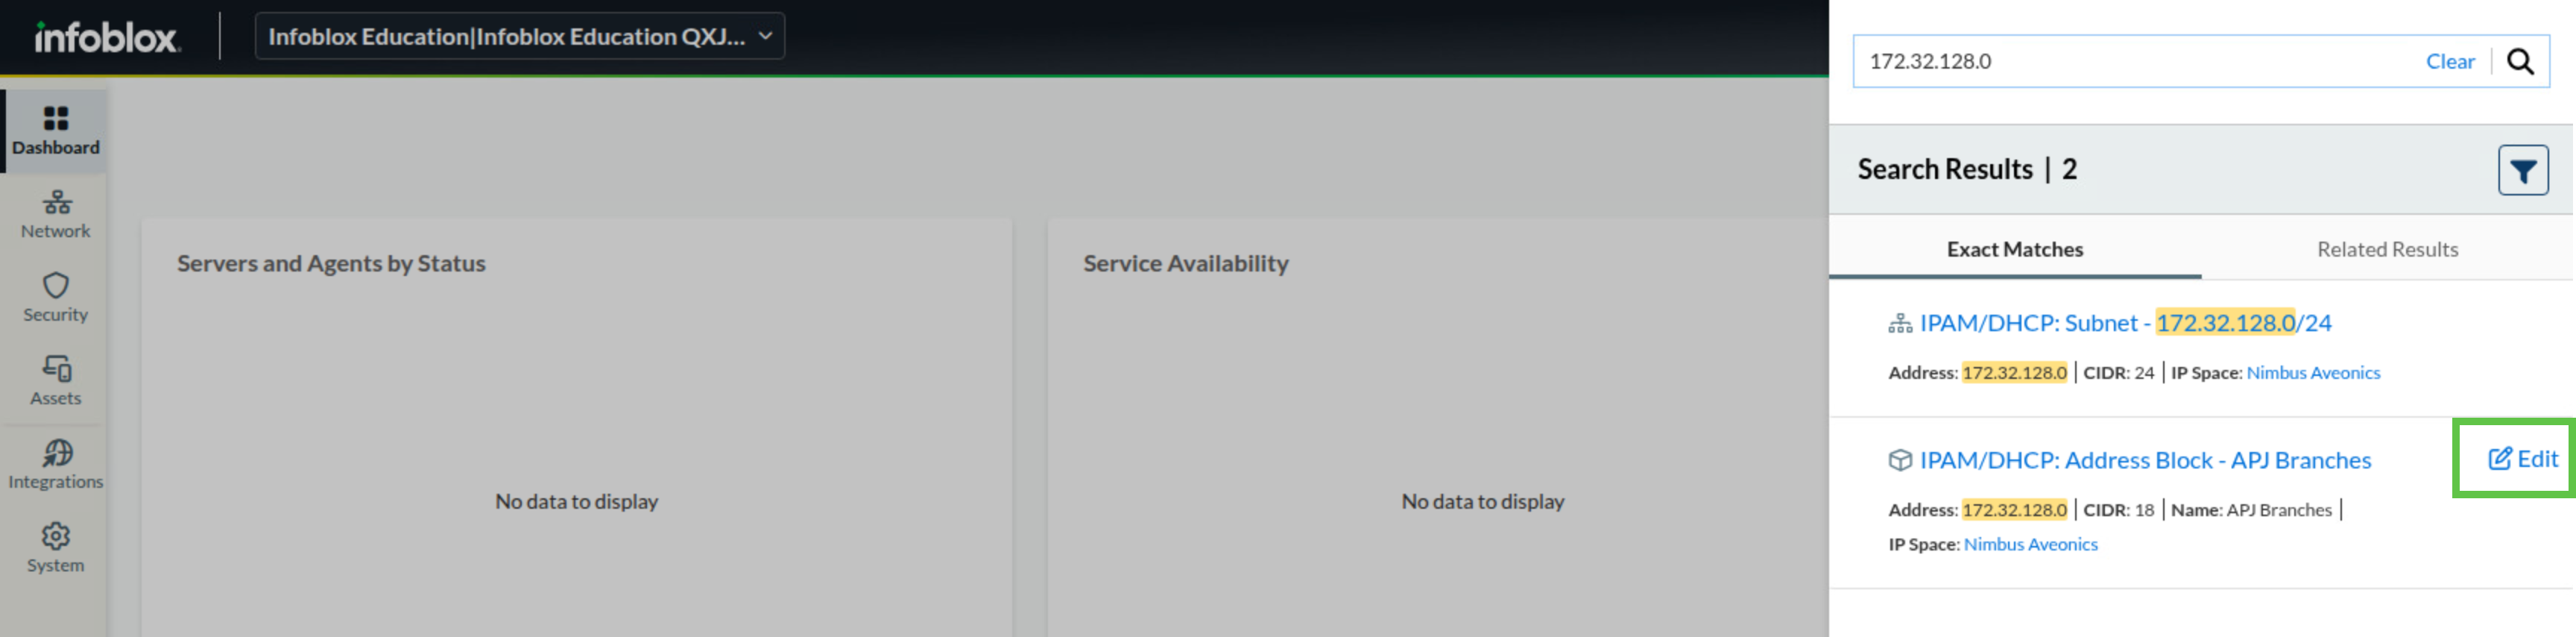
-
Hover over the 172.32.128.0/18 Address Block result and click Edit.
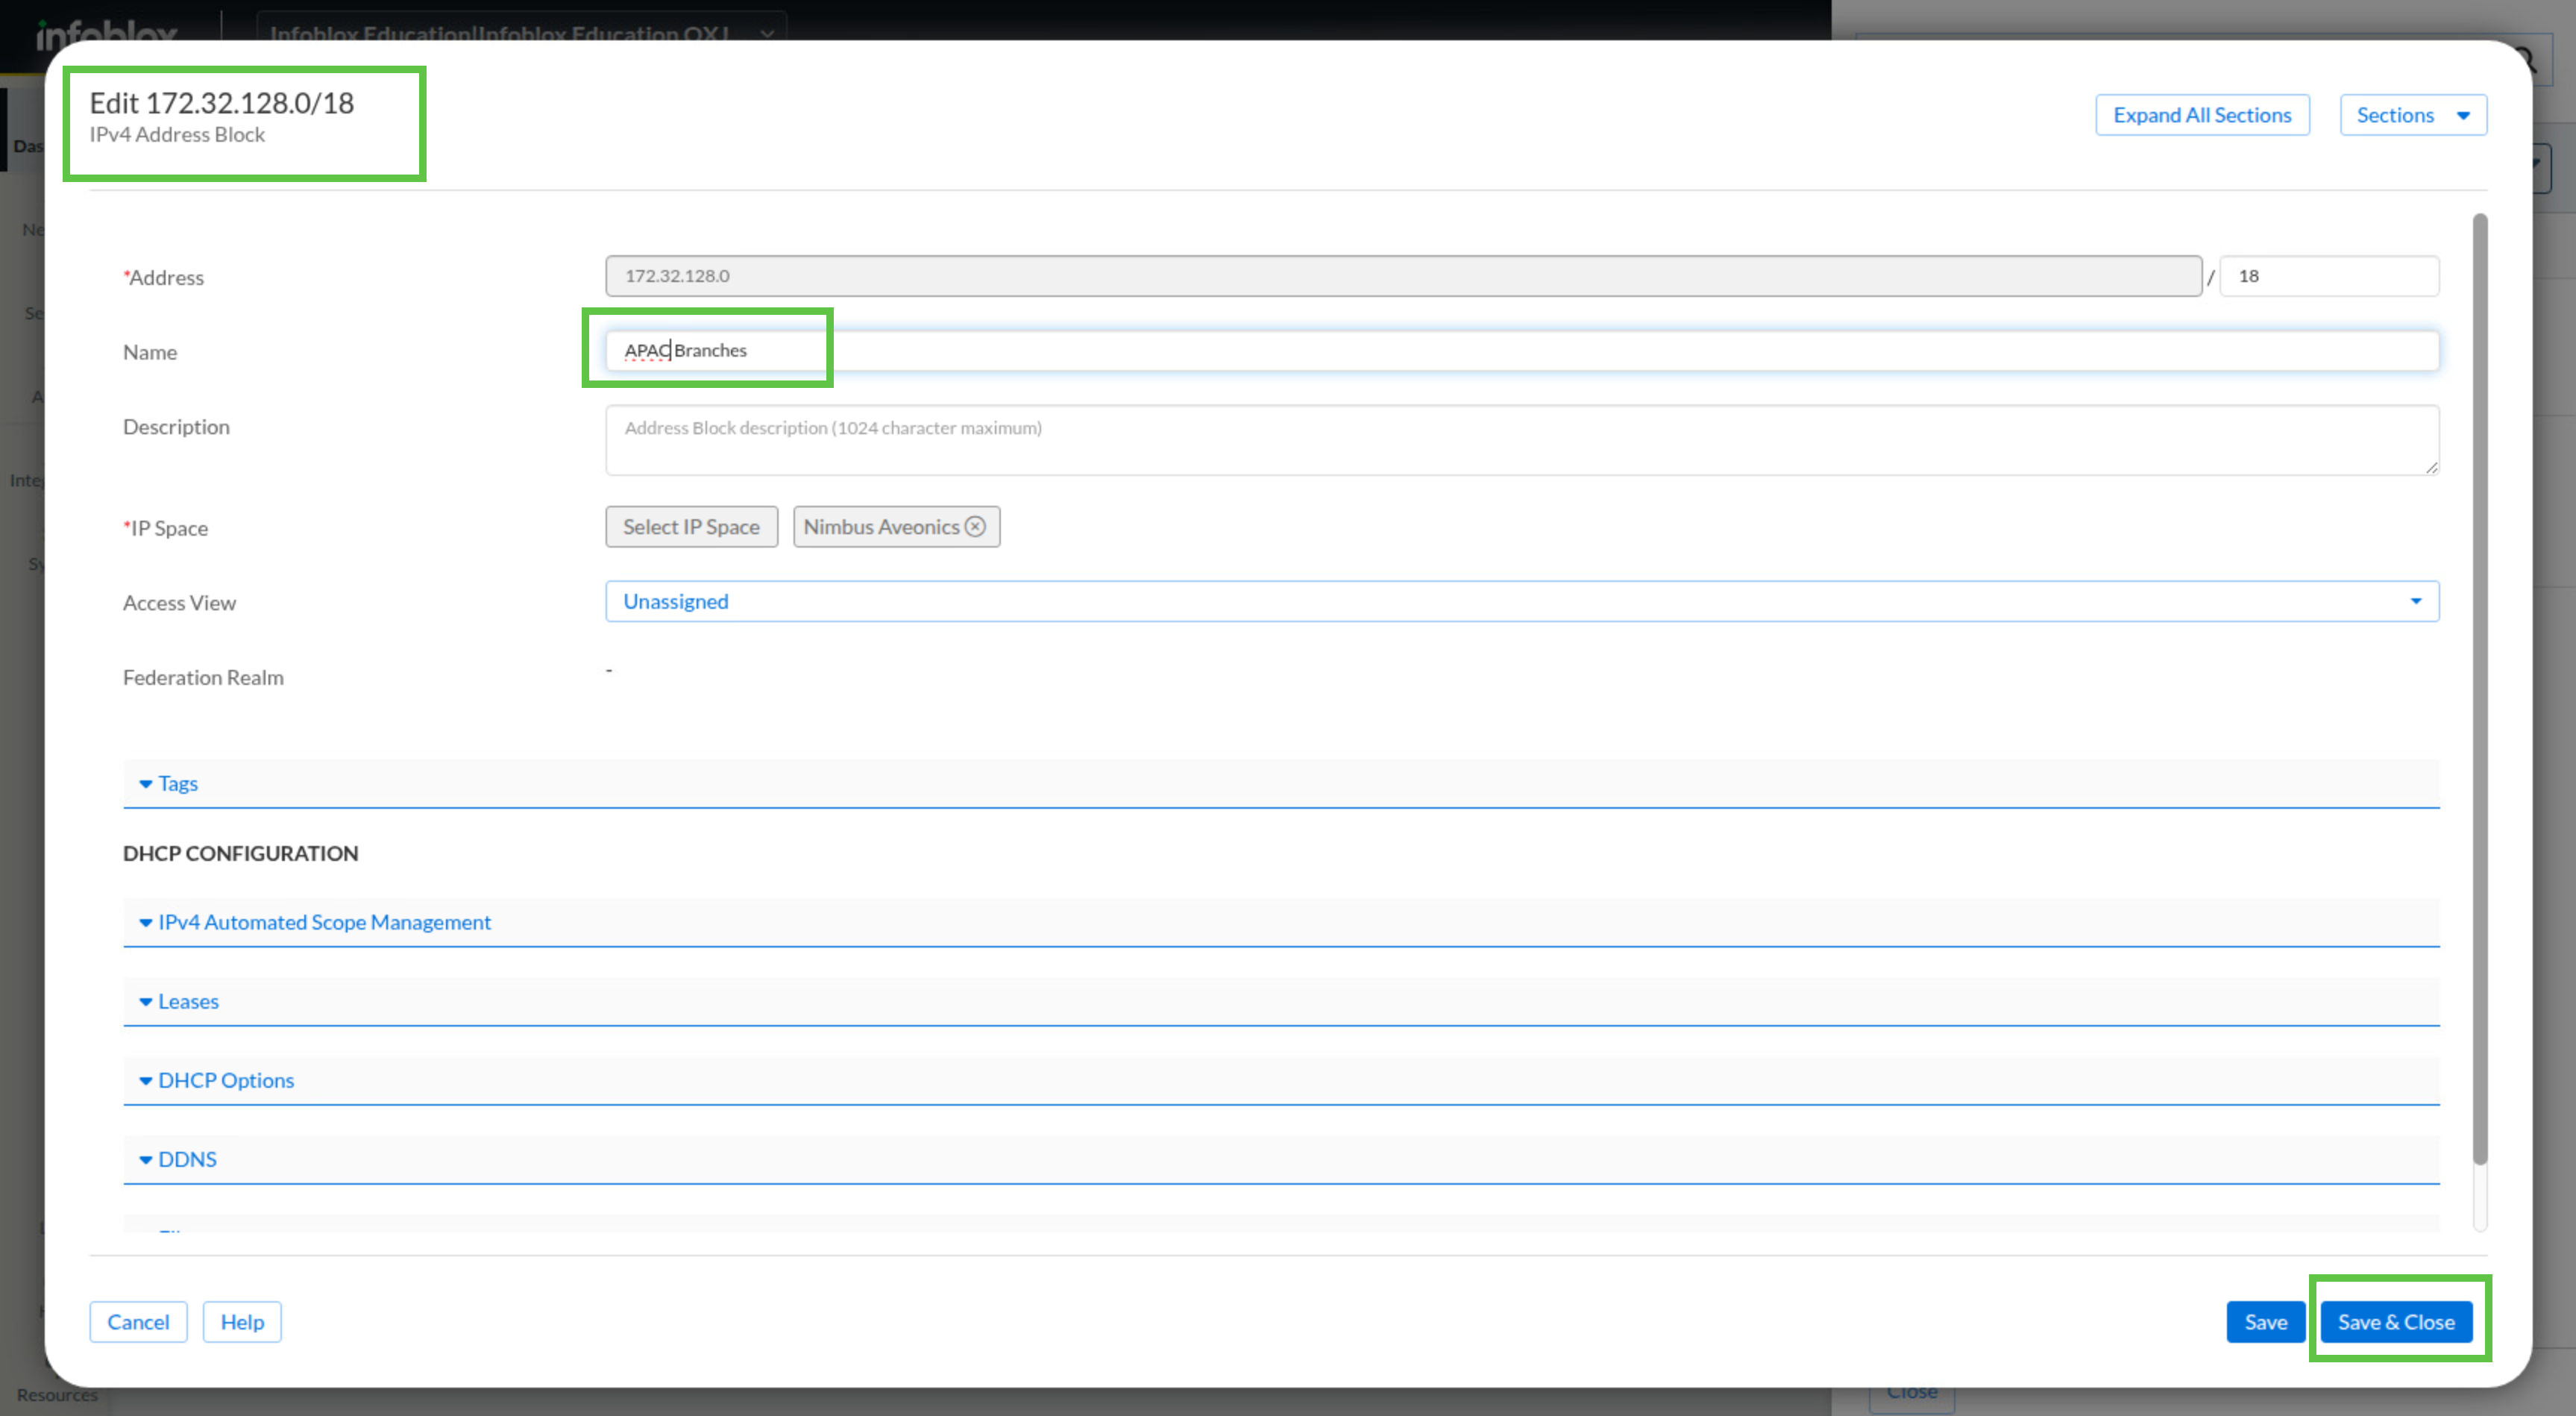
-
Change the name from APJ Branches to APAC Branches and click Save & Close.
-
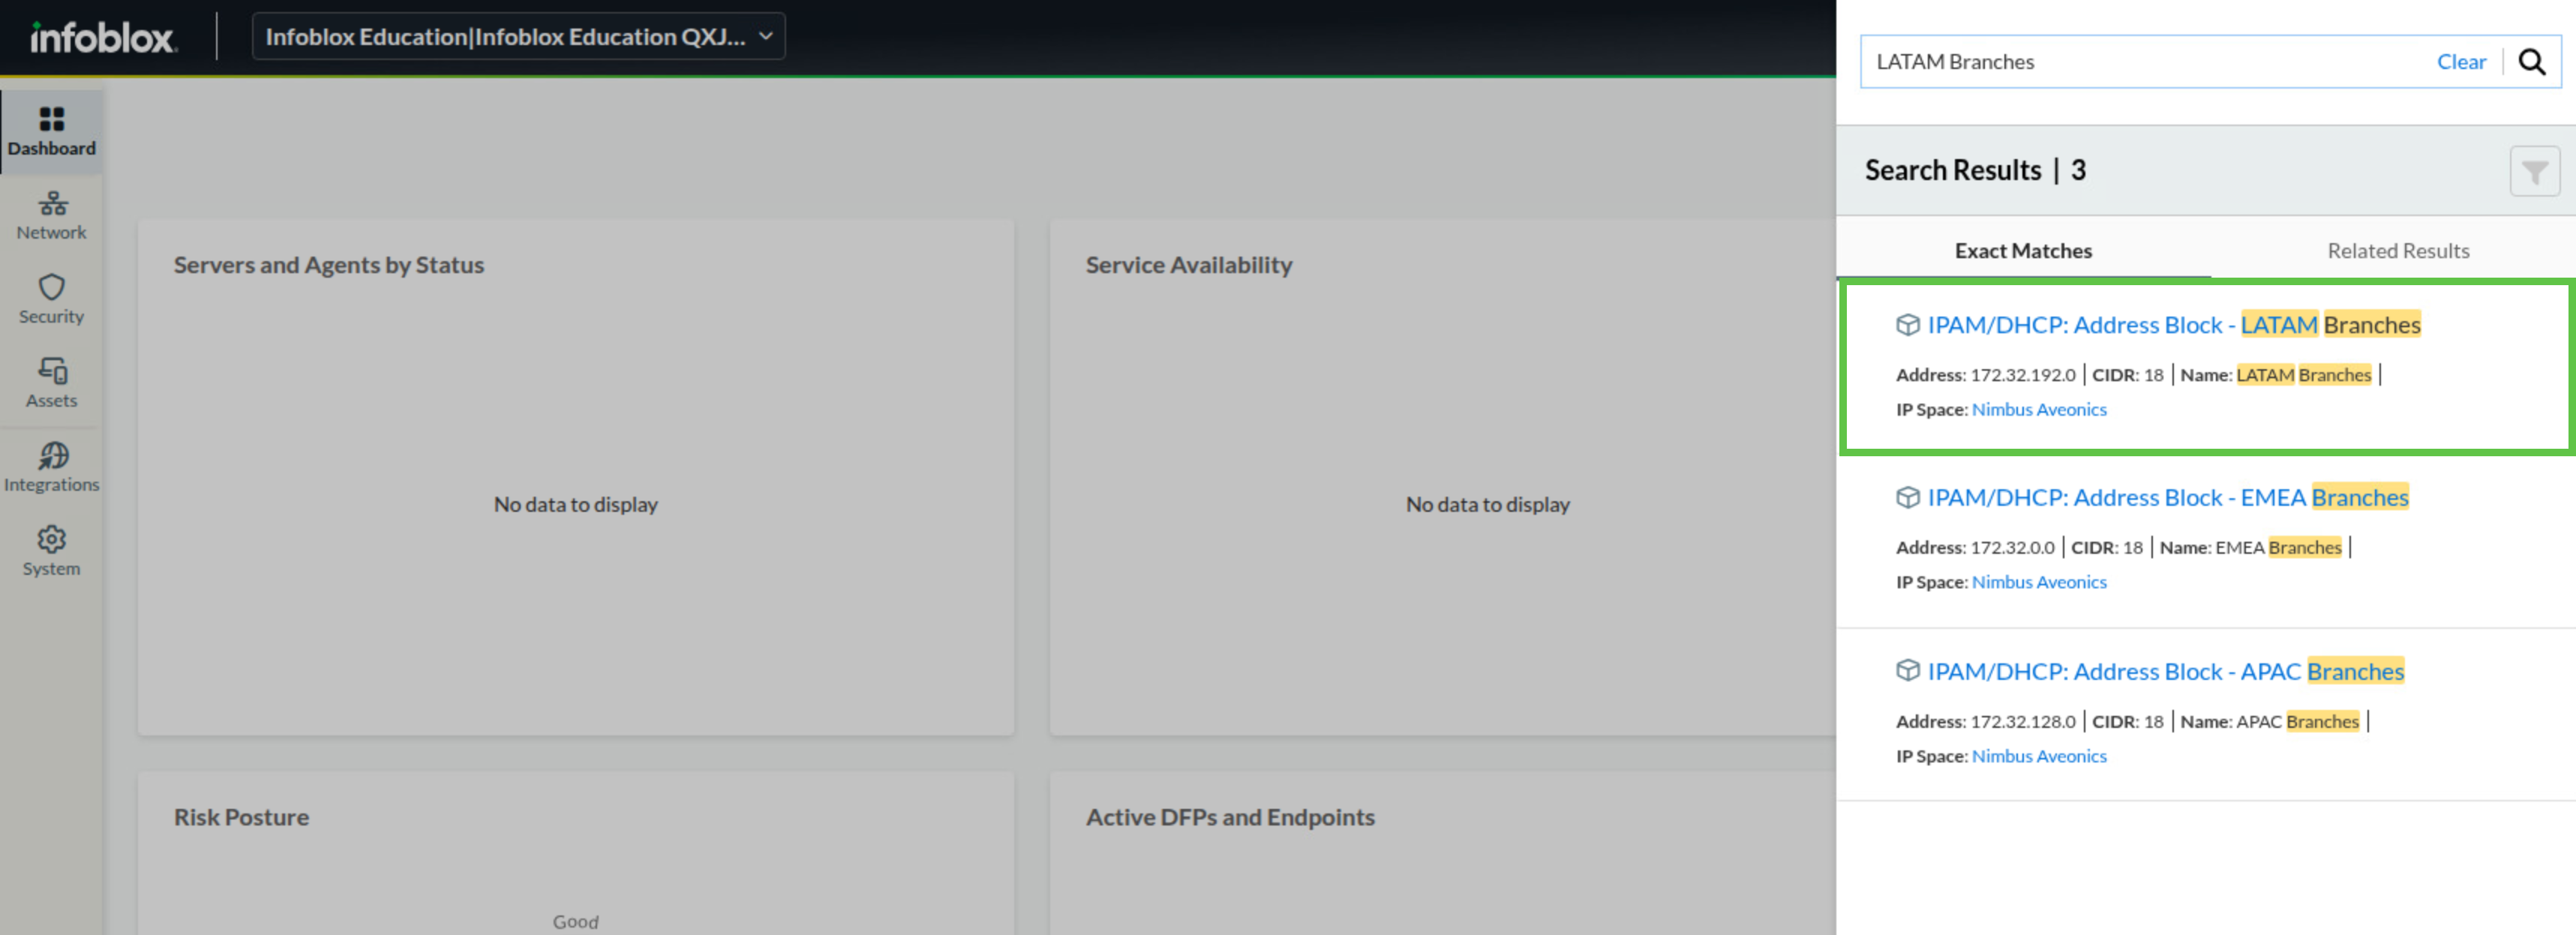
Search for LATAM Branches.
-
Review the results. Because the search matches both LATAM and Branches, you may see additional Branches-related results.
-
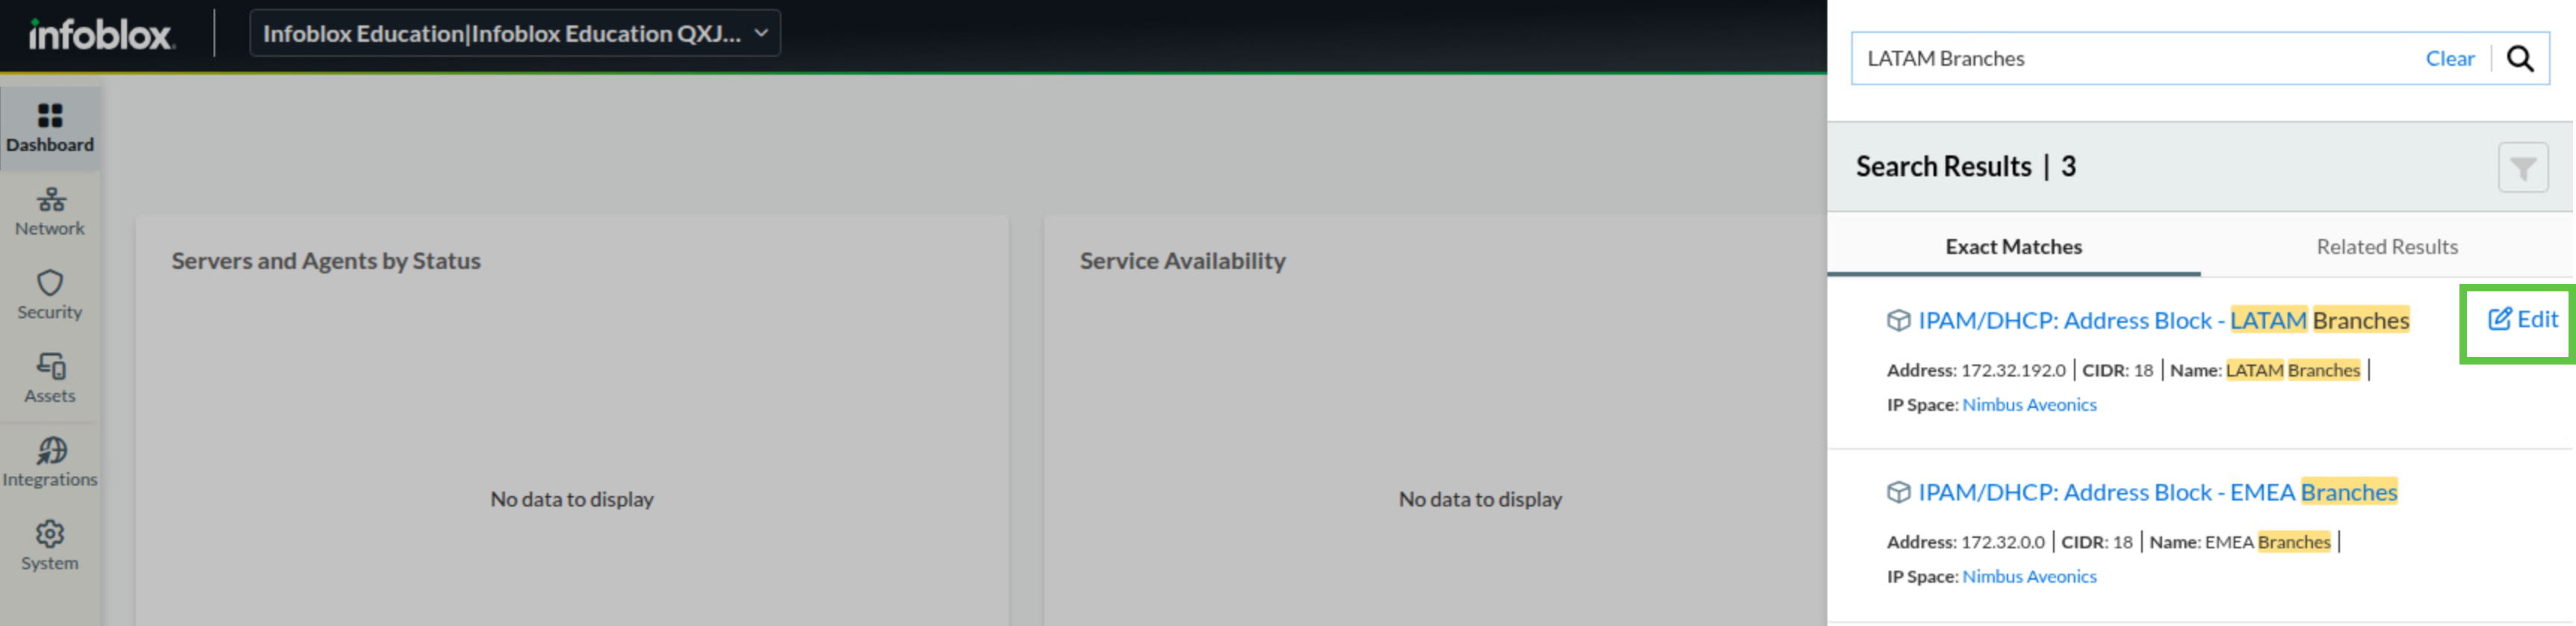
Focus on the Address Block results, hover over the LATAM Branches Address Block entry, and click Edit.
-
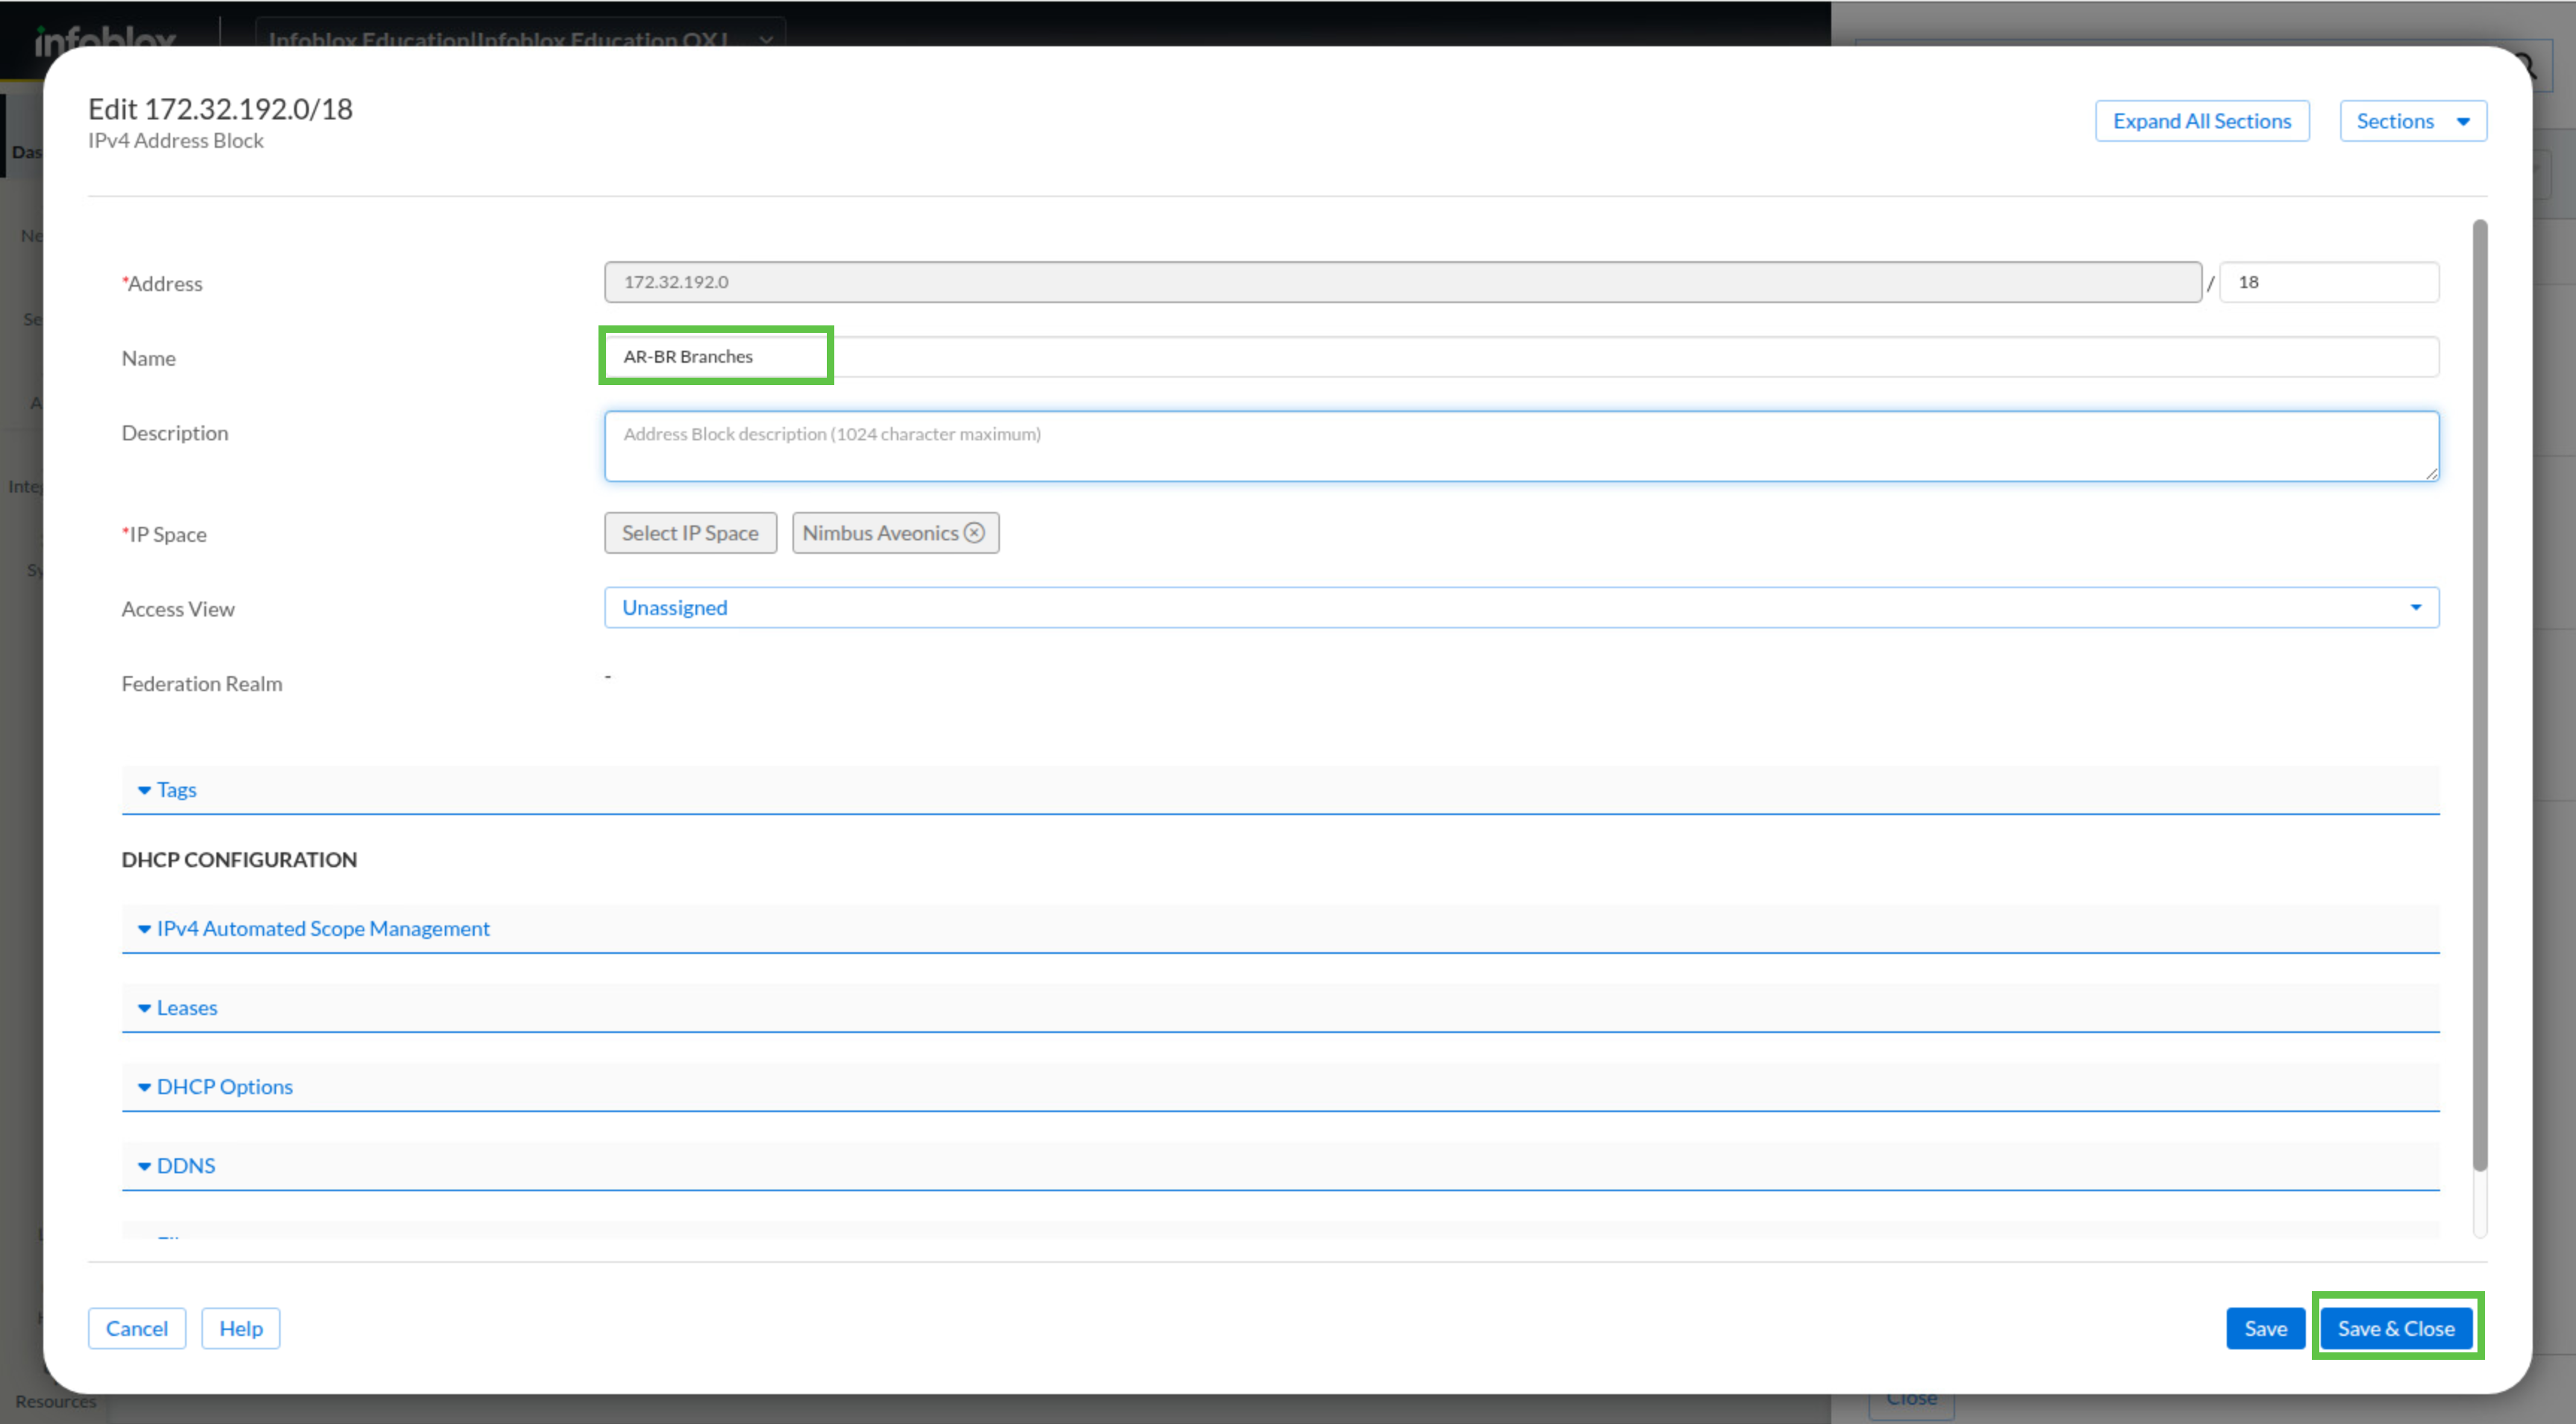
Change the name from LATAM Branches to AR-BR Branches and click Save & Close.
-
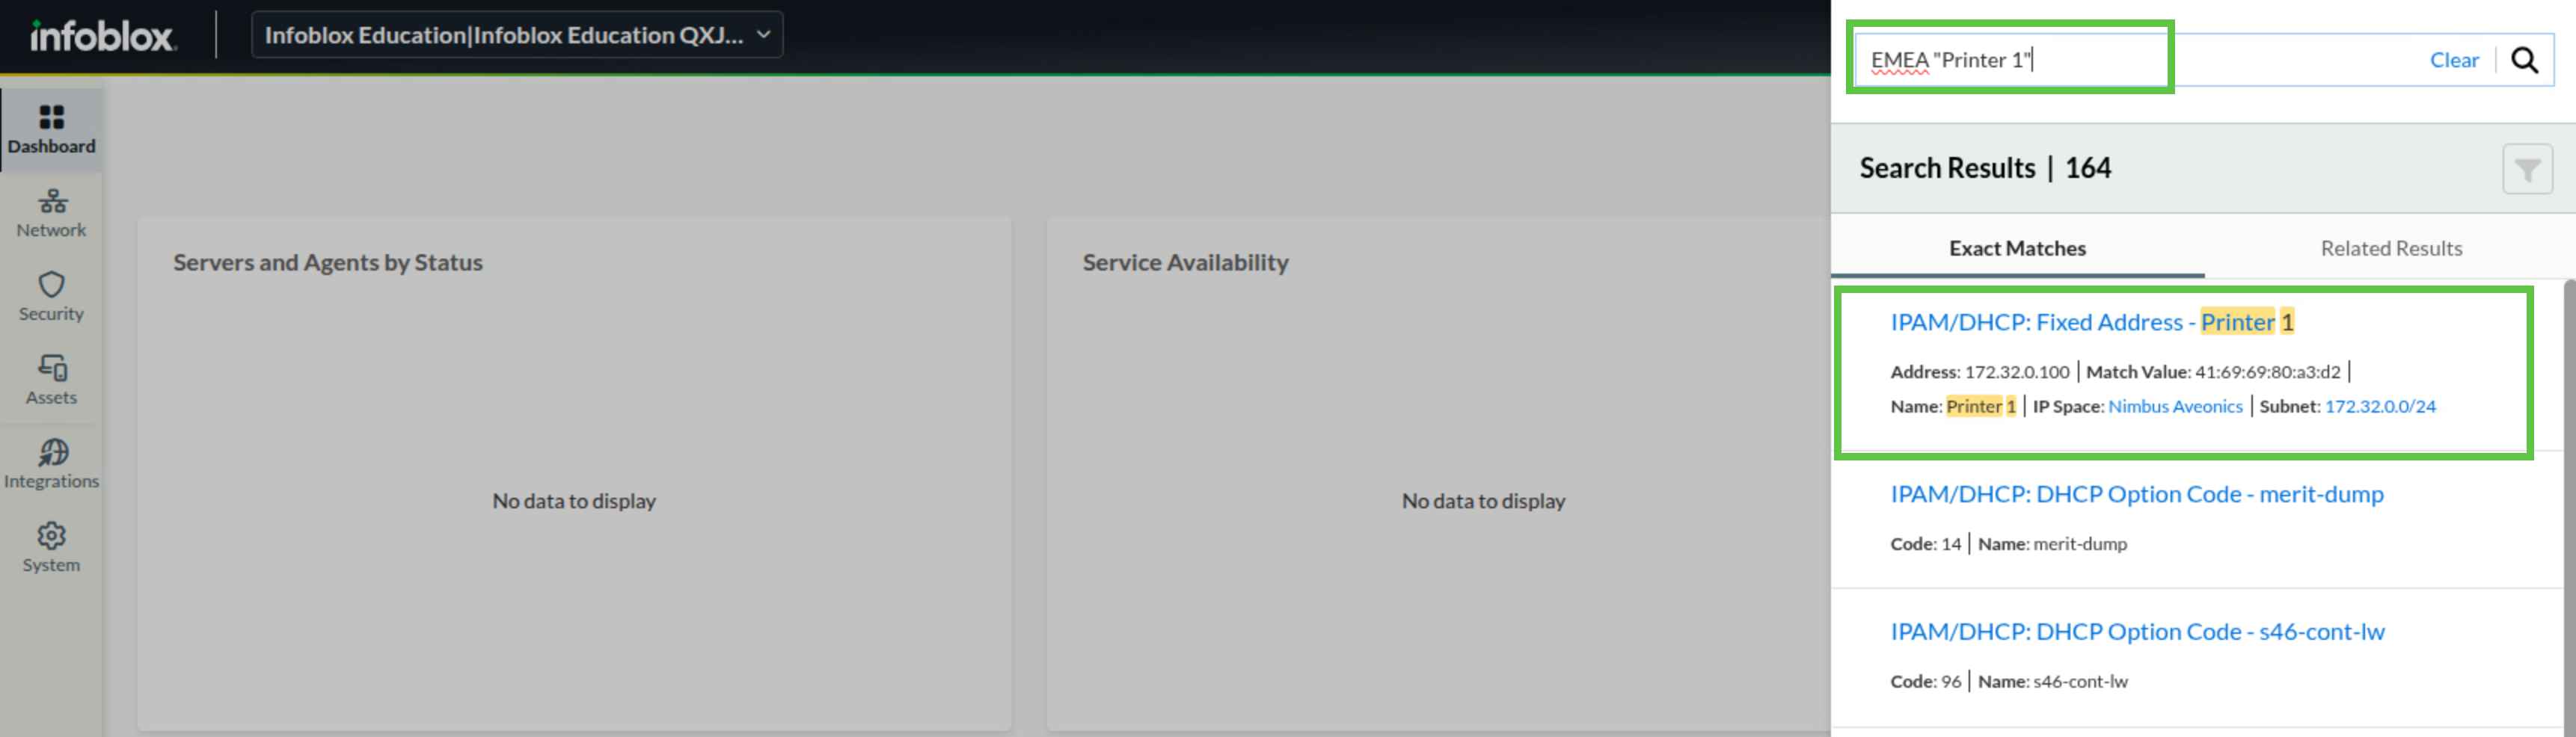
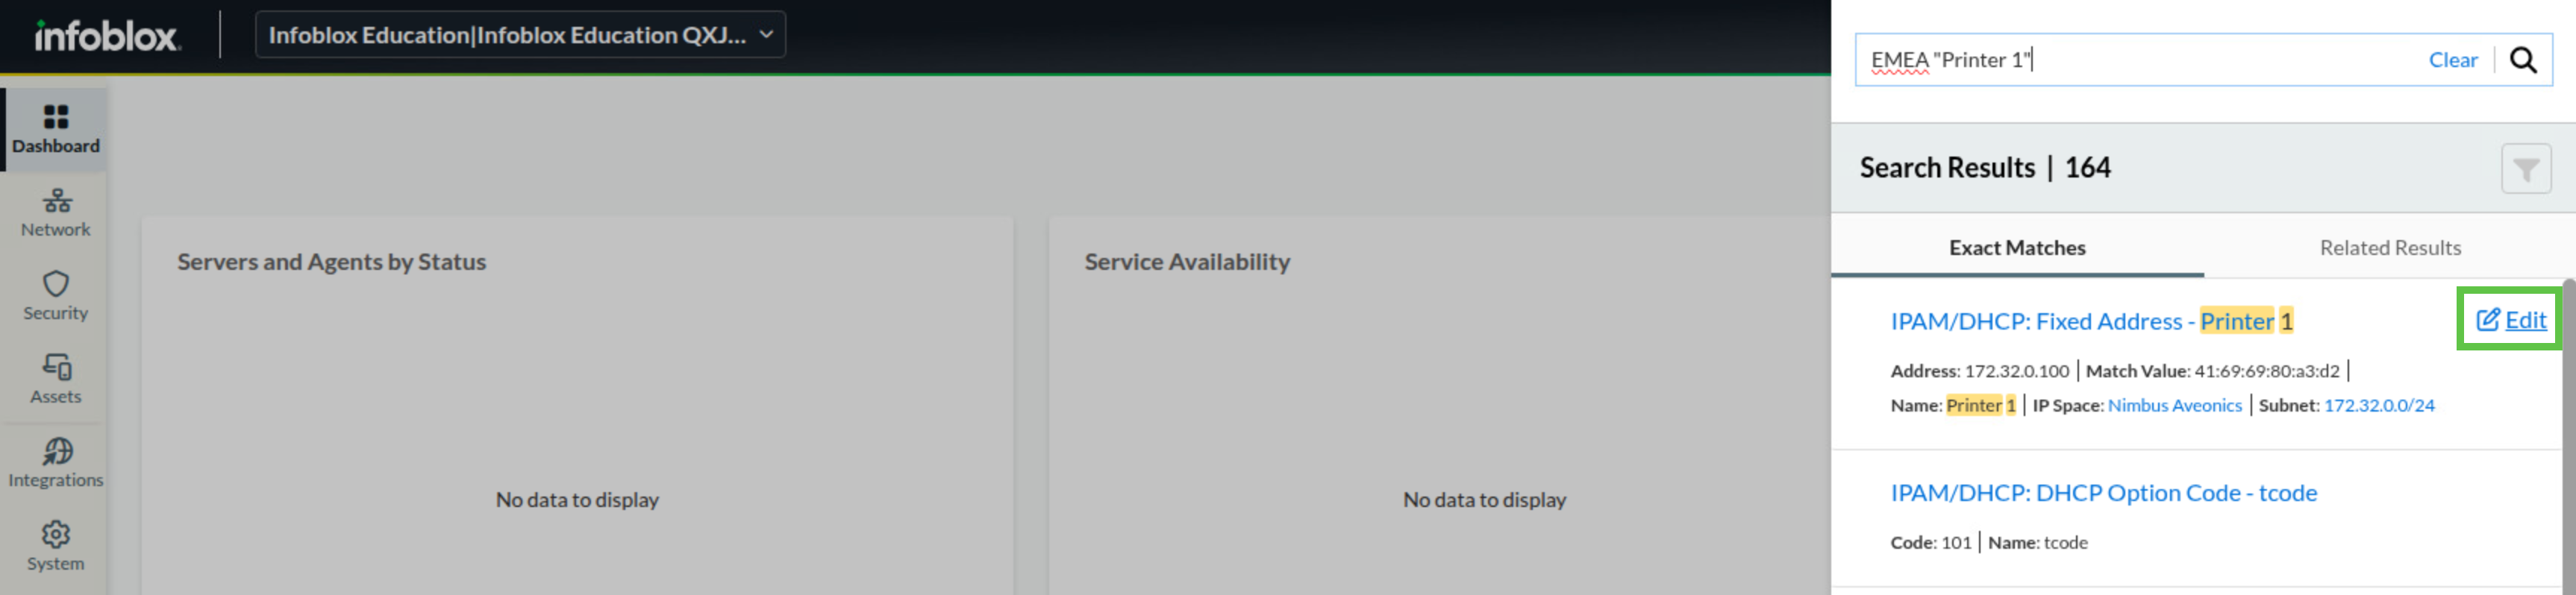
Search for EMEA "Printer 1".
-
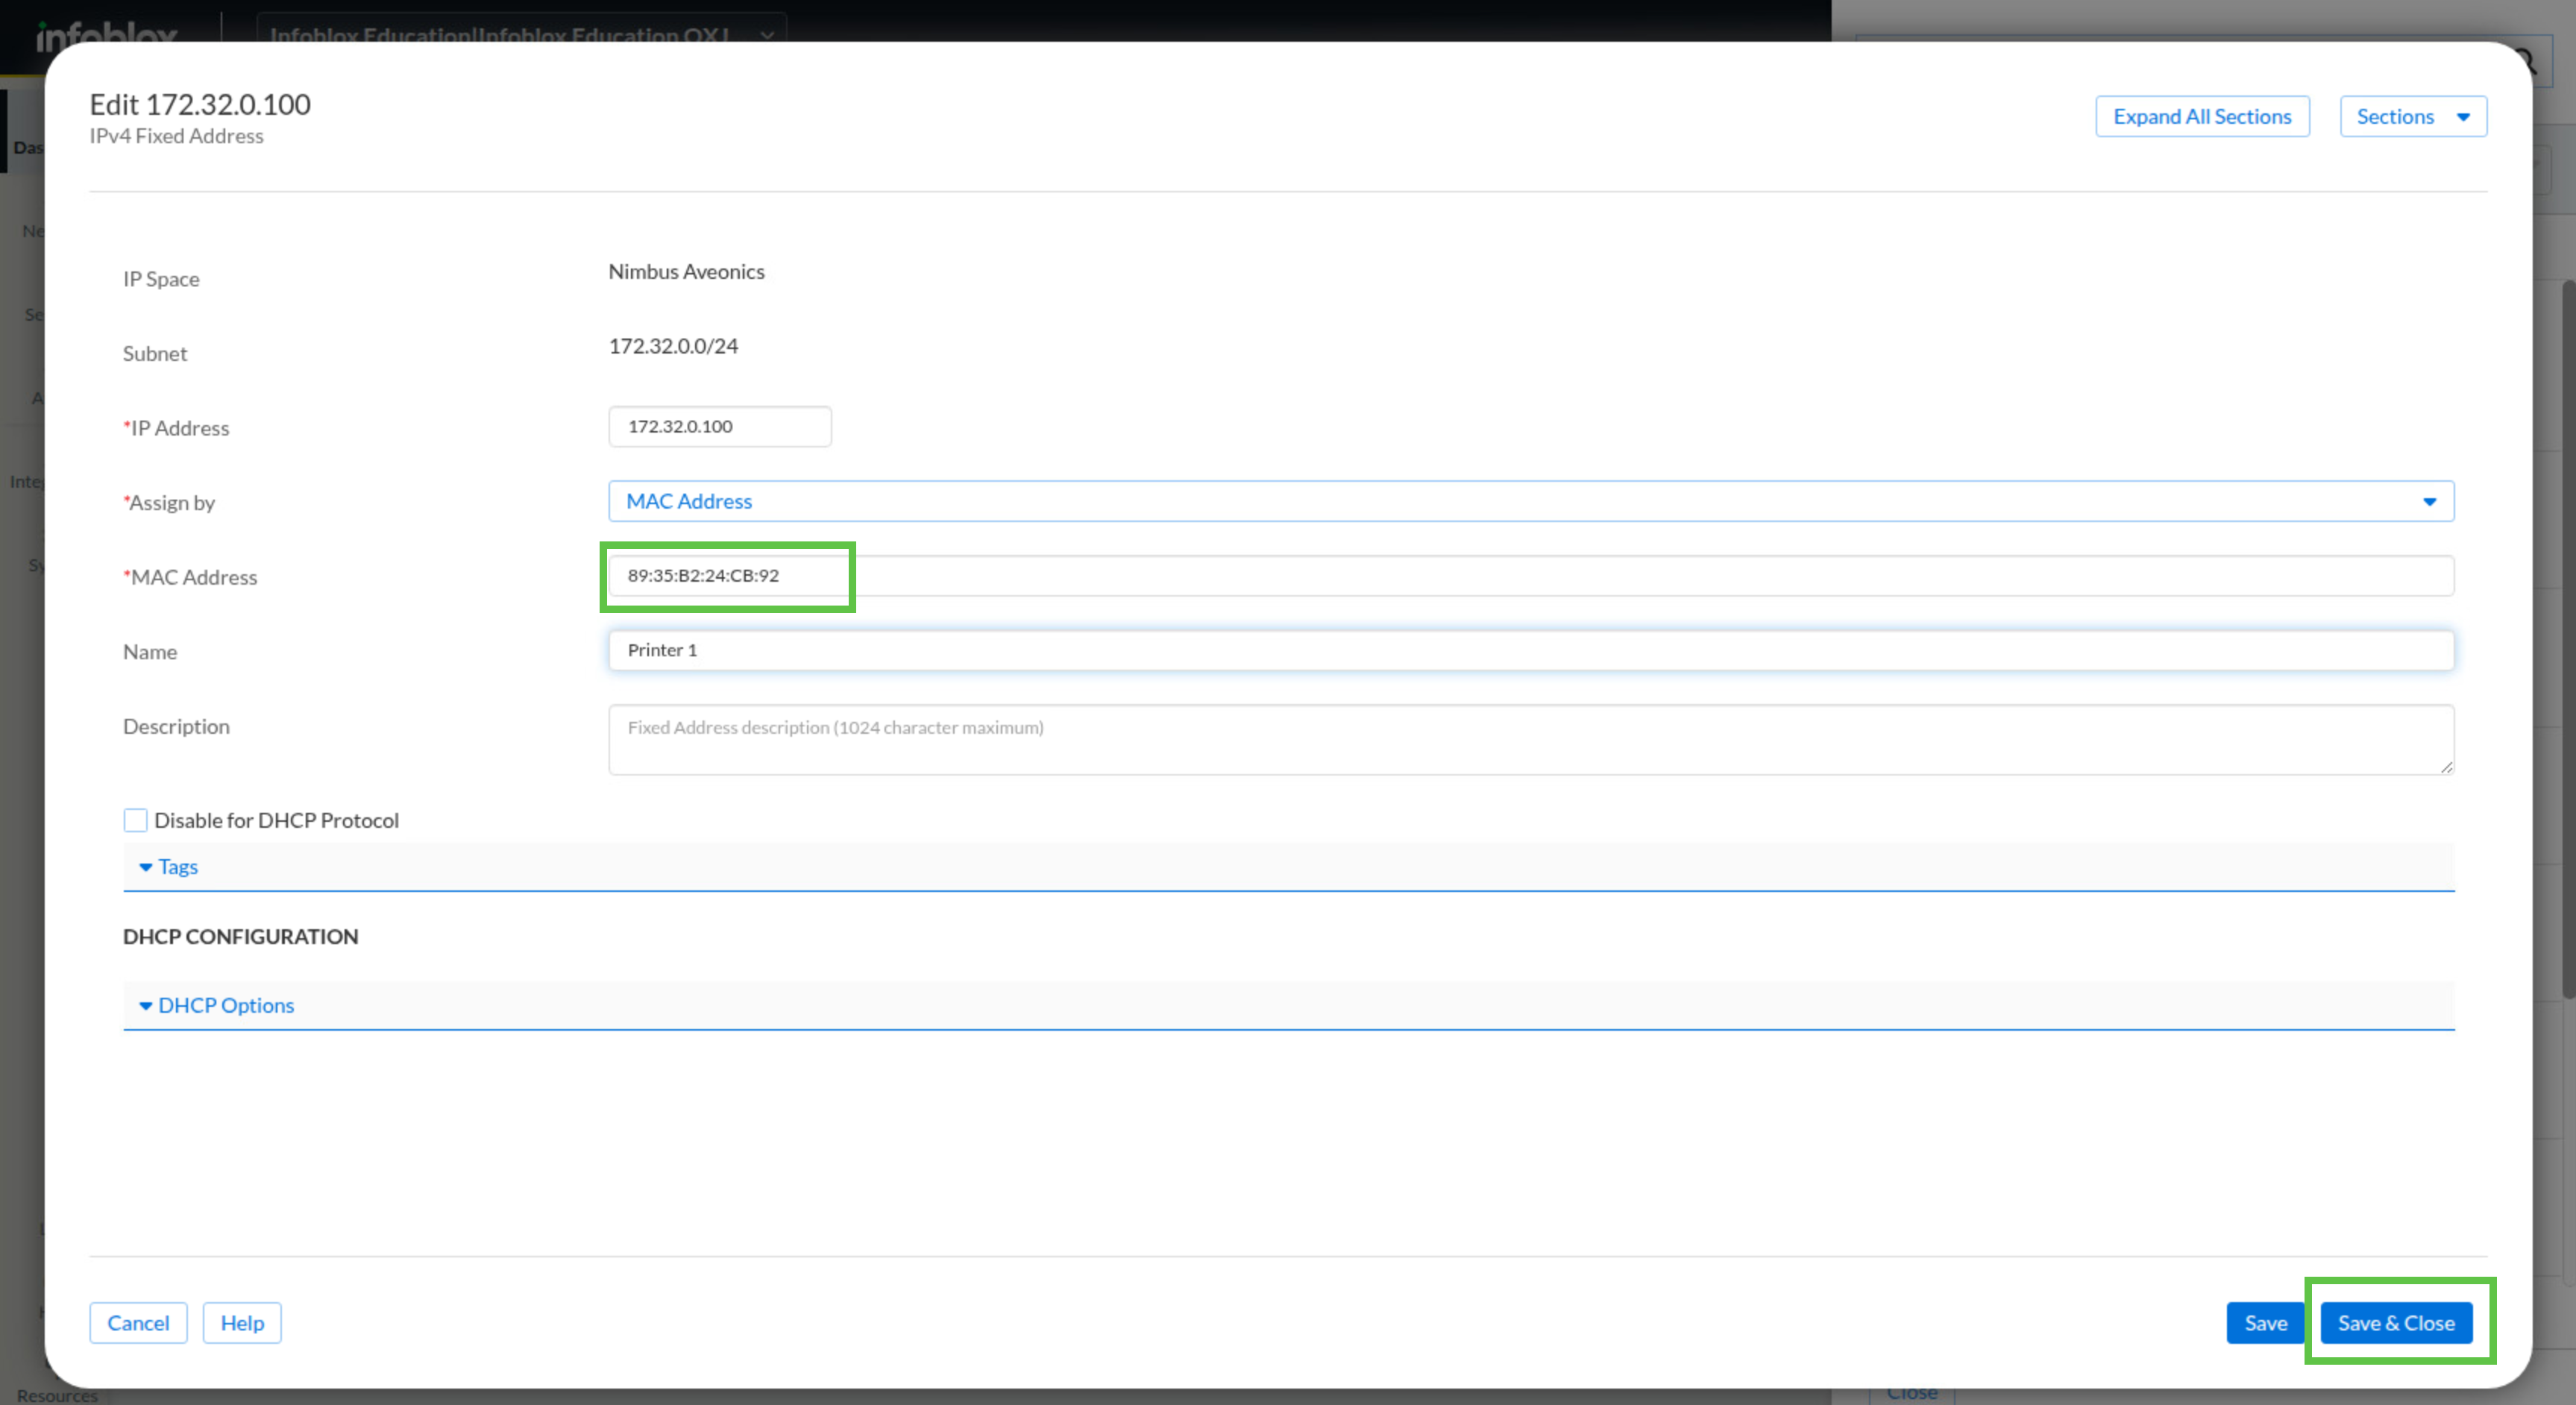
Hover over the Fixed Address result for Printer 1 and click Edit.
-
Change the MAC Address field from 41:69:69:80:a3:d2 to 89:35:B2:24:CB:92 and click Save & Close.