Scenario
You already have an active DHCP service host with a DHCP Config Profile applied, but clients are still not receiving IP addresses because no DHCP-served network has been defined yet. Your goal is to build the DHCP network hierarchy for the Techblue branch environment, assign it to the correct DHCP service instance, and confirm that a client can successfully obtain a lease from the new range.
Estimated Completion Time
-
20 to 30 minutes
Prerequisites
-
Administrative access to the CSP
Learning Content
Tasks
-
Create IP Space
-
Create IP Address Block
-
Create a Subnet
-
Create IP Address Range
-
Validate DHCP Lease
Task 1: Create IP Space
Create an IP space named Techblue Networks. This IP space will contain the DHCP address block, subnet, and range used in the rest of the lab.
Task 2: Create IP Address Block
Create an address block inside Techblue Networks and set it to 172.31.0.0/16.
Normally, an IP space has more address blocks. For example, many enterprises may have an internal IP Space with 10.0.0.0/8, 172.16.0.0/12, and 192.168.0.0/16. For the lab, we are only using one address block for simplicity.
Task 3: Create a Subnet
Create a subnet 172.31.101.0/24 in the address block and associate it with Techblue DHCP Service 1.
Task 4: Create IP Address Range
Create IPv4 range 172.31.101.100 to 172.31.101.199 in the subnet and associate it with Techblue DHCP Service 1.
Task 5: Validate DHCP Lease
Test the DHCP network with a client and confirm that the client receives an IP address from the configured range.
Solutions
Task 1 Solution: Create IP Space
Start by creating an IP space to hold the DHCP-served network objects for this branch. In production, an IP space often contains multiple address blocks, but this lab uses a single block for simplicity.
-
Log in to your lab’s jump-desktop.
-
Use the Education Infoblox Portal credentials to sign in to the Infoblox Portal.
-
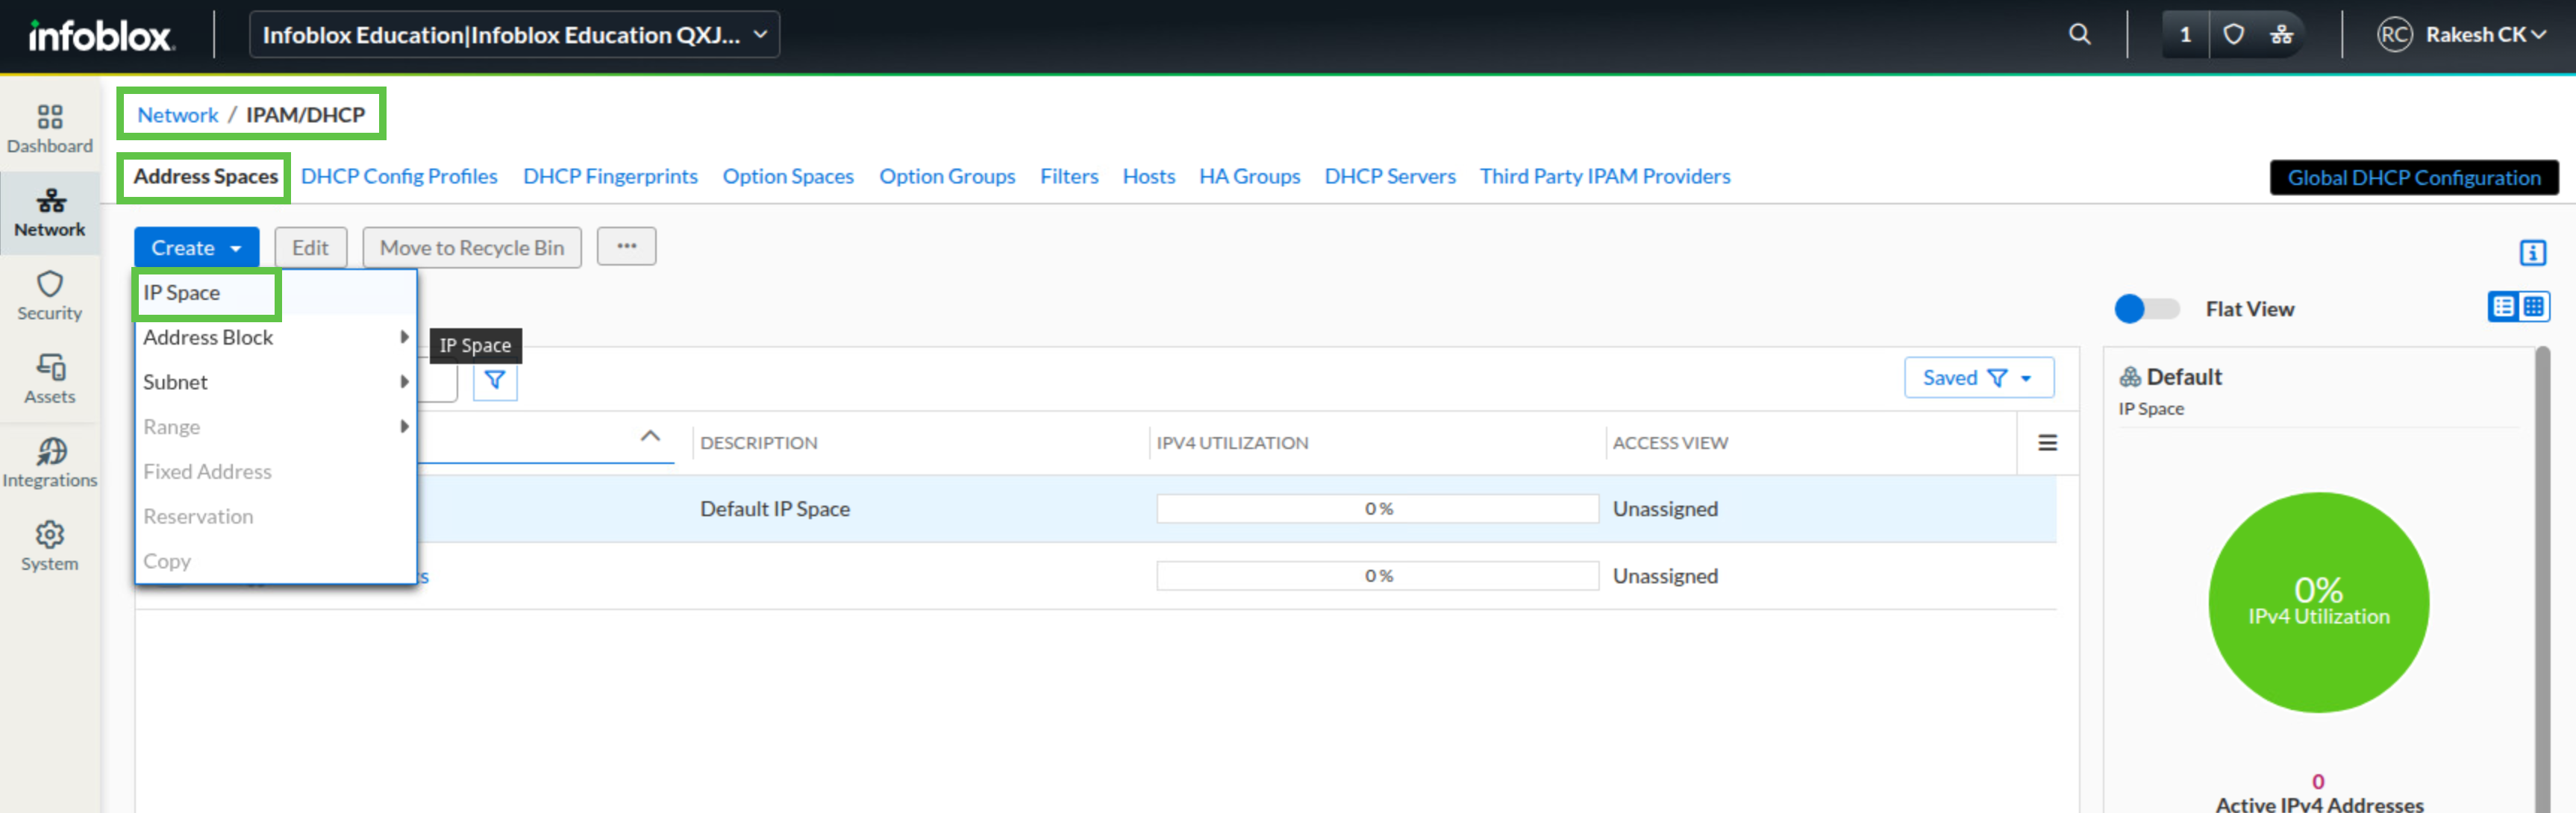
Navigate to Network → IPAM/DHCP.
-
Select the Address Spaces tab.
-
Click Create and select IP Space.
-
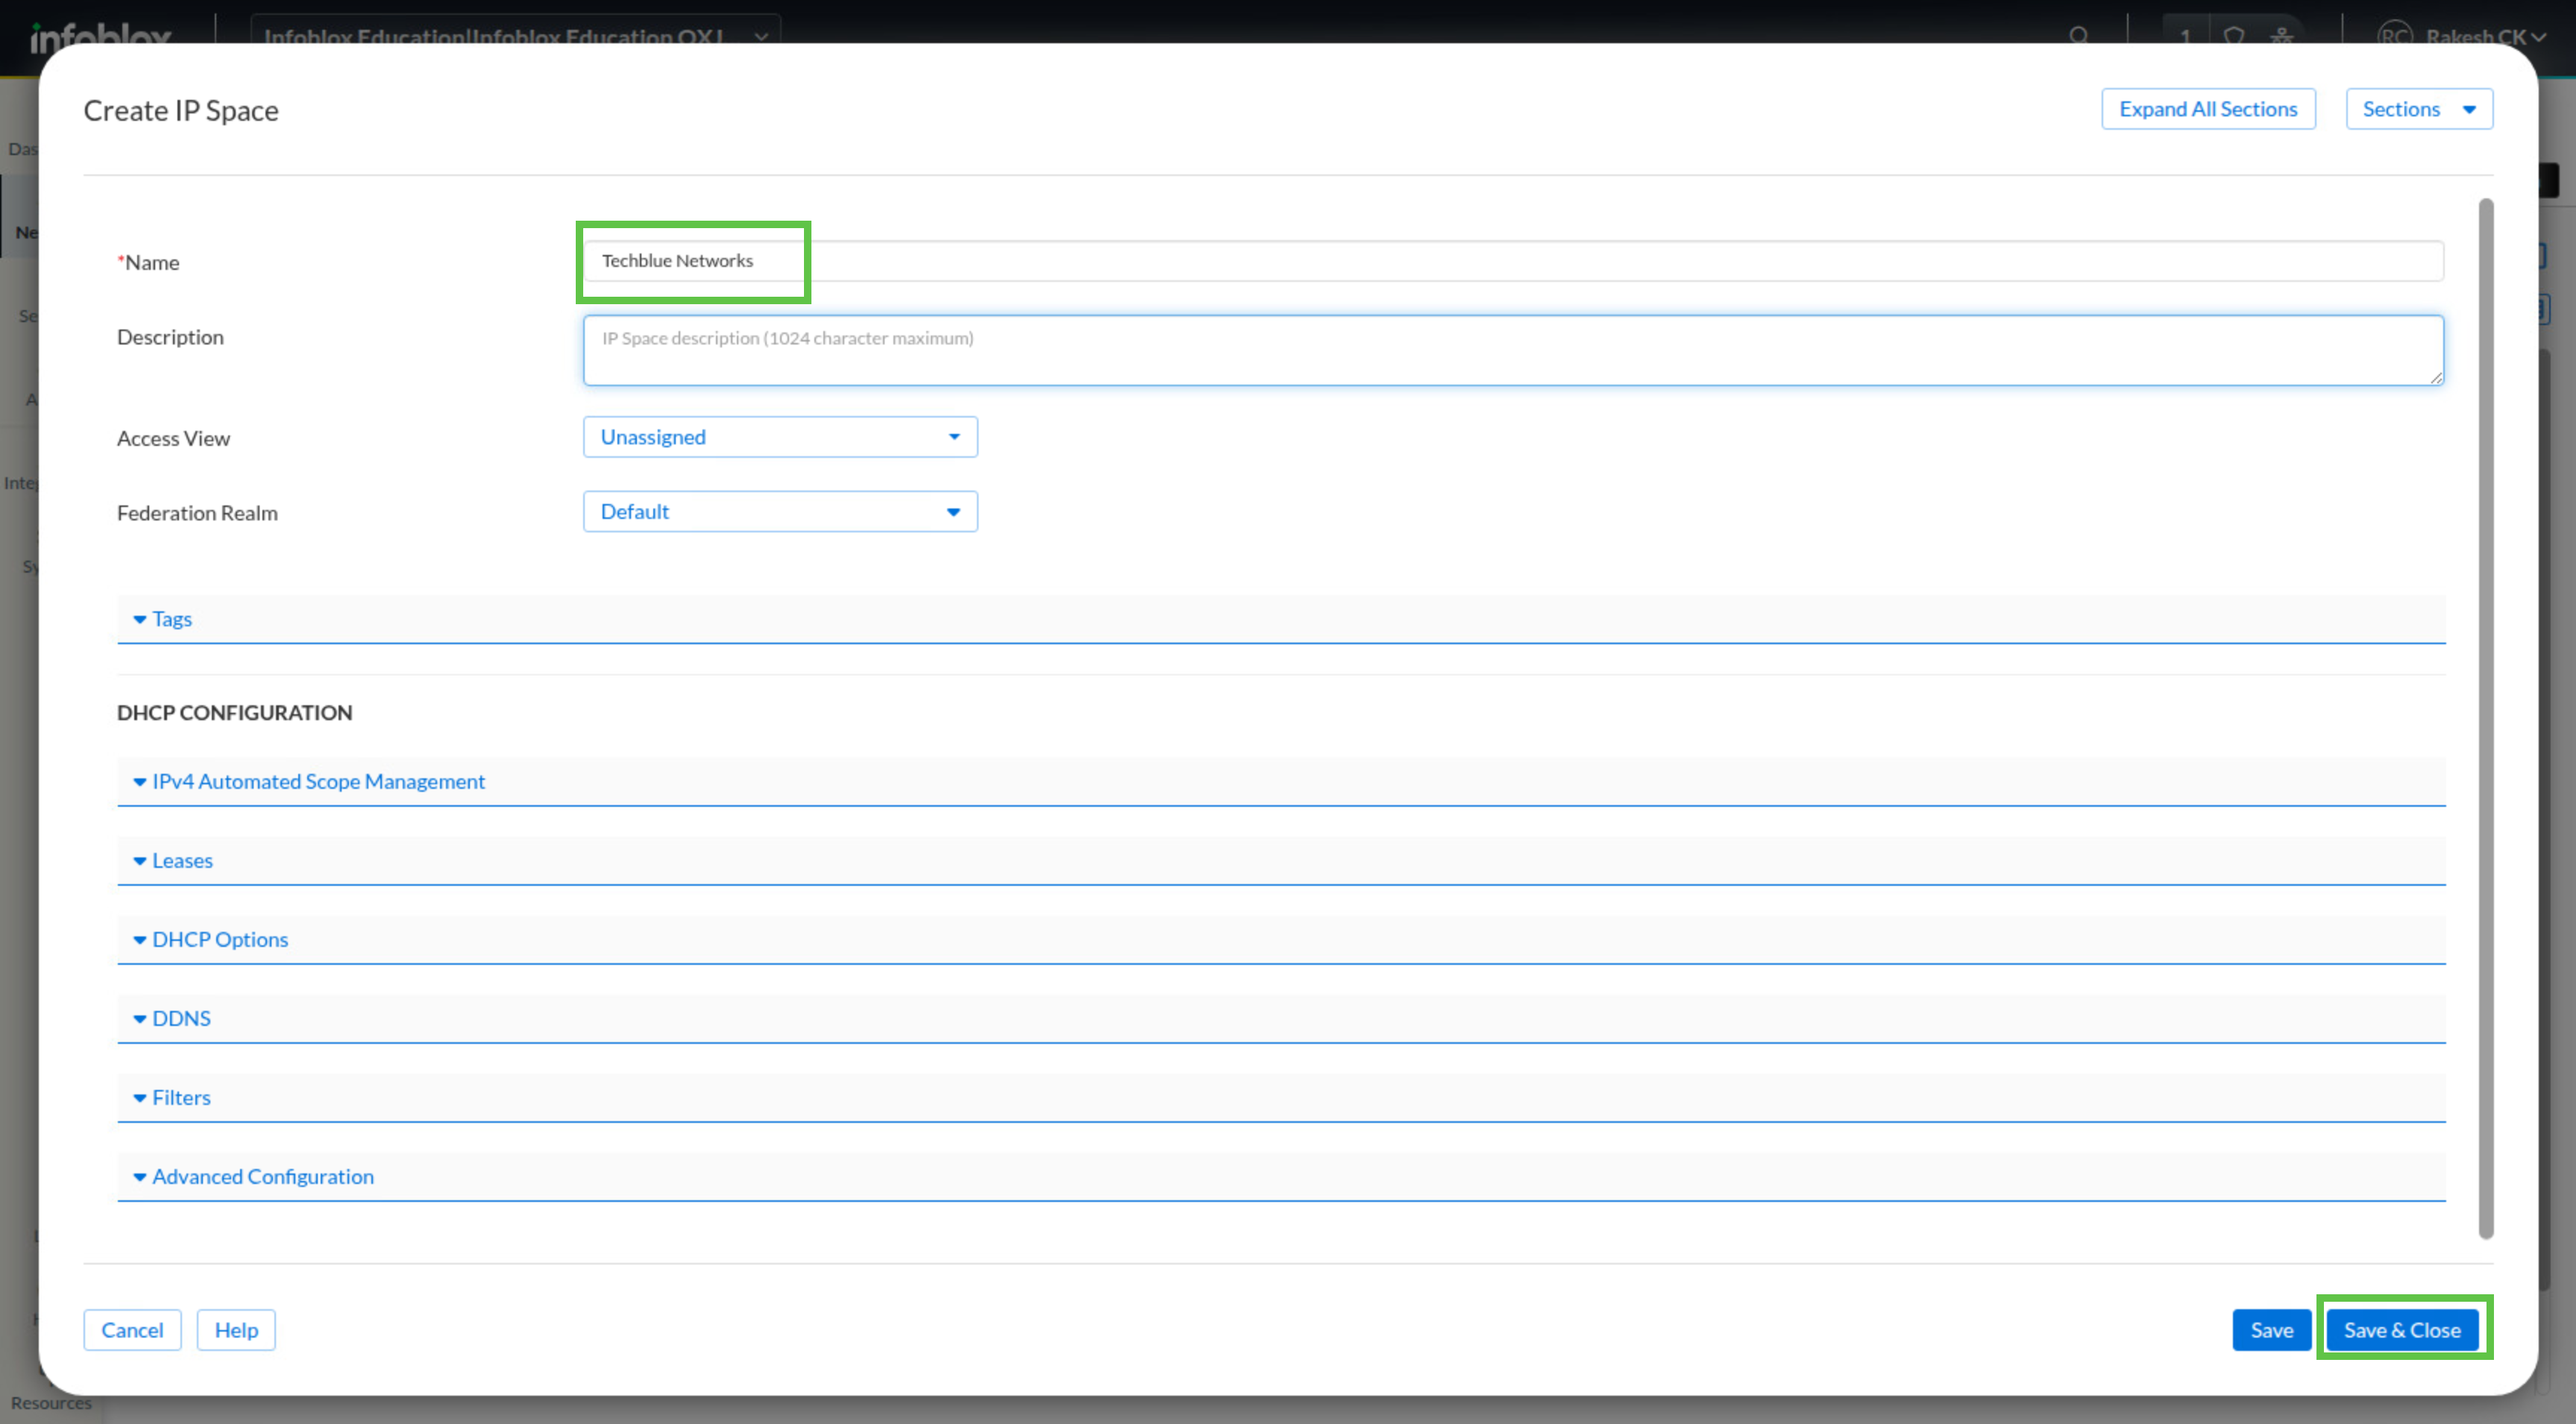
In the Create IP Space window, enter Techblue Networks as the name.
-
Click Save & Close.
Task 2 Solution: Create IP Address Block
Next, create the parent address block that will contain the subnet used for DHCP. This gives the IP space a structured container for the subnet and the lease range you create later.
-
Navigate to Network → IPAM/DHCP.
-
Select the Address Spaces tab.
-
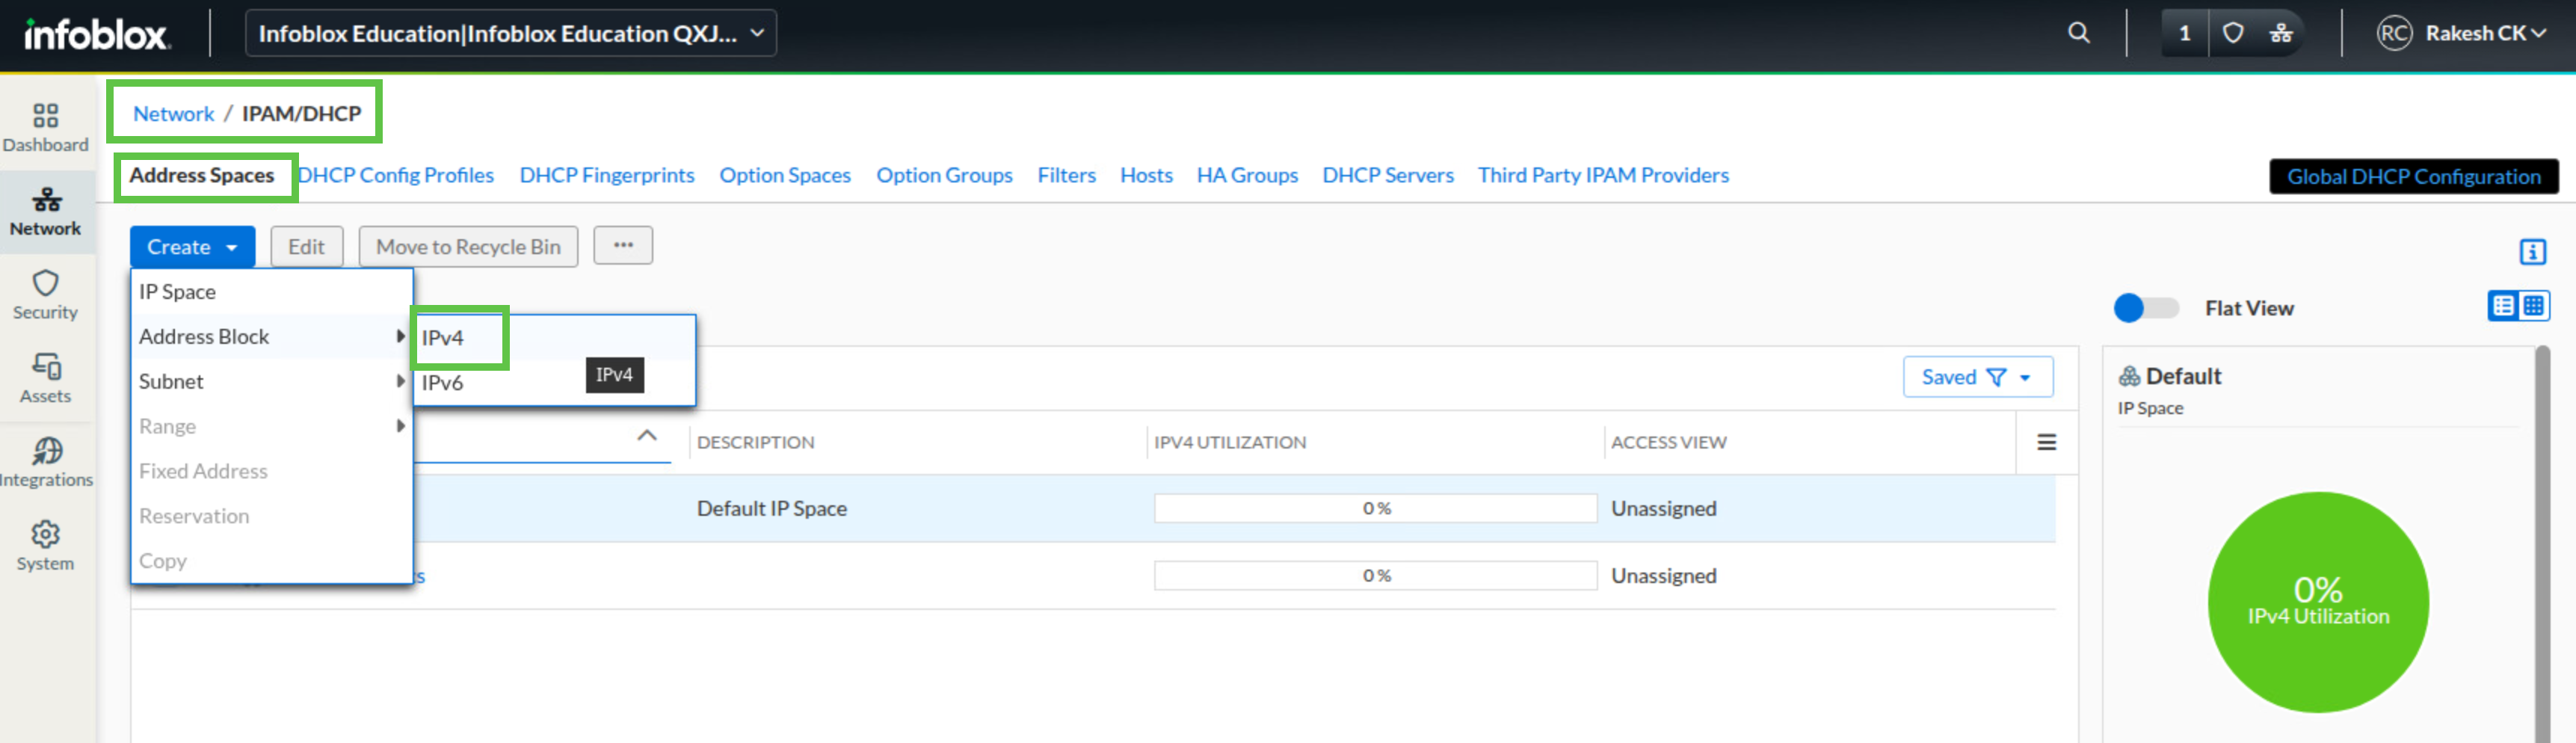
Click Create and select Address Block → IPv4.
-
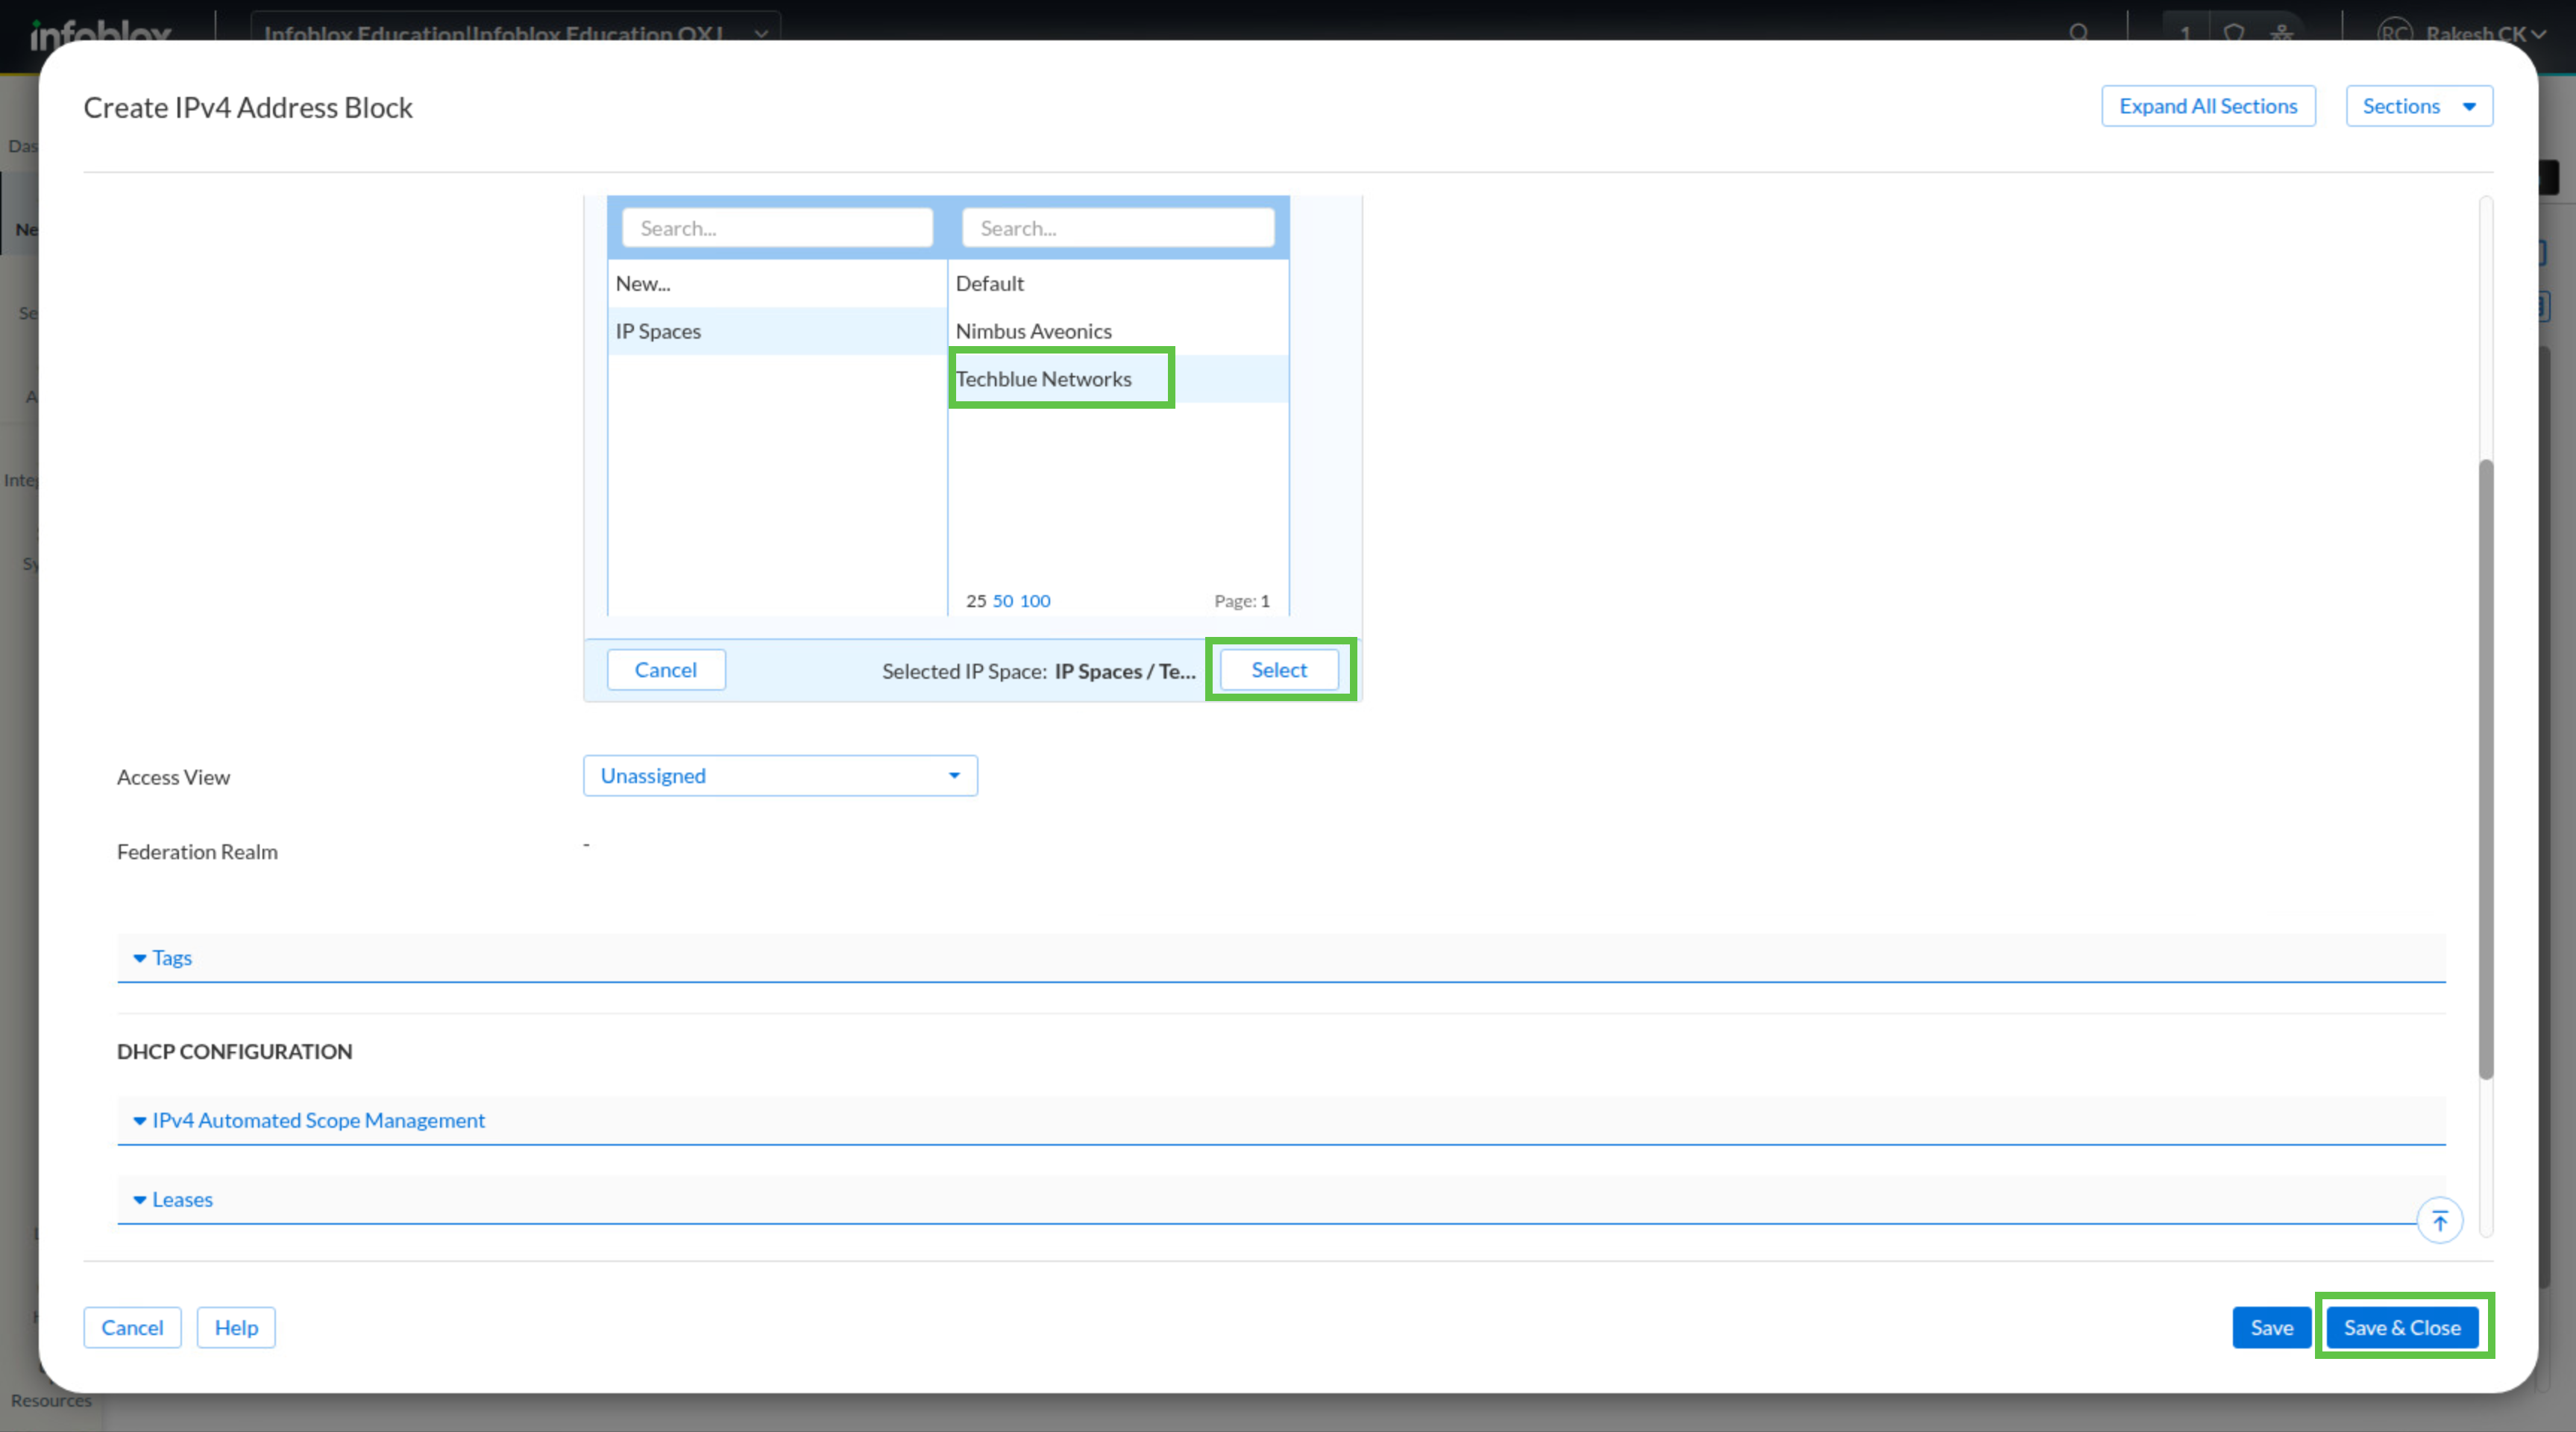
In the Create IPv4 Address Block window, enter address 172.31.0.0 with mask 16.

-
Click Select IP Space.
-
In the selection dialog, expand IP Spaces, choose Techblue Networks, and click Select.
-
Click Save & Close.
Normally, an IP space has more address blocks. For example, many enterprises may have an internal IP Space with 10.0.0.0/8, 172.16.0.0/12, and 192.168.0.0/16. For the lab, we are only using one address block for simplicity.
Task 3 Solution: Create a Subnet
Create the subnet that DHCP clients will use and bind it to the active DHCP service instance. Associating the subnet with Techblue DHCP Service 1 tells Universal DDI which service should answer DHCP requests for this network.
-
Navigate to Networking → IPAM/DHCP.
-
Select the Address Spaces tab.
-
Click Create and select Subnet → IPv4.

-
In the Create IPv4 Subnet window, enter subnet address 172.31.101.0 with mask 24.

-
Click Select IP Space, choose Techblue Networks, and click Select.
-
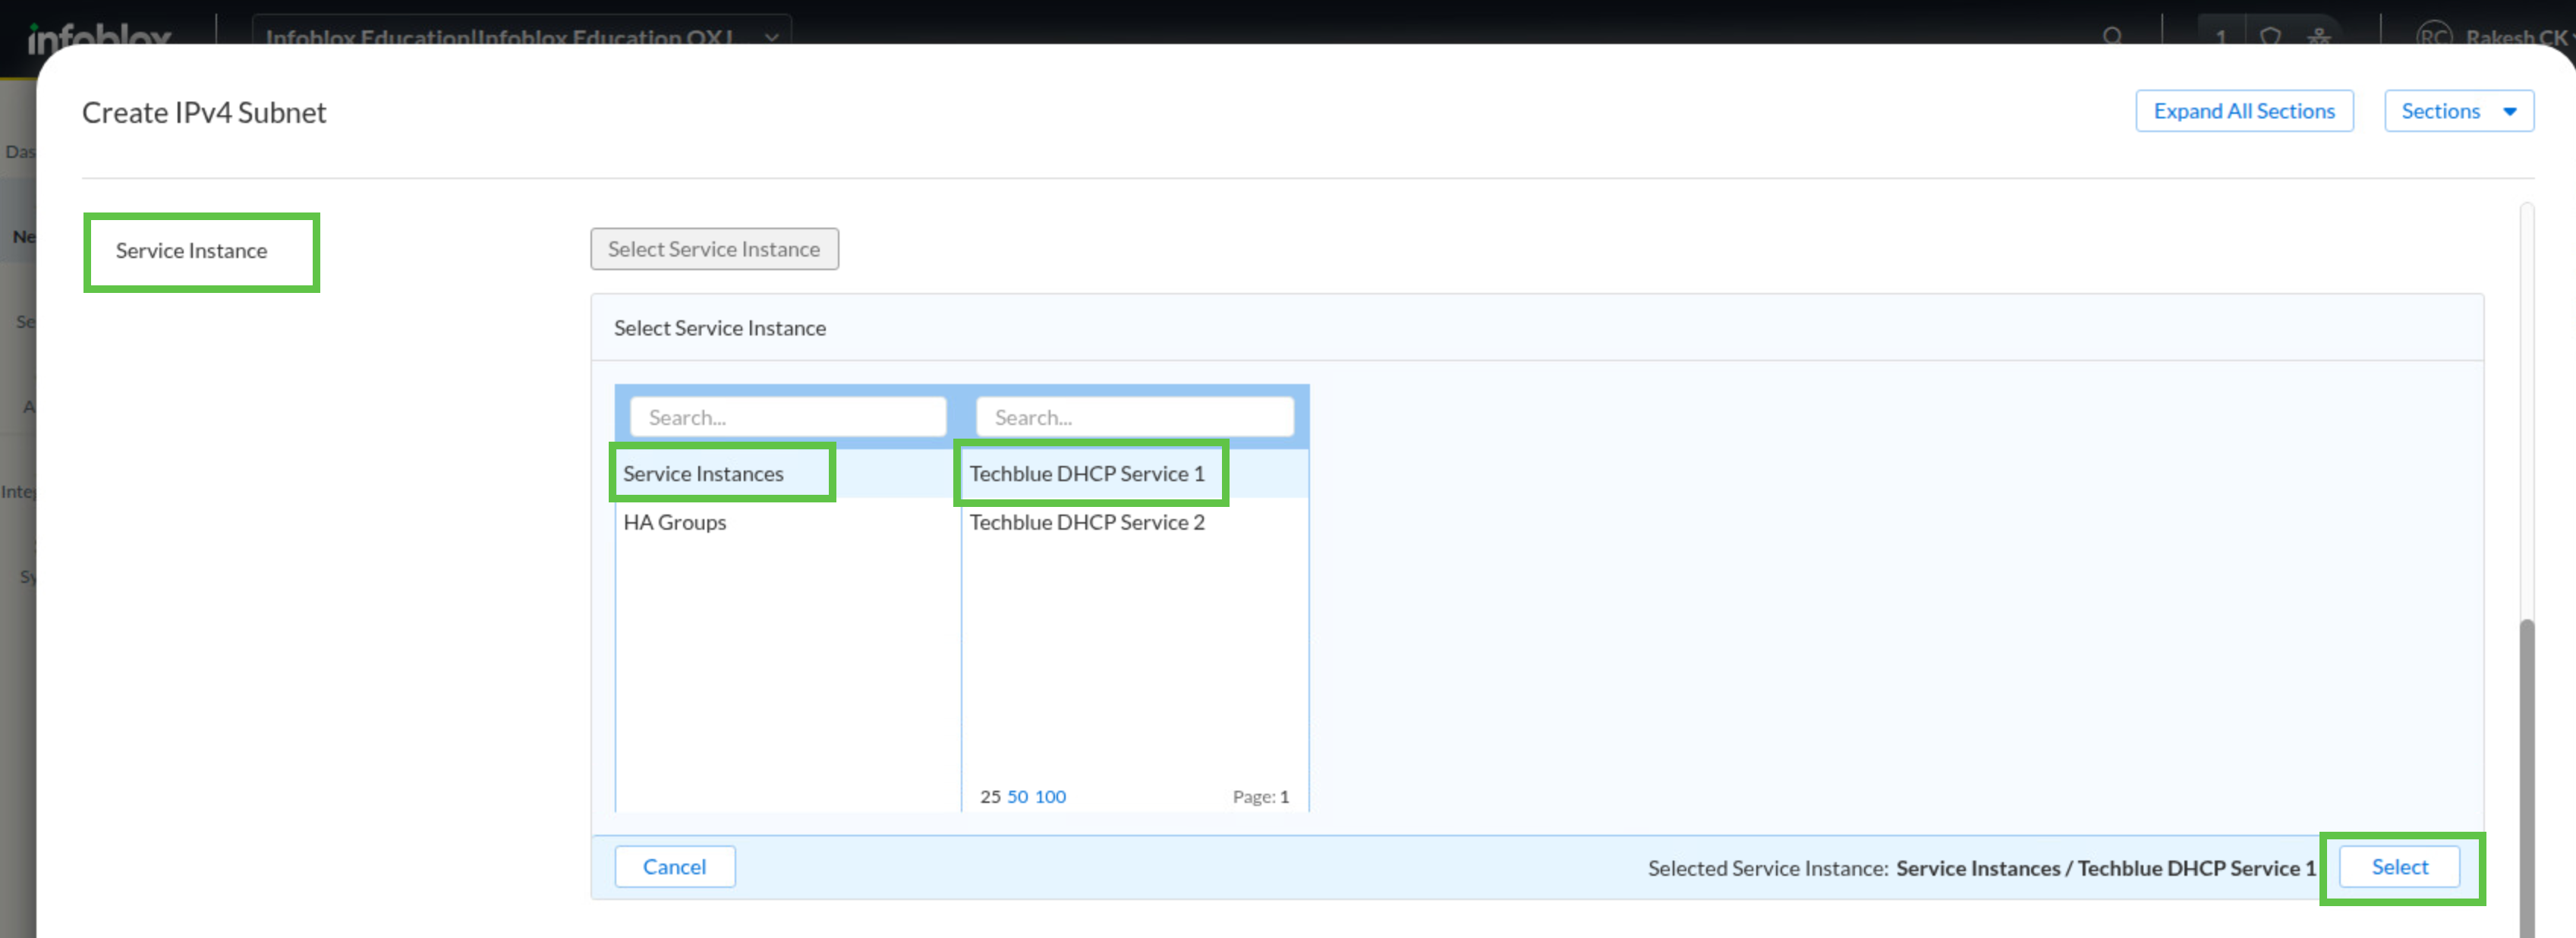
Click Service Instance, select Techblue DHCP Service 1, and click Select.
-
If Techblue DHCP Service 1 is not listed, review the DHCP Services lab and confirm the earlier steps were completed correctly.
-
Review the subnet settings to confirm the address, IP space, and service instance are correct.
-
Click Save & Close.
Task 4 Solution: Create IP Address Range
After the subnet exists, define the DHCP lease pool inside it. The range identifies the specific addresses that clients can receive, while using the parent service instance ensures the leases are served by the subnet’s assigned DHCP service.
-
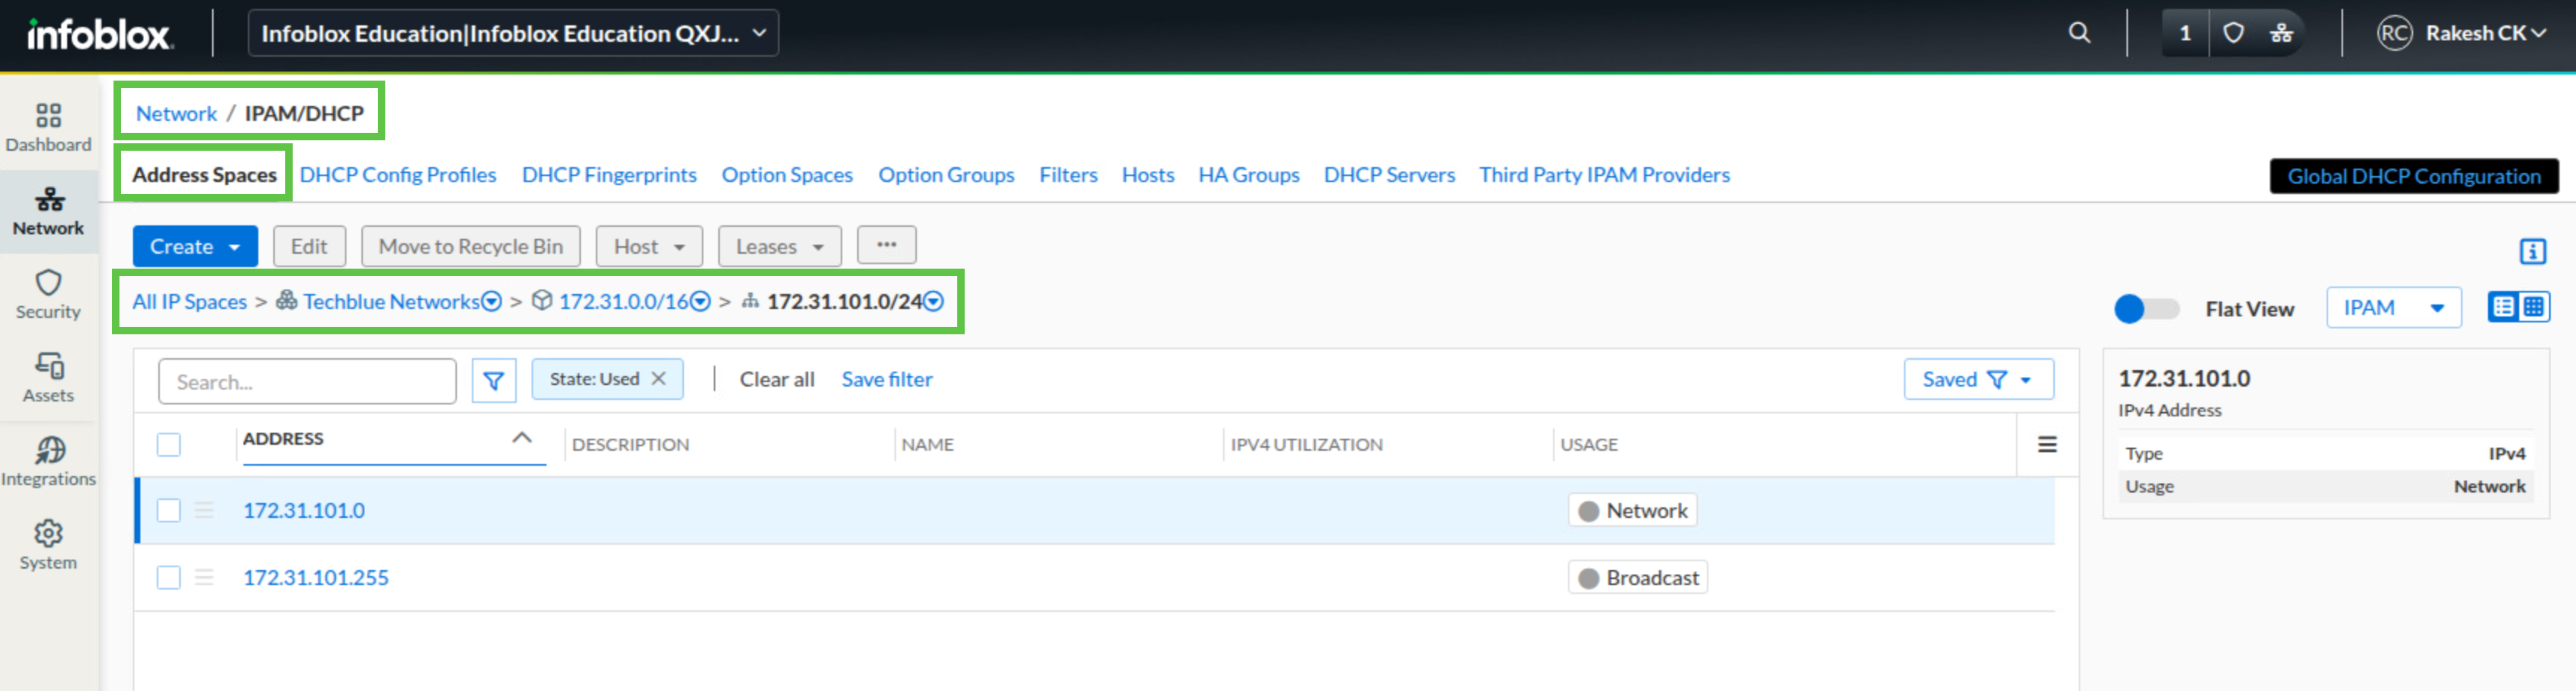
Navigate to Networking → IPAM/DHCP and open the Address Spaces tab.
-
Open Techblue Networks, then 172.31.0.0/16, then 172.31.101.0/24.
-
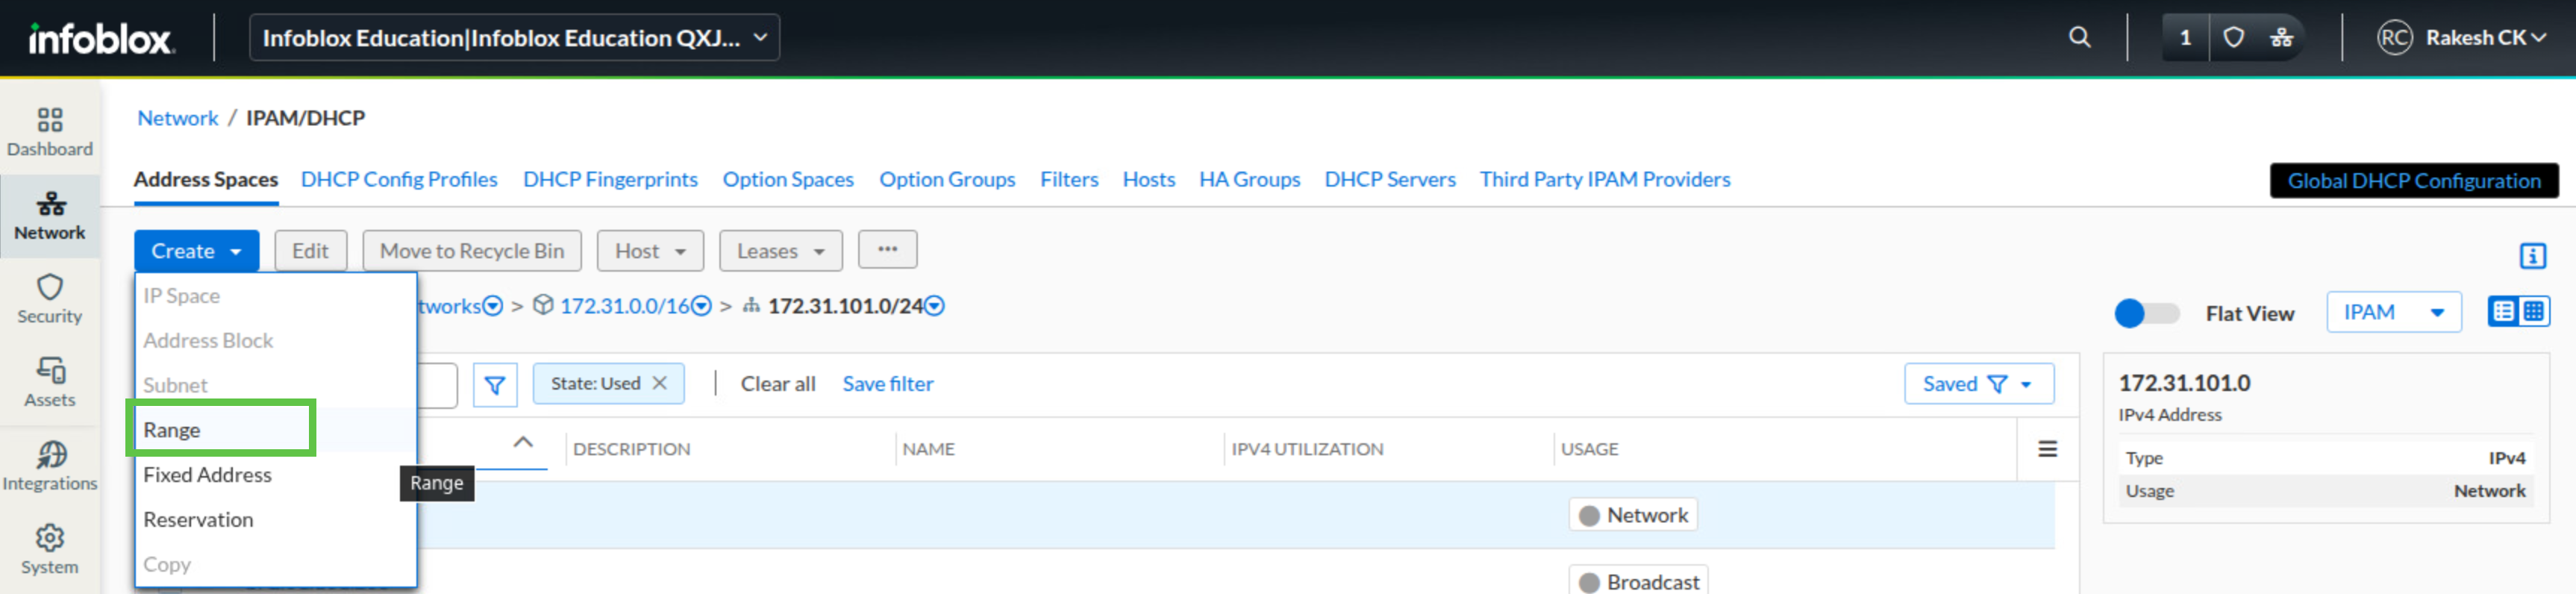
Click Create and select Range.
-
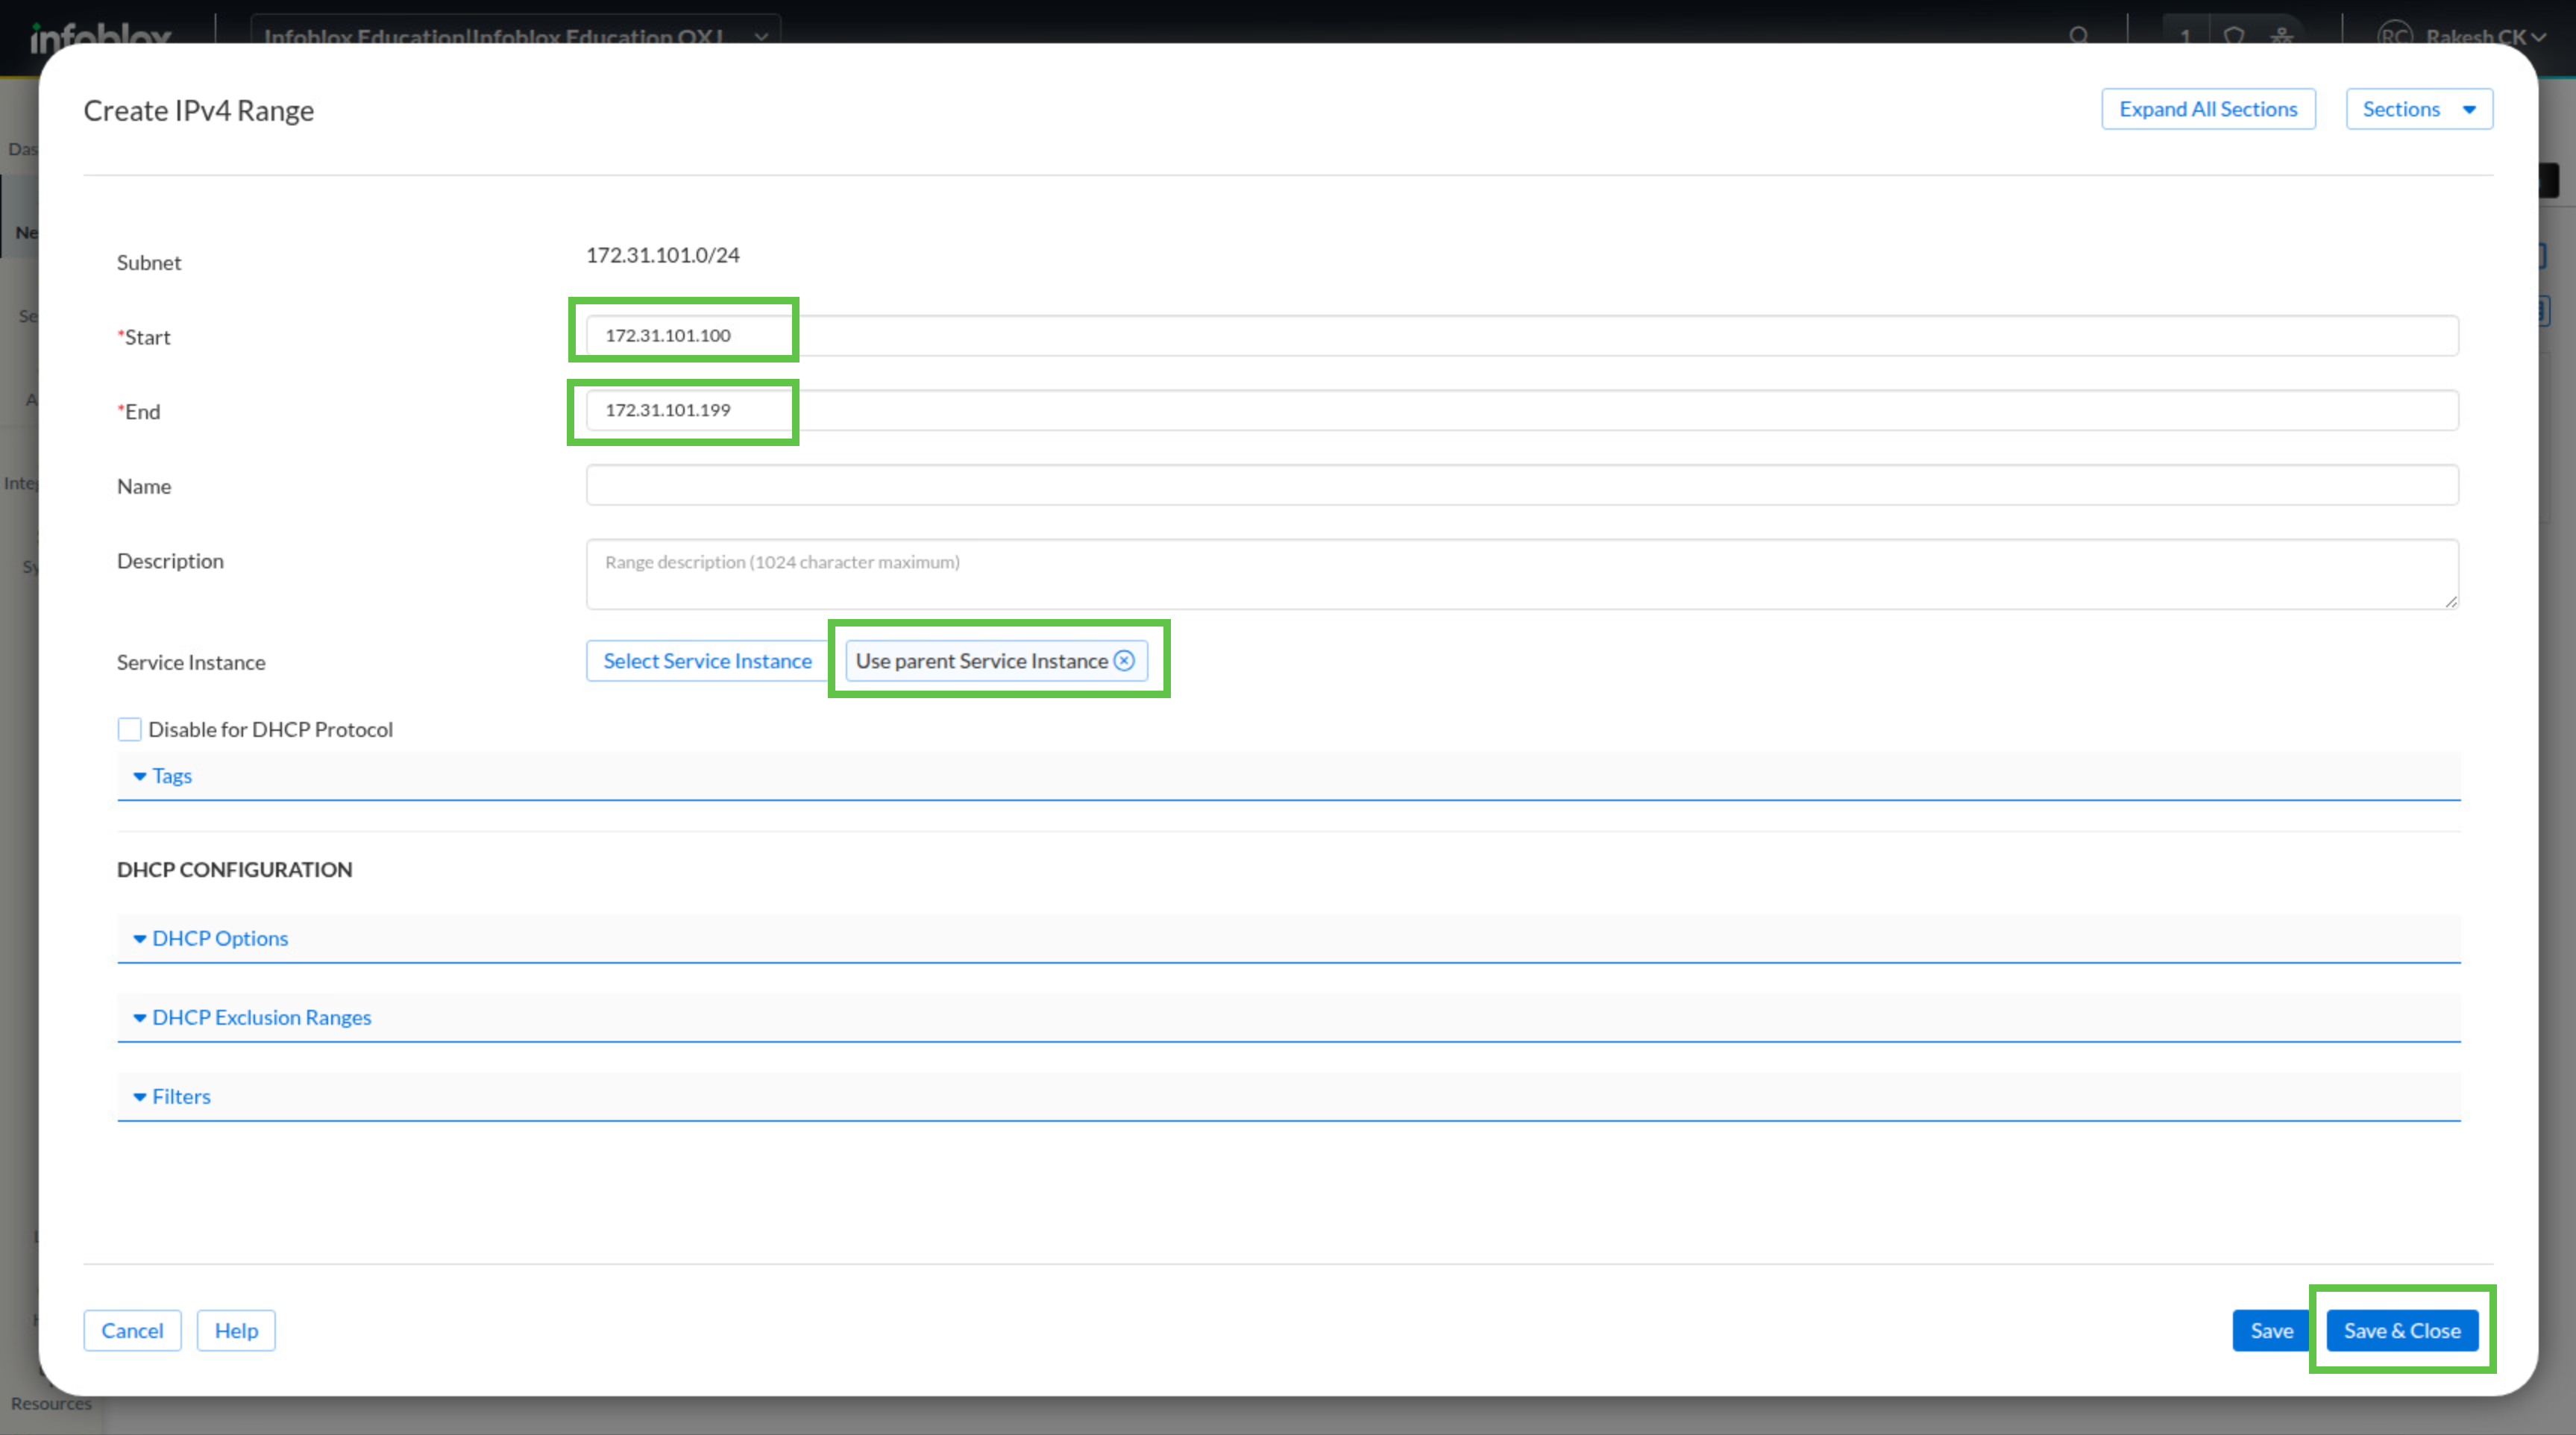
In the Create IPv4 Range window, enter Start 172.31.101.100 and End 172.31.101.199.
-
For Service Instance, keep Use parent Service Instance (default).
-
Click Save & Close.
Task 5 Solution: Validate DHCP Leases
Finish by testing the DHCP network from a client VM. This confirms that the service instance, subnet, and range are working together and that the client can obtain a lease from the range you created.
-
Switch to the testing-linux virtual machine and open a terminal window.
-
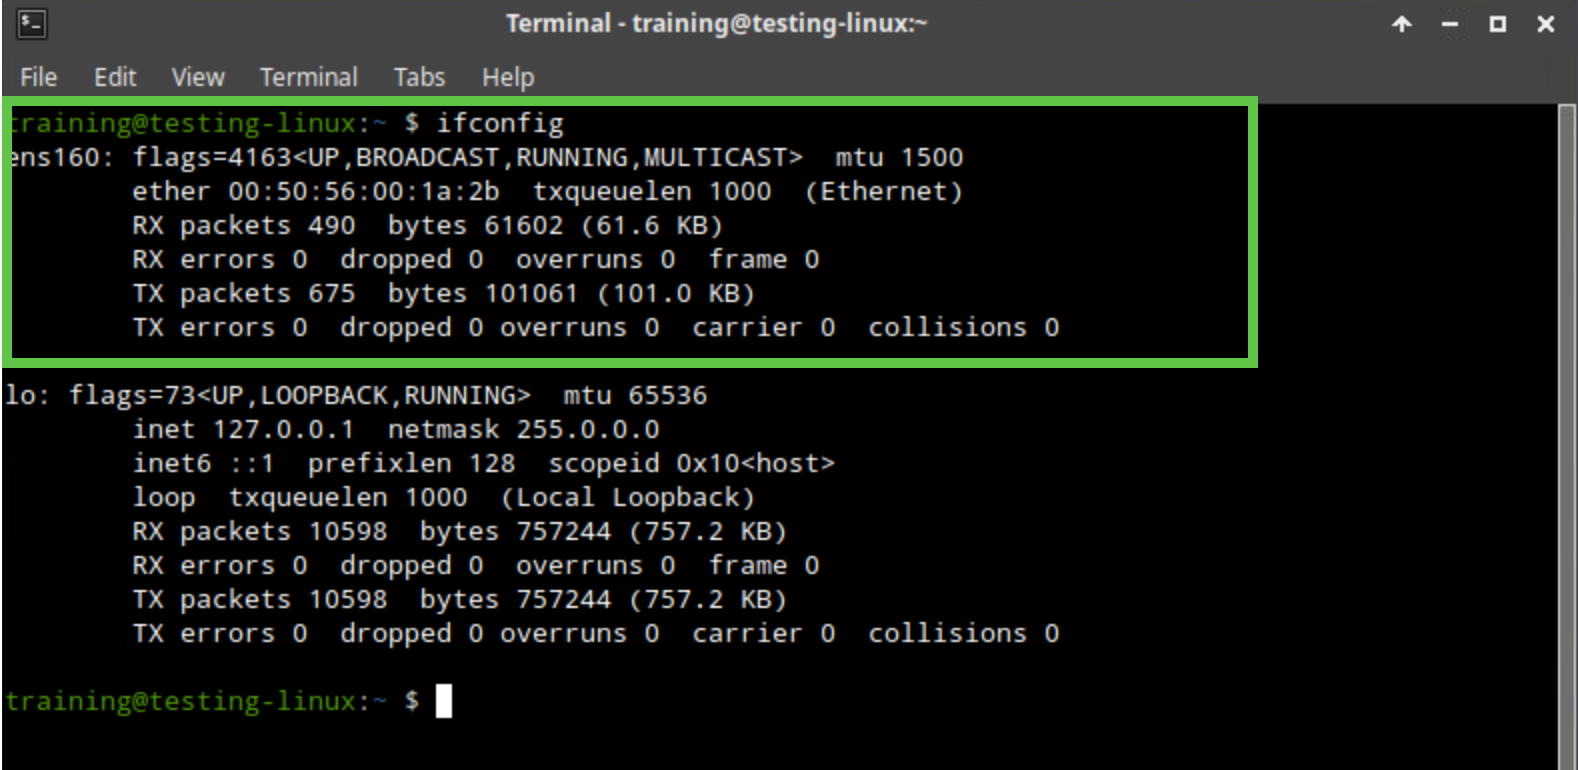
Confirm that the client does not already have an IP address by running ifconfig.
-
Enable the DHCP client by running sudo set-network-dhcp. If prompted for a password, use infoblox.

-
Wait a minute or two for the DHCP exchange to complete.
-
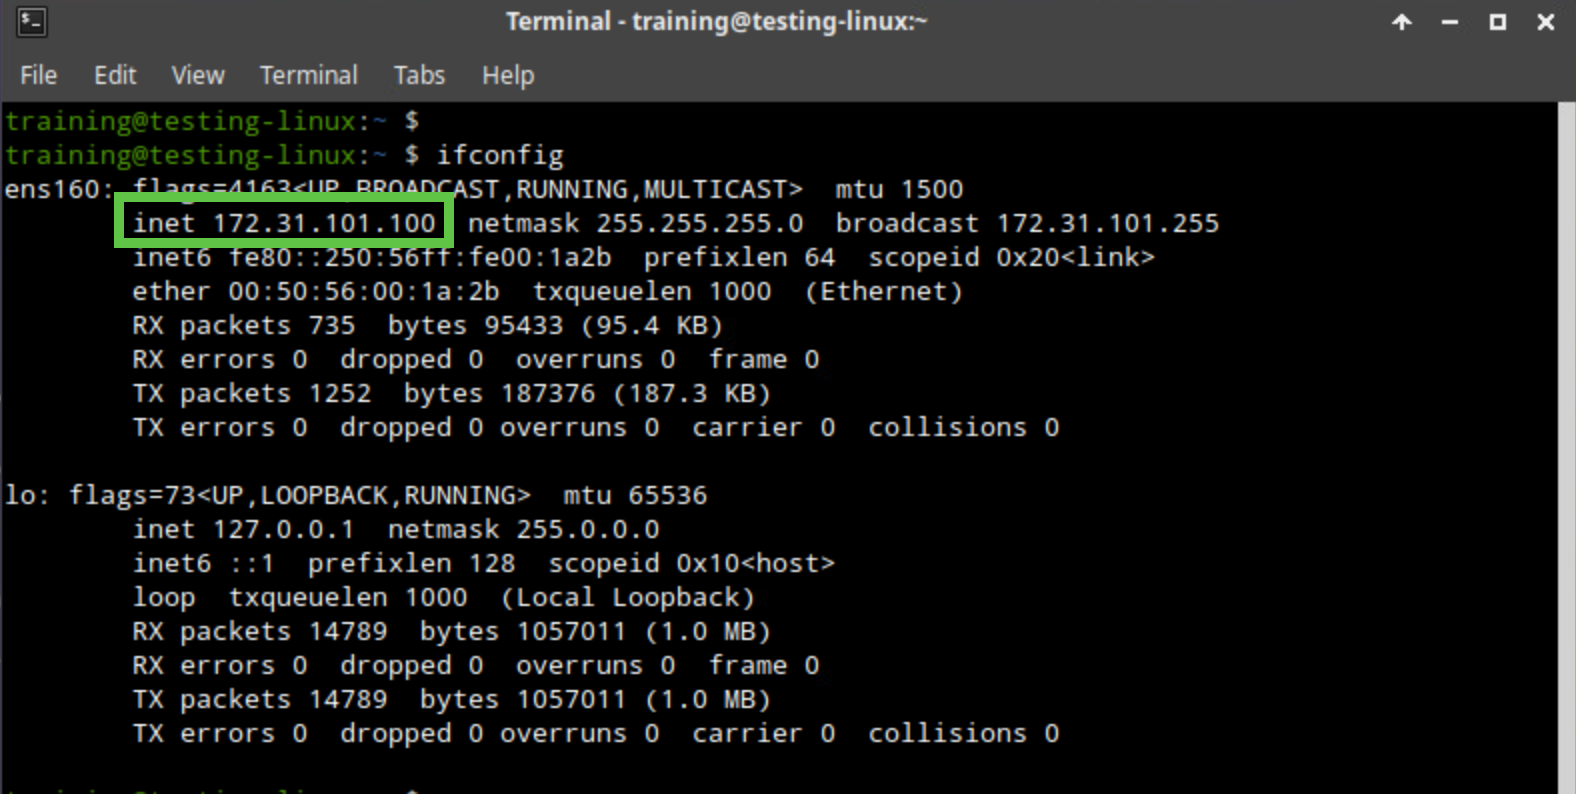
Run ifconfig again and compare the output to confirm that the client received an IPv4 address via DHCP.
-
Optionally, run sudo show-dhcp-lease to display the DHCP lease details.

-
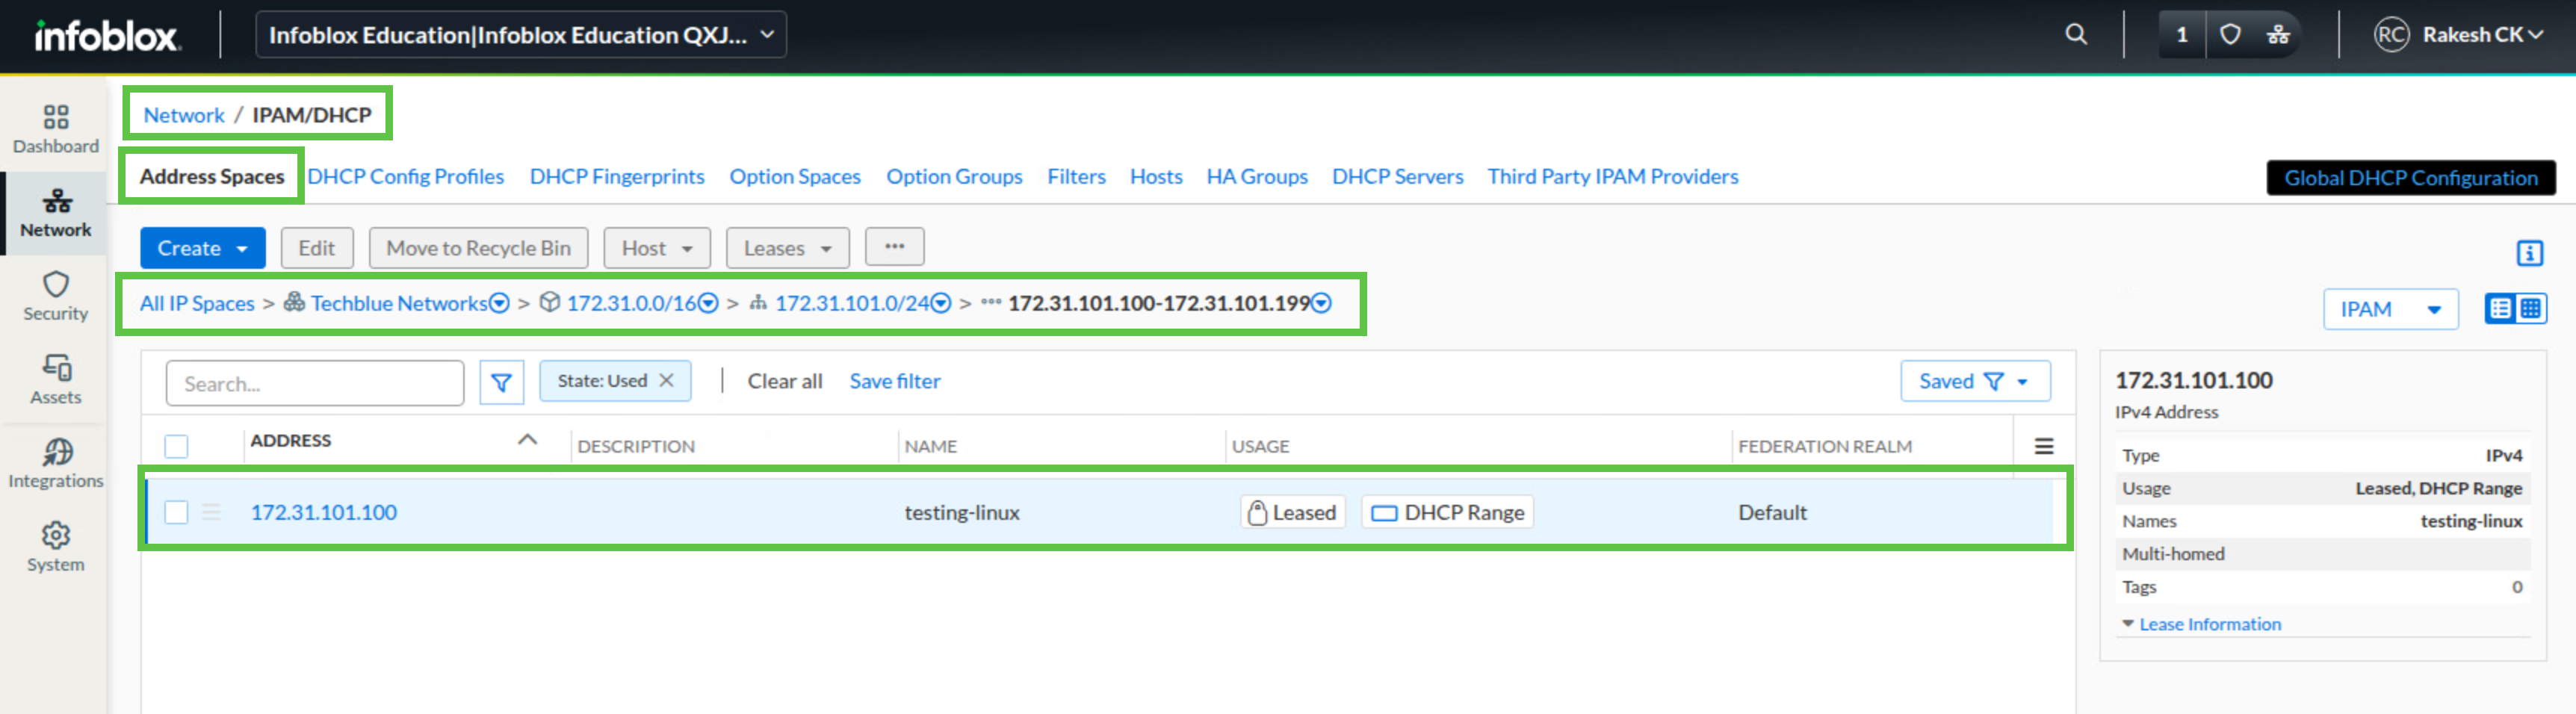
Switch back to jump-desktop and return to the Infoblox Portal.
-
Navigate back to the range created in Task 4 and verify that IP address 172.31.101.100 is shown as leased to testing-linux.