Scenario
You already have DNS services running on oph1.techblue.net and oph2.techblue.net, but you want clients to use a single DNS address that remains reachable as long as at least one DNS server is online. To provide that resiliency, your team decided to use DNS anycast with BGP and advertise the shared IPv4 address 10.24.7.53 from both NIOS-X servers. Your goal is to create the anycast configuration, attach it to DNS anycast service instances on both servers, verify the anycast route is reachable, and confirm that DNS queries succeed through the anycast address.
Estimated Completion Time
-
20 to 30 minutes
Prerequisites
-
Administrative access to the Infoblox Portal
Tasks
-
Create Anycast Configuration.
-
Create Anycast Service Instances.
-
Verify Anycast Service is Online.
-
Verify DNS Service over Anycast.
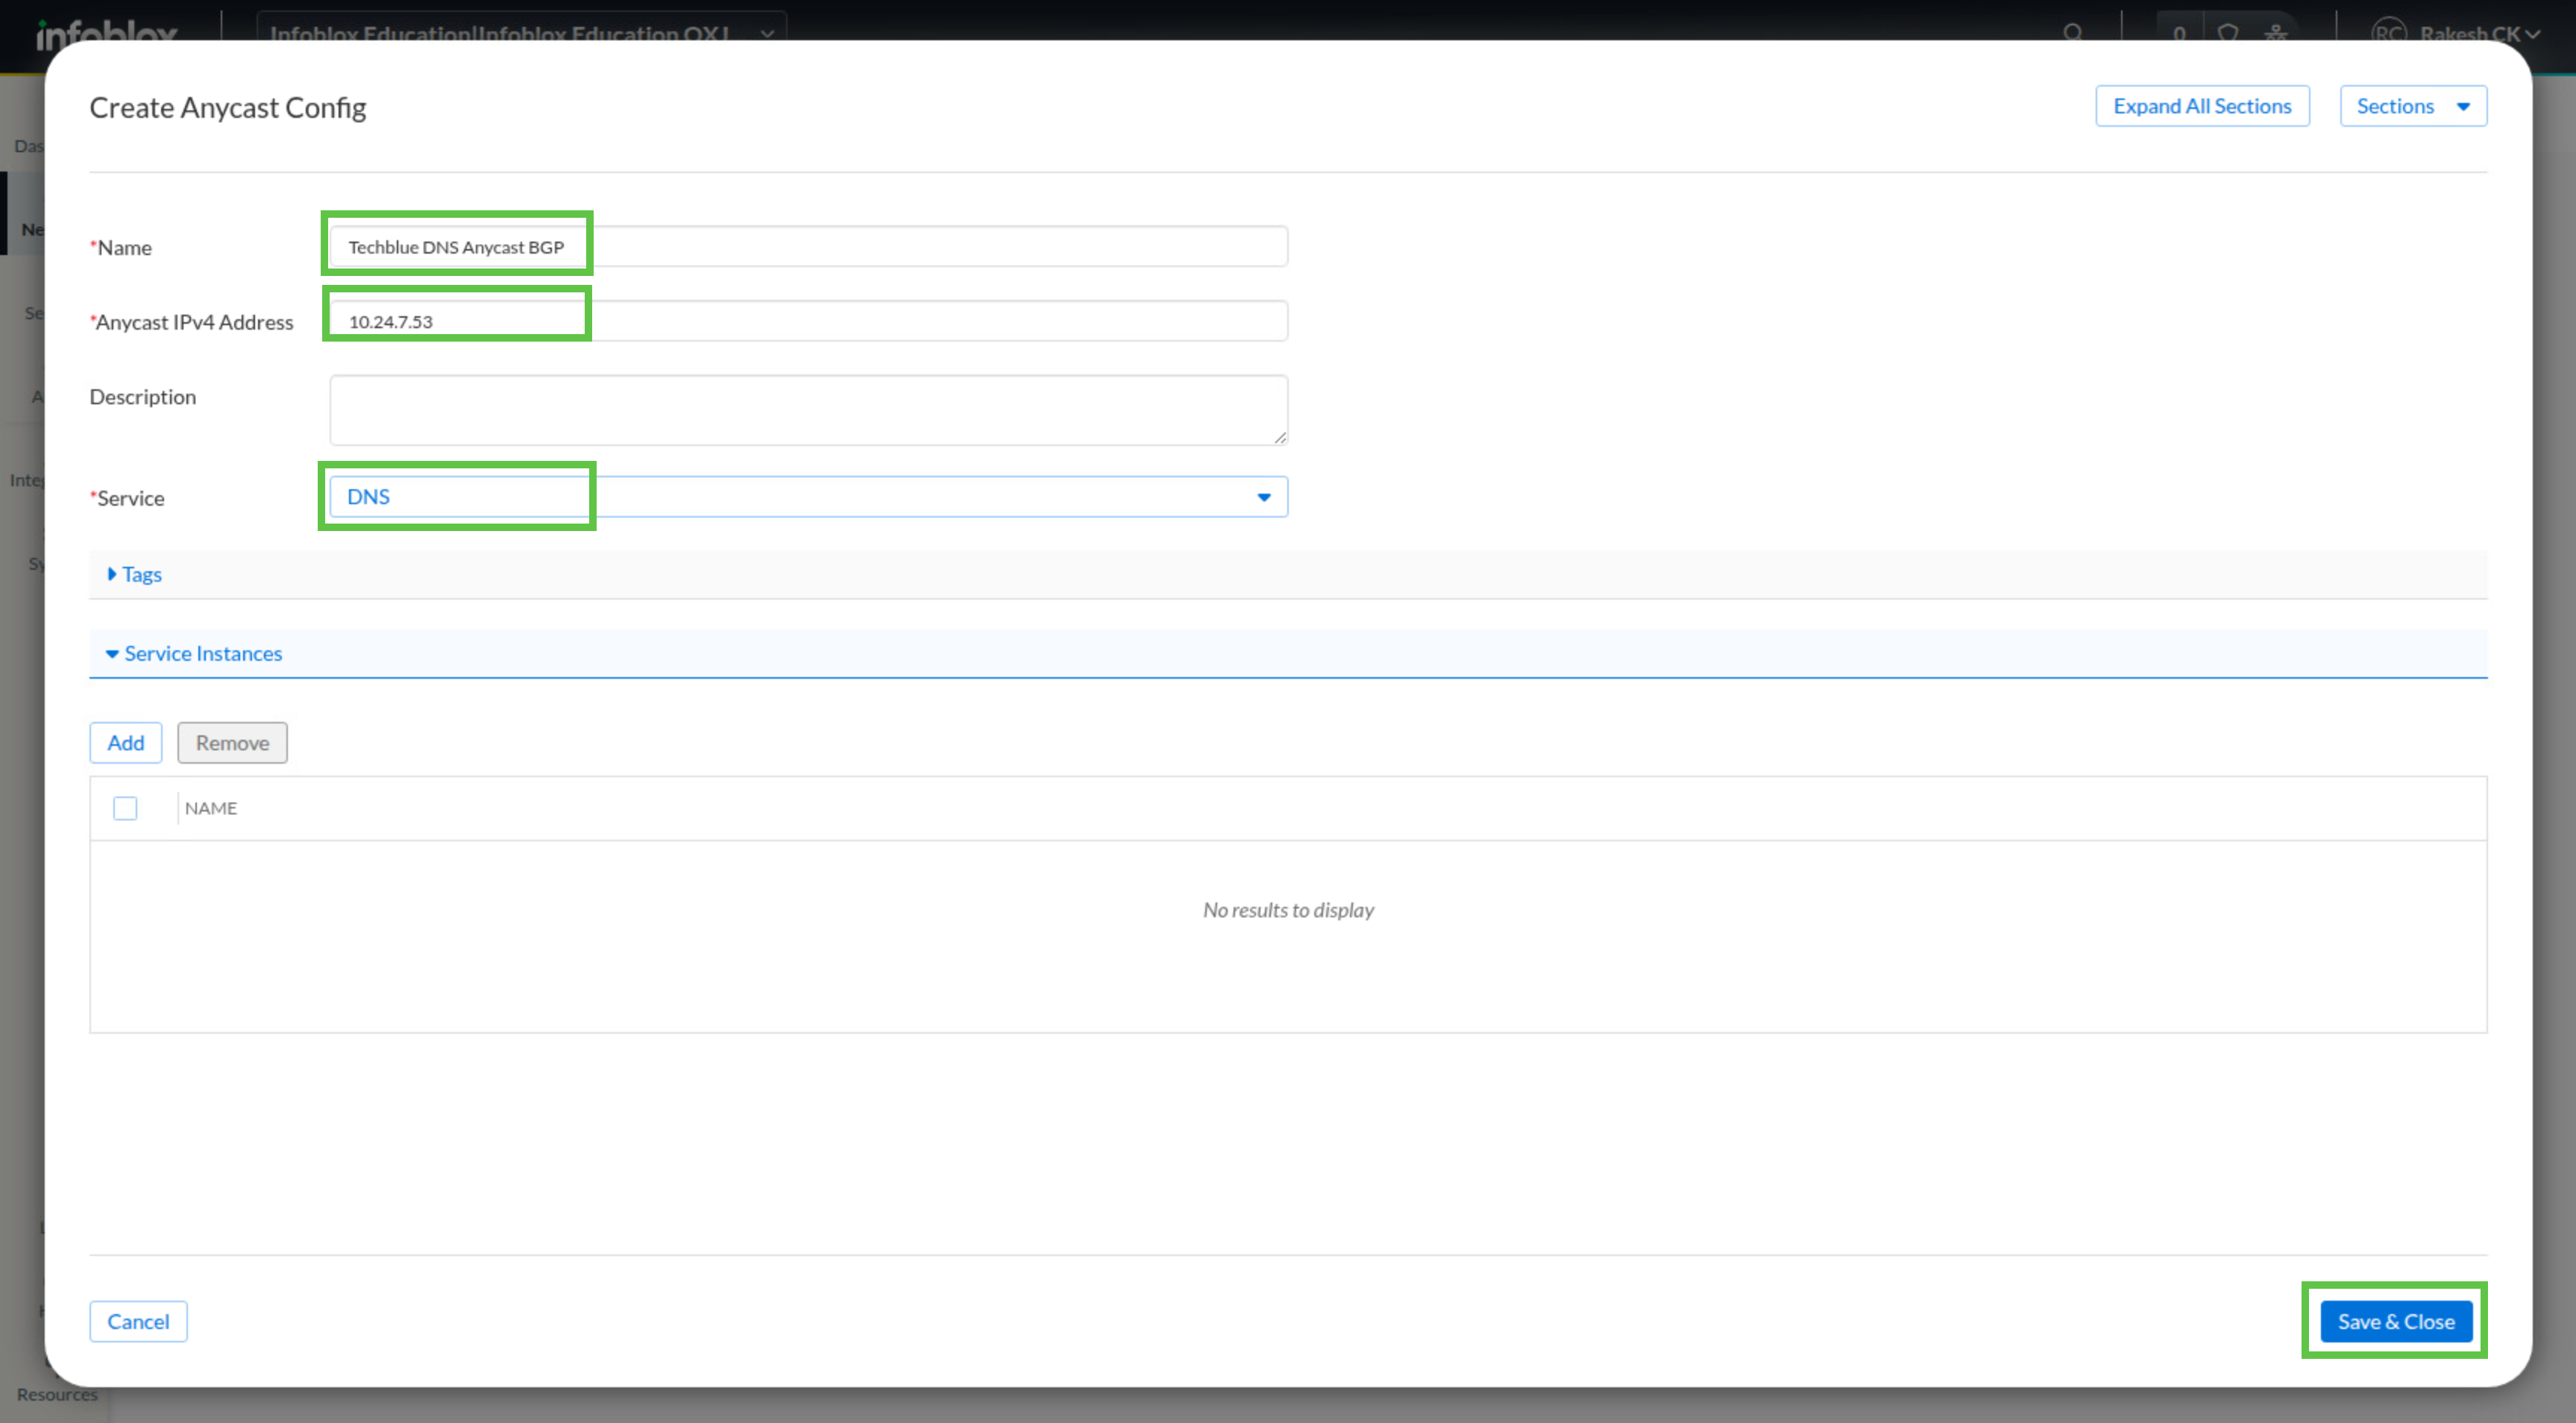
Task 1: Create Anycast Configuration
In the Infoblox Portal, navigate to Network → Anycast and create an anycast configuration named Techblue DNS Anycast BGP. Set the anycast IPv4 address to 10.24.7.53 and set Service to DNS. This creates the shared anycast object that both NIOS-X servers will advertise.
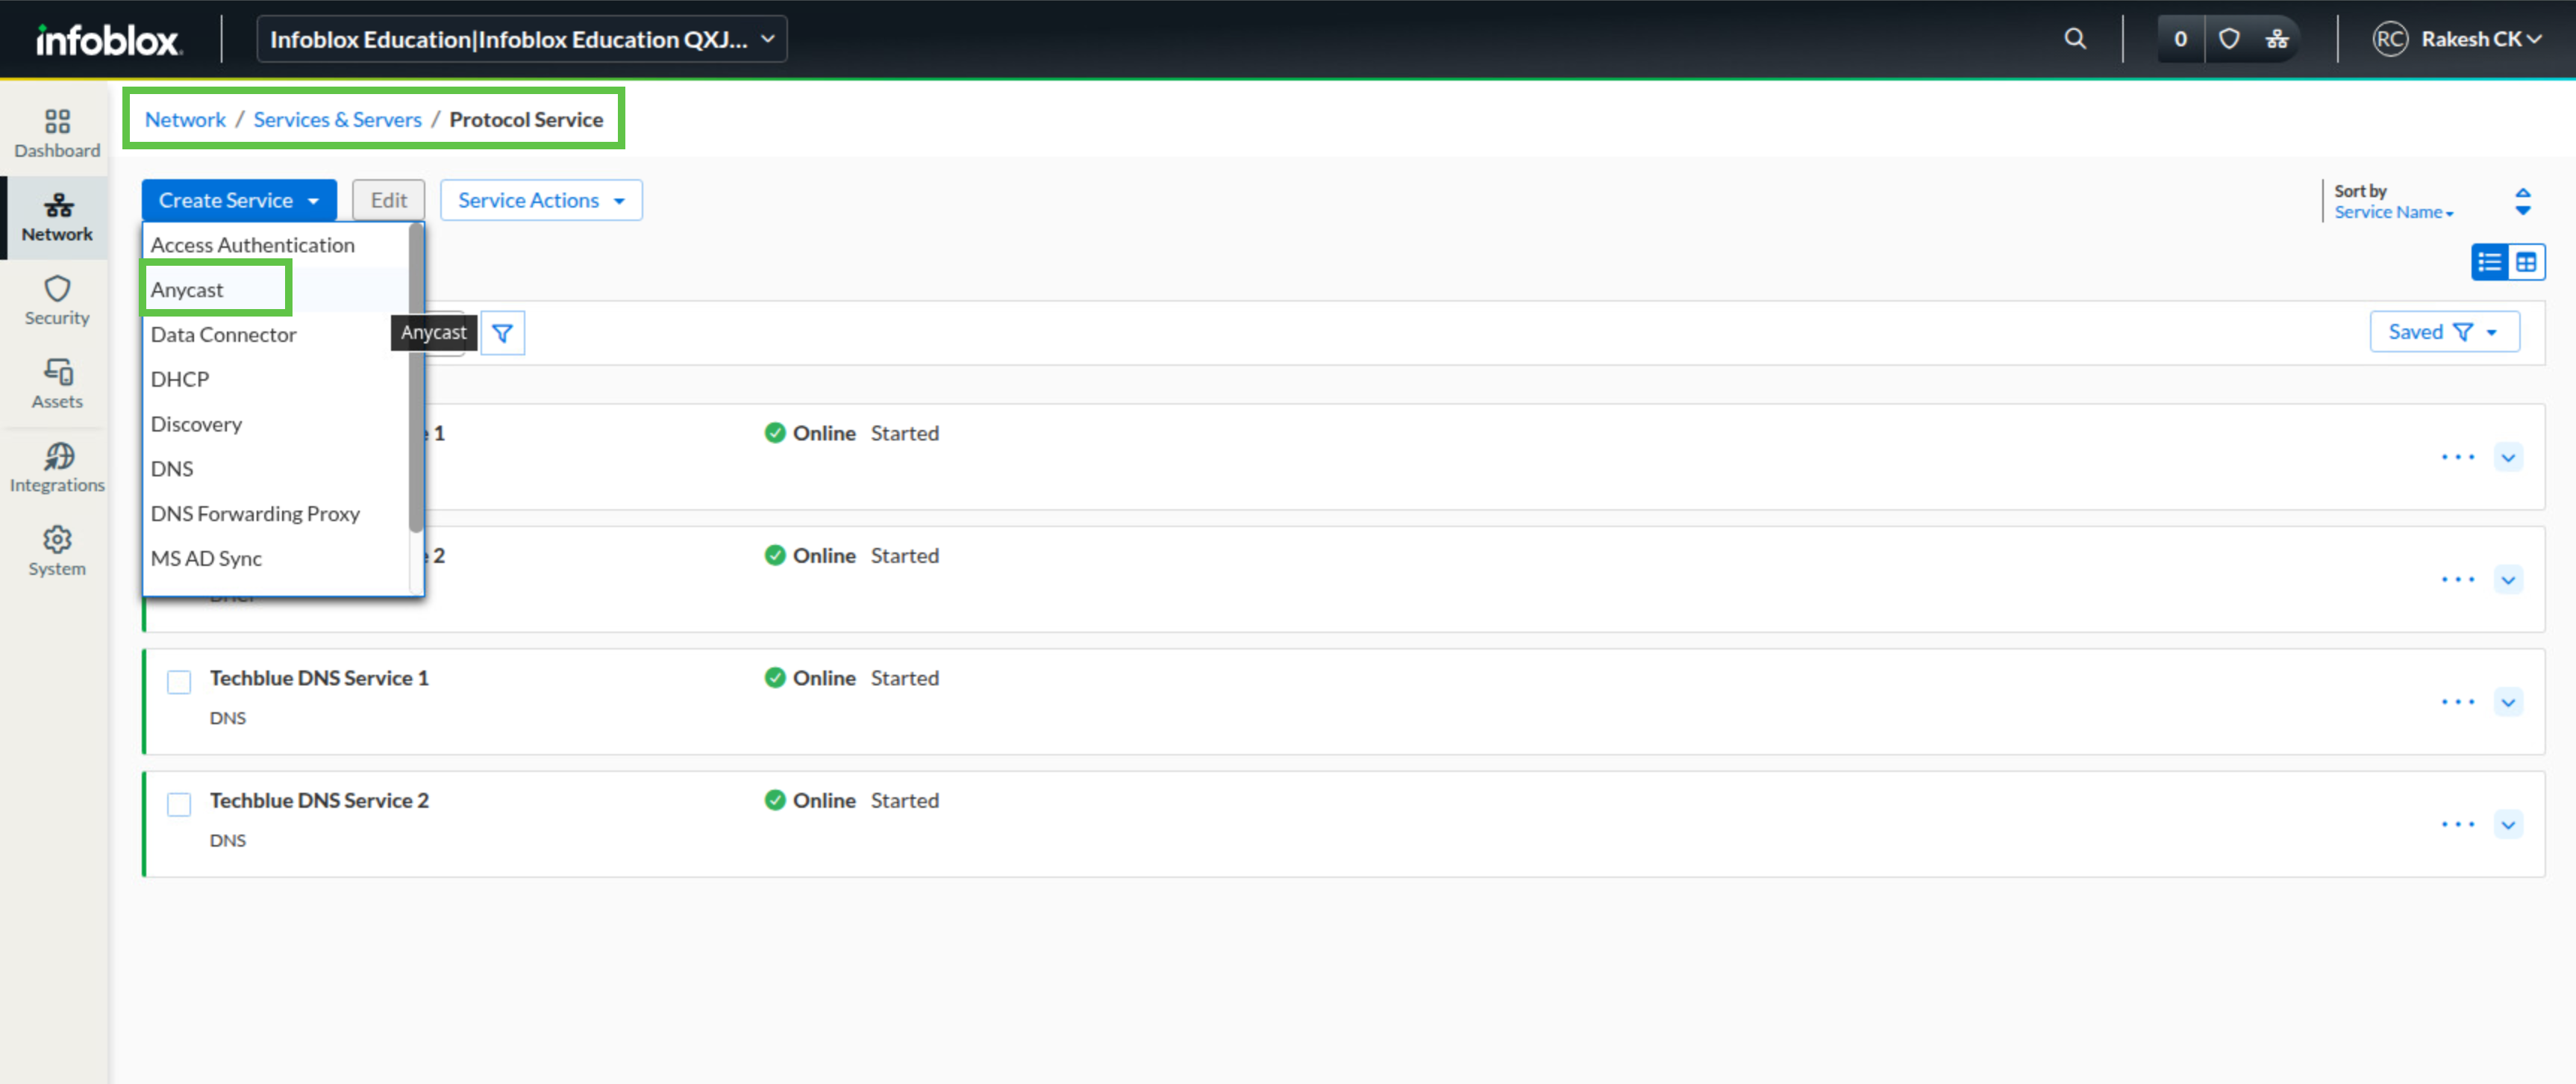
Task 2: Create Anycast Service Instances
Create two Anycast service instances and attach both to the anycast configuration from Task 1. Use the values below.
|
Service Instance |
ASN |
Keepalive |
Hold Down |
Neighbor Router |
Remote ASN |
|---|---|---|---|---|---|
|
Techblue Anycast Service 1 |
65400 |
4 |
16 |
10.100.0.1 |
65247 |
|
Techblue Anycast Service 2 |
65400 |
4 |
16 |
10.200.0.1 |
65247 |
The Anycast Profile would be Techblue DNS Anycast BGP (10.24.7.53).
After saving both service instances, wait a few minutes for the anycast services to start.
Task 3: Verify Anycast Service is Online
In Network → Anycast, confirm that Techblue DNS Anycast BGP shows a green Active status and that both service instances appear online. Then switch to vyos-router, log in with vyos / vyos, run show ip bgp, and confirm that the router shows routes associated with oph1 (10.100.0.110) and oph2 (10.200.0.110). Finally, from testing-linux, run ping 10.24.7.53 and confirm that the anycast address is reachable. Optionally, power off oph1 and oph2 one at a time while the ping continues to verify that the address stays reachable as long as one server remains online.
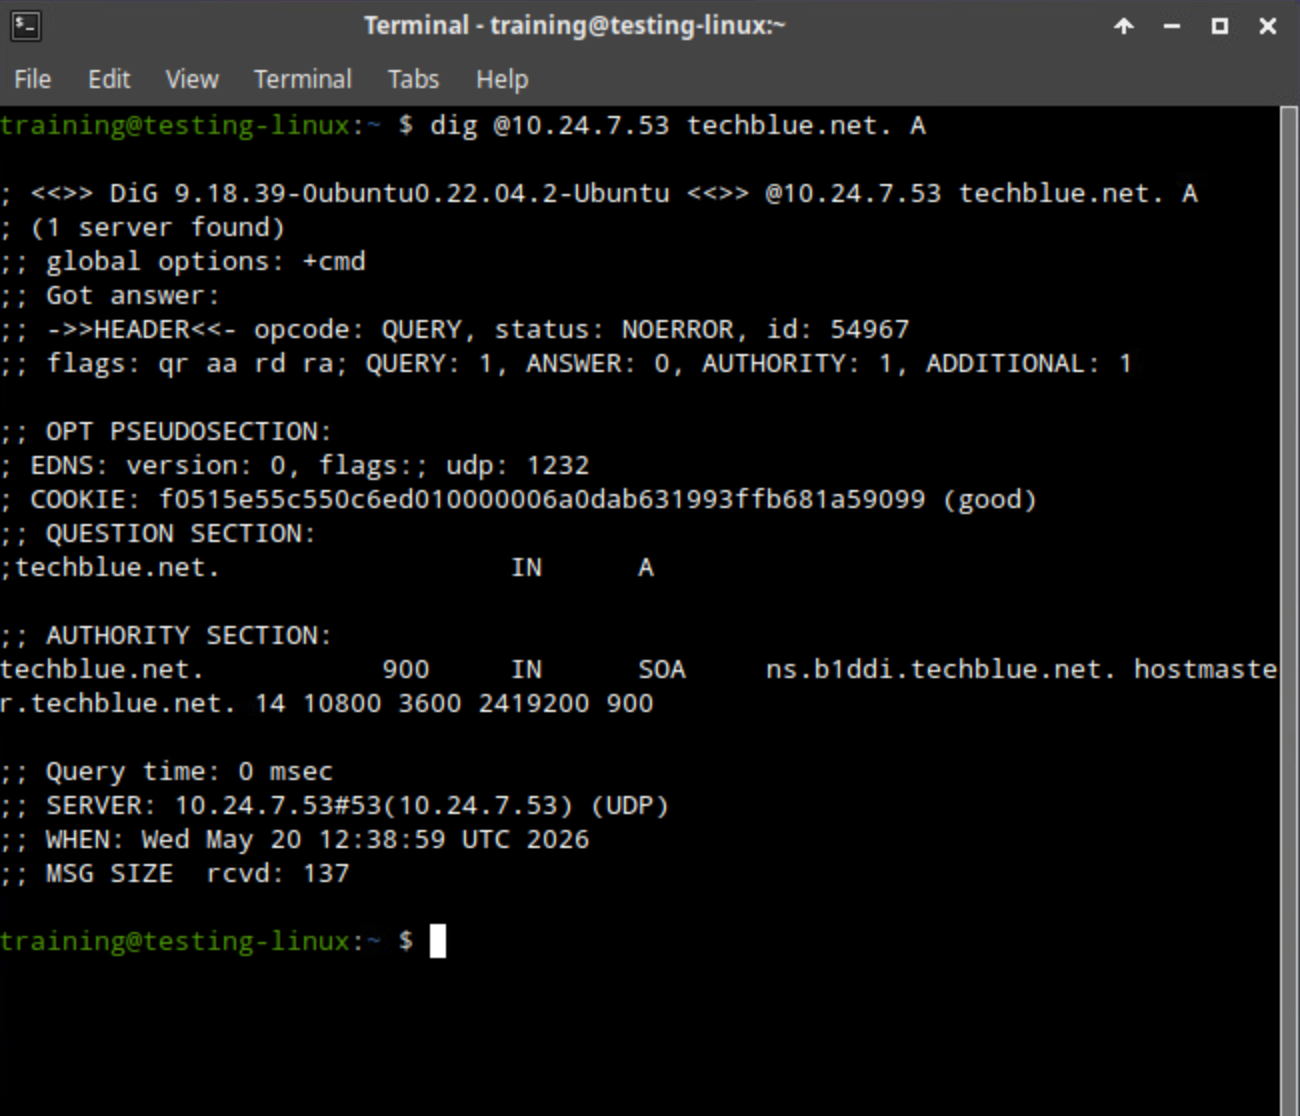
Task 4: Verify DNS Service over Anycast
From testing-linux, run dig @10.24.7.53 techblue.net. A and confirm that the anycast address returns a DNS response. This verifies that the shared anycast address is not only reachable, but is also serving DNS successfully.
Solutions
Task 1 Solution: Create Anycast Configuration
Start by creating the shared anycast object. This defines the single IPv4 address that clients will use, while the service instances you create later will advertise it from both NIOS-X servers.
-
Log in to your lab’s jump-desktop.
-
Use the Education Infoblox Portal credentials to sign in to the Infoblox Portal.
-
Navigate to Network → Anycast.
-
Click Create Anycast Configuration.

-
In the Name field, enter Techblue DNS Anycast BGP.
-
In Anycast IPv4 Address, enter 10.24.7.53.
-
In Service, select DNS.
-
Click Save & Close.
Task 2 Solution: Create Anycast Service Instances
After the anycast configuration exists, create service instances on both NIOS-X servers so they can advertise the same DNS anycast address through BGP. The values are nearly identical on both servers, with the only operational difference being the neighbor router address.
-
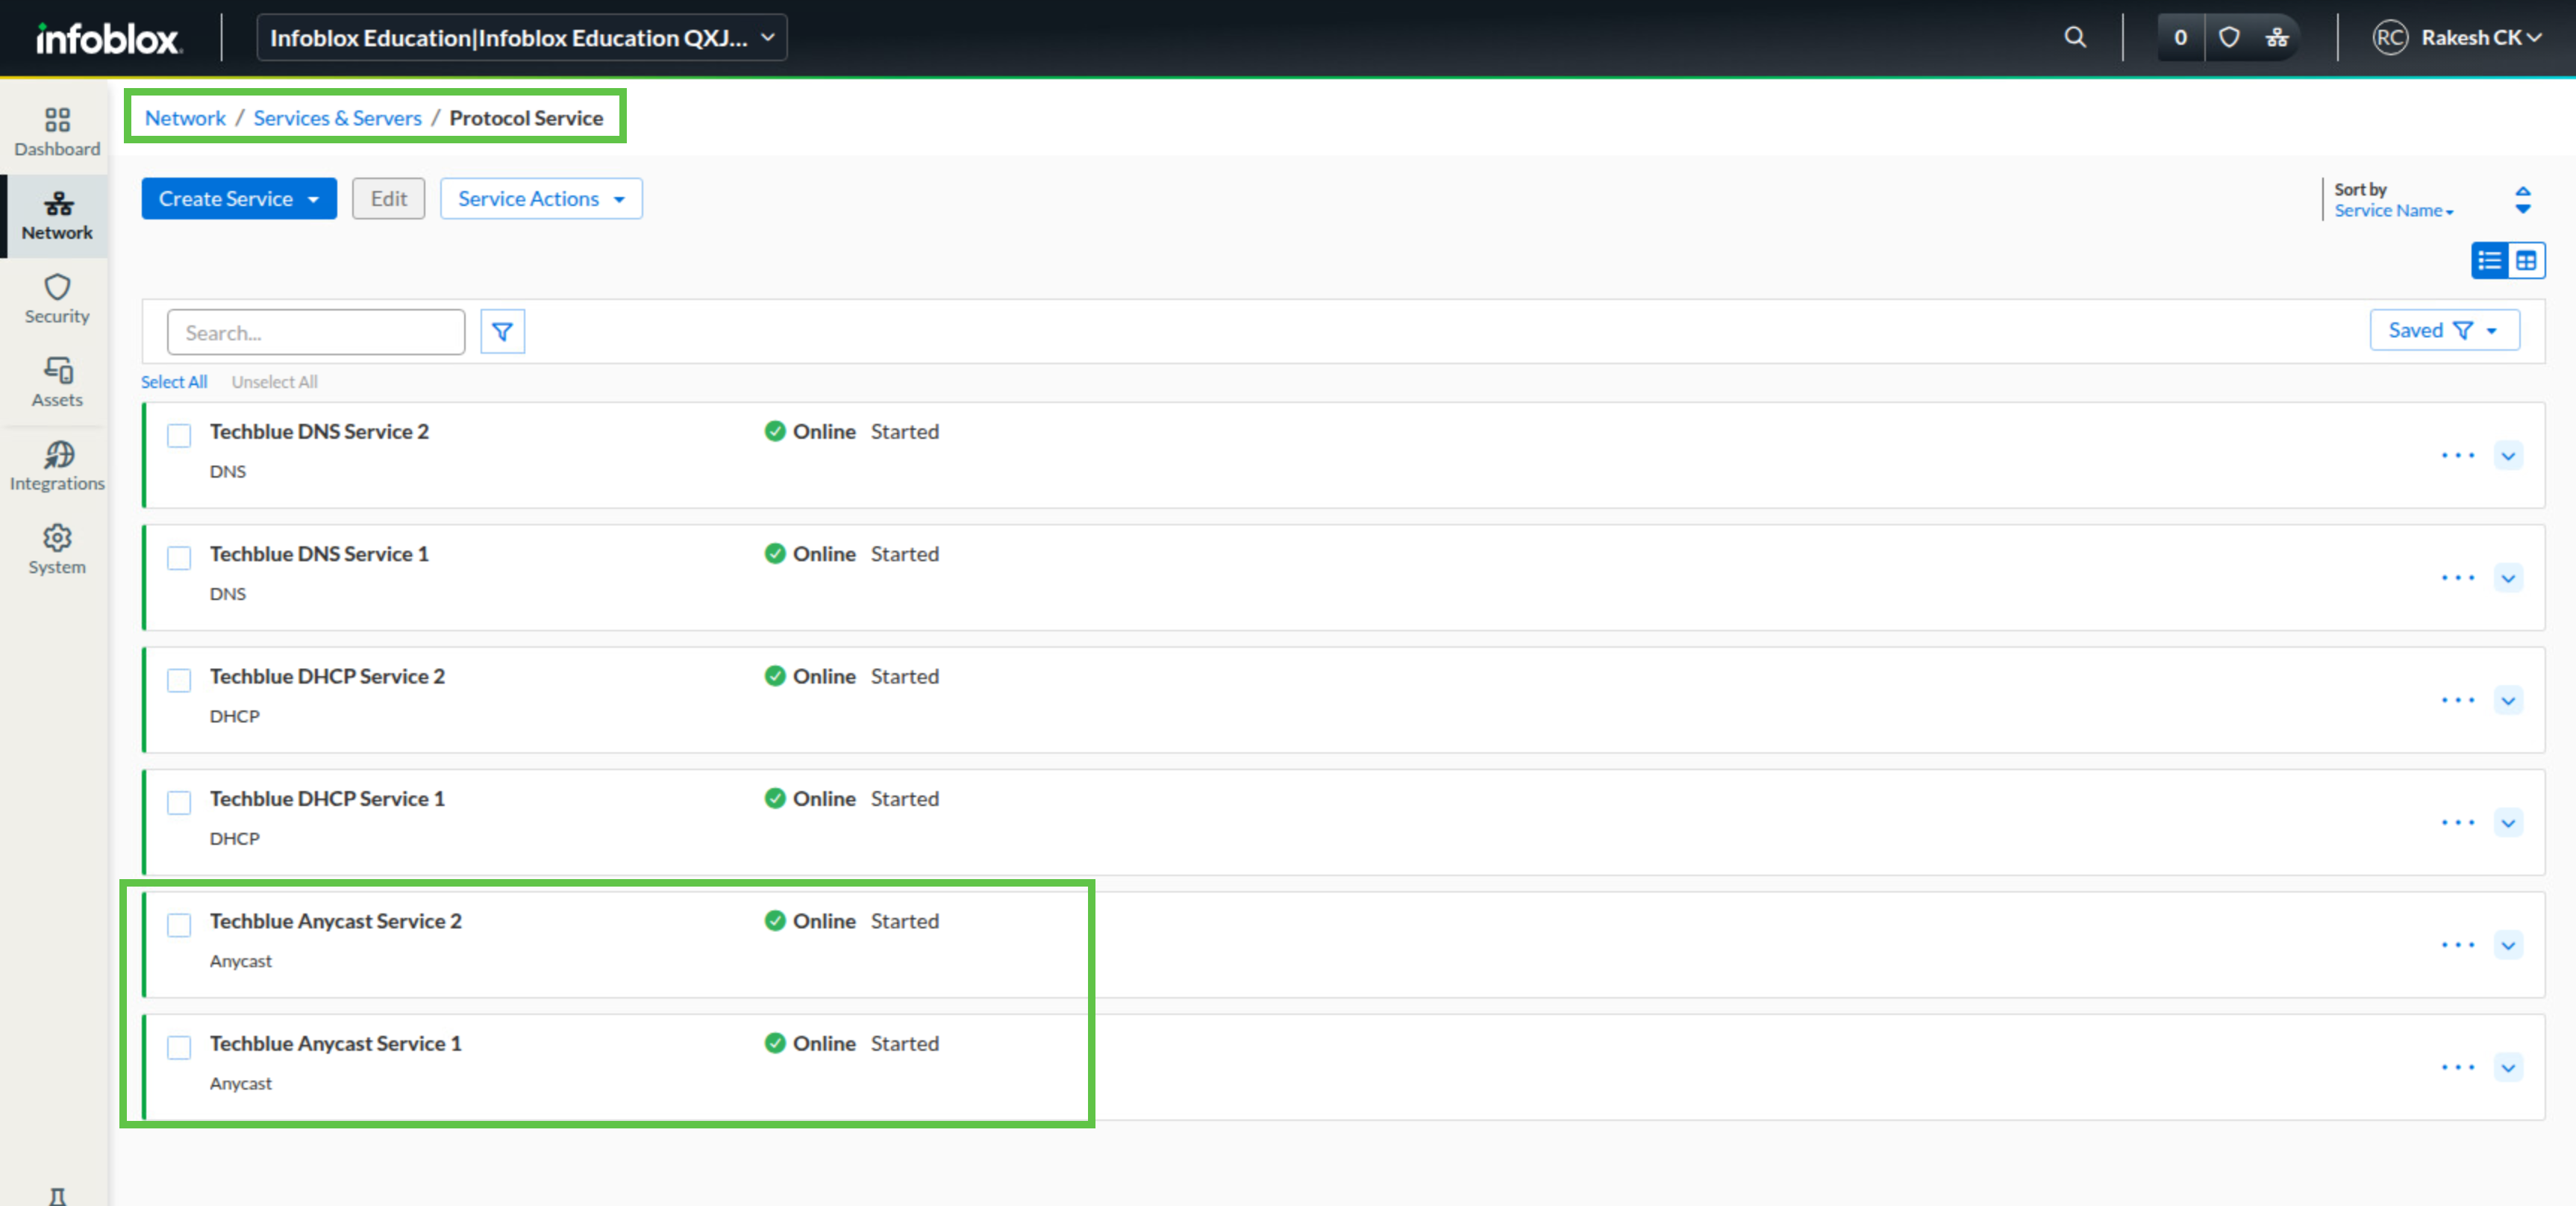
In the Infoblox Portal, navigate to Network → Services & Servers → Protocol Service.
-
Click Create Service and select Anycast.
-
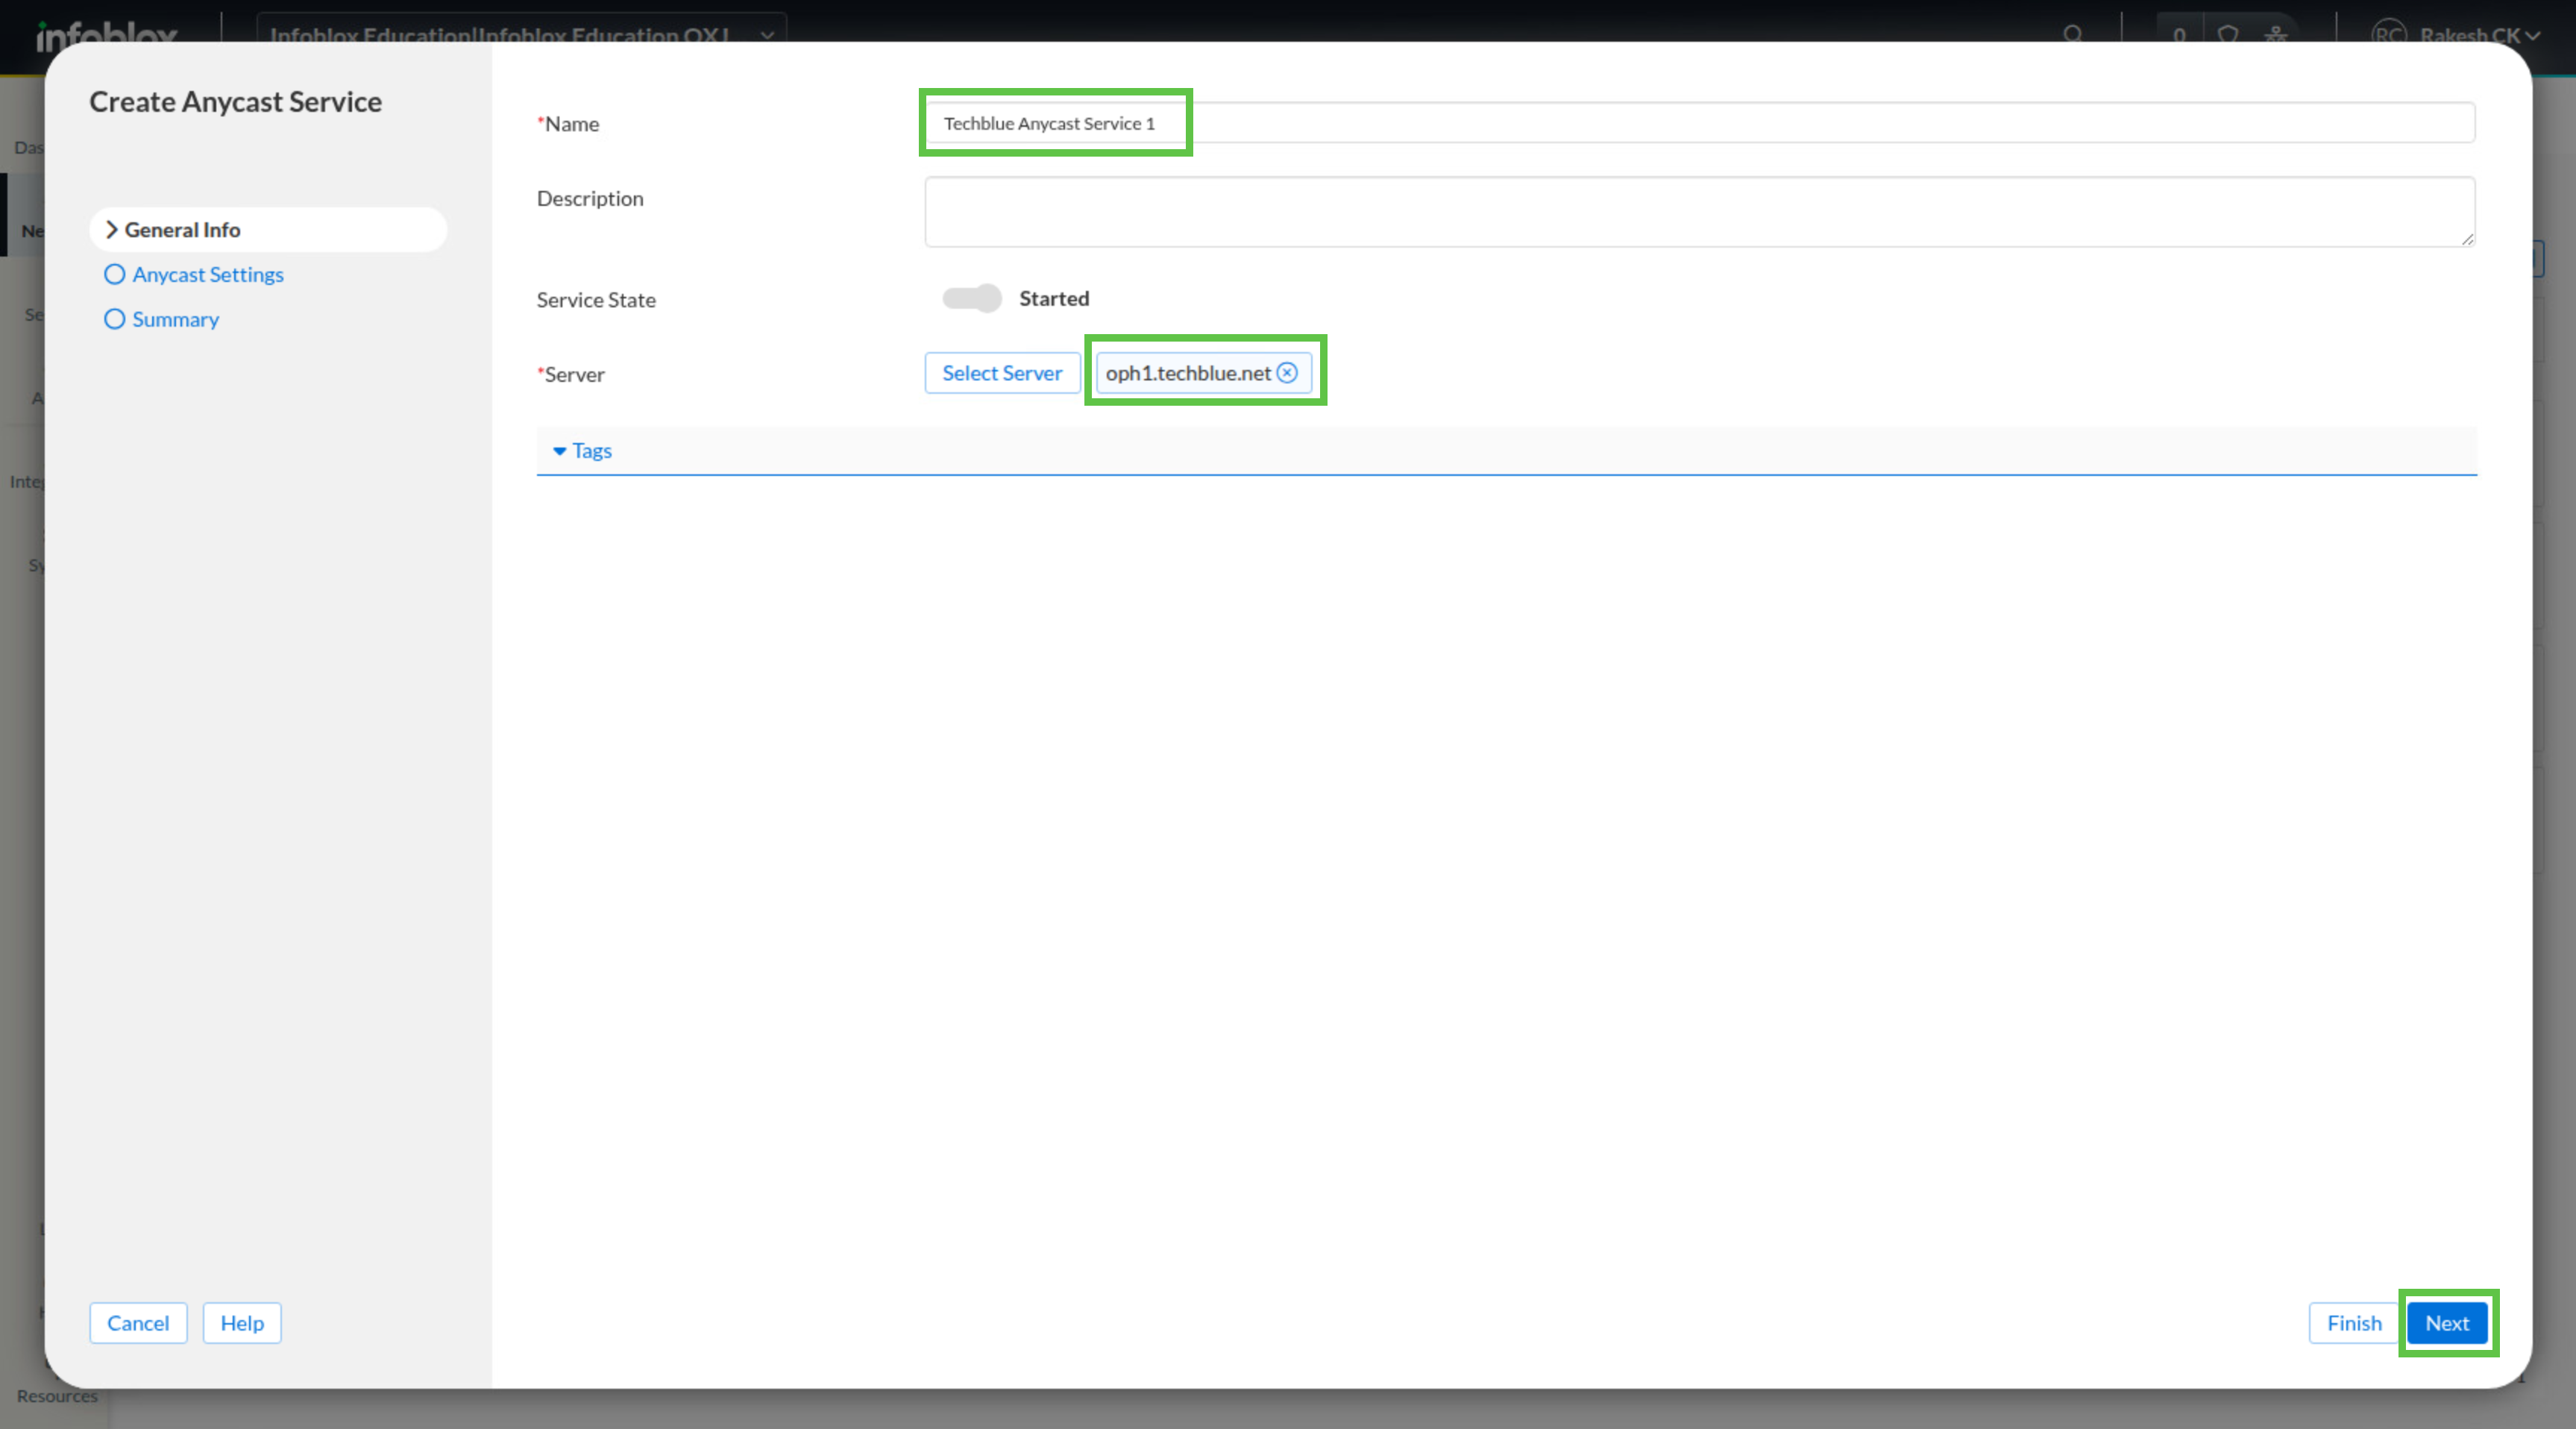
In the General Info tab, enter Techblue Anycast Service 1 in the Name field.
-
Click Select Server, choose oph1.techblue.net, and click Select.
-
Click Next or open the Anycast Settings tab.
-
In the ANYCAST PROFILE section, click Add.
-
Select Techblue DNS Anycast BGP (10.24.7.53) and enable BGP.
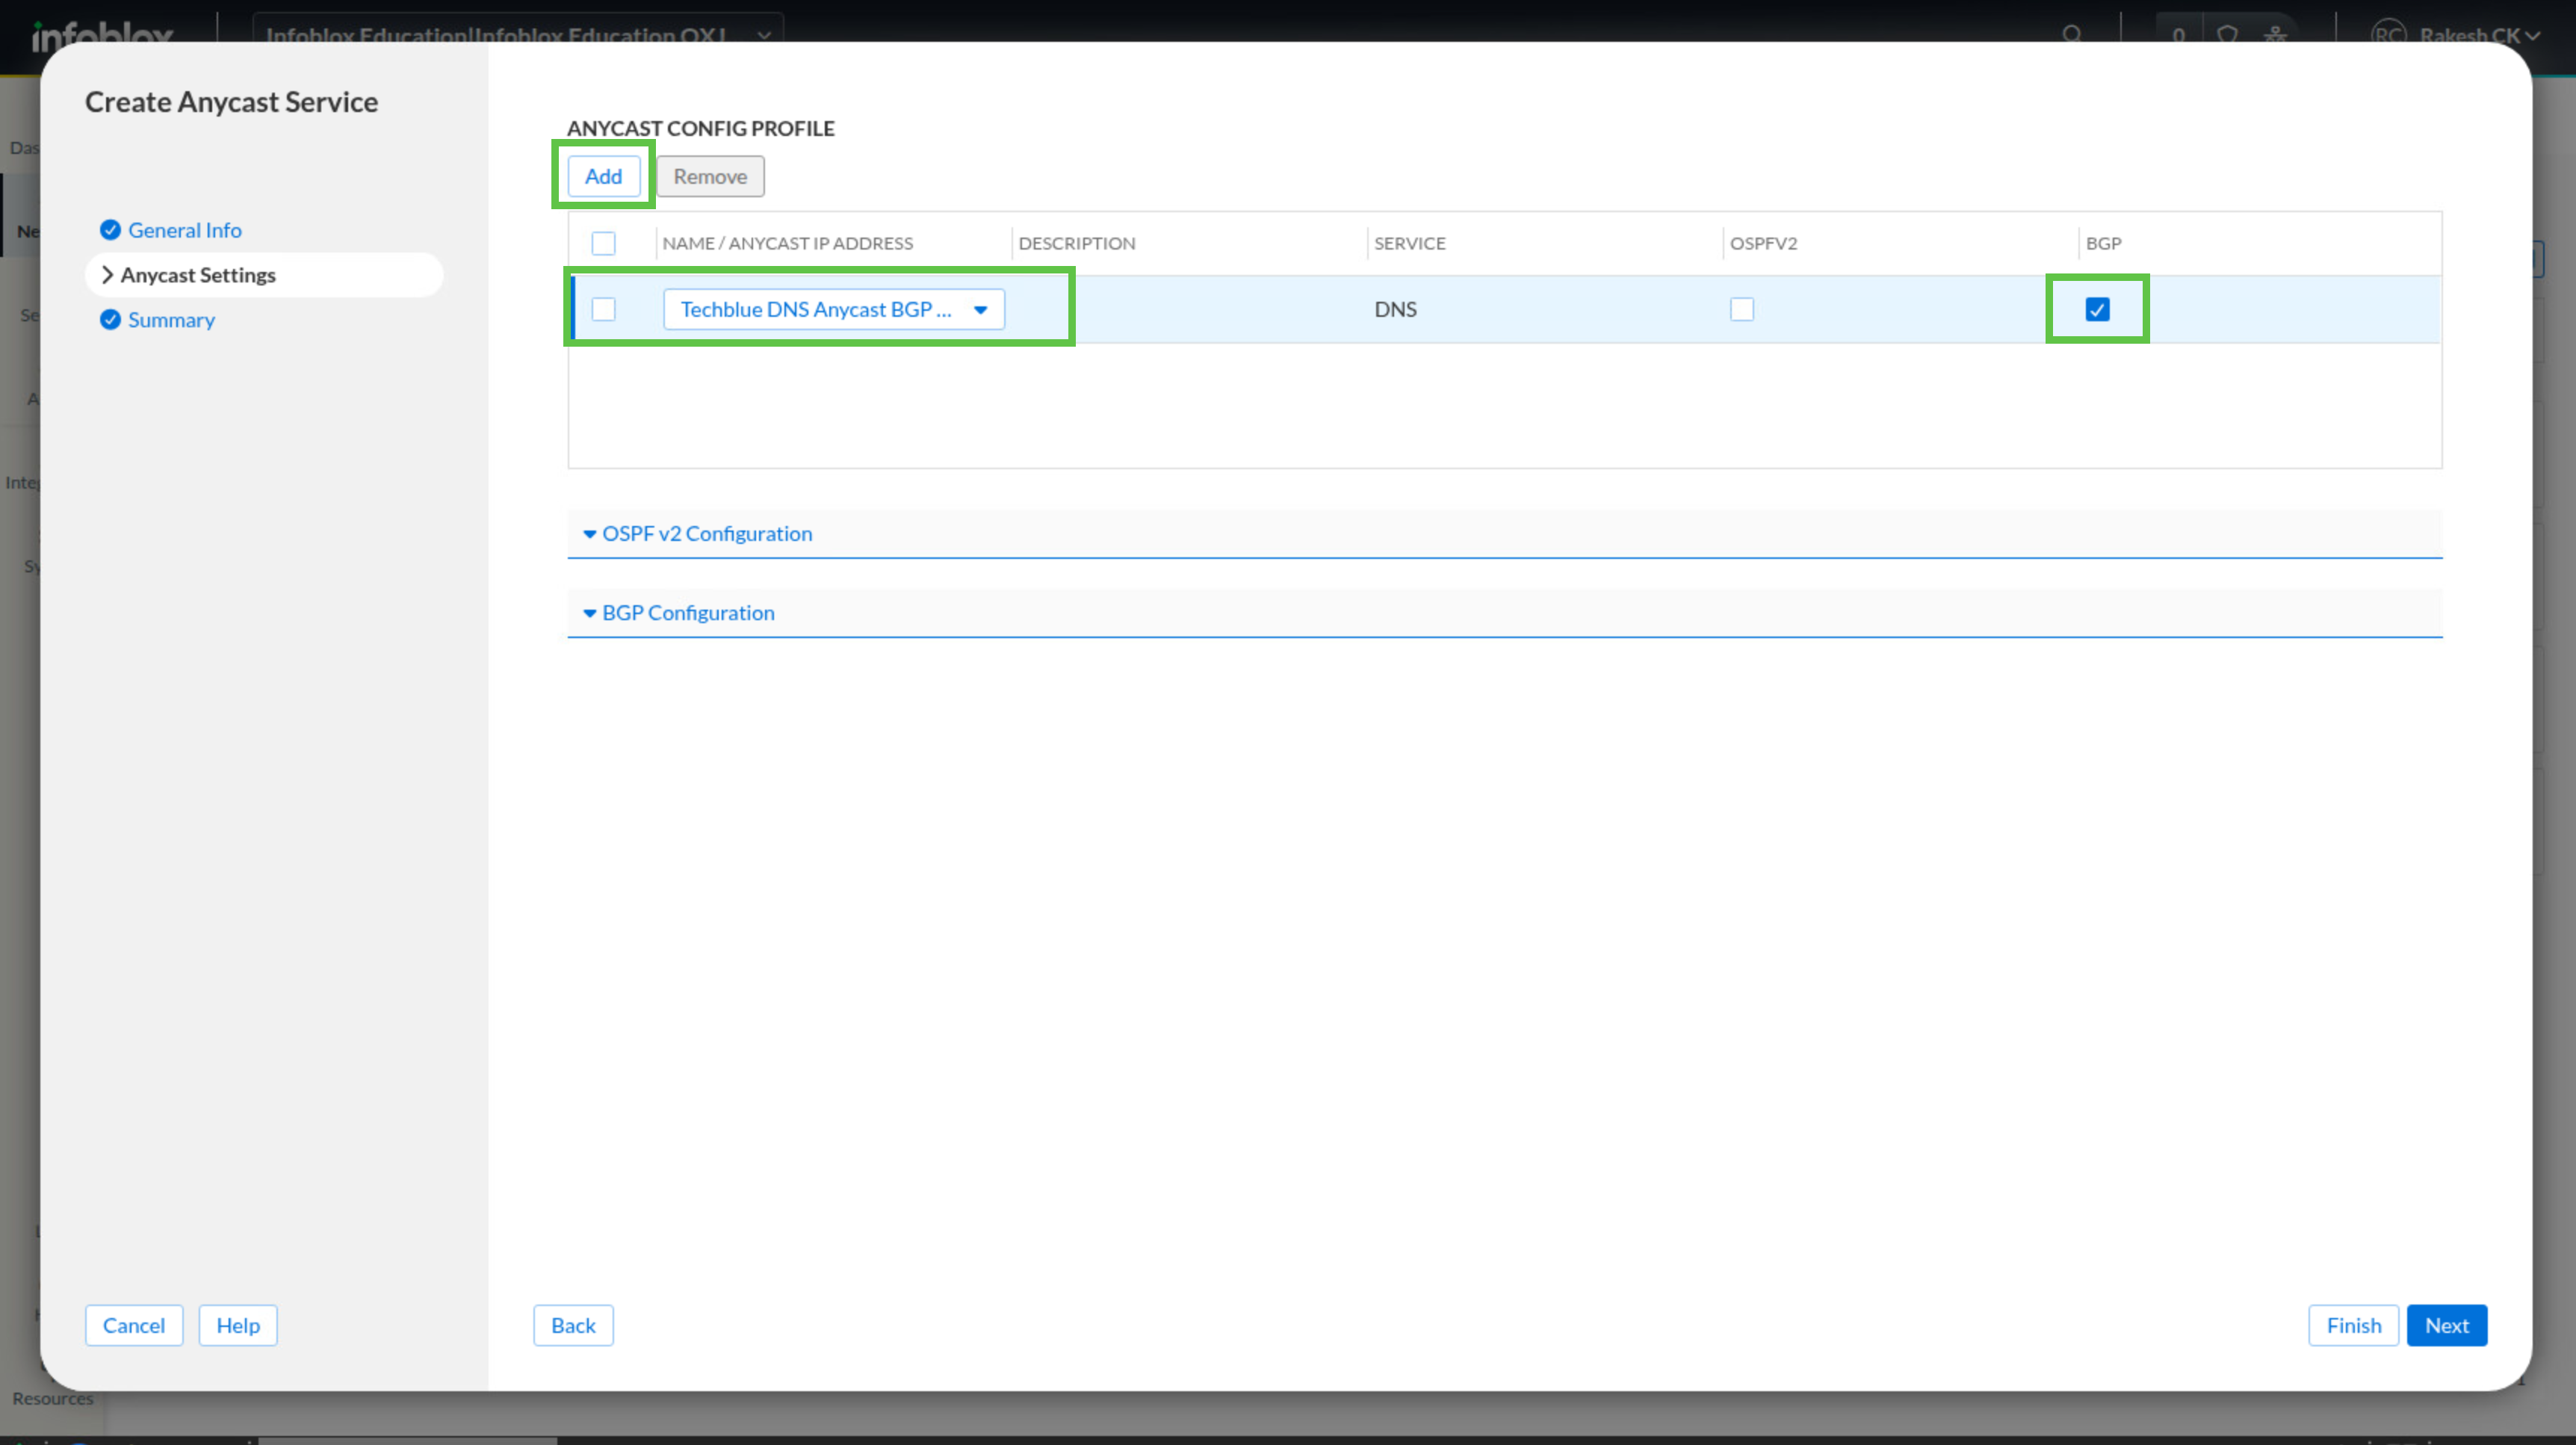
-
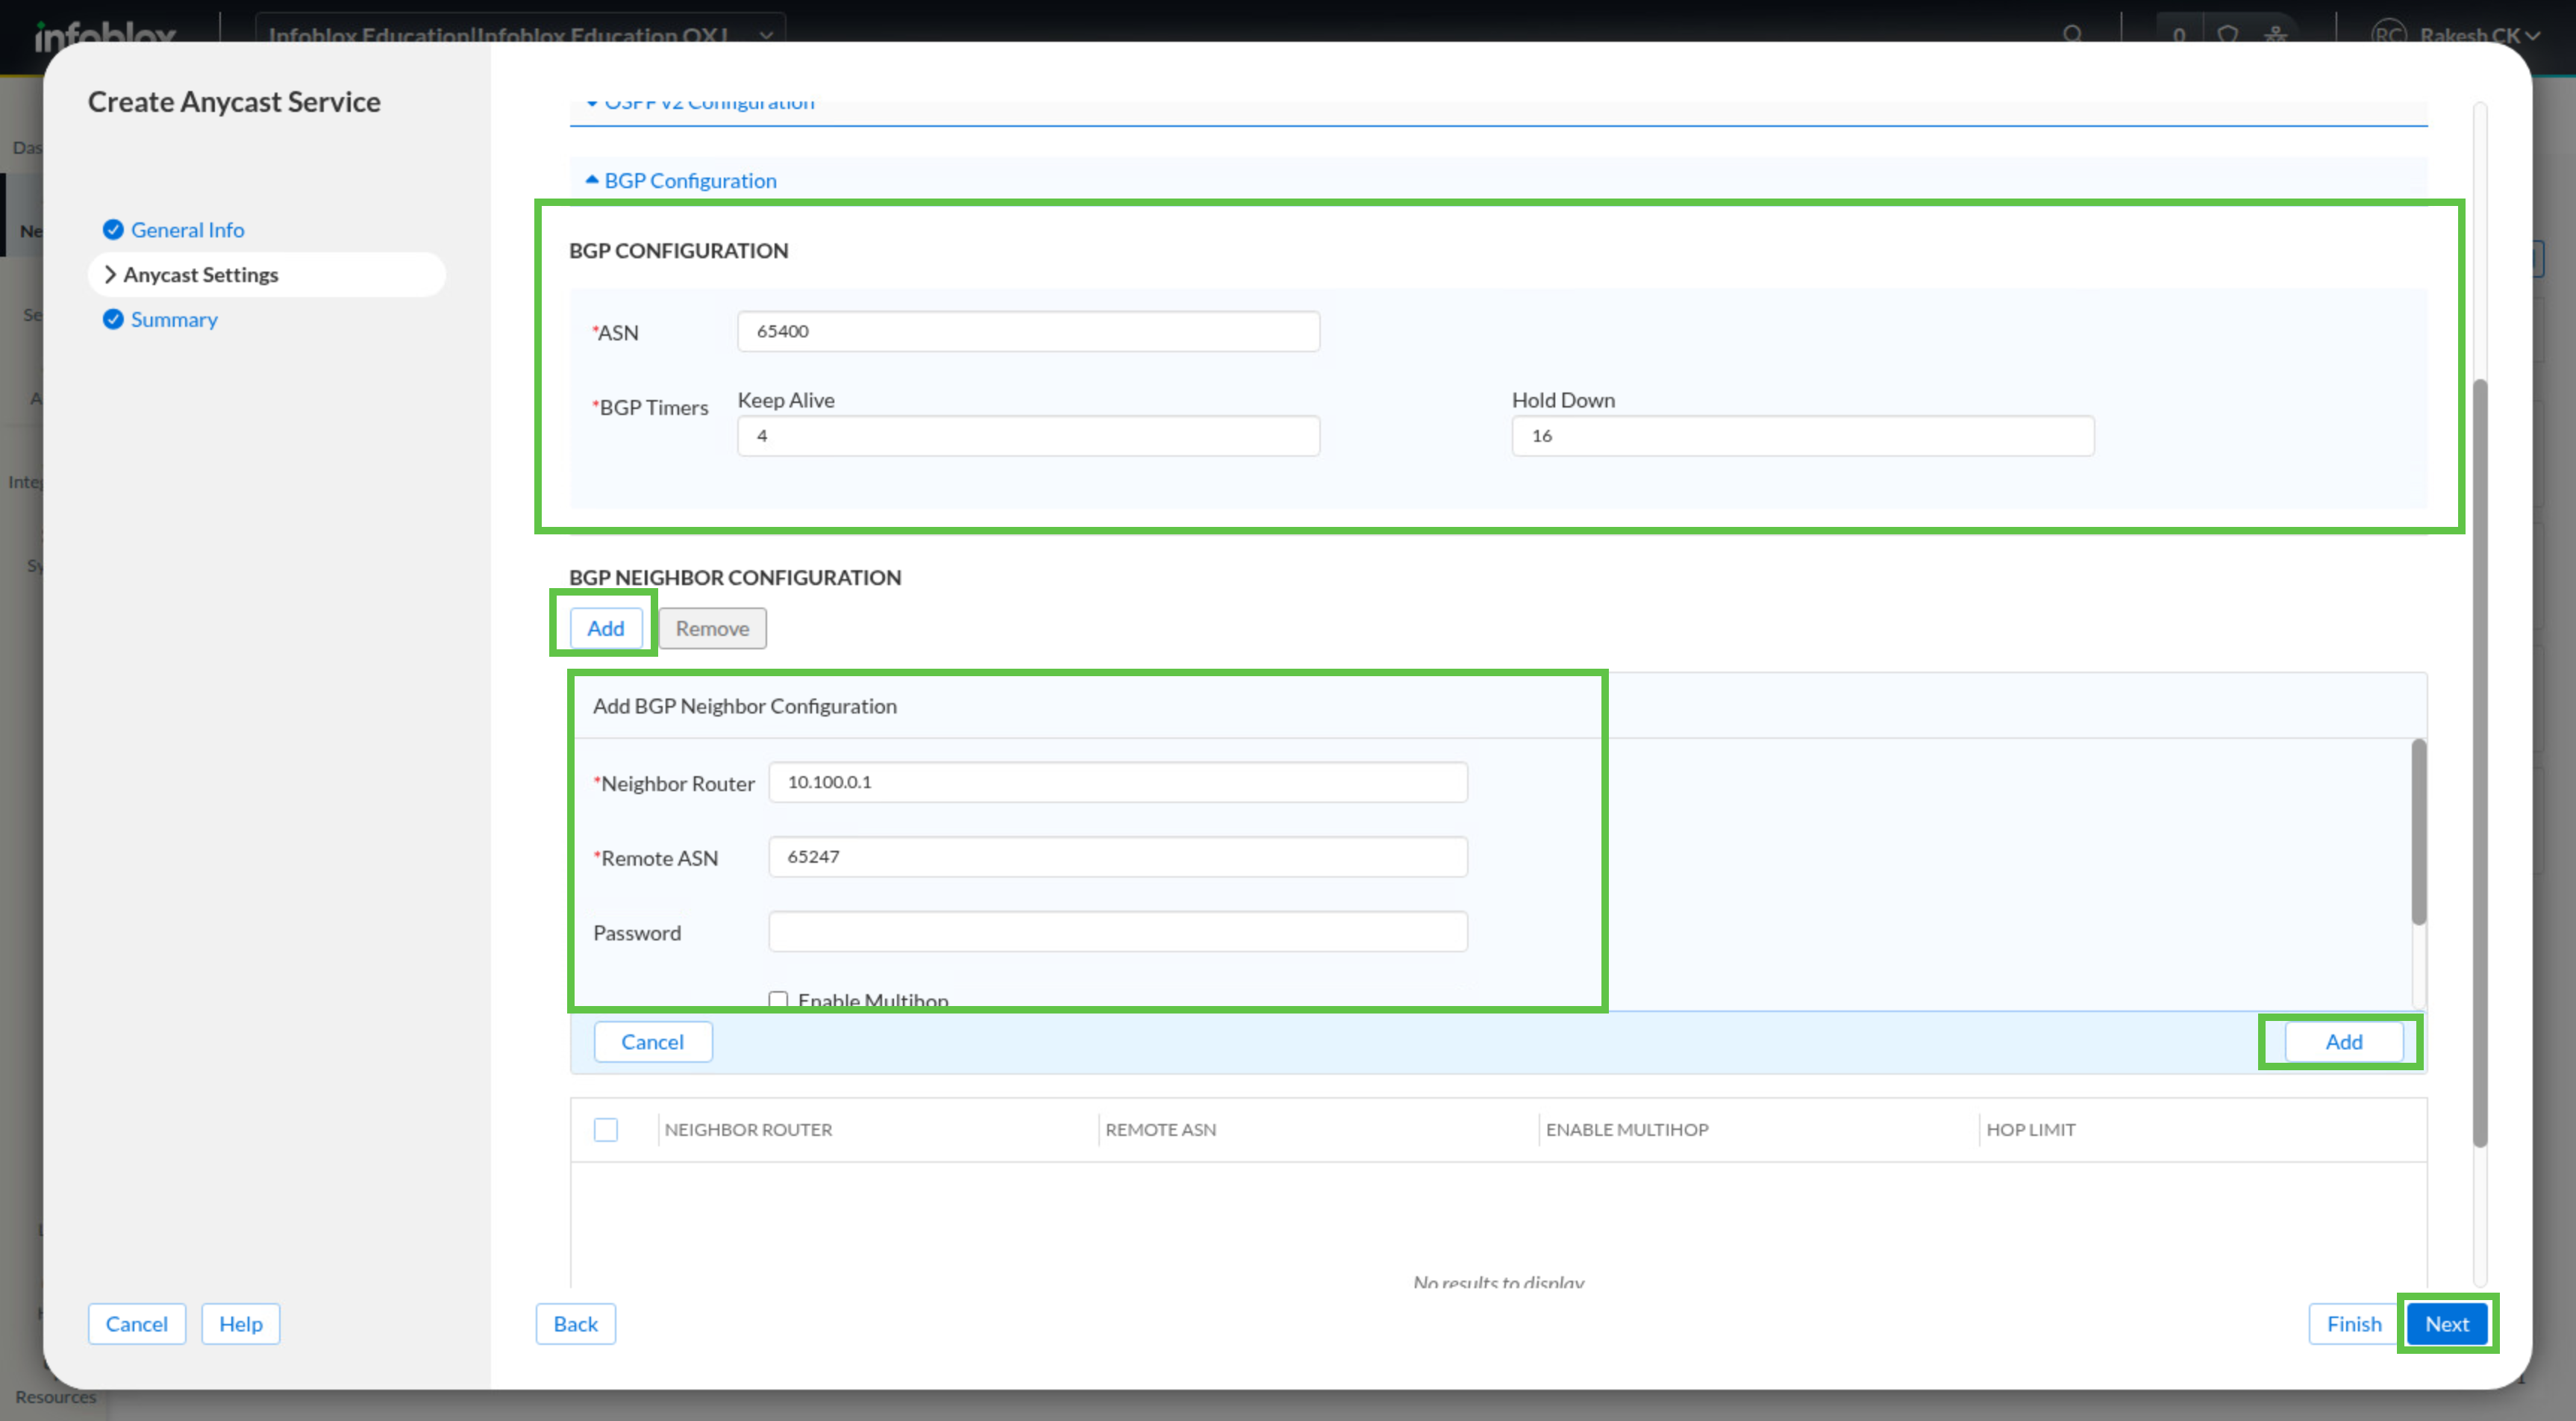
In the BGP CONFIGURATION section, set ASN to 65400, BGP Timers to 4, and Hold Down to 16.
-
In the BGP NEIGHBOR CONFIGURATION section, click Add and set Neighbor Router to 10.100.0.1 and Remote ASN to 65247.
-
Click Add.
-
Click Next, review the summary.
-
Click Save & Close.
-
Repeat steps 2 through 10 to create Techblue Anycast Service 2 on oph2.techblue.net.
-
For Techblue Anycast Service 2, keep the same anycast and BGP settings, but set Neighbor Router to 10.200.0.1.
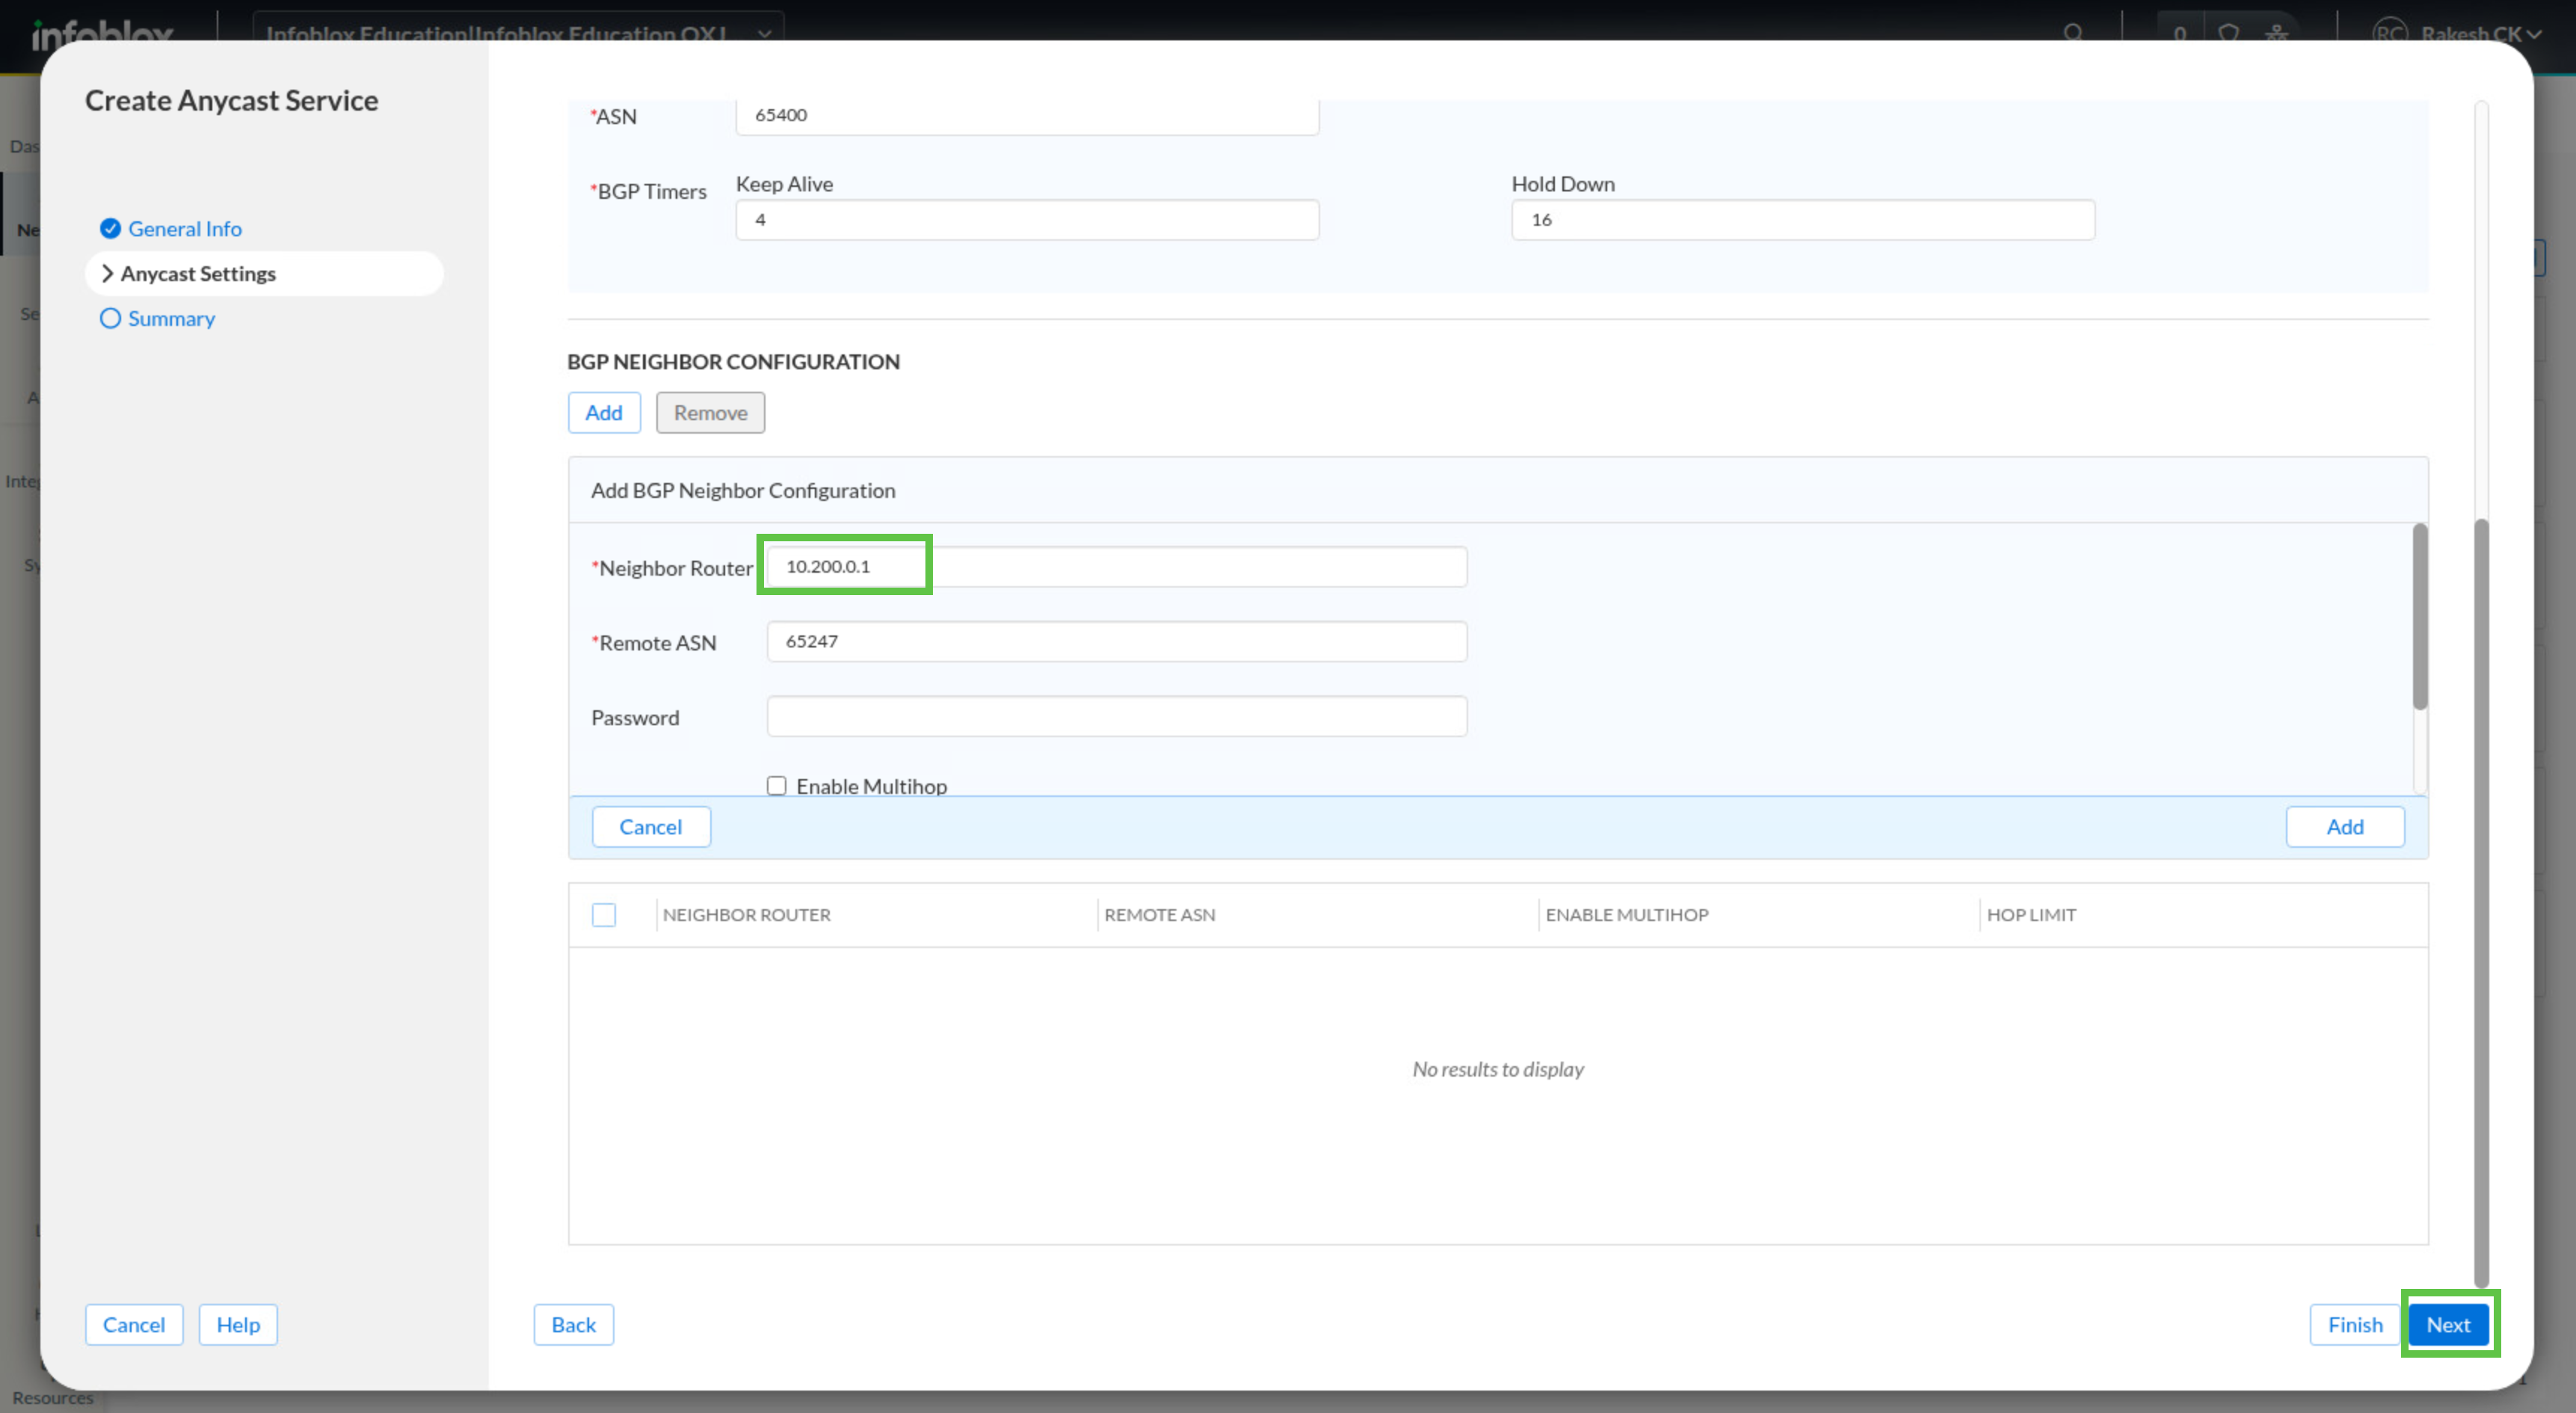
-
Click Save & Close.
-
You may need to wait a few minutes for the Anycast services to start on both instances.
Task 3 Solution: Verify Anycast Service is Online
Before testing DNS itself, verify that the anycast advertisement and BGP routing are working. If the route is not active yet, DNS over anycast will fail even if the DNS services themselves are healthy.
-
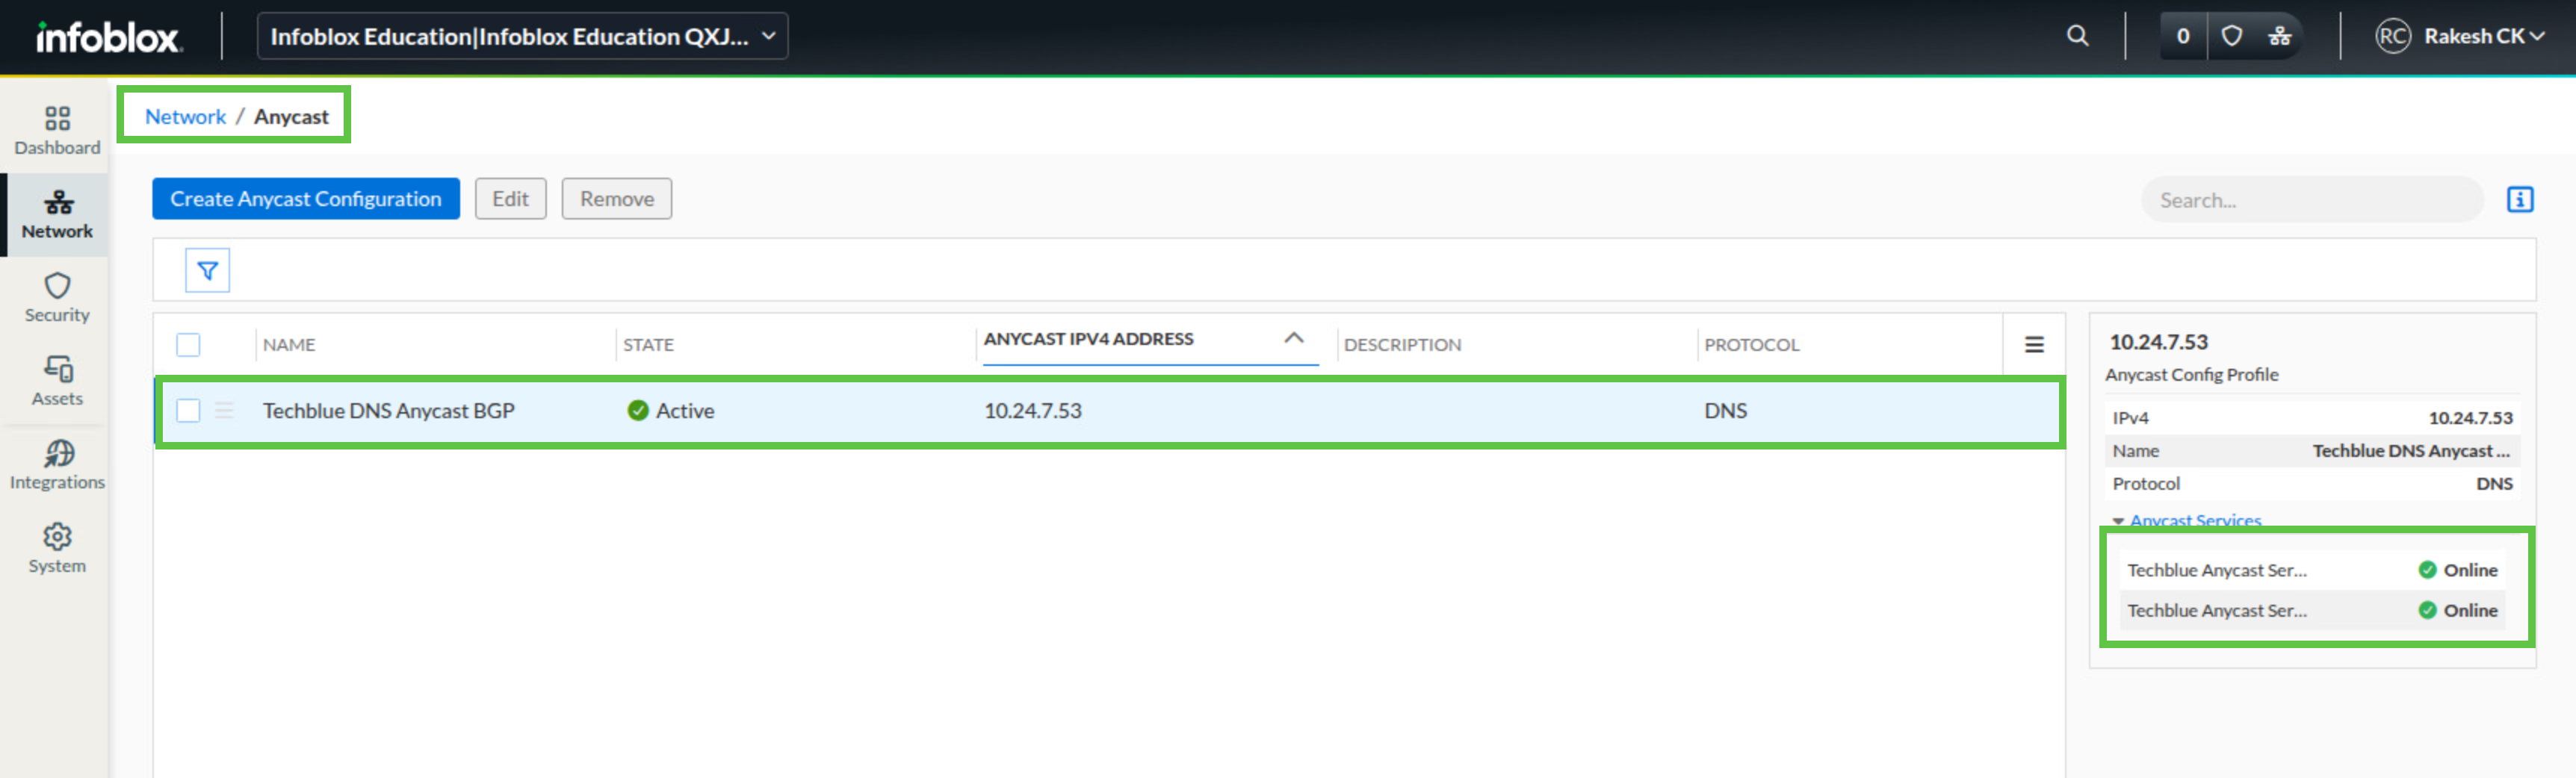
In the Infoblox Portal, navigate to Network → Anycast.
-
Check the status of Techblue DNS Anycast BGP and confirm it is green and Active.
-
Confirm that both anycast service instances appear online to the right of the configuration.
-
Switch to the virtual machine vyos-router.
-
Log in with username vyos and password vyos.
-
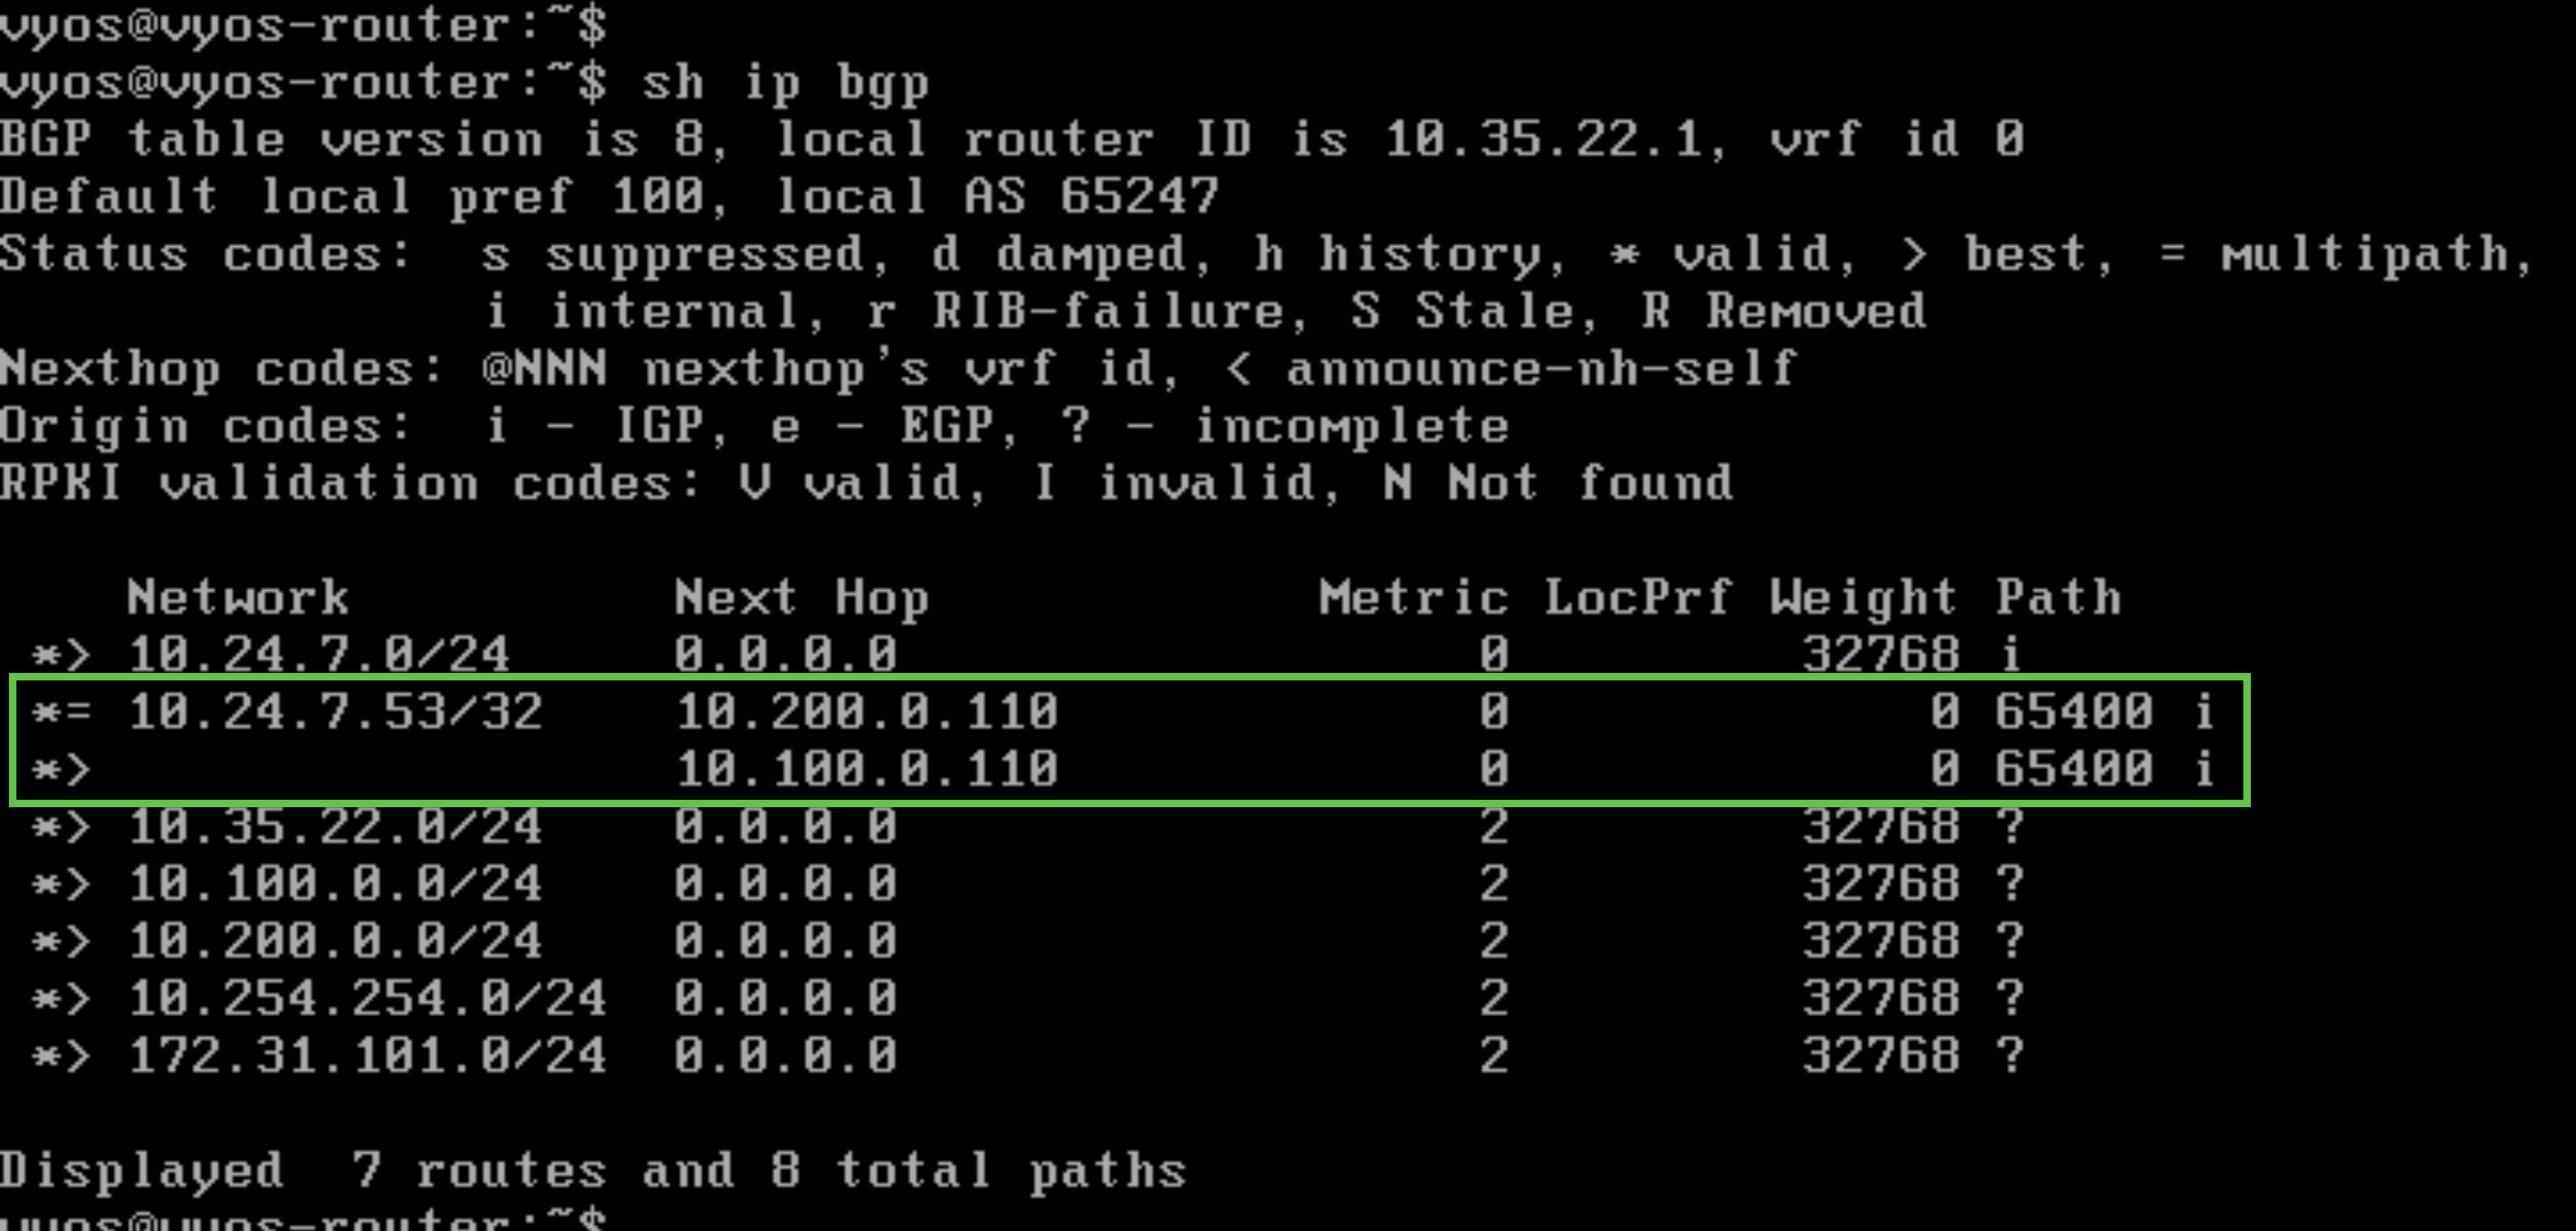
Run show ip bgp.
-
Review the routing table and look for the IP addresses of oph1 (10.100.0.110) and oph2 (10.200.0.110).
-
Switch to testing-linux and open a terminal window.
-
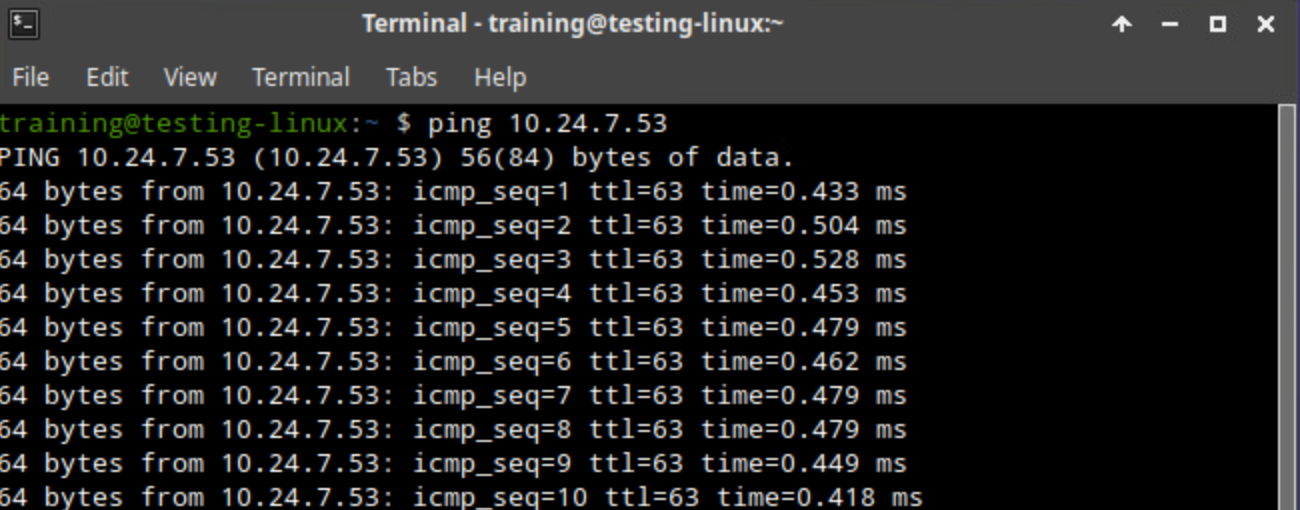
Run ping 10.24.7.53 and confirm that the anycast address responds.
-
Optionally, keep the ping running and temporarily disable the DNS service on oph1 and oph2 one at a time. Confirm that 10.24.7.53 remains reachable as long as the DNS service is running on at least one server. Ensure that the DNS service is started again on both oph1 and oph2 after completing the test.
Task 4 Solution: Verify DNS Service over Anycast
Now test DNS over the shared anycast address. This confirms that the address is not only reachable through BGP, but is also serving DNS successfully for clients.
-
On testing-linux, open a terminal window if one is not already open.
-
Run dig @10.24.7.53 techblue.net. A.
-
Confirm that the query returns a DNS response from the anycast address.