Scenario
You have already created the techblue.net primary zone, and now you need to add the resource records that support basic host, alias, reverse, and mail resolution for the environment. Your goal is to create a host record for chaos.techblue.net at 10.100.0.25 with an associated PTR record, create the alias mail.techblue.net for that host, add MX records for the zone, and verify that the new records resolve successfully from a client system.
Estimated Completion Time
-
20 to 30 minutes
Prerequisites
-
Administrative access to the Infoblox Portal
Learning Content
Tasks
-
Create A and PTR records.
-
Create CNAME record.
-
Create MX records.
Task 1: Create A and PTR records
In zone techblue.net, create an A Record named chaos with IPv4 address 10.100.0.25, and enable Create Associated PTR record so the reverse record is created automatically. Then, from testing-linux, verify both mappings by running dig @10.100.0.110 chaos.techblue.net. A and dig @10.100.0.110 -x 10.100.0.25. Both queries should return authoritative data.
Task 2: Create CNAME record
In zone techblue.net, create a CNAME Record with Alias set to mail and Canonical Name set to chaos. The zone name techblue.net is appended automatically to both fields. Then, from testing-linux, run dig @10.100.0.110 mail.techblue.net. A and confirm that the alias resolves authoritatively to the same target as chaos.techblue.net.
Task 3: Create MX records
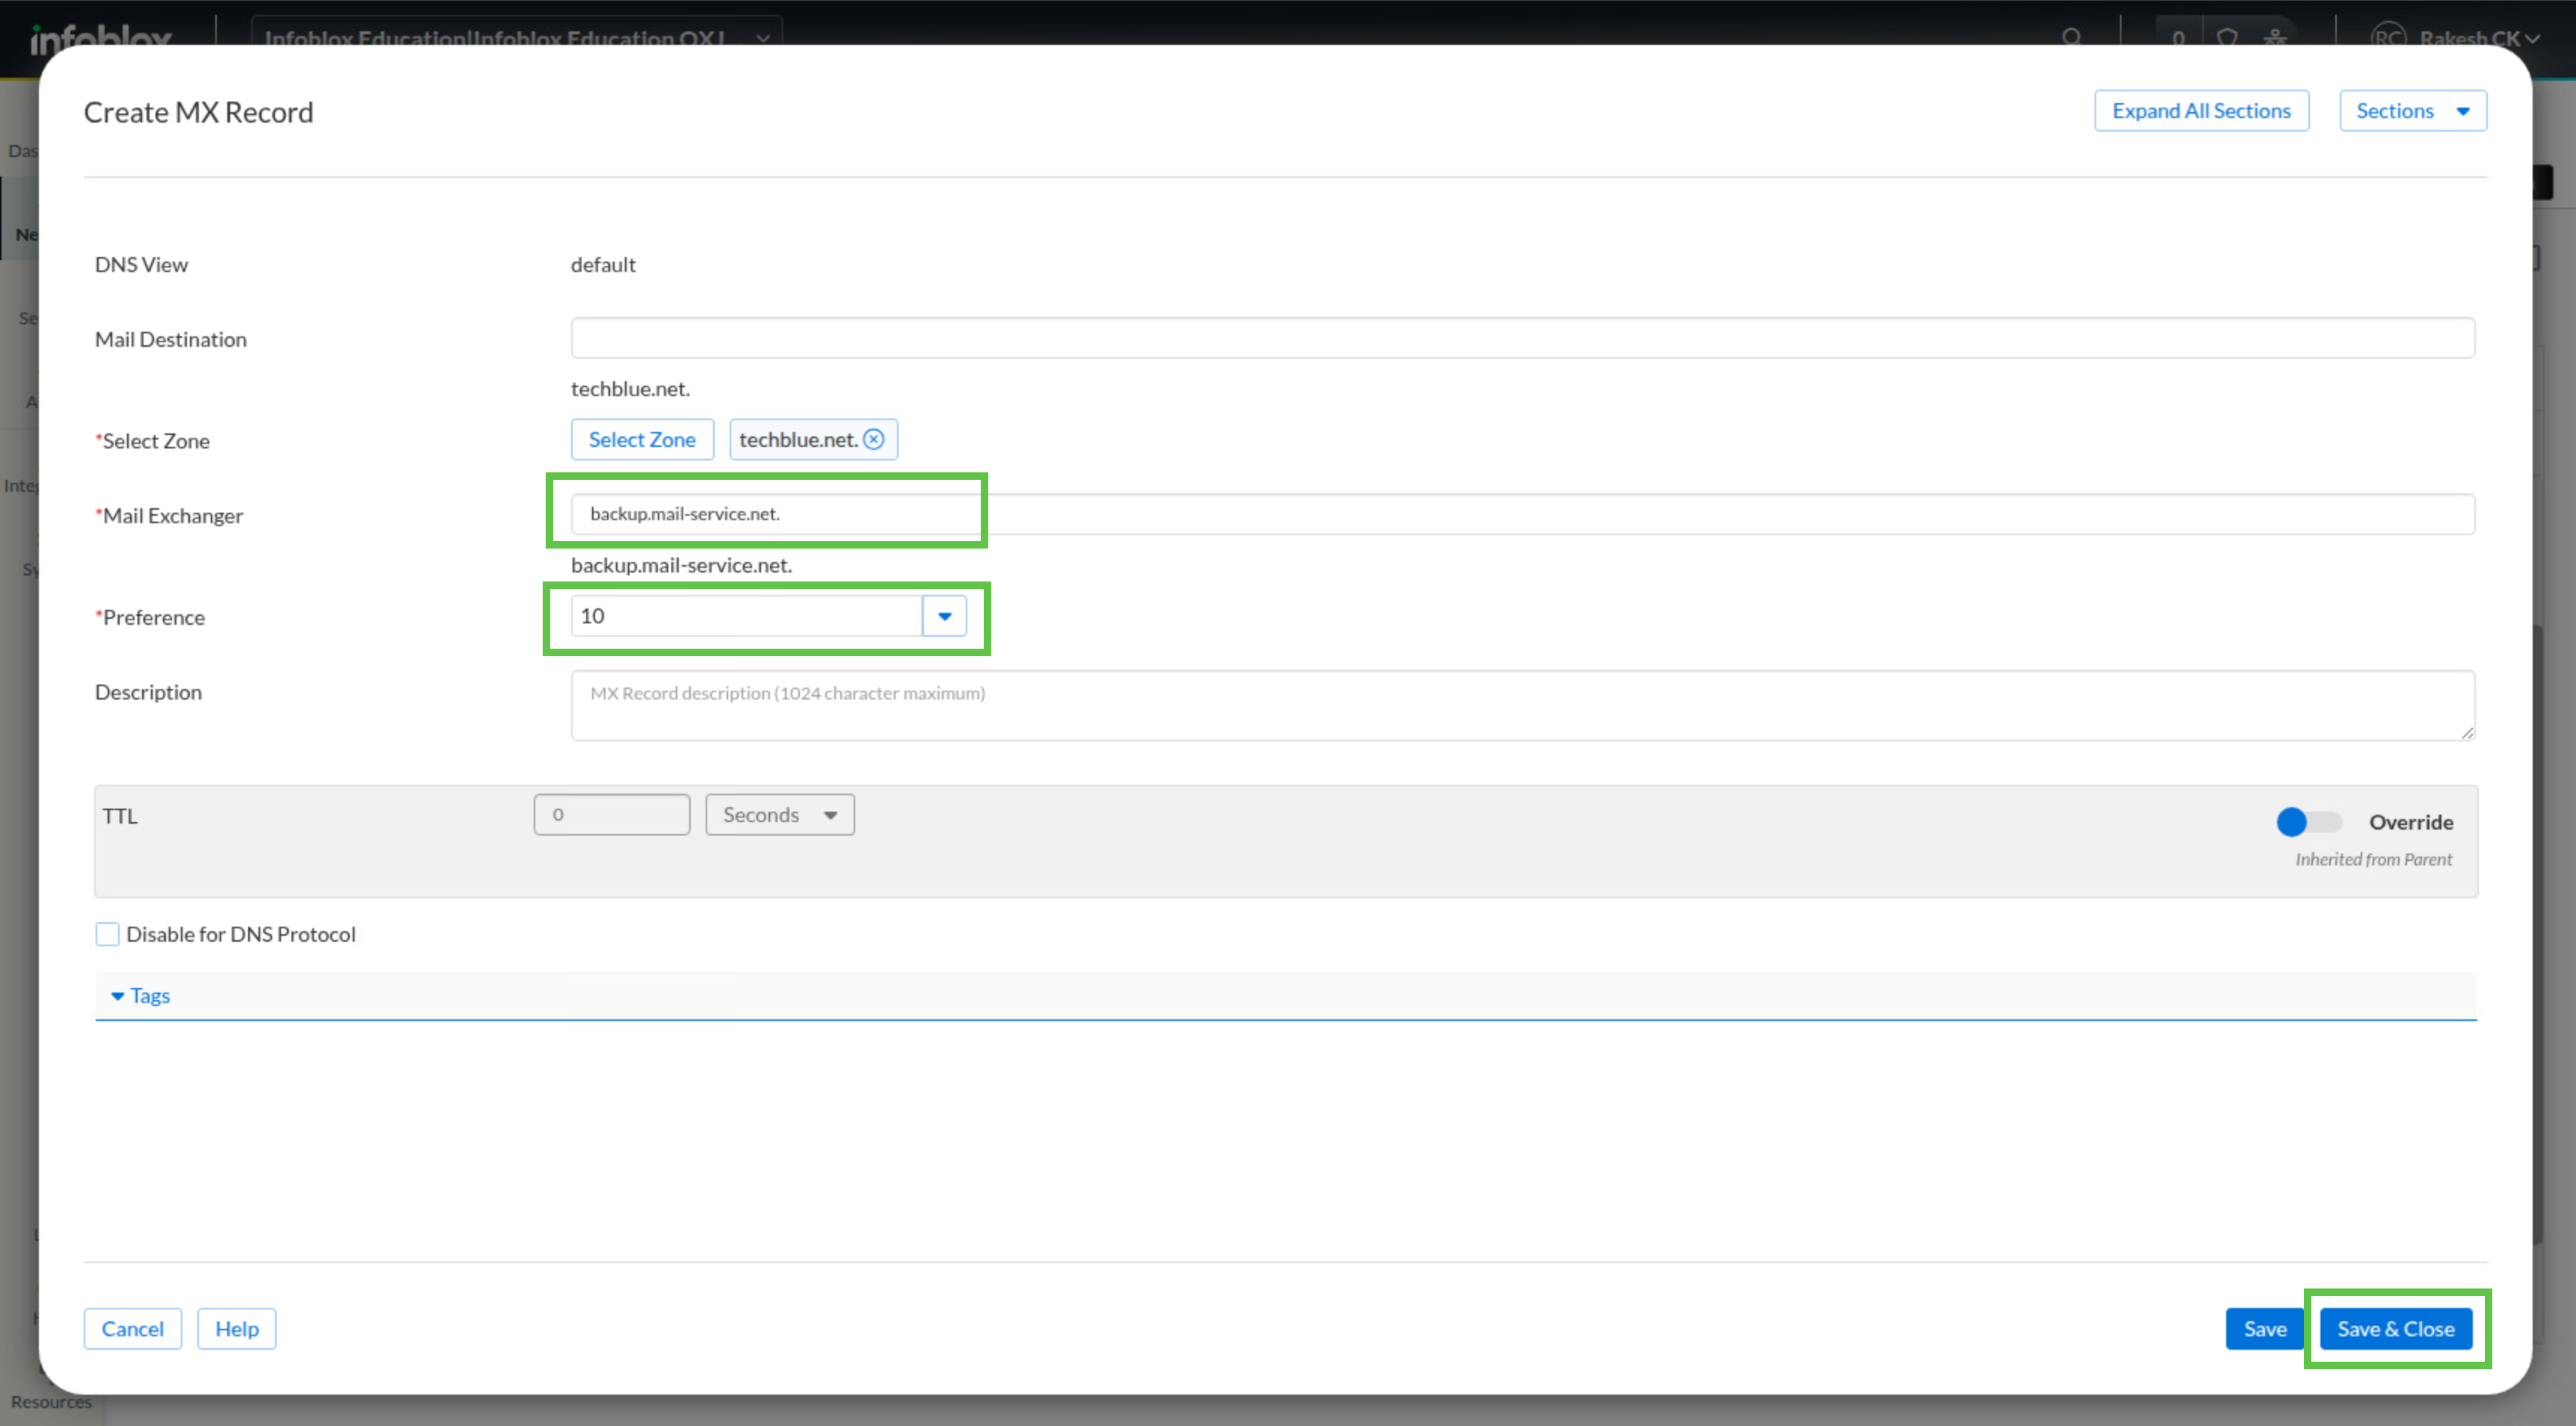
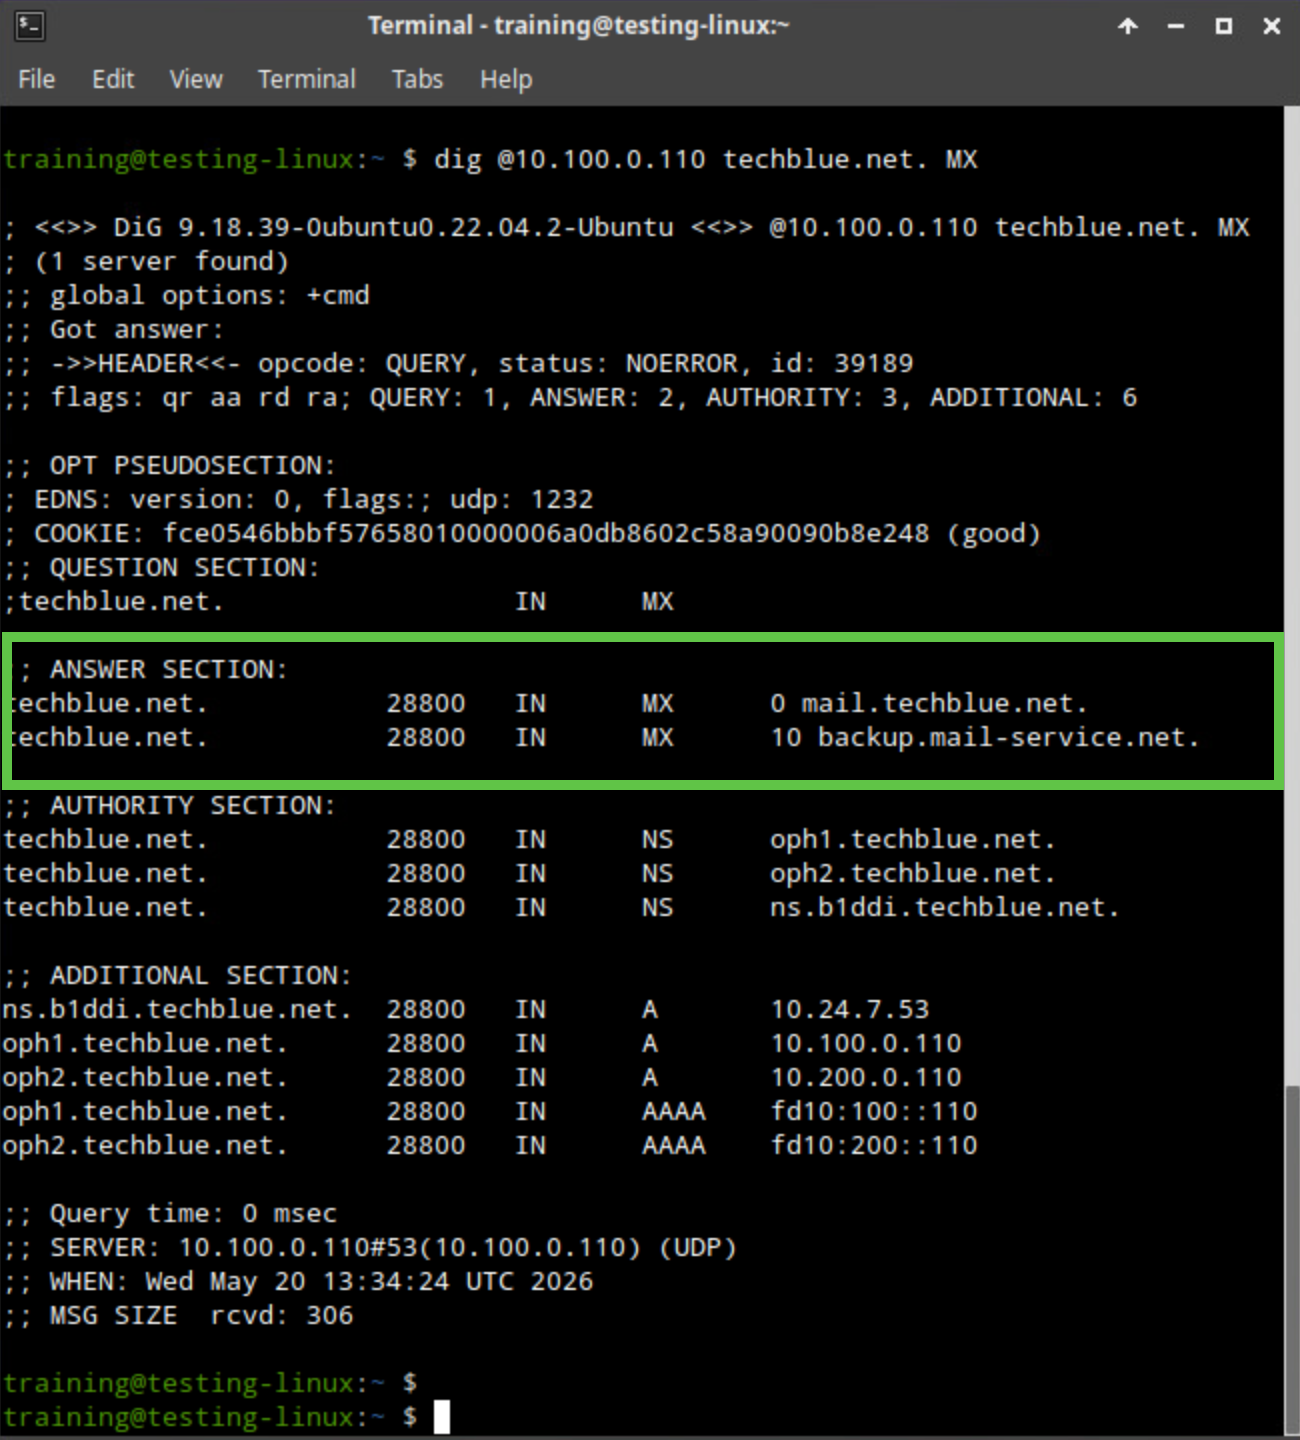
In zone techblue.net, create two MX Record entries. For the first record, set Mail Exchanger to mail and Preference to 0. For the second record, set Mail Exchanger to backup.mail-service.net. with the trailing period so the Portal does not append techblue.net, and set Preference to 10 or another value higher than the first MX record. Then, from testing-linux, run dig @10.100.0.110 techblue.net. MX and confirm that the authoritative response contains both MX records.
Solutions
Task 1 Solution: Create A and PTR records
If you do not have the zone techblue.net, retrace the steps in Creating a Primary Zone in Universal DDI.
Start with the host record because the later CNAME and MX tasks depend on a working target in the zone. Creating the PTR record at the same time ensures that forward and reverse lookups stay aligned without requiring a separate reverse-zone edit.
-
Log in to your lab’s jump-desktop.
-
Use the Education Infoblox Portal credentials to sign in to the Infoblox Portal.
-
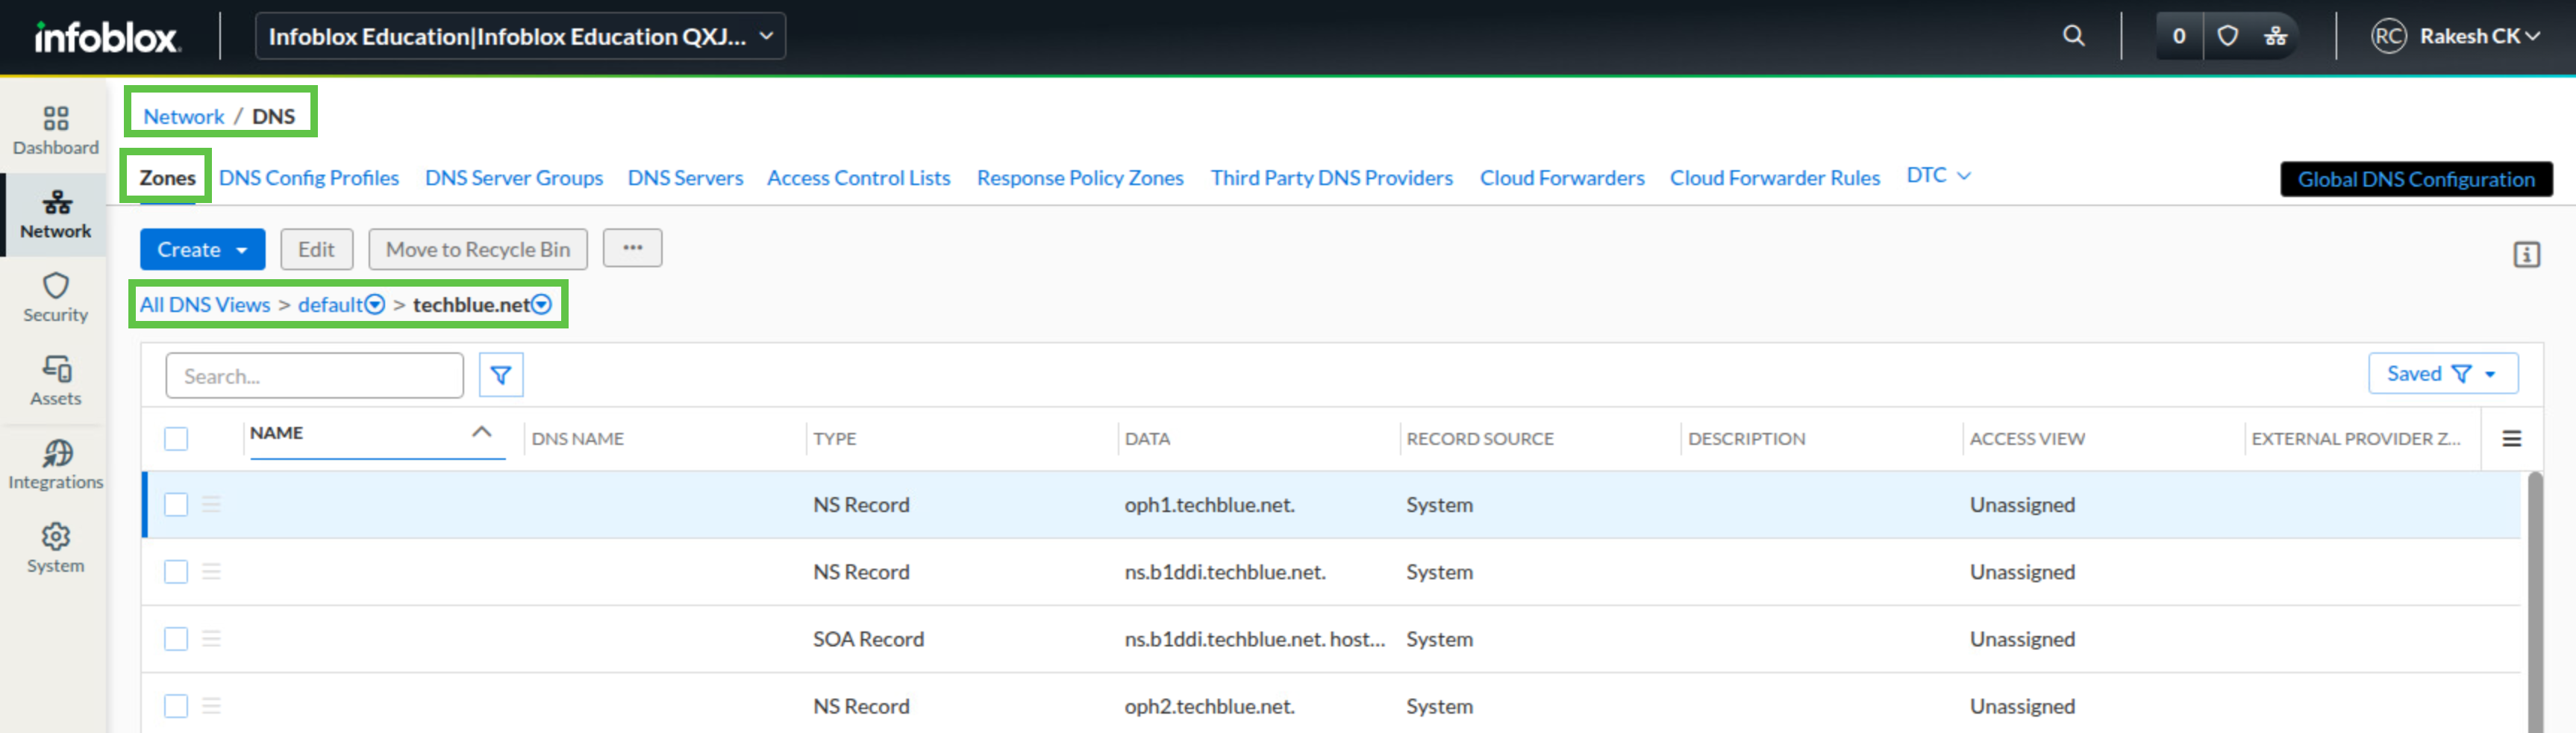
Navigate to Network → DNS.
-
Select the Zones tab.
-
Verify that the only DNS view listed is default, then click default.
-
Click zone techblue.net.
-
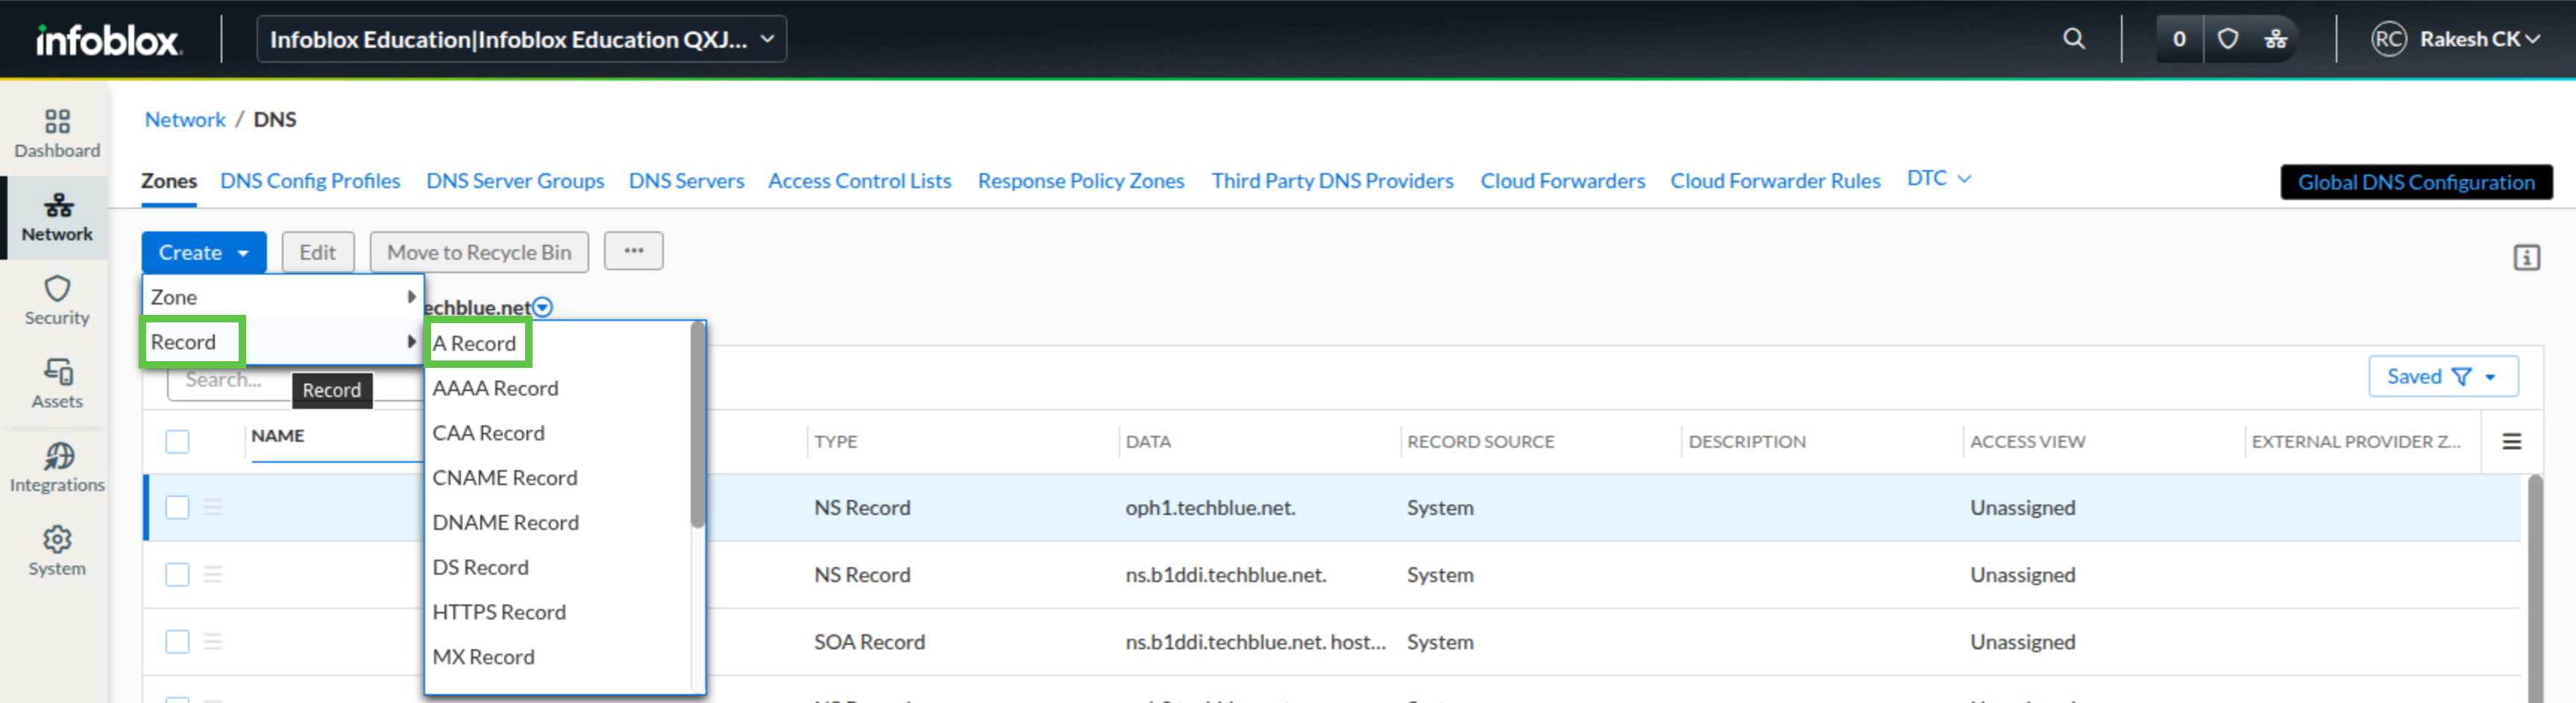
Click Create, then select Record → A Record.
-
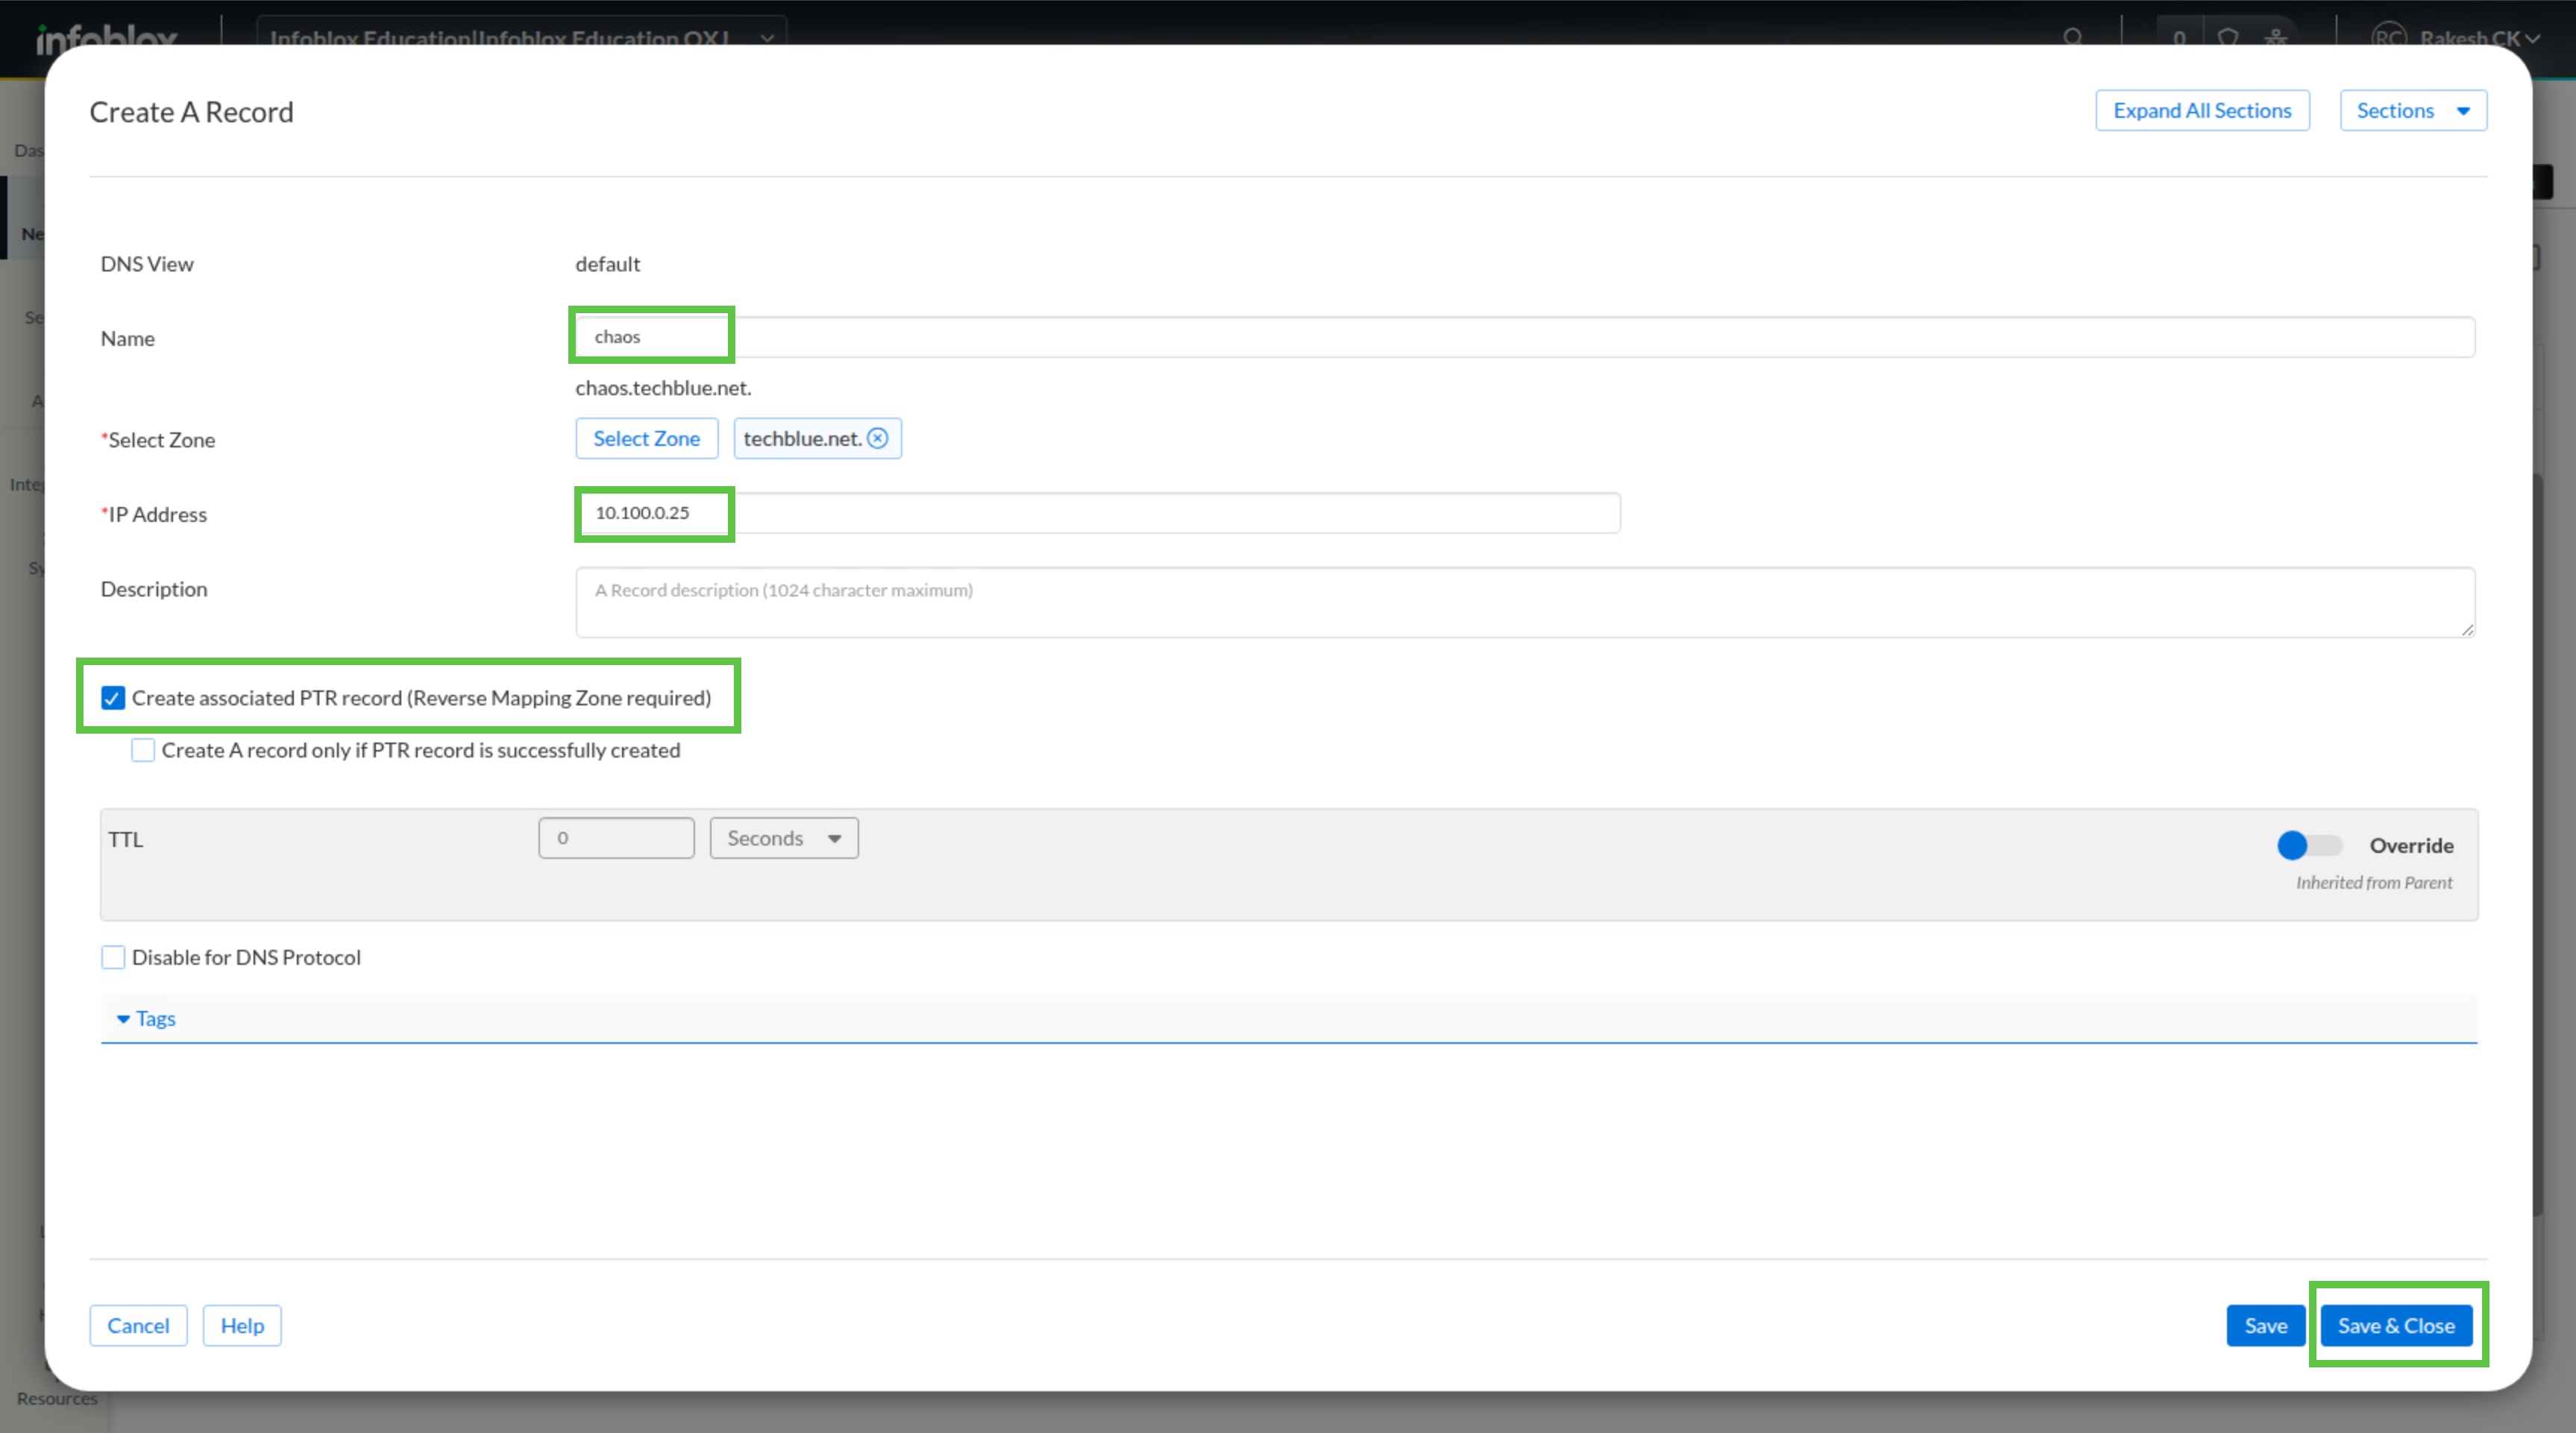
In the Name field, enter chaos.
-
In the IP Address field, enter 10.100.0.25.
-
Enable Create Associated PTR record.
-
Click Save & Close.
-
Switch to virtual machine testing-linux and open a terminal window.
-
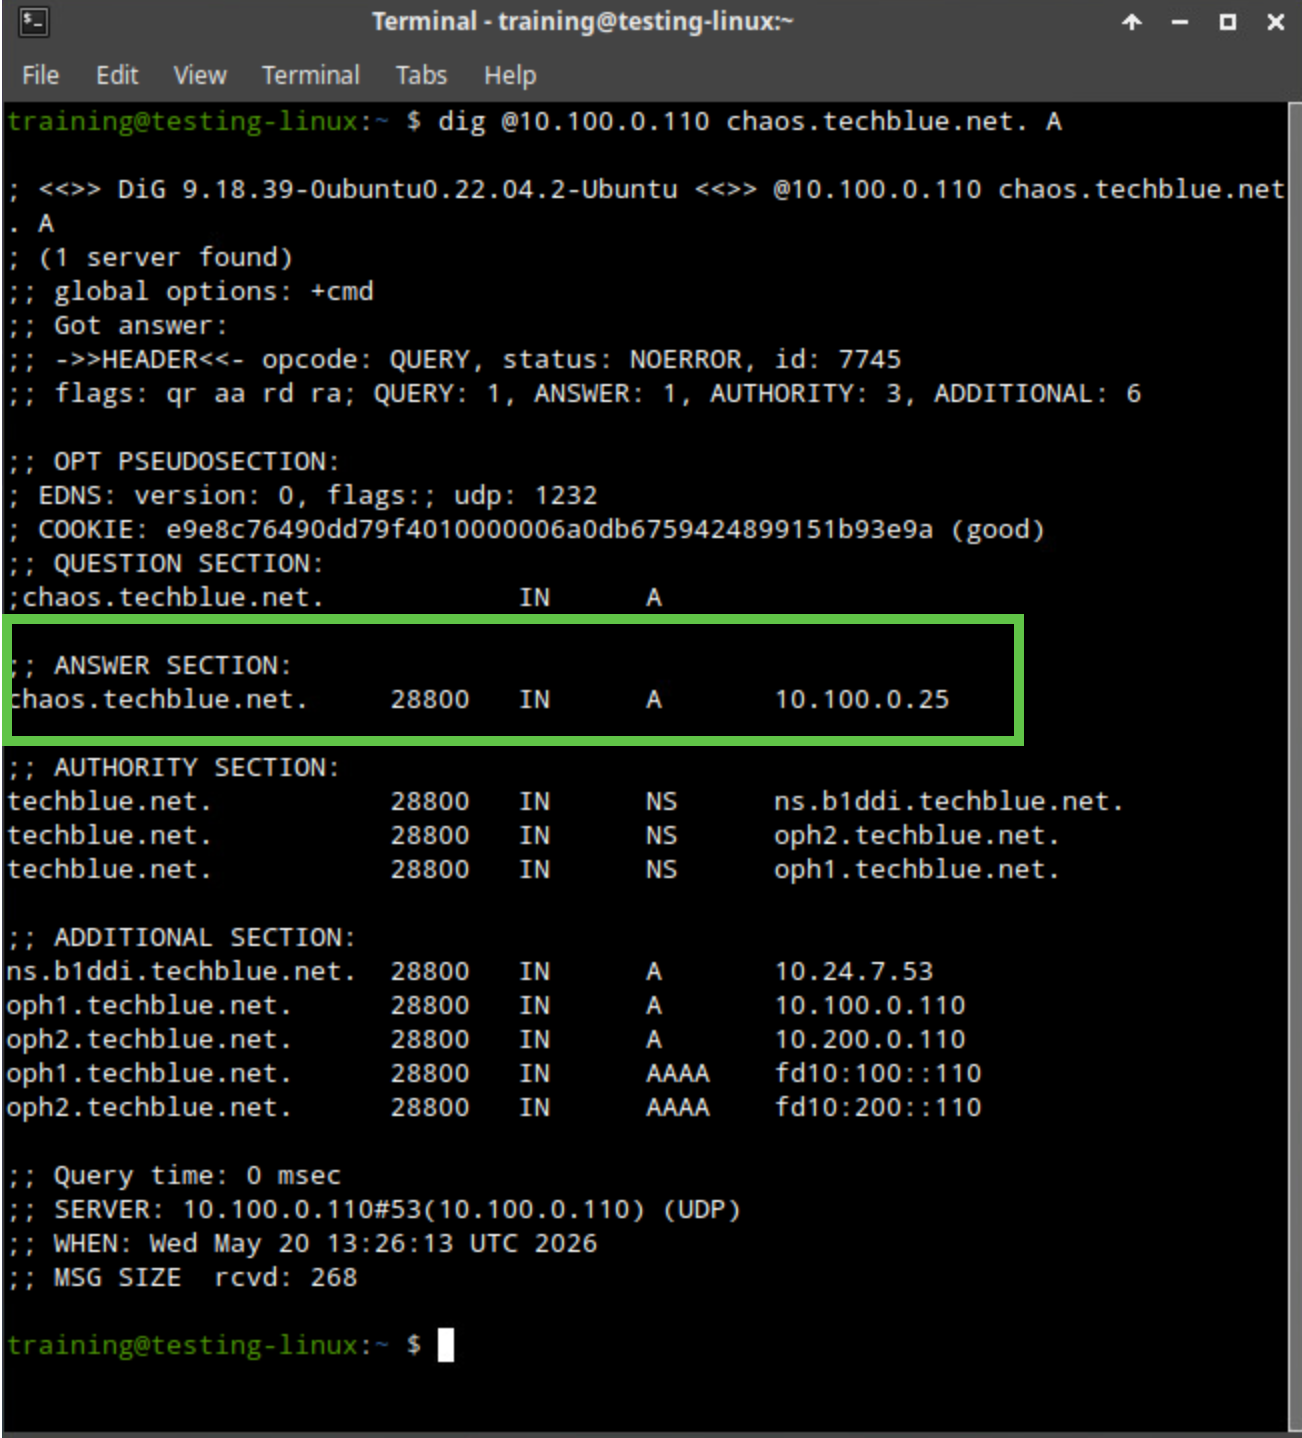
Run dig @10.100.0.110 chaos.techblue.net. A.
-
Run dig @10.100.0.110 -x 10.100.0.25.
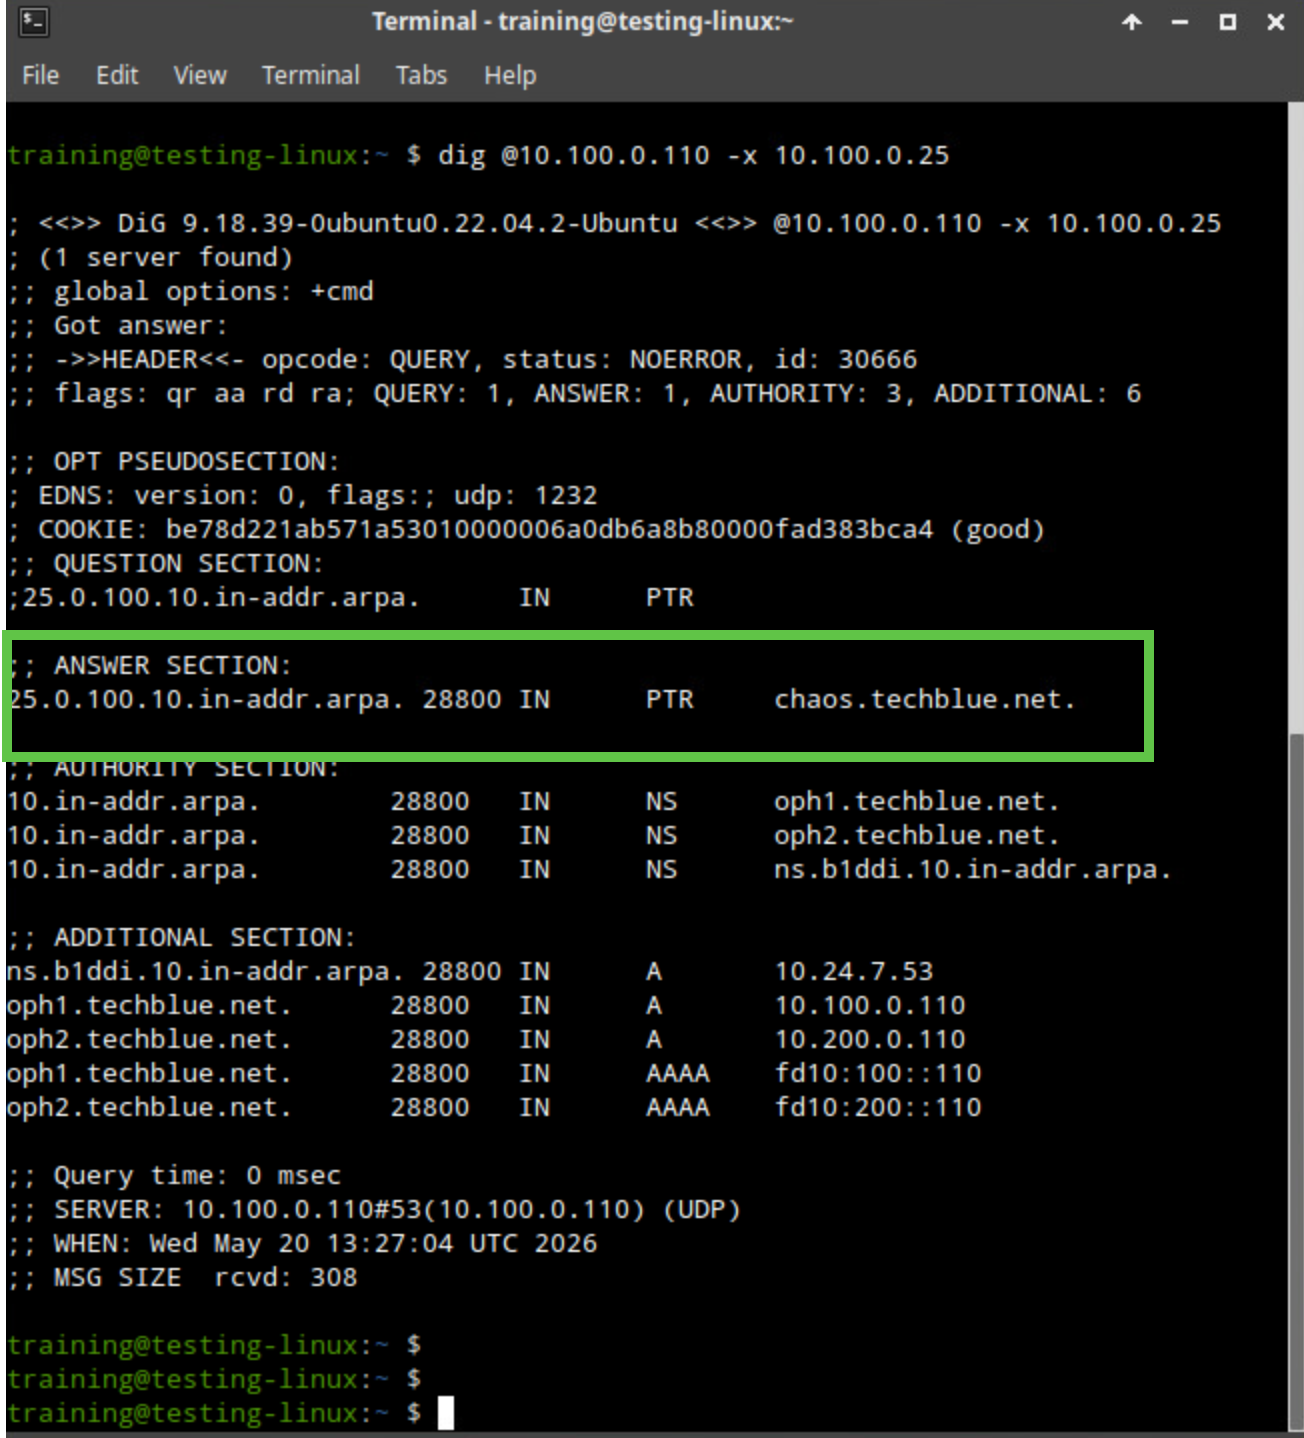
-
Review both responses and confirm that they return authoritative data.
Task 2 Solution: Create CNAME record
Now, create the alias that points mail traffic to the host record you just created. This lets you publish a mail-friendly DNS name without duplicating the host’s address data in a second A record.
-
Switch to jump-desktop and return to the Infoblox Portal.
-
Stay inside zone techblue.net.
-
Click Create, then select Record → CNAME Record.
-
In Alias, enter mail.
-
In Canonical Name, enter chaos.
-
Confirm that techblue.net is appended automatically to both names.
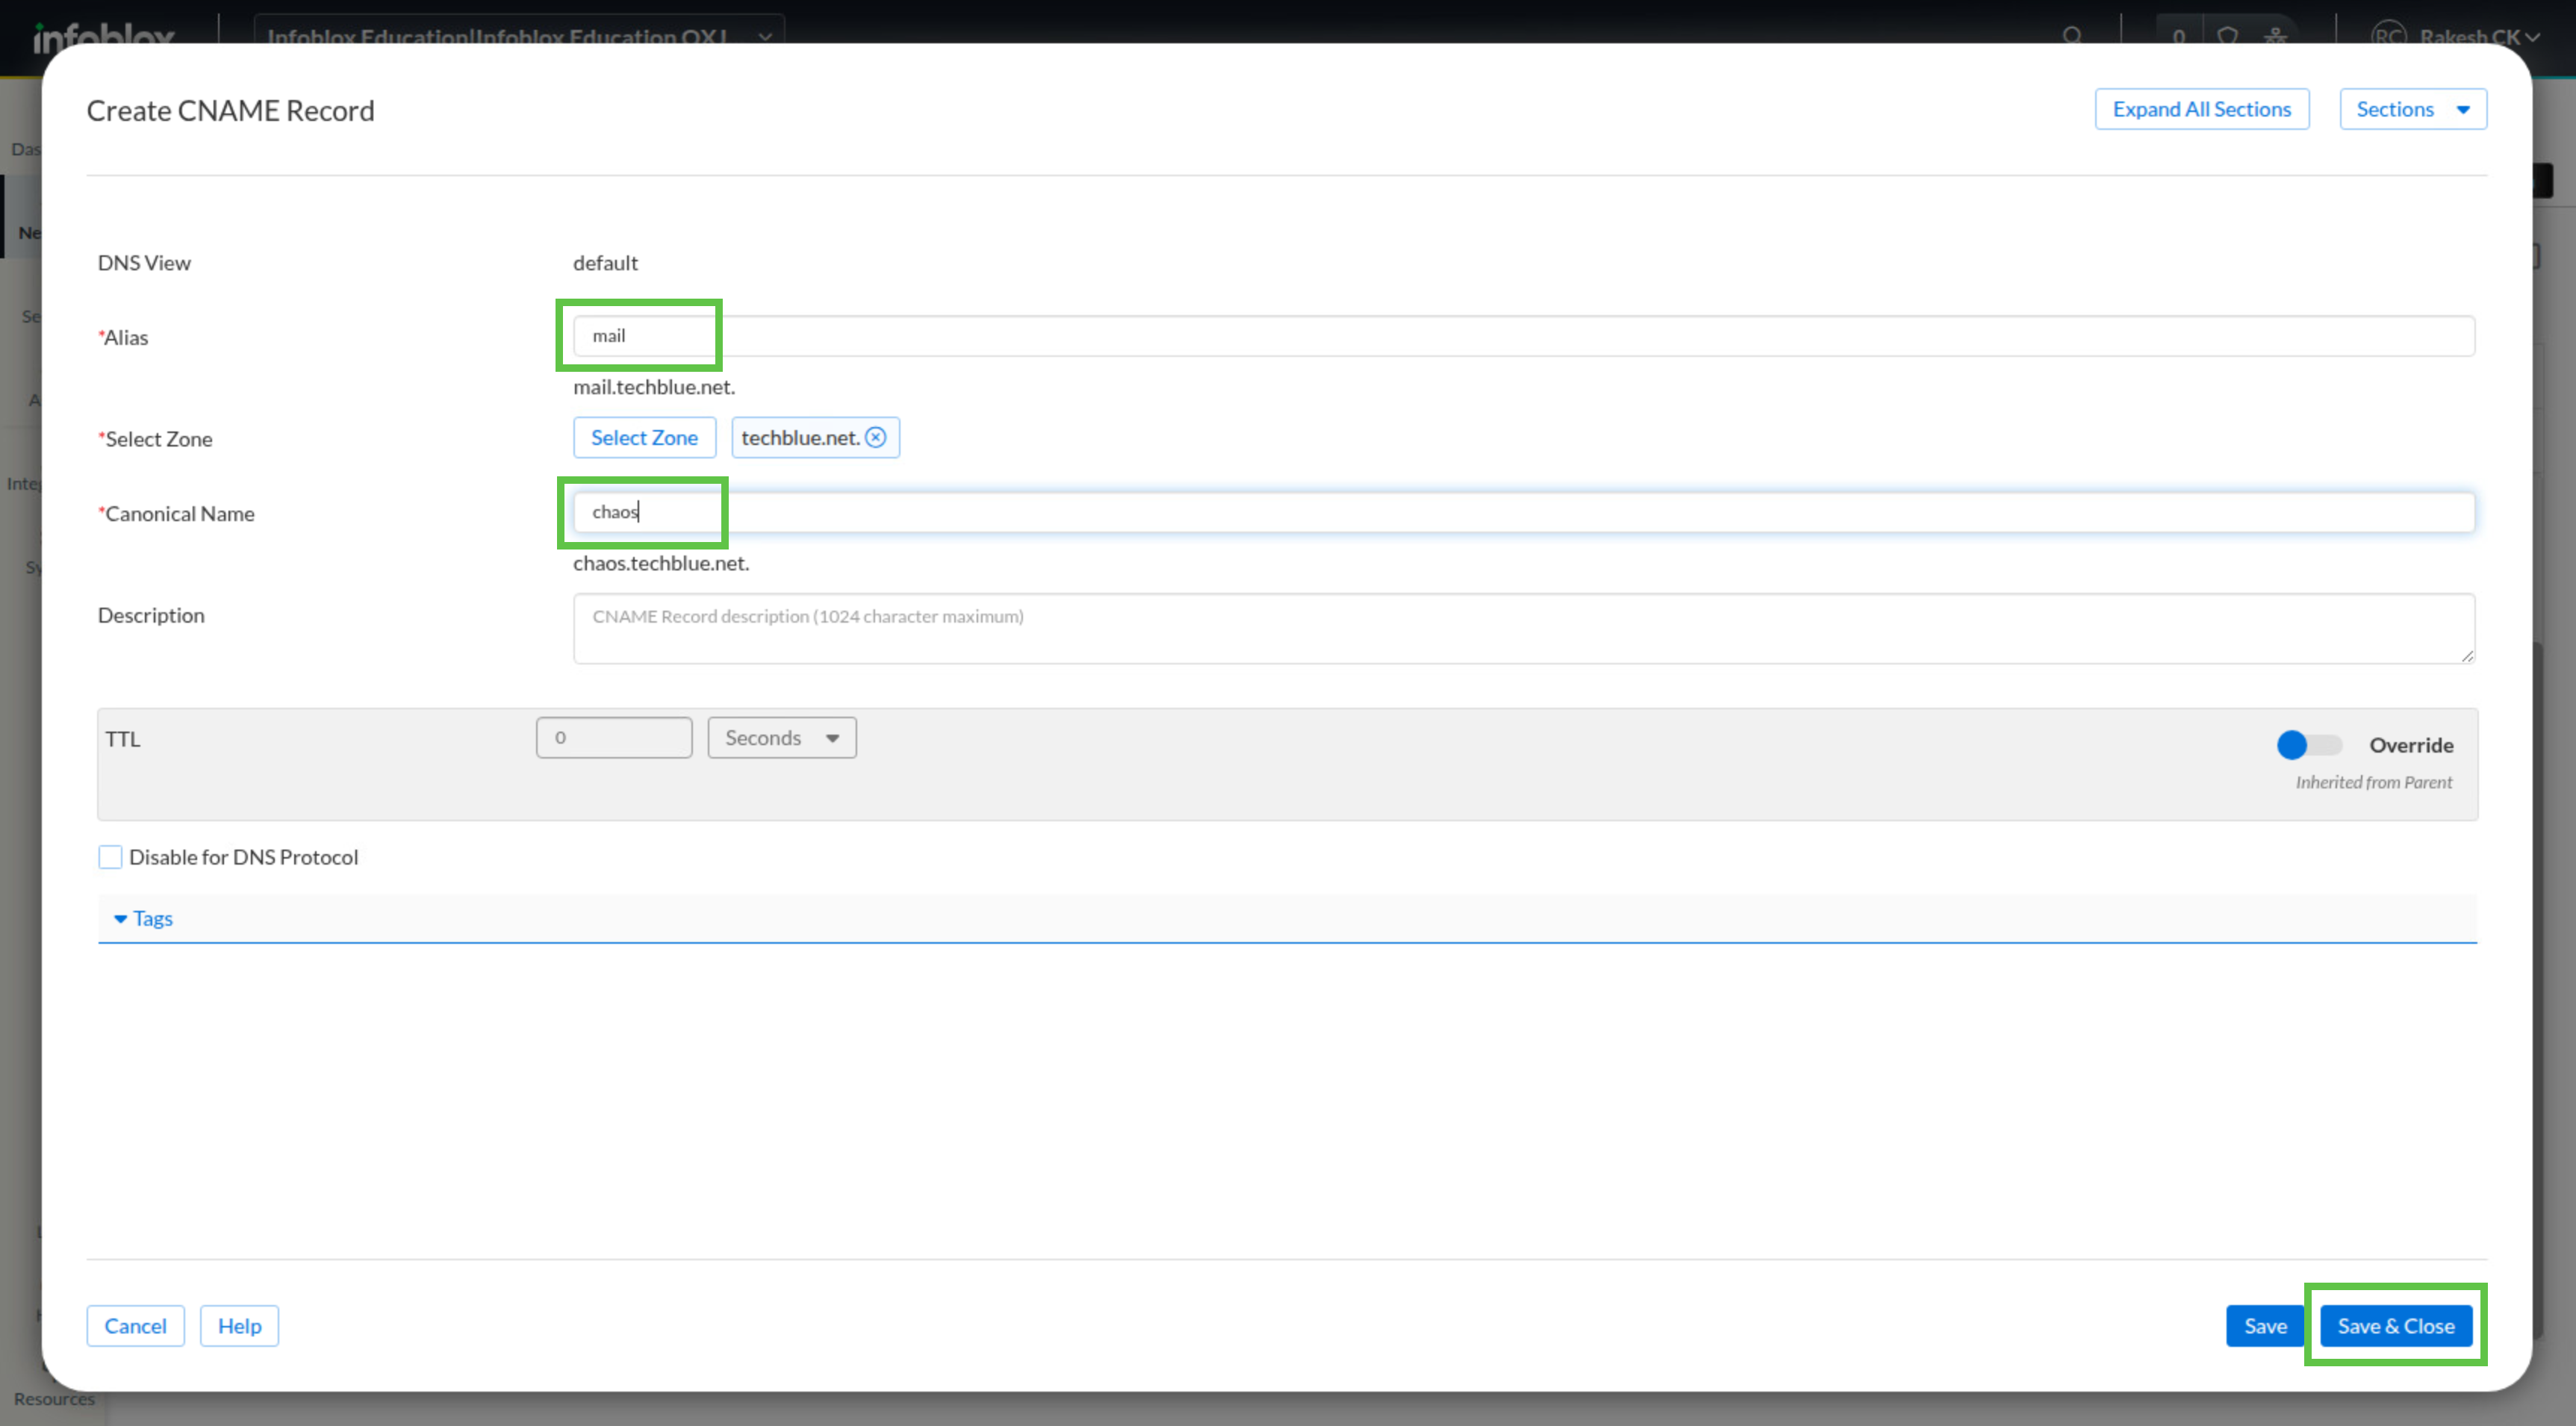
-
Click Save & Close.
-
Switch to testing-linux and open a terminal window.
-
Run dig @10.100.0.110 mail.techblue.net. A.
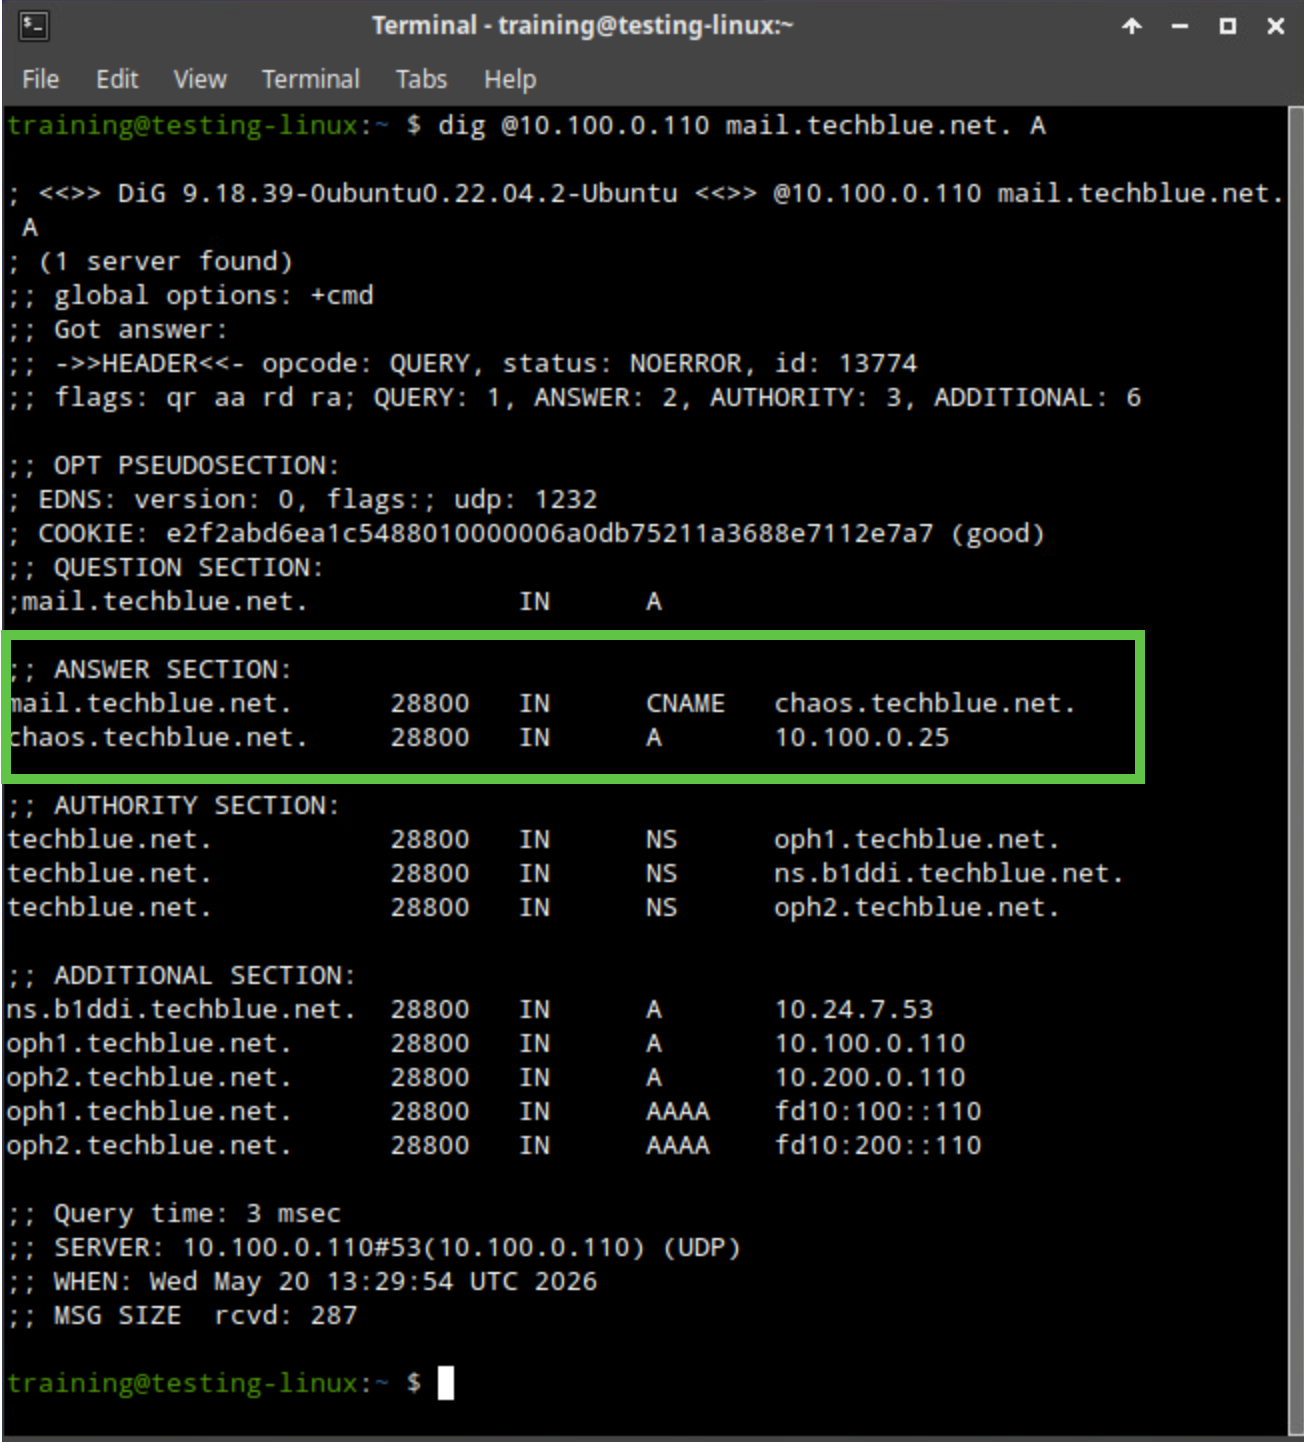
-
Review the response and confirm that the alias resolves authoritatively.
Task 3 Solution: Create MX records
Finish by creating the zone’s mail-exchanger records. The first MX record points mail delivery to mail.techblue.net, and the second provides a fallback target with a lower priority. Using a higher preference value for the fallback ensures the primary MX record is tried first.
-
Switch to jump-desktop and return to the Infoblox Portal.
-
Stay inside zone techblue.net.
-
Click Create, then select Record → MX Record.
-
In Mail Exchanger, enter mail.
-
In Preference, select 0.
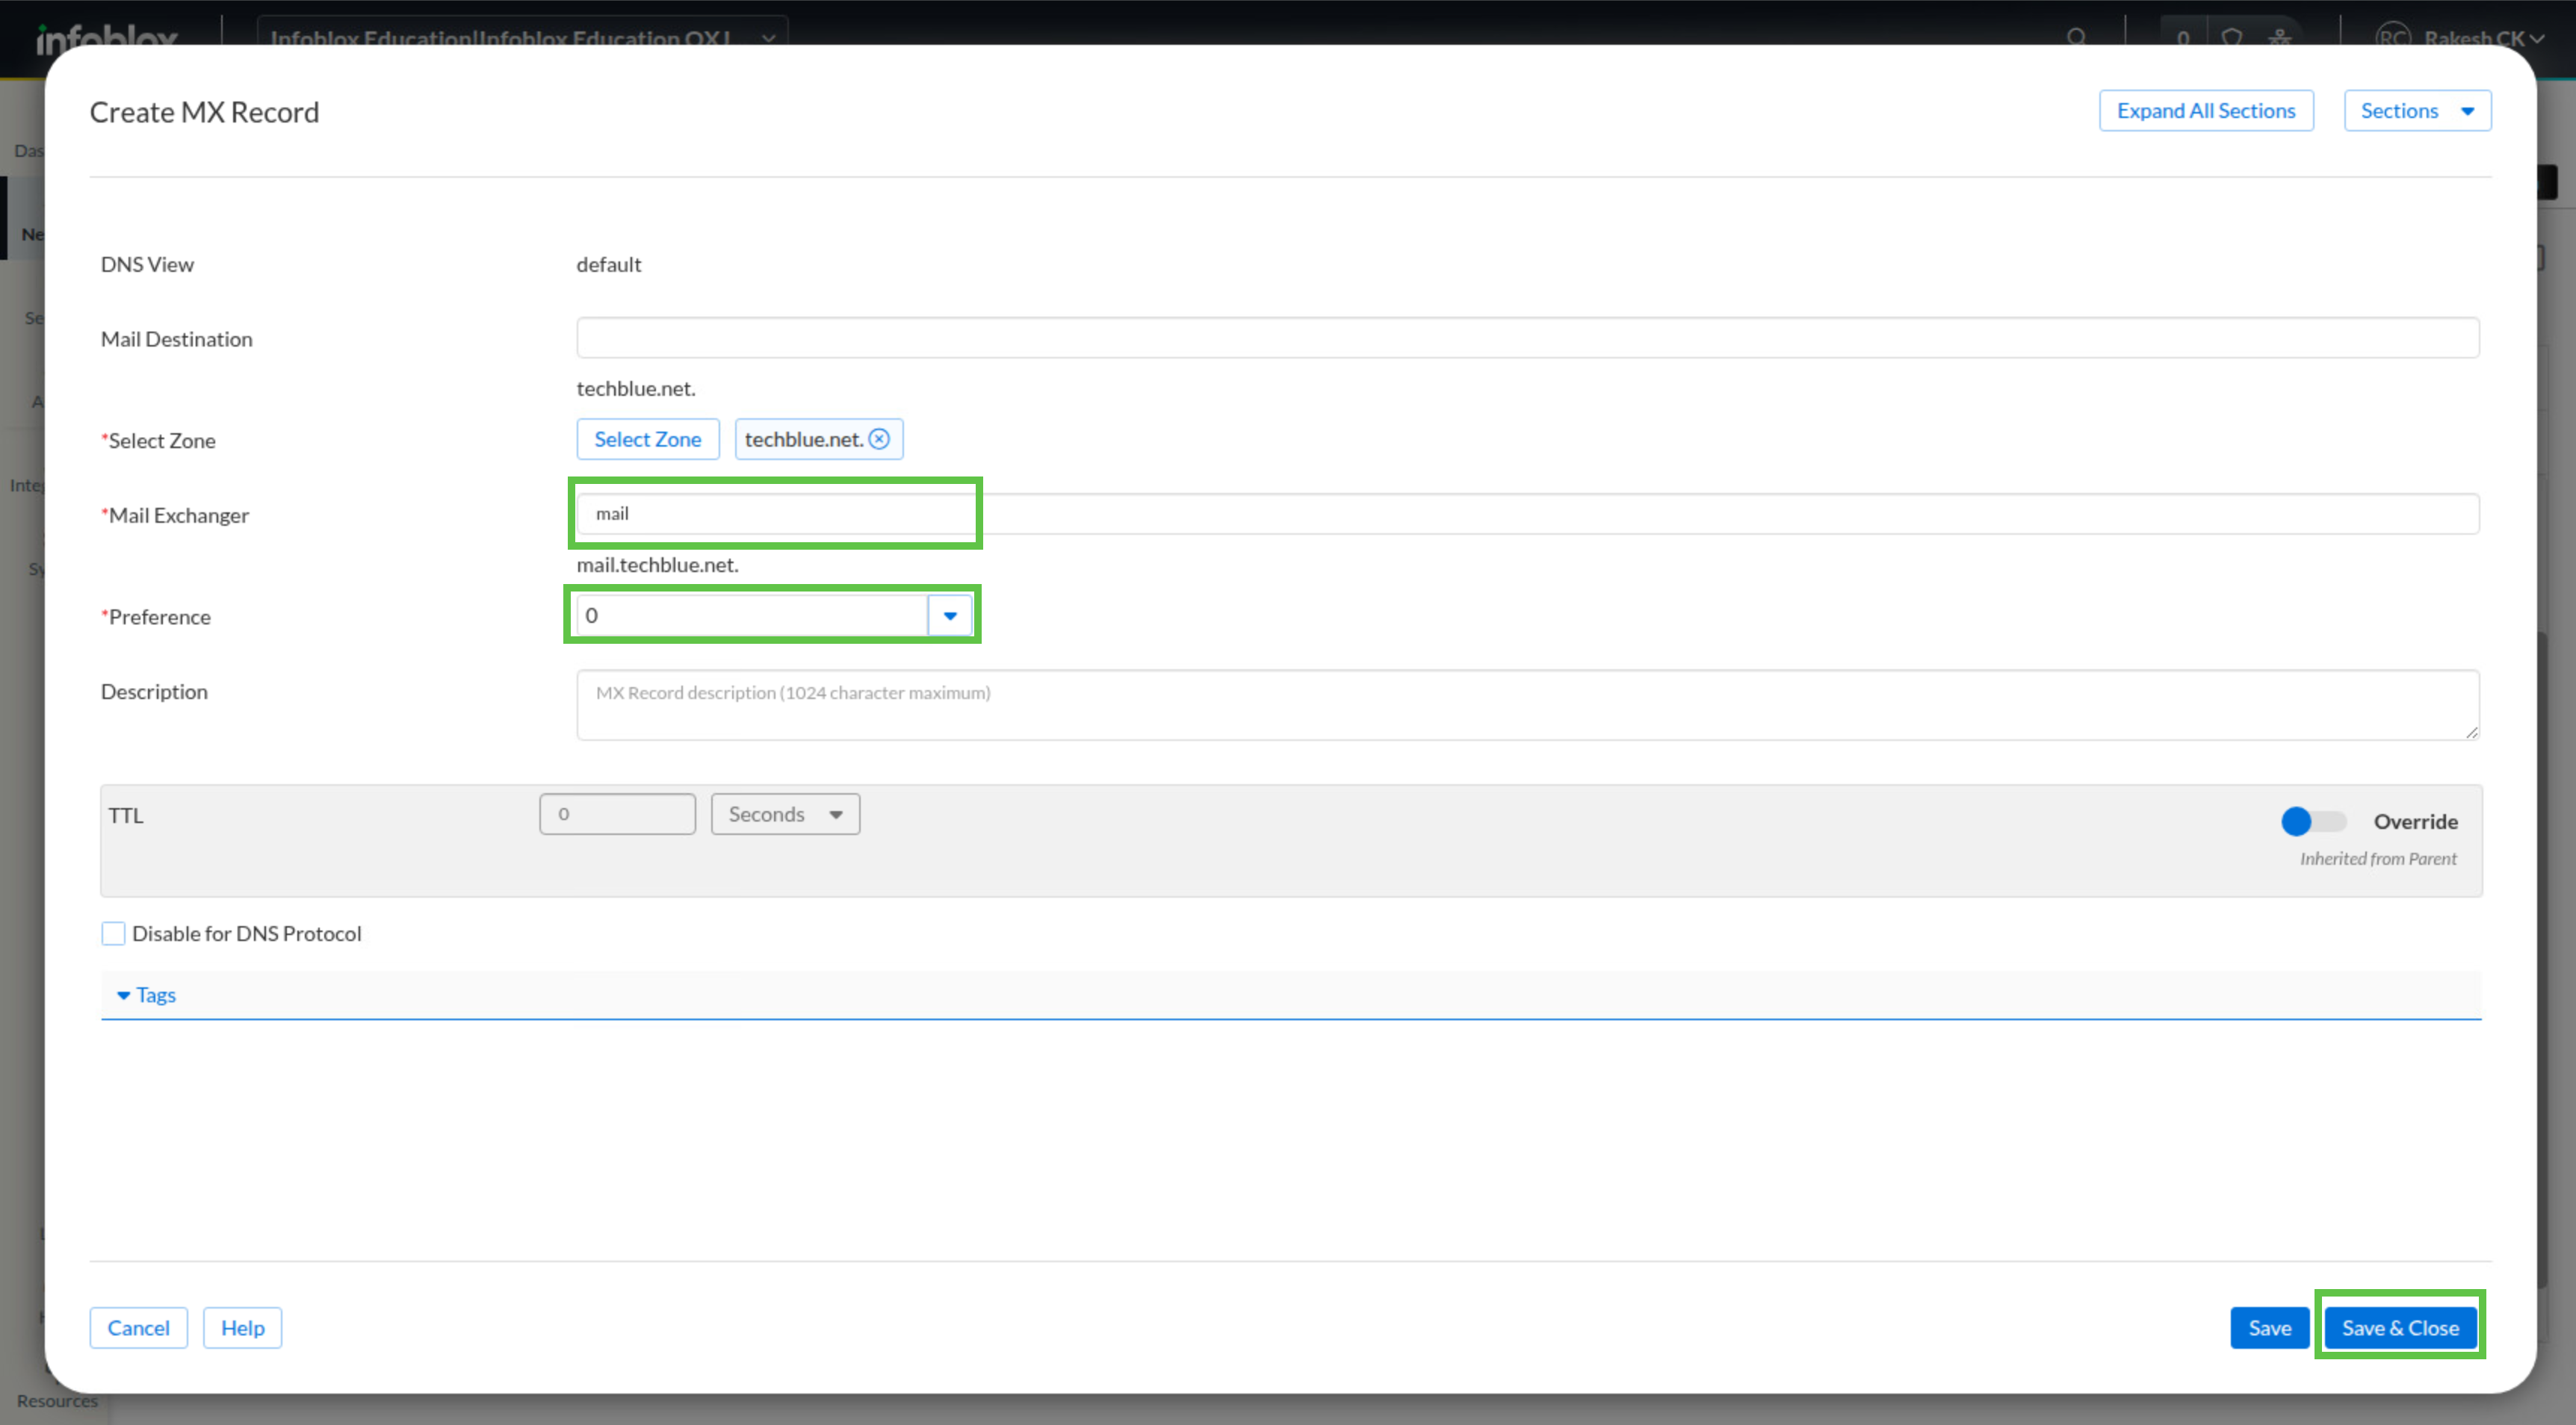
-
Click Save & Close.
-
Click Create again and select Record → MX Record.
-
In Mail Exchanger, enter backup.mail-service.net. with the trailing period.
-
In Preference, select 10 or another value higher than the first MX record.
-
Click Save & Close.
-
Switch to testing-linux and open a terminal window.
-
Run dig @10.100.0.110 techblue.net. MX.
-
Review the authoritative response and confirm that both MX records are present.