Scenario
You are a DDI administrator supporting a Windows system that was recently added to the network. The system received an address through DHCP, but because it runs security monitoring software, it now needs to receive the same address consistently. The firewall team has already selected the address the system should use, so your goal is to identify the client’s MAC address, create a fixed address for 172.31.101.20 in Universal DDI, and verify that the Windows client receives that address through DHCP.
Estimated Completion Time
-
15 to 20 minutes
Prerequisites
-
Administrative access to the Infoblox Portal
Learning Content
Tasks
-
Identify Windows Client MAC Address
-
Create Fixed Address
-
Verify DHCP Assignment
Task 1: Identify Windows Client MAC Address
Access the testing-windows system and record both its current IP address and MAC address. You will use the MAC address to create the fixed address, and the current IP address gives you a before-and-after check when you verify the result later.
Task 2: Create Fixed Address
Create a fixed address in the Infoblox Portal that binds the testing-windows MAC address to 172.31.101.20. This ensures the Windows client always receives the address reserved by the firewall team.
Task 3: Verify DHCP Assignment
Return to testing-windows and force the client to renew its DHCP lease so you can confirm that it now receives 172.31.101.20 from DHCP.
Solutions
Task 1 Solution: Identify Windows Client MAC Address
Before you create the fixed address, collect the client information you need from the Windows system. The MAC address is the identifier Universal DDI will use for the fixed address, and noting the current IP helps you confirm later that the lease changed as expected.
-
Log in to testing-windows.
-
Open Command Prompt from the taskbar.
-
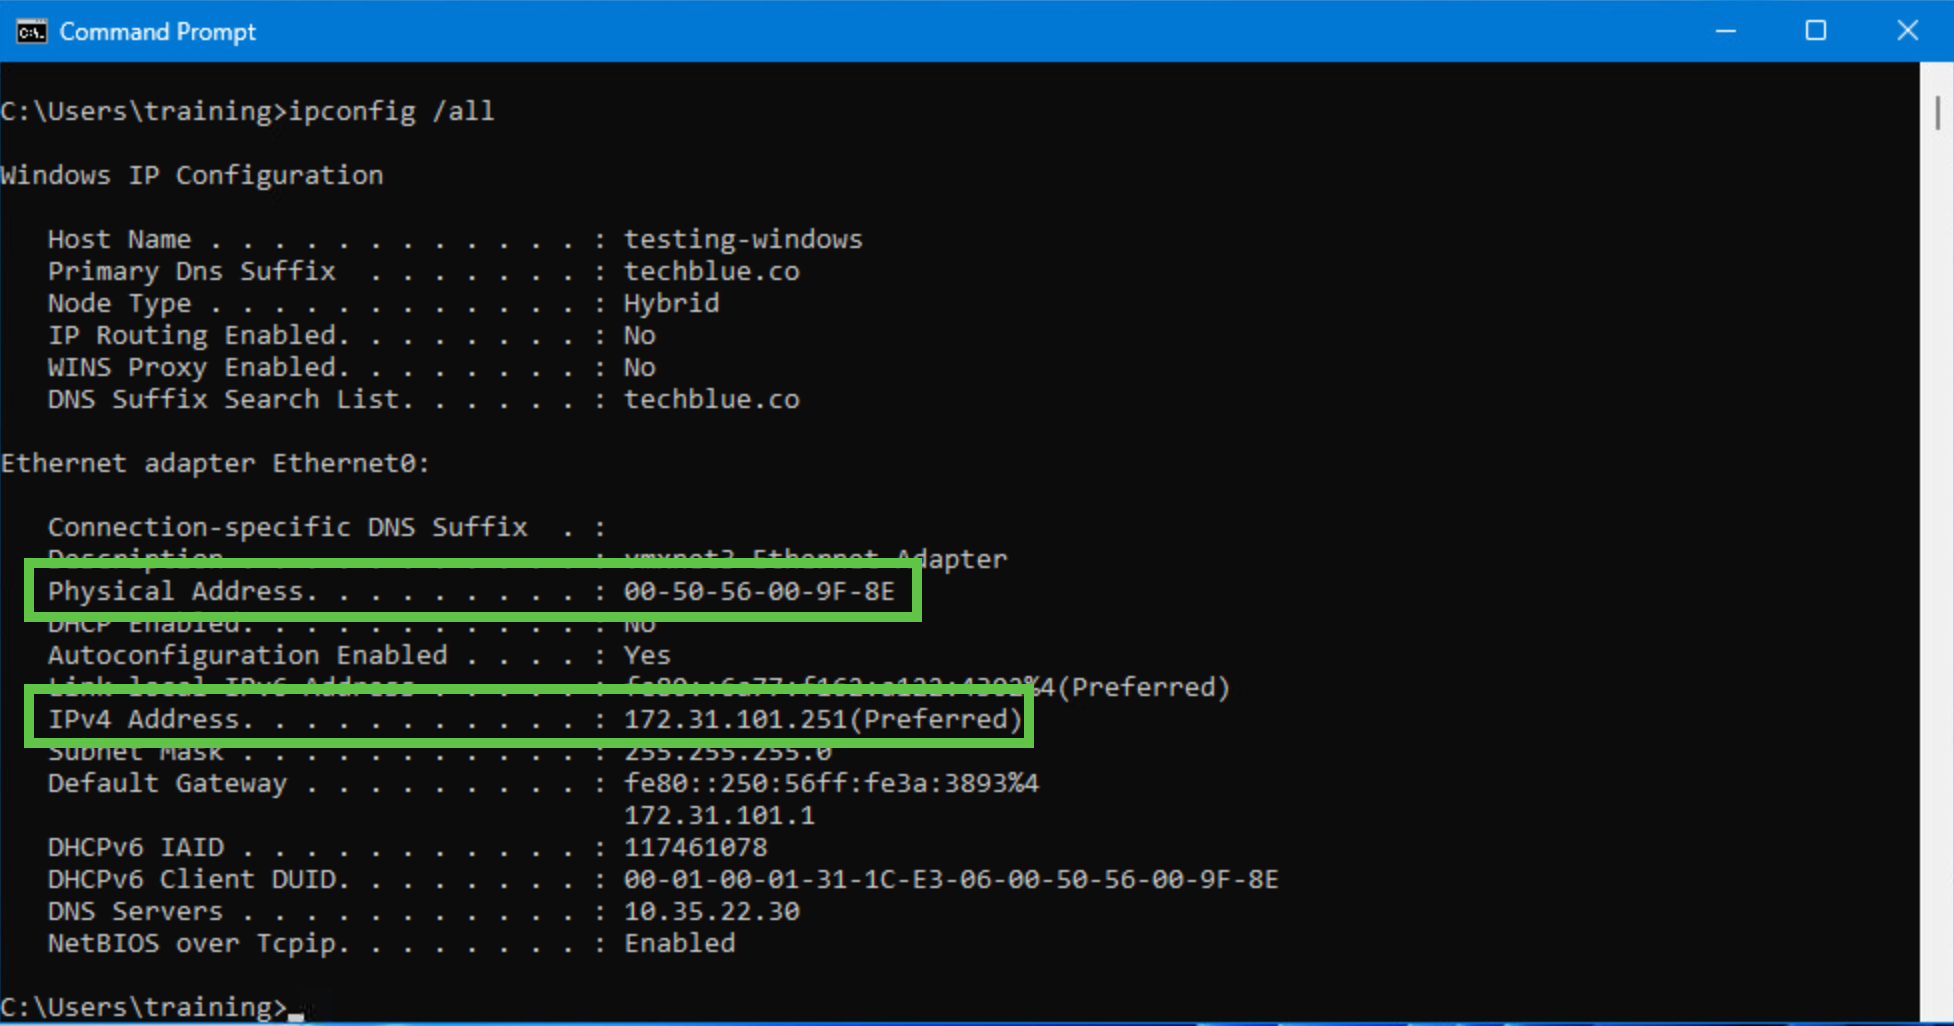
Run ipconfig /all and note the current IP address and the MAC address for the client.
Task 2 Solution: Create Fixed Address
Now that you know the client’s MAC address, create the fixed address in the subnet that is already being served by DHCP. This binds the Windows client to 172.31.101.20 so the system receives the firewall team’s required address whenever it renews its DHCP lease.
-
Sign in to the Infoblox Portal.
-
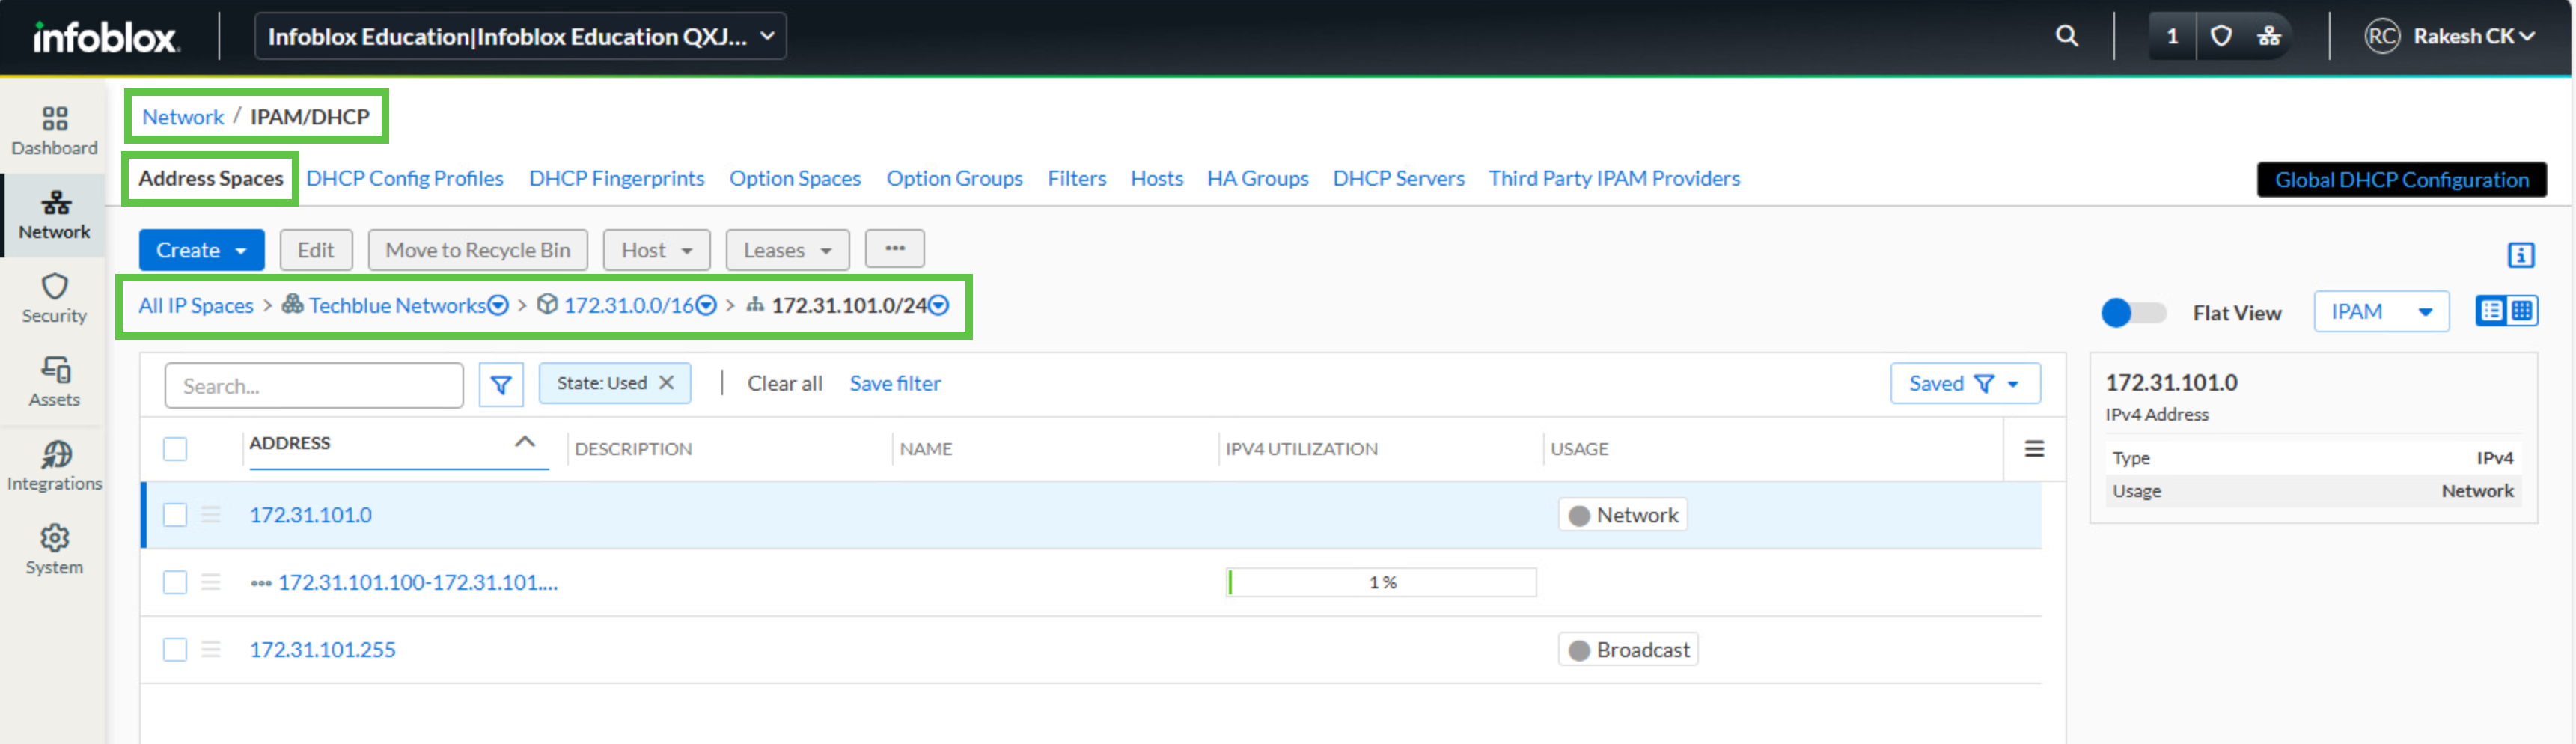
Navigate to Networking → IPAM/DHCP.
-
Open Techblue Networks.
-
Open the address block 172.31.0.0/16, then open subnet 172.31.101.0/24.
-
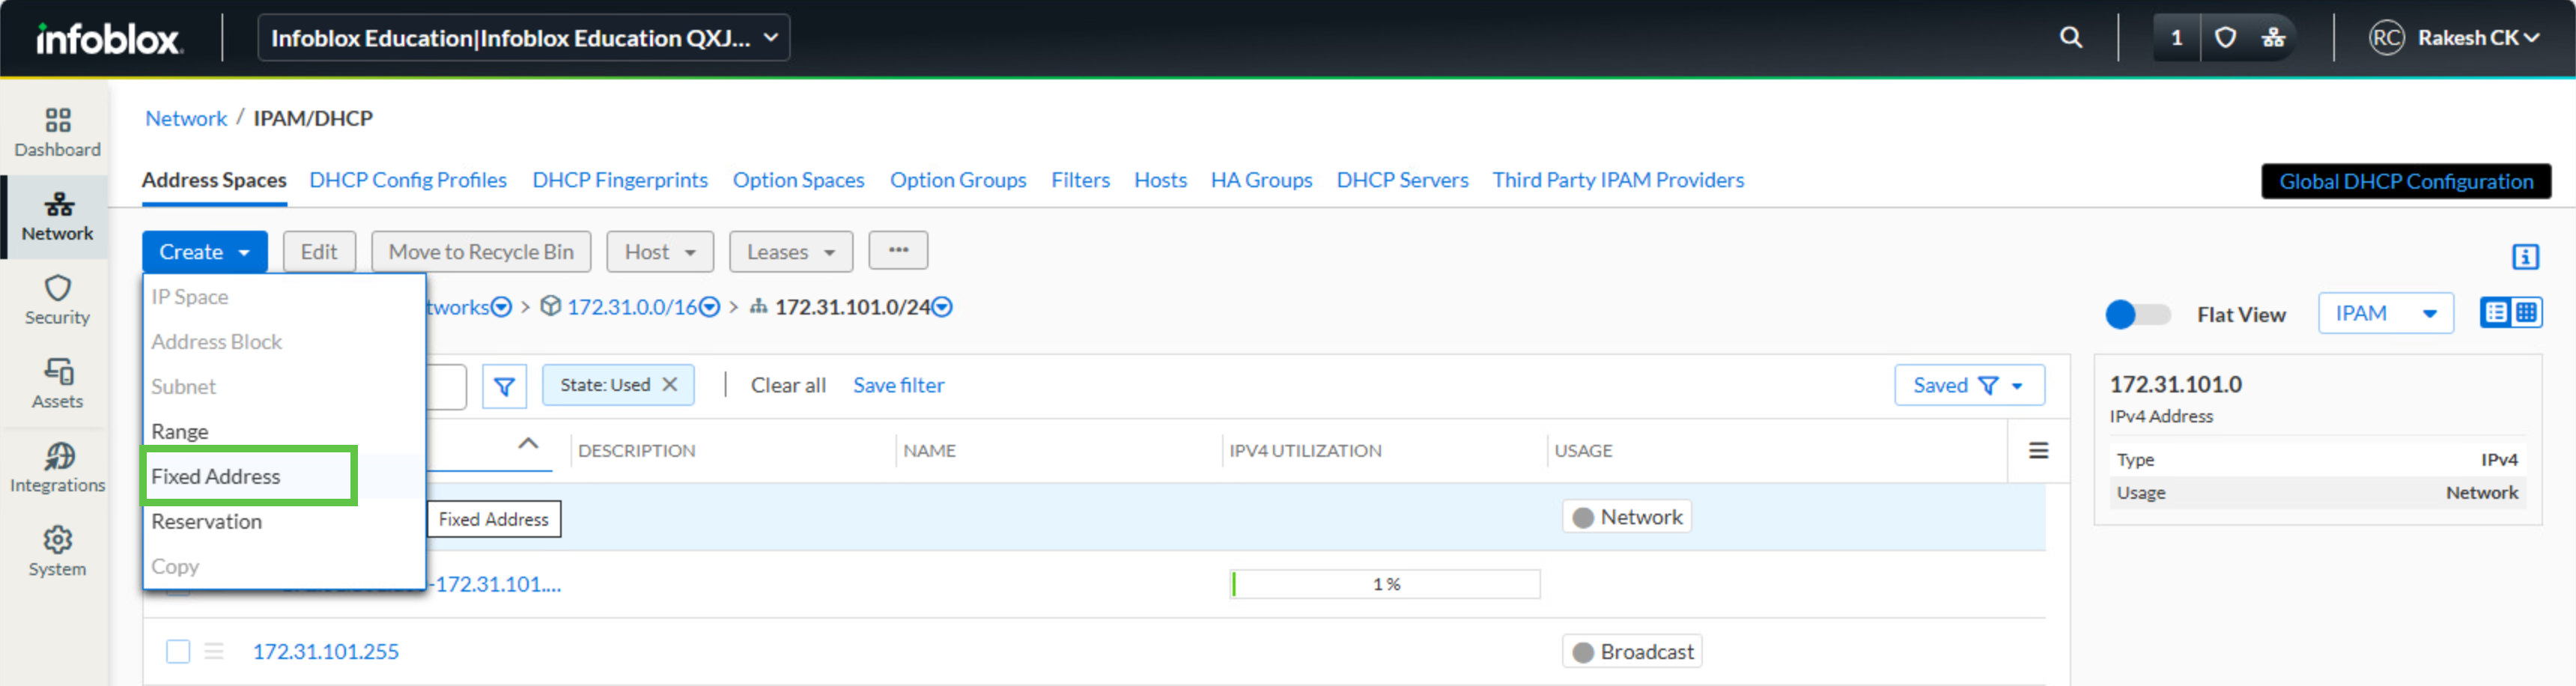
Click Create > Fixed Address.
-
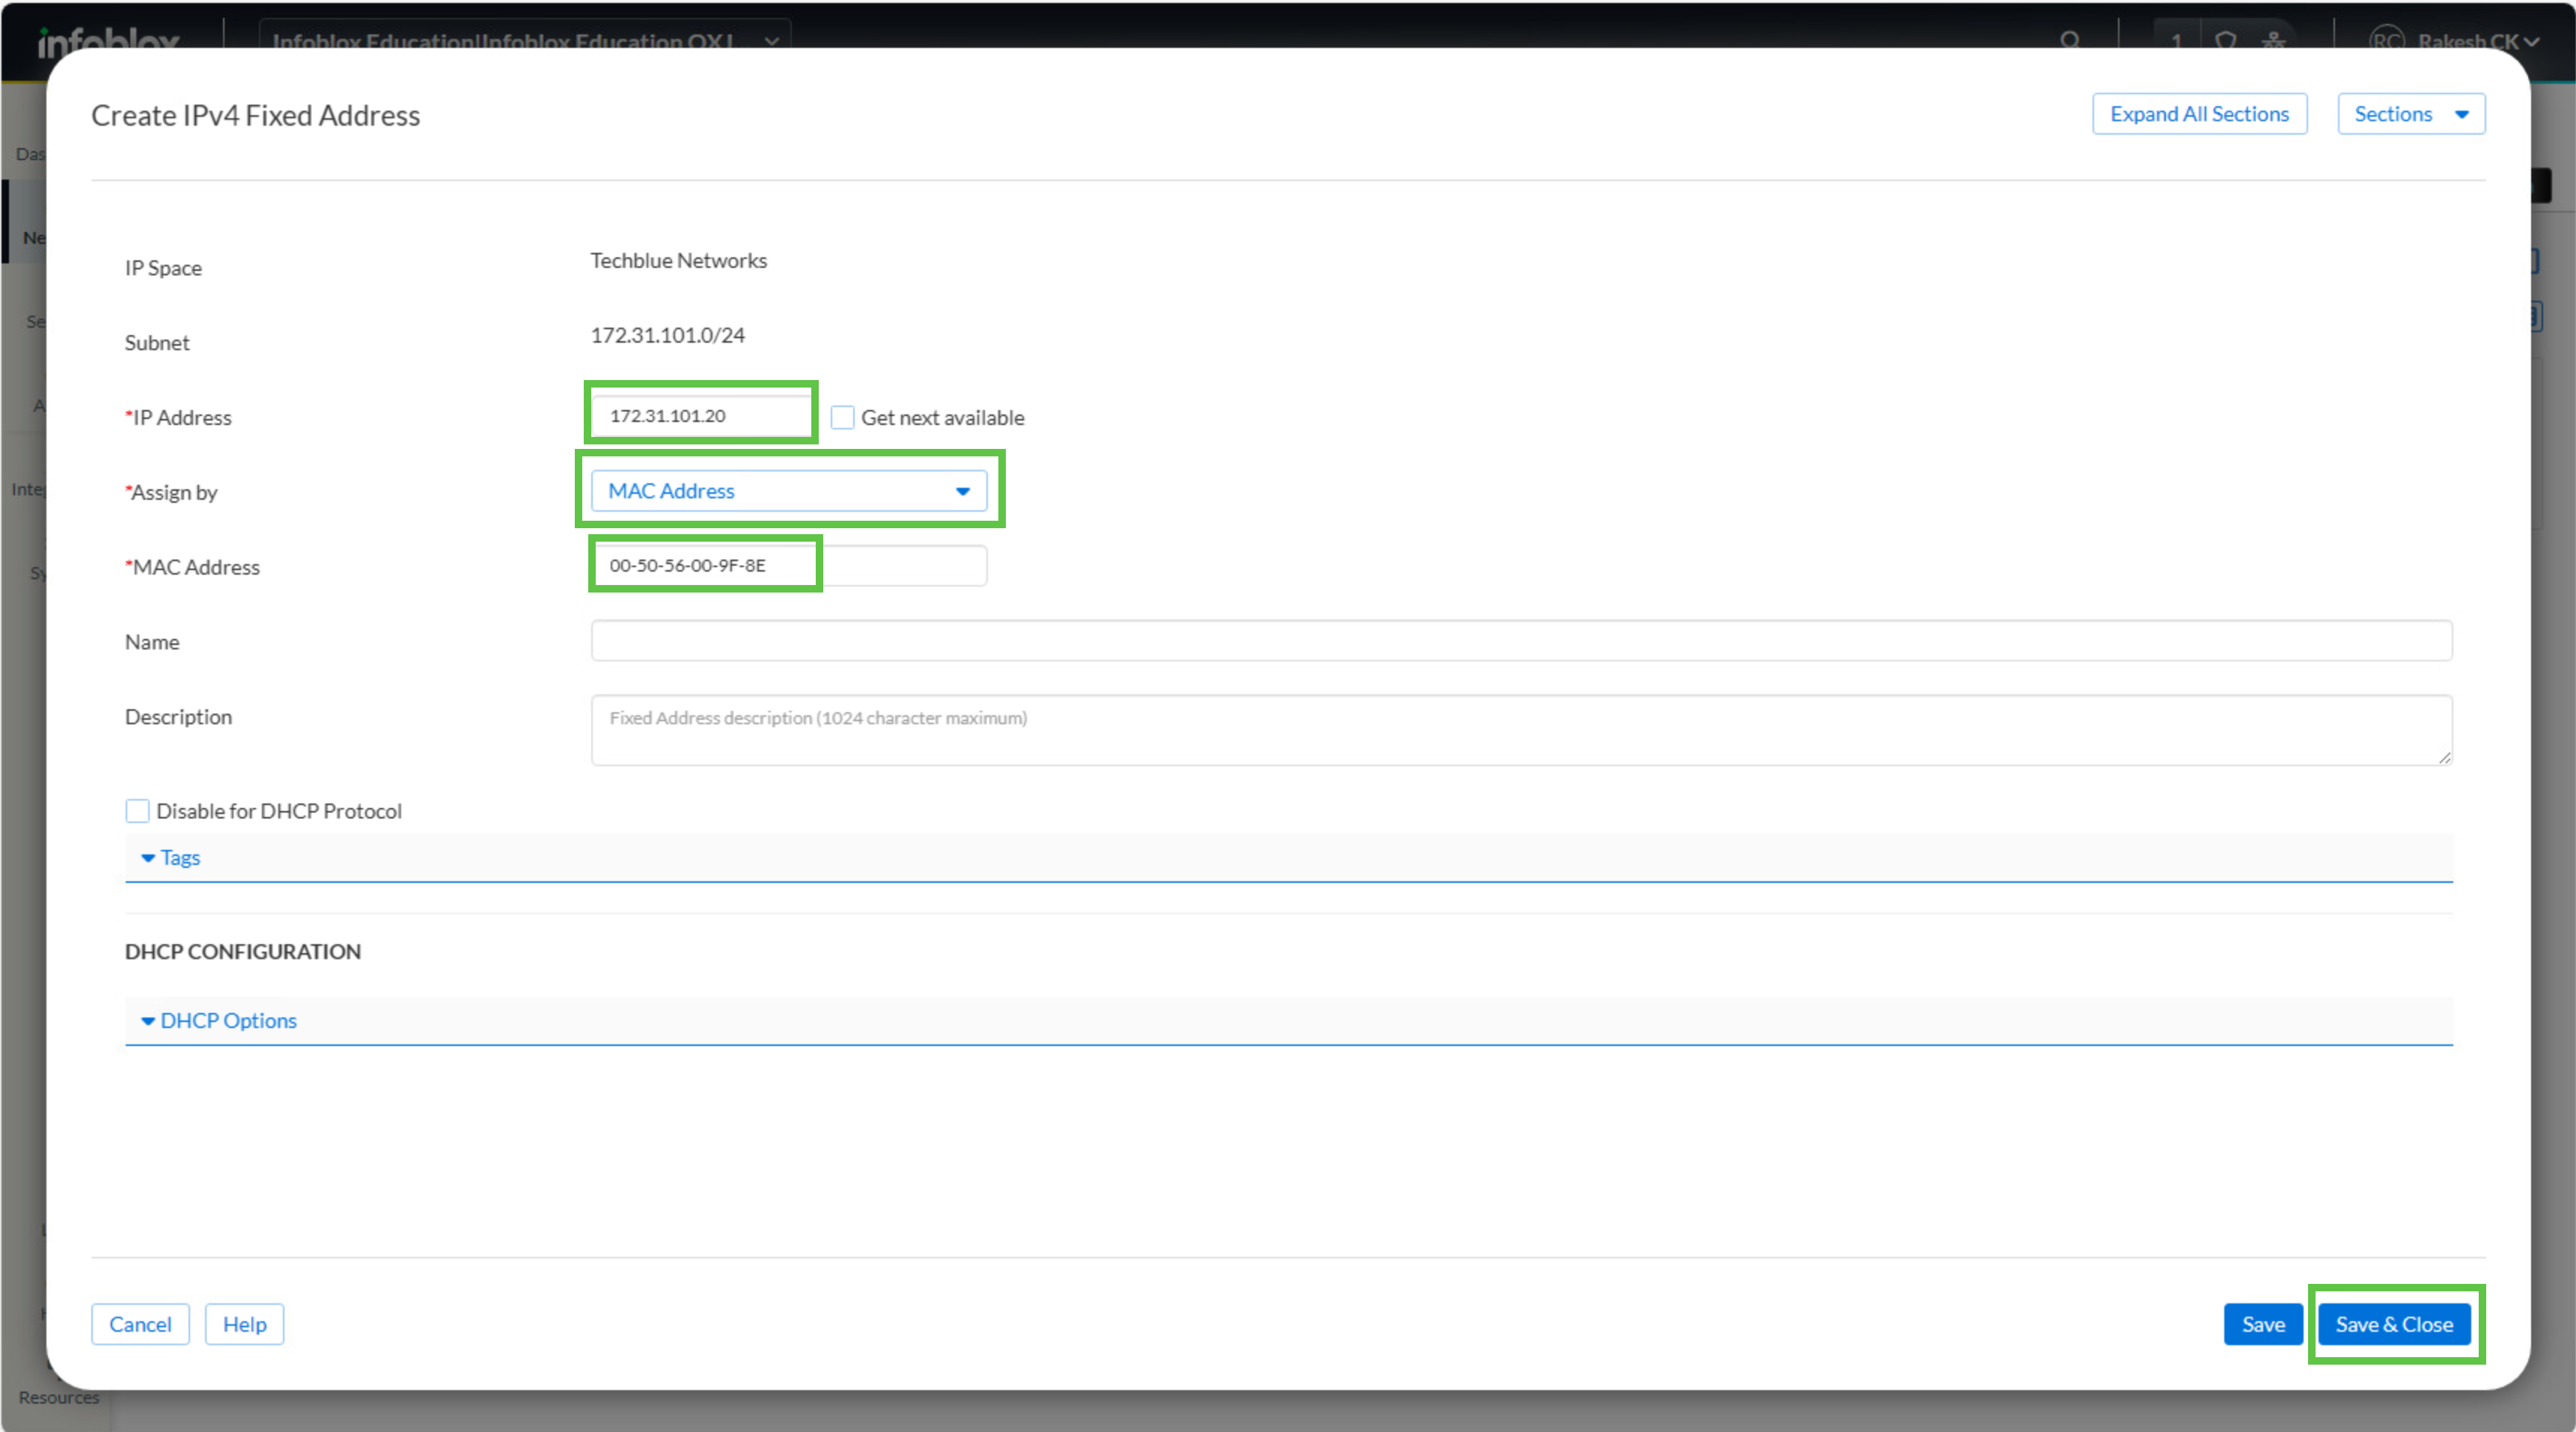
In the IP address field, enter 172.31.101.20.
-
In Assign by, select MAC Address.
-
In the MAC Address field, enter the MAC address you recorded from testing-windows.
-
Click Save & Close.
Task 3 Solution: Verify DHCP Assignment
After the fixed address is created, renew the Windows client’s DHCP lease so the client requests an address again. This verifies that the fixed address is active and that the client now receives the reserved address instead of a dynamically assigned one.
-
Switch back to testing-windows.
-
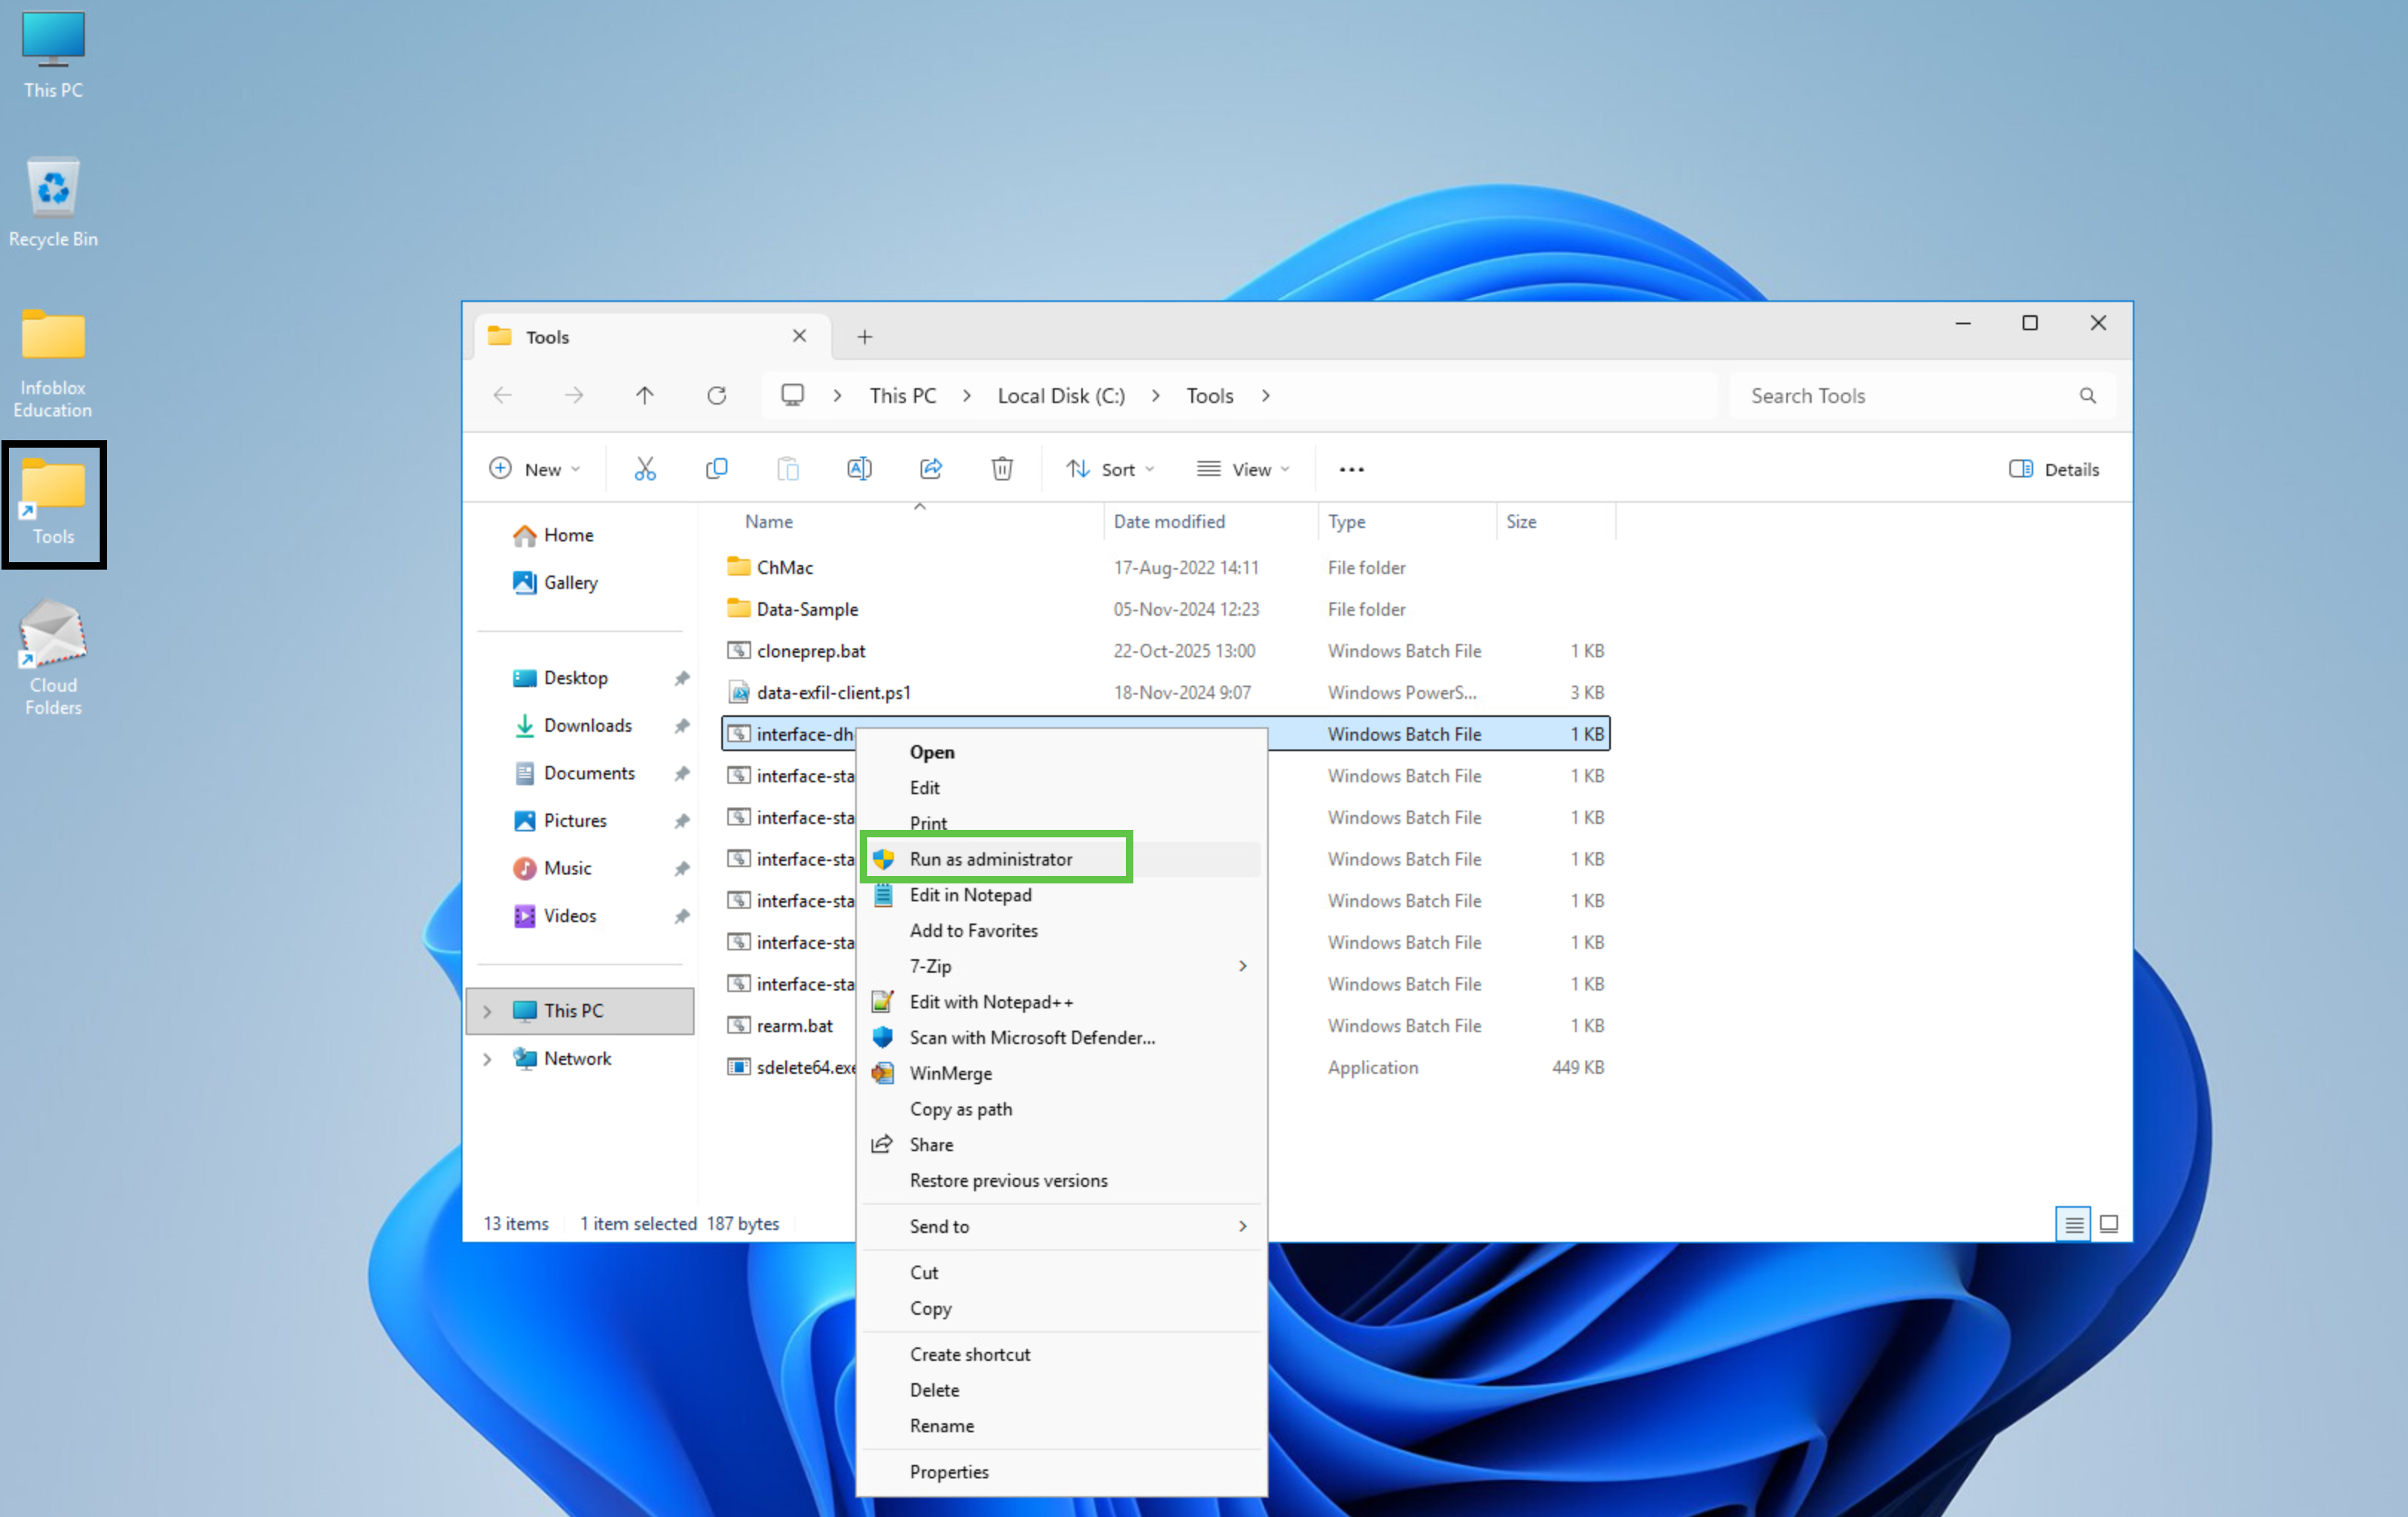
Open the Tools folder on the desktop.
-
Locate interface-dhcp.bat.
-
Right-click the file and select Run as administrator.
-
In the User Access Control prompt, click Yes.
-
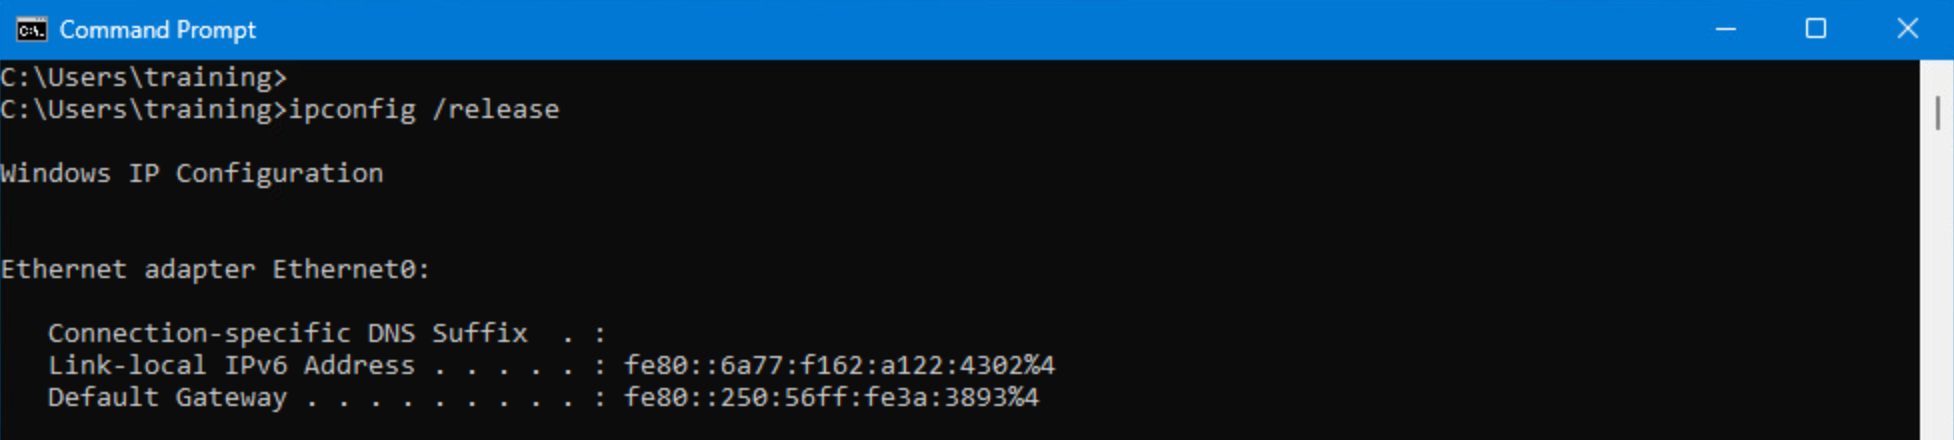
Open Command Prompt from the taskbar.
-
Run ipconfig /release.
-
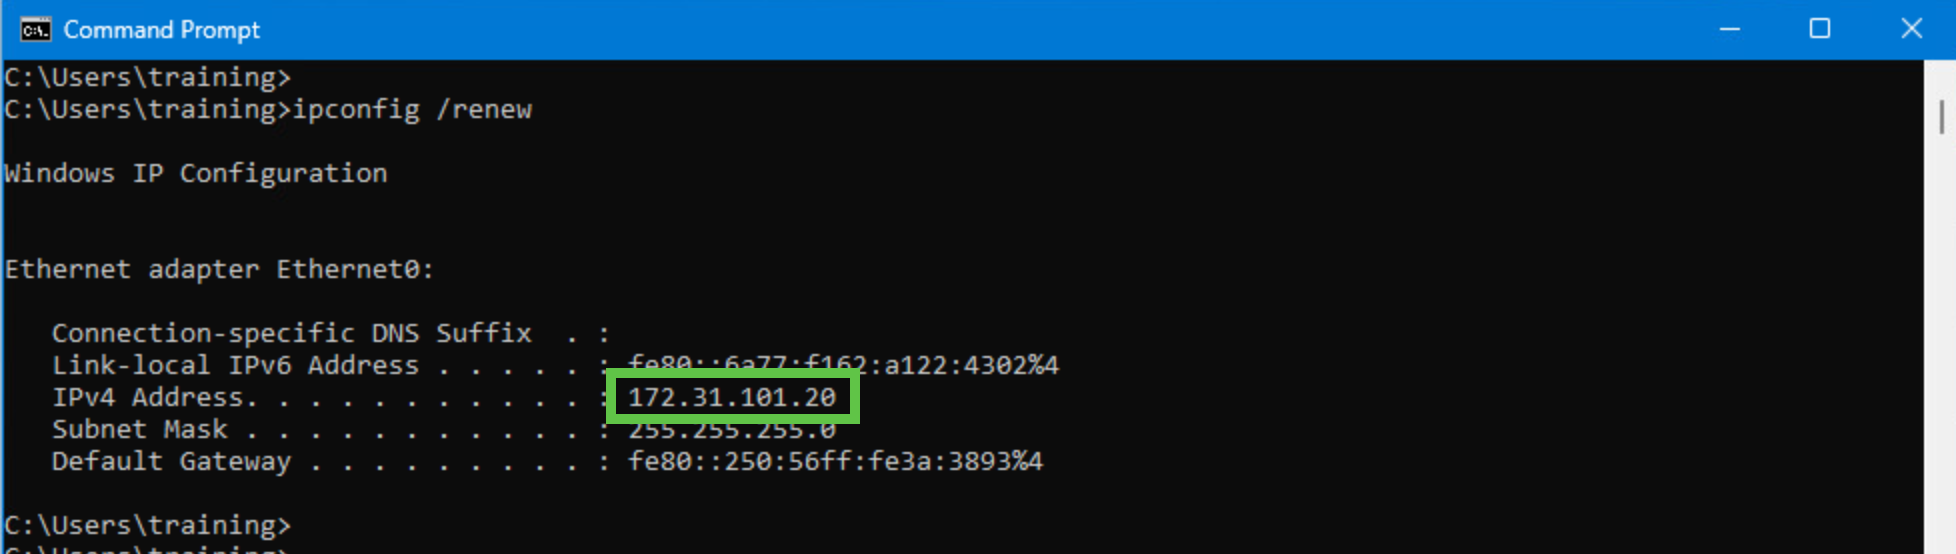
Run ipconfig /renew.
-
Review the output and confirm that the IPv4 address is 172.31.101.20.