Scenario
You are a DNS administrator supporting two environments - Production and Staging - that use the same application name but must return different answers depending on where the query originates. In this lab environment, queries for app.techblue.net from the 10.35.22.0/24 network should return the staging address 10.10.10.10, while queries from other networks should continue to return the default address 172.31.10.20. Your goal is to create a new DNS view for staging, copy the existing zone into that view, update the record only in the staging view, and verify that the same name resolves differently based on the client source network.
Estimated Completion Time
-
40 minute
Prerequisites
-
Administrative access to the Infoblox Portal
Learning Content
Tasks
-
Create Default View record
-
Validate initial resolution
-
Create Staging View
-
Copy Zone to Staging View
-
Update Staging Records
-
Validate View-Based Resolution
-
Cleanup
Task 1: Create Default View record
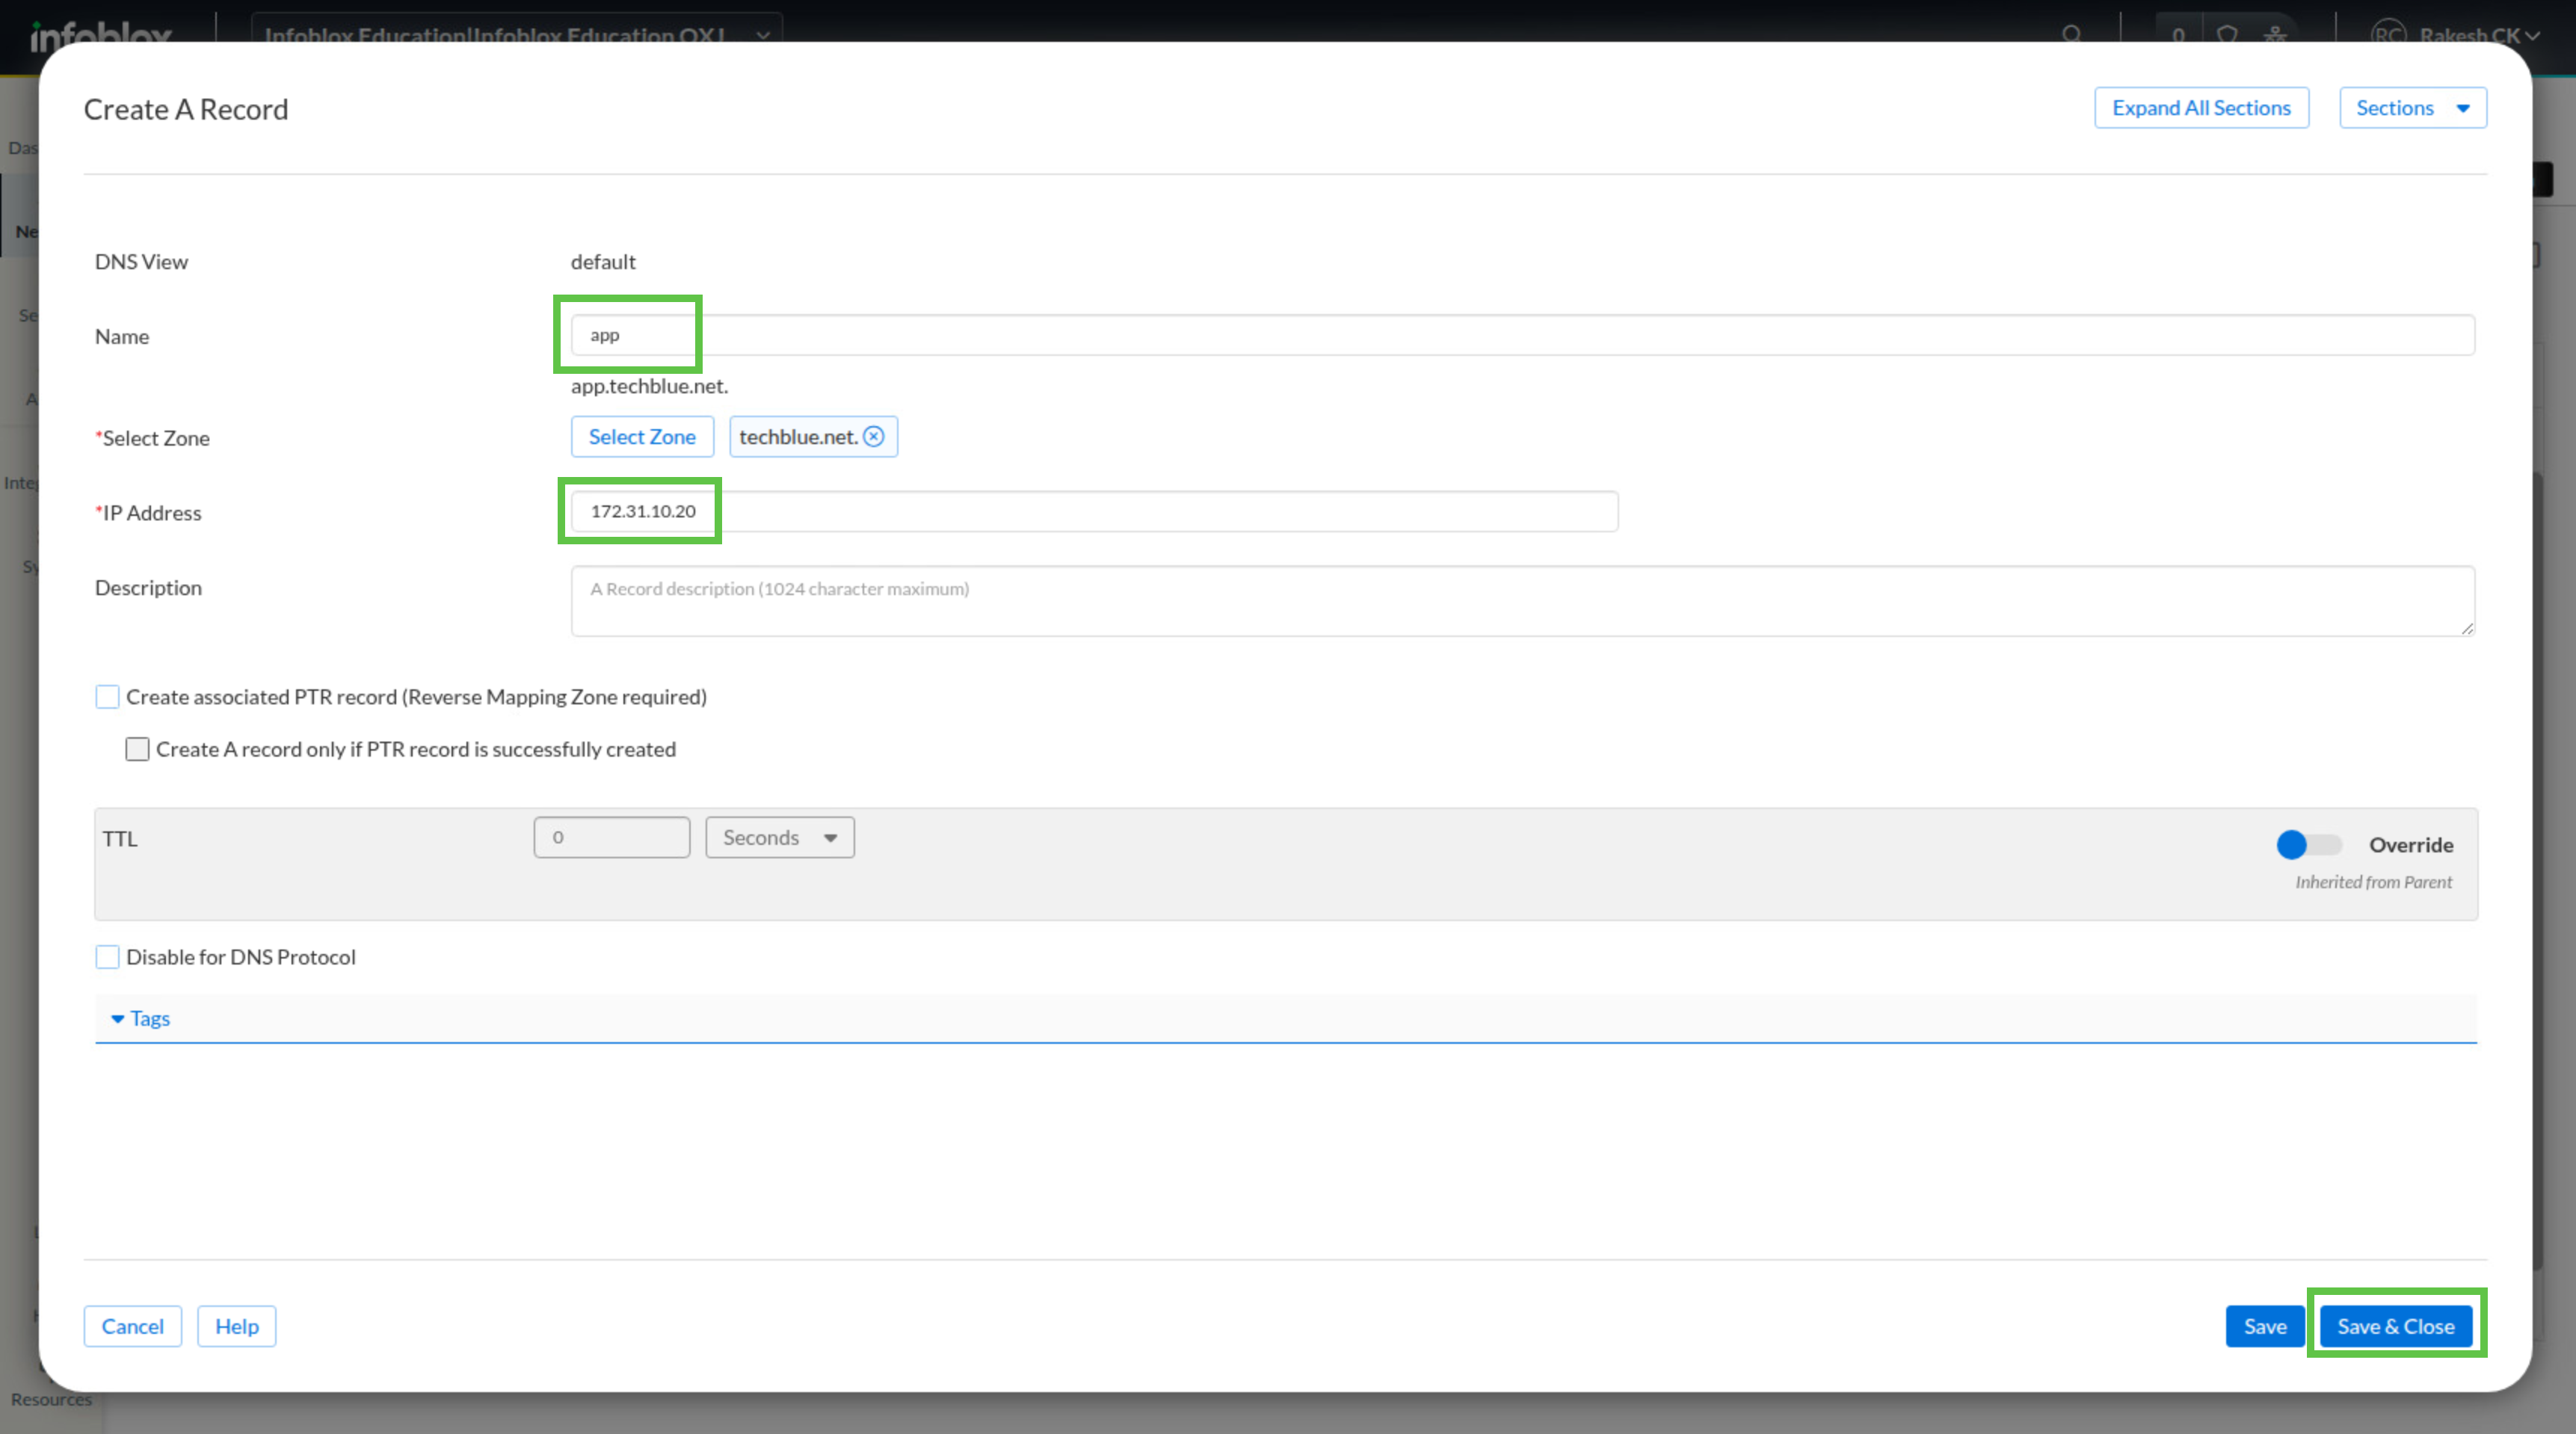
In the default DNS view, open zone techblue.net. Create an A record named app with IP address 172.31.10.20 so the default view returns the production address for app.techblue.net.
Task 2: Validate initial resolution
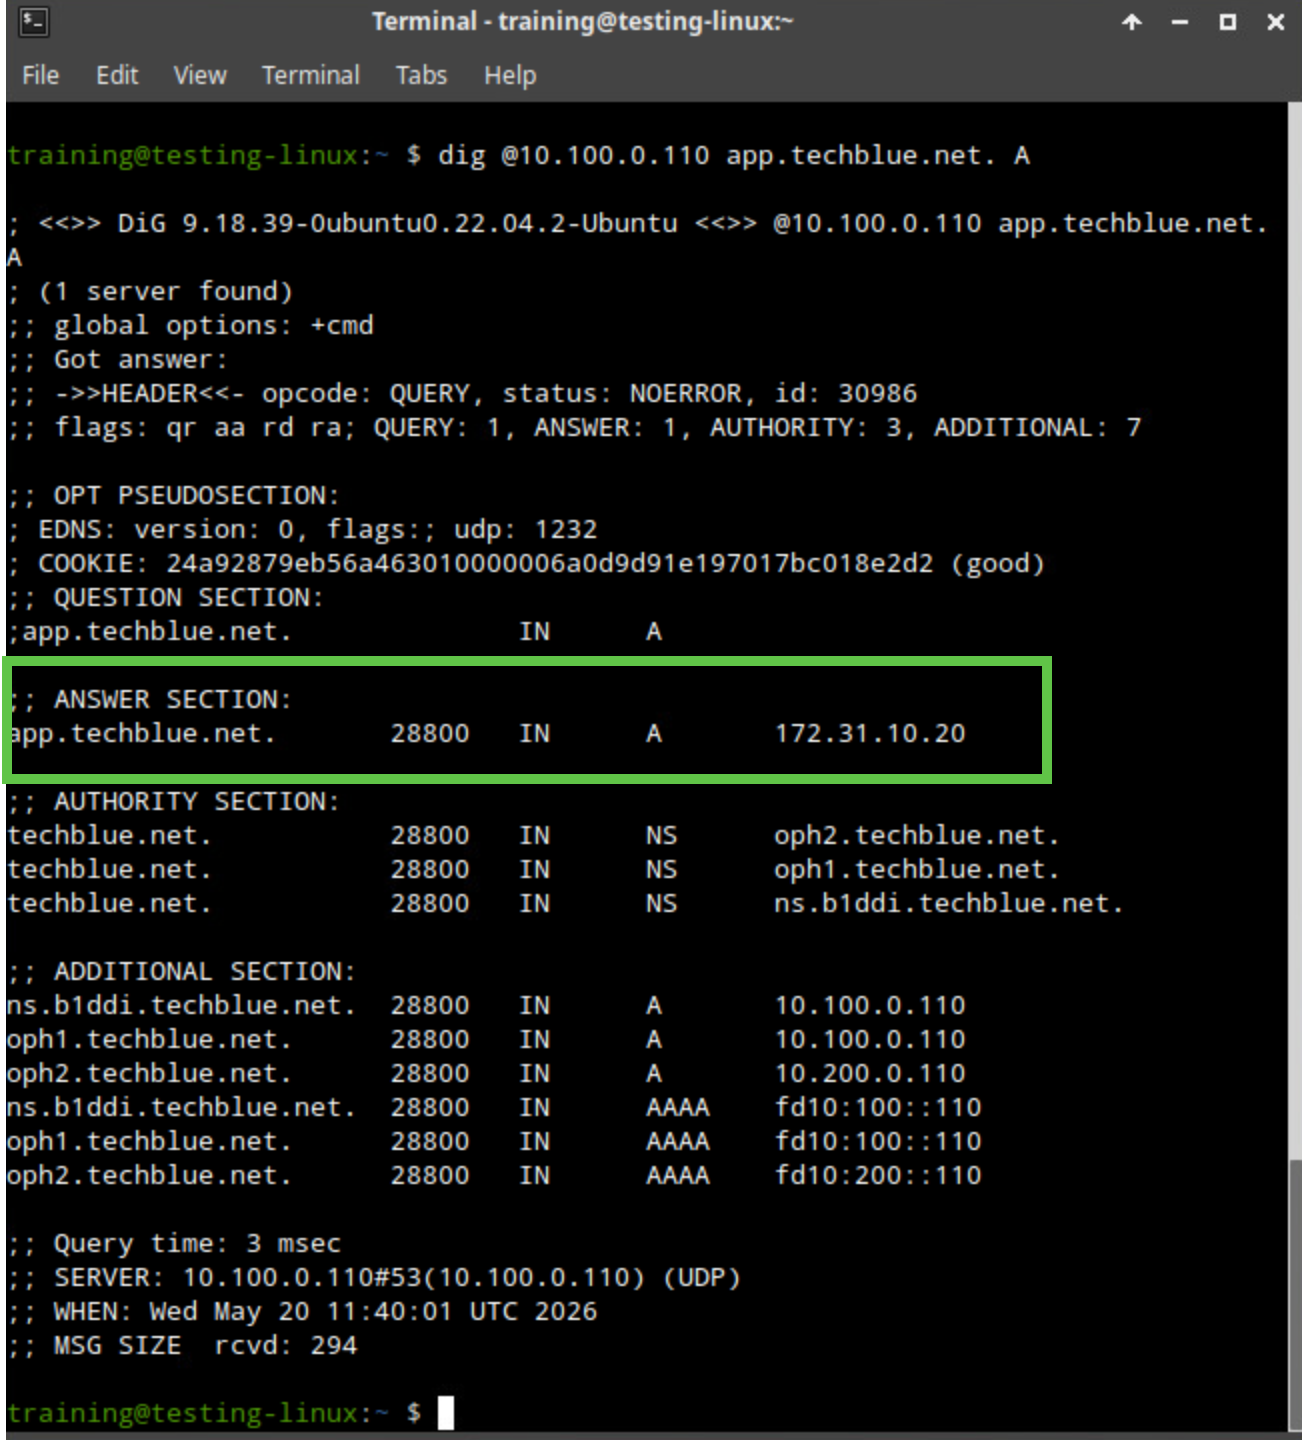
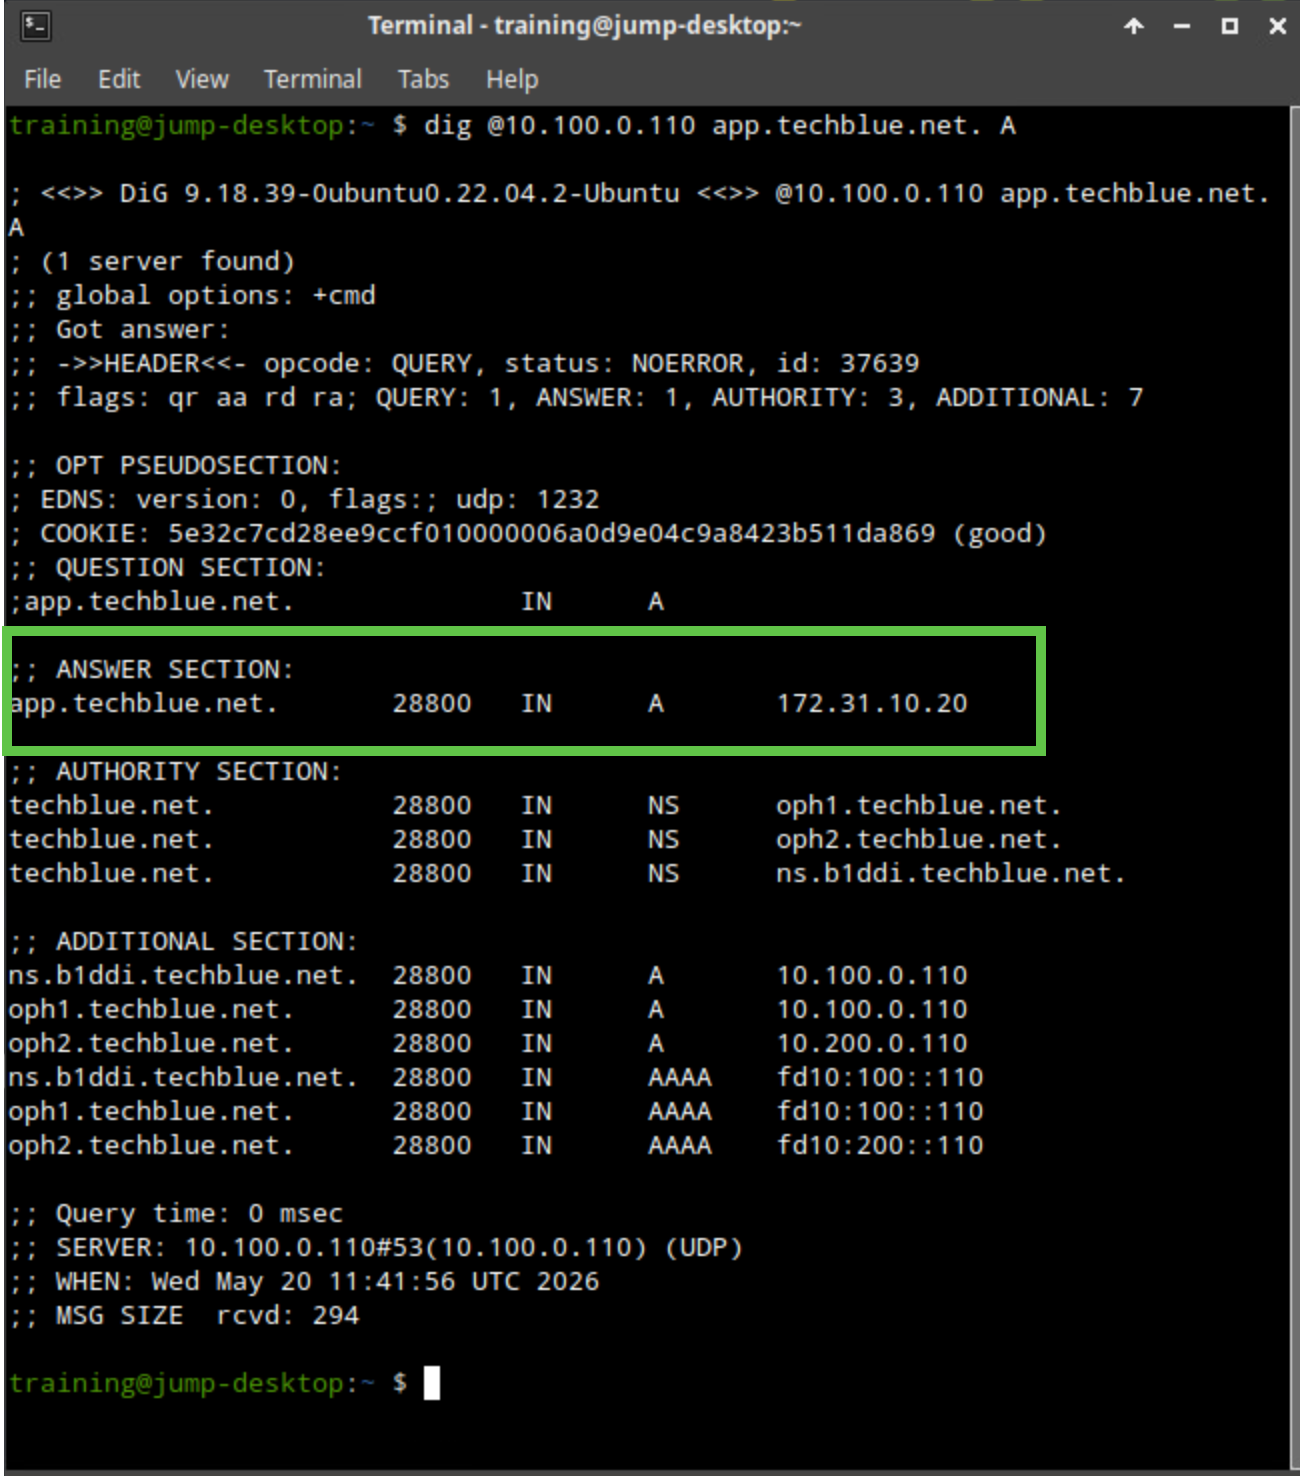
From both testing-linux and jump-desktop, run dig @10.100.0.110 app.techblue.net. A and confirm that both clients currently receive 172.31.10.20. This establishes the baseline before you create a staging-specific view.
Task 3: Create Staging View
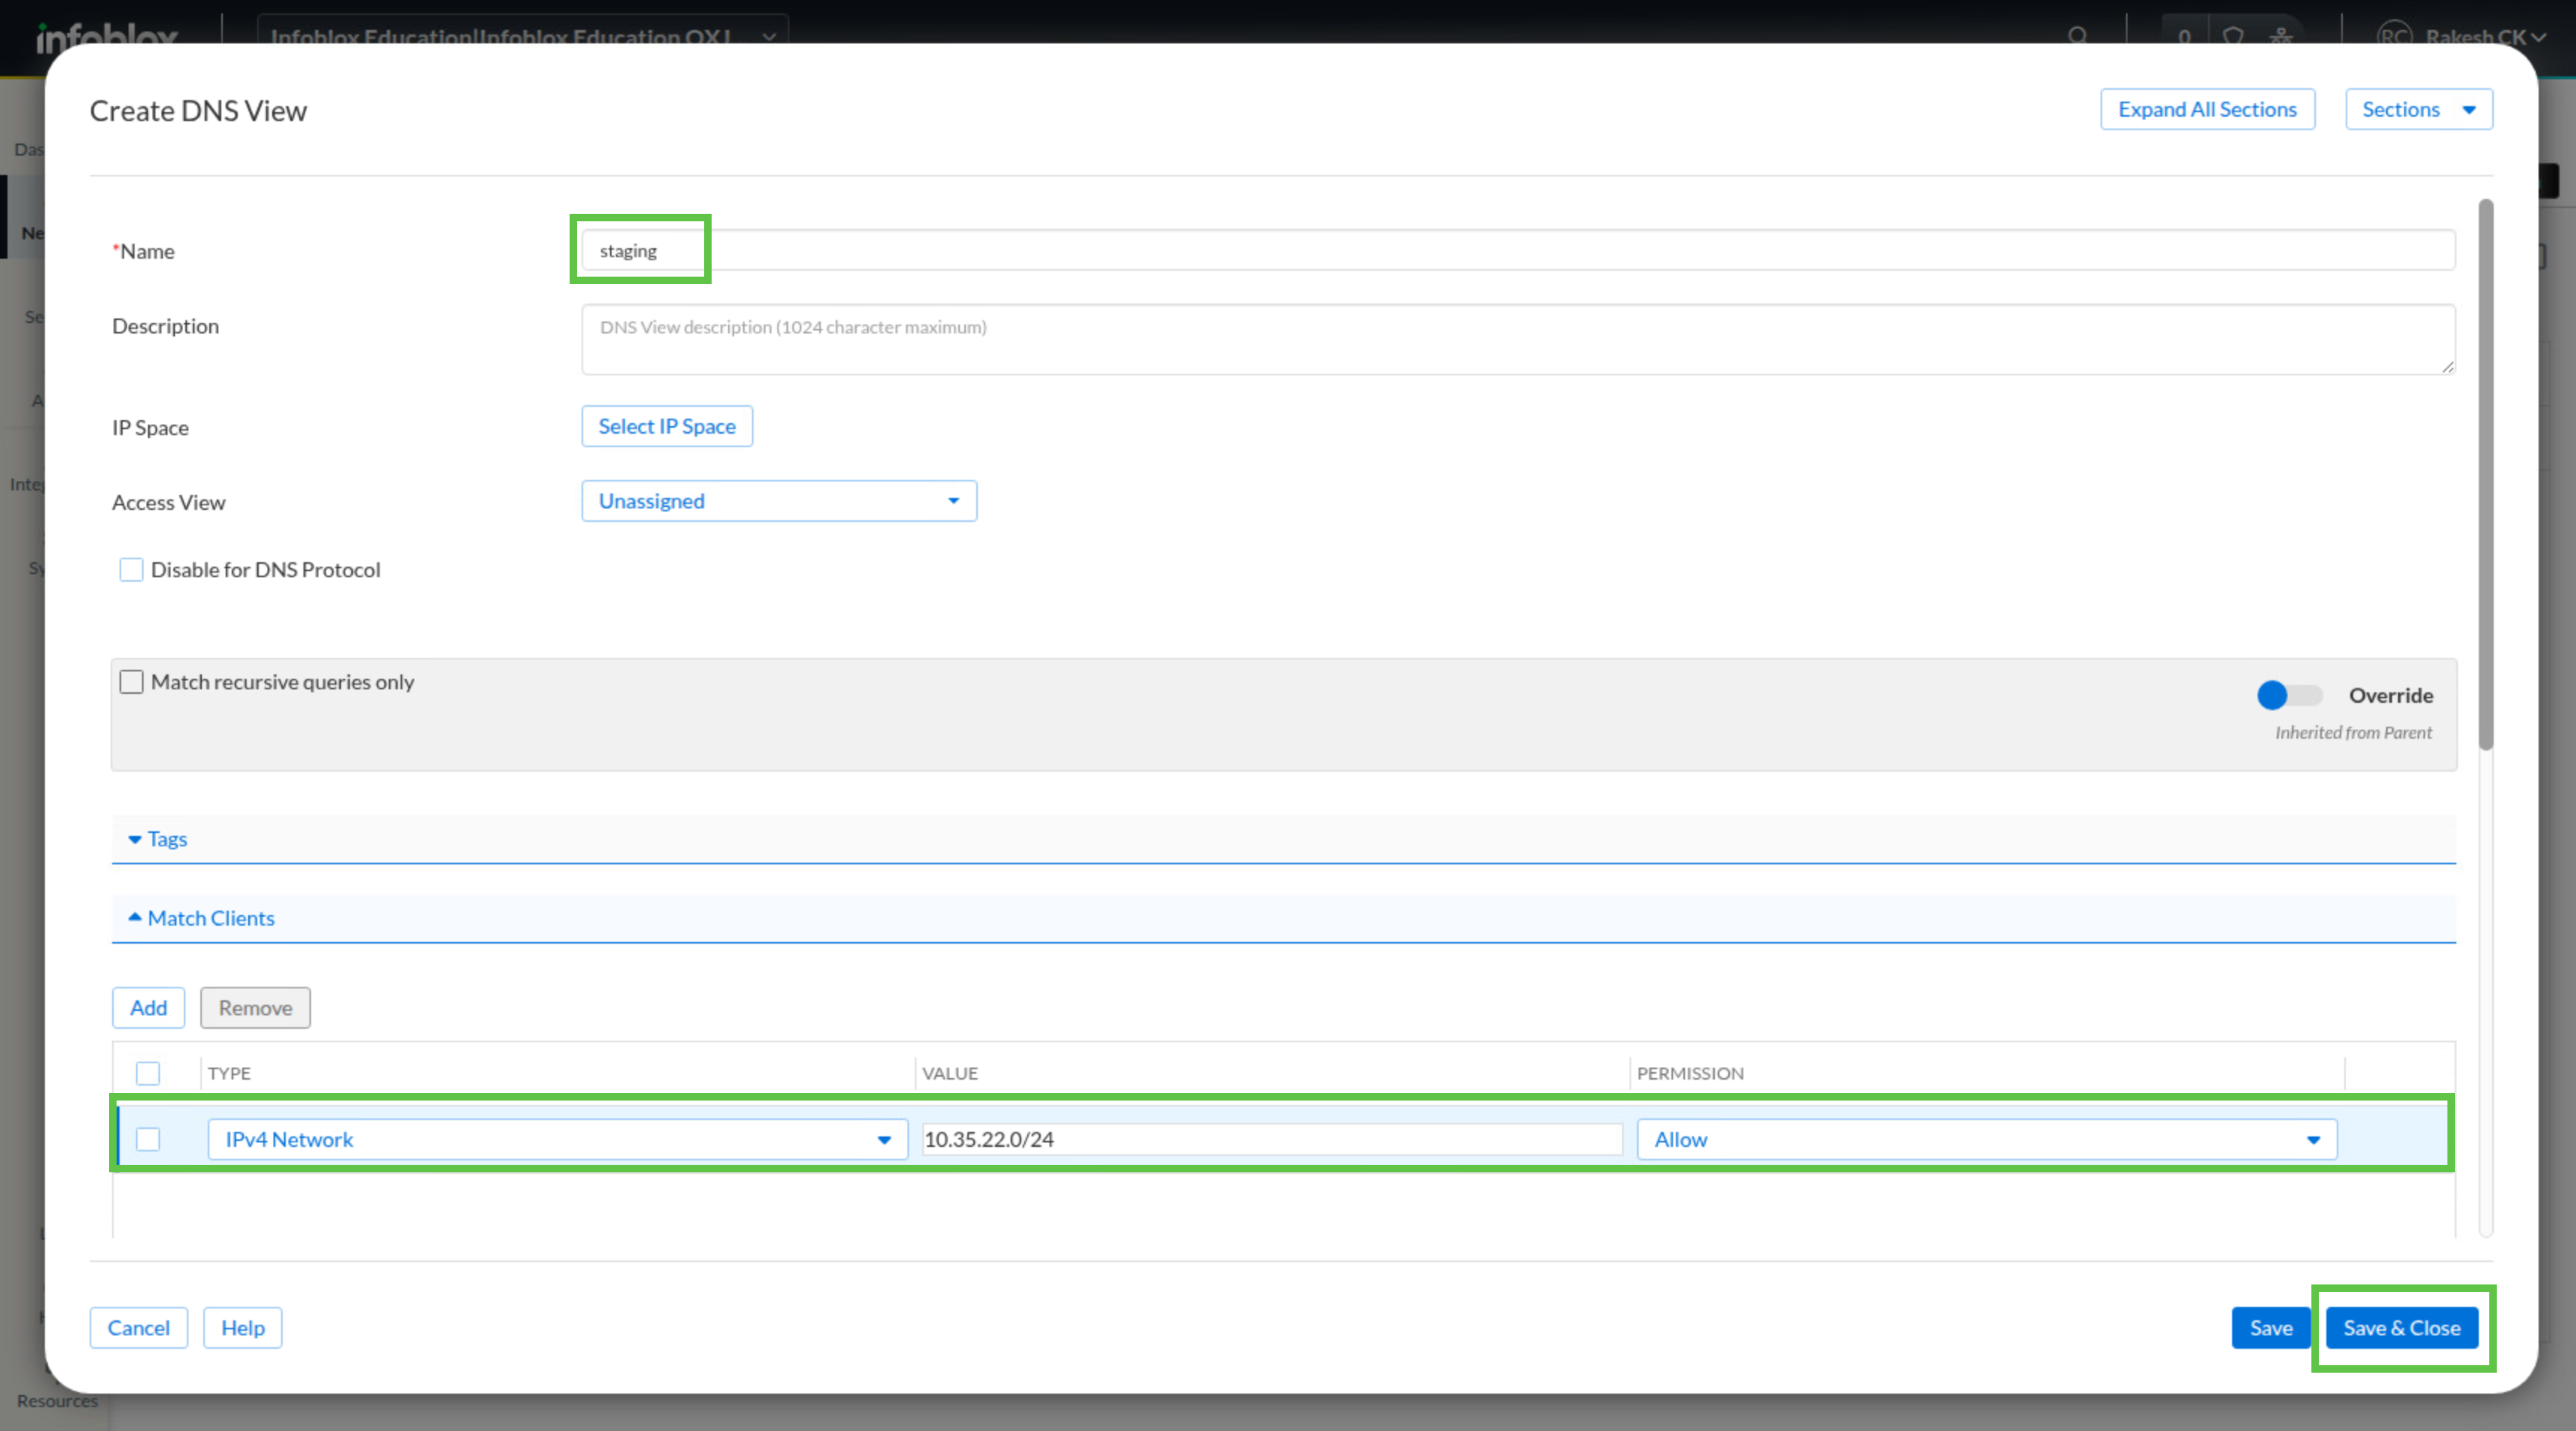
Create a DNS view named staging. Under Match Clients, add an IPv4 Network entry for 10.35.22.0/24 with the permission Allow. This view will apply only to clients in the staging source network.
Task 4: Copy Zones to Staging View
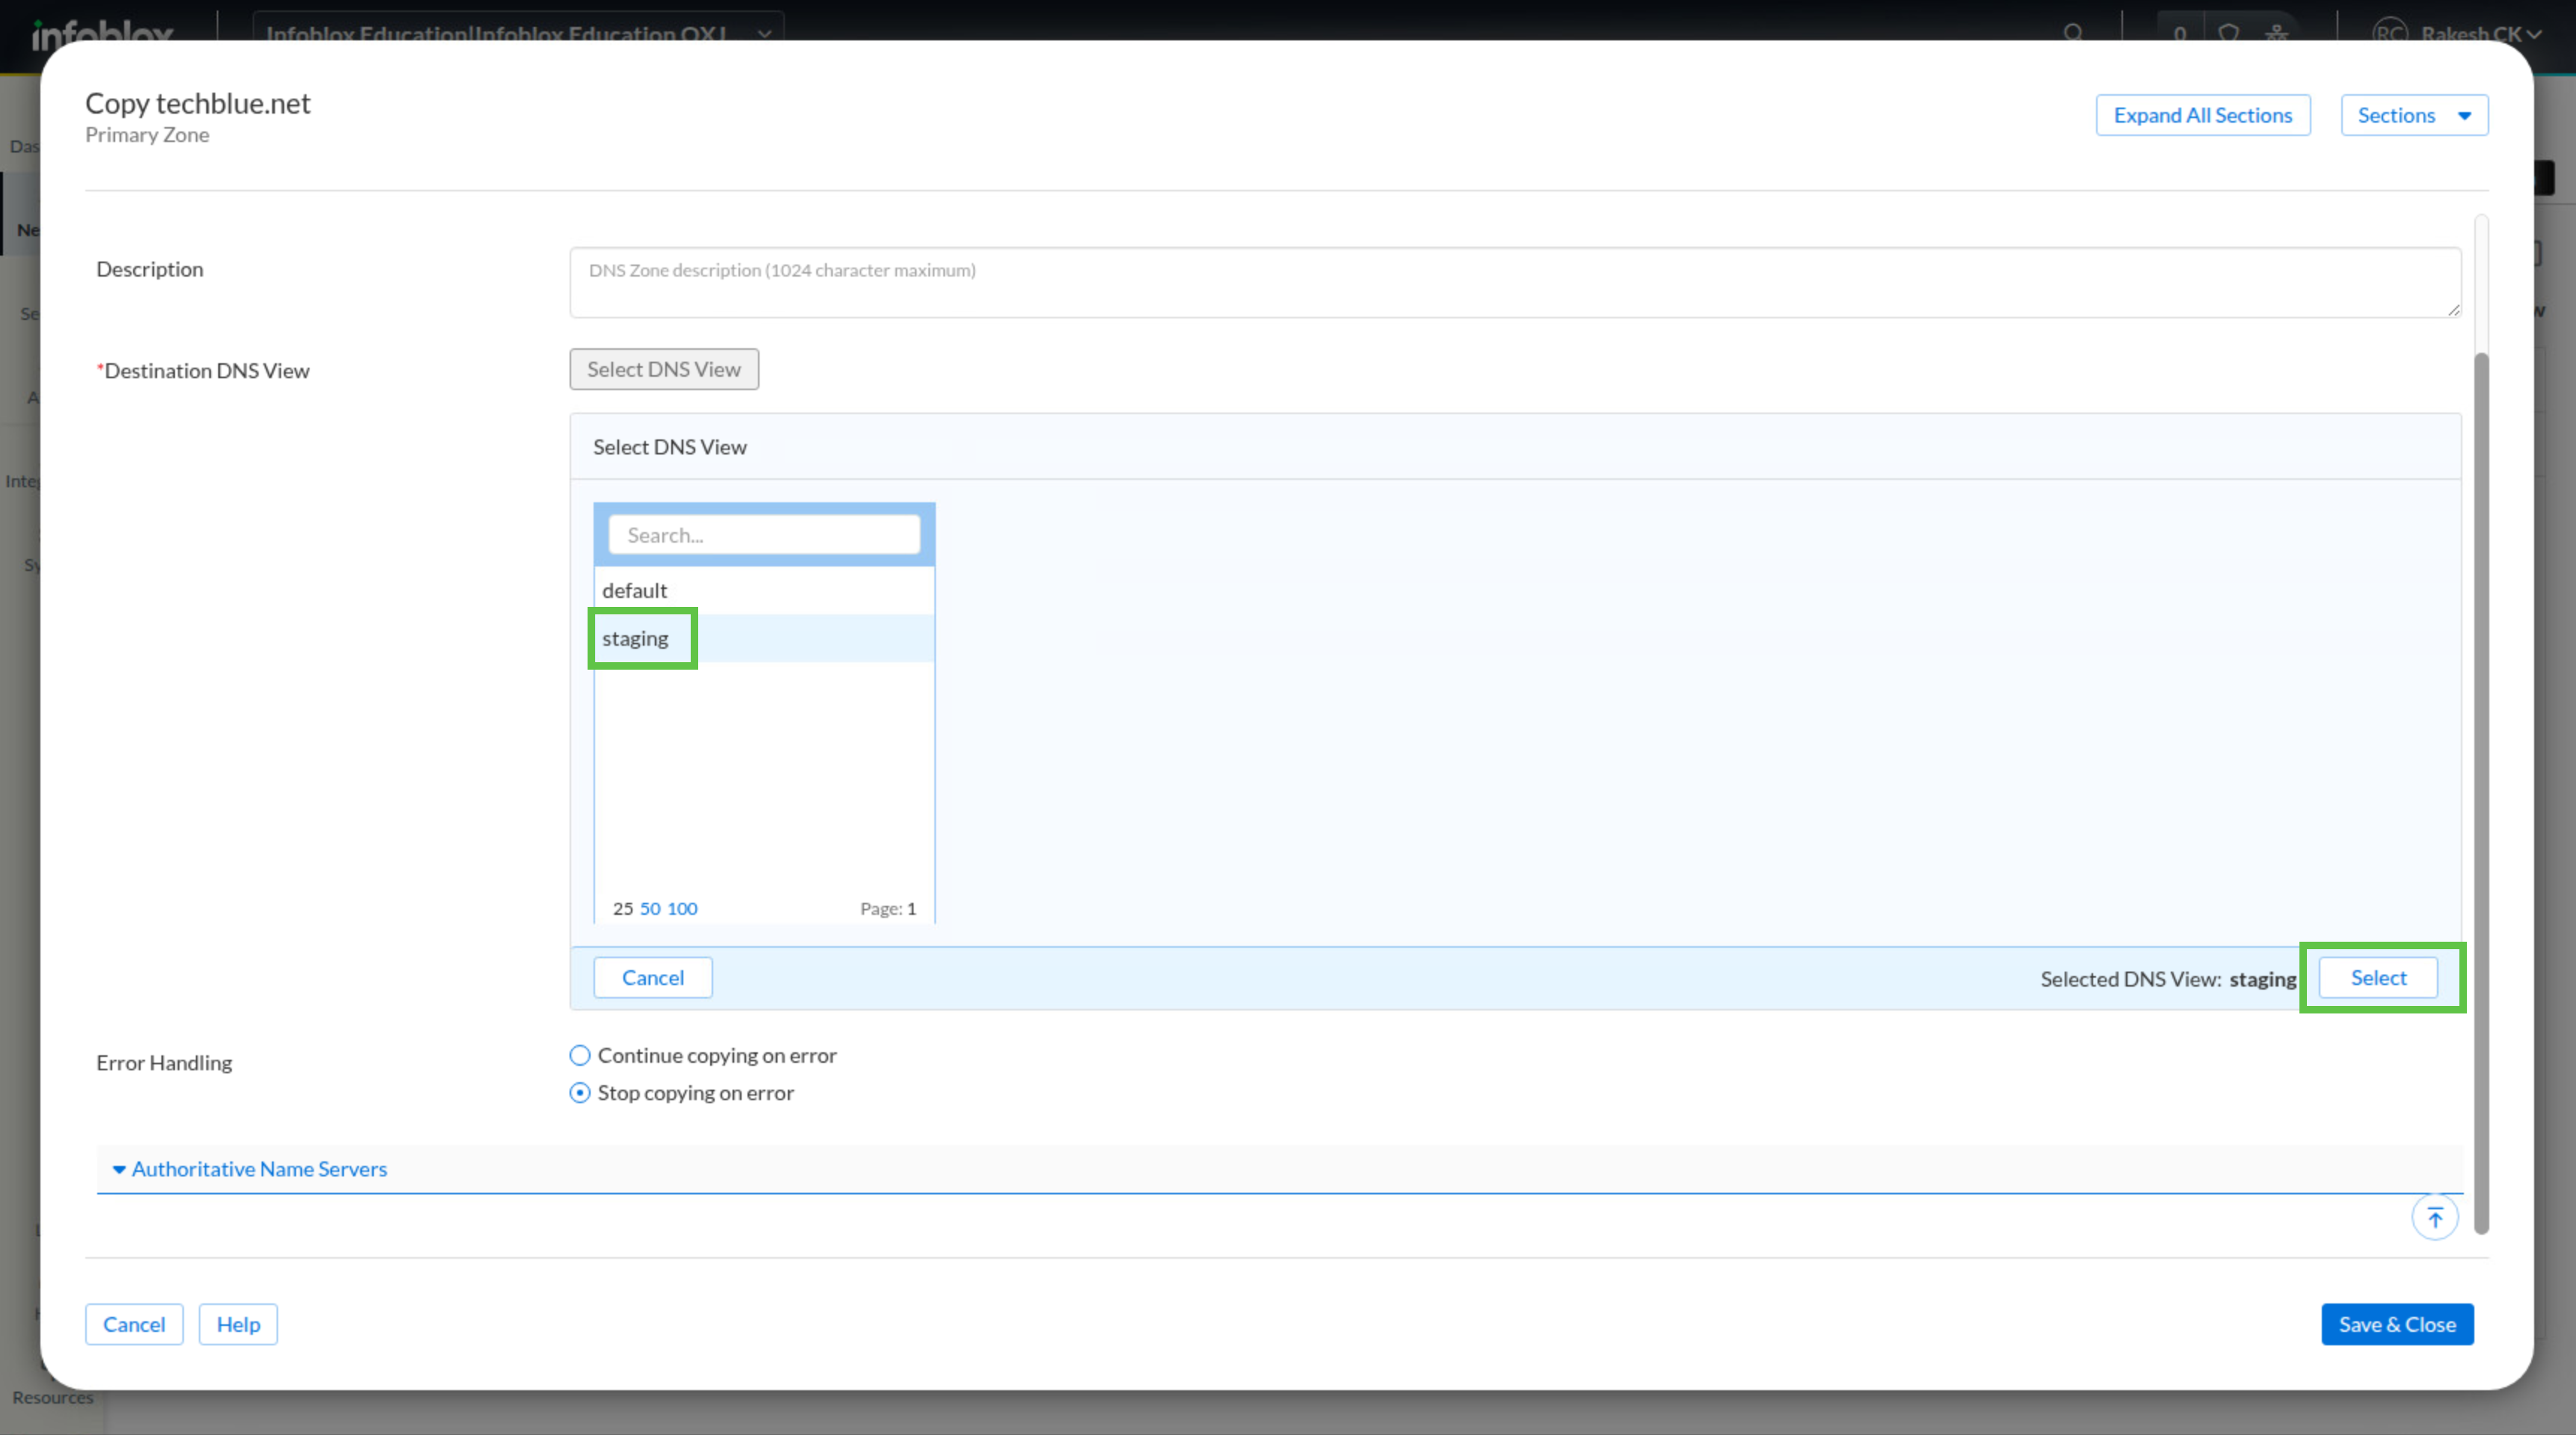
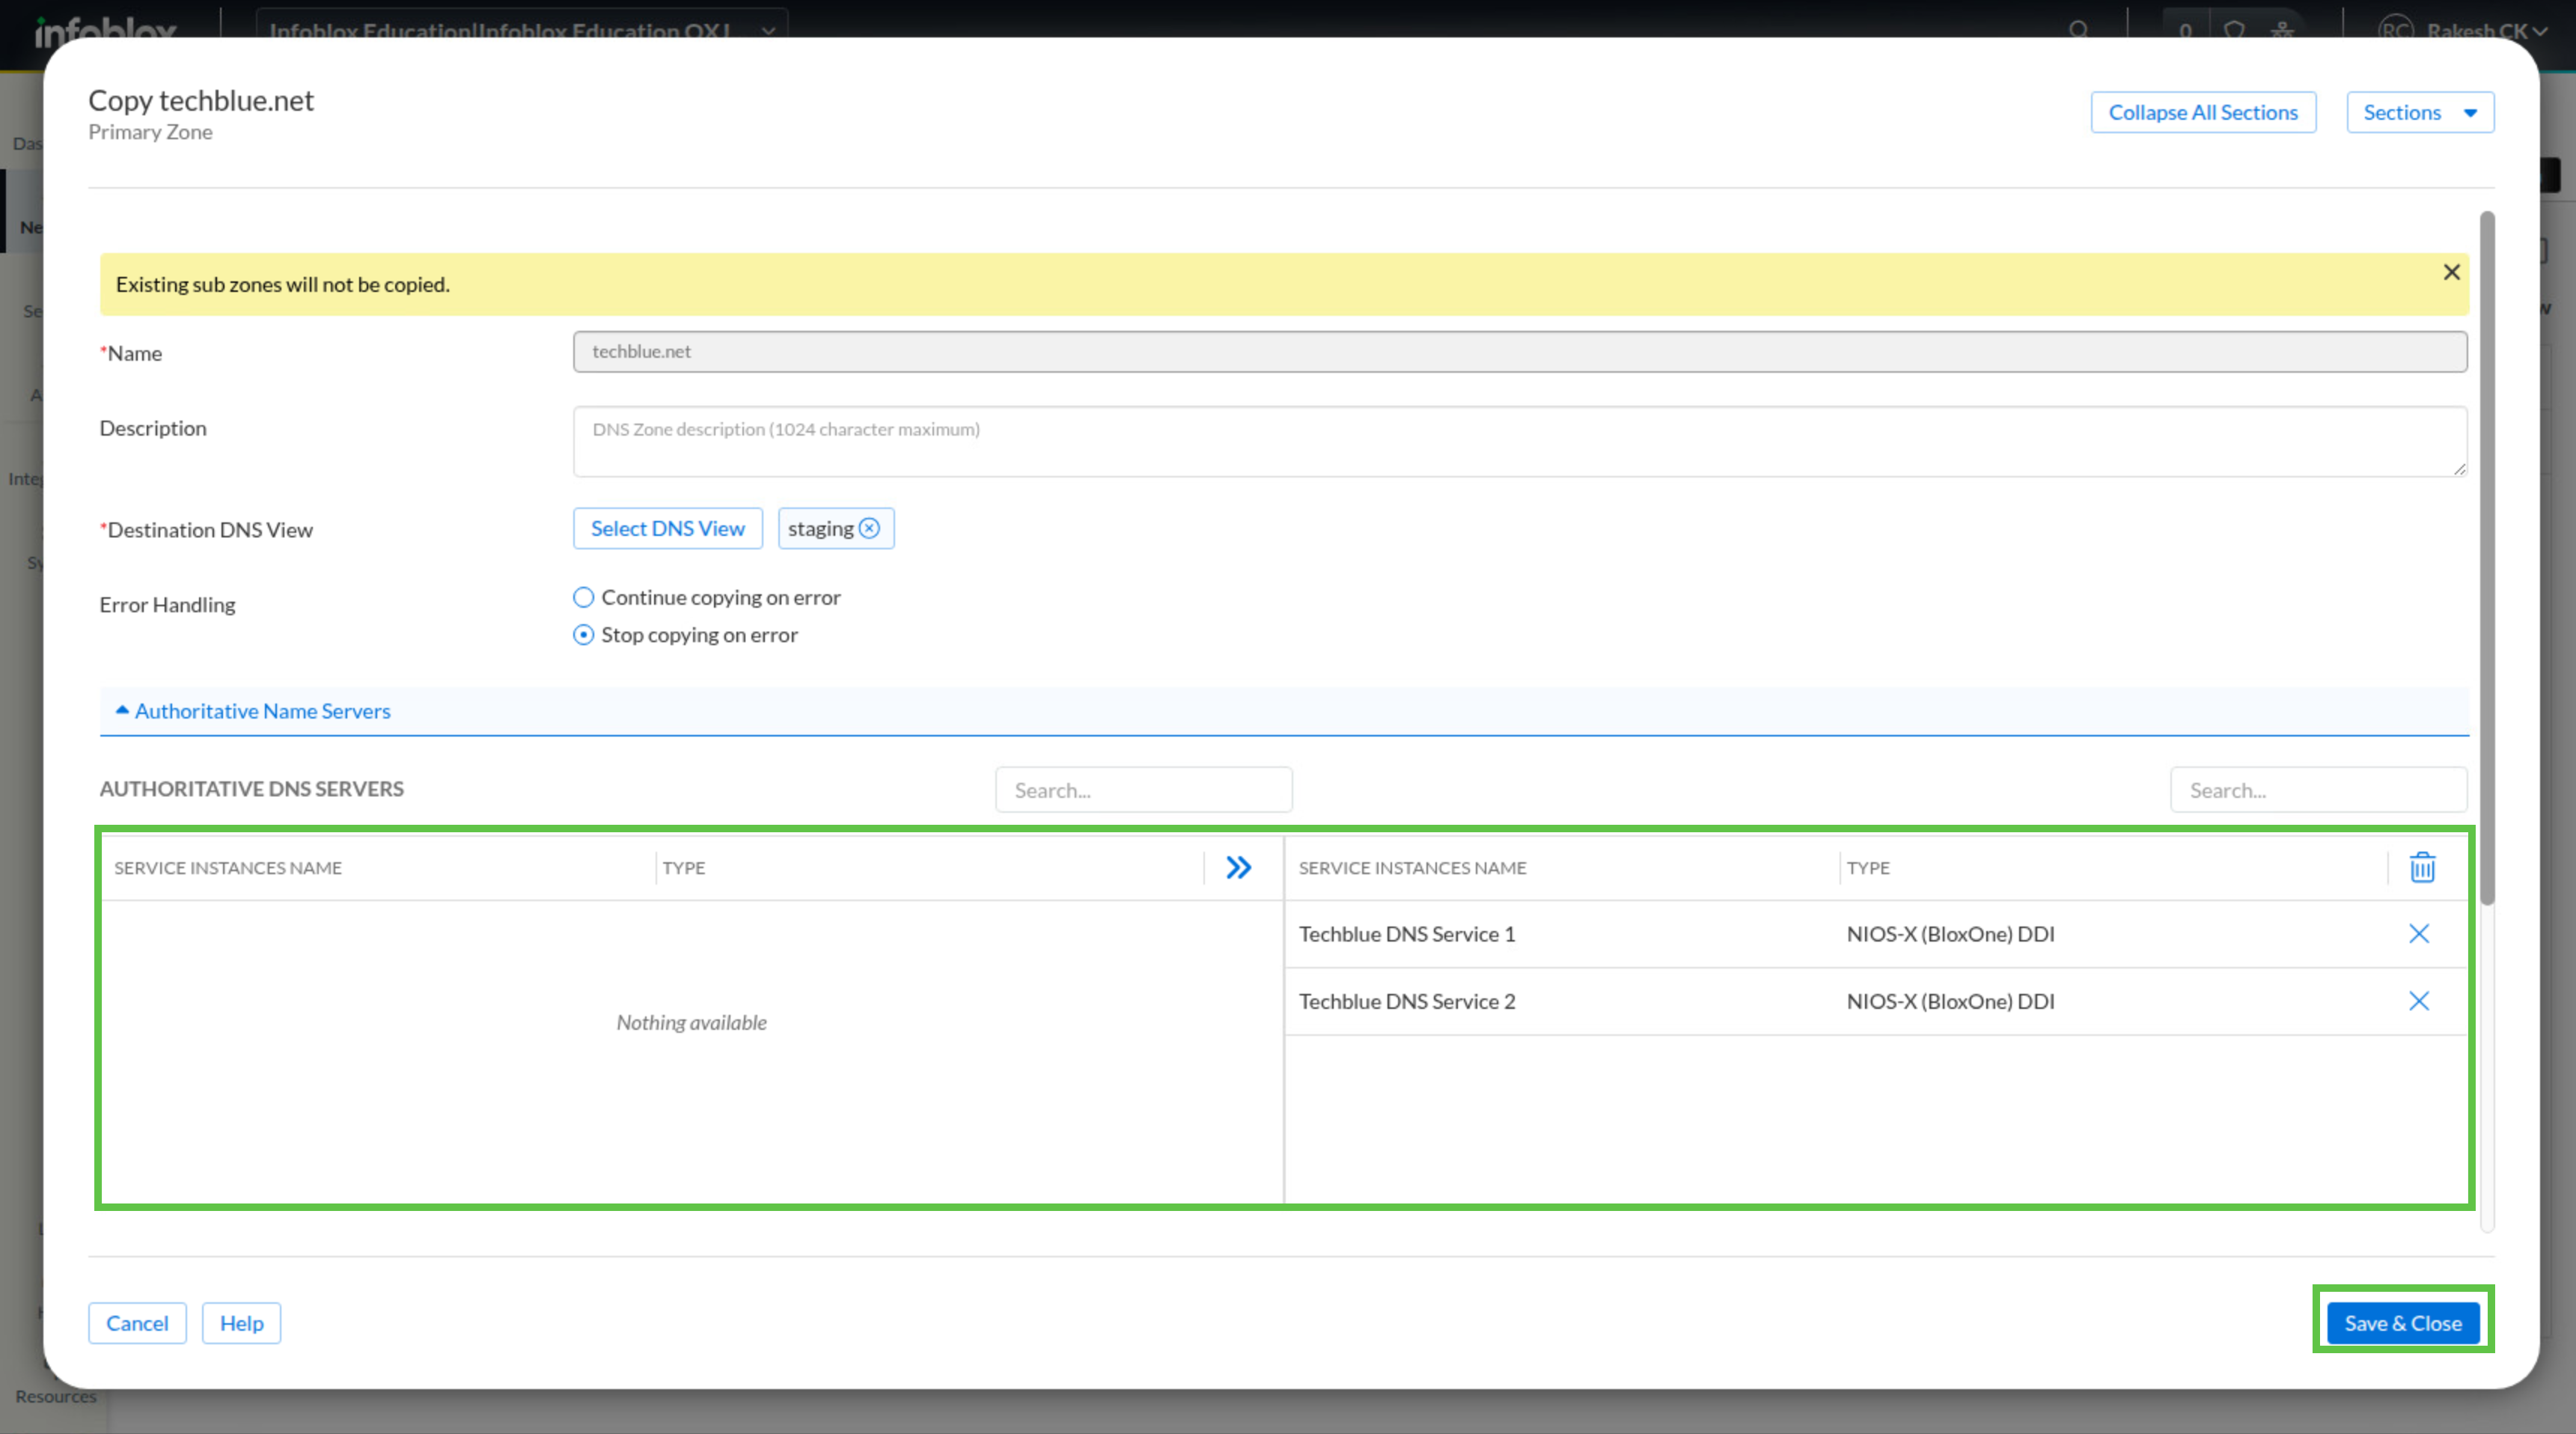
In the default DNS view, copy zone techblue.net to the staging DNS view. When prompted for the destination view, select staging, and include Techblue DNS Service 1 and Techblue DNS Service 2 as the authoritative DNS servers for the copied zone.
Task 5: Update Staging Records
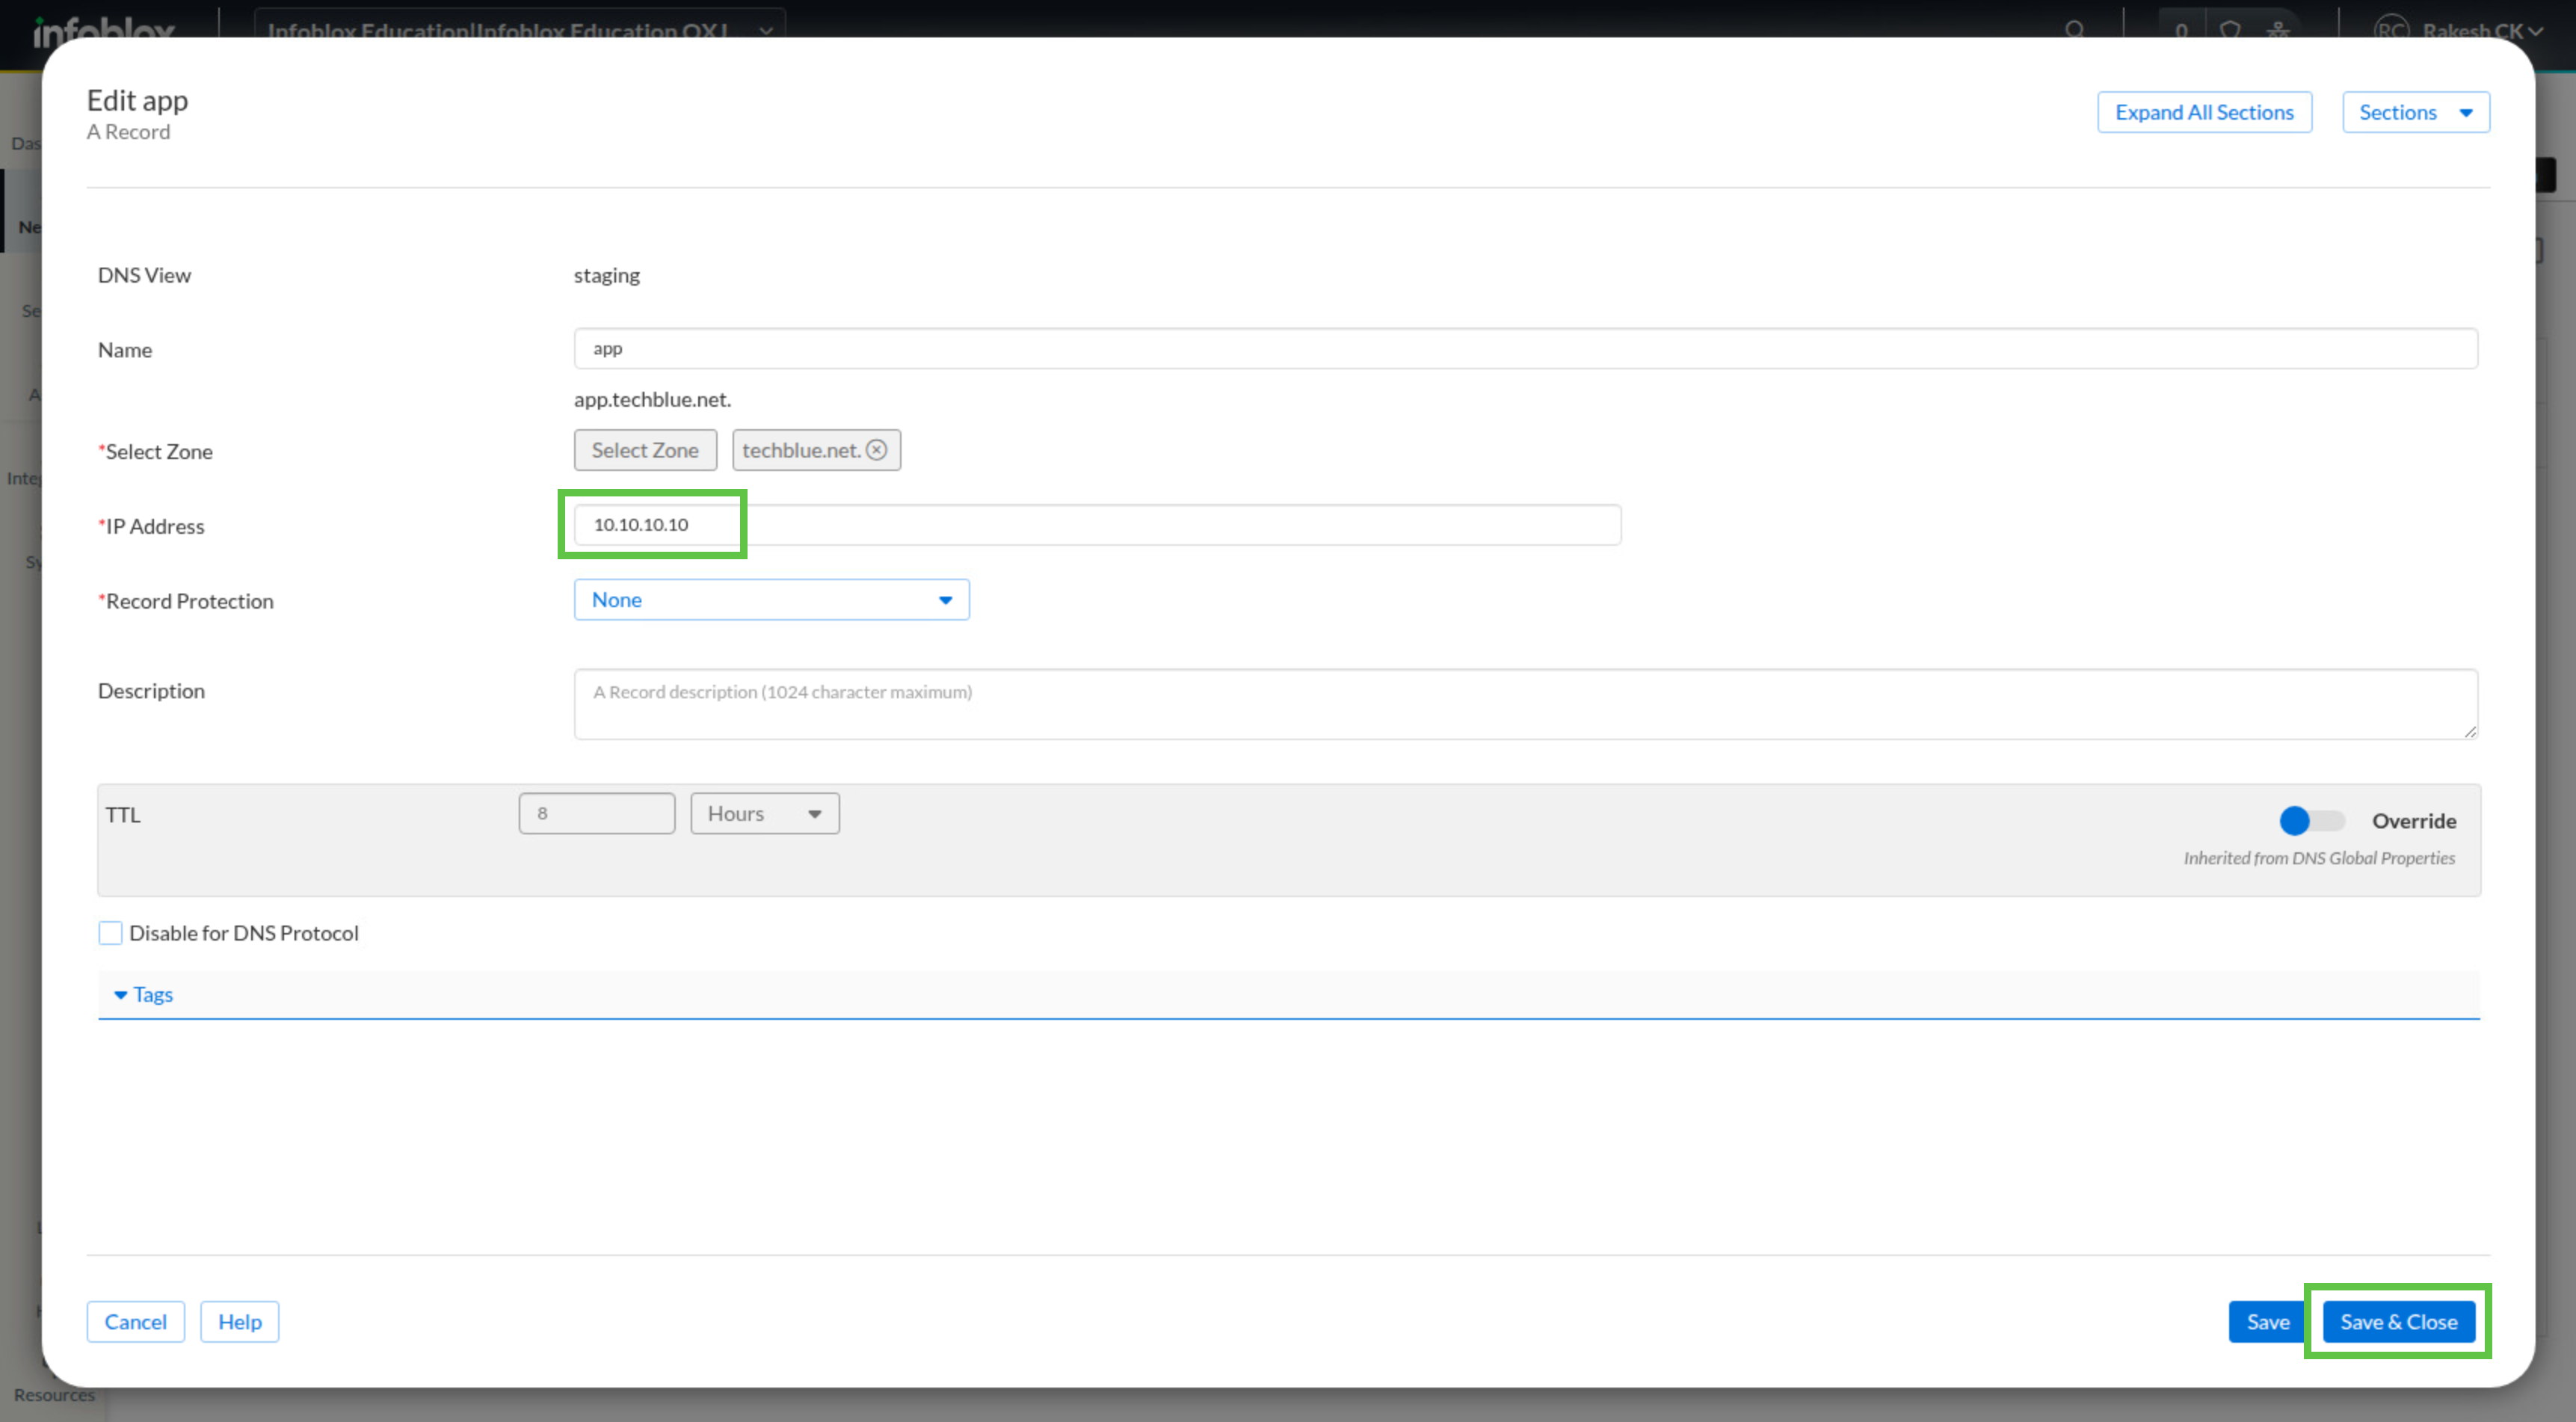
Open the staging DNS view, locate app.techblue.net, and change its A record from 172.31.10.20 to 10.10.10.10. Do not change the same record in the default view.
Task 6: Validate View-Based Resolution
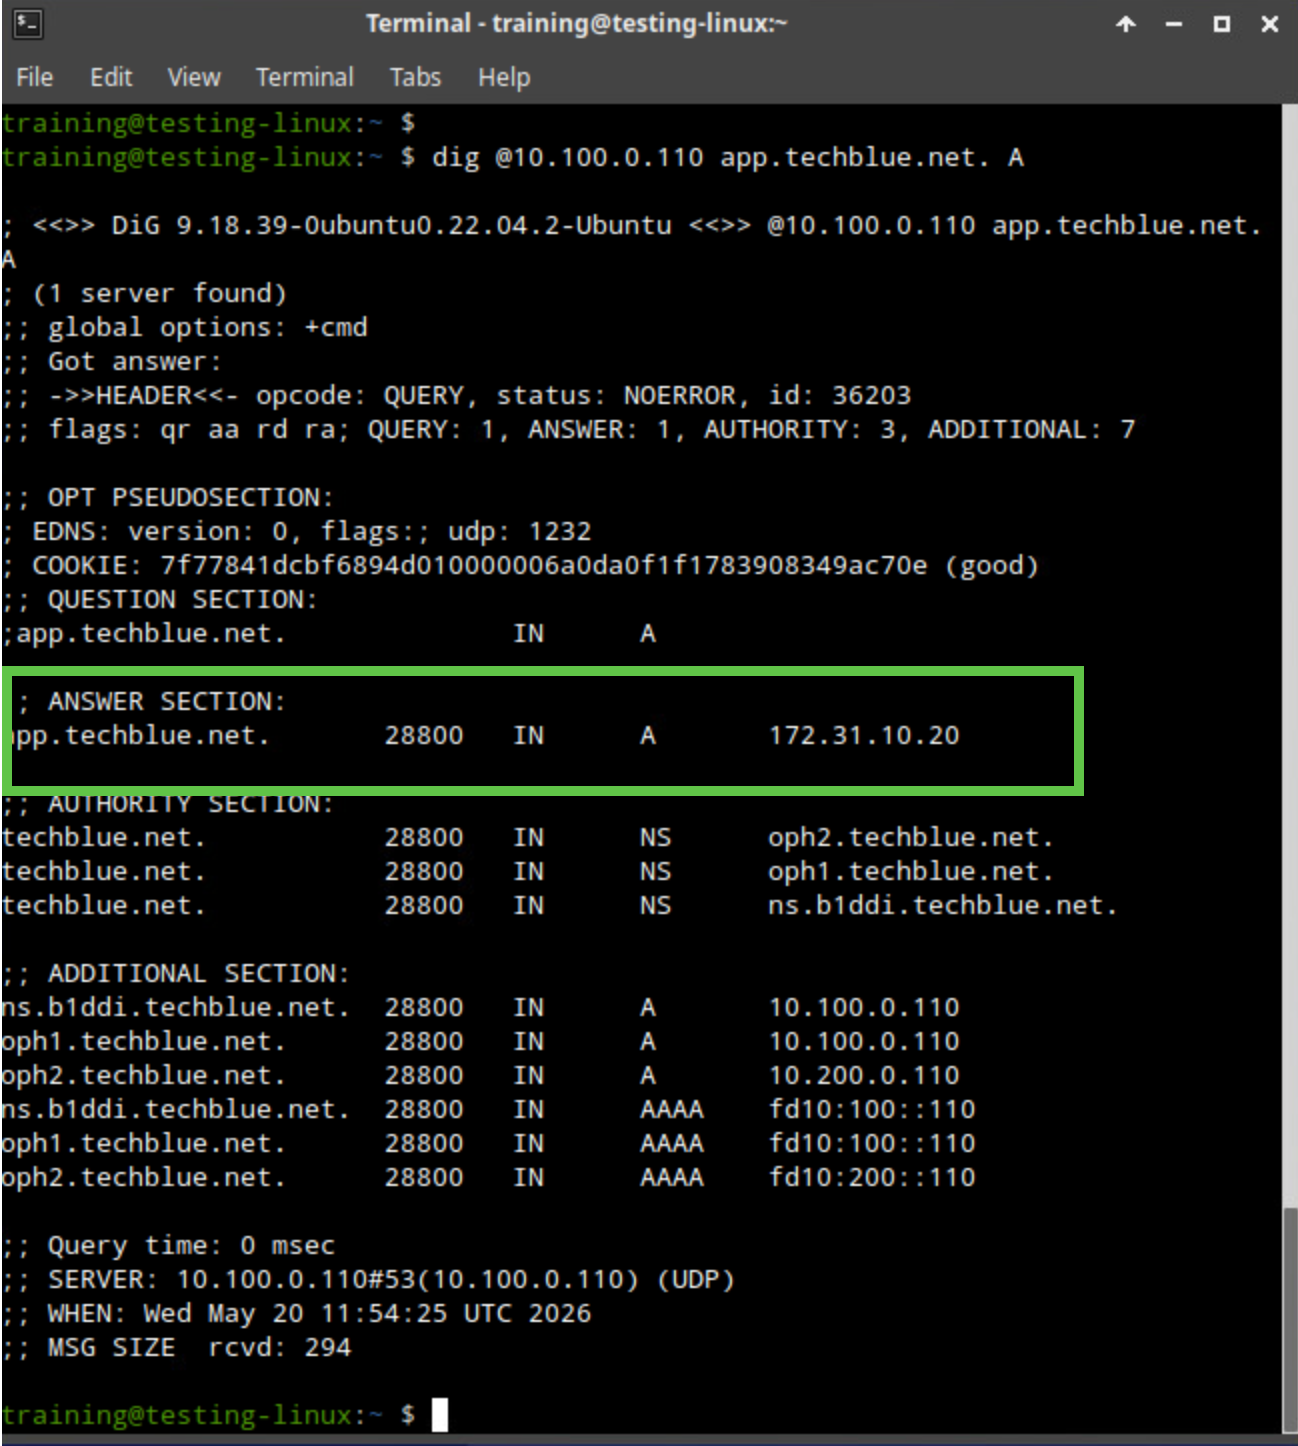
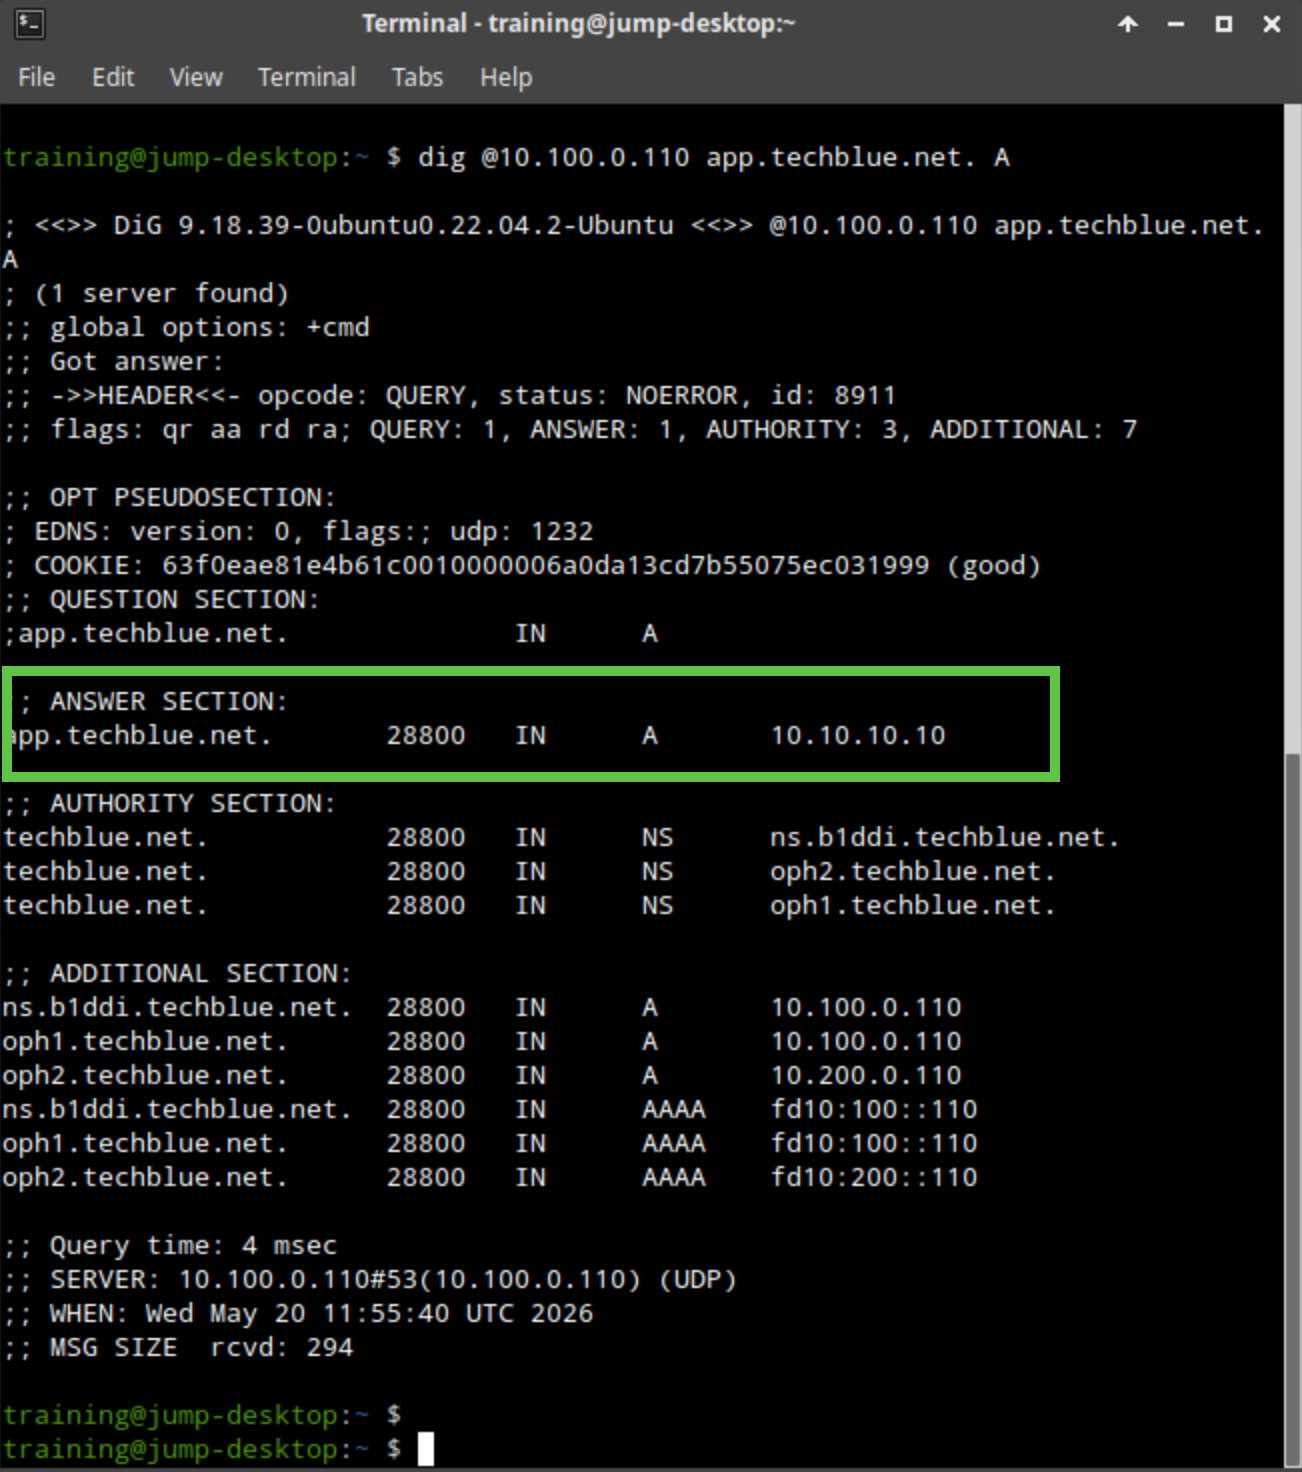
Run dig @10.100.0.110 app.techblue.net. A again from both clients. On testing-linux, the answer should remain 172.31.10.20. On jump-desktop, the answer should now be 10.10.10.10 because that client matches the 10.35.22.0/24 staging view.
Task 7: Cleanup
After validation is complete, delete the staging DNS view by moving it to the recycle bin.
Solutions
Task 1 Solution: Create Default View record
If you do not have the zone techblue.net, retrace the steps in Creating a Primary Zone in Universal DDI.
Start by creating the record in the default view because it provides the base answer for all clients that do not match a more specific DNS view. You need this baseline record before the staging view can override it for only one client network.
-
Log in to your lab’s jump-desktop.
-
Use the Education Infoblox Portal credentials to sign in to the Infoblox Portal.
-
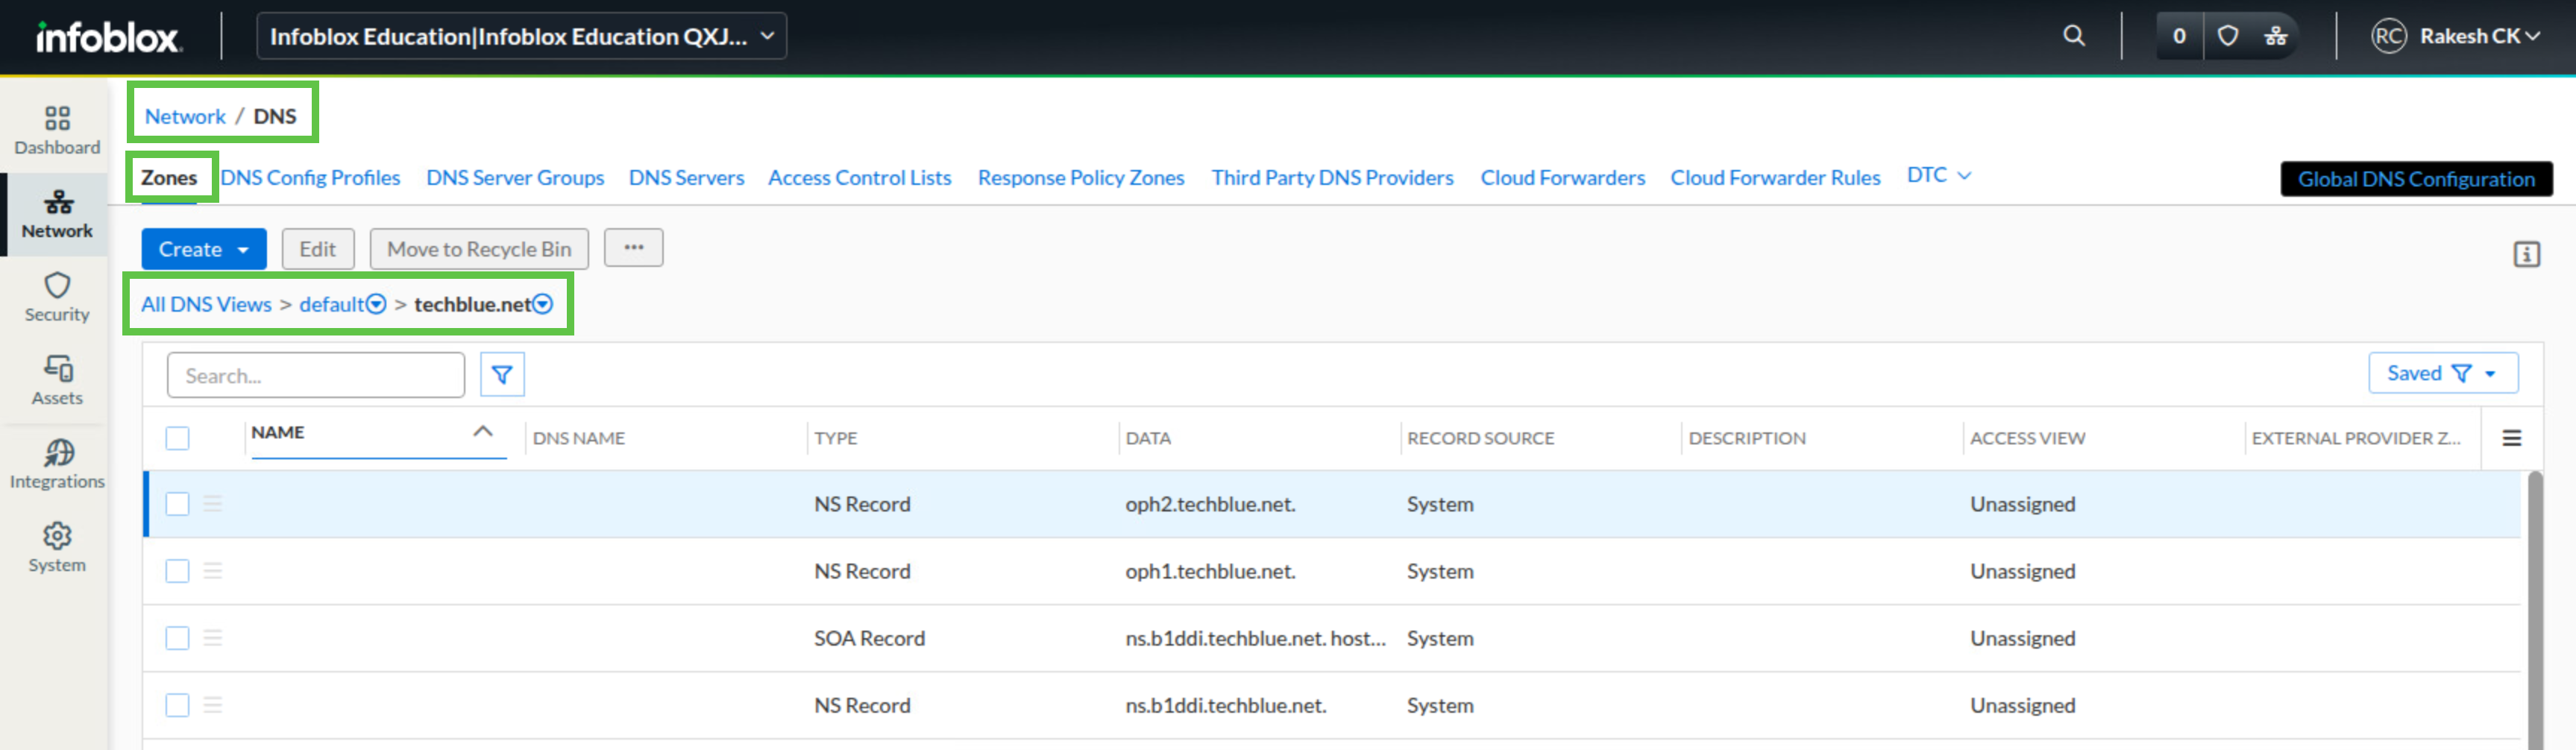
Navigate to Network → DNS.
-
Select the Zones tab.
-
Confirm that default is the only DNS view listed, then click default.
-
Click zone techblue.net.
-
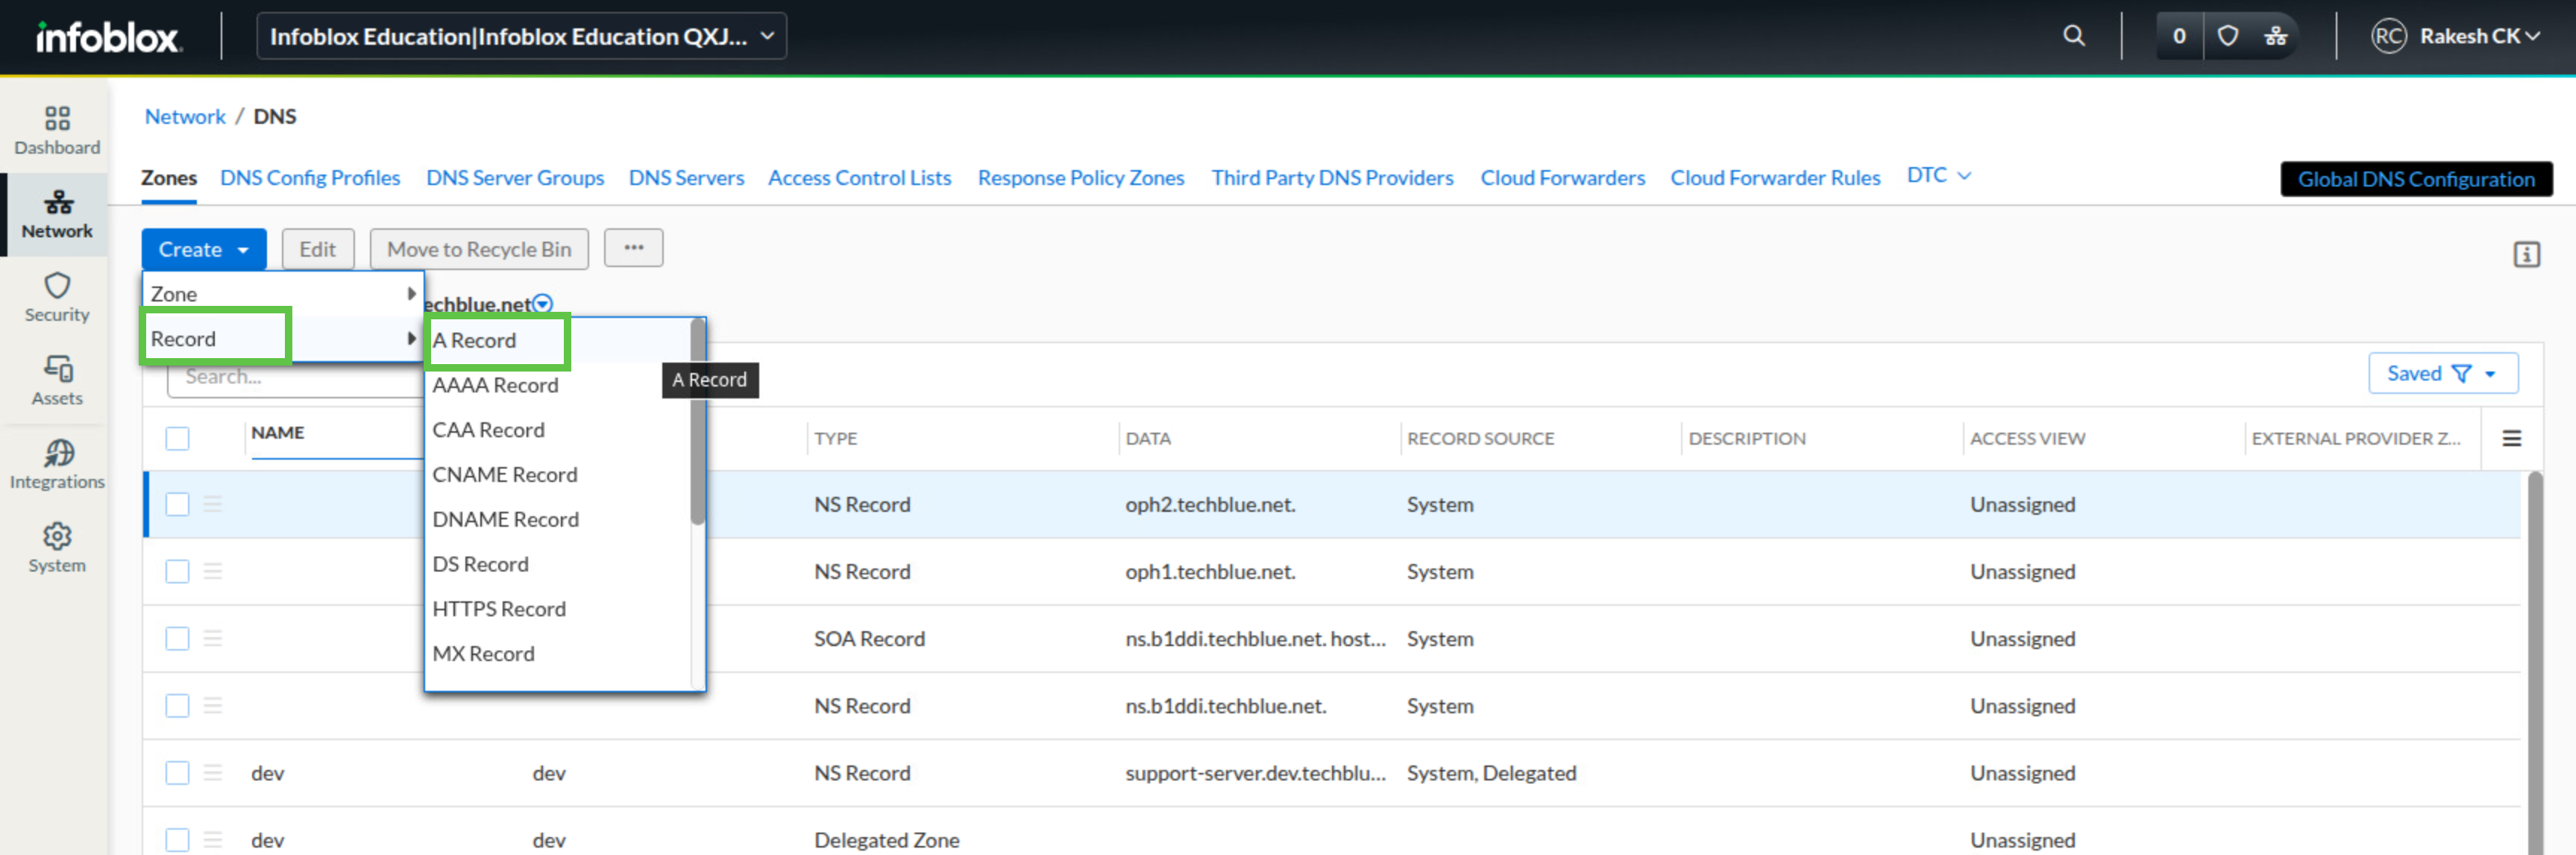
Click Create, then select Record → A Record.
-
In the Name field, enter app.
-
In the IP Address field, enter 172.31.10.20.
-
Click Save & Close.
Task 2 Solution: Validate initial resolution
Before you create the staging view, confirm that both clients currently receive the same answer. This gives you a clean baseline so you can see the effect of DNS views later instead of guessing whether the configuration worked.
-
Switch to virtual machine testing-linux and open a terminal window.
-
Run dig @10.100.0.110 app.techblue.net. A.
-
Confirm that the answer is 172.31.10.20.
-
Switch to virtual machine jump-desktop and open a command window.
-
Run dig @10.100.0.110 app.techblue.net. A.
-
Confirm that this client also receives 172.31.10.20.
Task 3 Solution: Create Staging View
Now create the DNS view that will apply only to staging clients. The Match Clients rule is the key setting here because it tells Universal DDI when to use the staging view instead of the default view.
-
In the Infoblox Portal, navigate to Network → DNS.
-
Select the Zones tab.
-
Click Create DNS View.
-
In the Name field, enter staging.
-
Under Match Clients, click Add.
-
Set Type to IPv4 Network.
-
In Value, enter 10.35.22.0/24.
-
Set Permission to Allow.
-
Click Save & Close.
Task 4 Solution: Copy Zones to Staging View
A new DNS view starts empty, so you must copy techblue.net into staging before you can customize records there. Copying the existing zone is faster and safer than rebuilding the zone manually.
-
Navigate to Network → DNS.
-
Select the Zones tab.
-
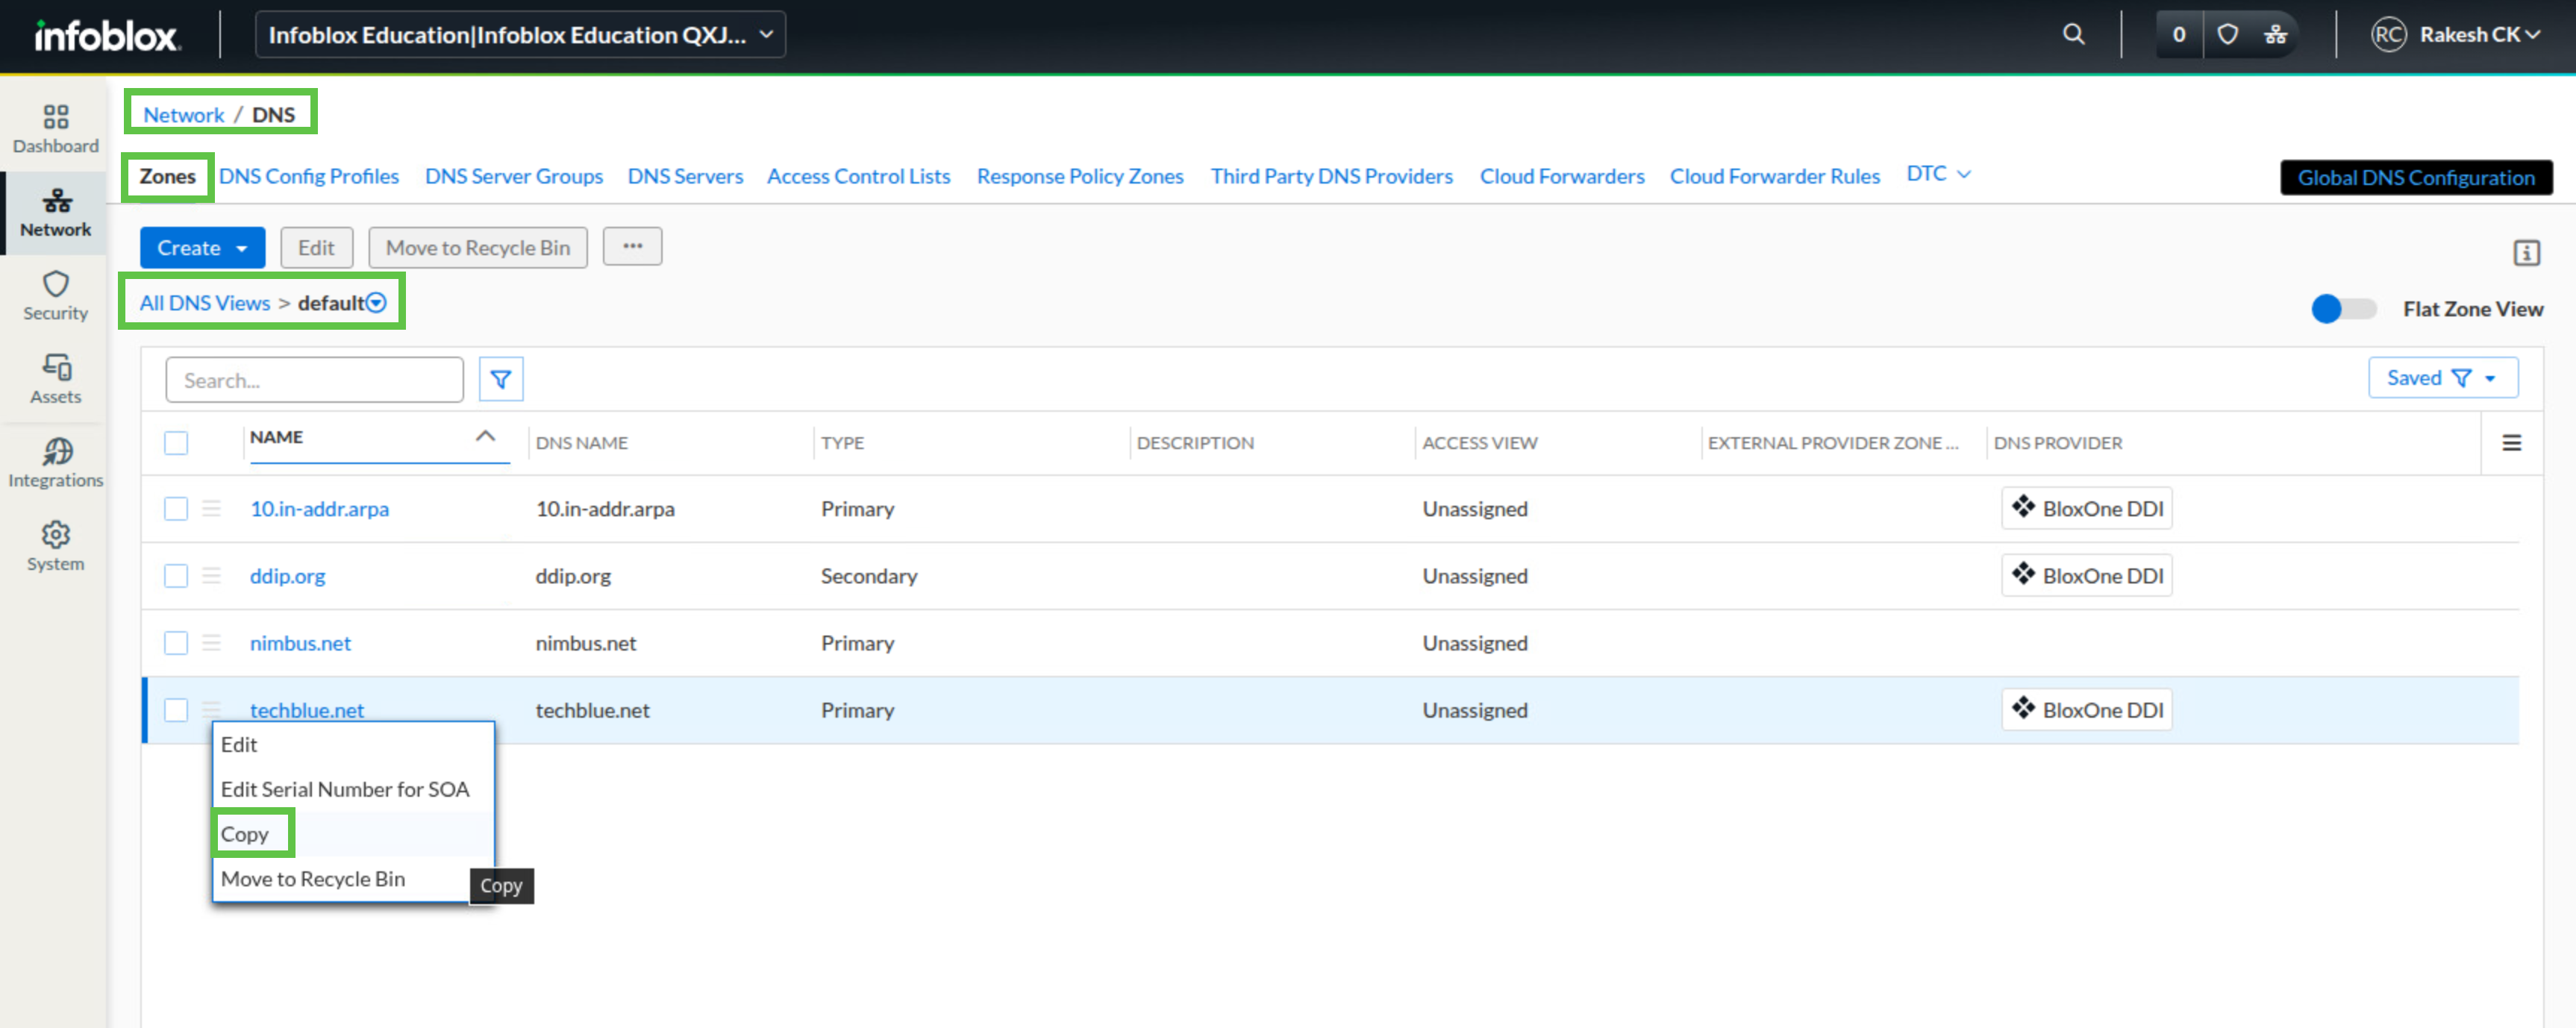
Click DNS view default.
-
Open the menu next to techblue.net and click Copy.
-
In the Copy techblue.net window, click Select DNS View for Destination DNS View.
-
Select staging and click Select.
-
Under Authoritative Name Servers, select Techblue DNS Service 1 and Techblue DNS Service 2.
-
Click Save & Close.
Task 5 Solution: Update Staging Records
With the zone copied into staging, you can now change the record in that view without affecting the default view. This is the core of the lab: the same name exists in both views, but each view returns a different answer based on client matching.
-
Navigate to Network → DNS.
-
Select the Zones tab.
-
Click DNS view staging.
-
Click techblue.net
-
Open the menu next to the A record for app.techblue.net and click Edit.
-
Change the IP address from 172.31.10.20 to 10.10.10.10.
-
Click Save & Close.
Task 6 Solution: Validate View-Based Resolution
Finish by testing from both clients again. Because jump-desktop matches 10.35.22.0/24, it should use the staging view and receive the staging address. testing-linux should continue using the default view and receive the original address. This confirms that the resolution difference is based on the client source, not on the queried name itself.
-
Switch to virtual machine testing-linux and open a terminal window.
-
Run dig @10.100.0.110 app.techblue.net. A.
-
Confirm that the answer is 172.31.10.20.
-
Switch to virtual machine jump-desktop and open a command window.
-
Run dig @10.100.0.110 app.techblue.net. A.
-
Confirm that the answer is 10.10.10.10.
Task 7 Solution: Cleanup
Delete the staging view after validation to restore the lab environment to its original state. This prevents later labs from inheriting a DNS view that changes name resolution unexpectedly.
-
Sign in to the Infoblox Portal if needed.
-
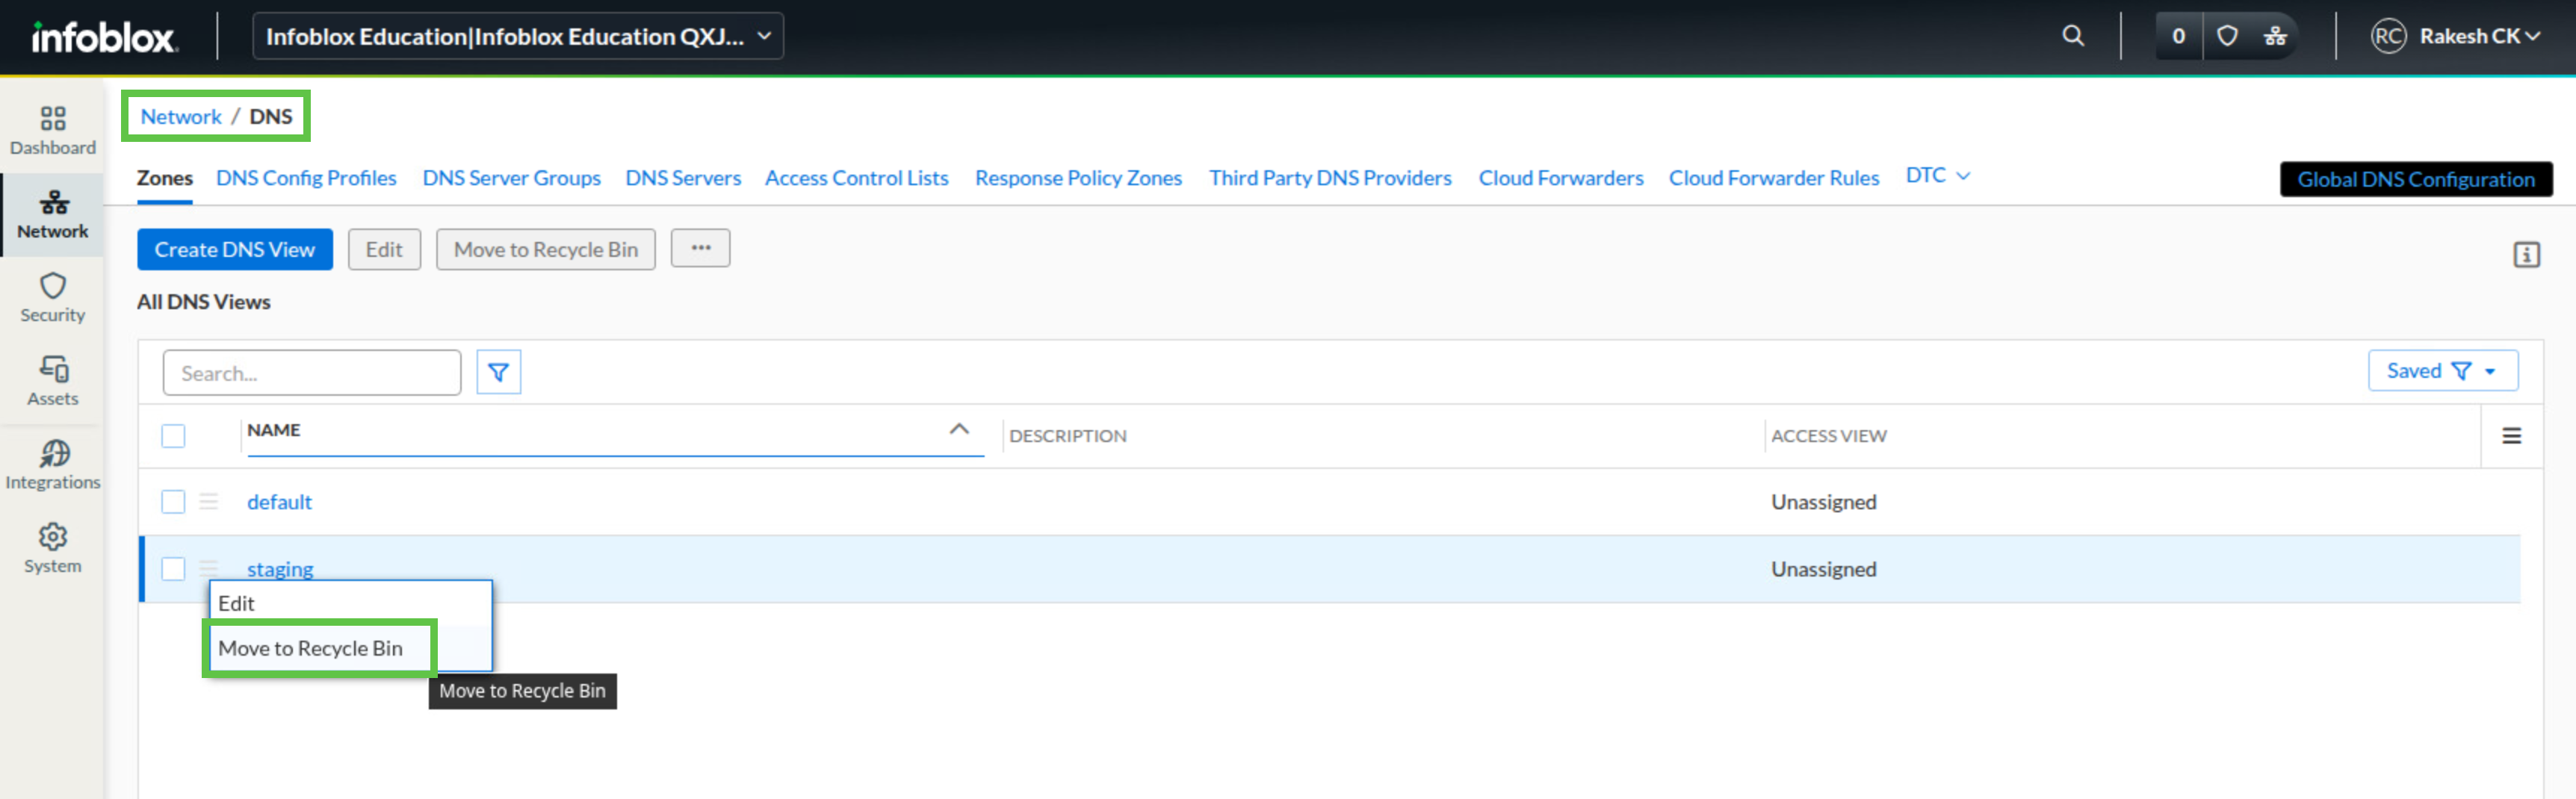
Navigate to Network → DNS.
-
Select the Zones tab.
-
Open the menu next to staging and click Move to Recycle Bin.
-
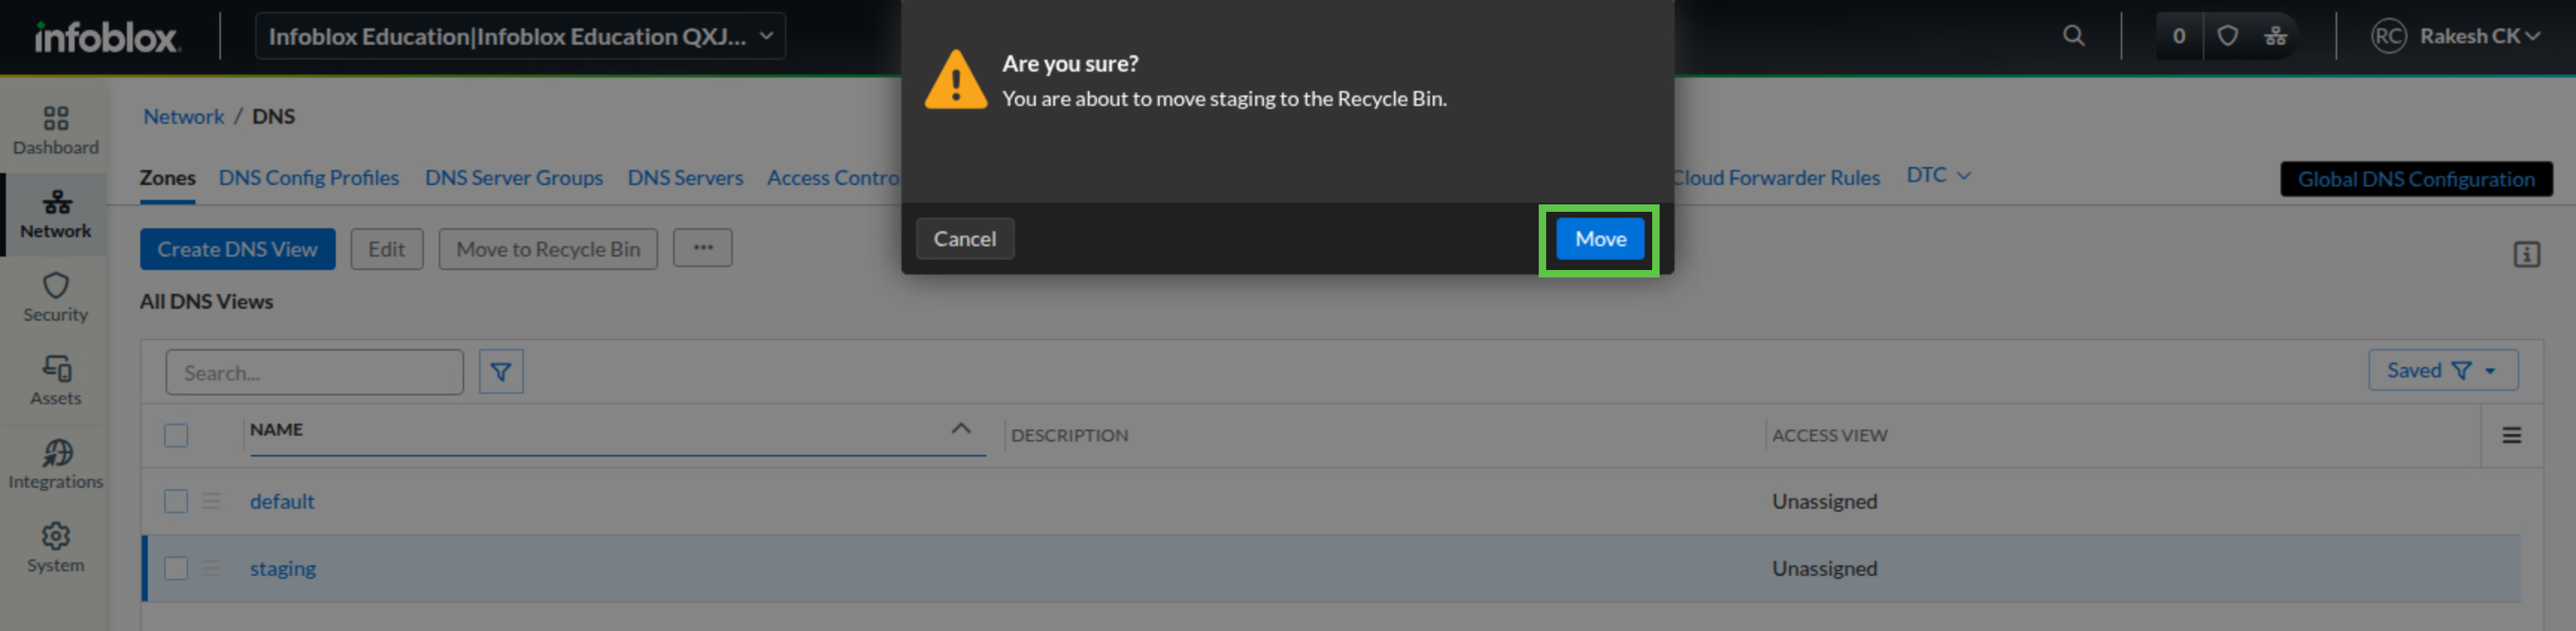
In the confirmation popup, click Move.
-
Select I understand the risk, then click Move.
