Scenario
To extend Threat Defense coverage to roaming users, your organization plans to enable Infoblox Endpoint protection on client devices such as company-managed laptops, smartphones, and handheld devices. An Endpoint Client was installed on a Windows machine for testing. A new Endpoint Group named Techblue Endpoints was created with the newly deployed Endpoint agent added.
You are tasked to add the Endpoint Group named Techblue Endpoints as a Network Scope in the existing security policy Techblue Sec Policy and verify the configuration by performing domain lookups from the Windows machine to ensure the policy rules are being applied.
Estimated Completion Time
-
20 to 30 minutes
Prerequisites
-
Administrative access to the Infoblox Portal
Tasks
-
Adding an Endpoint Group to a Security Policy
-
Testing Security Policies against Techblue Endpoints Group
Task 1: Adding an Endpoint Group to a Security Policy
In the Infoblox Portal, add the Techblue Endpoints Endpoint Group to the Techblue Sec Policy as a Network Scope.
Task 2: Testing Security Policies against Techblue Endpoints Group
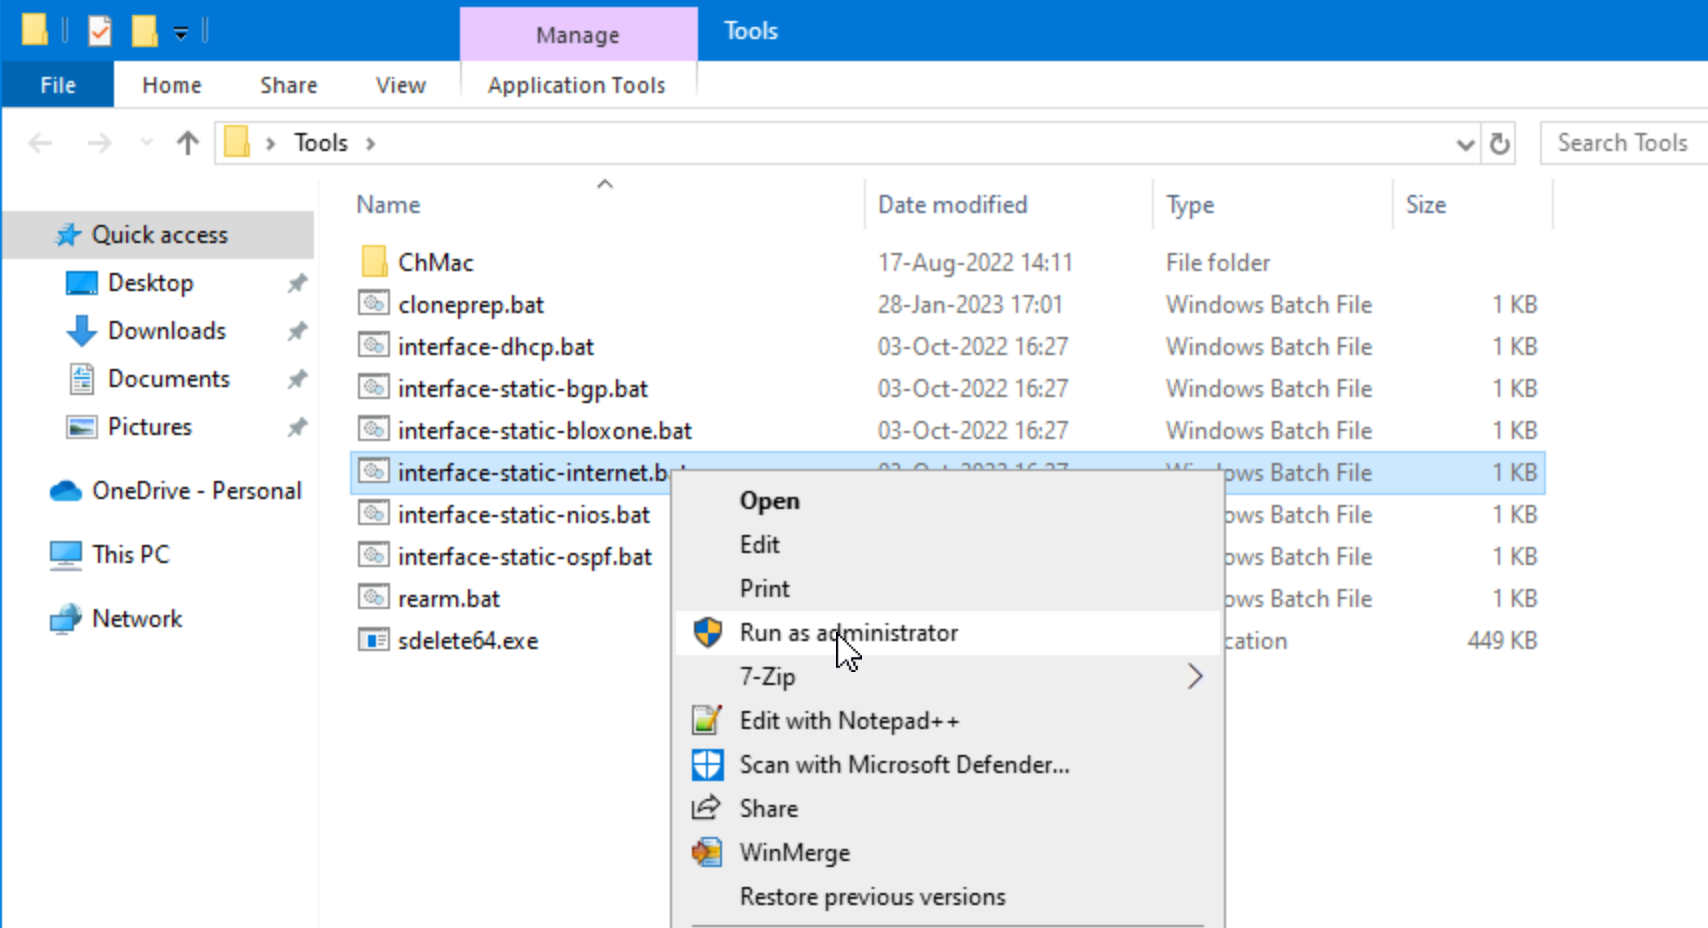
In testing-windows open the Tools folder on the Desktop and run the interface-static-internet.bat file as an administrator. This sets a static IP address for the VM. Please re-enter the command if the VM does not get an IP address the first time.
Use the testing-windows VM's web browser to access domains matching your organization's security policy rules and verify the policies work as intended.
www.infoblox.com should be allowed, while sites such as eicar.pw, eicar.stream, and eicar.host should be blocked. Domains like gambling.com and tiktok.com should be redirected to the default Infoblox redirection page. Finally, look at the Security Activity report to confirm that your organization's security policy rules were logged and match your observations using testing-windows VM's web browser.
Solutions
Task 1 Solution: Adding an Endpoint Group to a Security Policy
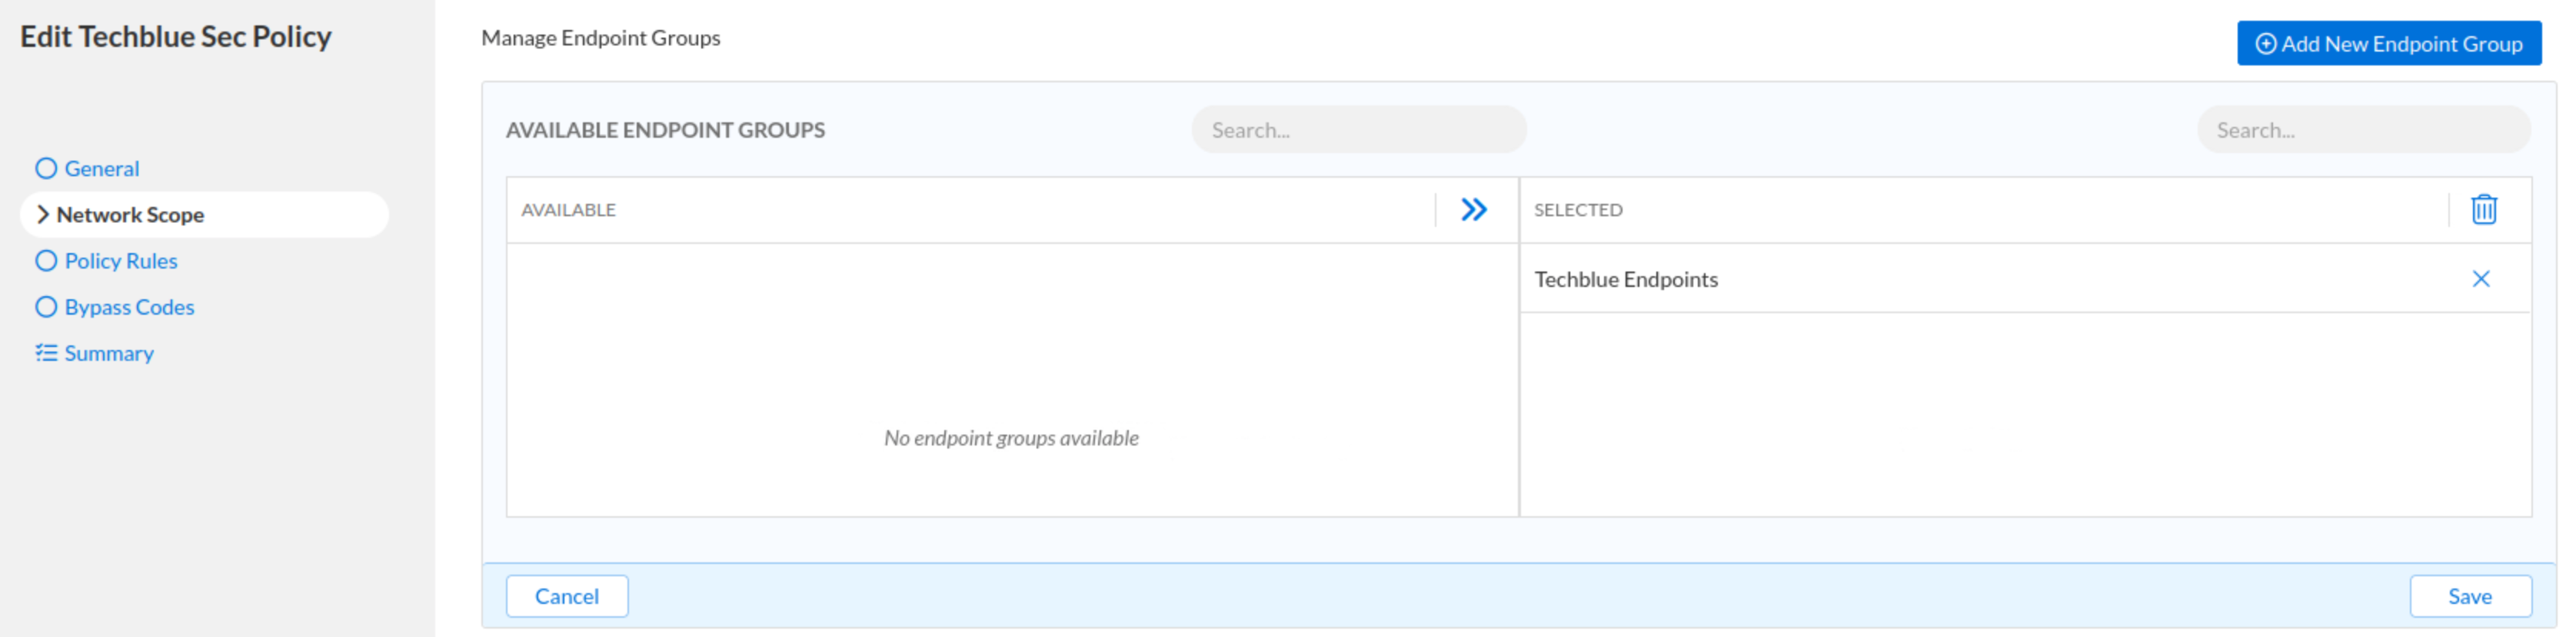
In this task, we will add the Endpoint Group Techblue Endpoints into the security policy Techblue Sec Policy as a Network Scope. This will allow all the rules configured as part of the policy to apply to traffic handled by the Endpoint Group.
-
Log into your lab’s VM jump-desktop.
-
While logged in to jump-desktop, use your Education Infoblox Portal Credentials to log into the Infoblox Portal.
-
Navigate to Security → Configuration → Security Policies → Security Policies
-
Select the checkbox to Techblue Sec Policy and click Edit
-
Under the Network Scopes tab:
-
Click Add Source
-
choose Endpoint Groups from the drop-down list.
-
Click the arrow icon next toTechblue-Endpoints to addd it
-
Click Save.
-
Click Finish, then Save&Close.
-
Task 2 Solution: Testing Security Policies against Techblue Endpoints Group
In this task, we test our configuration by using our lab’s testing-windows VM’s browser to access domains matching our preconfigured security policy rules. The Endpoint agent installed earlier should forward all DNS traffic to the Threat Defense, which blocks unwanted or harmful traffic based on our security policy rules.
-
Log into your lab’s testing-windows, with the credentials (training / infoblox).
-
Open the Tools folder on the Desktop.
-
Run the interface-static-internet.bat file as an administrator.
-
This file is used to set an IP address for the VM in a subnet simulating a direct internet connection.
-
-
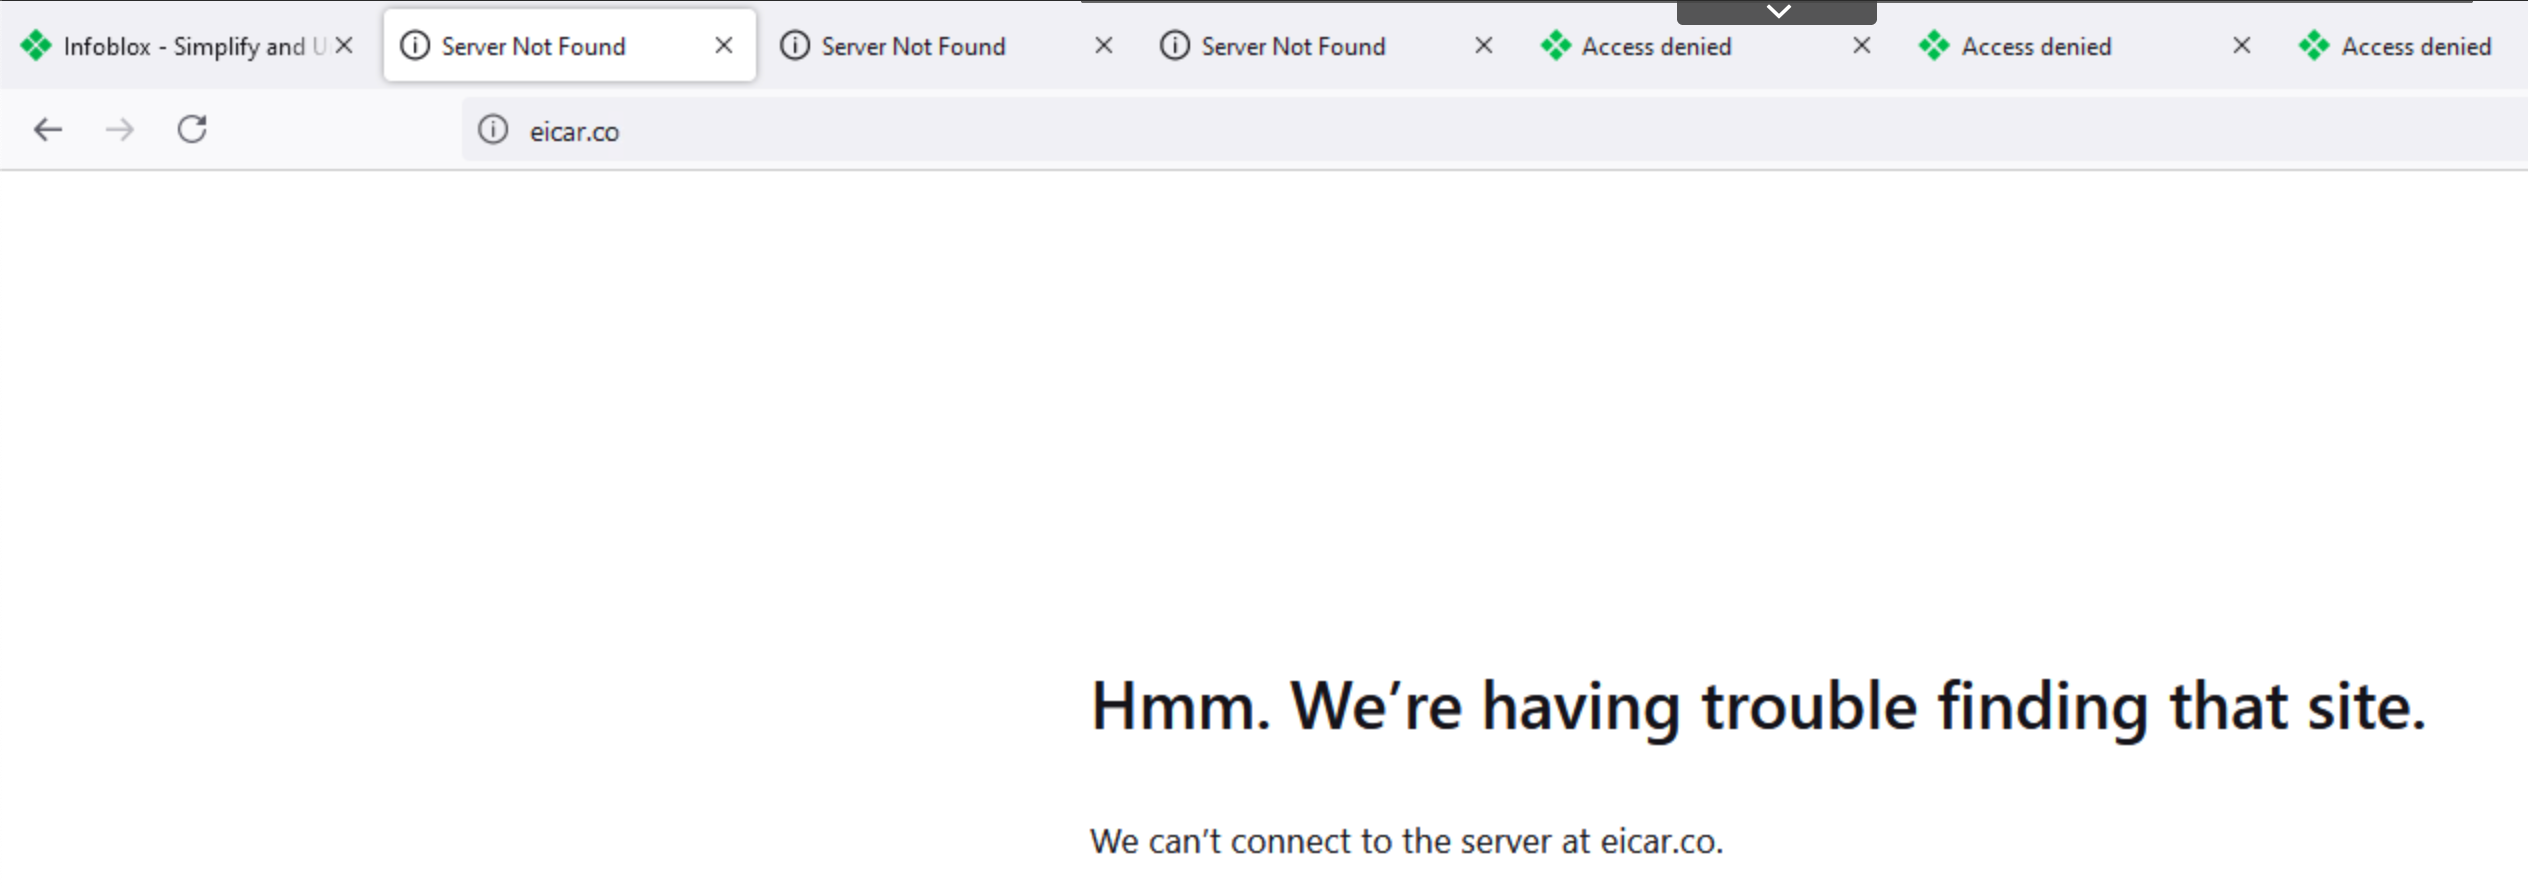
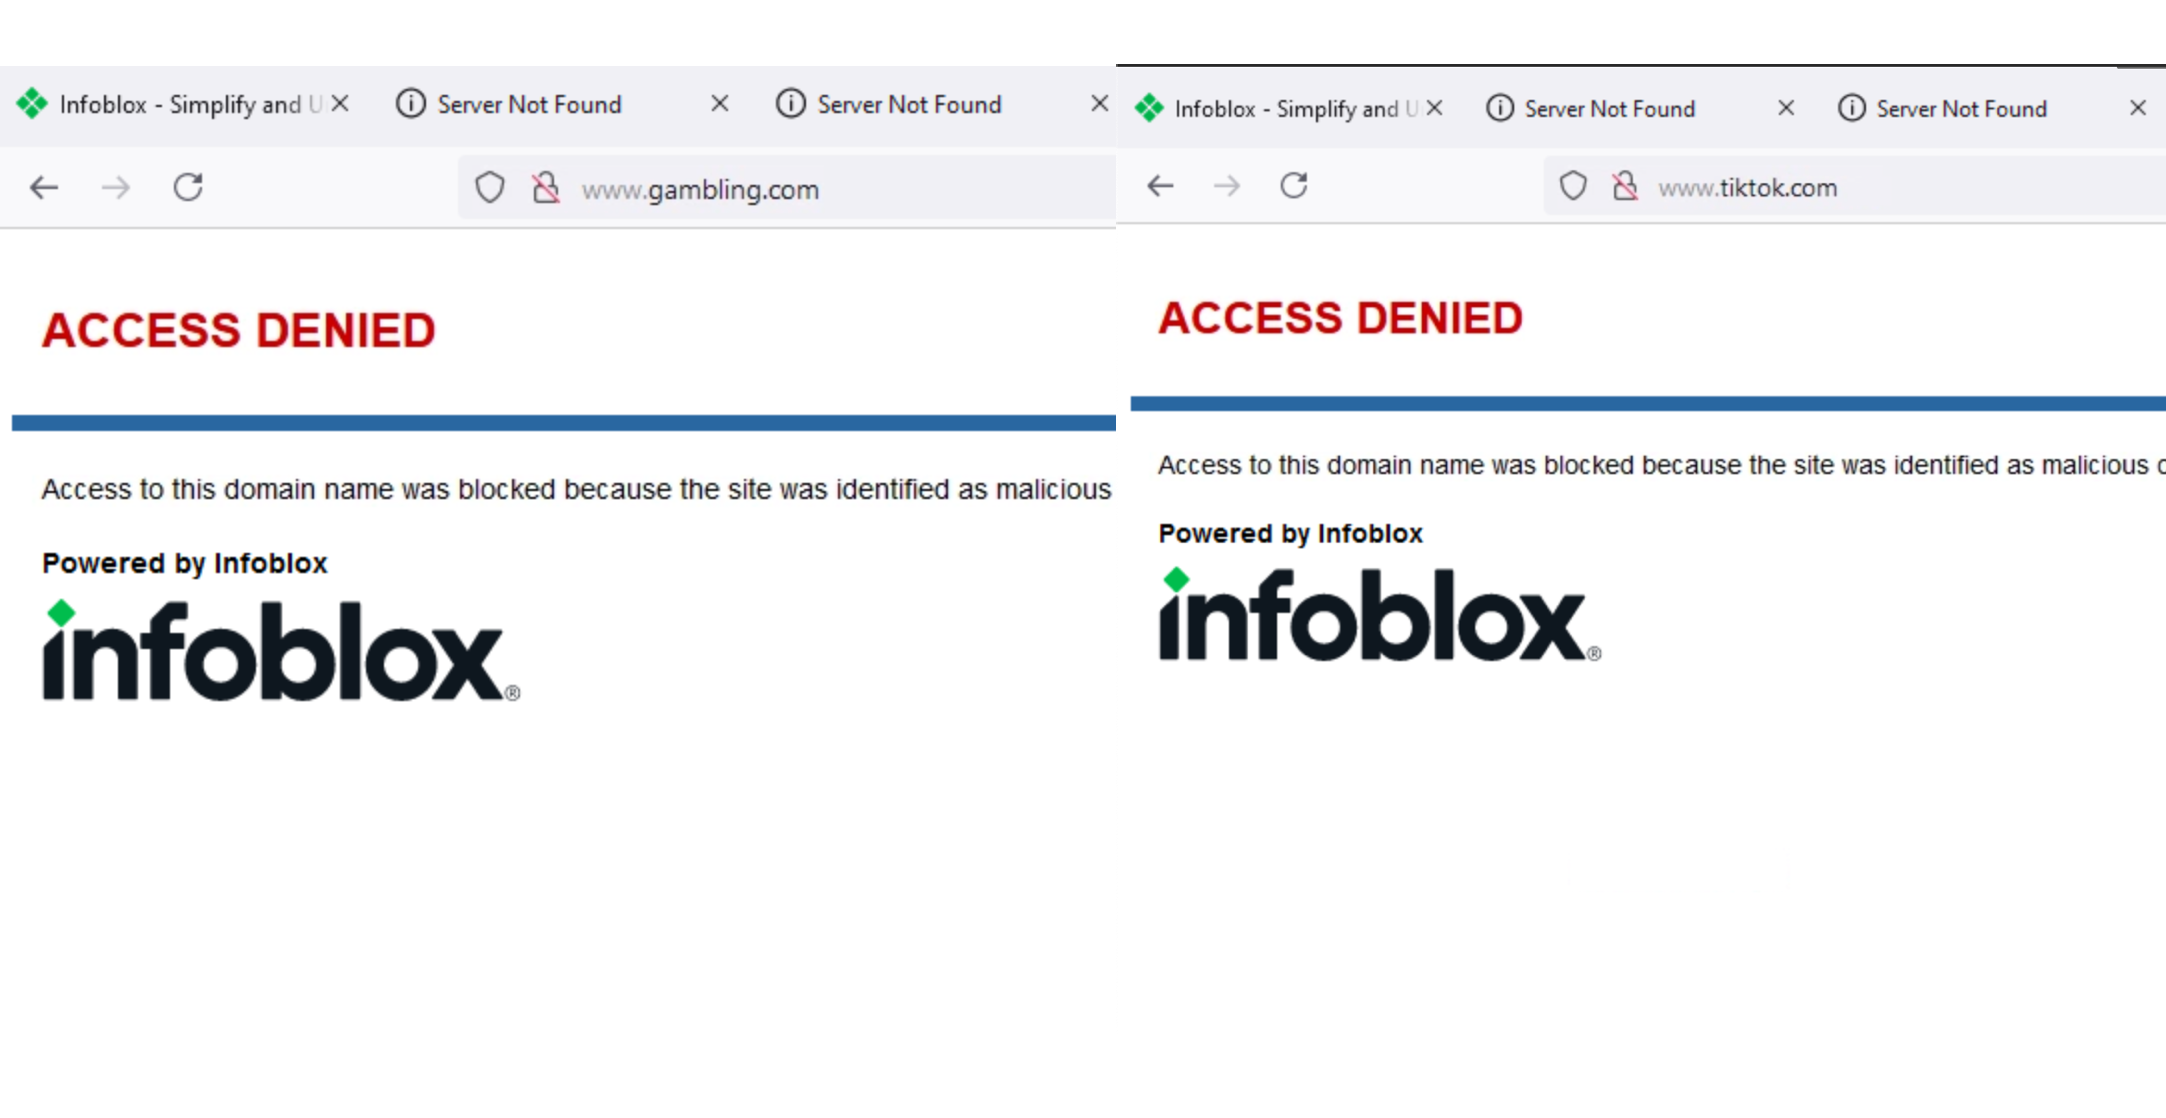
Open a browser window and navigate to www.infoblox.com, eicar.pw, eicar.stream, eicar.co, www.gambling.com, www.instagram.com, and www.tiktok.com.
-
www.infoblox.com should be allowed as it matched an allowed custom list, the Infoblox home page should be visible.

-
eicar.pw, eicar.stream, and eicar.co should all be blocked as they match a blocked custom list, the browser should fail to connect to the server indicating an NXDOMAIN response.
-
www.gambling.com, www.instagram.com, and www.tiktok.com will be redirected to the default Infoblox redirect page, as they match redirected category and application filters .
-
-
Switch back into your lab’s jump-desktop VM.
-
Use your Education Infoblox Portal Credentials to log into the Infoblox Portal.
-
Navigate to Security →Threat Defense → Security Activity
-
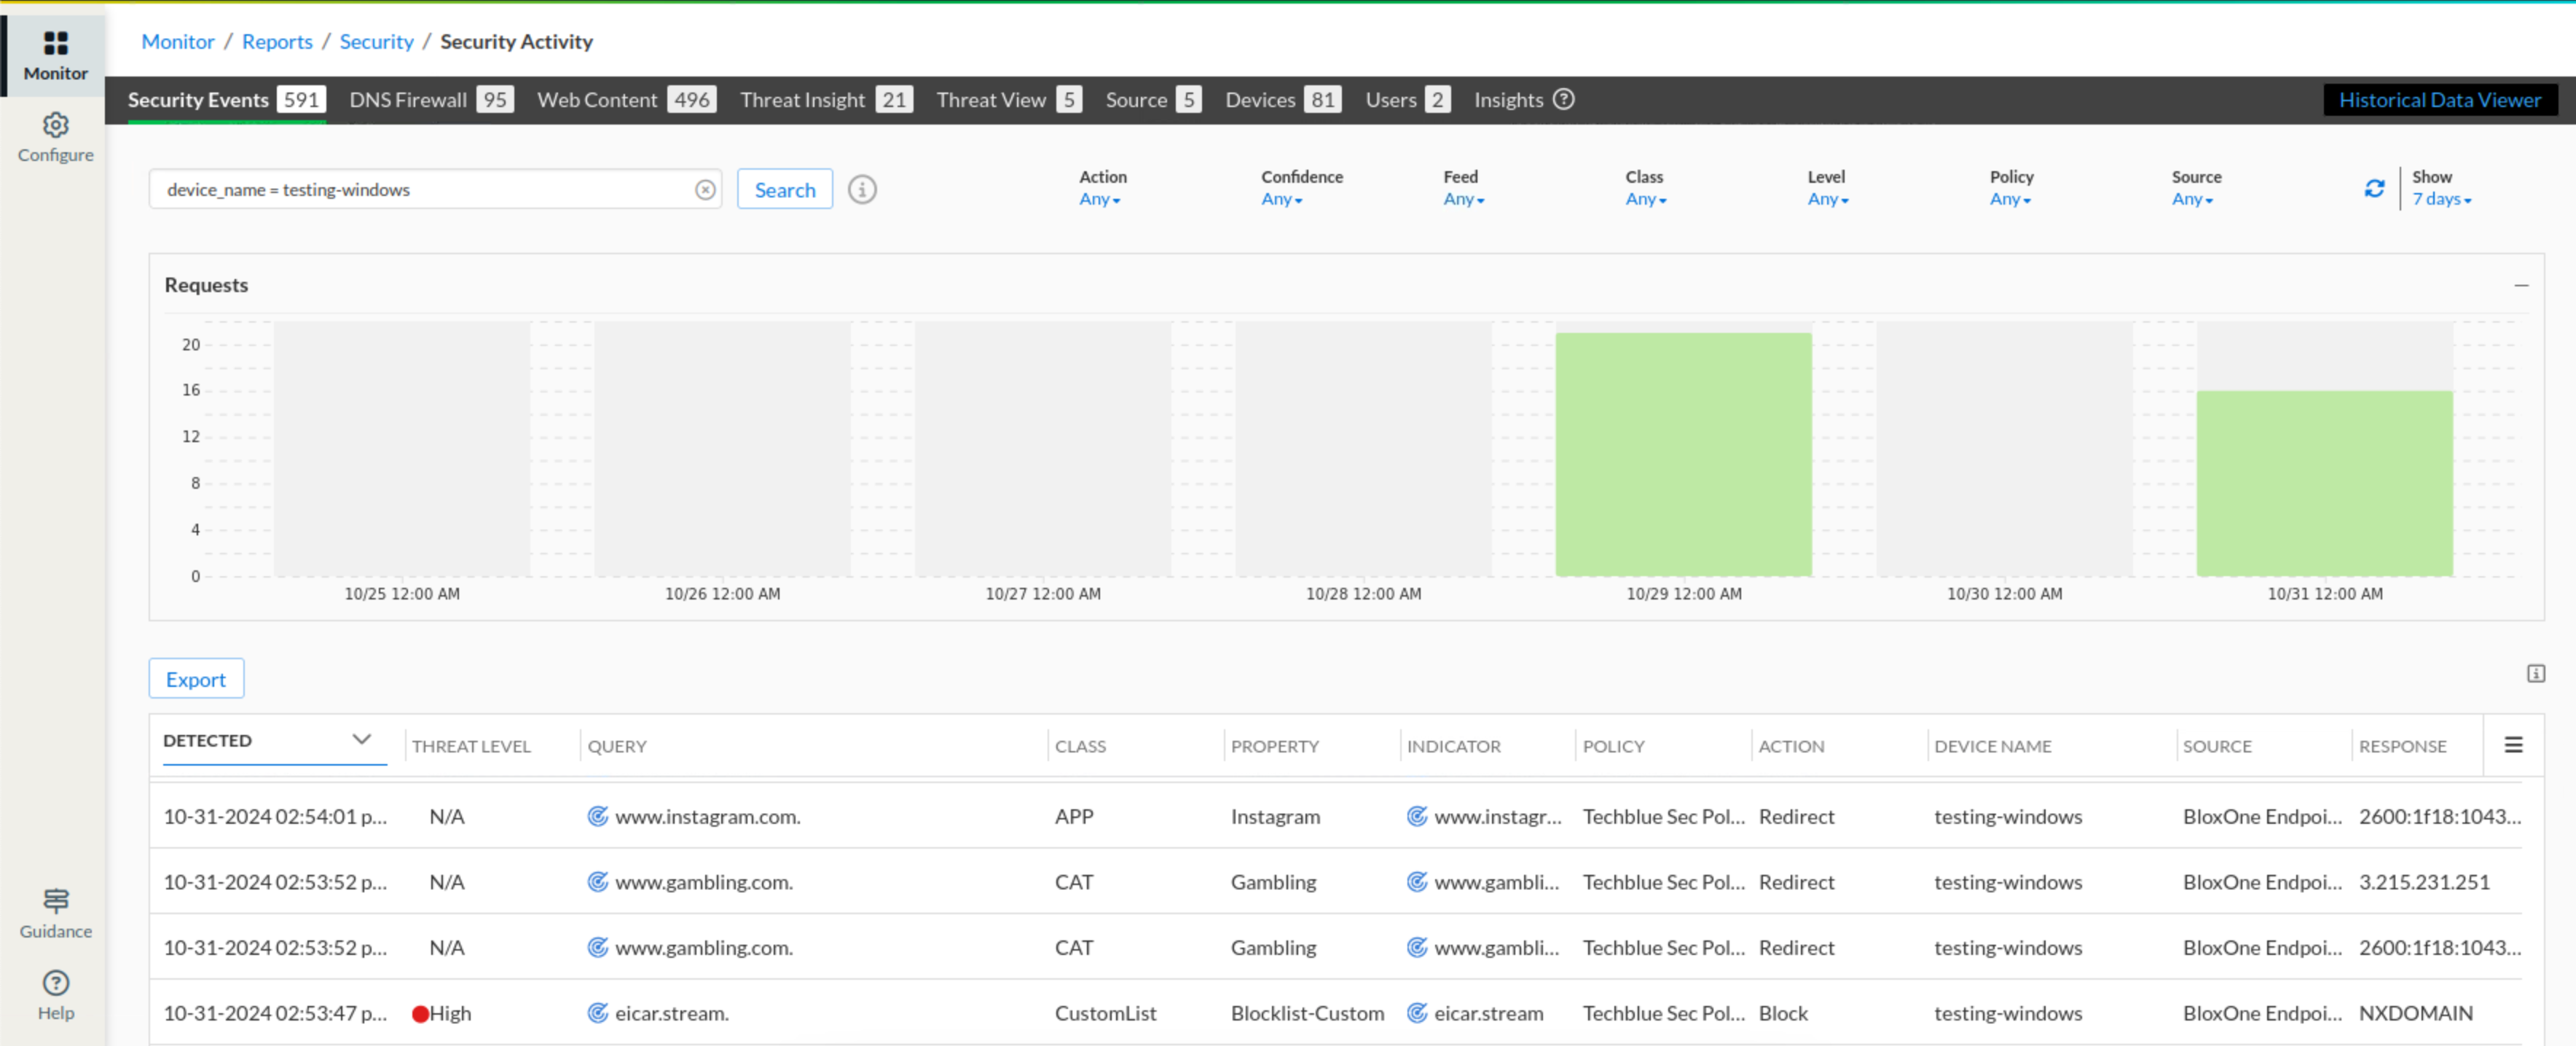
Use the search bar at the top of the page and use device_name = testing-windows.techblue.co to view all the logs for this specific machine.
-
The result should show a list of all queried domains, the action taken against each of them, the policy used, and other details. This confirms that our policy, Techblue Sec Policy, was matched and blocked malicious and unwanted traffic as designed, supporting our findings from using the web browser.
-