Scenario
After implementing DNS Forwarding Proxy (DFP) services on two NIOS-X servers, your organization will integrate the service into its security policy to detect and block malicious and unwanted DNS traffic. You are tasked with integrating the two DNS Forwarding Proxy services running on NIOS-X servers oph1.techblue.net and oph2.techblue.net into the existing security policy, Techblue Sec Policy, and validate the configuration by testing the policy rules against DNS traffic routed through the integrated NIOS-X servers.
Estimated Completion Time
-
20 to 30 minutes
Prerequisites
-
Administrative access to the Infoblox Portal
Tasks
-
Adding DNS Forwarding Proxies (DFP) to a Security Policy
-
Testing Security Policies against DNS Forwarding Proxy
Task 1: Adding DNS Forwarding Proxies (DFP) to a Security Policy
Allow 5 minutes for the security policy configuration changes to take effect.
In the Infoblox Portal, add the two DFP service instances, DFP-OPH1 and DFP-OPH2, to the Techblue Sec Policy as Network Scopes.
Task 2: Testing Security Policies against DNS Forwarding Proxy
-
In the lab environment, provision the VM testing-linux with a static IP address (use the command: sudo set-network-static-bloxone) to reach the NIOS-X servers.
-
Use the testing-linux VM to perform DNS lookups against the oph1.techblue.net server.
-
Lookups for the domain www.infoblox.com should be allowed, while lookups for eicar.pw and eicar.host should be blocked with NXDOMAIN.
-
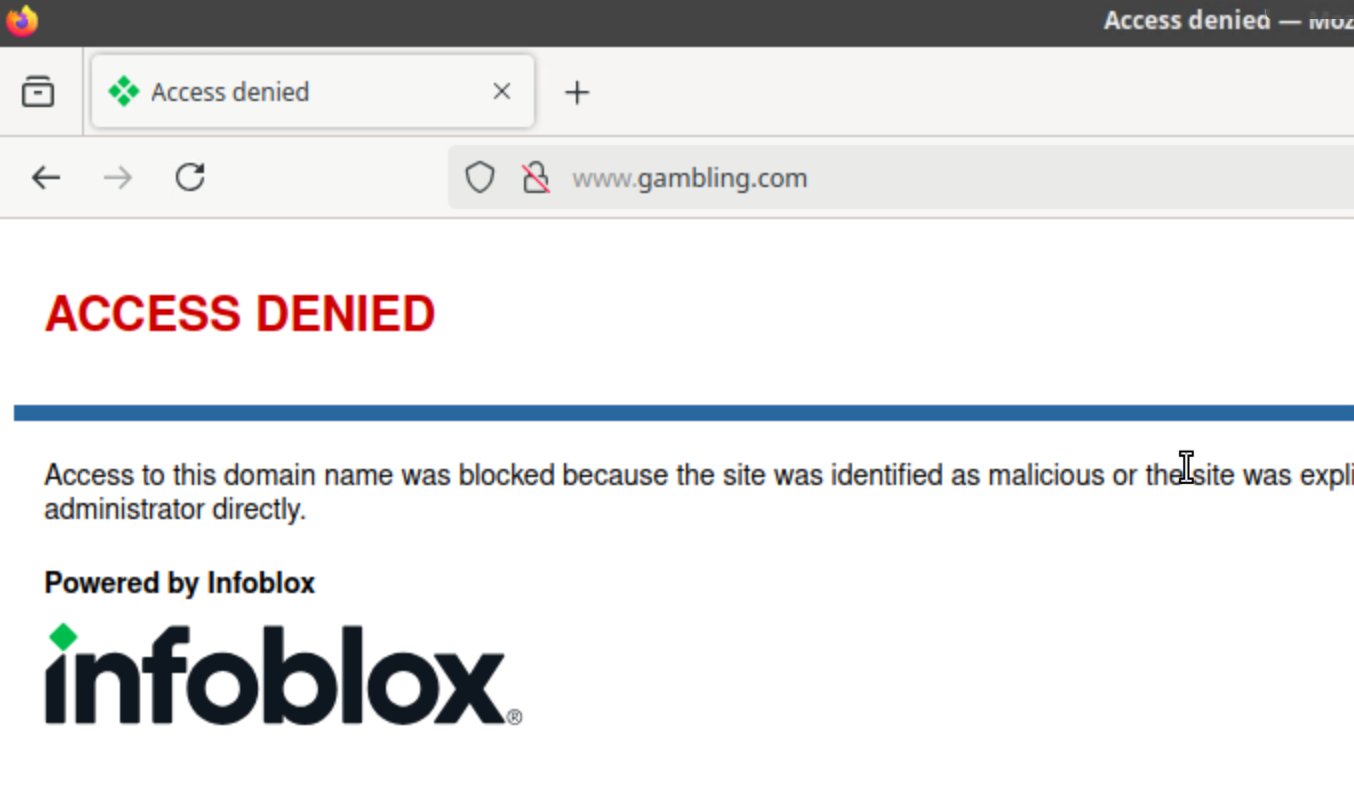
Using a web browser, access gambling.com and tiktok.com to verify that the category and application filters are redirecting unwanted traffic.
-
-
Use the Security Activity Report to confirm that Threat Defense logged these queries.
Solutions
Task 1 Solution: Adding DNS Forwarding Proxies (DFP) to a Security Policy
In this task, we will add two DFP services into the security policy Techblue Sec Policy as Network Scopes, which will allow all the rules already configured as part of the security policy to apply to traffic handled by oph1.techble.net and oph2.techblue.net.
-
Log in to your lab’s VM jump-desktop.
-
While logged in to jump-desktop, use your Education Infoblox Portal Credentials to log into the Infoblox Portal.
-
Navigate to Security → Configure → Security Policies → Security Policies
-
Select the checkbox for Techblue Sec Policy and click Edit
-
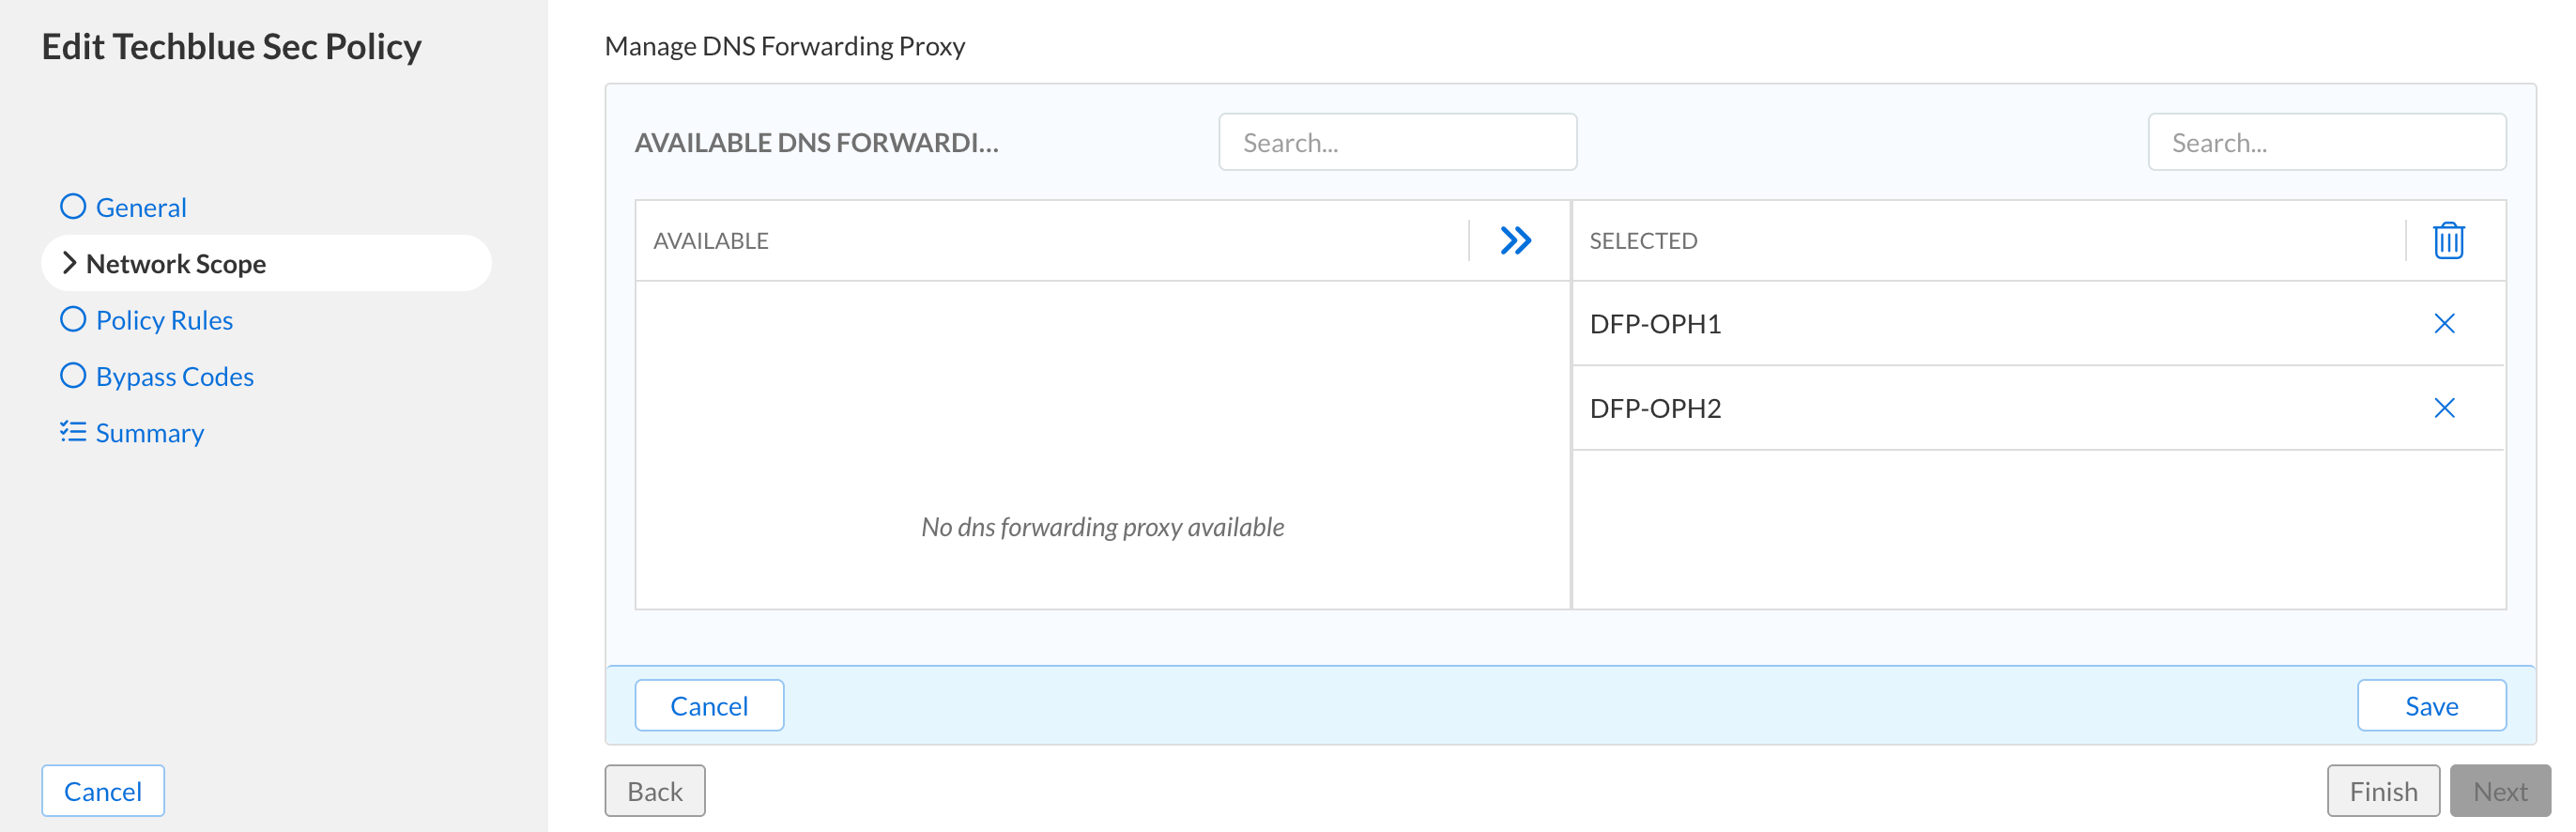
Under the Network Scopes tab:
-
Click Add Source and choose DNS Forwarding Proxy from the list.
-
Click the arrow icon next to DFP-OPH1 and DFP-OPH2 to add them.
-
Click Save.
-
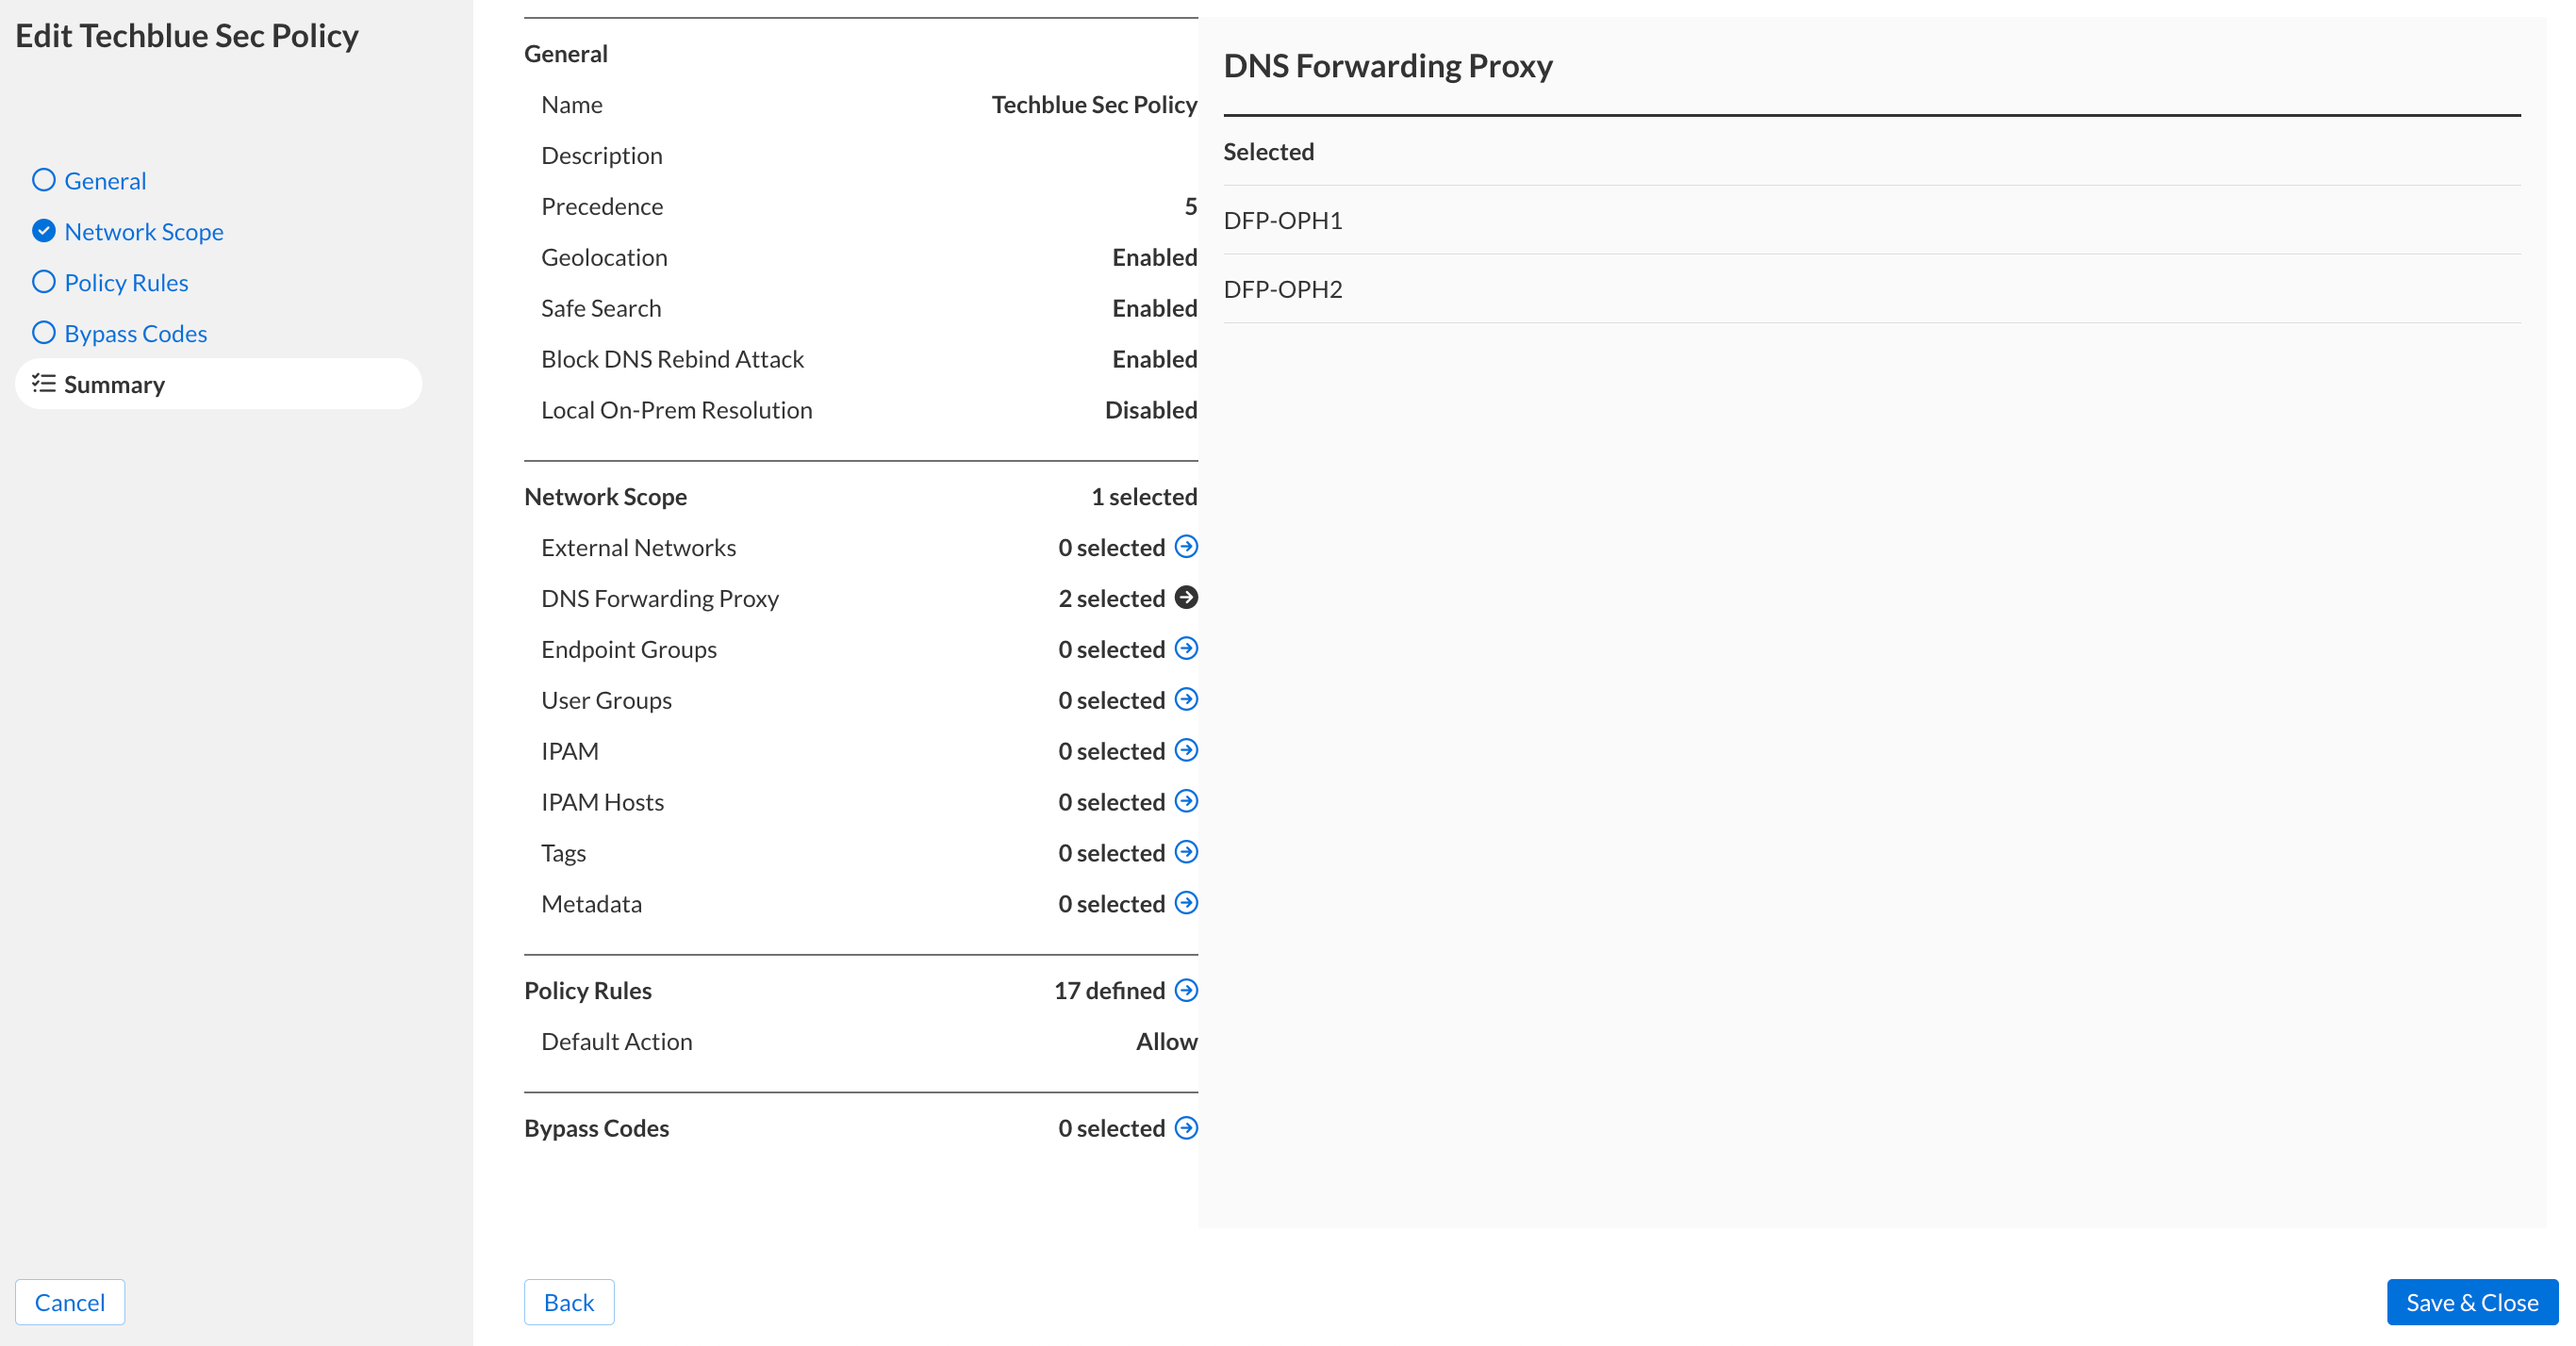
Click Finish, then Save&Close.
-
Allow for 5 minutes to pass to give time for the security policy configuration changes to take effect
Task 2 Solution: Testing Security Policies against DNS Forwarding Proxy
In this task, we are simulating a client setting behind a DFP querying for DNS domains. The DFP should forward all the client DNS traffic to the Threat Defense Cloud, which should block unwanted or harmful traffic based on our Security Policies configuration.
-
Log in to the VM testing-linux in your lab environment with the credentials (training / infoblox).
-
Open a terminal window and enter the command sudo set-network-static-bloxone.
-
If prompted for a password, enter infoblox.
-
This command sets a static IP address for the testing-linux VM to reach the NIOS-X servers.

-
-
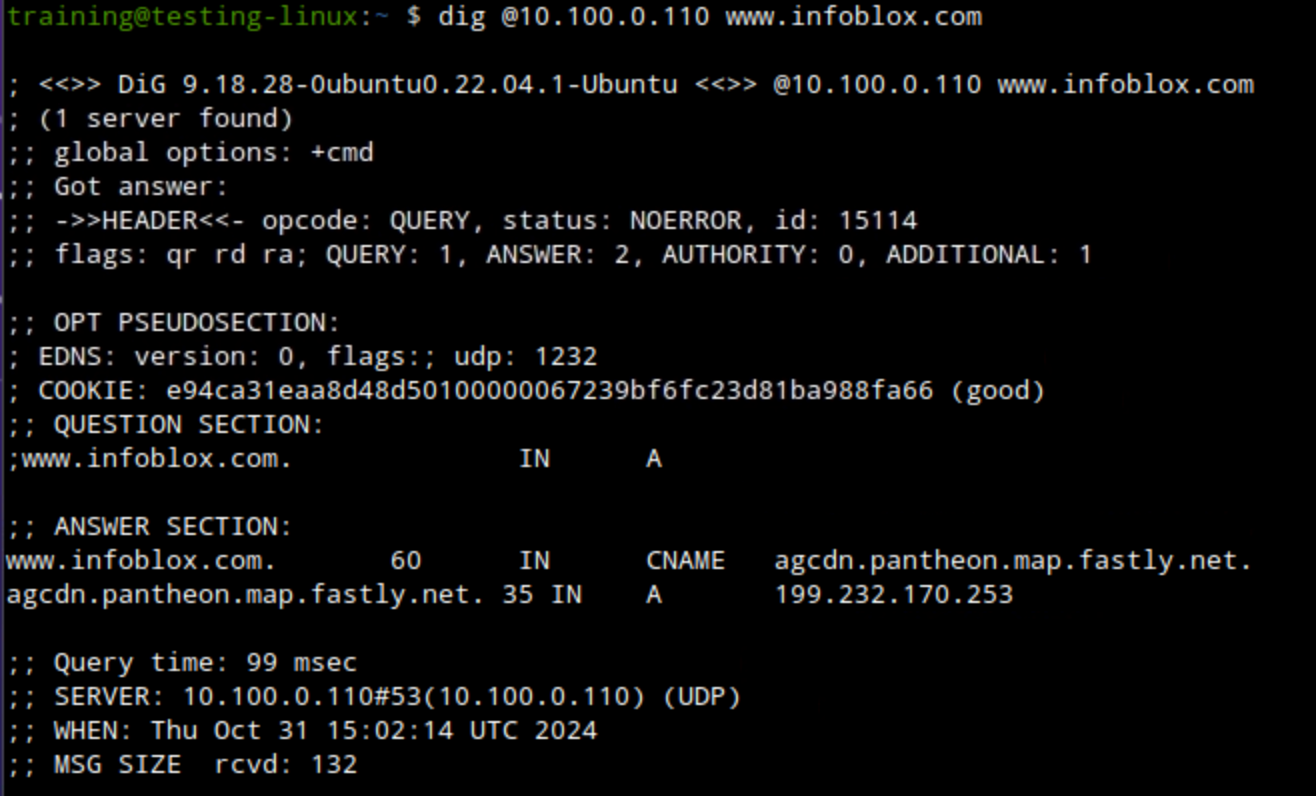
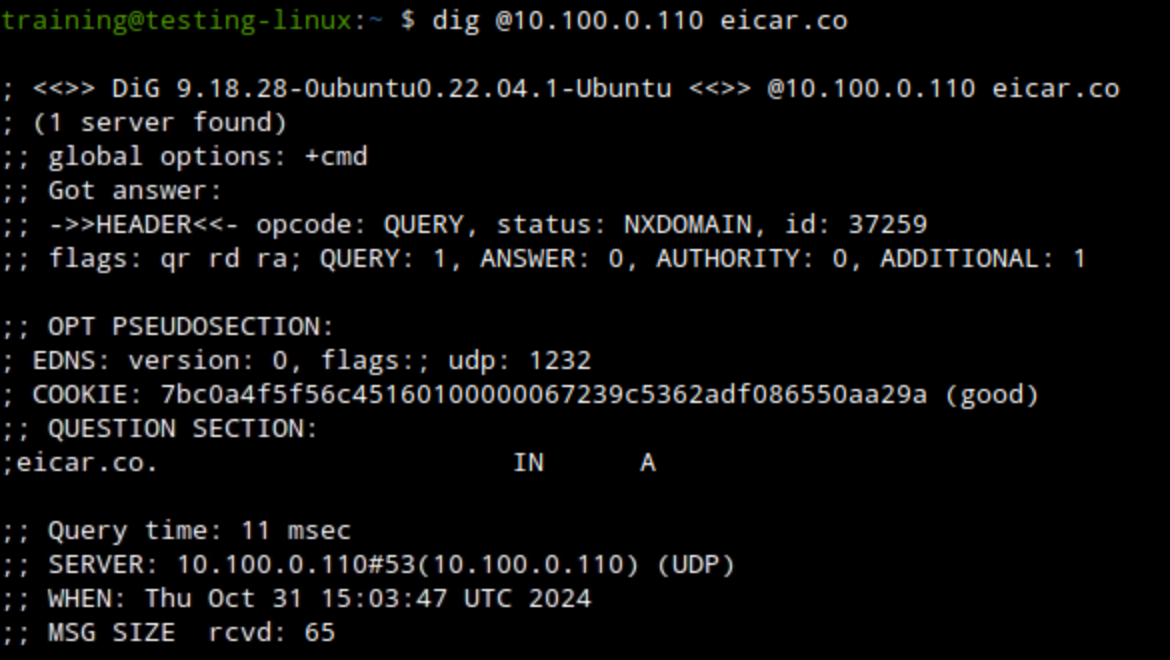
Use the command
dig @10.100.0.110 <DOMAIN-NAME>to test the custom lists we created earlier.-
dig @10.100.0.110 www.infoblox.com should be allowed with the NOERROR response code.
-
eicar.pw, eicar.stream and eicar.co should be blocked with an NXDOMAIN response code.
-
-
Open a browser window and enter www.gambling.com, www.instagram.com, and www.tiktok.com to test Category and Application filters.
-
All three domains should be redirected to the default Infoblox redirect page.
-
-
Switch back to the terminal window.
-
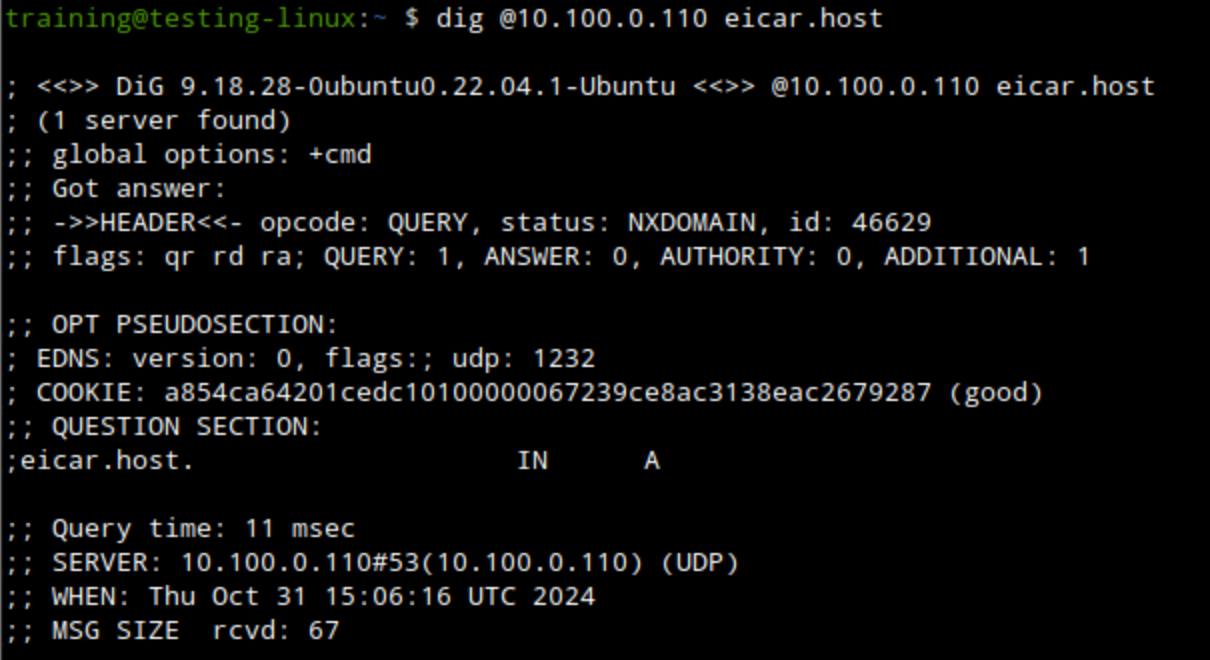
Use the command dig @10.100.0.110 eicar.host to test the Infoblox_Base Feed.
-
The domain should be blocked with an NXDOMAIN response code.
-
-
Switch back to your lab’s jump-desktop VM.
-
Use your Education Infoblox Portal Credentials to log into the Infoblox Portal.
-
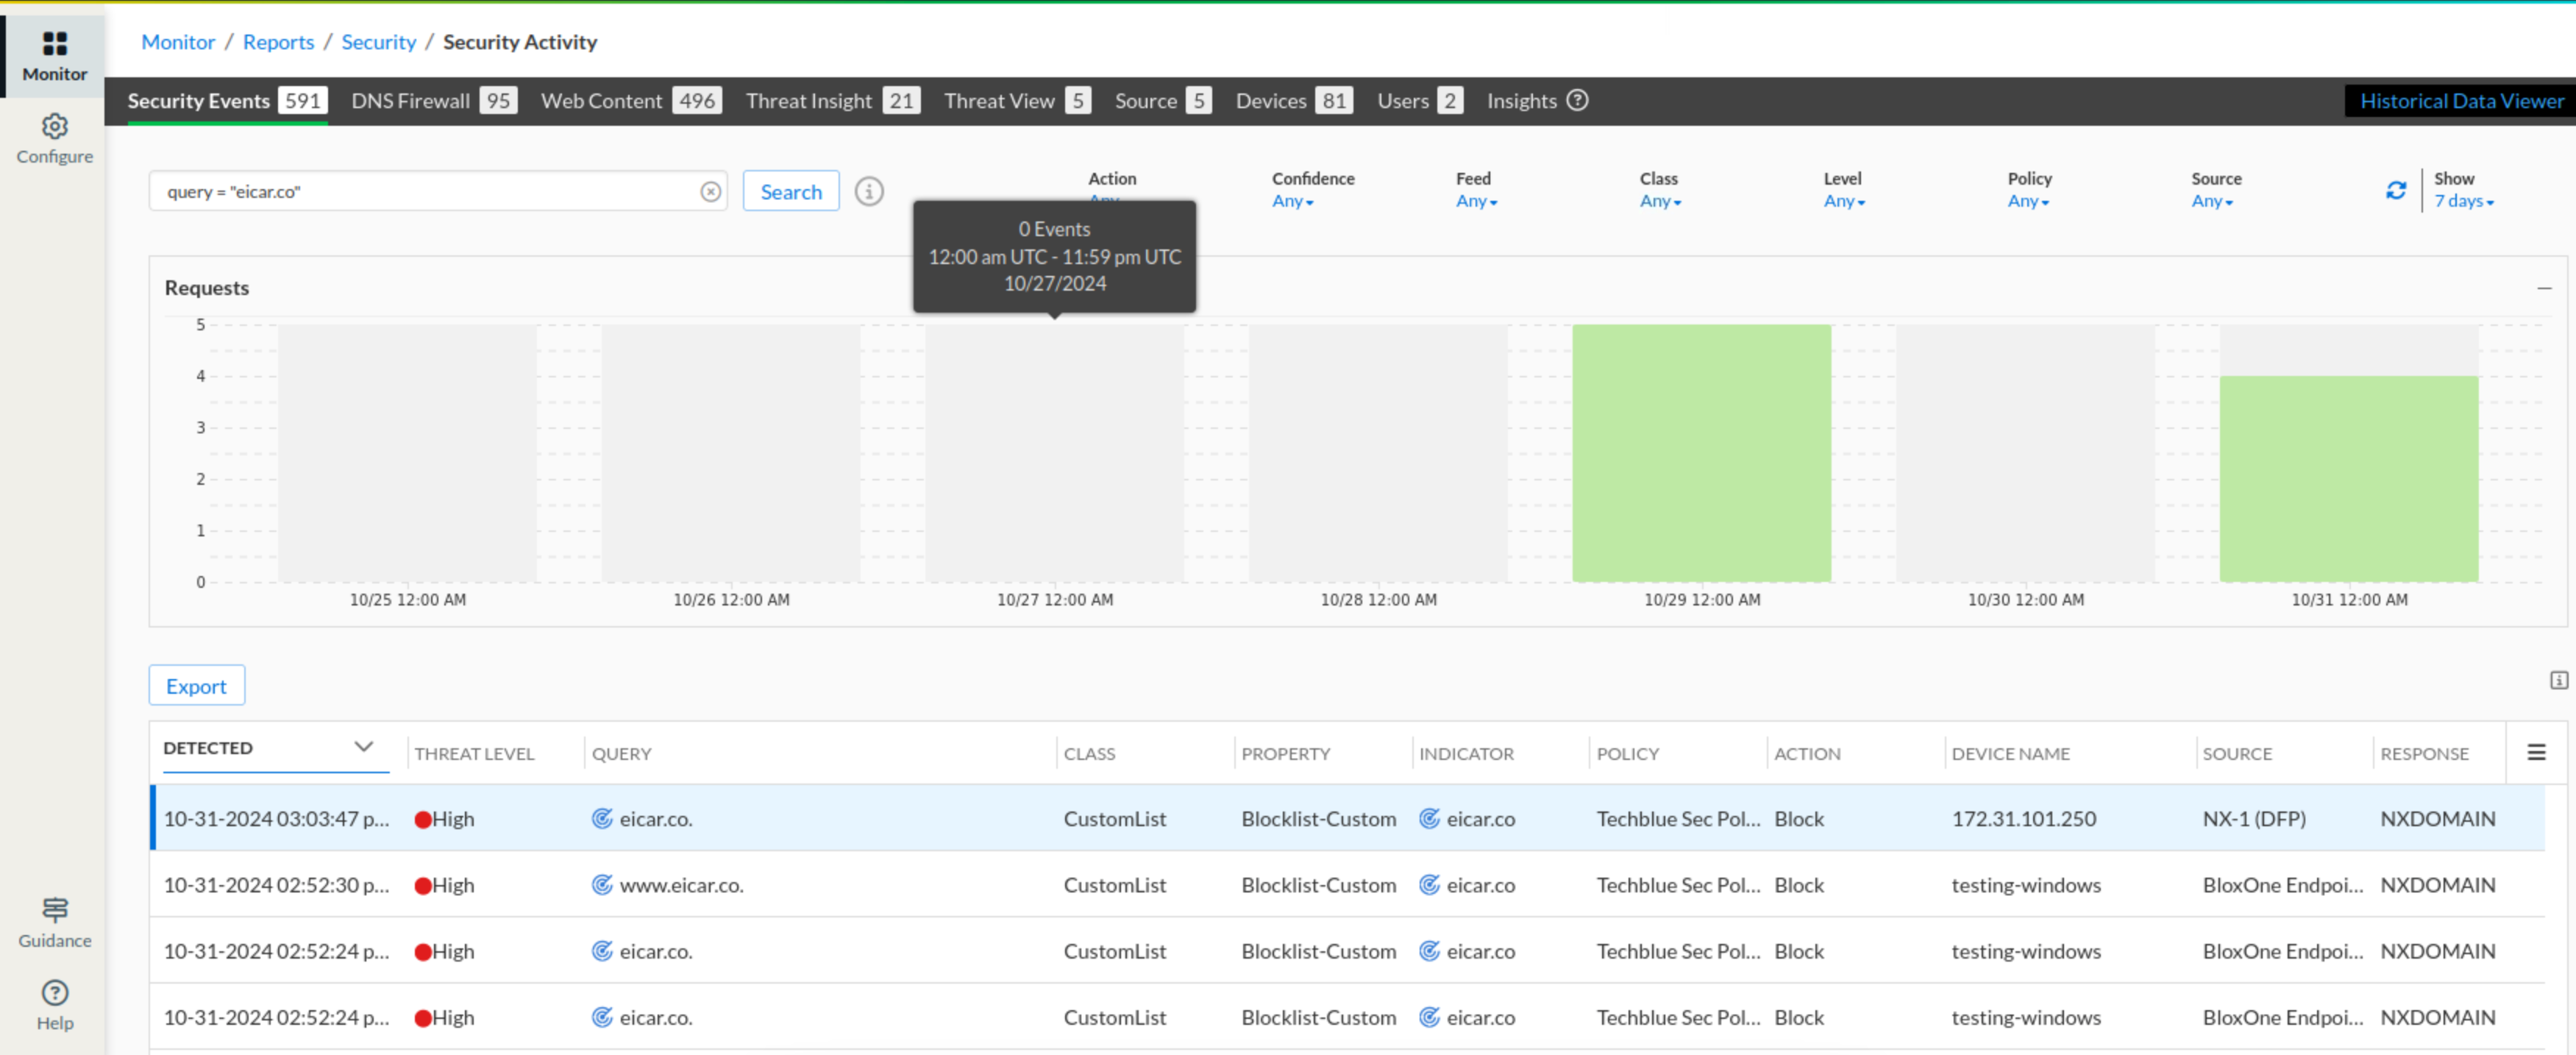
Navigate to Security →Threat Defense → Security Activity
-
Use the search bar at the top of the page and use
query ="<DOMAIN-NAME>"to verify each domain.-
Examples for domain queries to use query = “eicar.co” or query = “gambling.com”
-
-
The result should show the queried domain, the action taken, the policy used, and other details. This confirms that our policy, Techblue Sec Policy, blocked the traffic as designed, supporting our findings from using dig.
-