Scenario
You are a security analyst tasked with enhancing your organization’s DNS security posture. While your organization currently relies on Infoblox Threat Intelligence Feeds to block malicious and unwanted DNS traffic, your team needs more flexibility in handling specific threat classes/properties within those feeds. Specifically, you’ve been assigned to modify the response to a particular threat class to be redirected instead of blocked, without impacting other indicators in the same Threat Intelligence feeds. To accomplish this, you will create a Custom Response Policy Zone (RPZ), populate it with the desired threat class, integrate it into your organization’s DNS security policy, and then test the Custom RPZ to ensure it behaves as intended.
Estimate Completion Time
-
180 - 200 mins (~3.5 hours)
Prerequisites
-
Administrative access to the CSP
-
Enabling the DNS Forwarding Proxy Service (DFP) on a NIOS-X Server (2802)
-
Integrating DNS Forwarding Proxy Service (DFP) into a Security Policy (2816)
Tasks
-
Creating a Custom RPZ
-
Adding techblue-crpz to Techblue Sec Policy
-
Identifying domains for testing using TIDE Active Indicators
-
Testing Custom RPZ Policy Rule techblue-crpz
Task 1: Creating a Custom RPZ
It may require up to three hours for the feed to populate with records following its creation.
In the Infoblox Portal, create a Custom RPZ named techblue-crpz and add the Scam Threat Class to it.
Task 2: Adding Techblue-CRPZ to Techblue Sec Policy
Add the newly created Custom RPZ techblue-crpz into the Techblue Sec Policy security policy as a new policy rule with the action of Default Redirect. Place the new policy rule above the Infoblox-Base rule in the 6th place.
Task 3: Identifying domains for testing using TIDE Active Indicators
Use the Active Indicators research page to identify and note at least one domain from the Scam Threat Class to be used for testing in the next task.
Task 4: Testing Custom RPZ Rule techblue-crpz
Ensure the feed is populated before testing to achieve expected results. An unpopulated feed will have no records, leading to no traffic matching and affecting other rule actions.
Use the testing-linux VM to perform DNS lookups against the oph1.techblue.net server. Use the domains you noted from the previous task to initiate dig queries using the command: dig @10.100.0.110 <DOMAIN NAME>.
Solutions
Task 1 Solution: Creating a Custom RPZ
It may require up to three hours for the feed to populate with records following its creation.
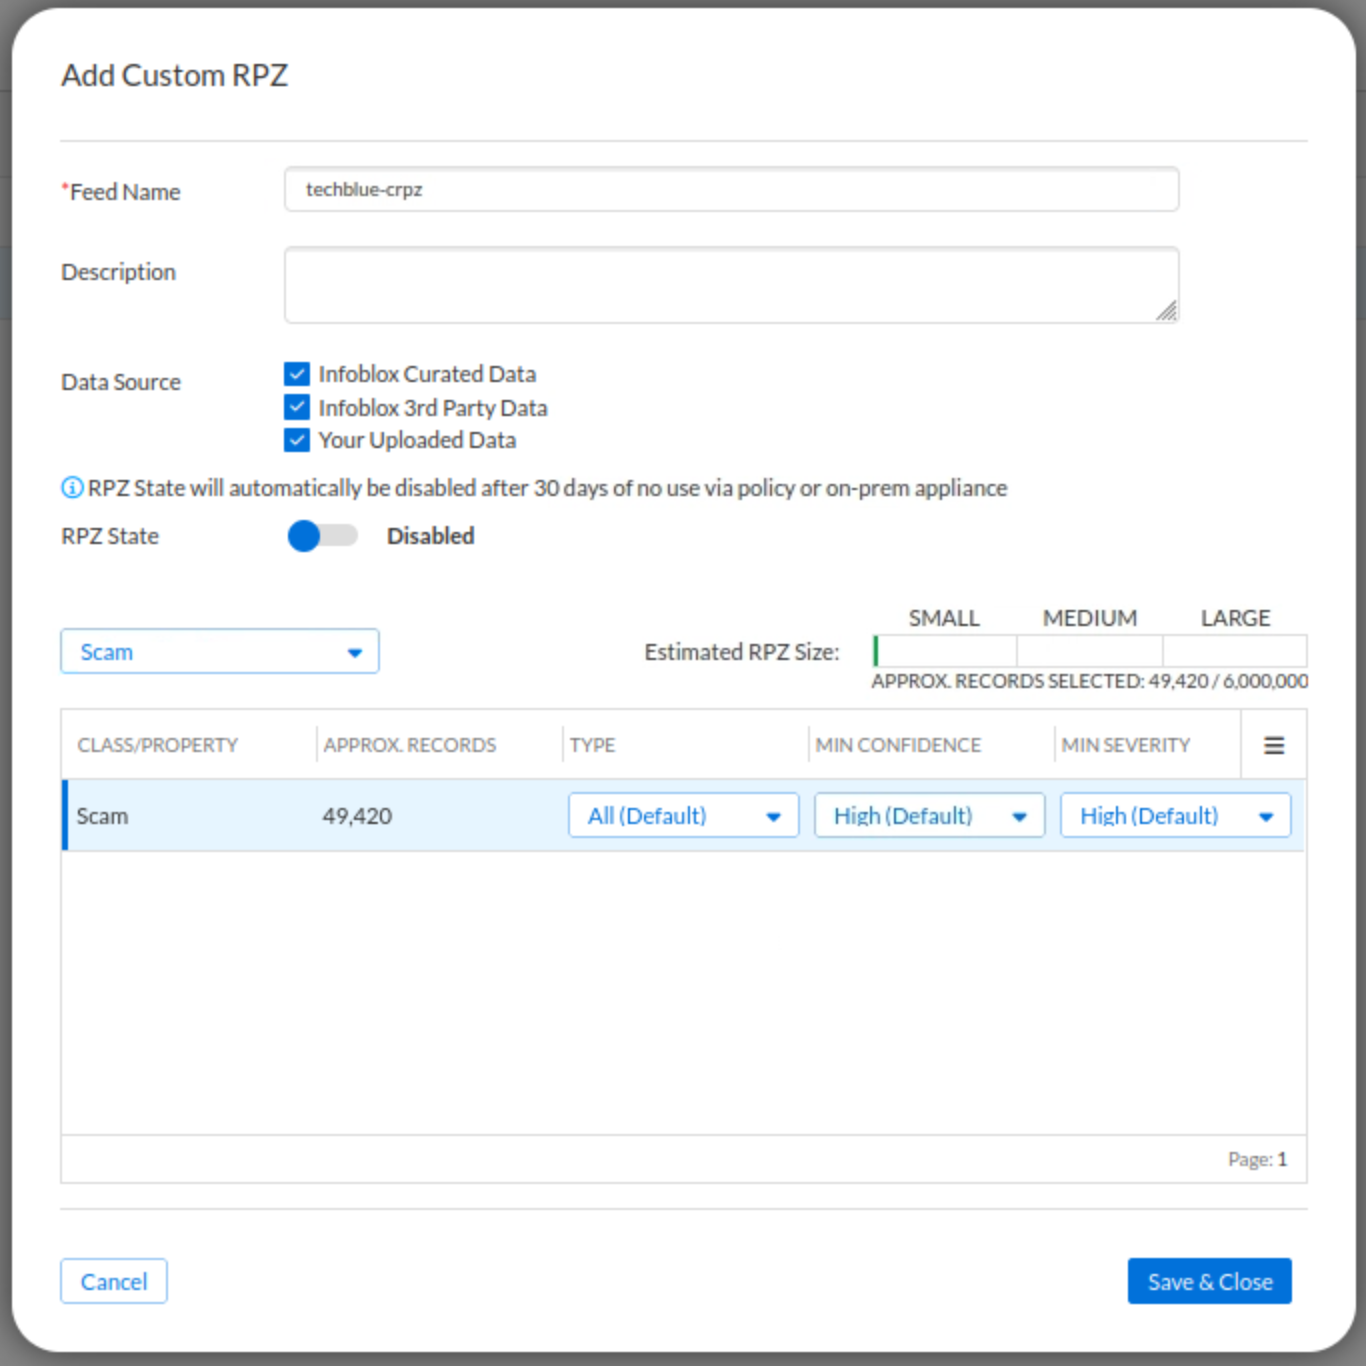
In this task, we will create a custom Response Policy Zone (RPZ) named techblue-crpz. This RPZ will be a dedicated container for a specific threat class from the Infoblox Threat Intelligence data your organization wants to handle differently. Using the Infoblox Portal’s Custom RPZ creation wizard, we will add the Scam threat class to the Custom RPZ. As a rule, we will integrate this custom RPZ into your DNS security policy later.
-
Log into your lab’s VM jump-desktop.
-
While logged in to jump-desktop, use your Education Infoblox Portal Credentials to log into the Infoblox Portal.
-
Navigate to Security → Configuration → TIDE → Custom RPZ
-
Click the Add Custom RPZ button
-
Use the name techblue-crpz
-
Click on the Select Class/Property list
-
Select the Scam threat class
-
Click Save & Close
Task 2 Solution: Adding techblue-crpz to Techblue Sec Policy
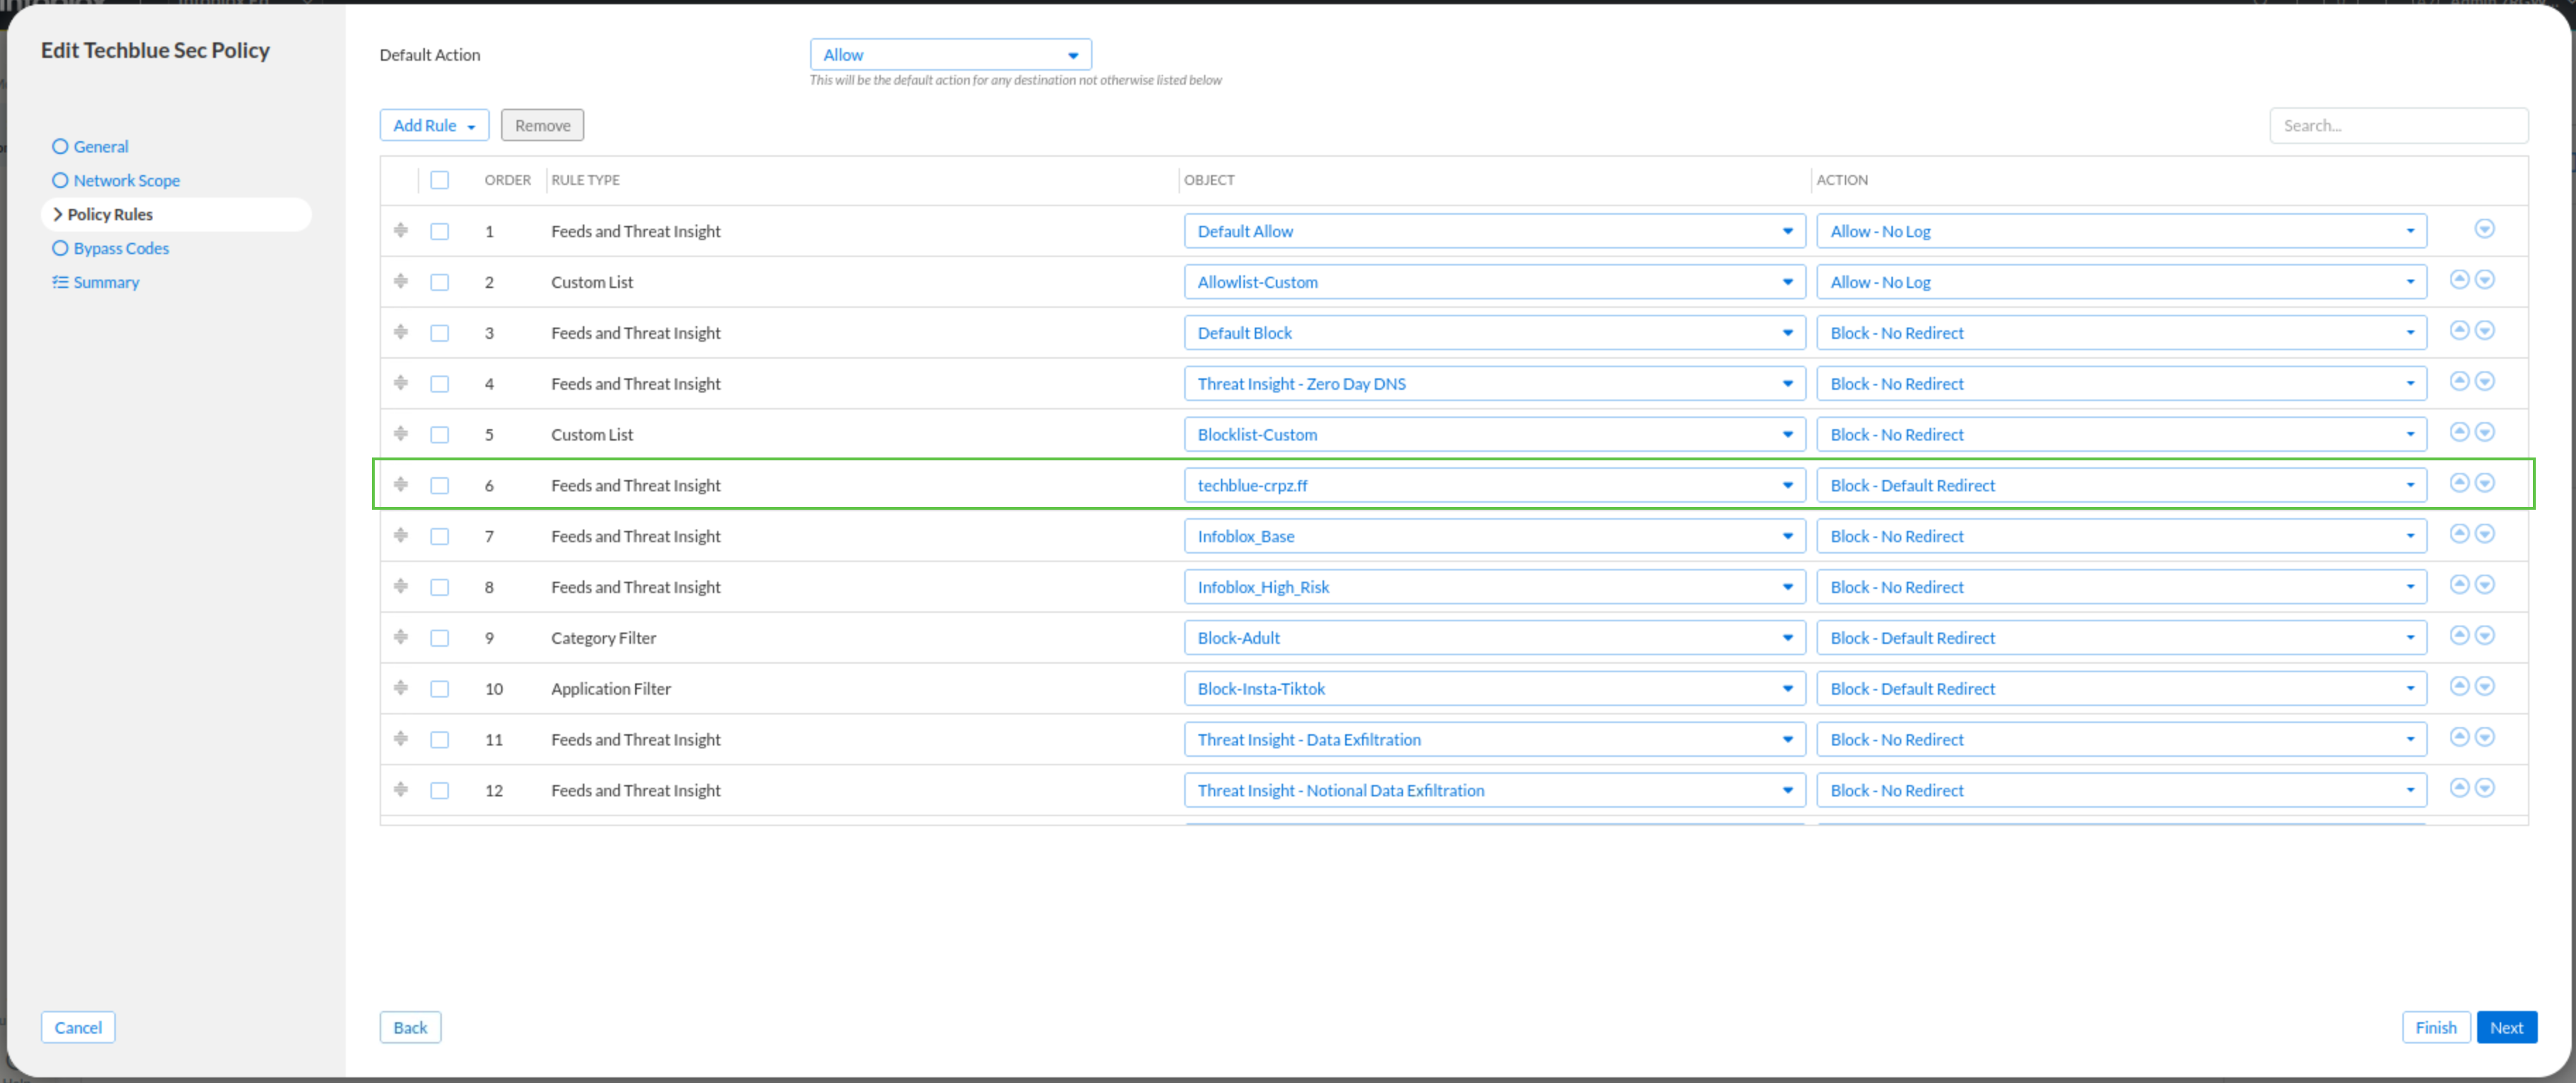
In this task, we will add the techblue-crpz custom RPZ to the Techblue Sec Policy as a new rule. We will assign the Default-Redirect action to this rule, ensuring that any DNS queries matching the grouped threat classes and properties are redirected rather than blocked. Once the rule is created, we will move it to the 6th position, placing it just above the Infoblox-Base rule. This placement is critical since the threat components in our custom RPZ also exist in the broader Infoblox feeds, so positioning our rule higher in the policy ensures it takes precedence. As a result, our custom action will be applied before the generic feed rules are evaluated, achieving our desired outcome.
-
Navigate to Security → Configuration → Security Policies
-
Click the hamburger icon next to Techblue Sec Policy
-
Click Edit
-
Click on the Policy Rules tab
-
Click on Add Rule
-
Select Feeds and Threat Insights
-
Under the object drop-down list, select techblue-crpz.ff
-
Change the rule action to Block - Default Redirect
-
-
Use the arrow icon next to the rule to move it to the 6th position, just on top of the Infoblox_Base rule
-
Click Finish, then Save & Close
Task 3 Solution: Identifying domains for testing using TIDE Active Indicators
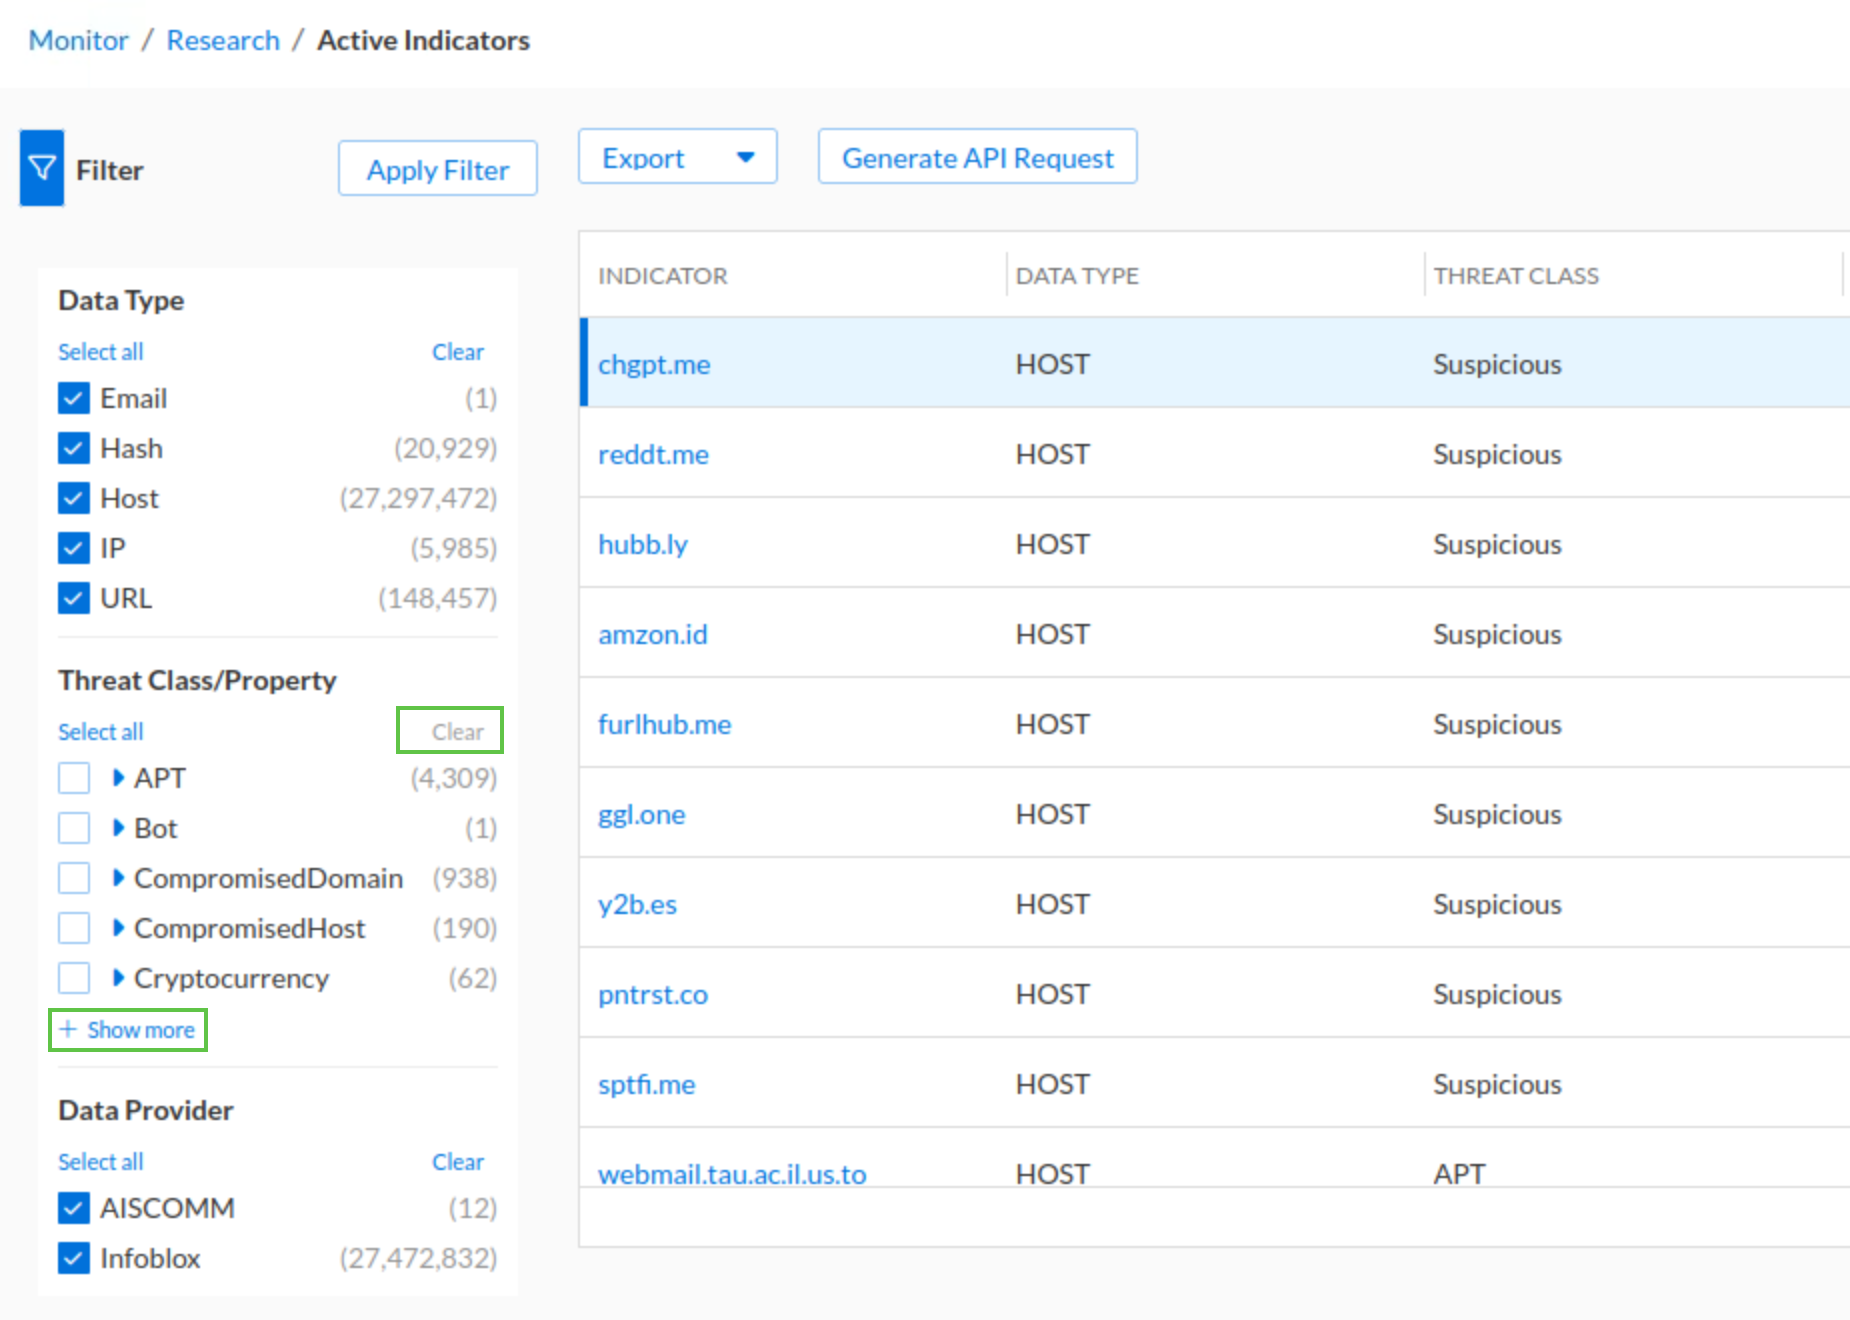
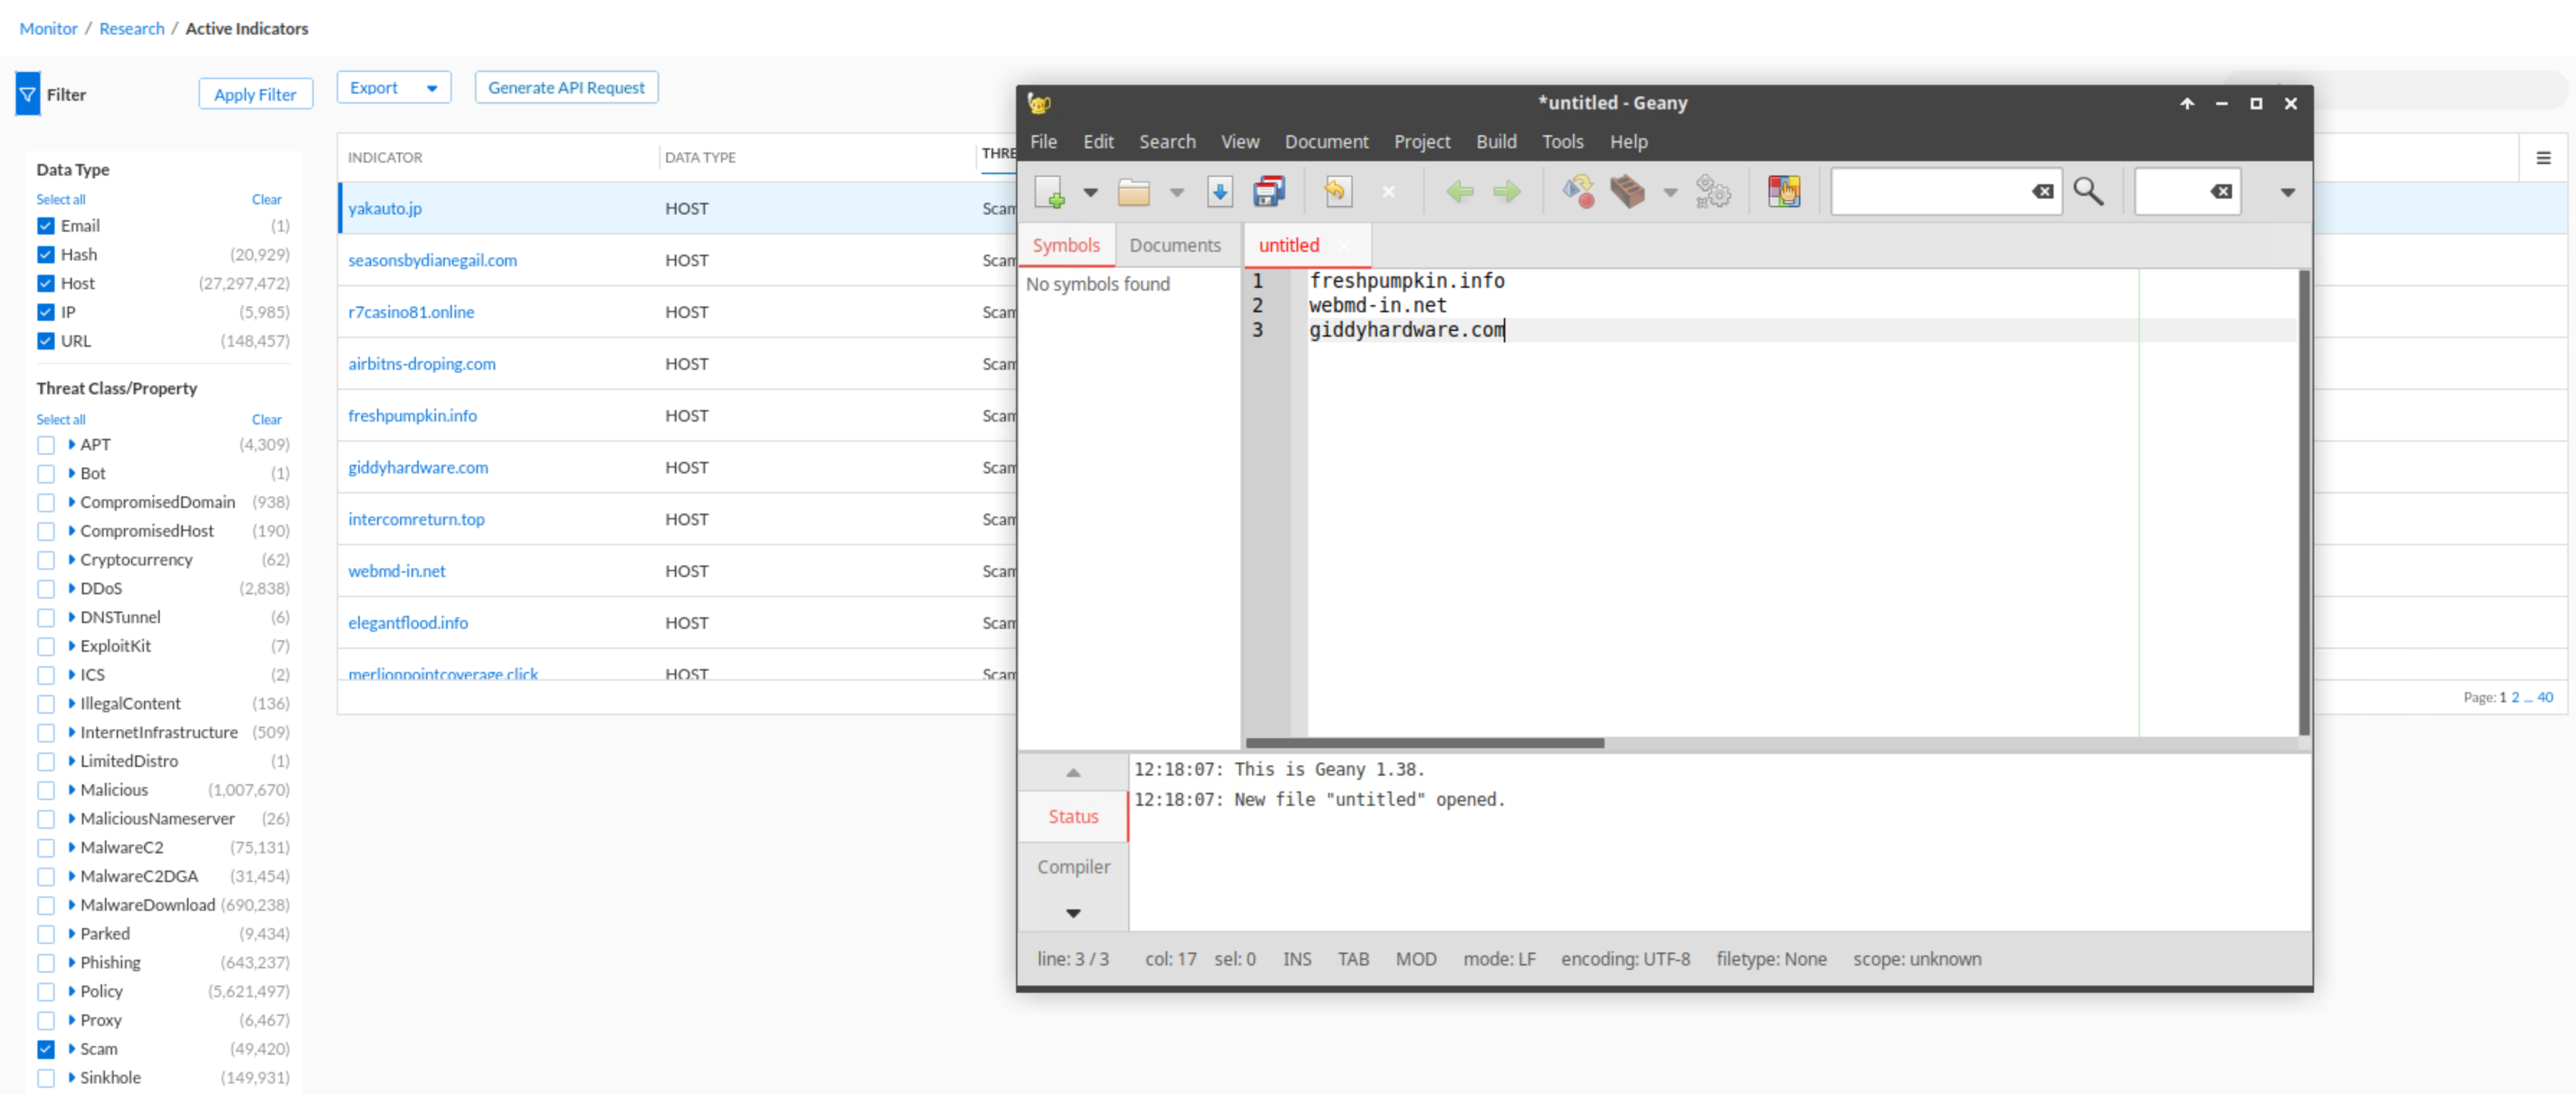
In this task, we will use the TIDE Active Indicators research page on the Infoblox Portal to identify and note down at least one domain per class/property we added to the custom RPZ we created earlier, so we can use them in the next task to test our new policy rule against them. The Active Indicators table will contain all the domains in any feeds and insights available in our Threat Defense tenant.
-
Navigate to Security → Research → Active Indicators
-
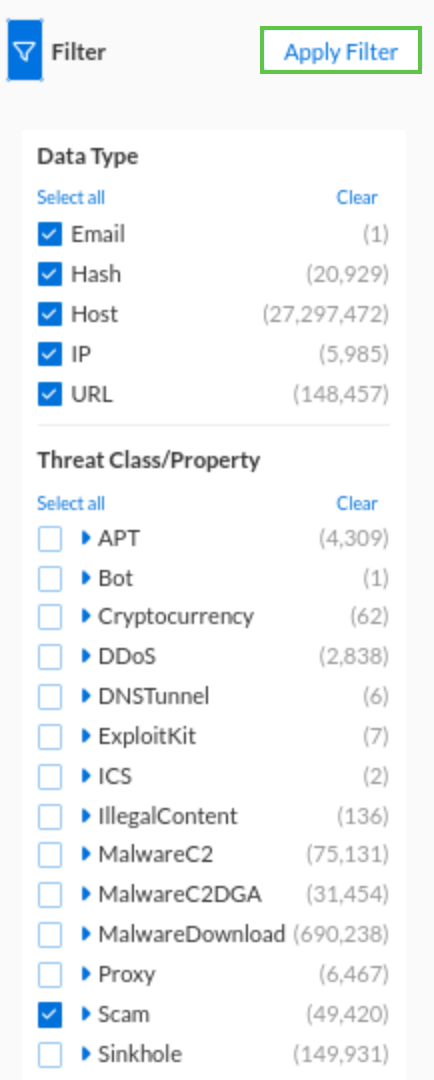
In the Filter section, click the clear link under the Threat Class/Property, then click show more
-
Under the Threat Class/Property check the Scam box.
-
Click Apply Filter
-
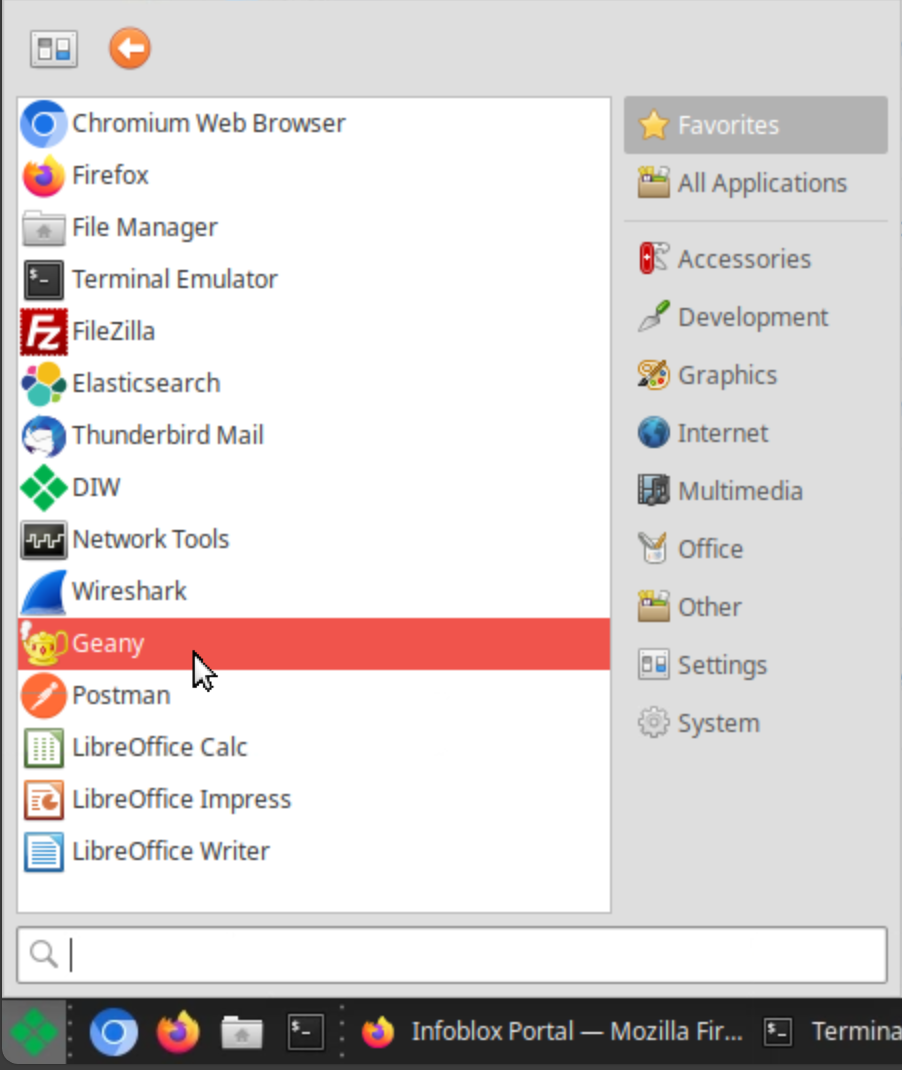
Click on the Infoblox Icon on the Application menu of your lab’s VM jump-desktop
-
Open the Geany application
-
Save at least three domains from the Scam Threat Class.
Task 4 Solution: Testing Custom RPZ Rule Techblue-CRPZ
Ensure the feed is populated before testing to achieve expected results. An unpopulated feed will have no records, leading to no traffic matching and affecting other rule actions.
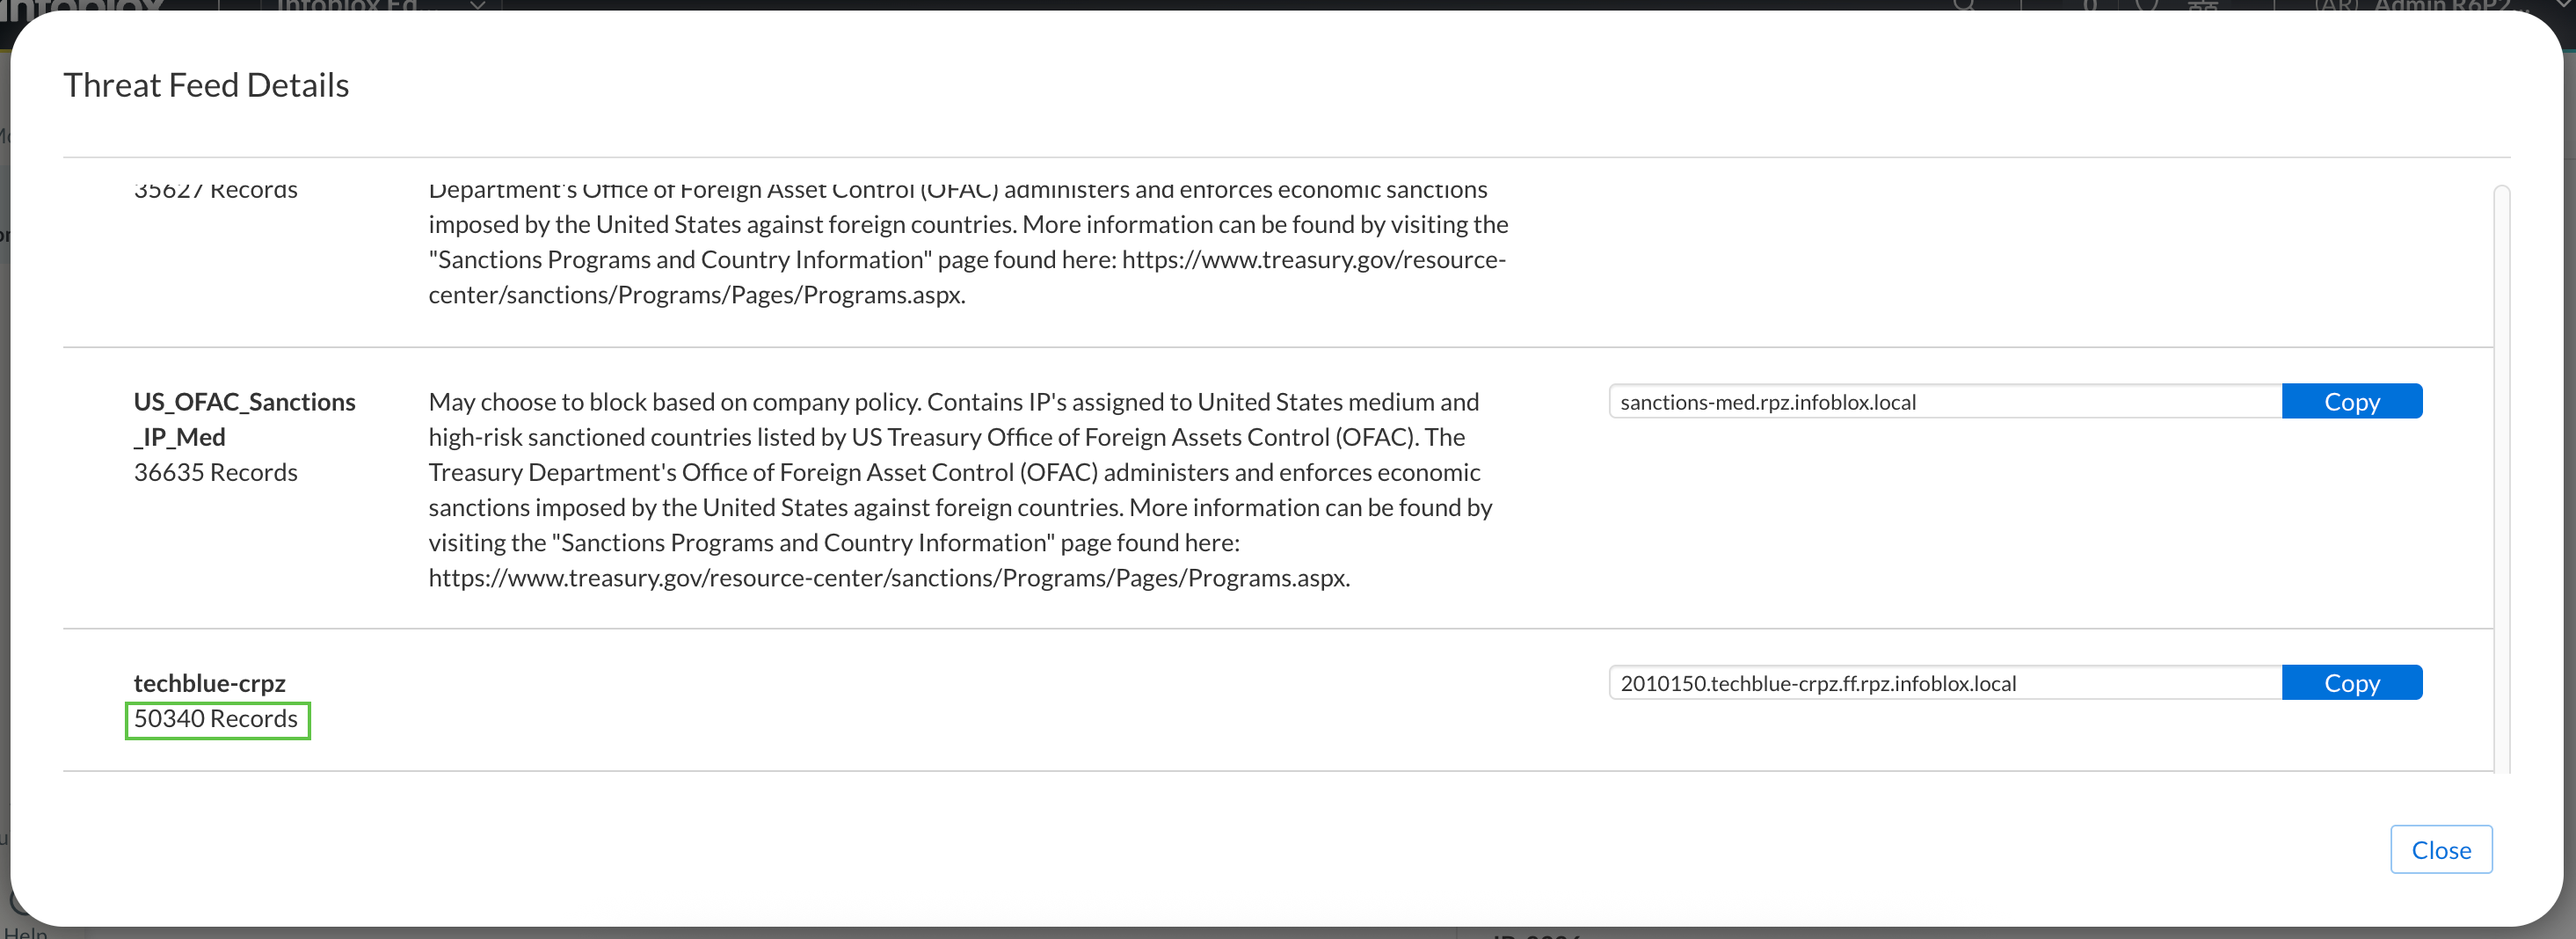
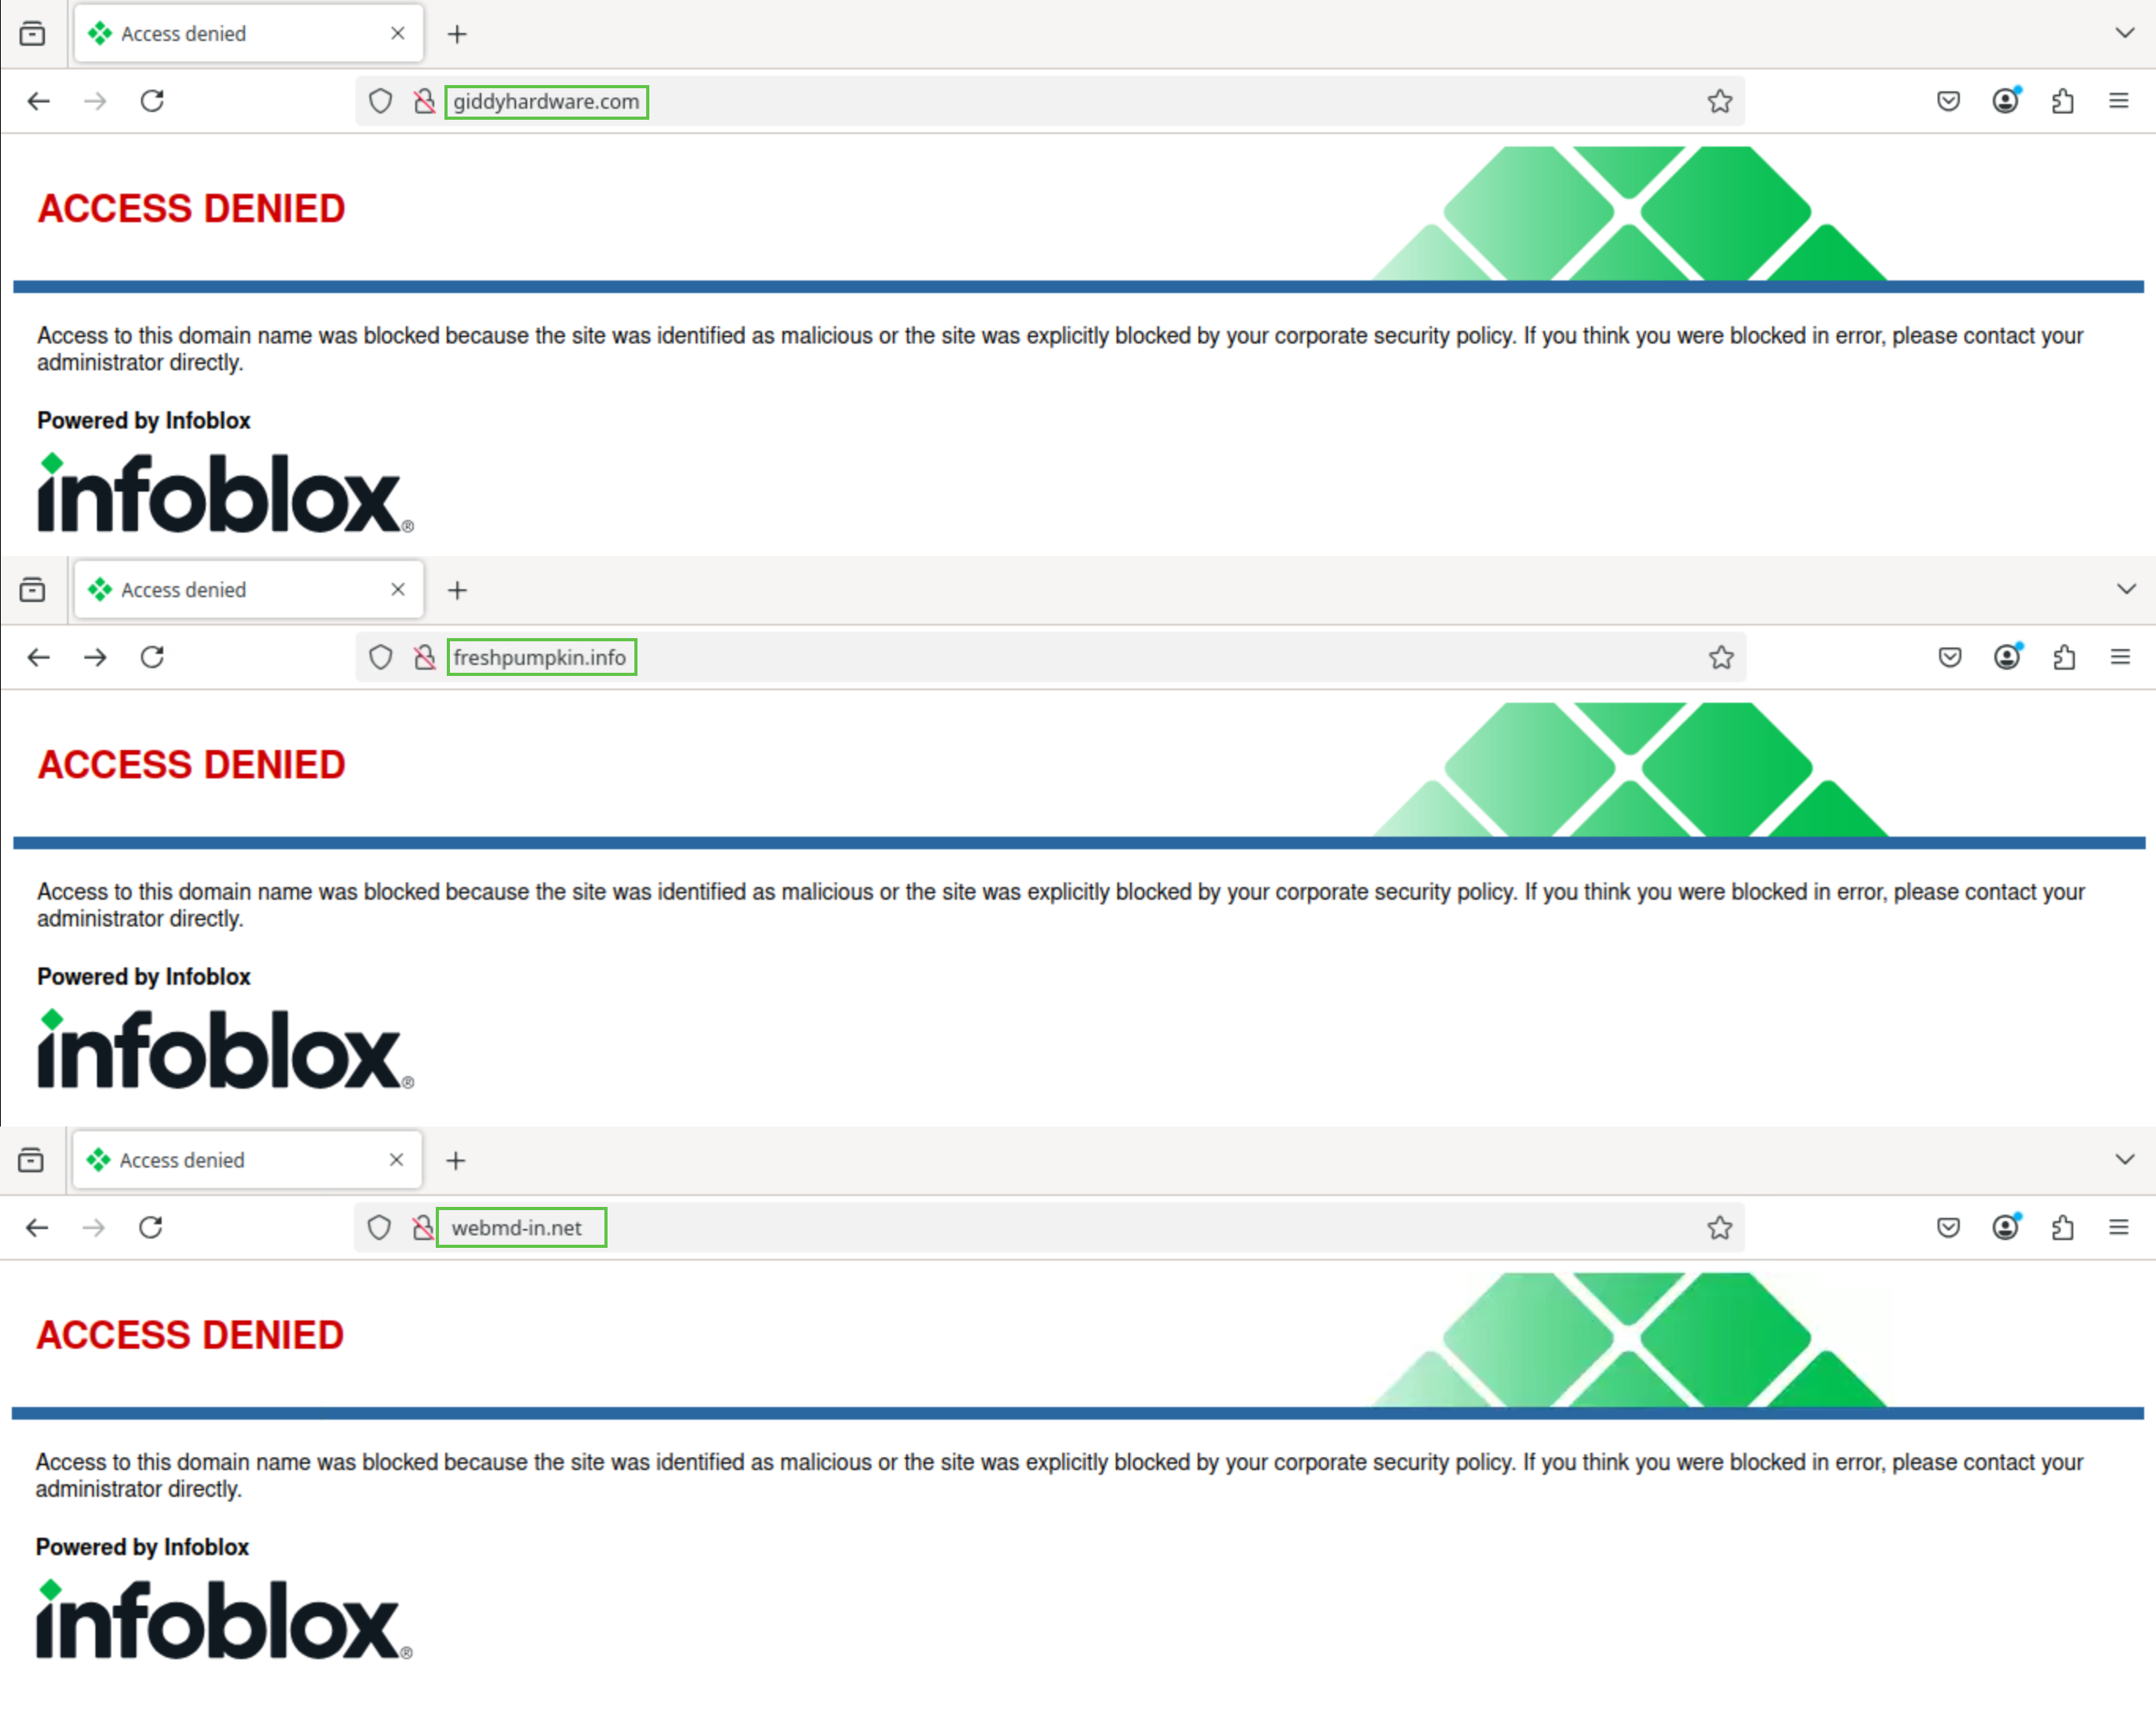
In this task, we will start by verifying that our custom RPZ feed has been populated with records as it might take between 1 to 3 hours for that to happen when we first create our RPZ. Then, we will use the testing-linux machine’s web browser to surf the web for our previously noted domains. As per our policy configuration, we expect our requests to be redirected to the default Infoblox redirect page.
-
Log into your lab’s VM jump-desktop.
-
While logged in to jump-desktop, use your Education Infoblox Portal Credentials to log into the Infoblox Portal.
-
Navigate to Security →Configuration -> On-Prem Firewall
-
Select Feed Configuration Values under Step 2
-
Scroll to the botttom of the feed list and verify that techblue-crpz has more than 0 records.
-
Log in to the VM testing-linux in your lab environment with the credentials (training / infoblox).
-
Open a terminal window and enter the command sudo set-network-static-bloxone. This command sets a static IP address for the testing-linux VM so it can reach the NIOS-X servers.

-
Open a browser window and surf for each previously saved domain
-
All domains should be redirected to the default Infoblox redirect page.
-
-
Log back into your lab’s jump-desktop VM.
-
Navigate to Security → Threat Defense → Security Activities
-
Use the search bar at the top of the page and use
query = <DOMAIN-NAME>to view all the logs for this specific machine.-
The
<DOMAIN-NAME>parameter should be replaced with the domain names we accessed for in the previous task.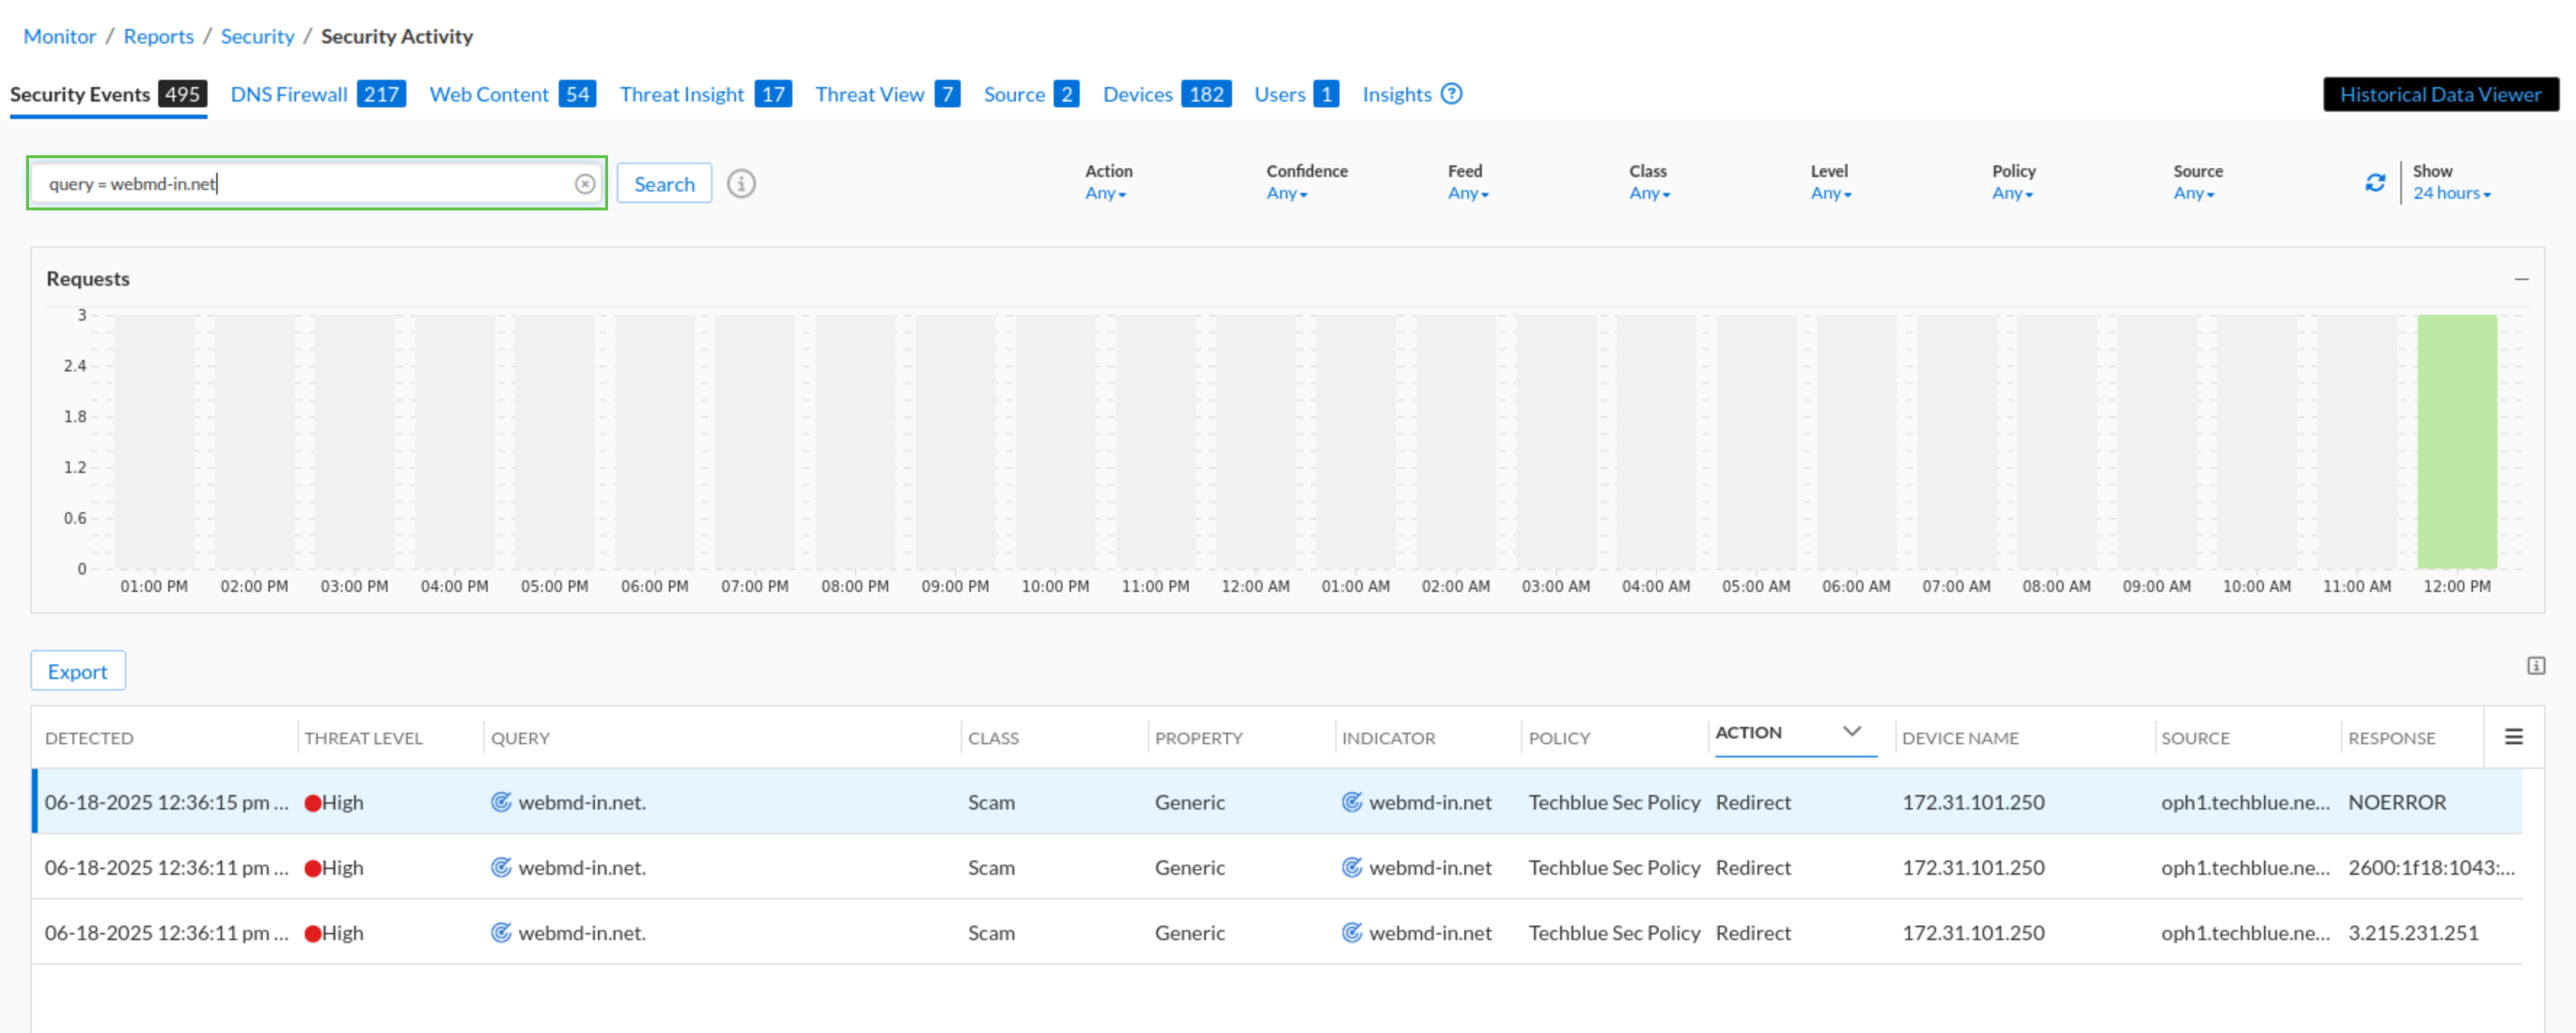
-
-