Scenario
You support client systems that need reliable access to the external domain ddip.org, which is owned by a training provider outside your organization. To improve local survivability, you decided to host a read-only secondary copy of the zone on your Universal DDI DNS servers so clients can continue resolving names even when connectivity to the external provider is disrupted. Your goal is to create the required DNS Server Group, configure the secondary zone ddip.org in the Infoblox Portal, and verify from a client that the transferred zone data is available locally.
Estimated Completion Time
-
20 to 30 minutes
Prerequisites
-
Administrative access to the Infoblox Portal
-
Permission to perform zone transfer from external primary DNS server
Learning Content
Tasks
-
Create DNS Server Group
-
Create Secondary Zone
-
Validate Zone Data
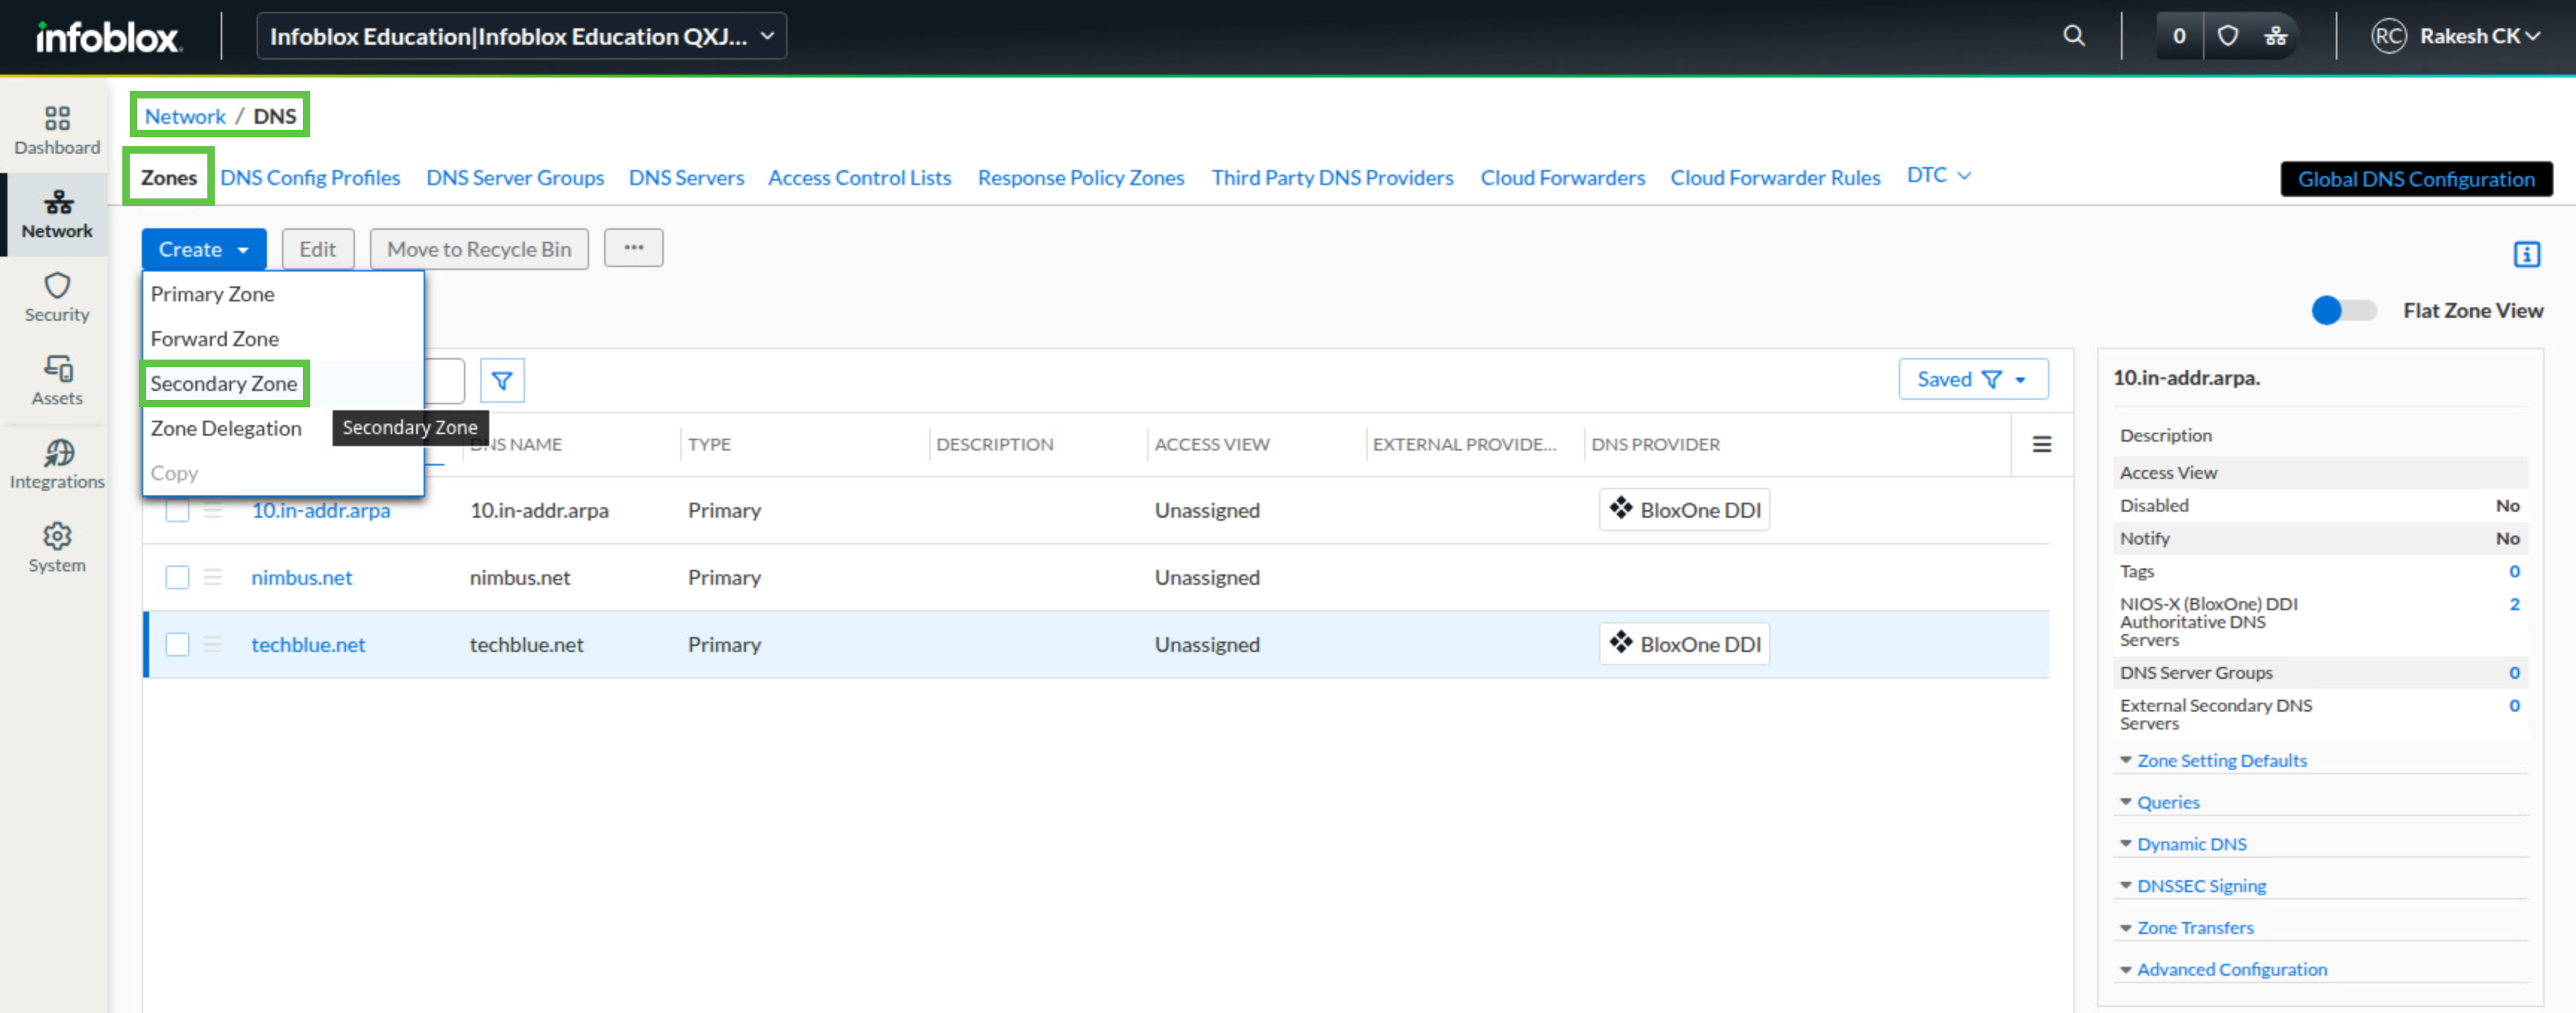
Task 1: Create DNS Server Group
Create an Authoritative DNS Server Group that includes the external primary server mimosa.techblue.io and the TSIG key provided for zone transfers. The key is stored in a file named tsig_xfer_sha256.txt on the Shared Drive of the jump-desktop VM. Use the following command on the jump-desktop VM to identify the current IP address of mimosa.techblue.io: dig +short mimosa.techblue.io. Configure the group so your two DNS service instances can receive the transferred zone data.
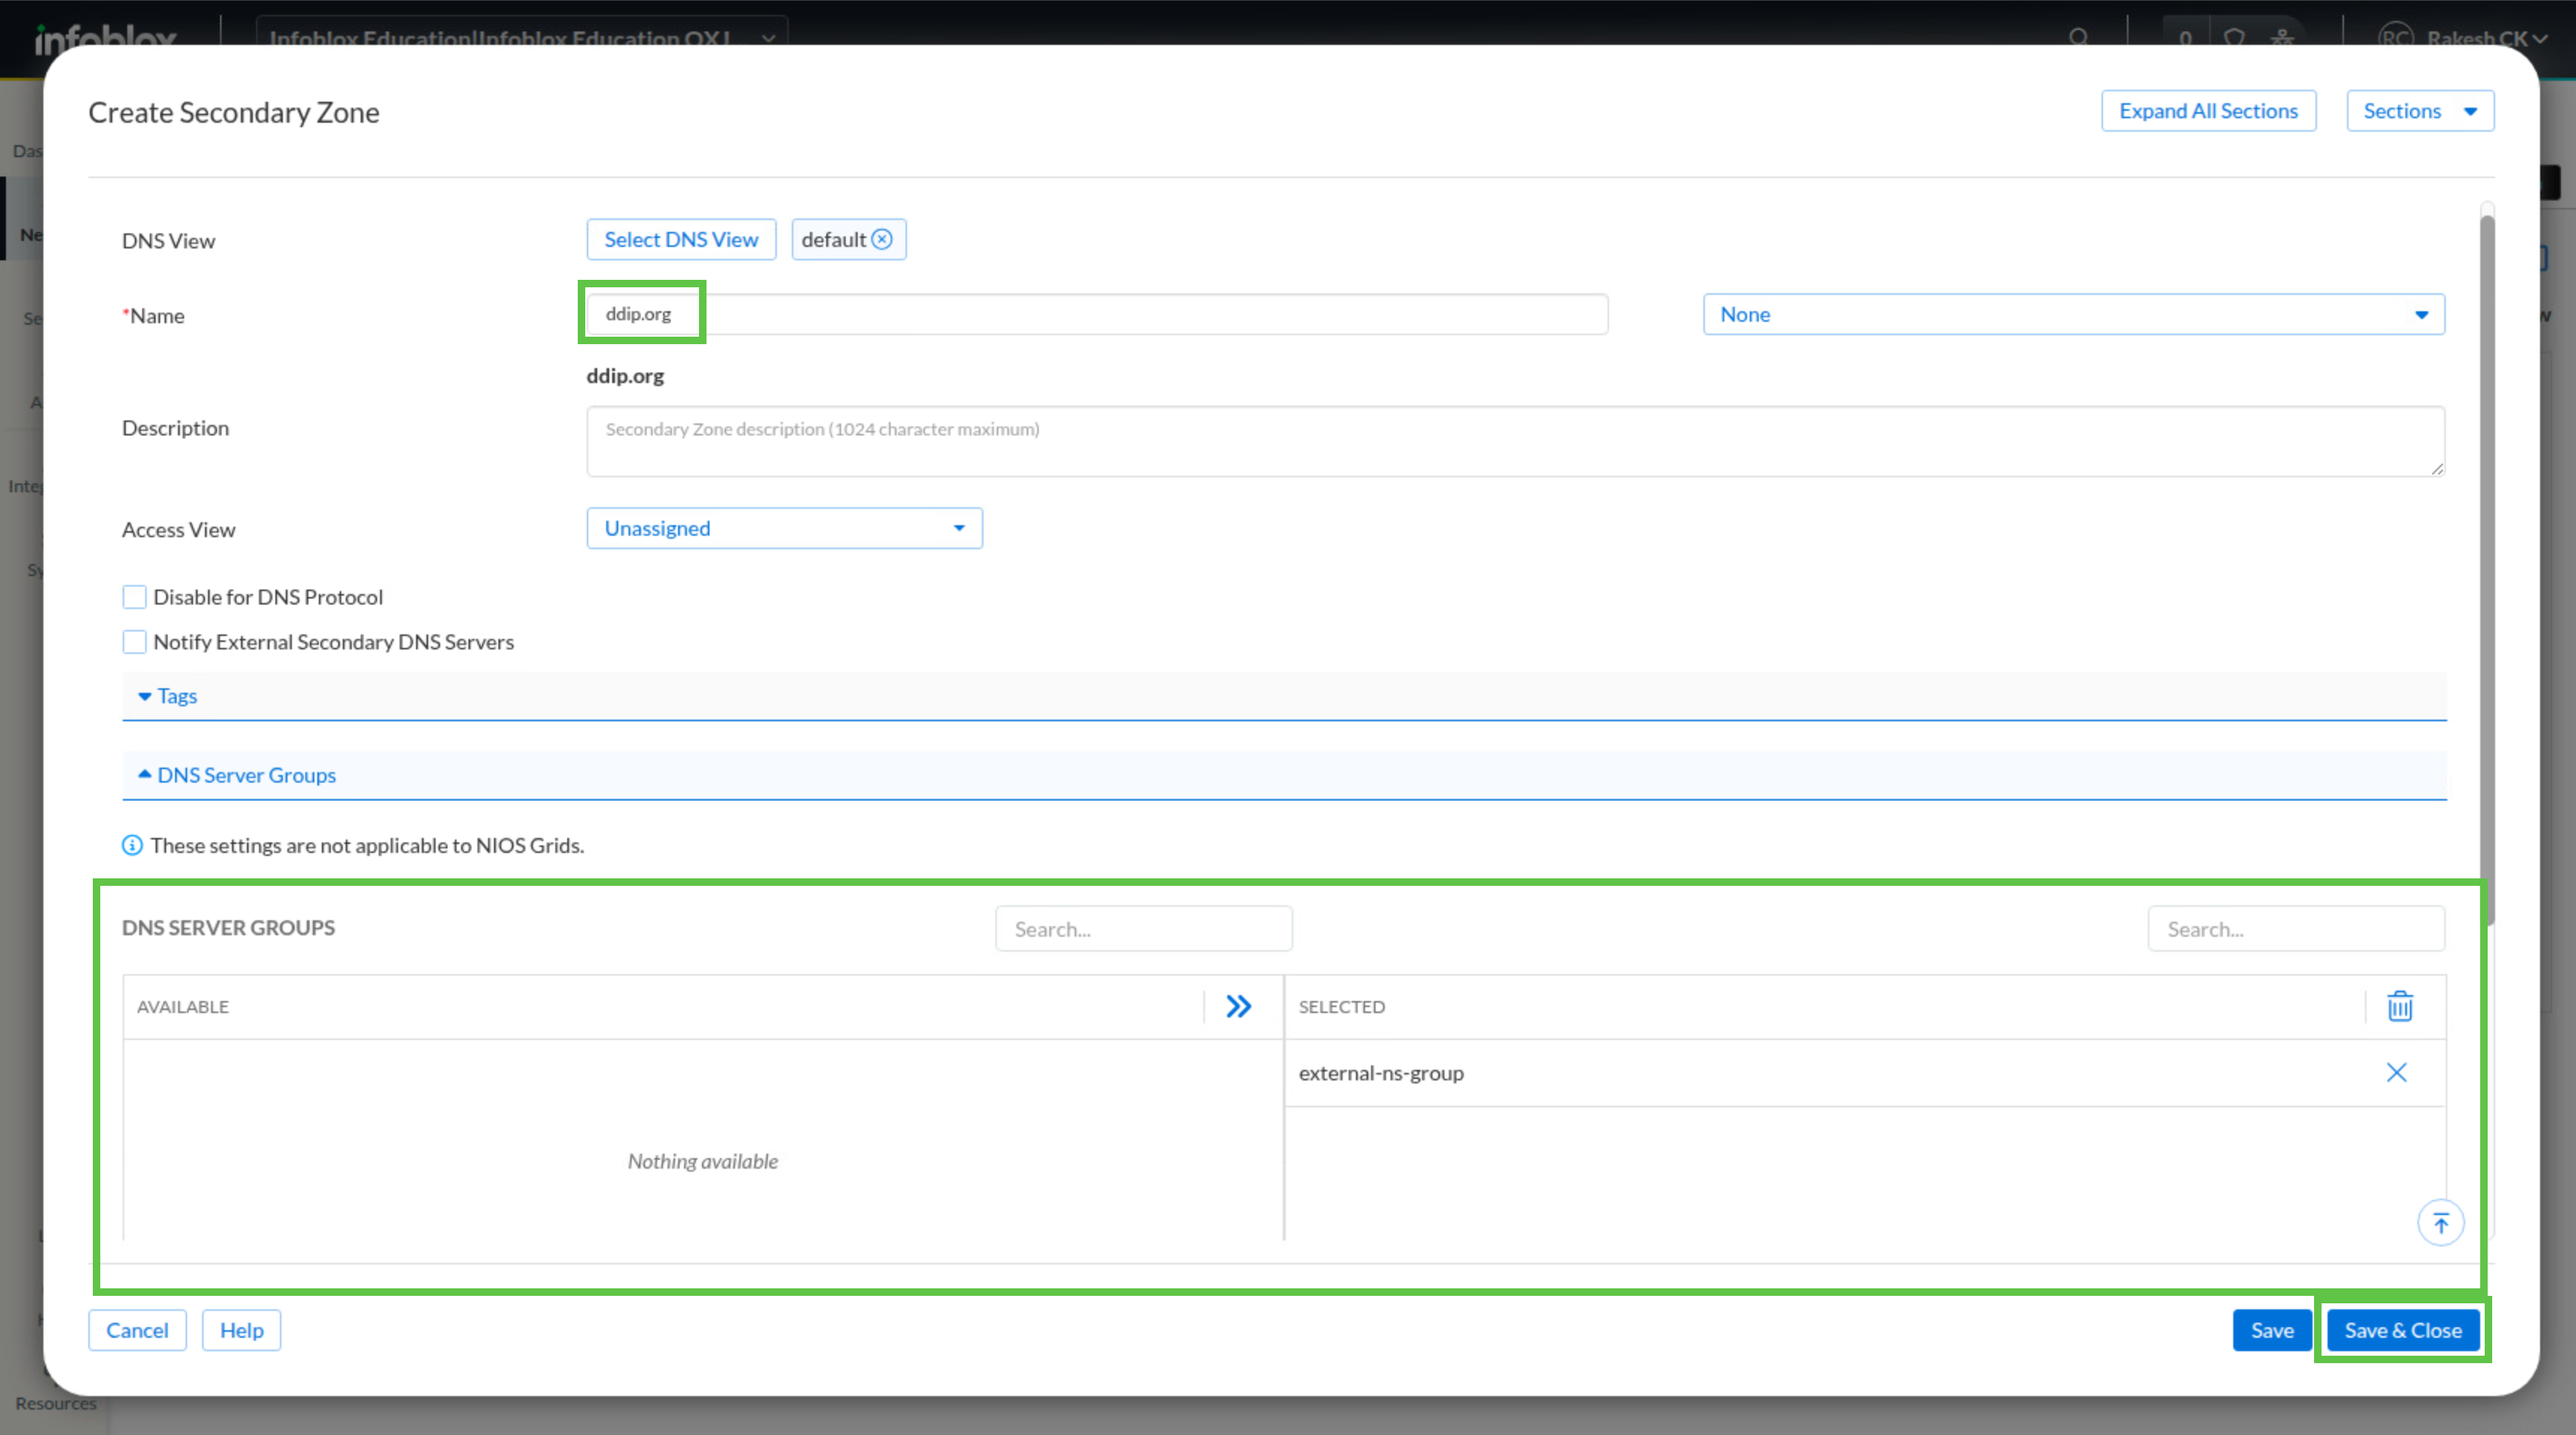
Task 2: Create a Secondary Zone
Use the DNS Server Group from Task 1 to create the secondary zone ddip.org in the default DNS view.
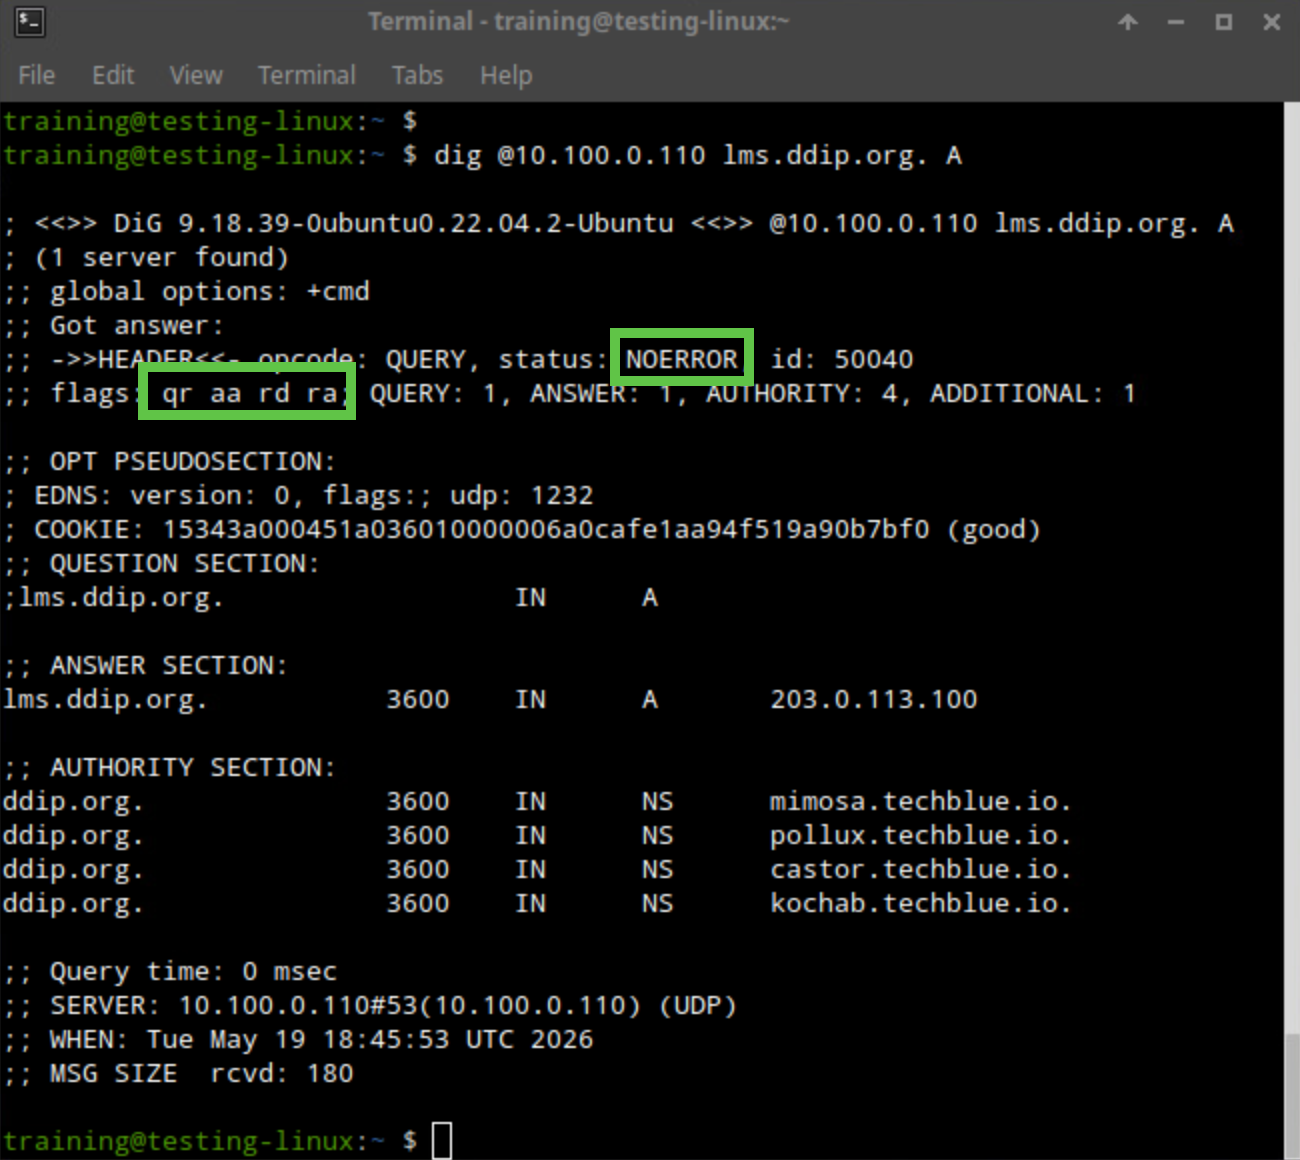
Task 3: Validate Zone Data
Use testing-linux to confirm that the zone transfer completed successfully and that clients can resolve records from the secondary zone.
Solutions
Task 1 Solution: Create DNS Server Group
Start by defining the external zone-transfer source and the authentication settings it requires. The DNS Server Group brings together the external primary server, the TSIG key, and your local DNS service instances so you can reuse that relationship when you create the secondary zone.
-
Log in to your lab’s jump-desktop.
-
Open a terminal on the jump-desktop VM and identify the current IP address of mimosa.techblue.io using the dig command :
dig +short mimosa.techblue.io. -
Note the returned IP address.
-
Use the Education Infoblox Portal credentials to sign in to the Infoblox Portal.
-
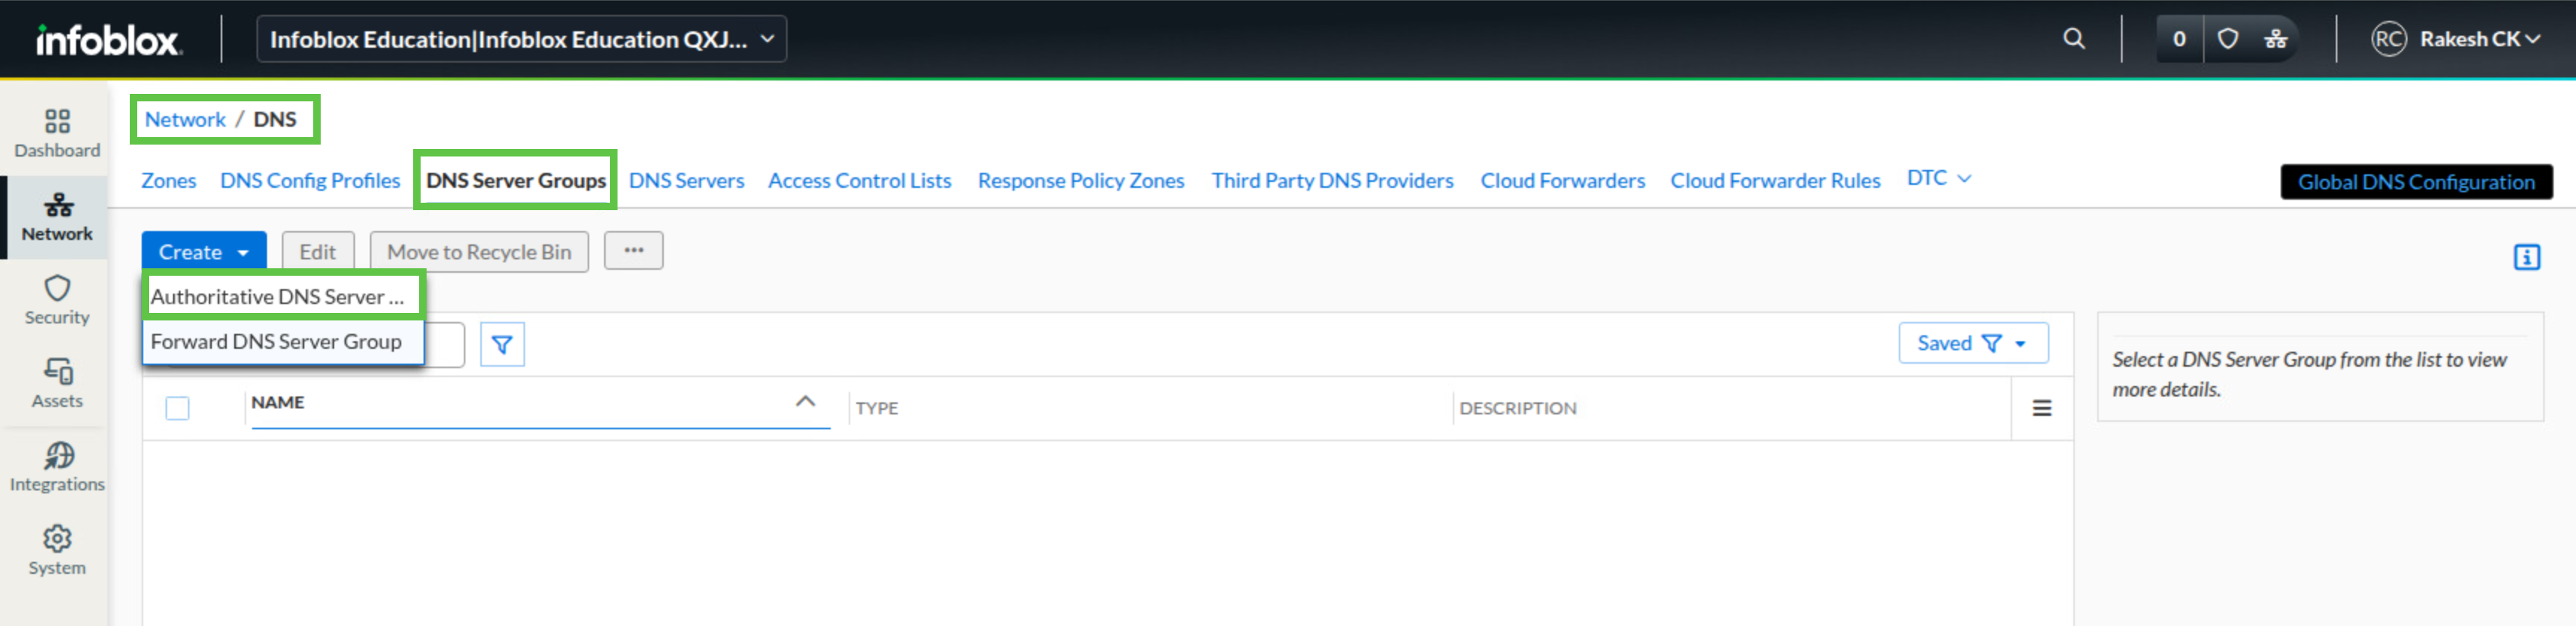
Navigate to Network → DNS.
-
Click the DNS Server Groups tab.
-
Click Create and select Authoritative DNS Server Group.
-
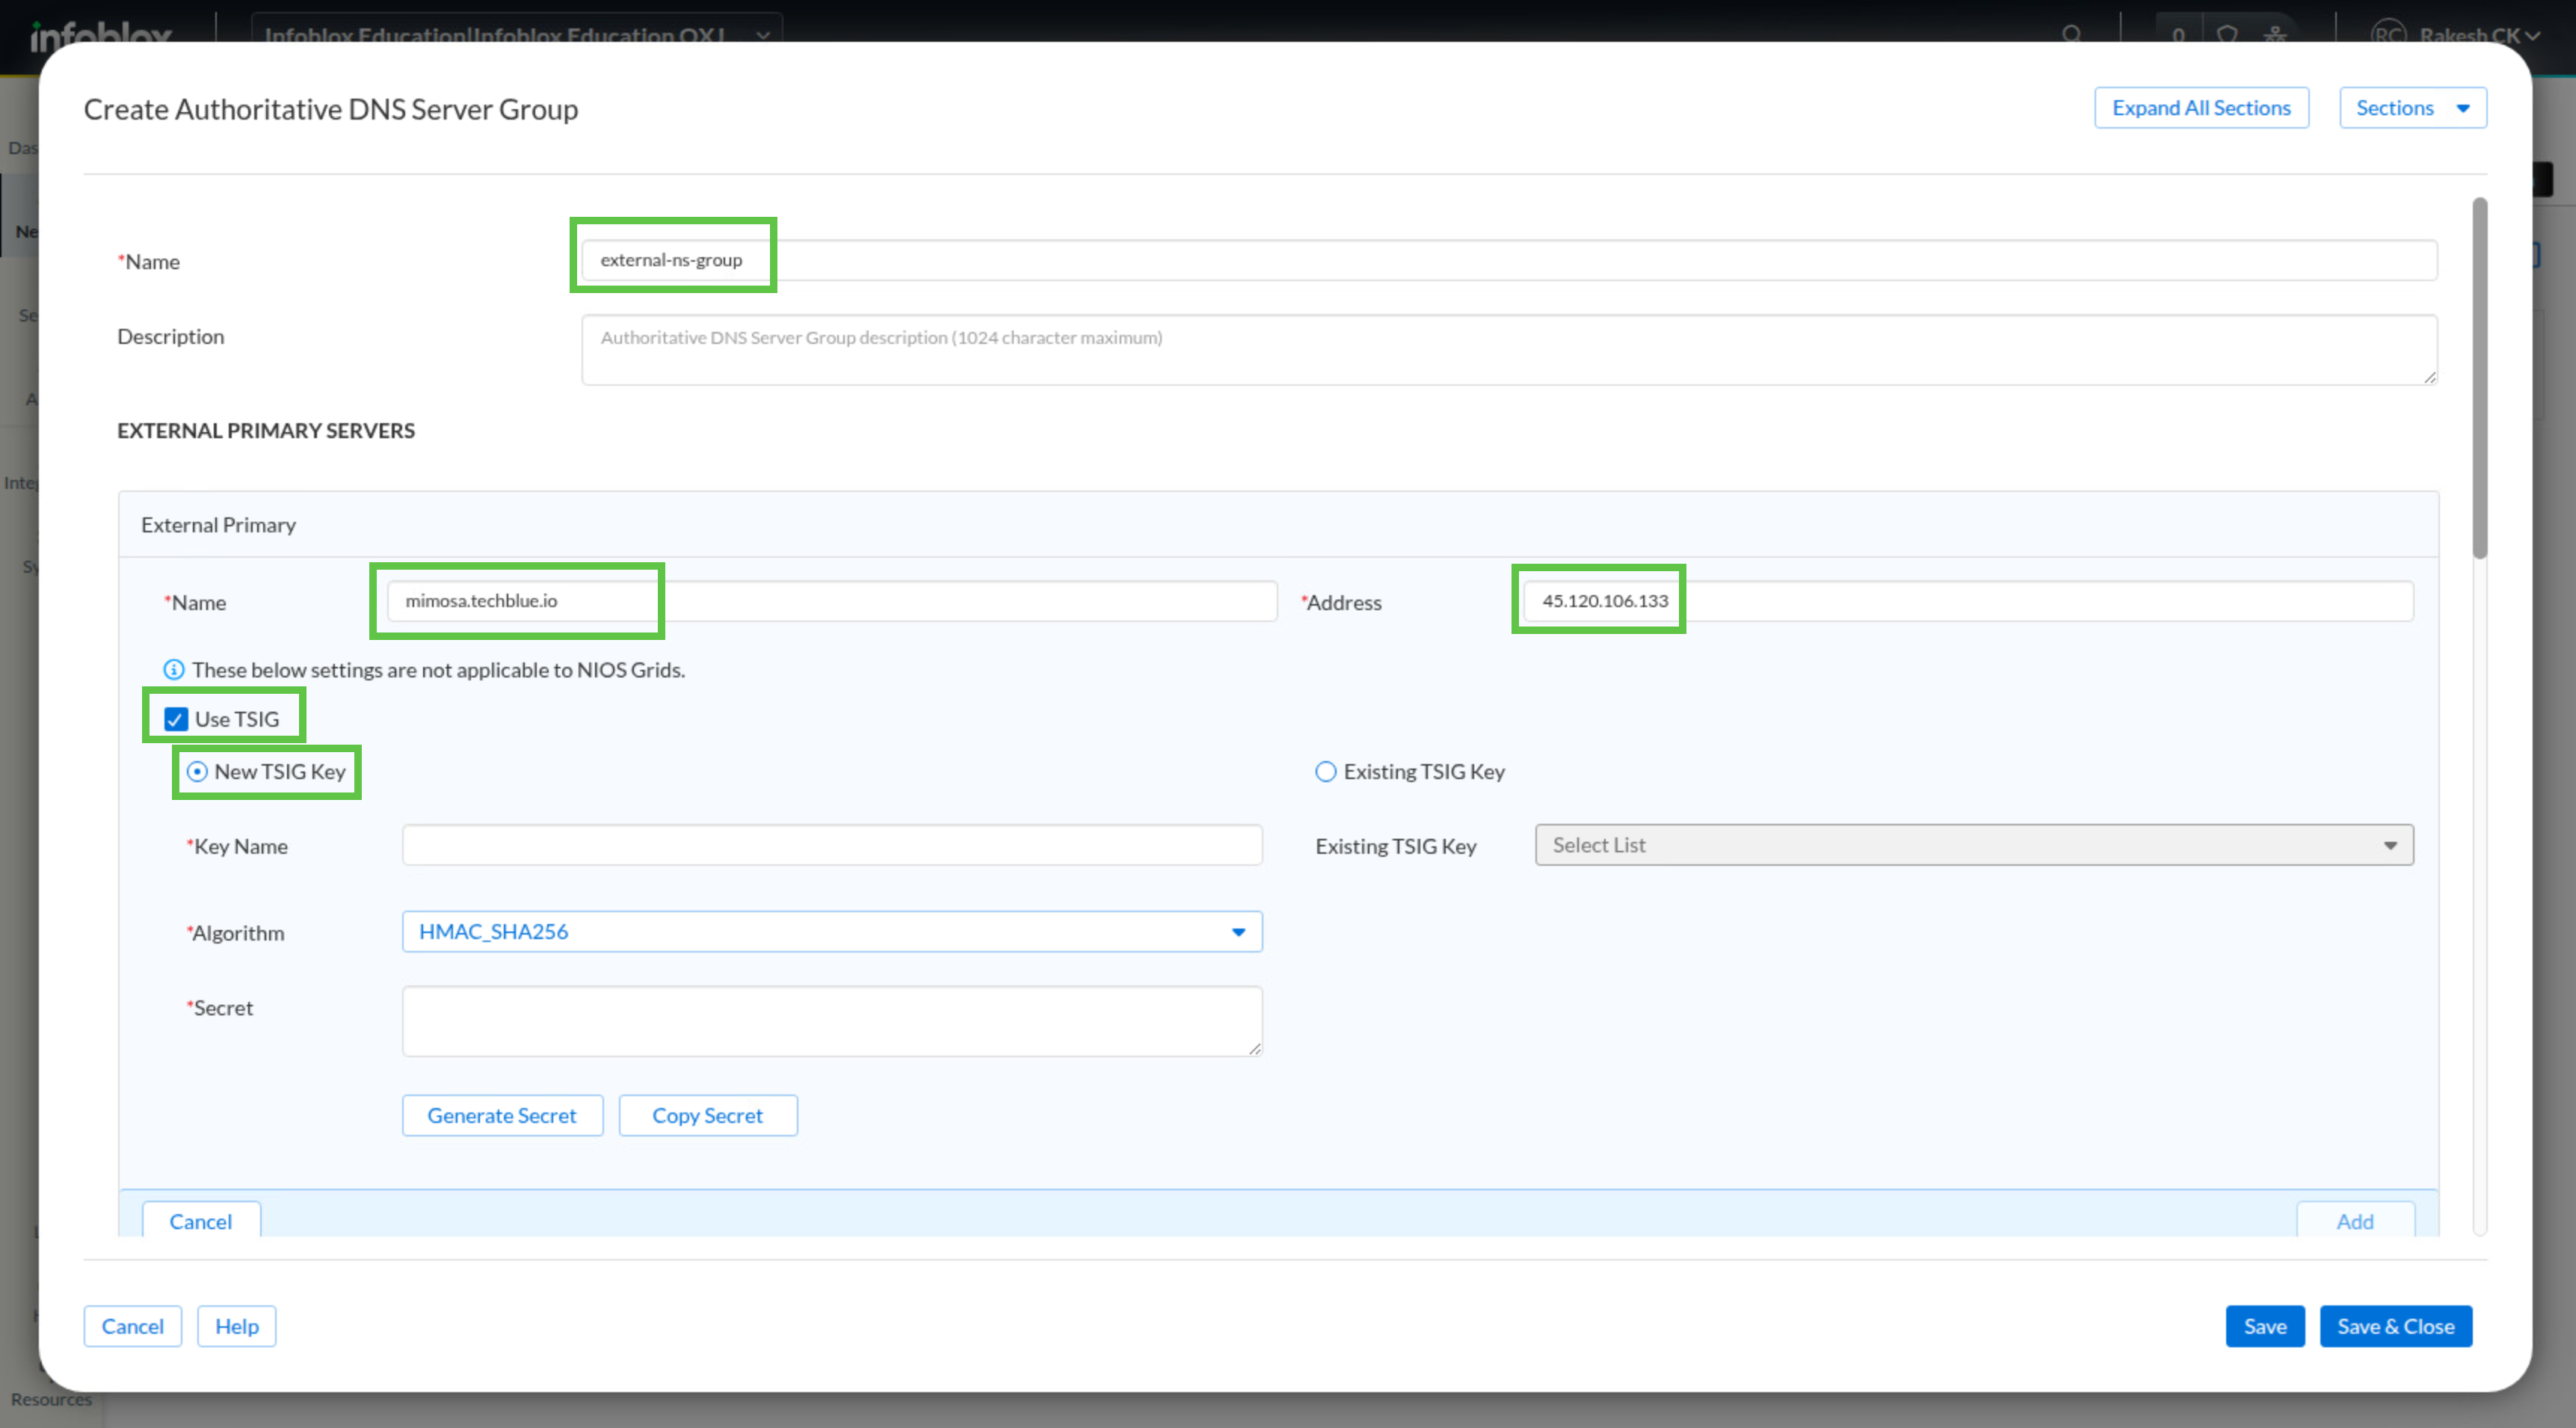
In the Name field, enter external-ns-group.
-
Under External Primary Servers, click Add and select External Primary.
-
Enter mimosa.techblue.io as the server name and enter the IP address obtained from the
digcommand in Step 2. -
Select Use TSIG and choose New TSIG Key.
-
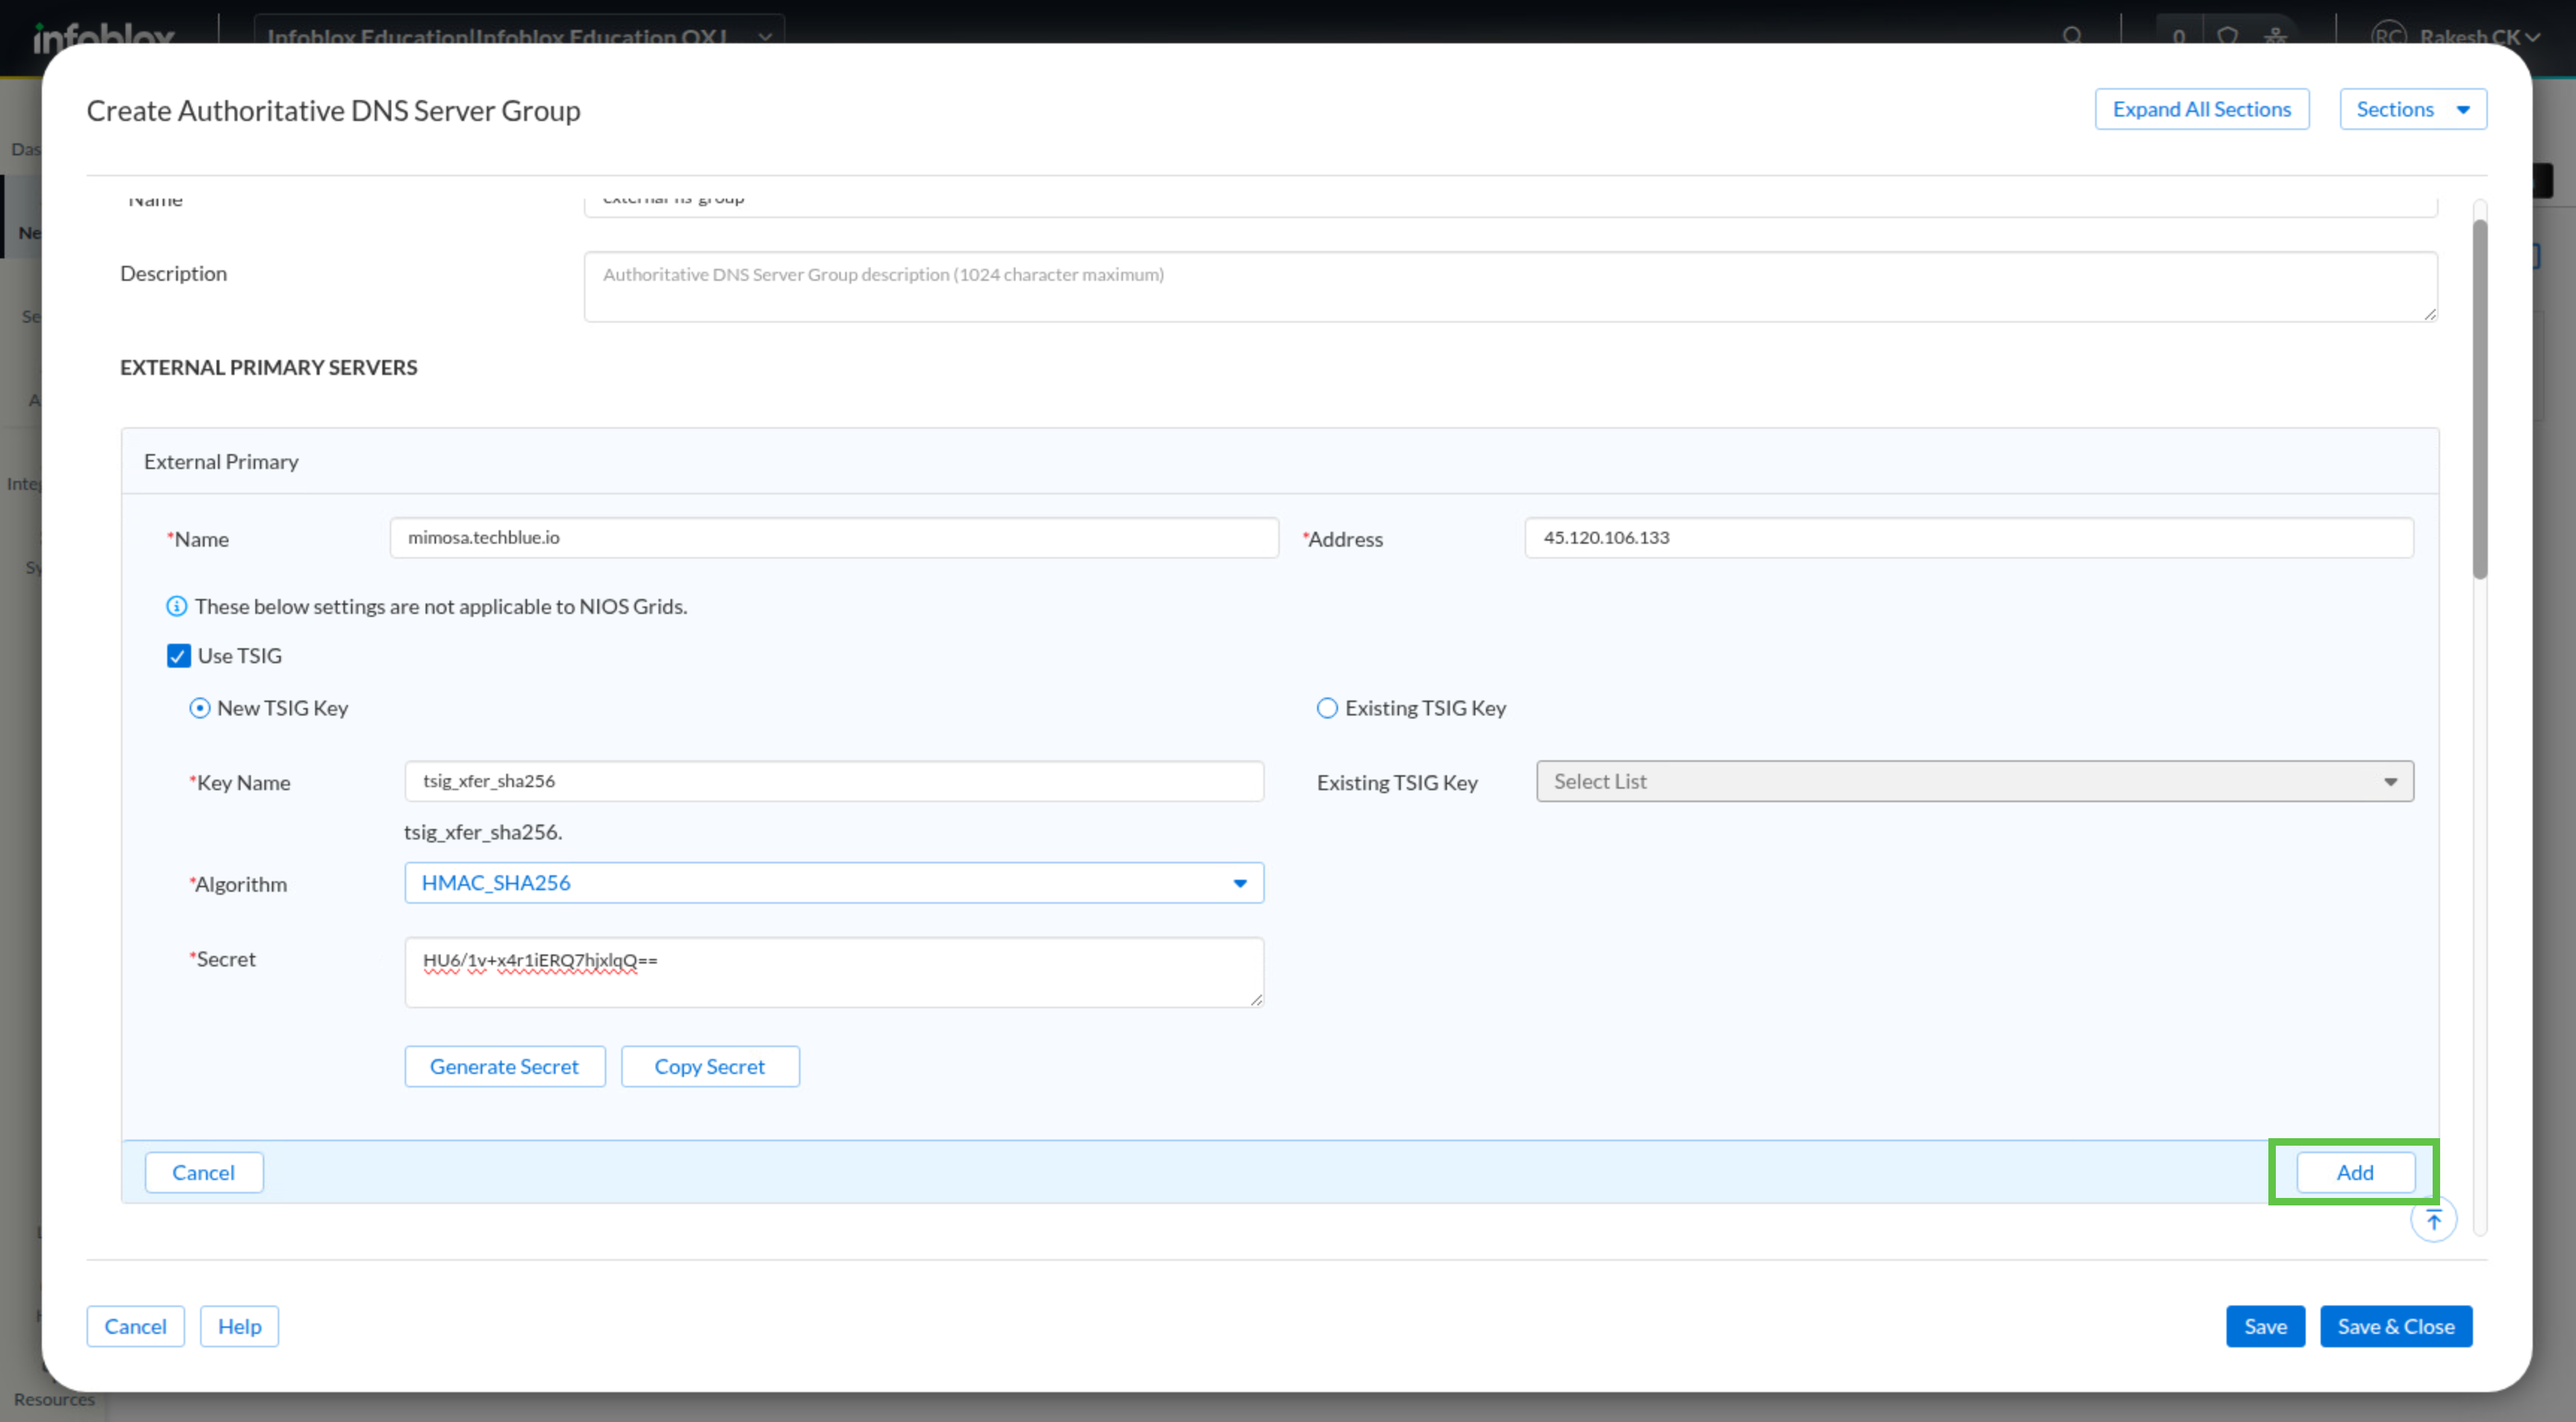
On jump-desktop, open Geany and load the file /mnt/shared/tsig_xfer_sha256.txt.
-
In the New TSIG Key section, enter the key name shown in the file, select the matching algorithm, and paste the secret exactly as provided.
-
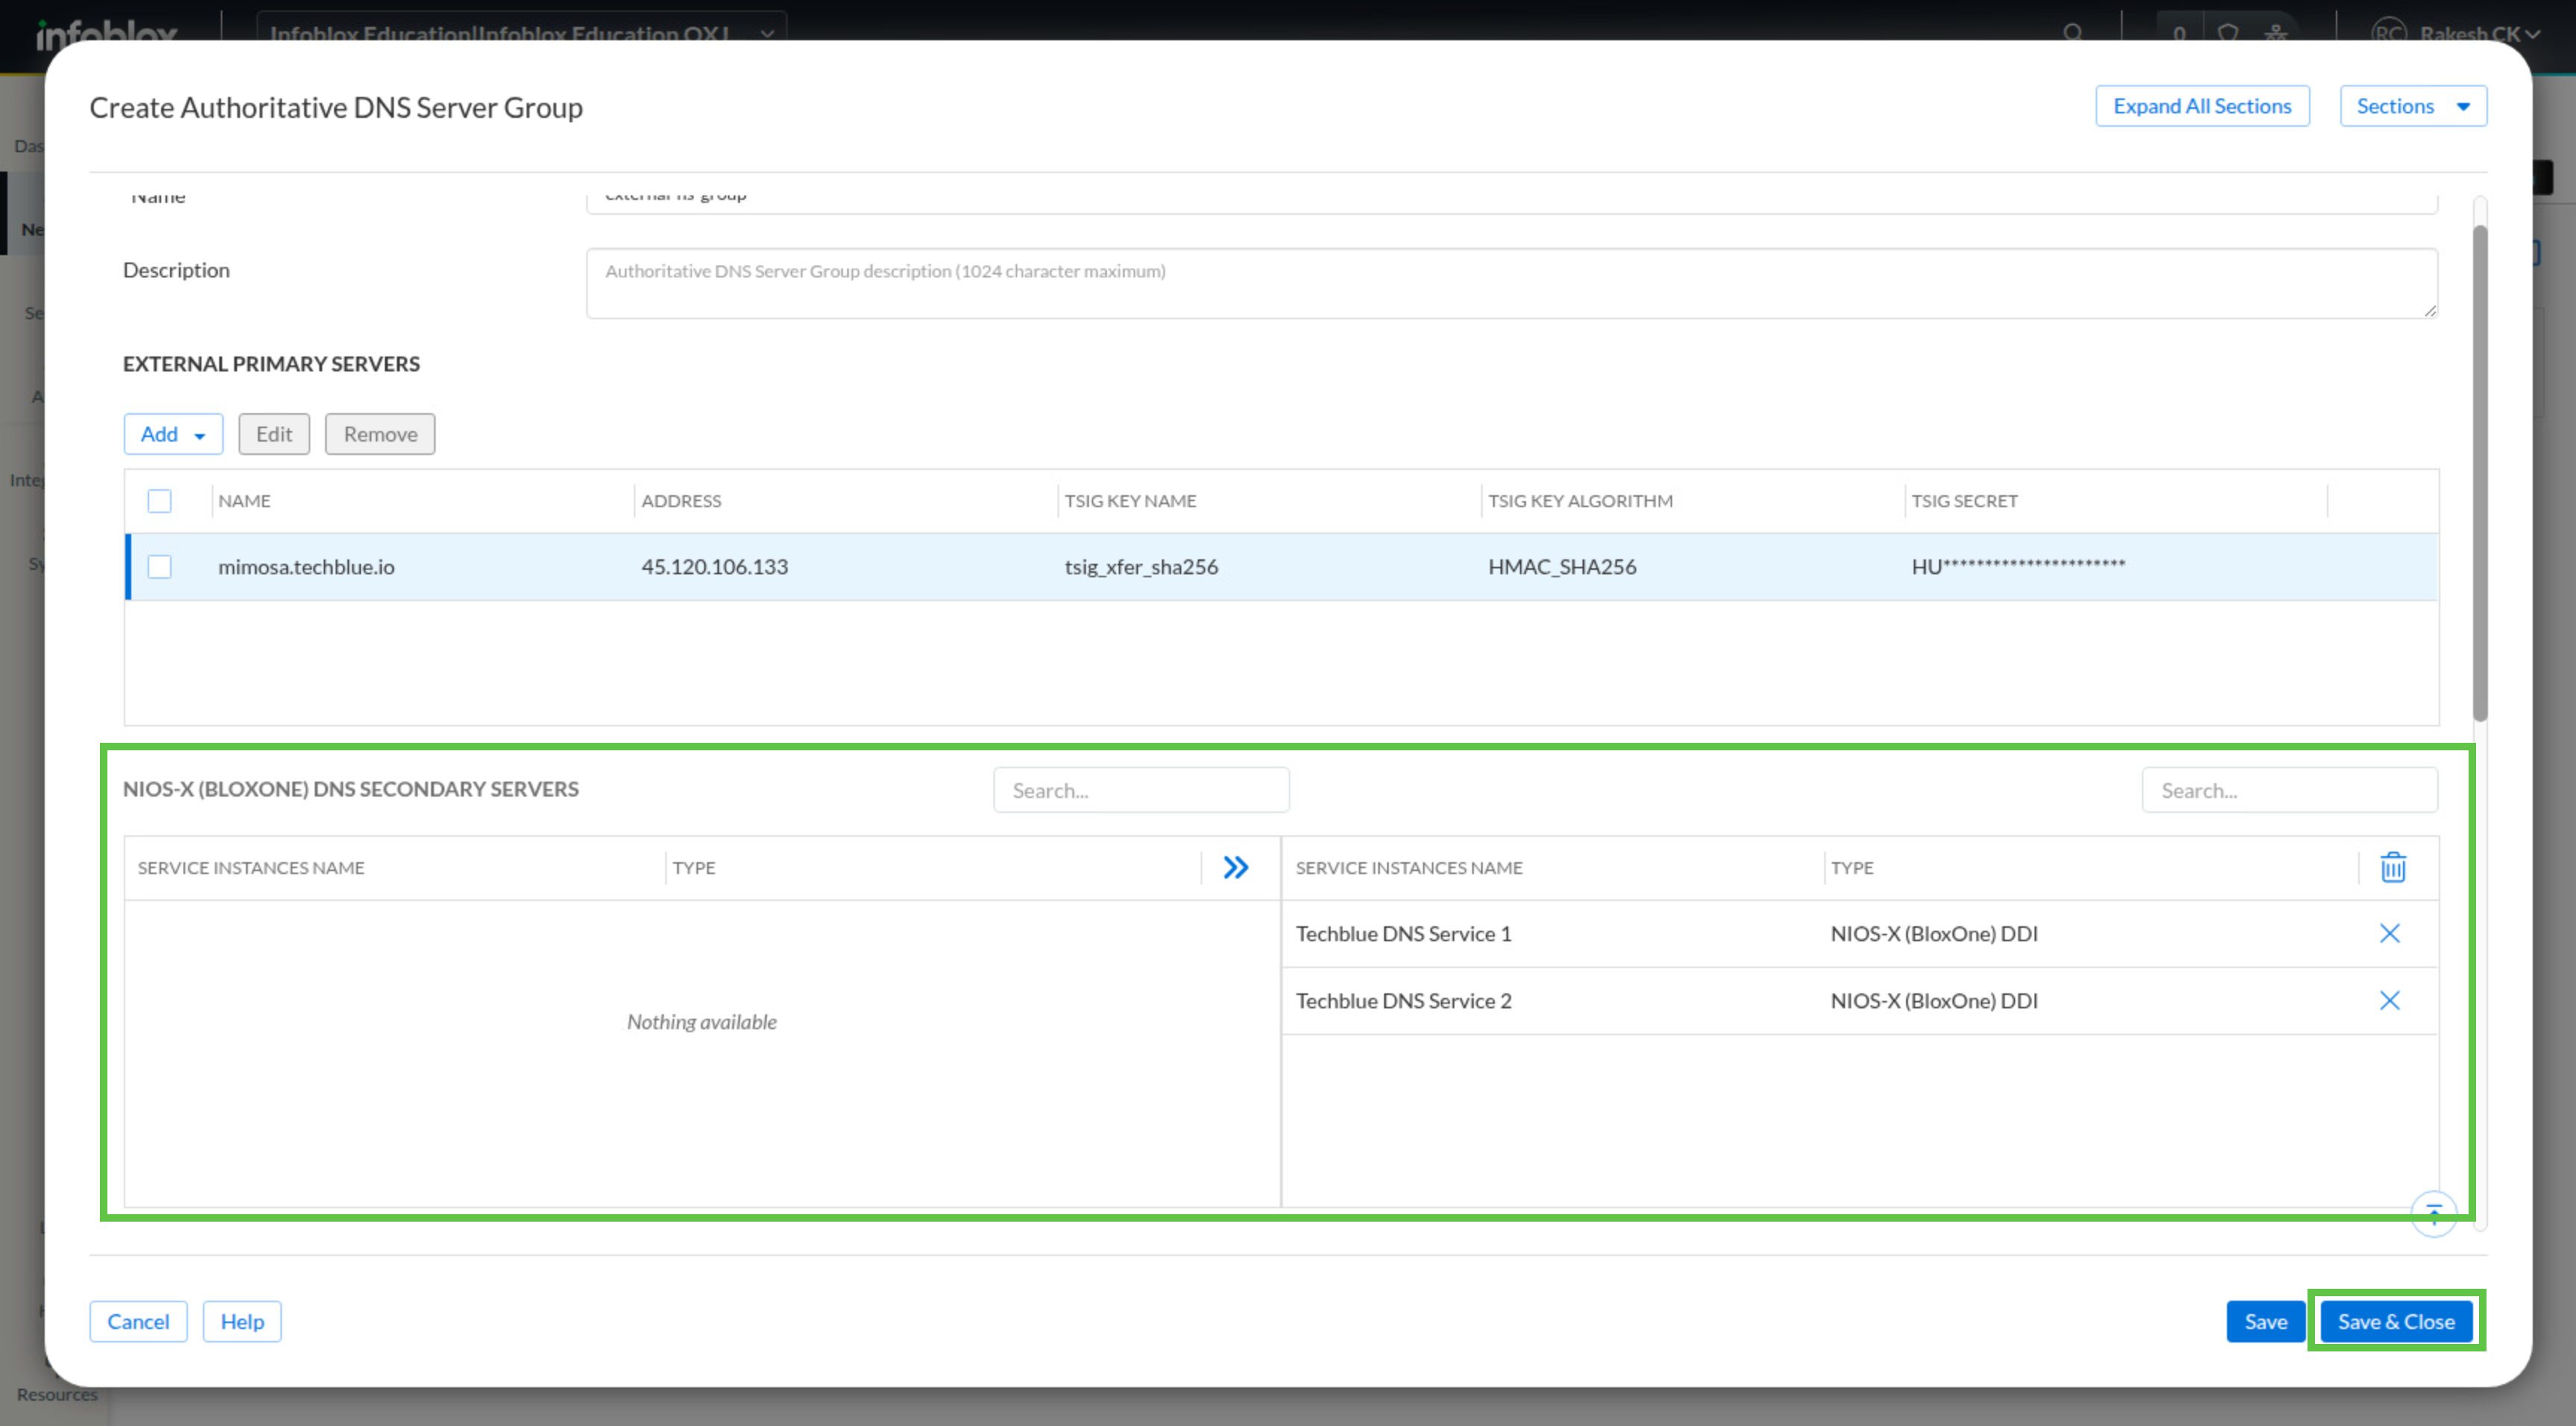
Click Add.
-
Under NIOS-X BloxOne Secondary DNS Servers, move both DNS service instances to the selected list of secondary DNS servers.
-
Click Save & Close.
Task 2 Solution: Create a Secondary Zone
After the DNS Server Group is ready, create the secondary zone that will pull data from the external primary source. Using the server group here avoids re-entering the transfer source and TSIG details and ensures the zone is mapped to the correct authoritative relationship.
-
Navigate to Network → DNS.
-
Select the Zones tab.
-
Click the DNS view default.
-
Click Create and select Secondary Zone.
-
In the Name field, enter ddip.org.
-
Expand the DNS Server Groups section.
-
From the available list, select external-ns-group and move it to the selected column.
-
Click Save & Close.
Task 3 Solution: Validate Zone Data
Finish by verifying with a client that the transferred zone data is available on your local DNS server. Querying a known record confirms that the secondary zone has transferred successfully and that the server is answering authoritatively for the copied data.
-
On testing-linux, open a terminal window.
-
Run sudo set-network-static-bloxone so the client has a route to the DNS server. If prompted for a password, use infoblox.
-
Run dig @10.100.0.110 lms.ddip.org. A.
-
Review the response and confirm that it returns aa and NOERROR.
-
Confirm that this means server 10.100.0.110 has a local copy of the authoritative zone data for ddip.org.