
Prerequisites
-
Student access to Launchpad
-
Stable internet connection
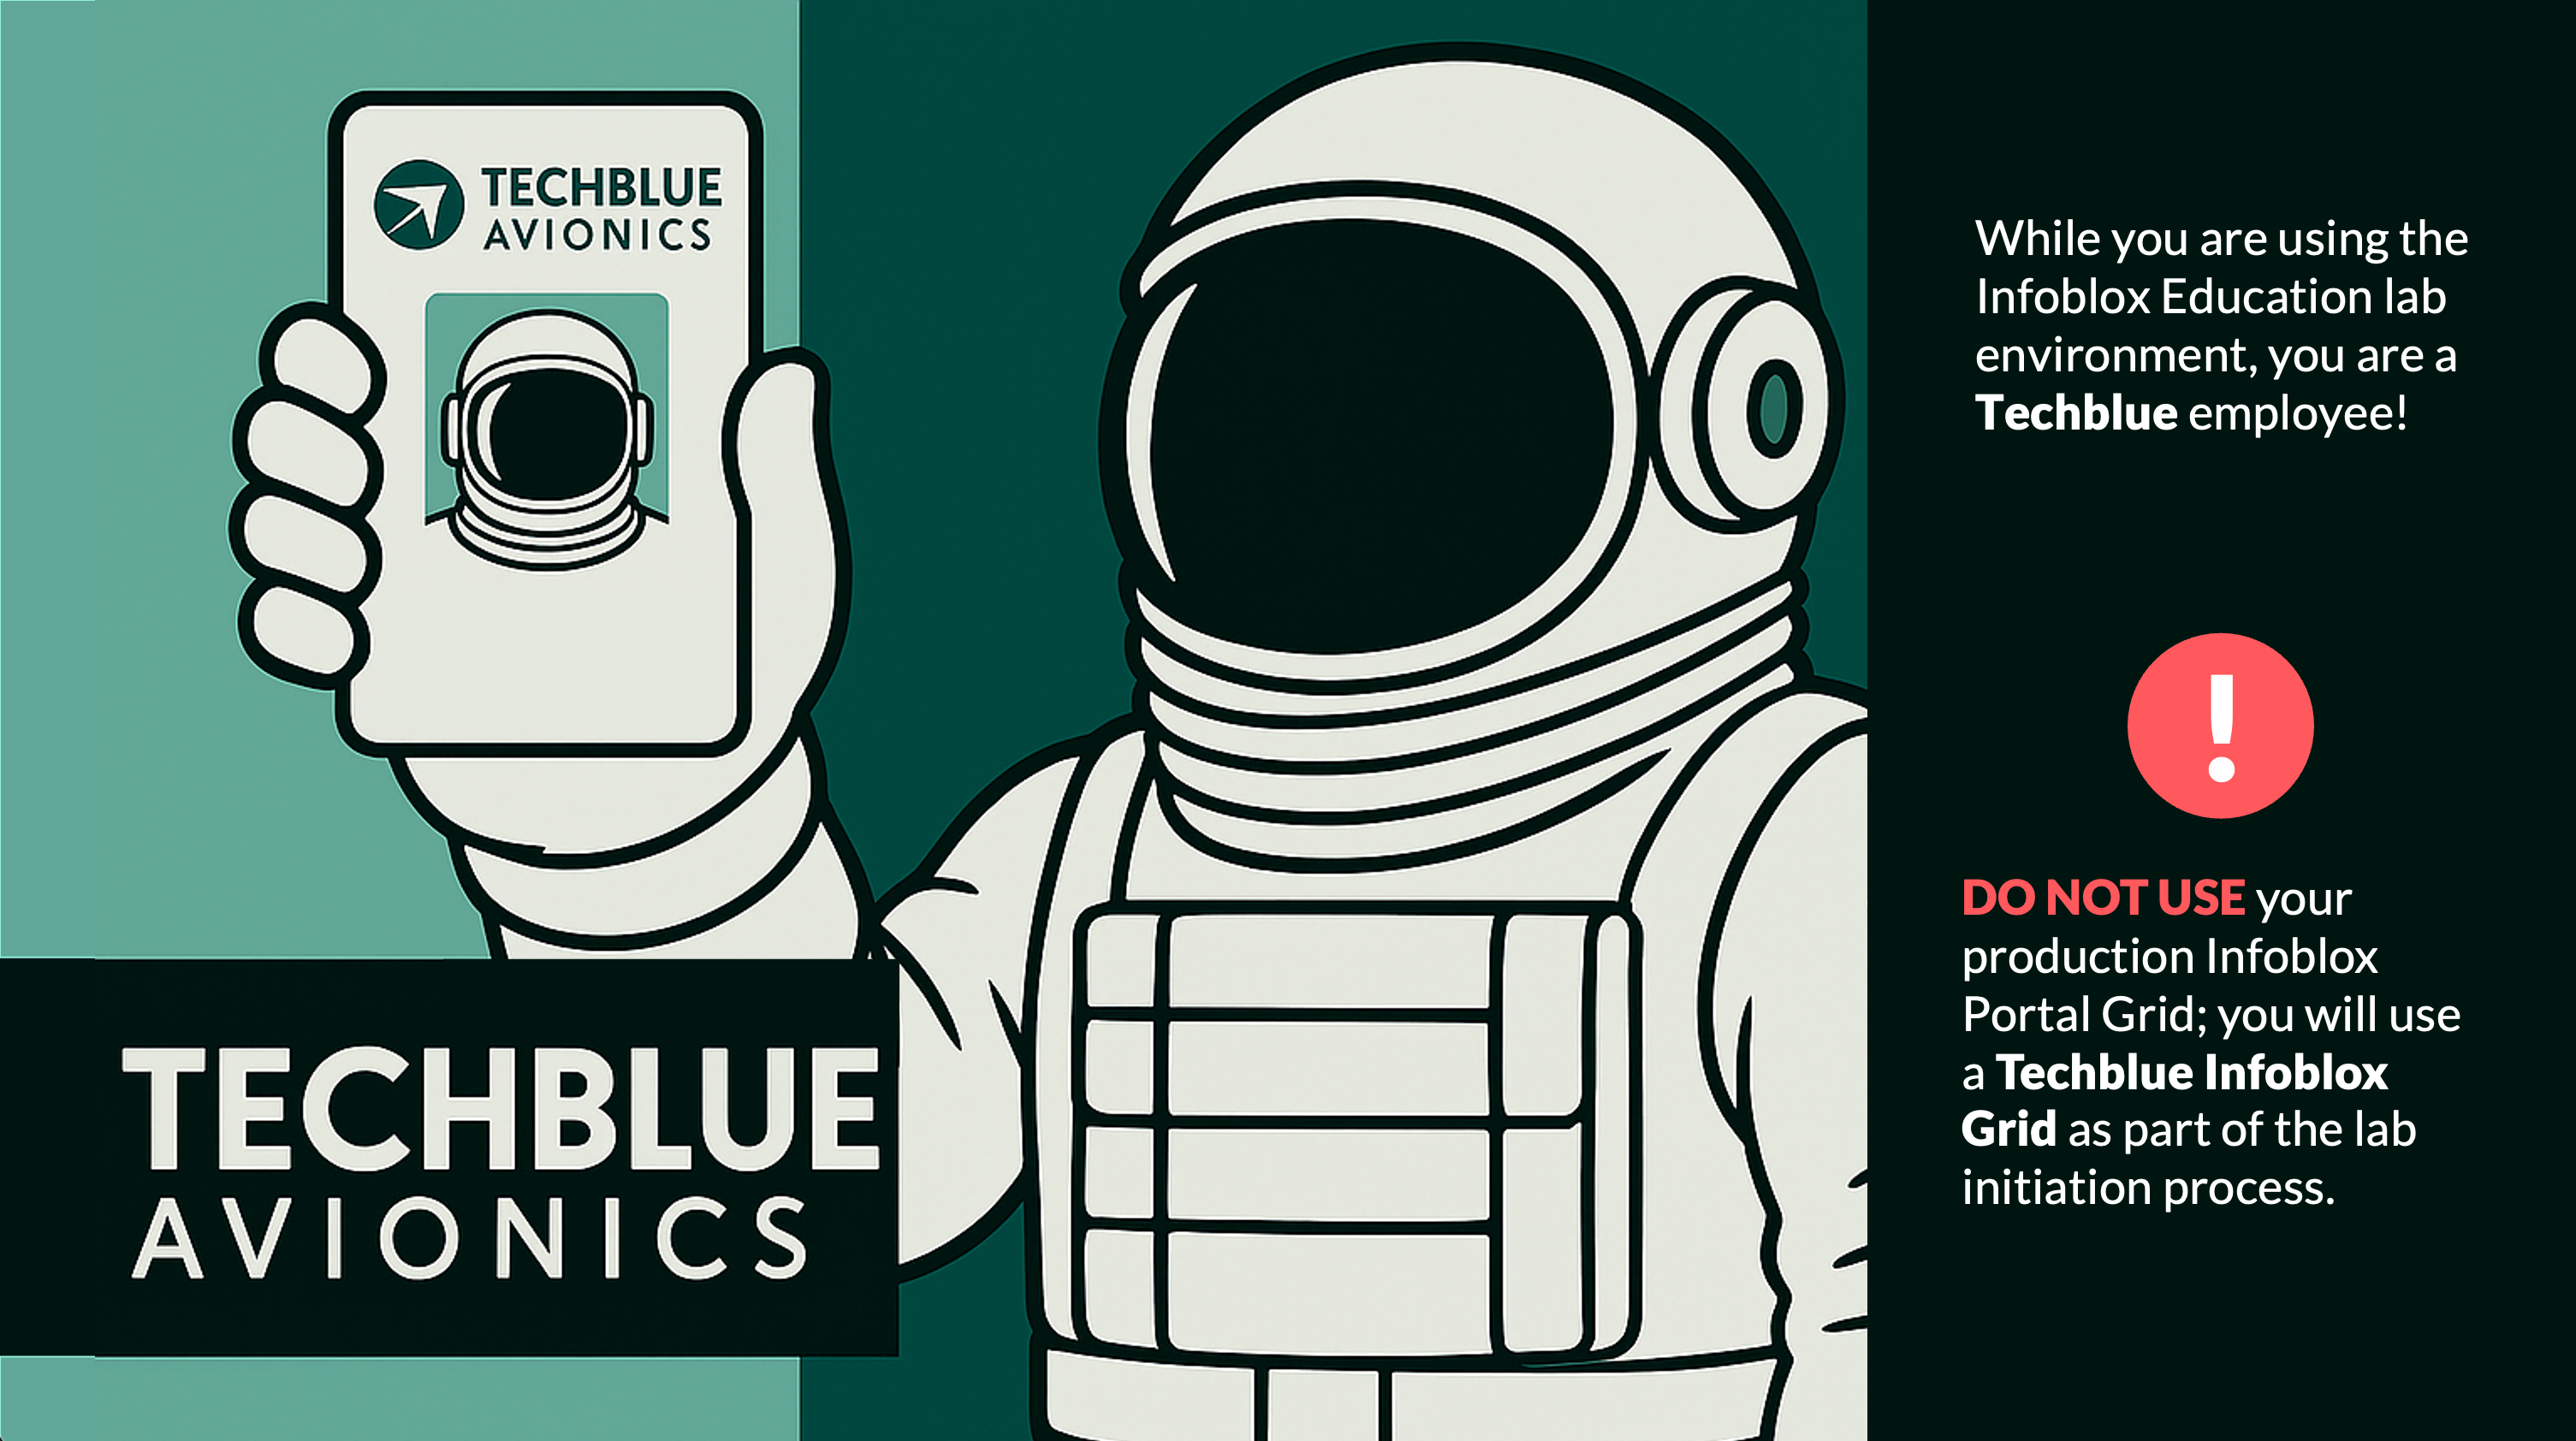
Welcome to Techblue Avionics!
-
While you are using the Infoblox Education lab environment, you are a Techblue Avionics employee.
Warning: DO NOT USE your production Infoblox Grid; you will use a Techblue Infoblox Grid as part of the lab initiation process.
Two Steps to Initiating a NIOS Lab Environment
To successfully initiate the NIOS labs, we will need to deploy a lab environment that hosts all the Techblue Avionics infrastructure.
Please follow these four steps to initiate a NIOS lab:
Step 1: Deploying a lab environment
-
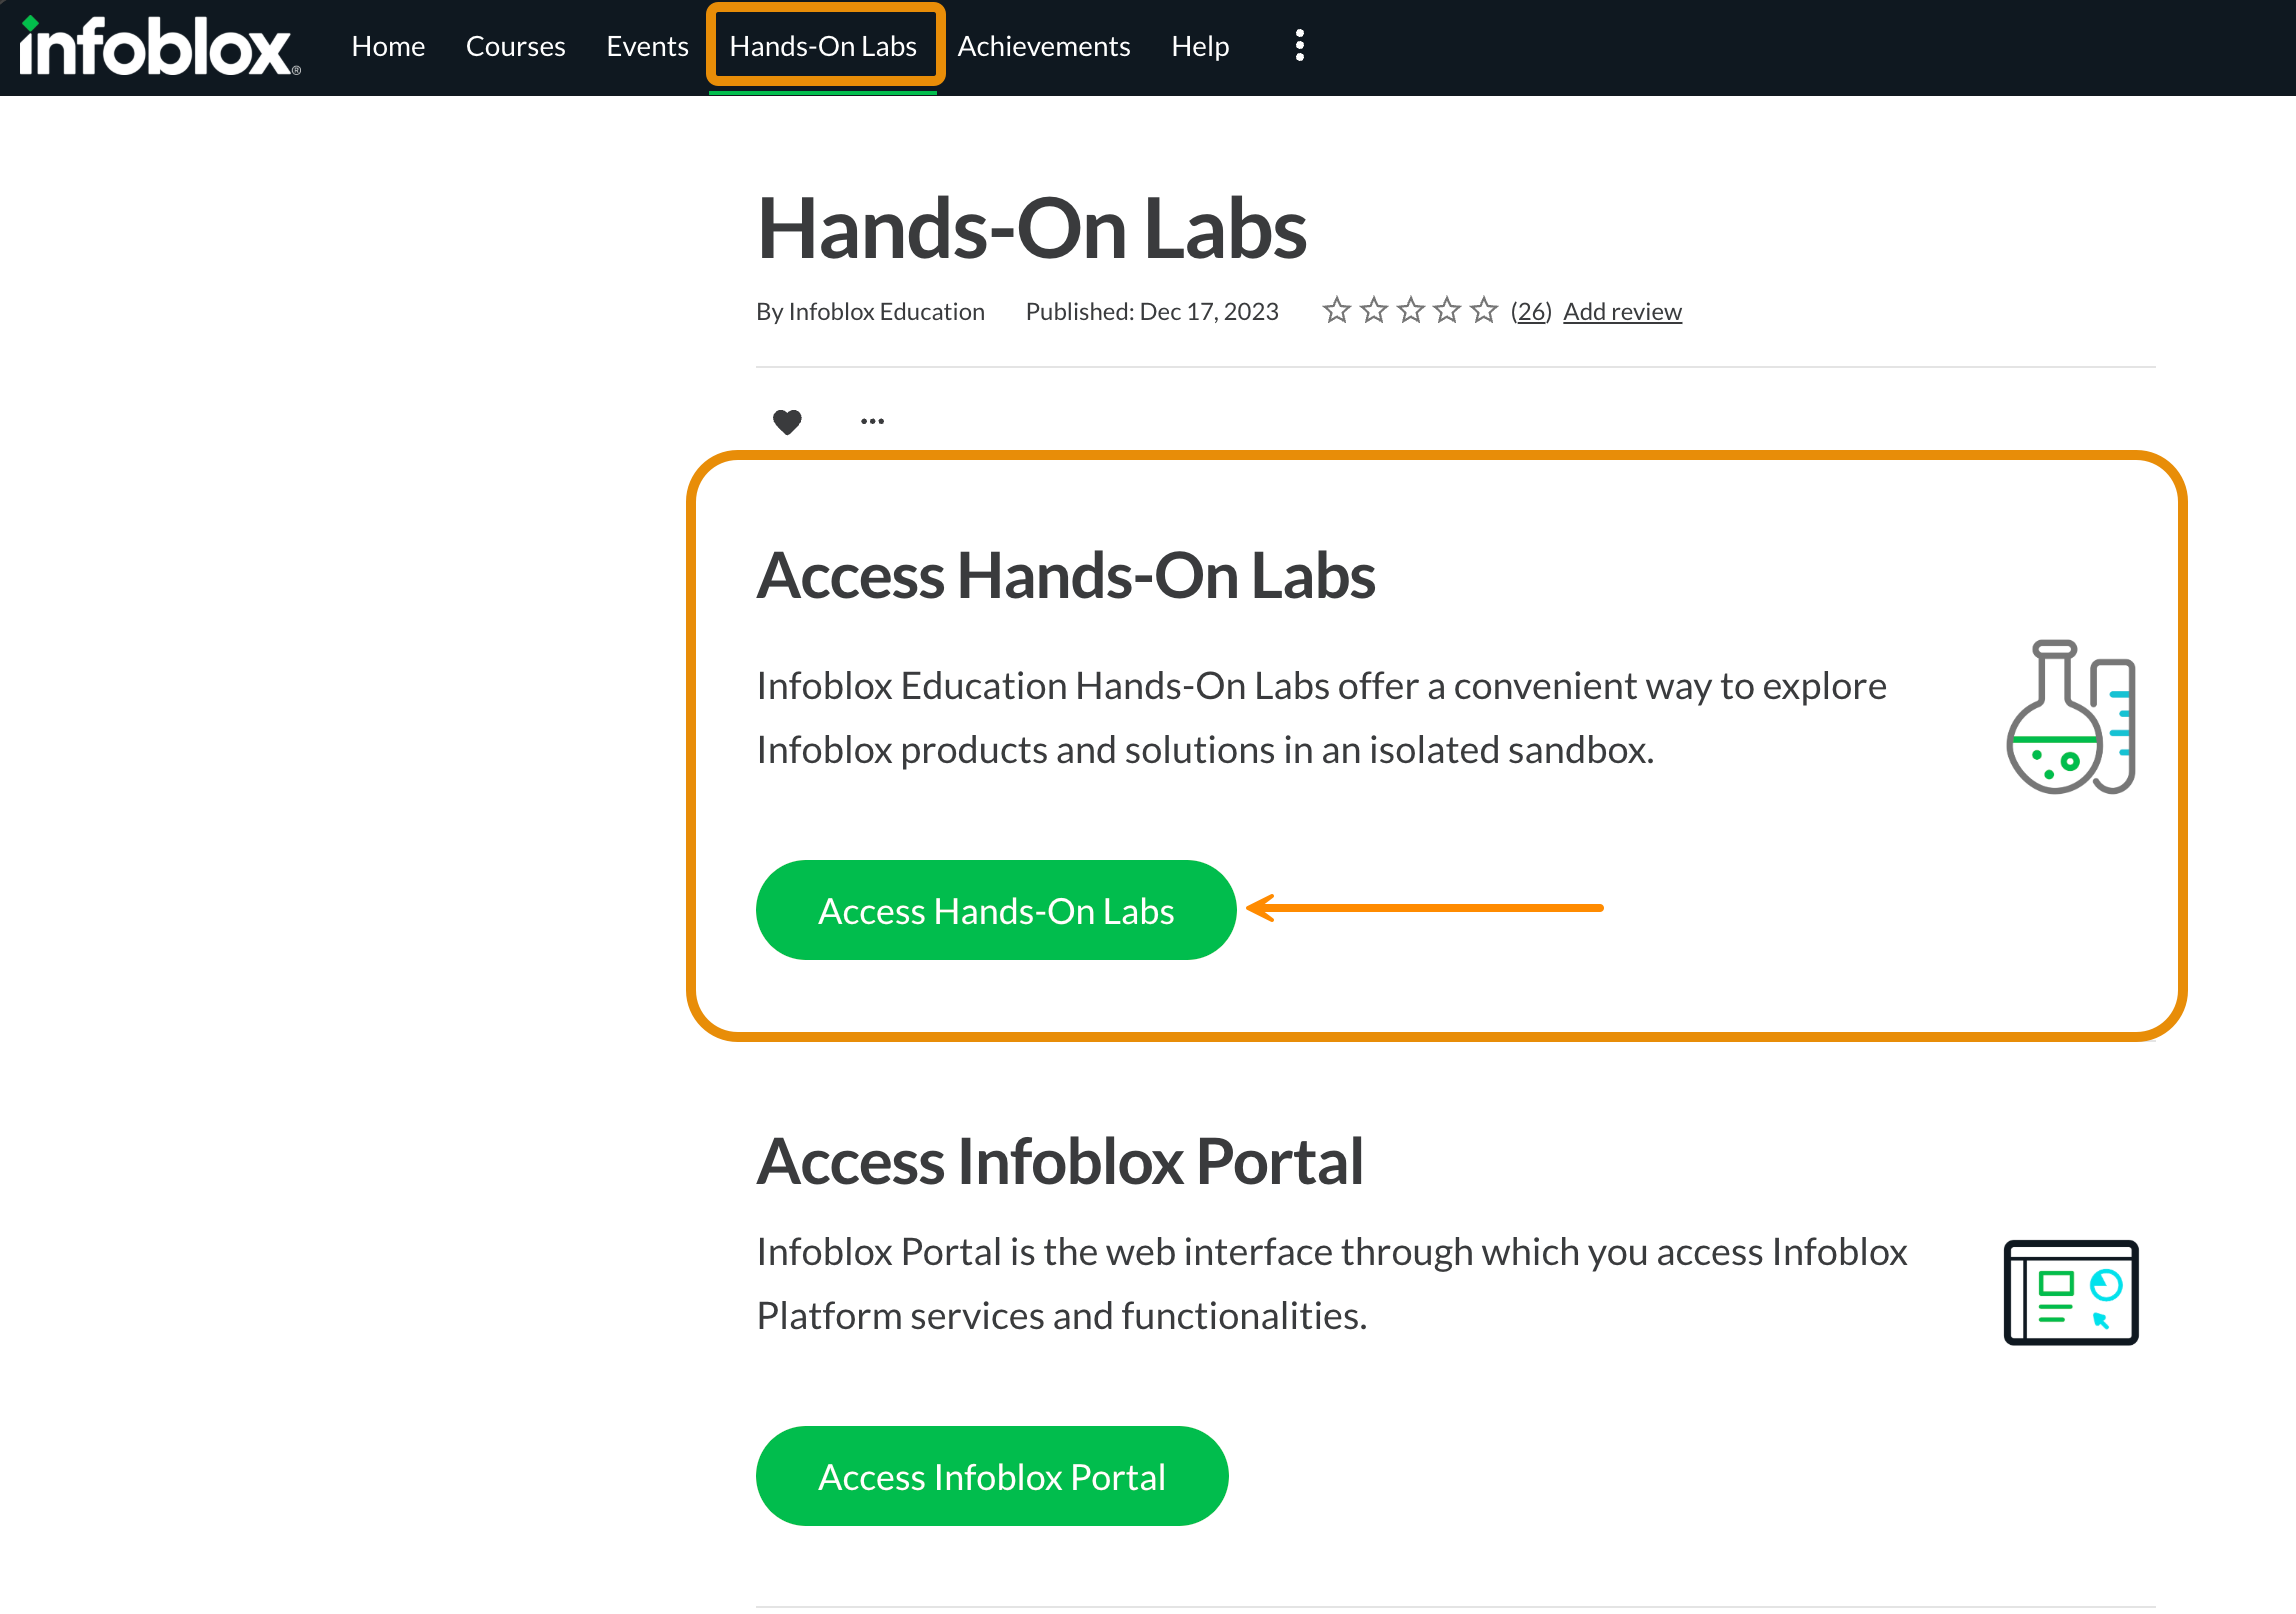
From Launchpad, locate the Hands-On Labs page:
-
From the main toolbar at the top of the screen, click Hands-On Labs. This will open a new browser tab with the page.
-
Locate the “Access Hands-On Labs” section.
-
Click the Access Hands-On Labs button to begin.
-
Step 2: Select and Launch a Lab
-
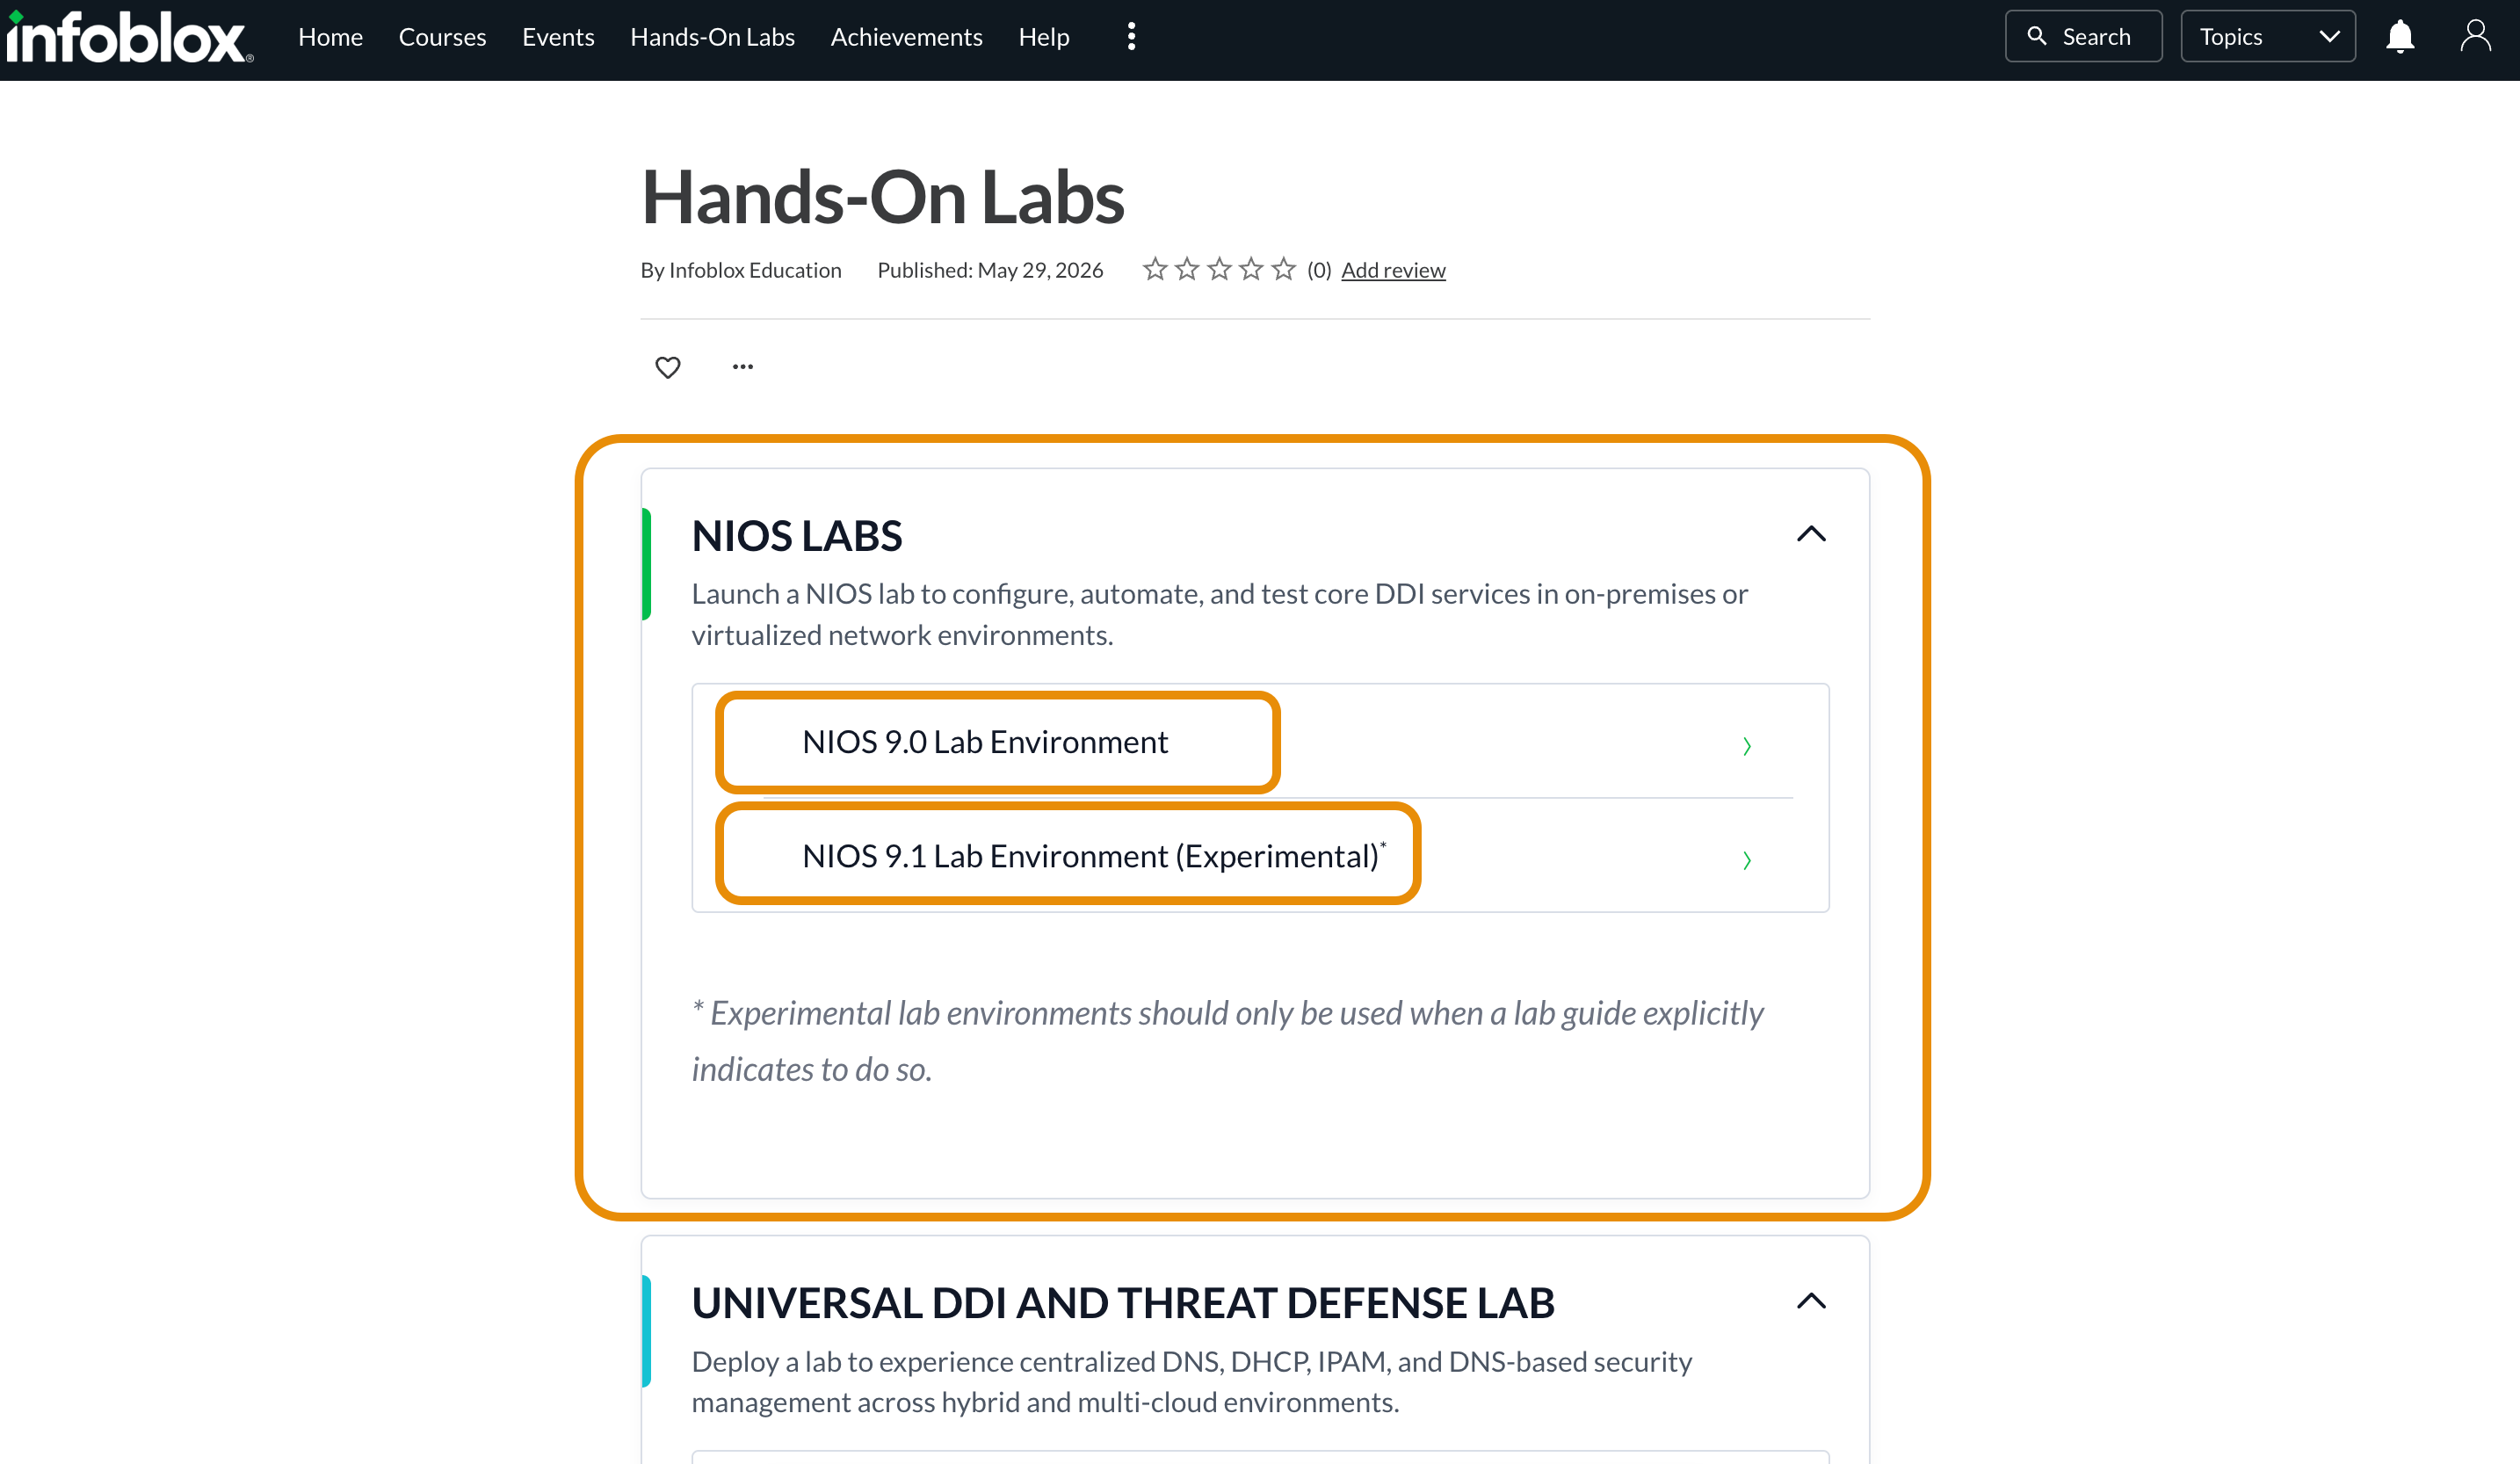
On the Hands-On Labs page, choose the lab category that matches the environment you need, then click the required lab environment to continue.
-
Available lab options may include:
-
NIOS Labs – for NIOS 9.0 and NIOS 9.1 lab environments.
-
Other Labs – for NetMRI or other specialized use-case labs.
-
-
After selecting a lab environment, you are taken to the launch page for that lab. Click Launch to open the lab environment in a new browser tab.

-
After launching:
-
An initial loading screen will appear while the environment is being prepared
-
-
Once ready:
-
The environment viewer will open automatically
-
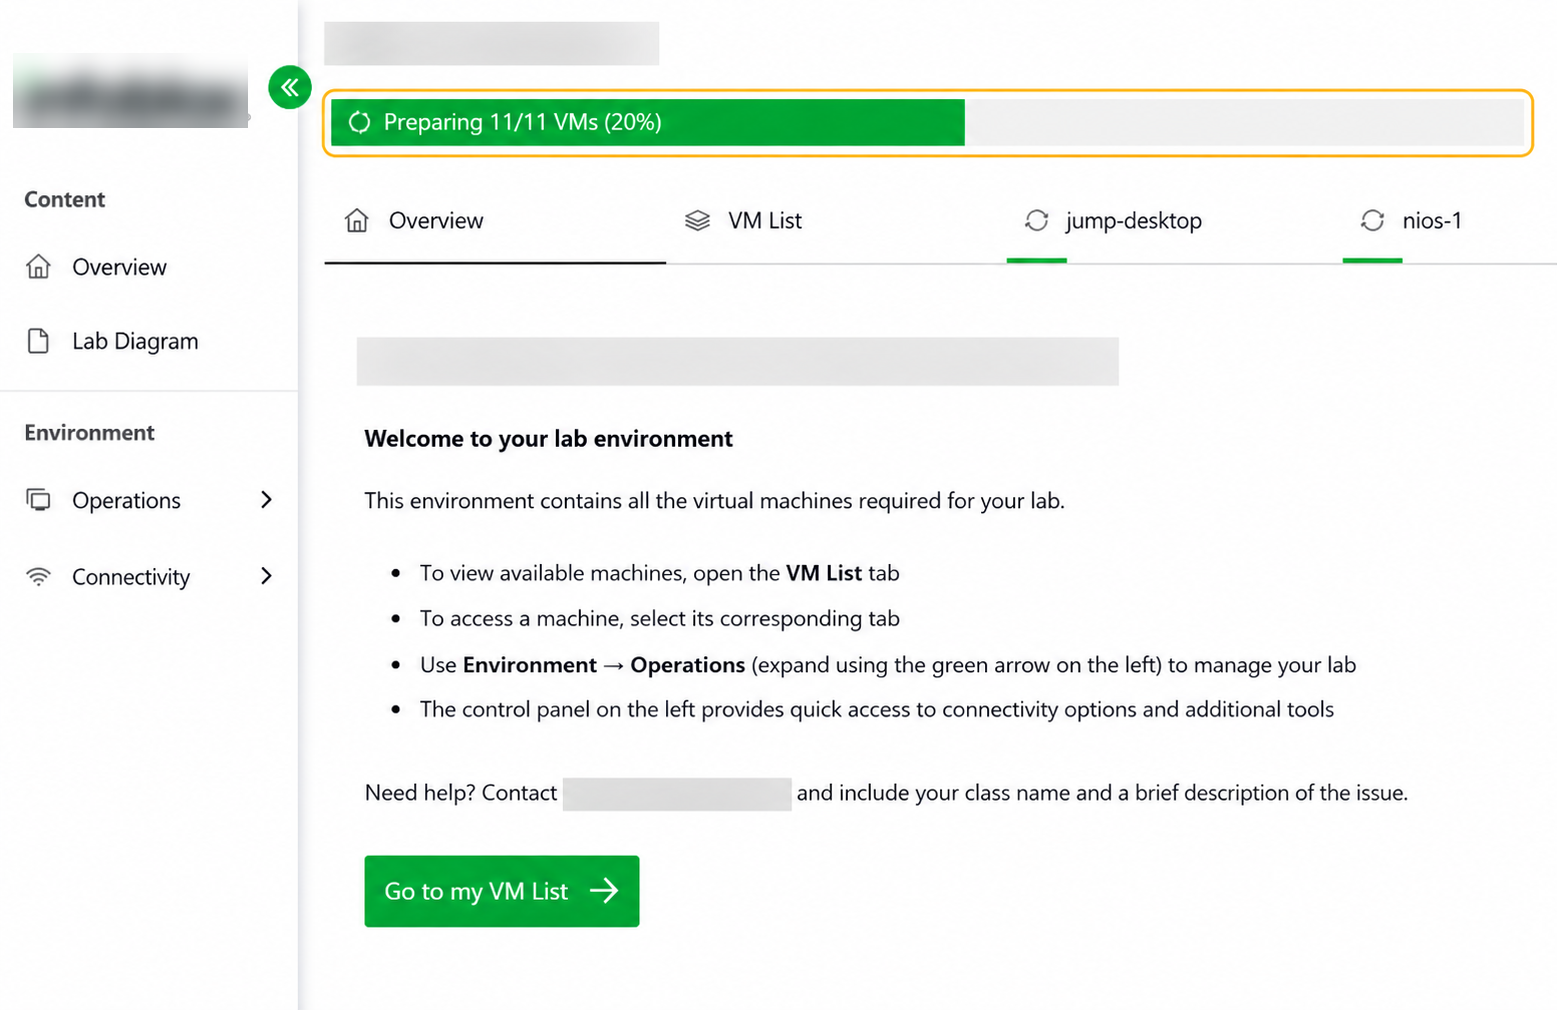
A green “Preparing” progress bar will be displayed while the virtual machines start
-
-
When the progress completes, the lab environment is ready for use.
The lab environment may take up to 20 minutes to be fully ready.
Verify Access to the Virtual Machines
To access a virtual machine:
-
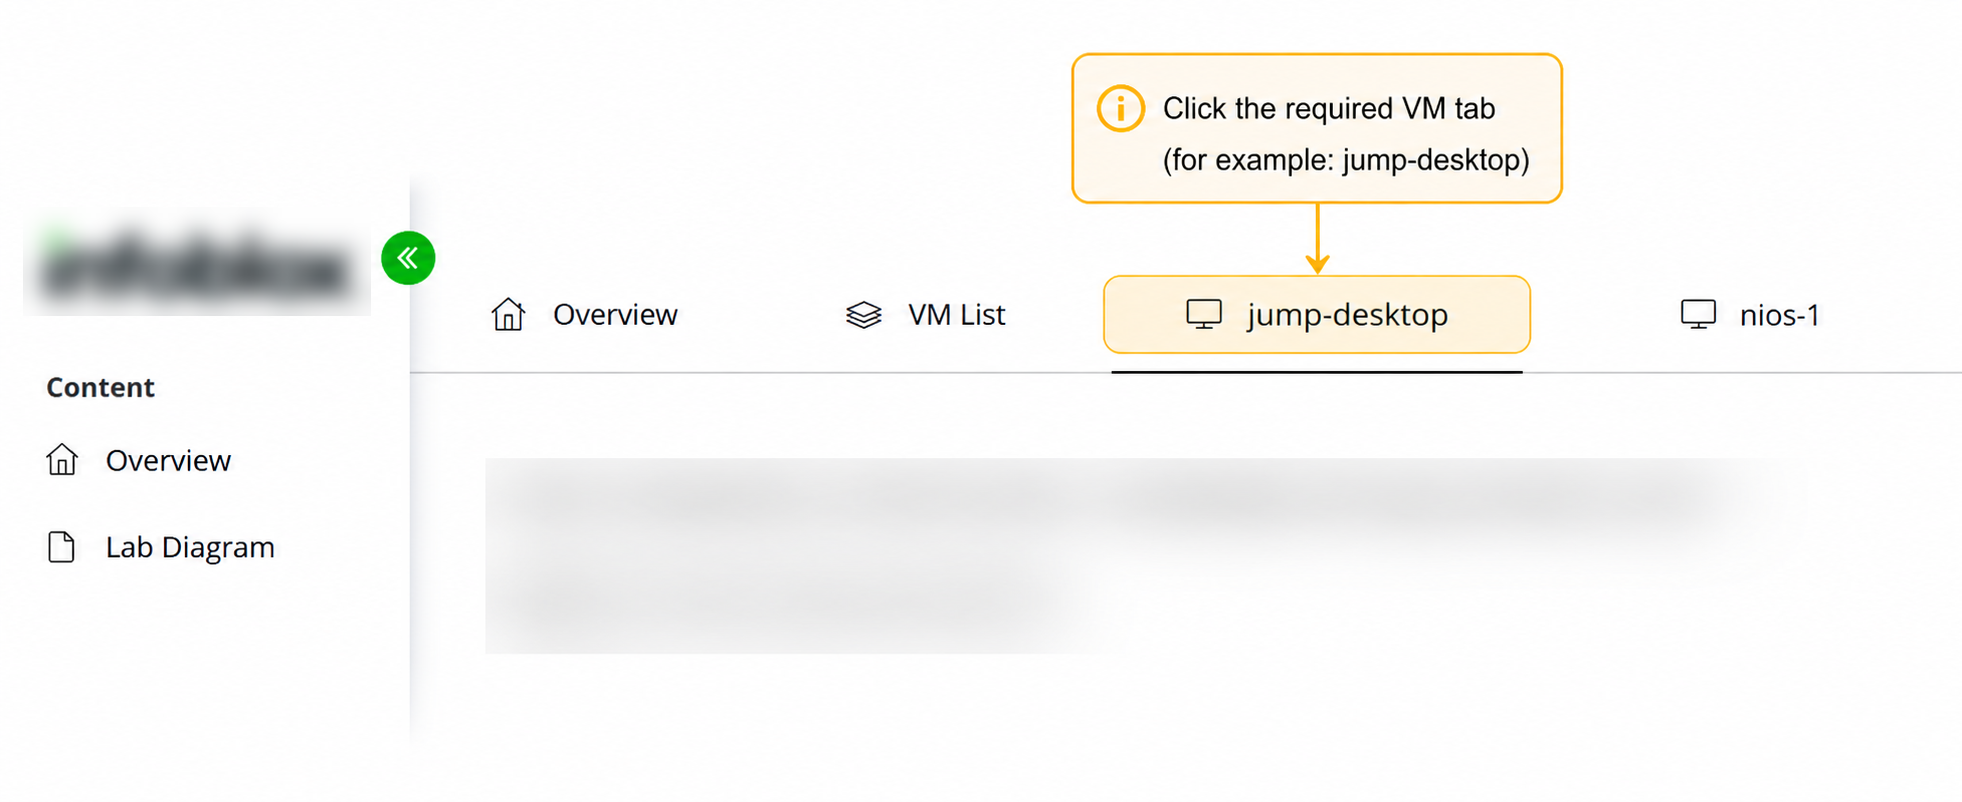
Click on the required VM tab (for example: jump-desktop) from the top menu
To switch between virtual machines:
-
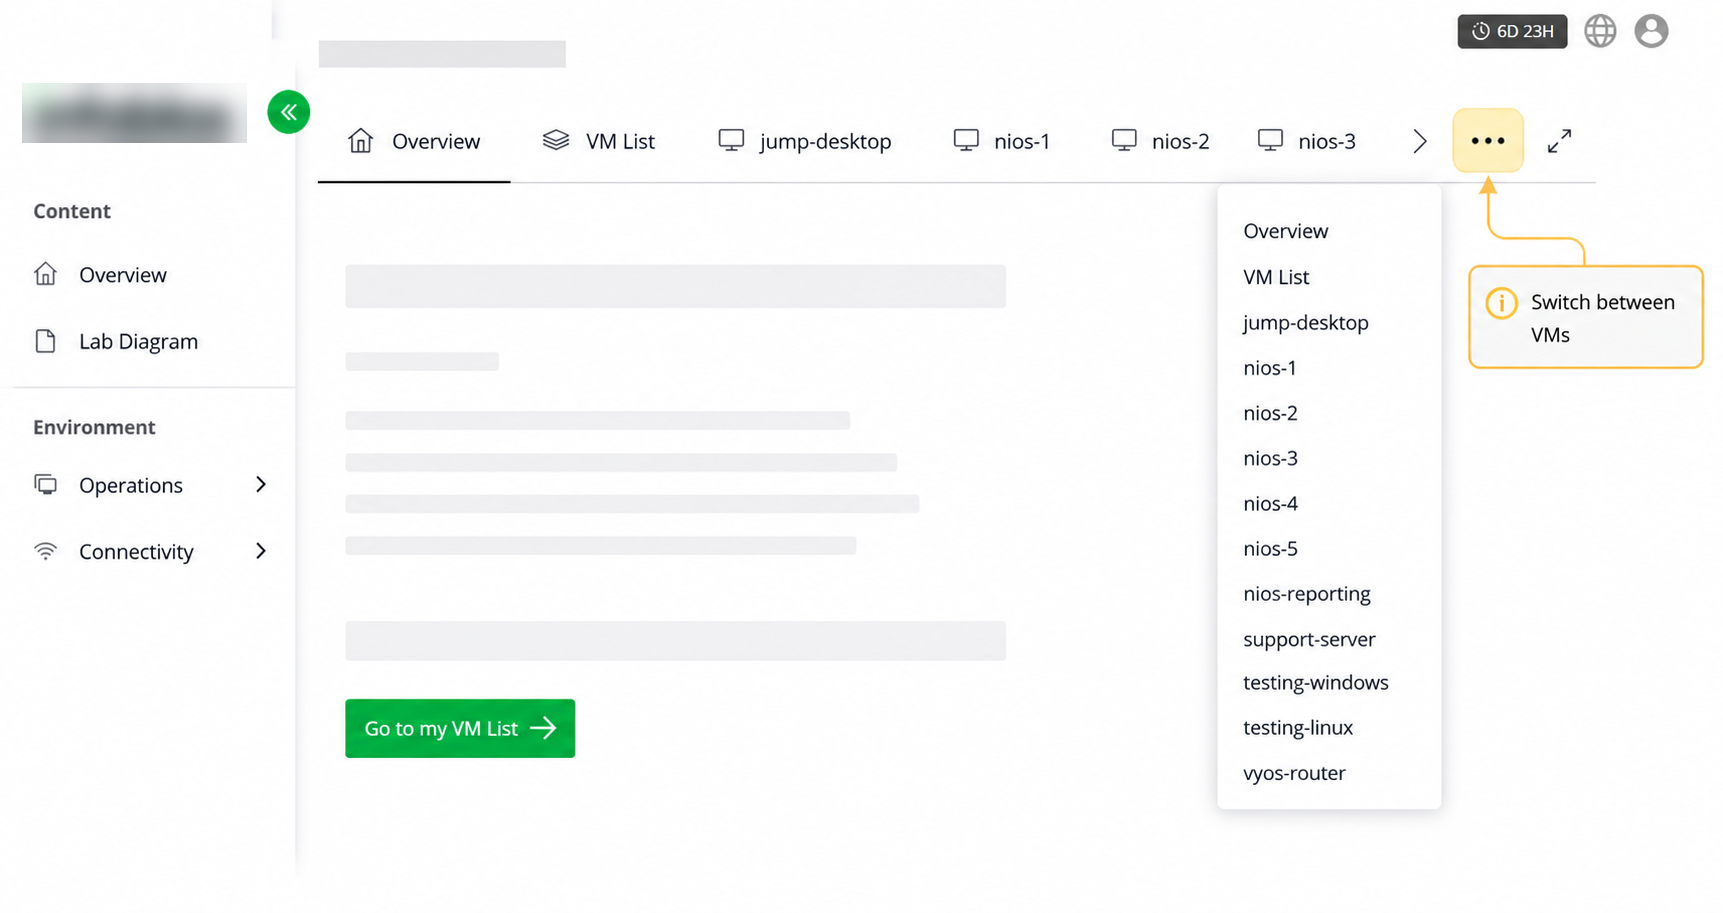
Use the VM tabs in the top menu, or
-
Click the … (ellipsis) menu and select the required VM
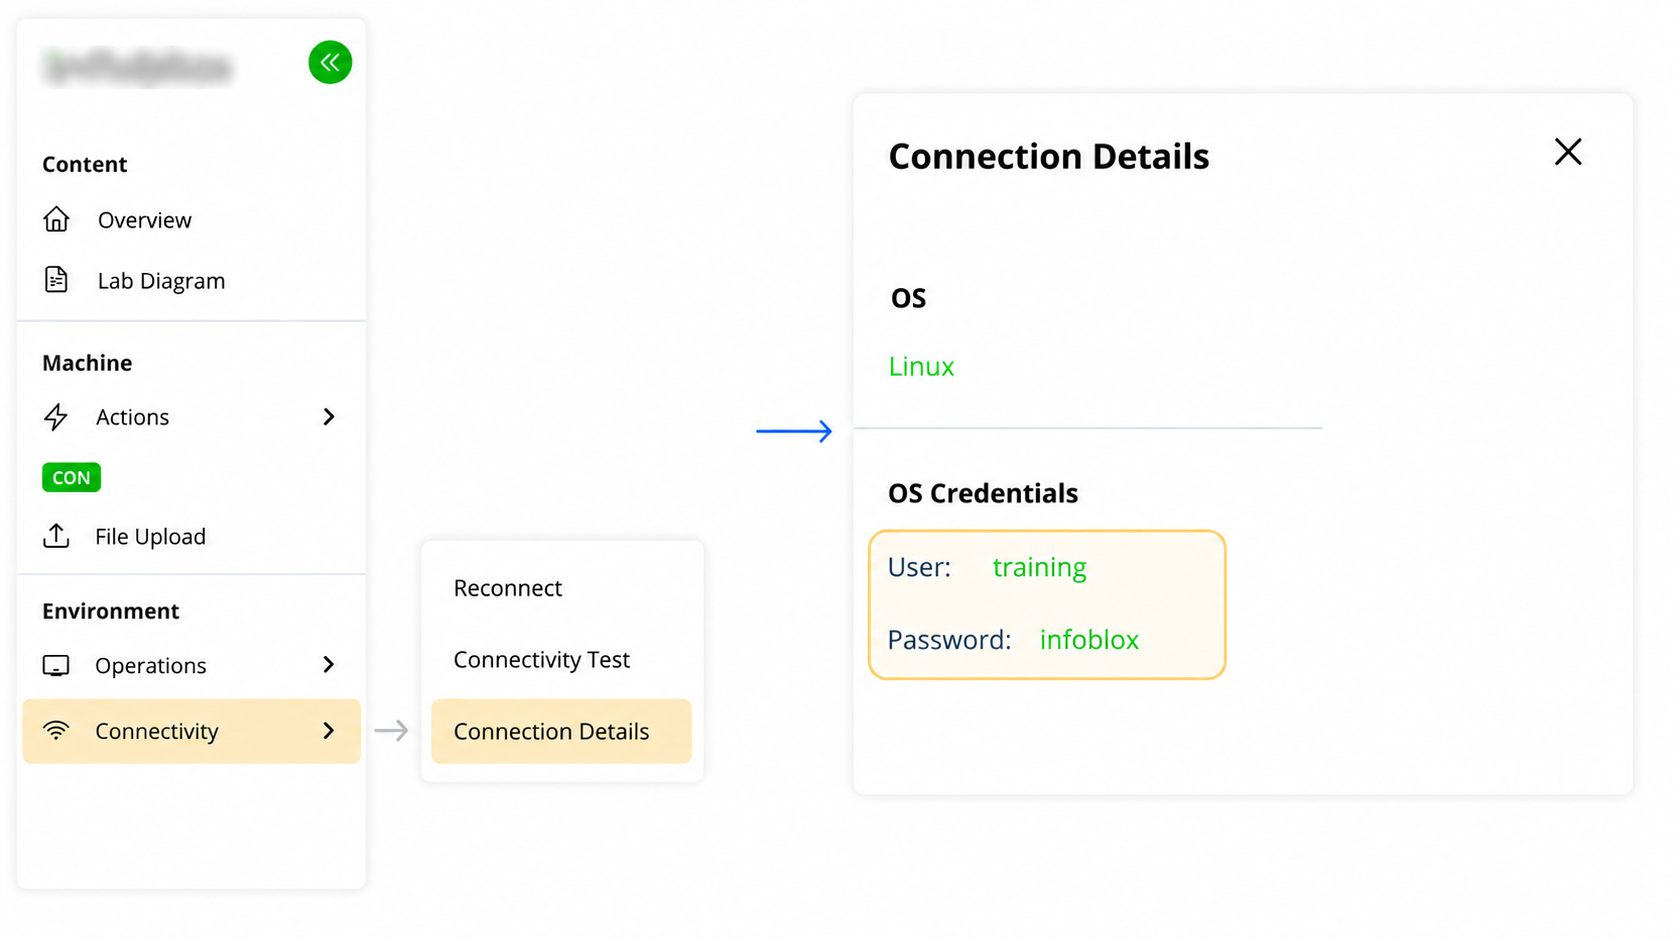
VM credentials can be found after selecting a VM:
-
Navigate to Environment → Connectivity
-
Click Connection Details
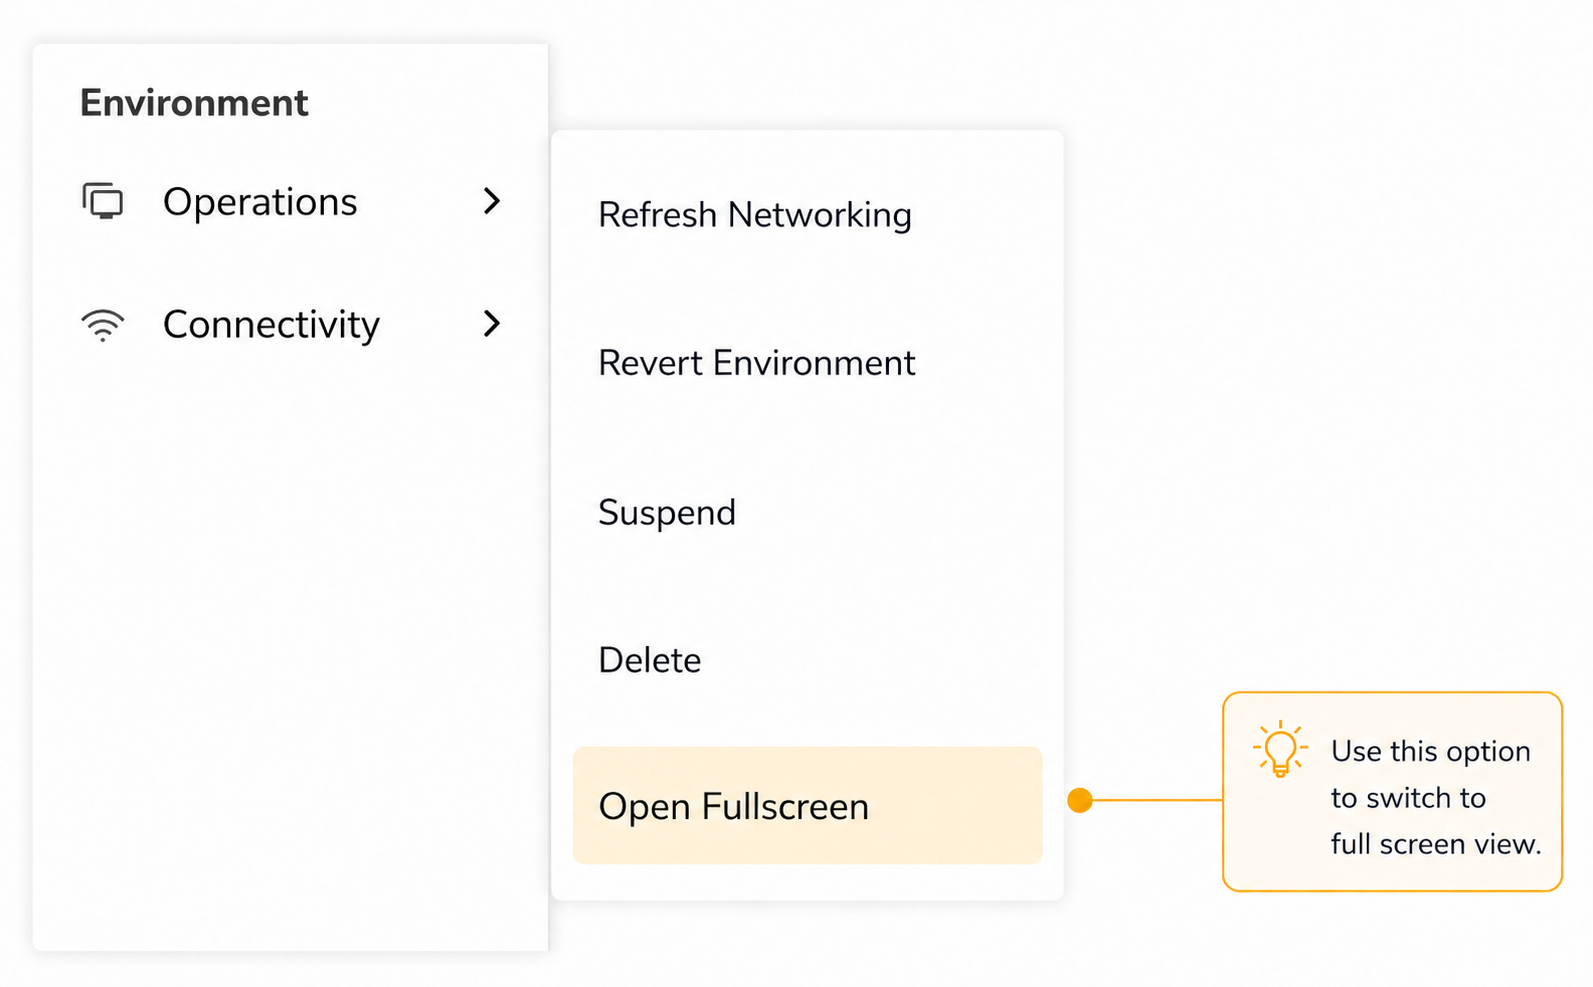
After the desktop appears, you can switch to full screen for a better experience:
-
Navigate to: Environment → Operations
-
Click Open Fullscreen
Note: When connecting to one of the console sessions, the screen might be black. You may have to press the Enter key before you see any output on the screen.
Virtual Machine Controls and Environment Actions
Virtual Machine Controls
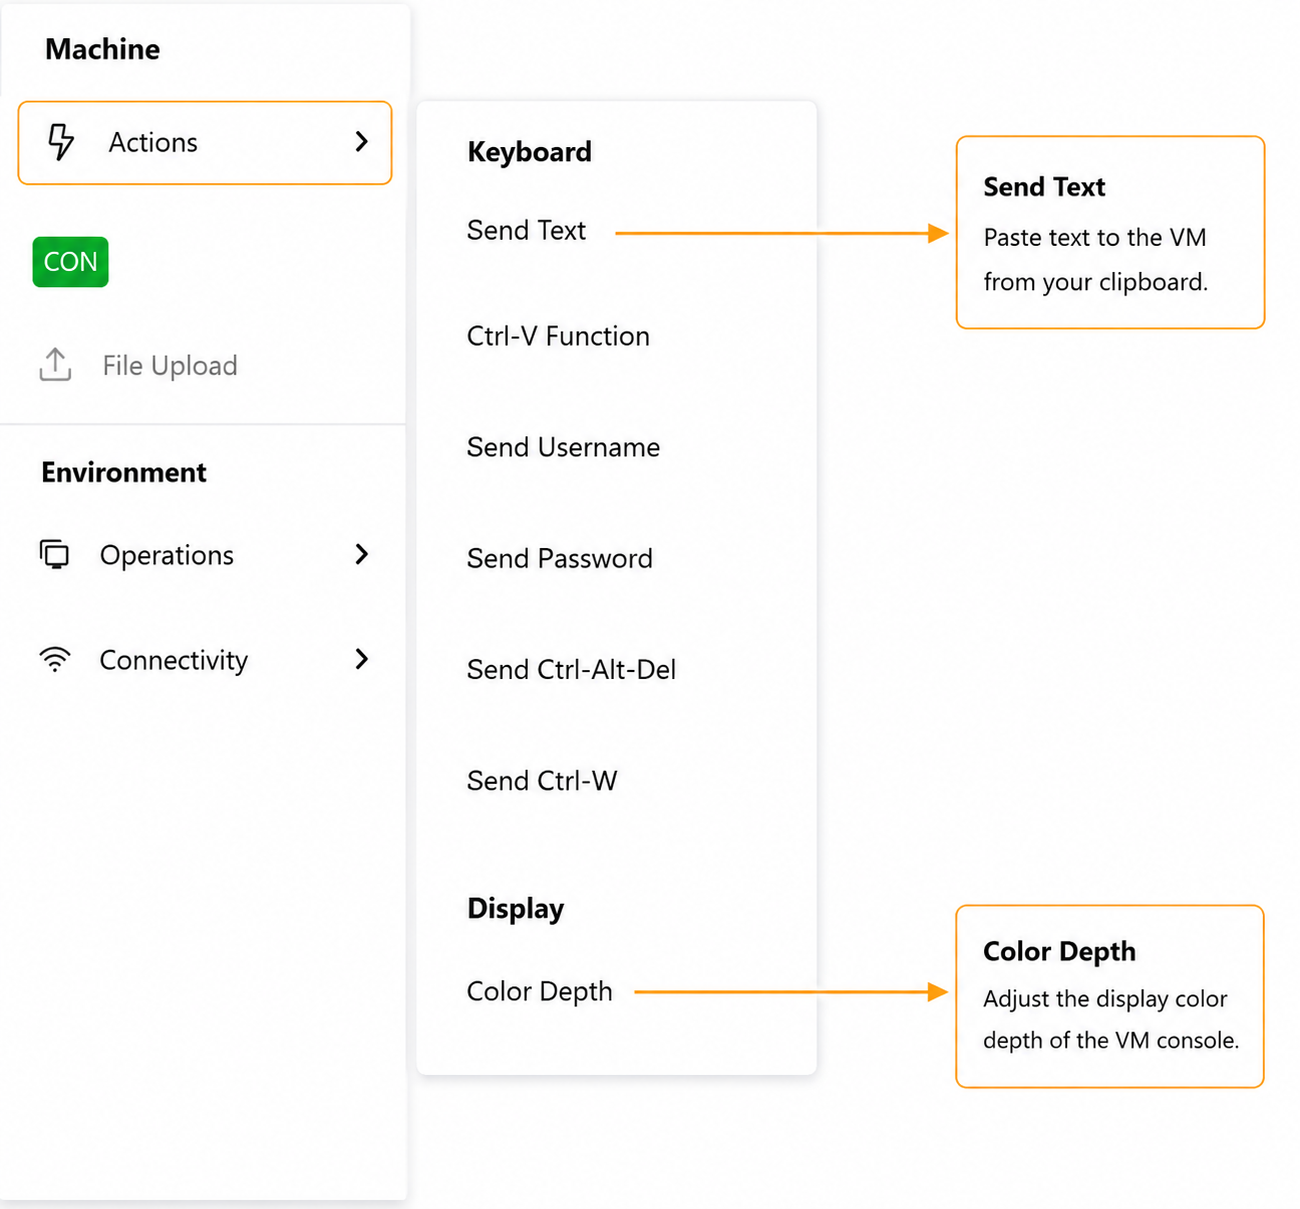
To access machine-level controls:
-
First select the required VM within the Environment Viewer.
-
Open the Machine → Actions menu to access keyboard controls, send text from clipboard to the VM, system commands, and display settings for the selected virtual machine
Environment Controls
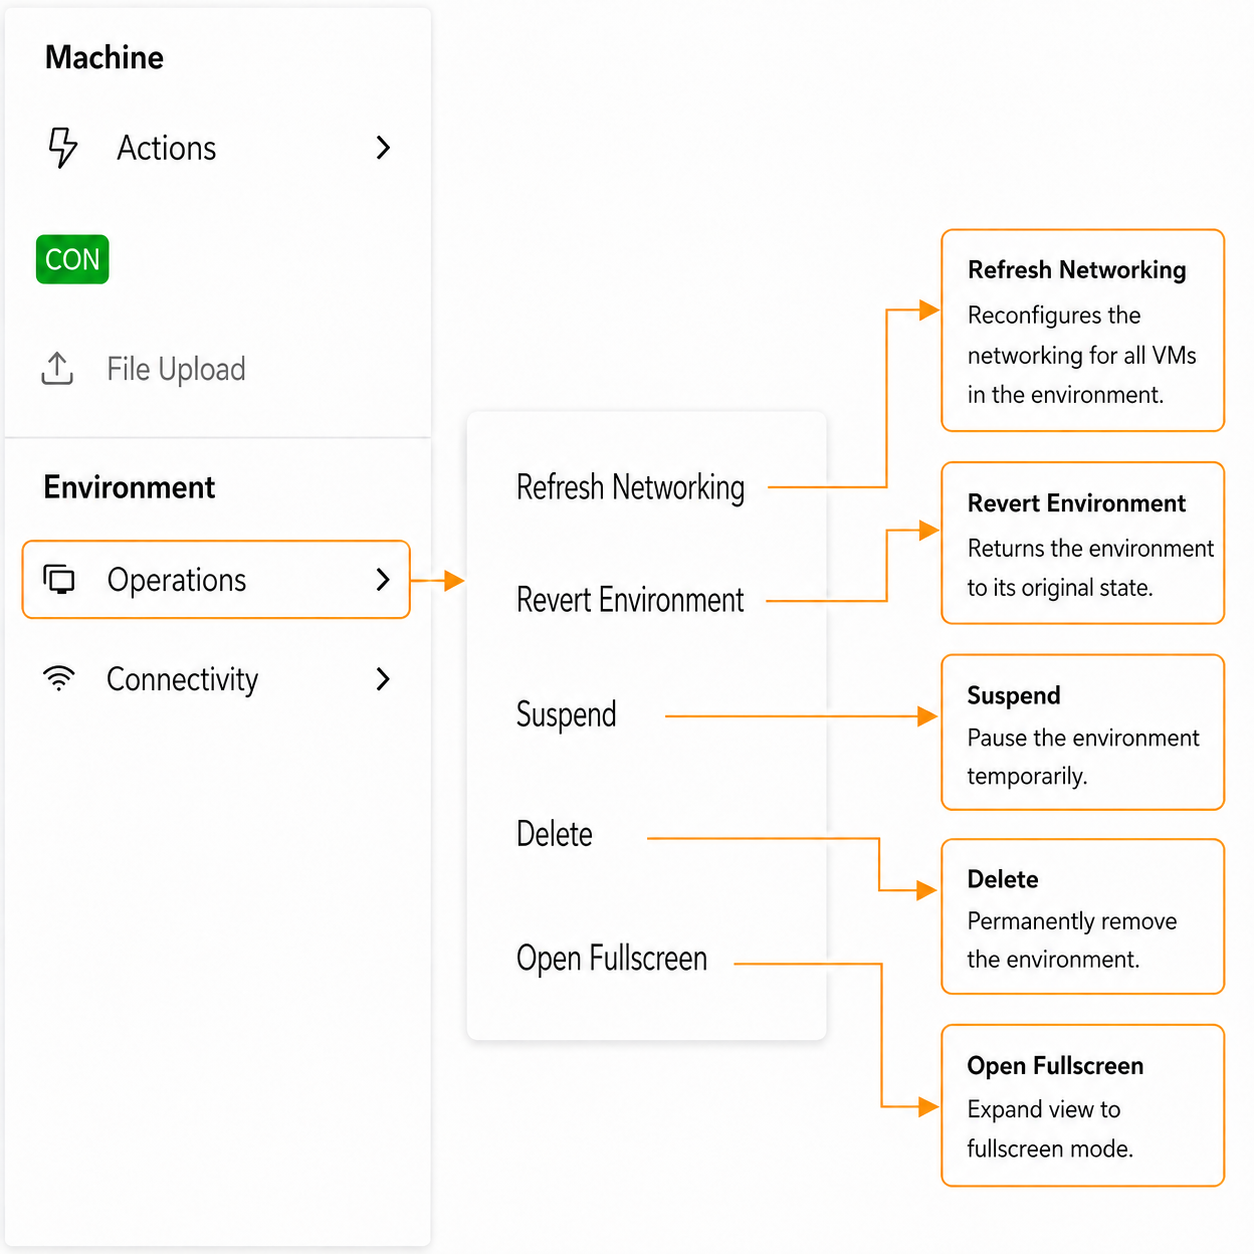
To access environment-level controls:
-
First select the required VM within the Environment Viewer.
-
Open the Environment → Operations menu to manage the virtual environment lifecycle, networking, and display options.
Connectivity Controls
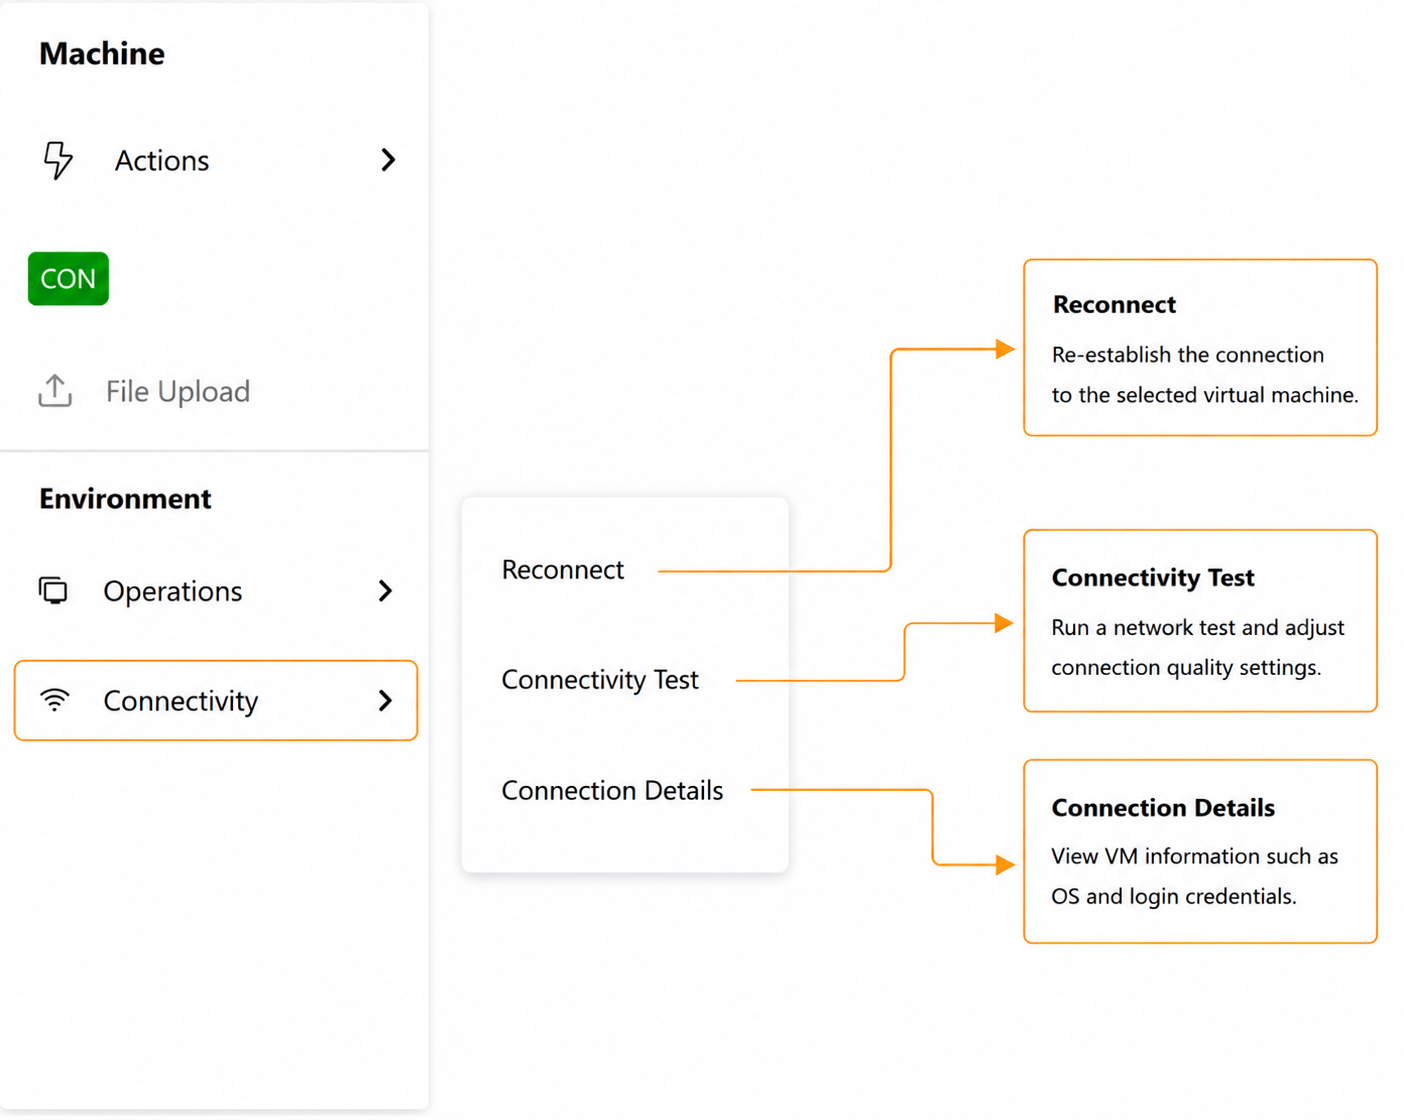
To access connectivity-related controls:
-
First select the required VM within the Environment Viewer.
-
Open the Environment → Connectivity menu to reconnect sessions, run connectivity and speed tests, adjust connection quality, and view VM operating system and credential details.
Shutdown or PowerOff a VM in the Lab Environment
To shut down or power off a virtual machine:
-
Select VM List from the top menu
-
Locate the required VM
-
Click the … (ellipsis) icon next to the VM
-
Select Power Off or Shut Down
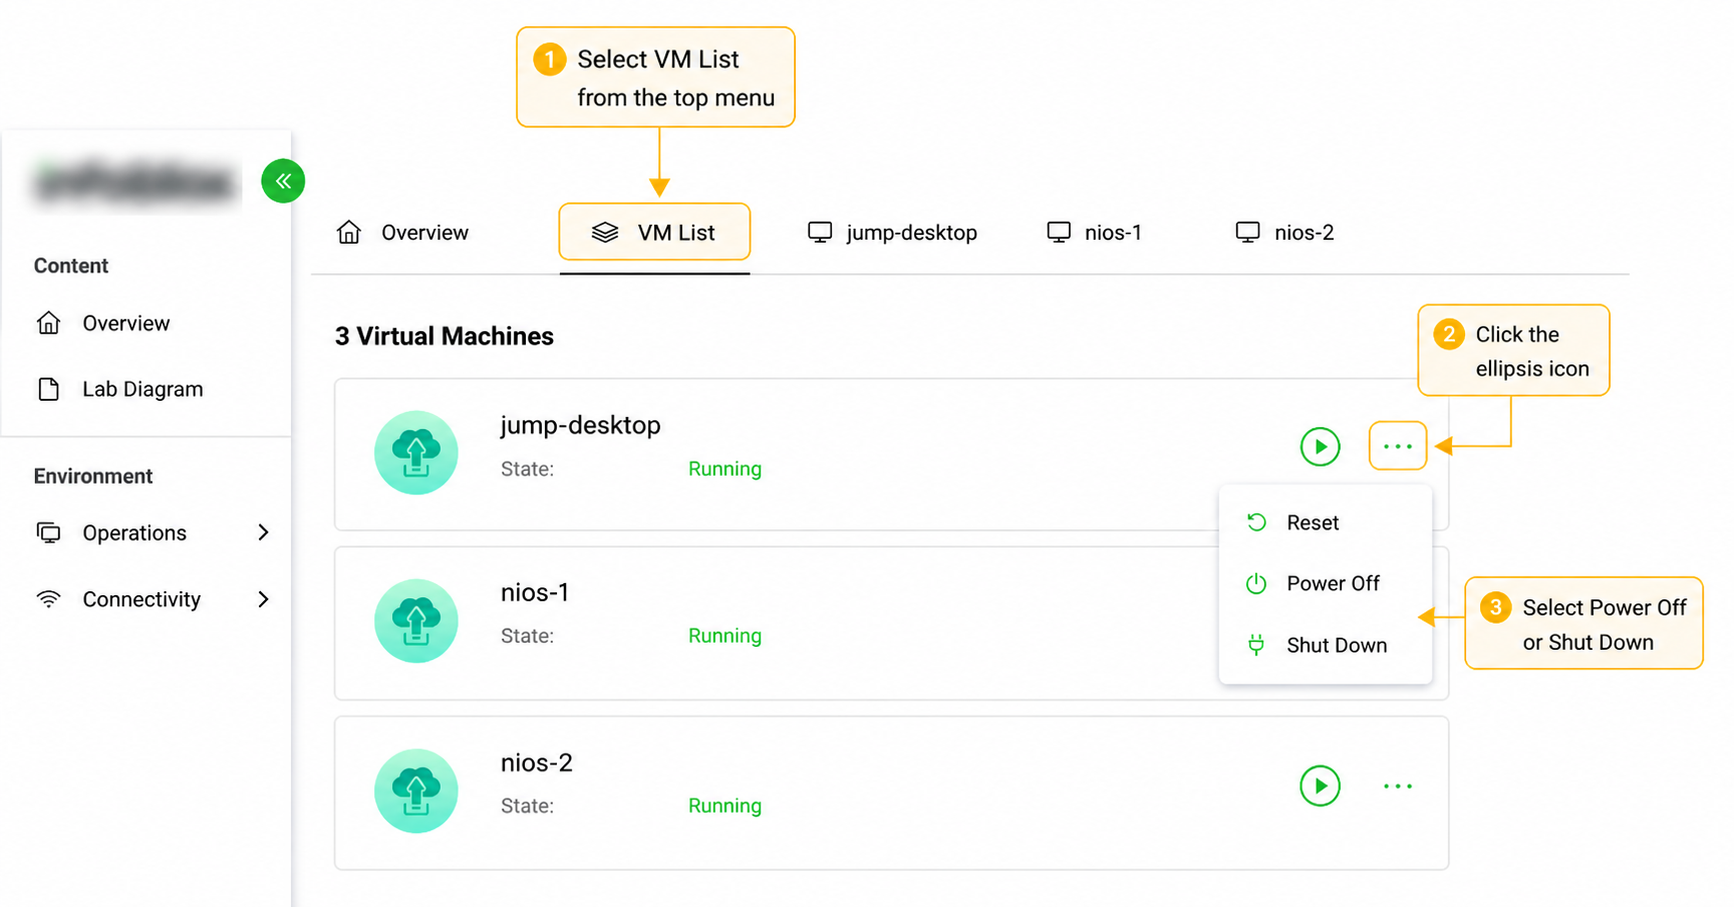
Note: Shut Down performs a graceful shutdown . Power Off immediately stops the VM.
Suspending your Lab Environment
To suspend the environment, navigate to:
Environment → Operations → Suspend
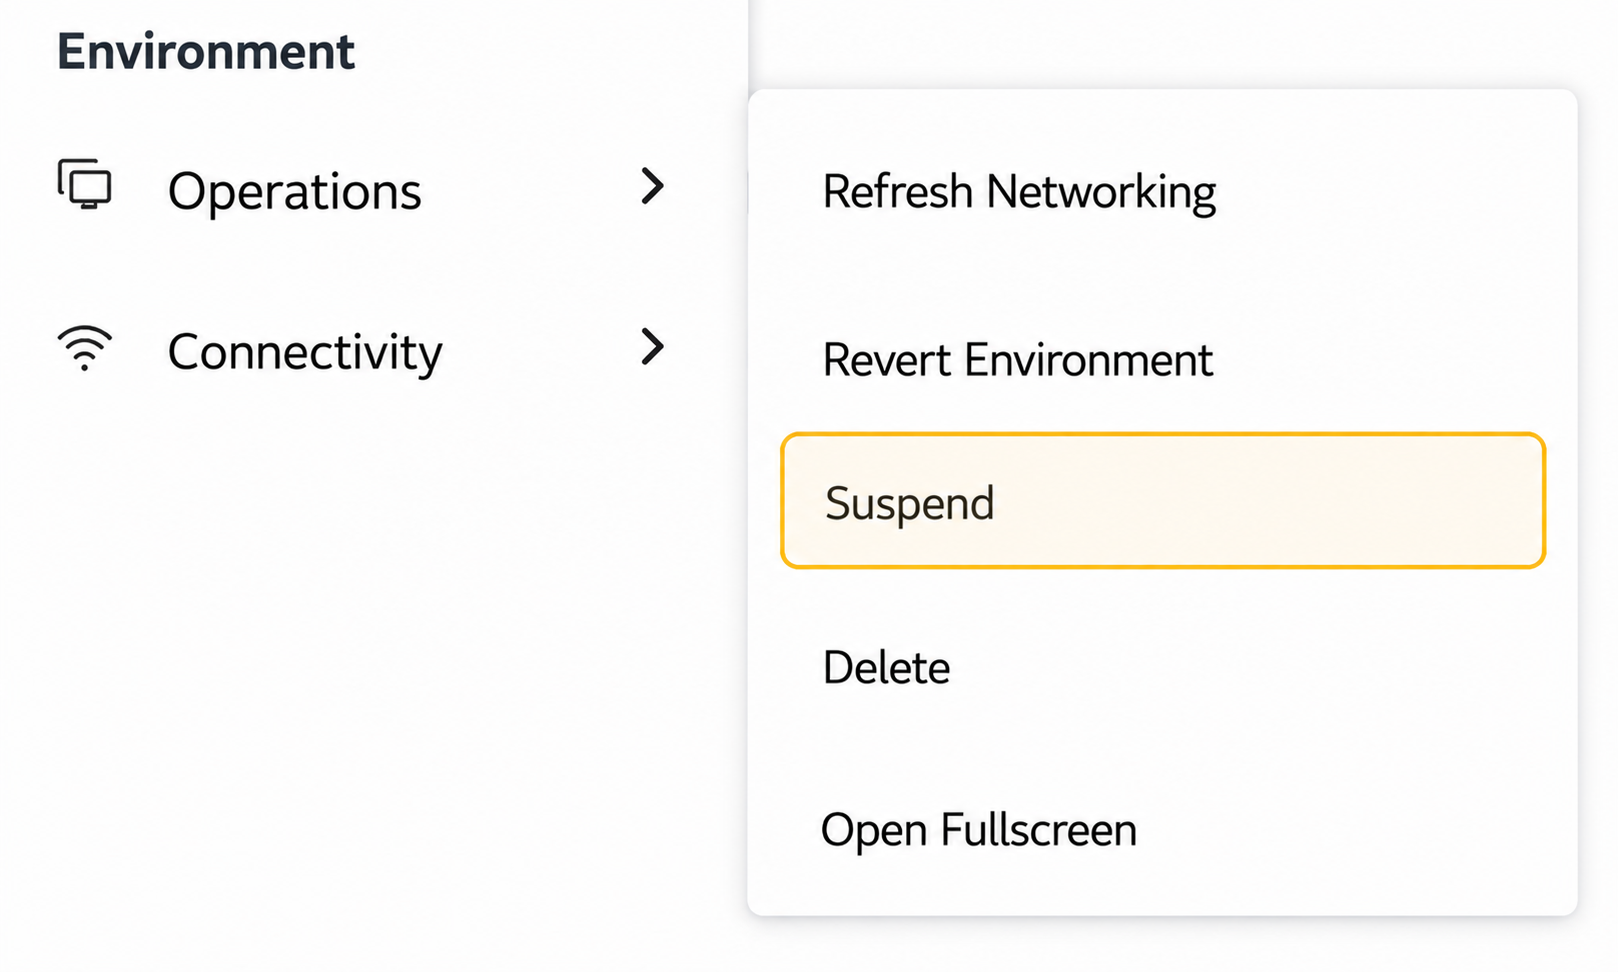
Note : When you are not actively using the lab environment, suspend it to avoid unnecessary lab runtime usage.To return to your lab environment later, access the Lab Environment activity in Launchpad again and click Launch.
Preparing your Lab (NIOS Labs Only)
If you are using a NIOS Lab Environment, you will need to prepare your lab environment before you can perform any lab tasks.
-
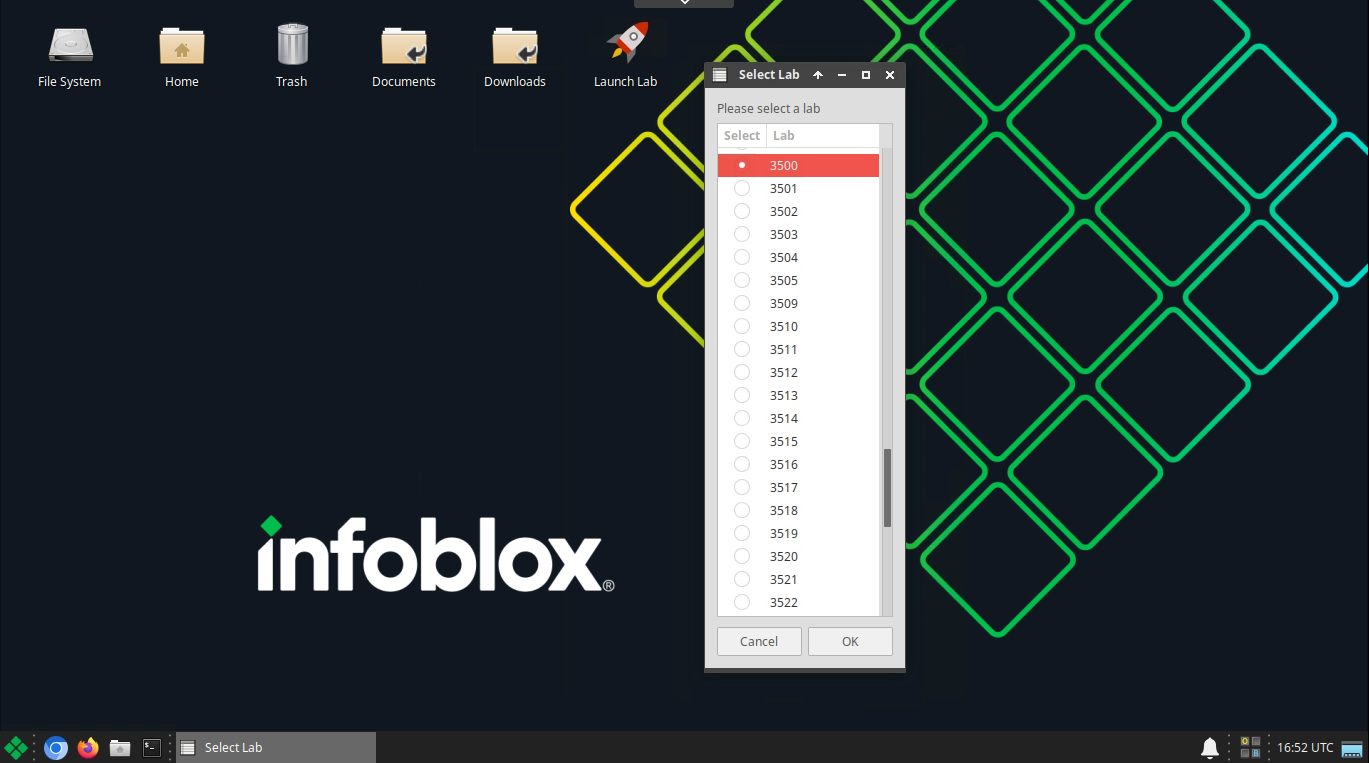
On the Jump-Desktop, double-click the Launch Lab shortcut on the Desktop.

-
Select your lab from the list, then click OK.
-
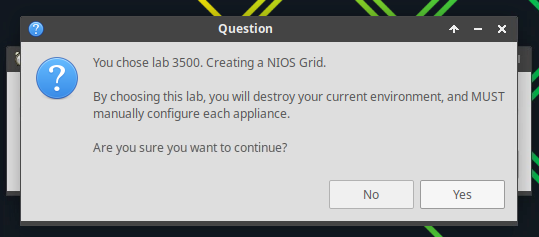
Read the popup message carefully.
-
It will display the lab name and number you are running, and essential information as to what it will do to the existing lab environment.
-
When you are ready to proceed, click Yes.
-
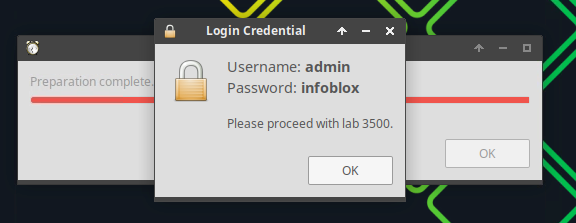
Once the lab has been prepared, the access credentials will be provided.
-
These you will use to access the Infoblox Grid.