

Infoblox Portal Navigation – Read First
Do things look different? A temporary toggle in the Infoblox Portal allows you to switch between the new and classic navigation experiences while our content is being updated. The toggle will be available through December 14, 2026. Use the toggle button switch between the classic and new navigation.

Scenario
You are the DNS administrator for the internal DNS domain techblue.net. Your team is preparing to publish DNS Traffic Control records for a load-balanced application, and you want those records organized in their own child/sub zone so they can be managed separately from the rest of the domain later. Your goal is to create the authoritative primary DNS zone dtc.techblue.net under techblue.net and then verify from a client that the new zone returns authoritative SOA and NS responses.
Estimated Completion Time
-
10 minutes
Prerequisites
-
Administrative access to the Infoblox Portal
Learning Content
Tasks
-
Create a Subzone
-
Validate Subzone Responses
Task 1: Create a Subzone
Create a primary subzone named dtc.techblue.net under the techblue.net zone in the default DNS view. Configure it as an authoritative zone, use dtcadmin@techblue.net as the administrative contact, and assign Techblue DNS Service 1 and Techblue DNS Service 2 as the authoritative DNS servers.
Task 2: Validate Subzone Responses
After creating the dtc.techblue.net subzone, verify that the setup is working as expected. Use the testing-linux virtual machine to query the DNS servers and confirm that the resource records resolve correctly.
Solutions
Task 1 Solution: Create a Subzone
Start by creating the DTC child zone under the existing techblue.net parent zone. This keeps DTC related records organized under their own authoritative namespace and prepares the environment for more granular administration later. Because the subzone is authoritative, Universal DDI automatically creates the SOA and NS records when you save it.
-
Log in to your lab’s jump-desktop.
-
Use the Education Infoblox Portal credentials to sign in to the Infoblox Portal.
-
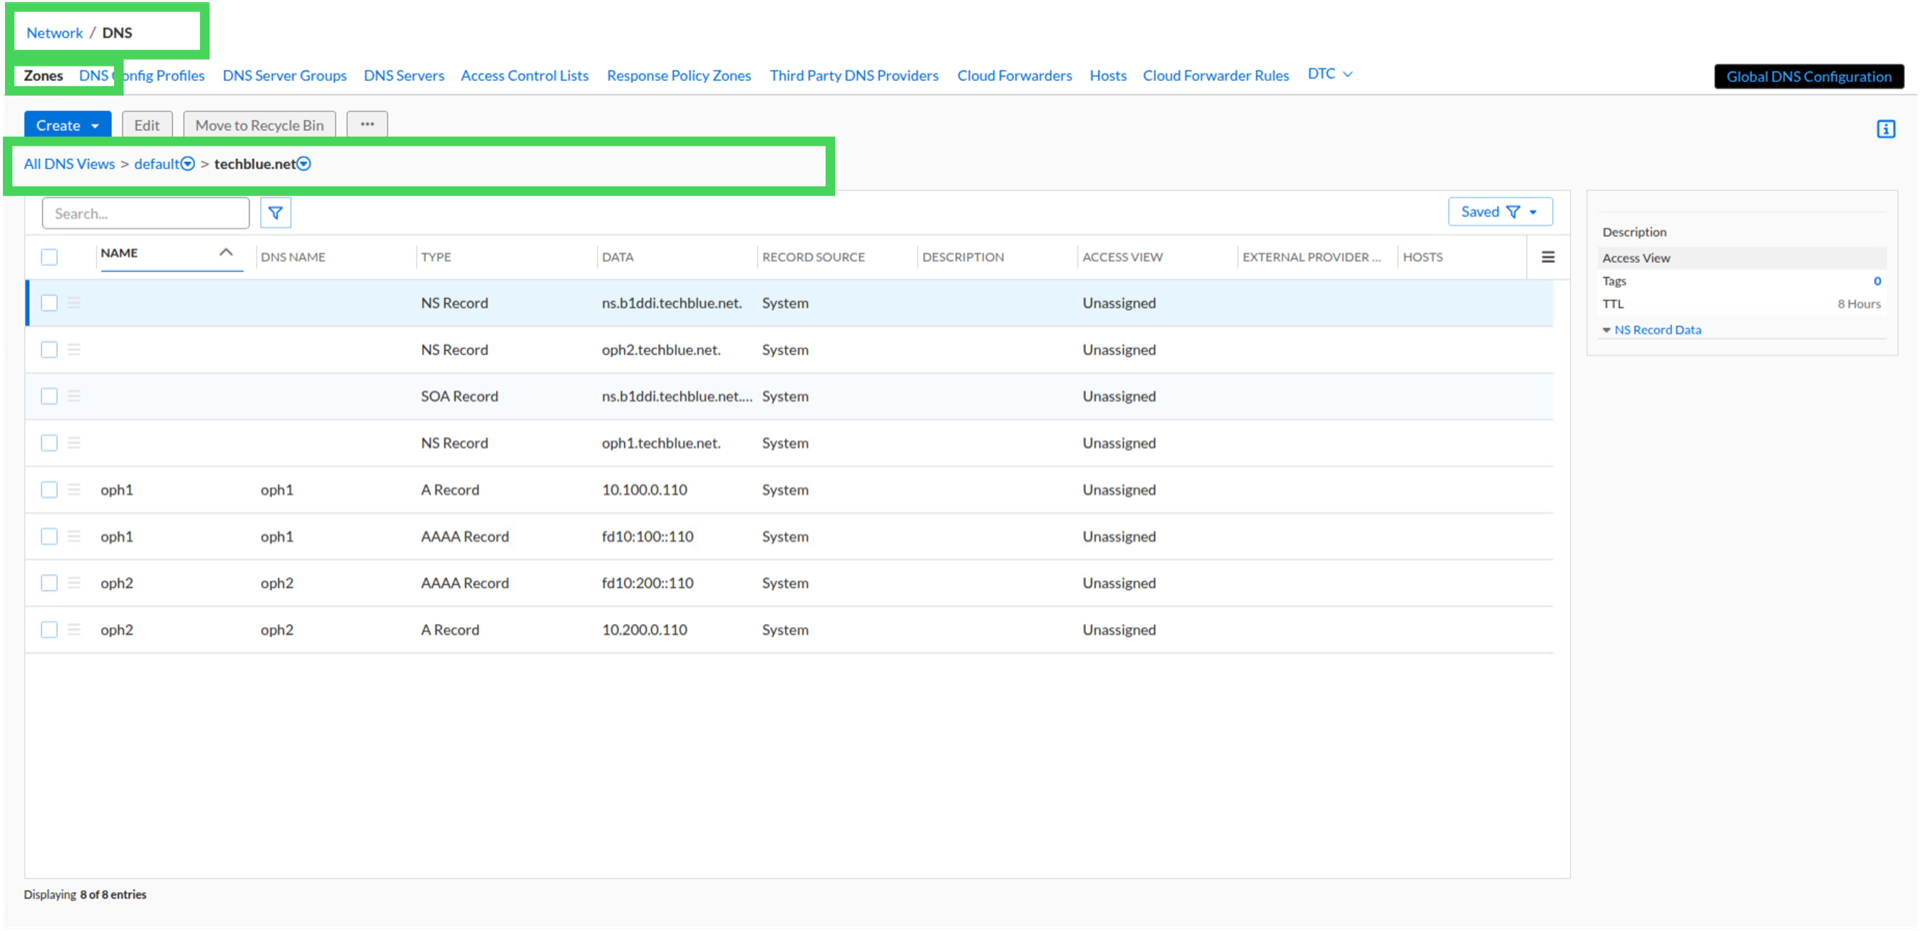
Navigate to Network → DNS.
-
Select the Zones tab.
-
Click the DNS view default.
-
In the default DNS view, click zone techblue.net to open it.
-
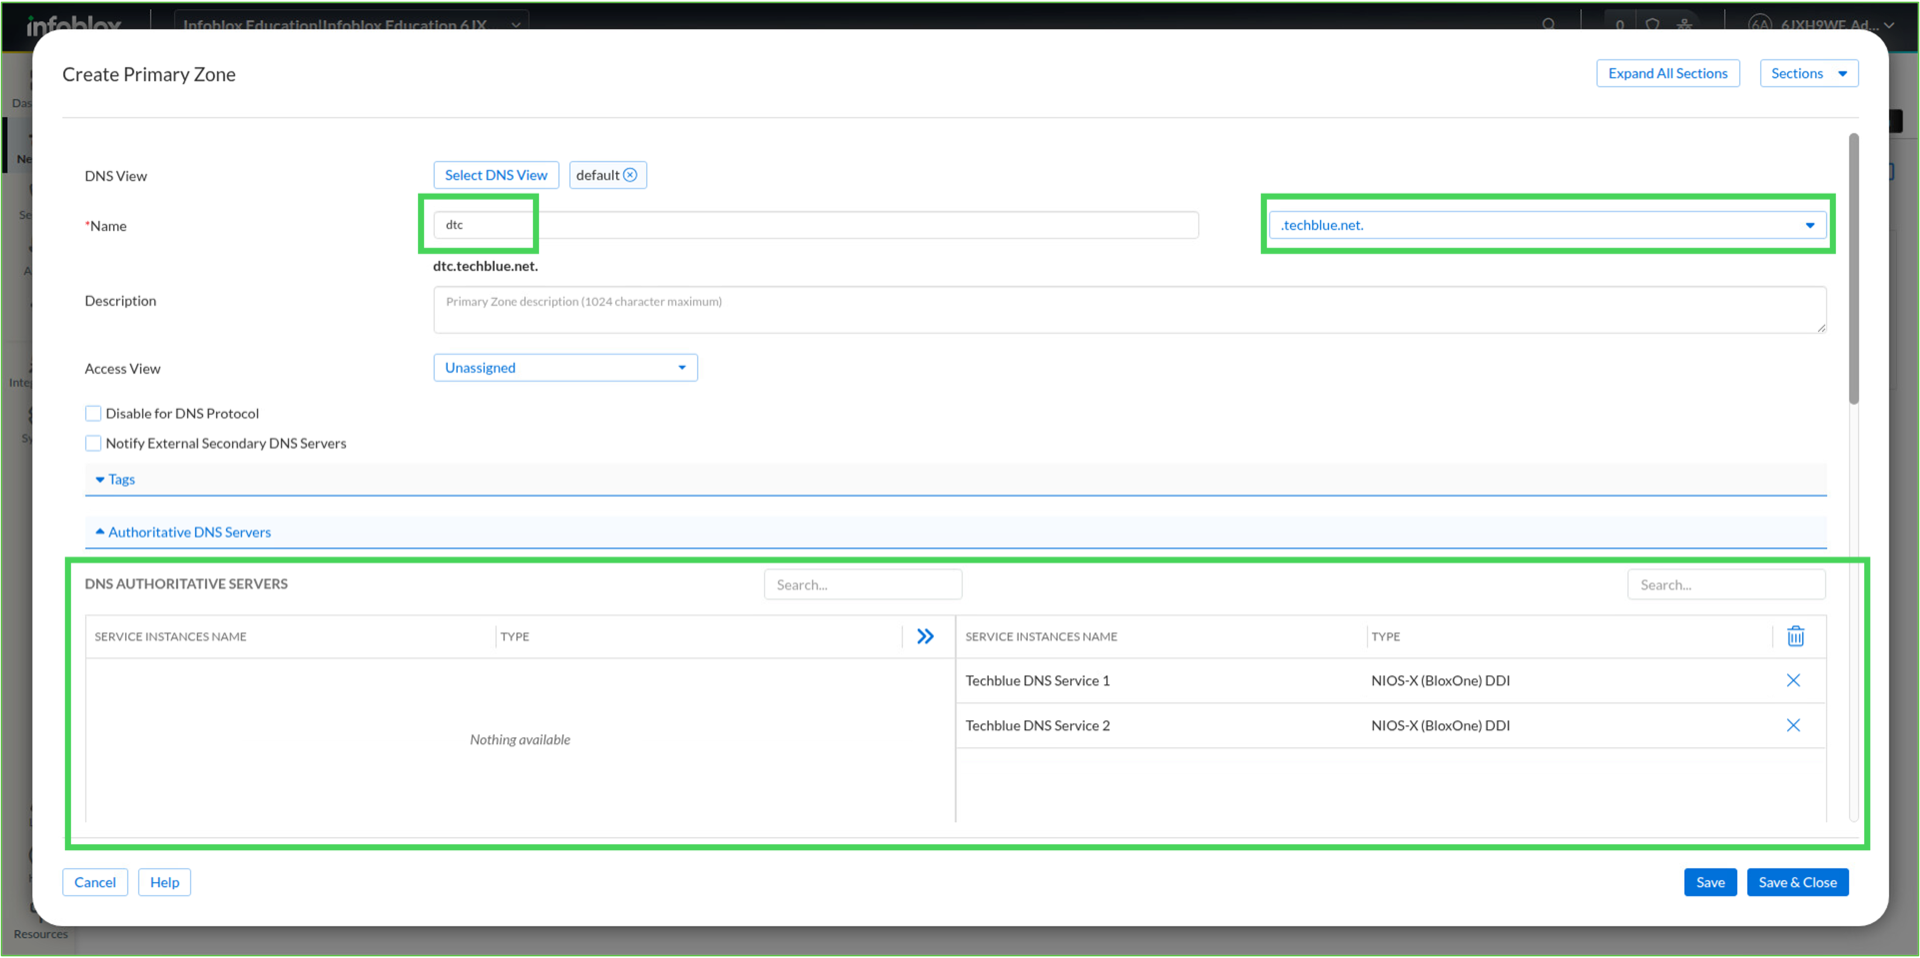
Click Create, point to Zone, and select Primary Zone.
-
In the Name field, enter dtc.
-
Verify that .techblue.net is selected in the suffix drop-down list.
-
Expand the Authoritative DNS Servers section.
-
Select Techblue DNS Service 1 and Techblue DNS Service 2, and move them to the selected list.
-
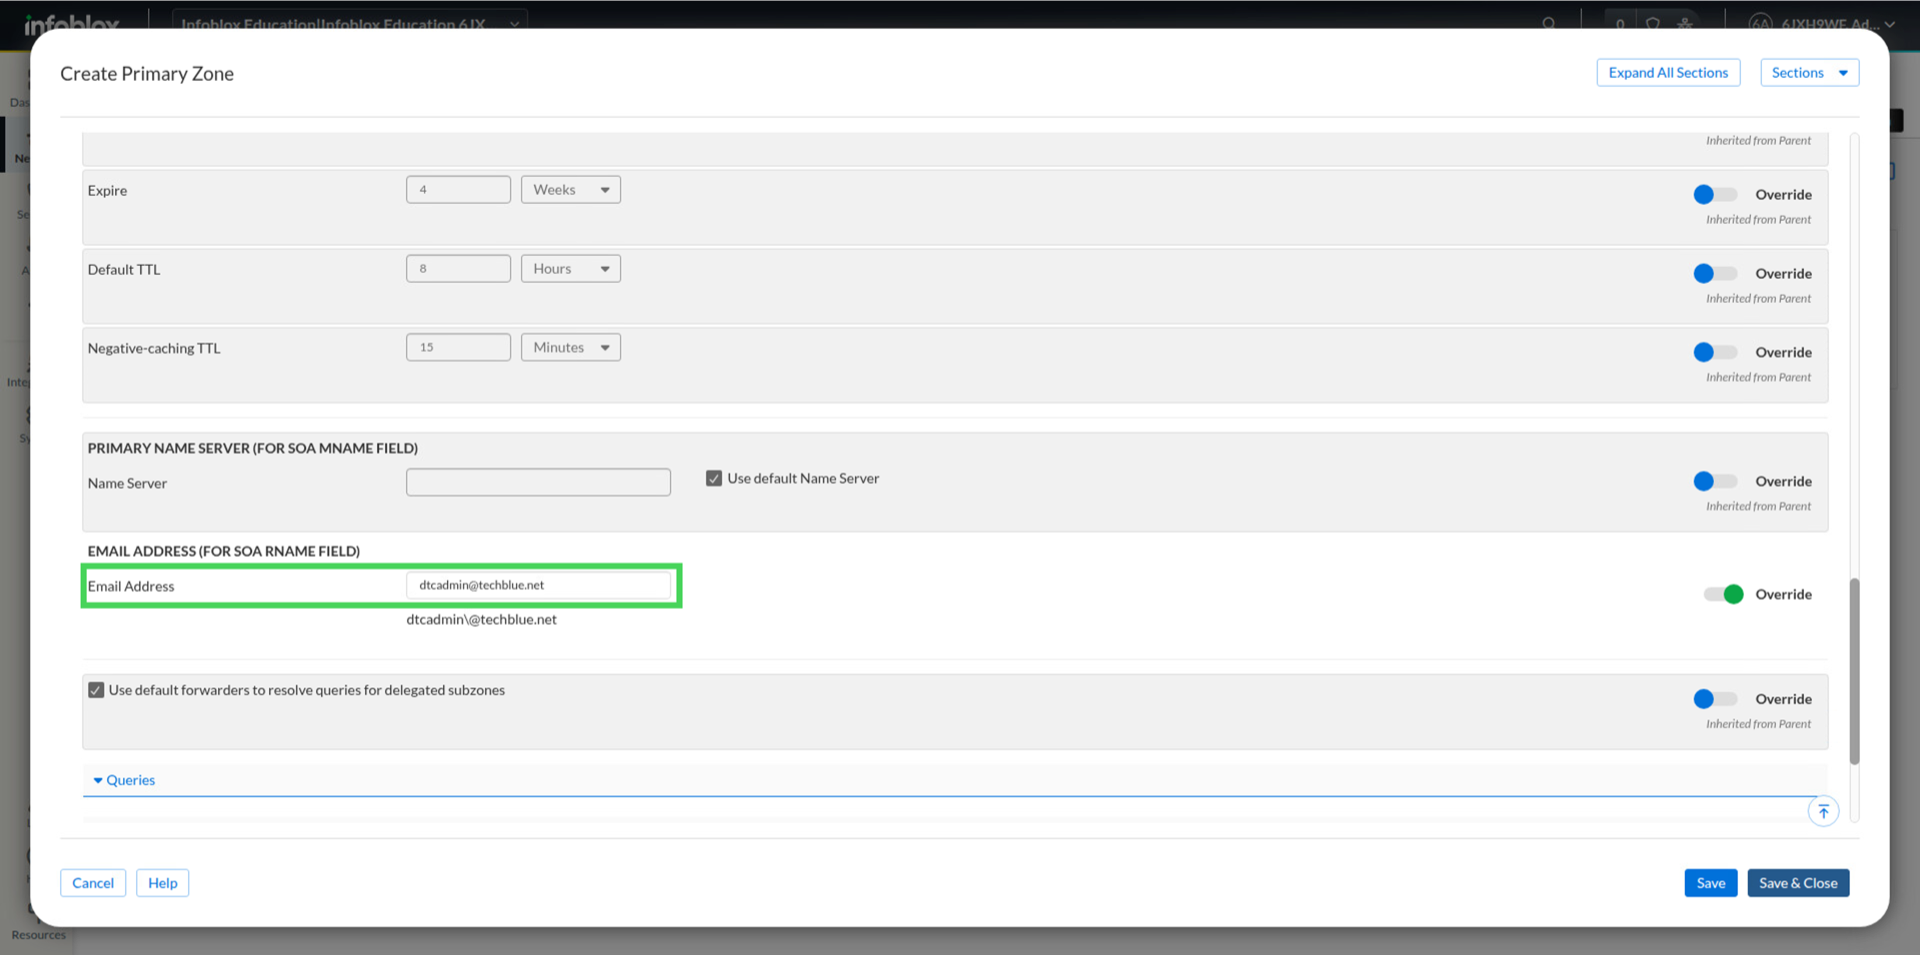
Expand the Zone Setting Defaults section.
-
Scroll to Email Address (for SOA field), turn on the Override toggle, and enter dtcadmin@techblue.net.
-
Click Save & Close.
Task 2 Solution: Validate Subzone Responses
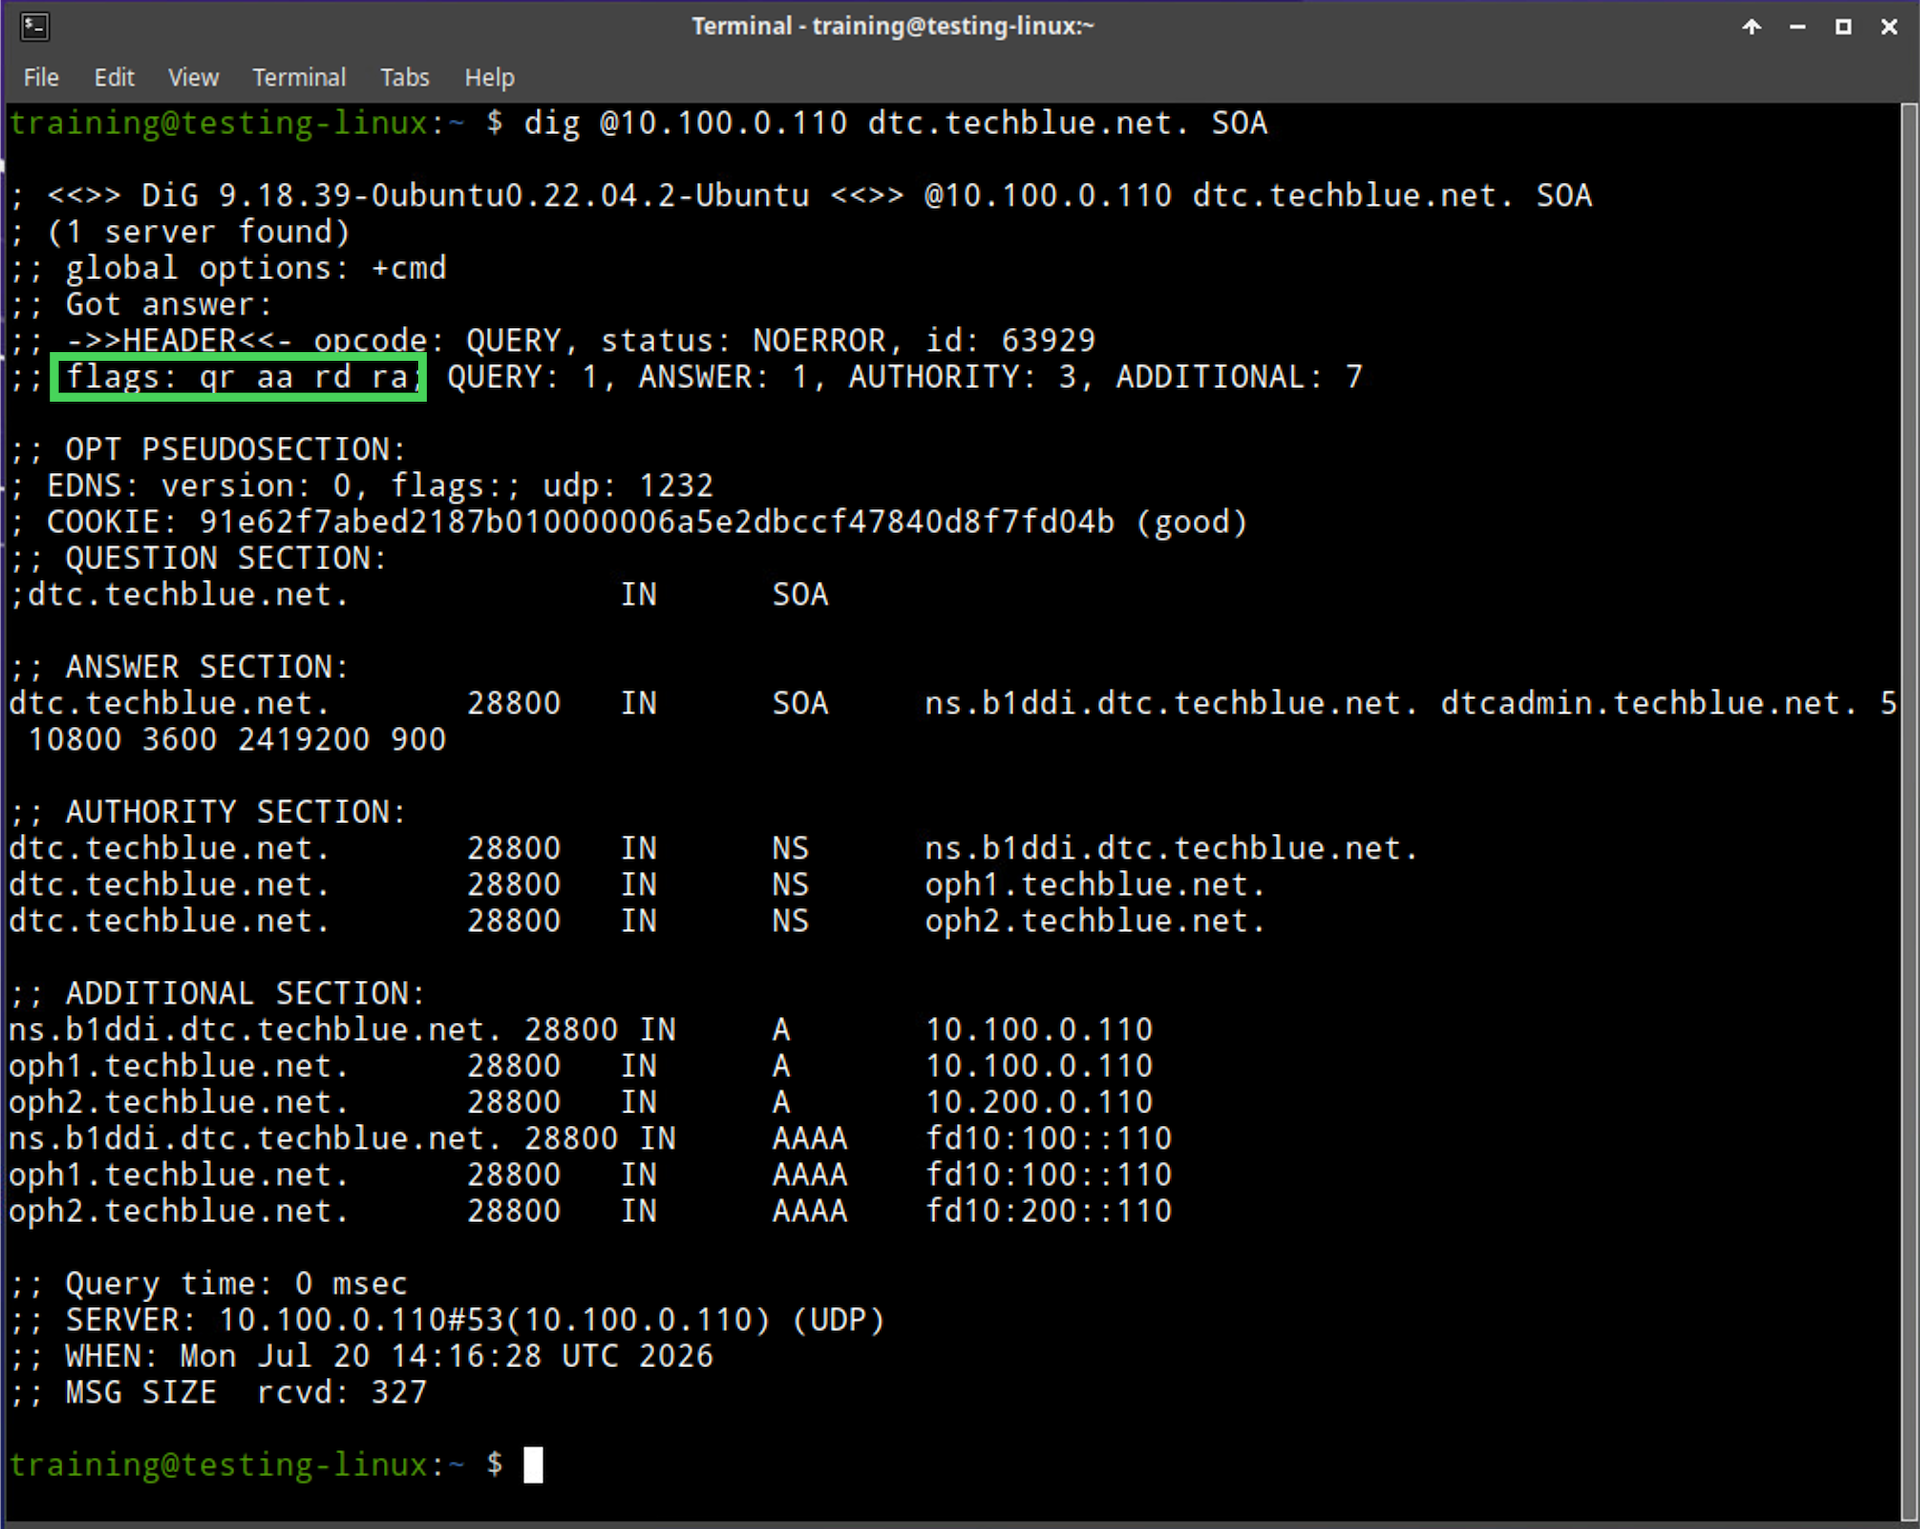
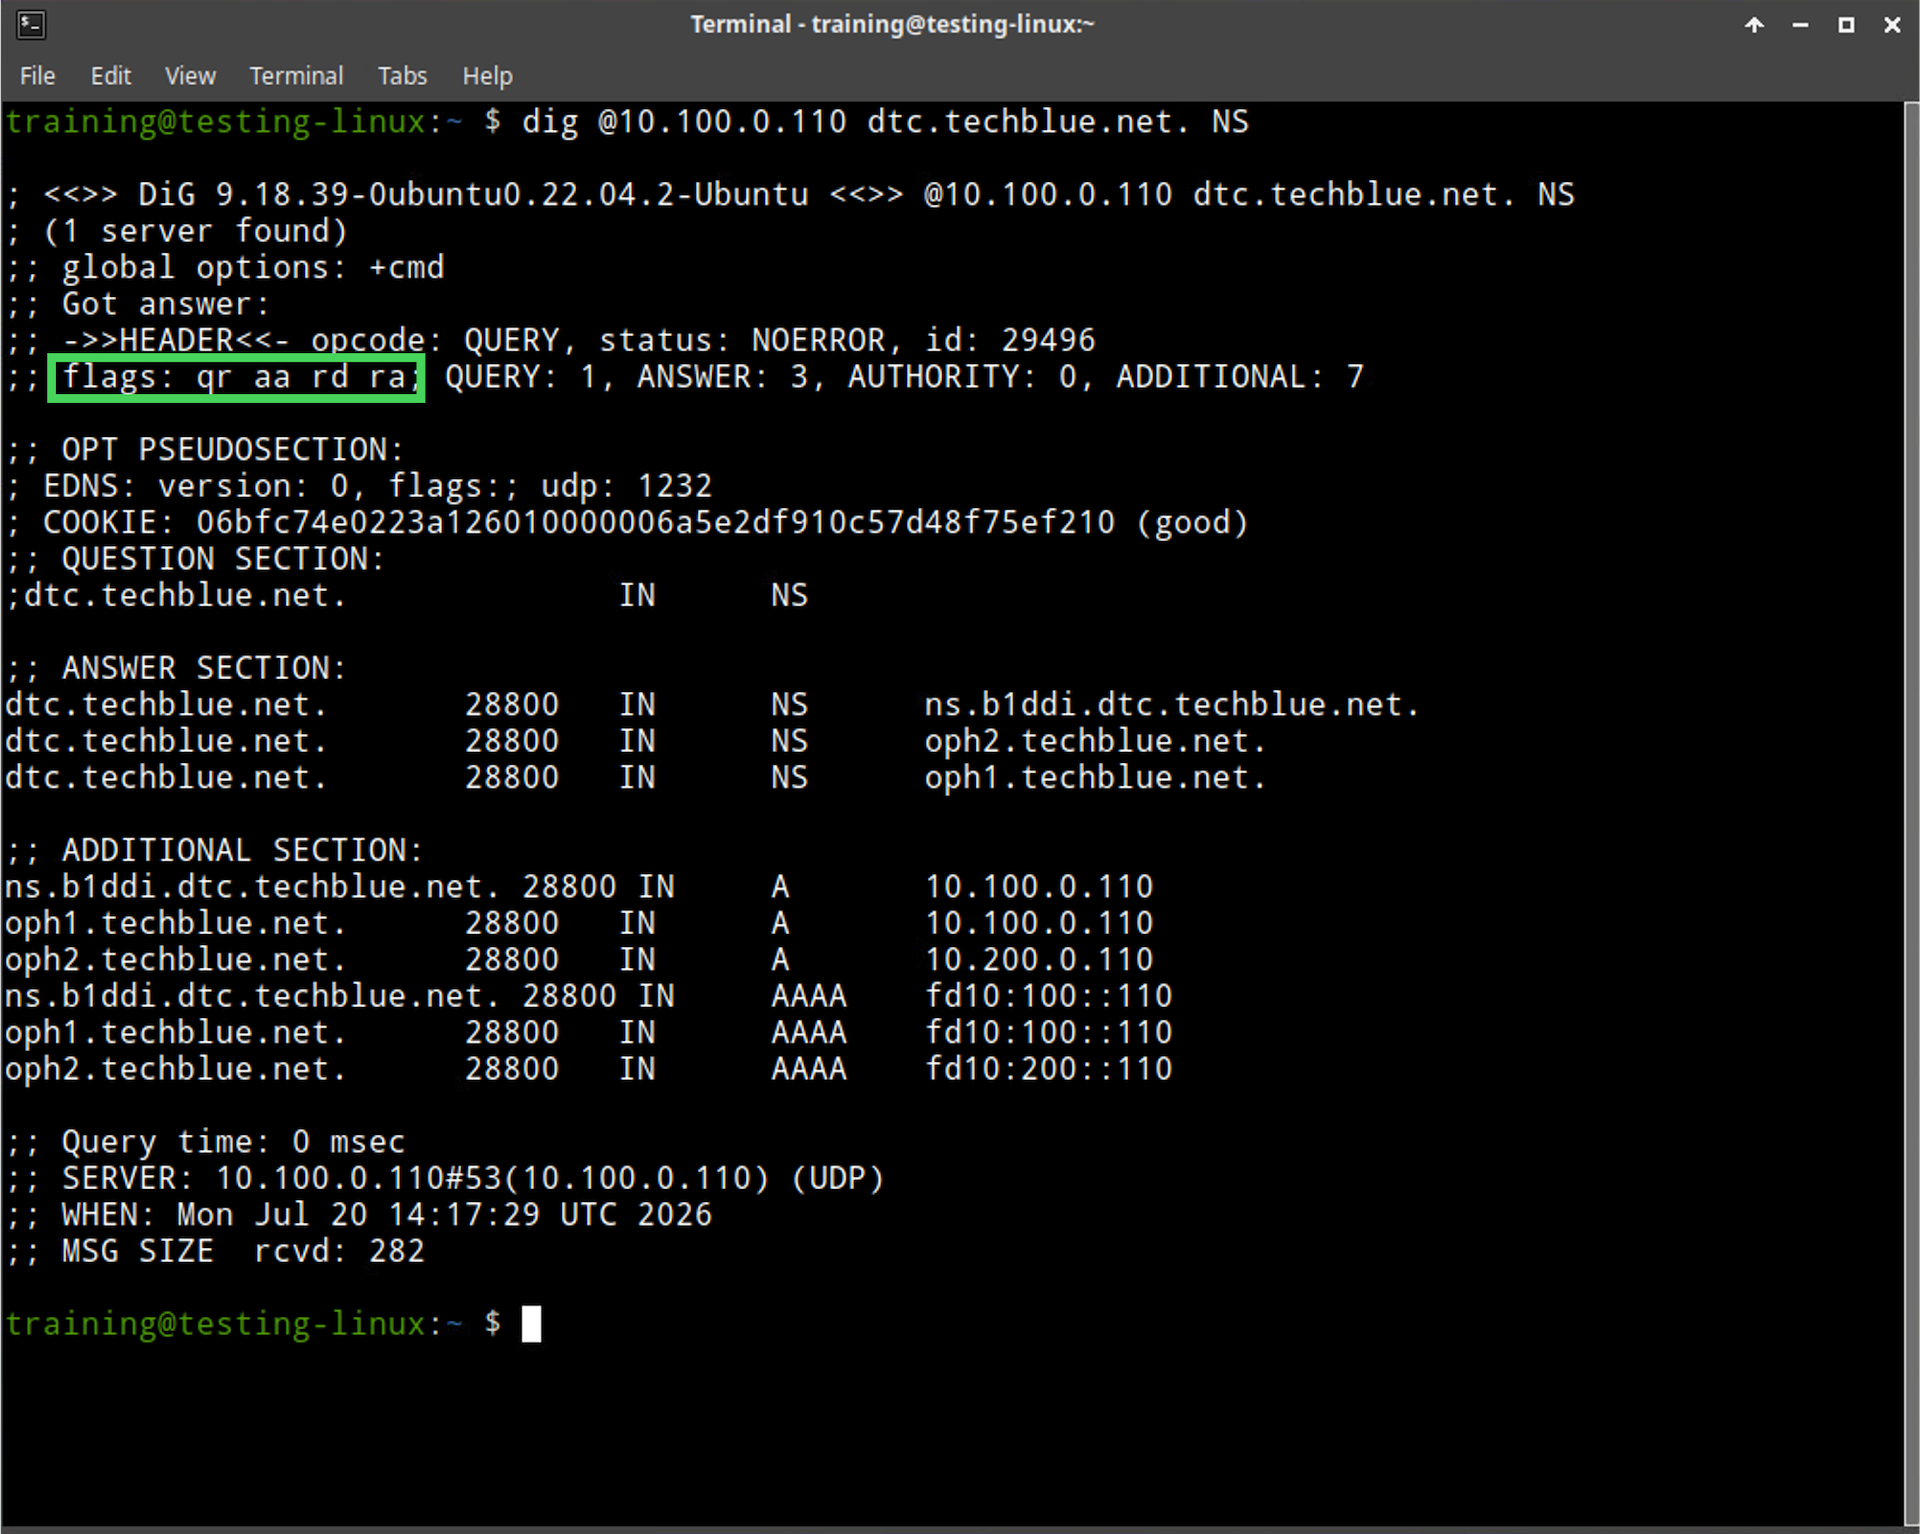
After you create the subzone, verify that the DNS servers are serving it authoritatively from a client system. Querying the SOA and NS records confirms both that the zone exists and that its core authoritative records were created correctly. A successful result should show an authoritative answer and a NOERROR status.
-
Switch to virtual machine testing-linux and open a terminal window.
-
Run sudo set-network-static-bloxone. If prompted for a password, use infoblox.
-
Run dig @10.100.0.110 dtc.techblue.net. SOA.
-
Run dig @10.100.0.110 dtc.techblue.net. NS.
-
Review both responses and confirm that they show an authoritative answer (aa) and NOERROR.