
Infoblox Portal Navigation – Read First
Do things look different? A temporary toggle in the Infoblox Portal allows you to switch between the new and classic navigation experiences while our content is being updated. The toggle will be available through December 14, 2026. Use the toggle button switch between the classic and new navigation.

Scenario
You have a production system, prod.dtc.techblue.net, which is served by four application servers across two pools, Pool A and Pool B. During normal operation, you prefer to have all application servers in Pool A respond. In the case of an outage, such as a disaster recovery (DR), all application servers from Pool B should respond. In this lab, you will configure this behavior using the Global Availability load balancing type in a DTC policy, simulate a DR event by taking down some application servers, verify DTC behaves as expected, and restore the application servers.
Estimated Completion Time
-
30 minutes
Prerequisites
-
Administrative access to the Infoblox Portal
-
Lab 2606: Creating a Primary Subzone for DTC in Universal DDI
Learning Content
Tasks
-
Create the Global Availability policy
-
Create the LBDN for the Global Availability policy
-
Test normal Global Availability behavior from the client side
-
Simulate a DR event
-
Test post-DR behavior from the client side
-
Restore the application servers
Task 1: Create the Global Availability policy
Create a policy that prefers Pool A and uses Pool B as the alternate answer source.
Task 2: Create the LBDN for the Global Availability policy
Create an LBDN for prod.dtc.techblue.net and associate it to the disaster recovery policy.
Task 3: Test normal Global Availability behavior from the client side
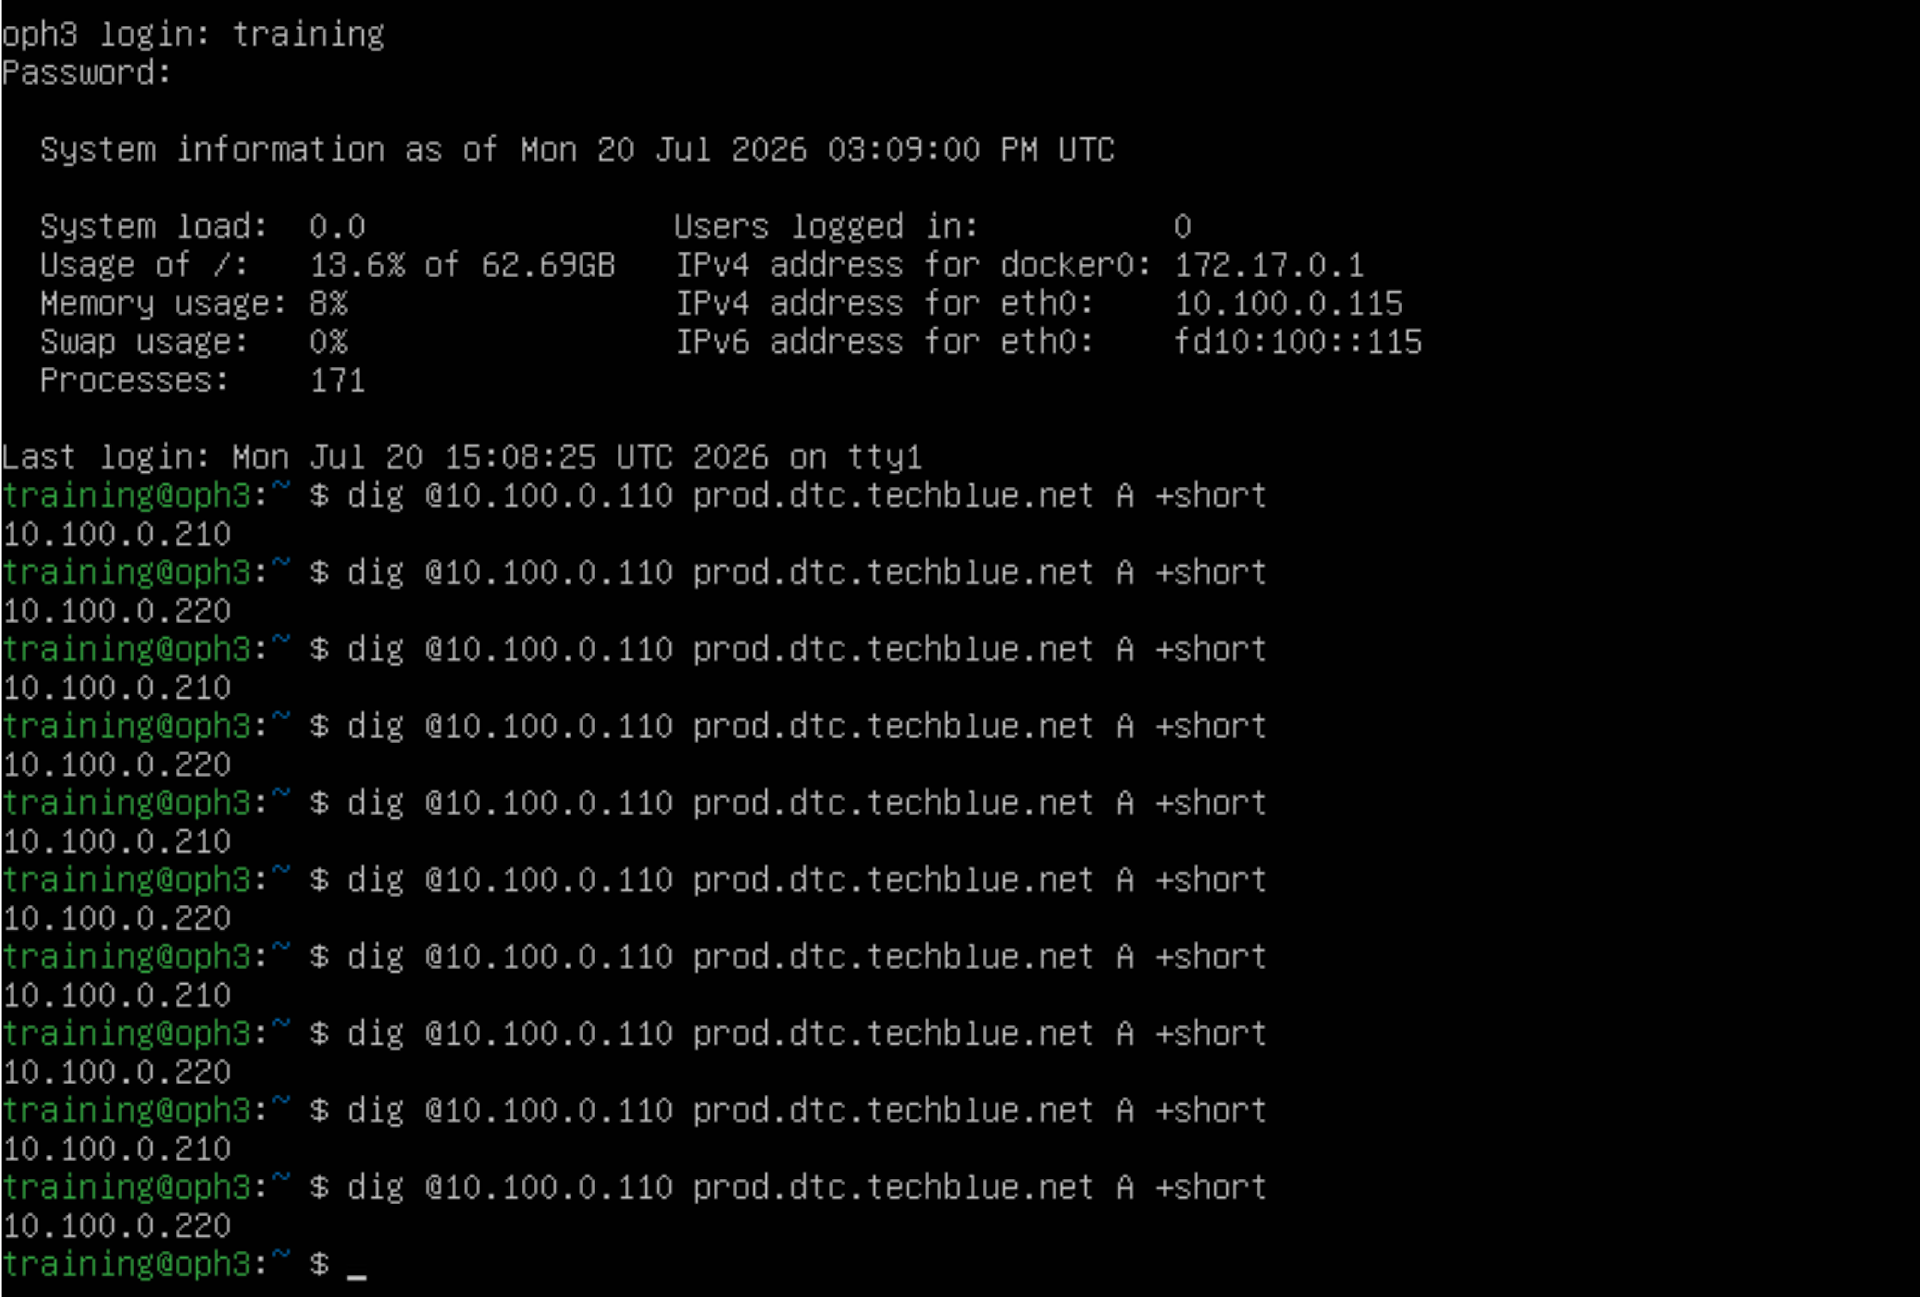
Use oph3, jump-desktop, and testing-linux to confirm that prod.dtc.techblue.net resolves only Pool A IP addresses during normal operation.
Task 4: Simulate a DR event
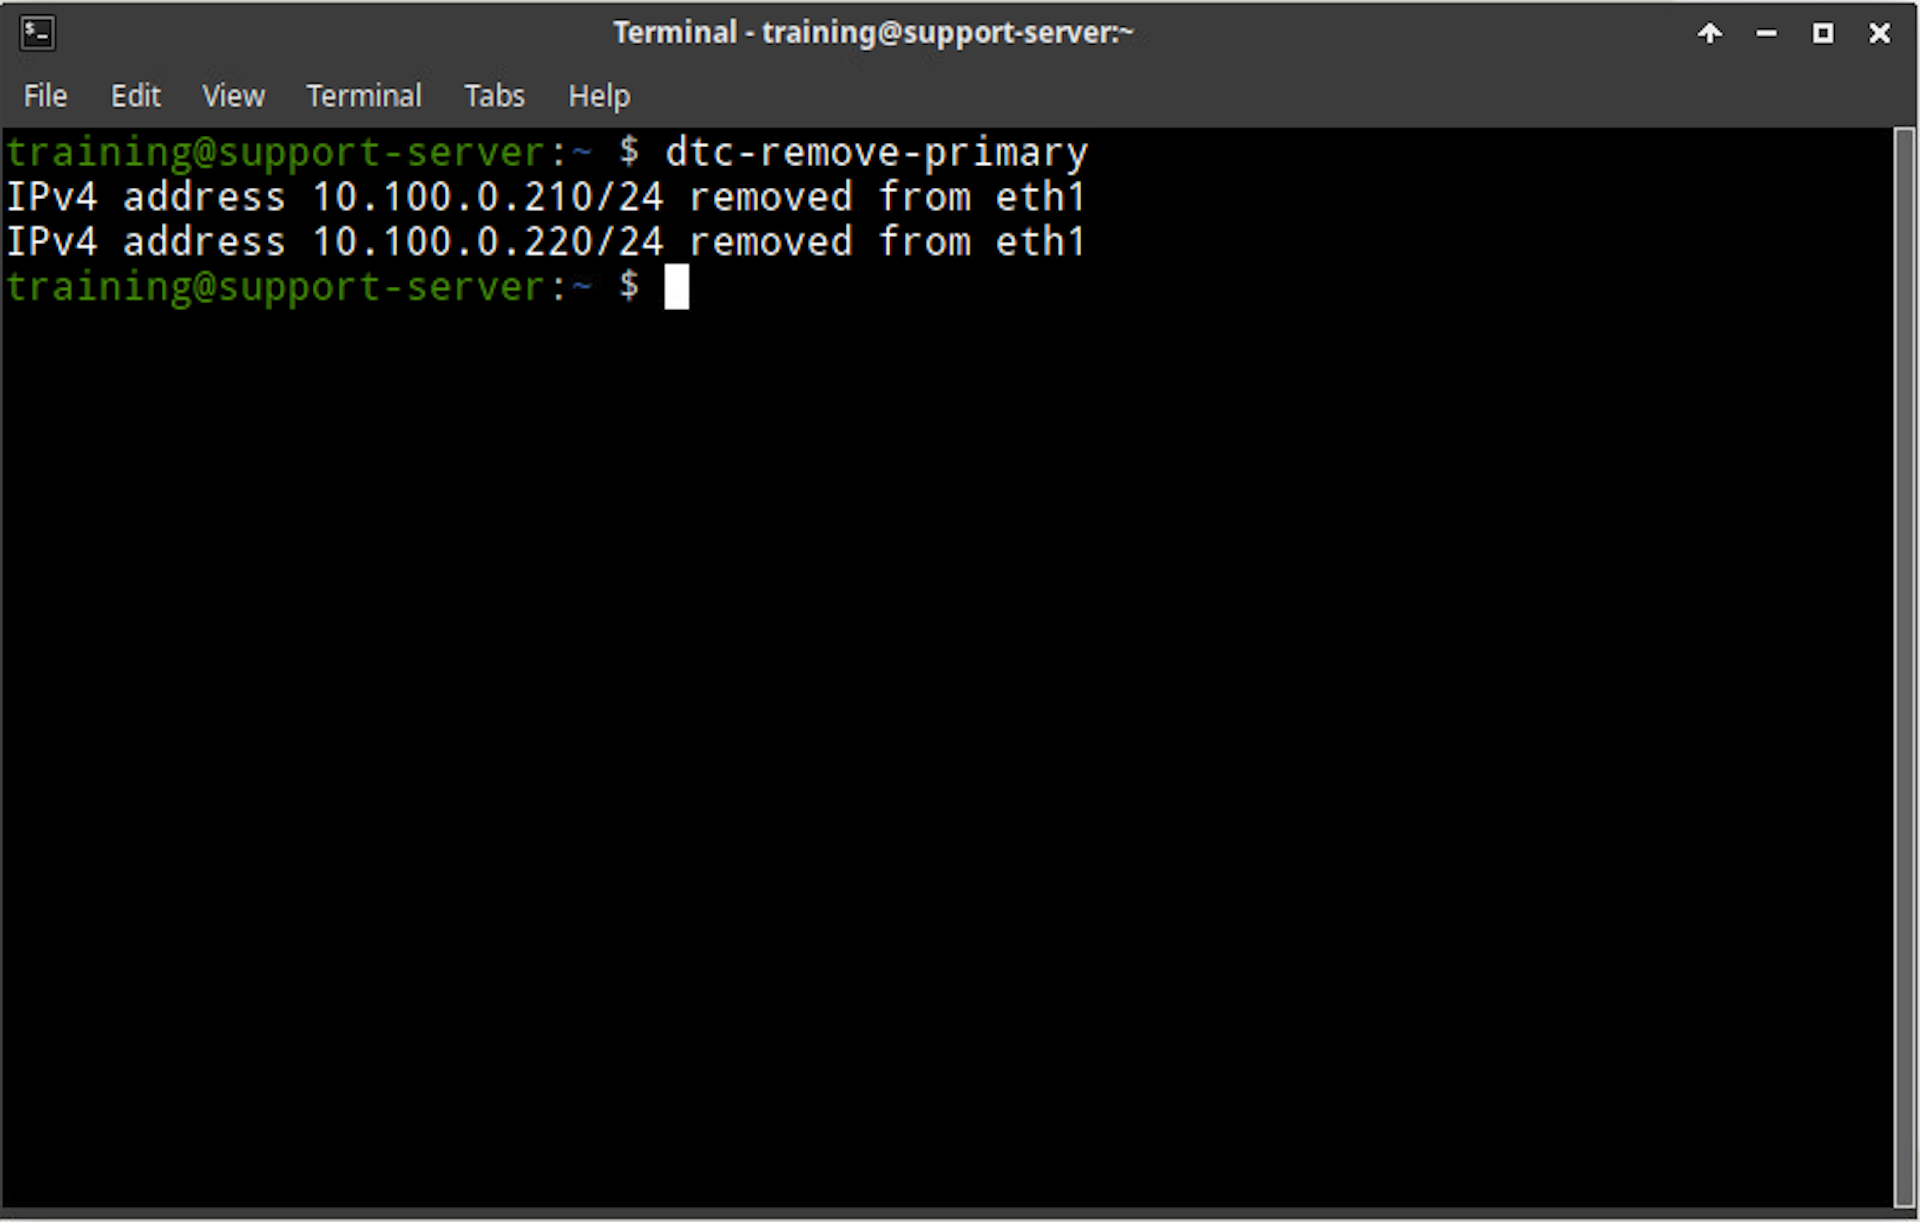
Simulate a DR event by removing the application servers belonging to Pool A, thereby causing the health checks to fail and the application servers to be taken out of consideration.
Task 5: Test post-DR behavior from the client side
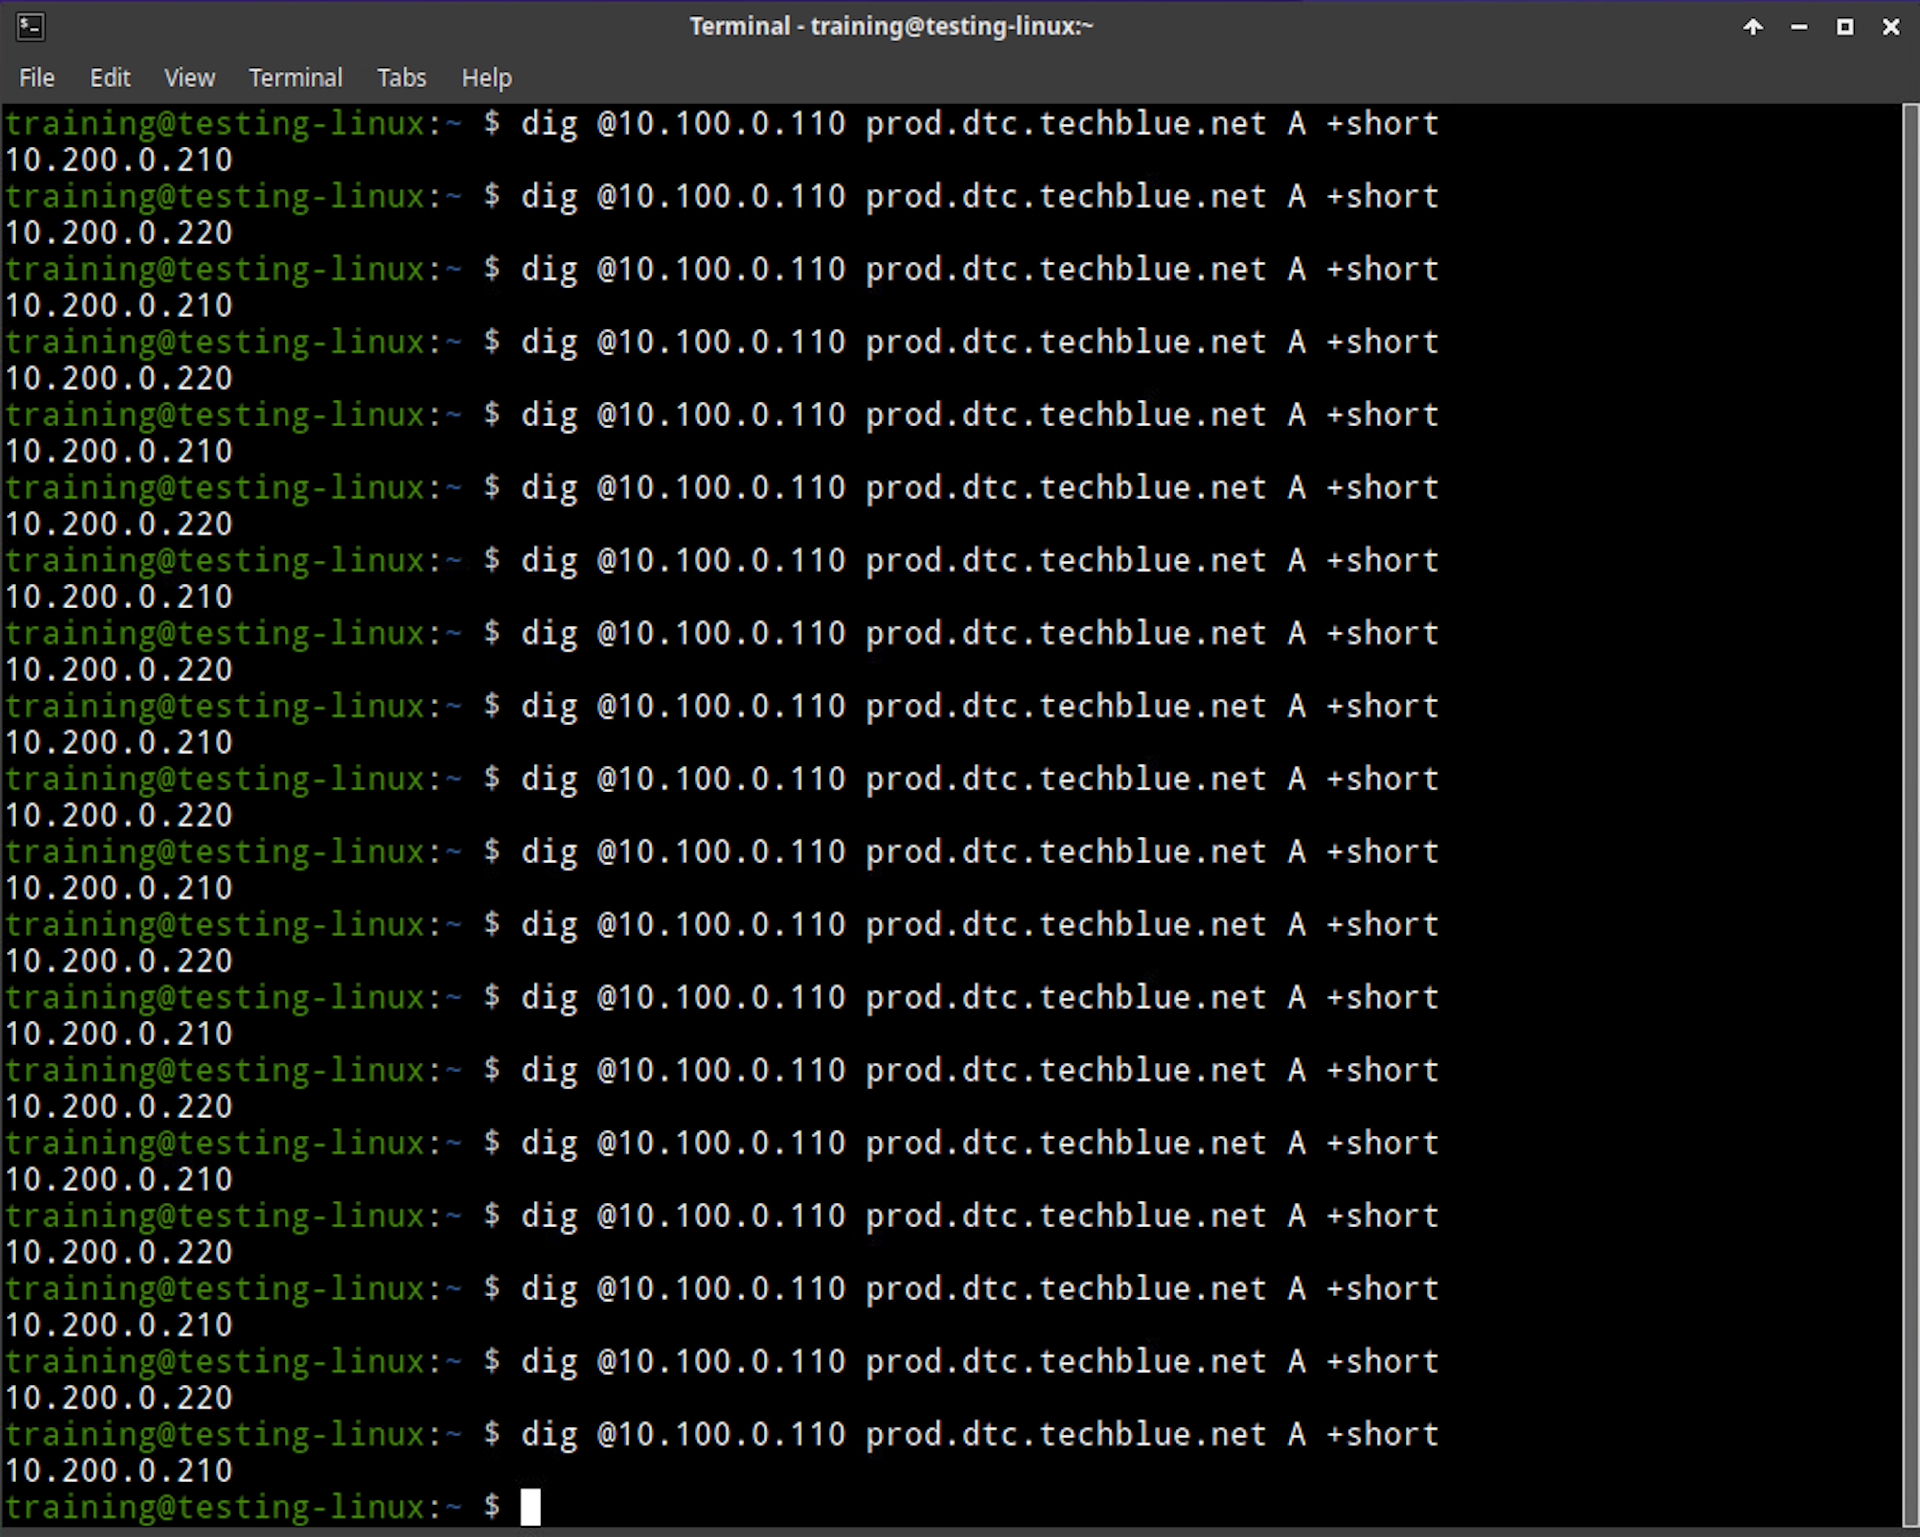
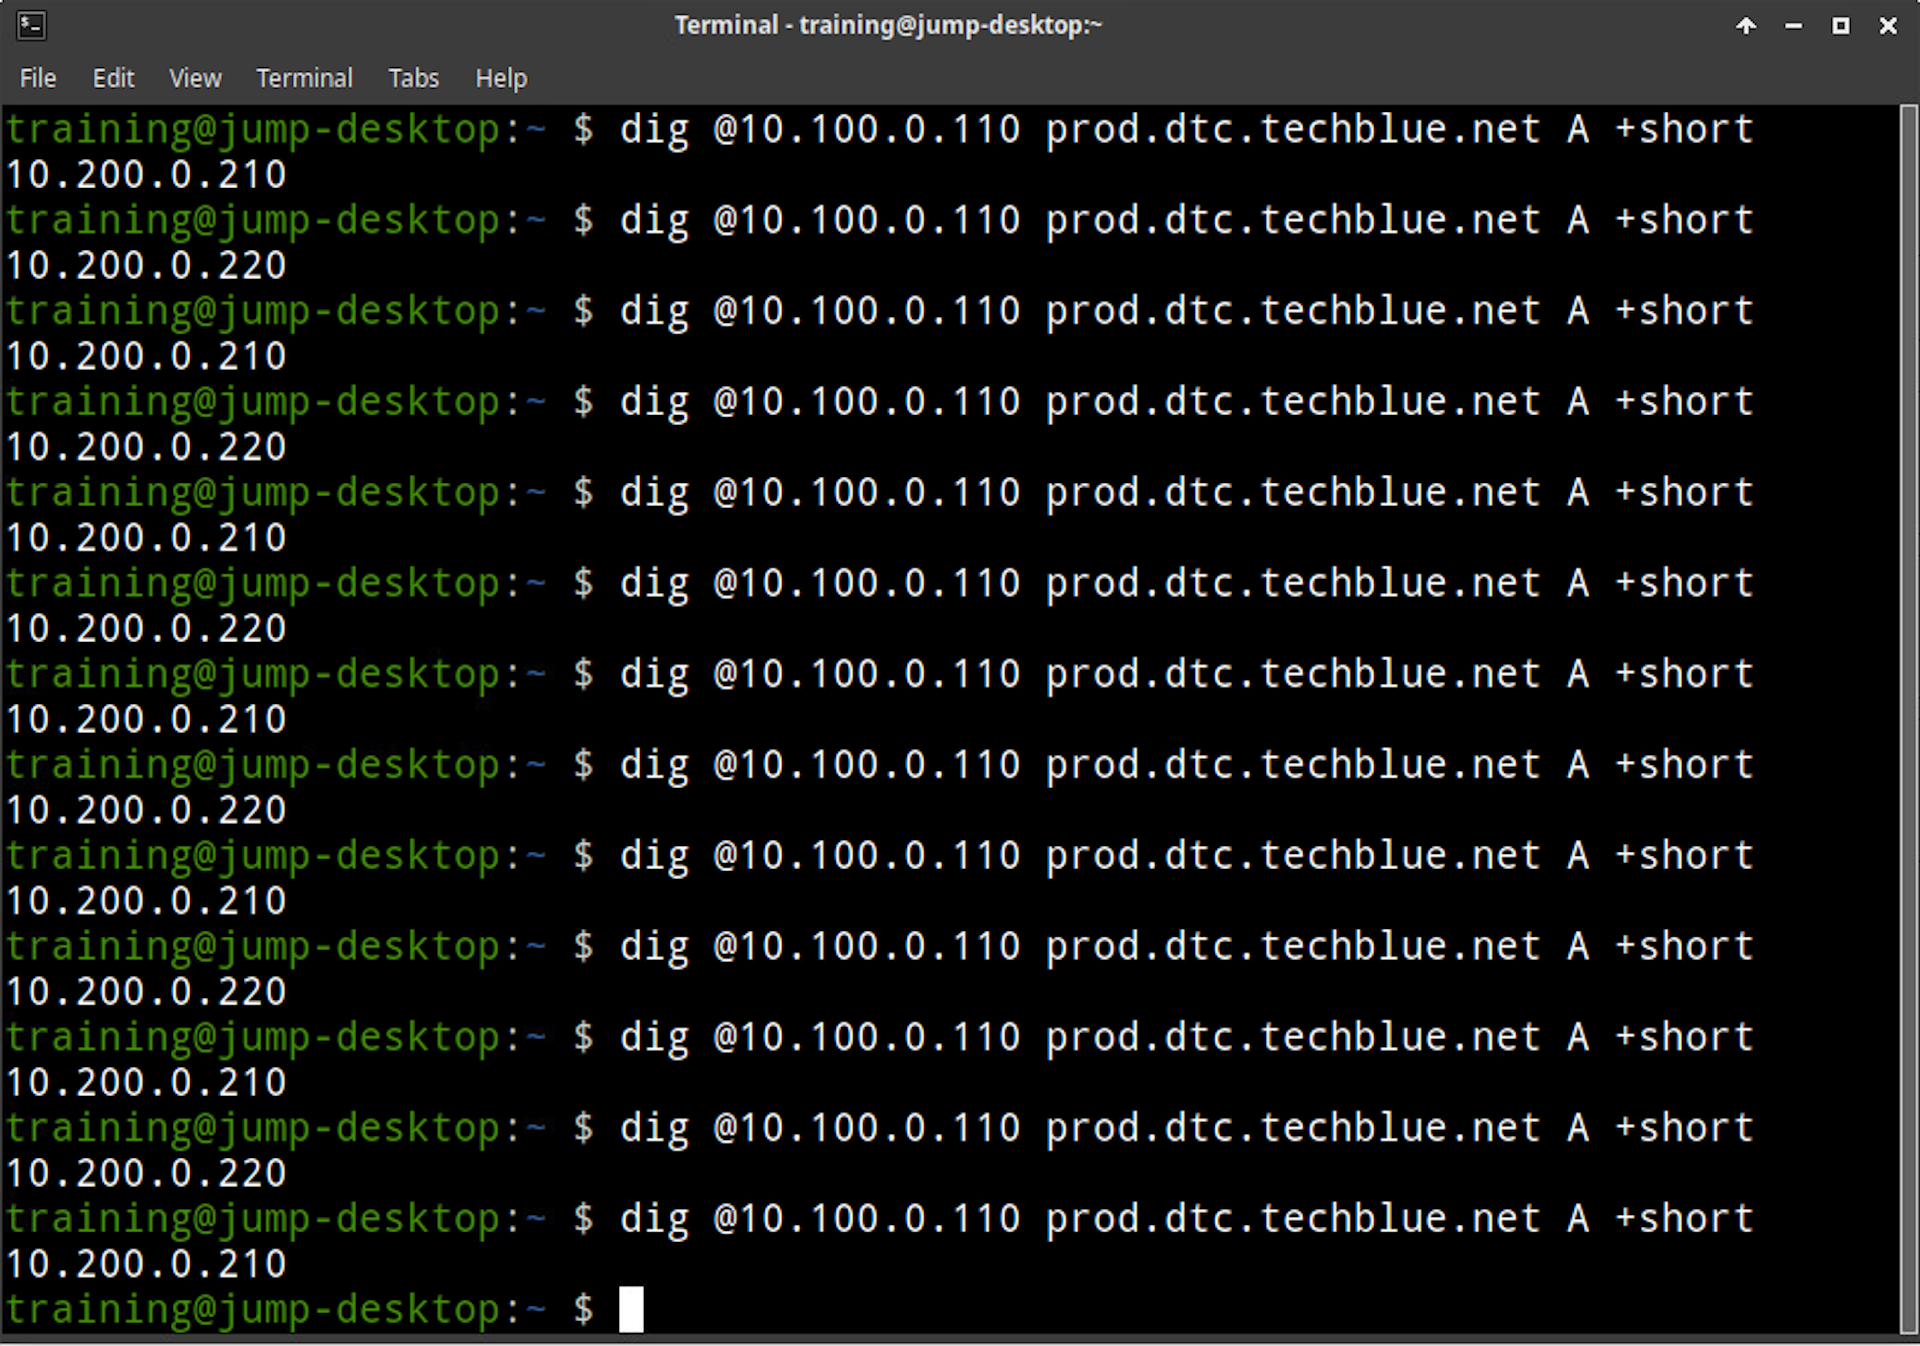
Confirm that lookups for prod.dtc.techblue.net resolve only Pool B IP addresses after the DR event.
Task 6: Restore the application servers
Restore the application servers back to the normal state.
Solutions
Task 1 Solution: Create the Global Availability policy
This step defines the preferred-versus-alternate behavior for the DTC design. The policy is what gives the configuration its disaster recovery logic by establishing which pool should answer first, and which pool will act as the fall back mechanism when the preferred targets become unavailable.
-
Log in to your lab’s jump-desktop.
-
Use the Education Infoblox Portal credentials to sign in to the Infoblox Portal.
-
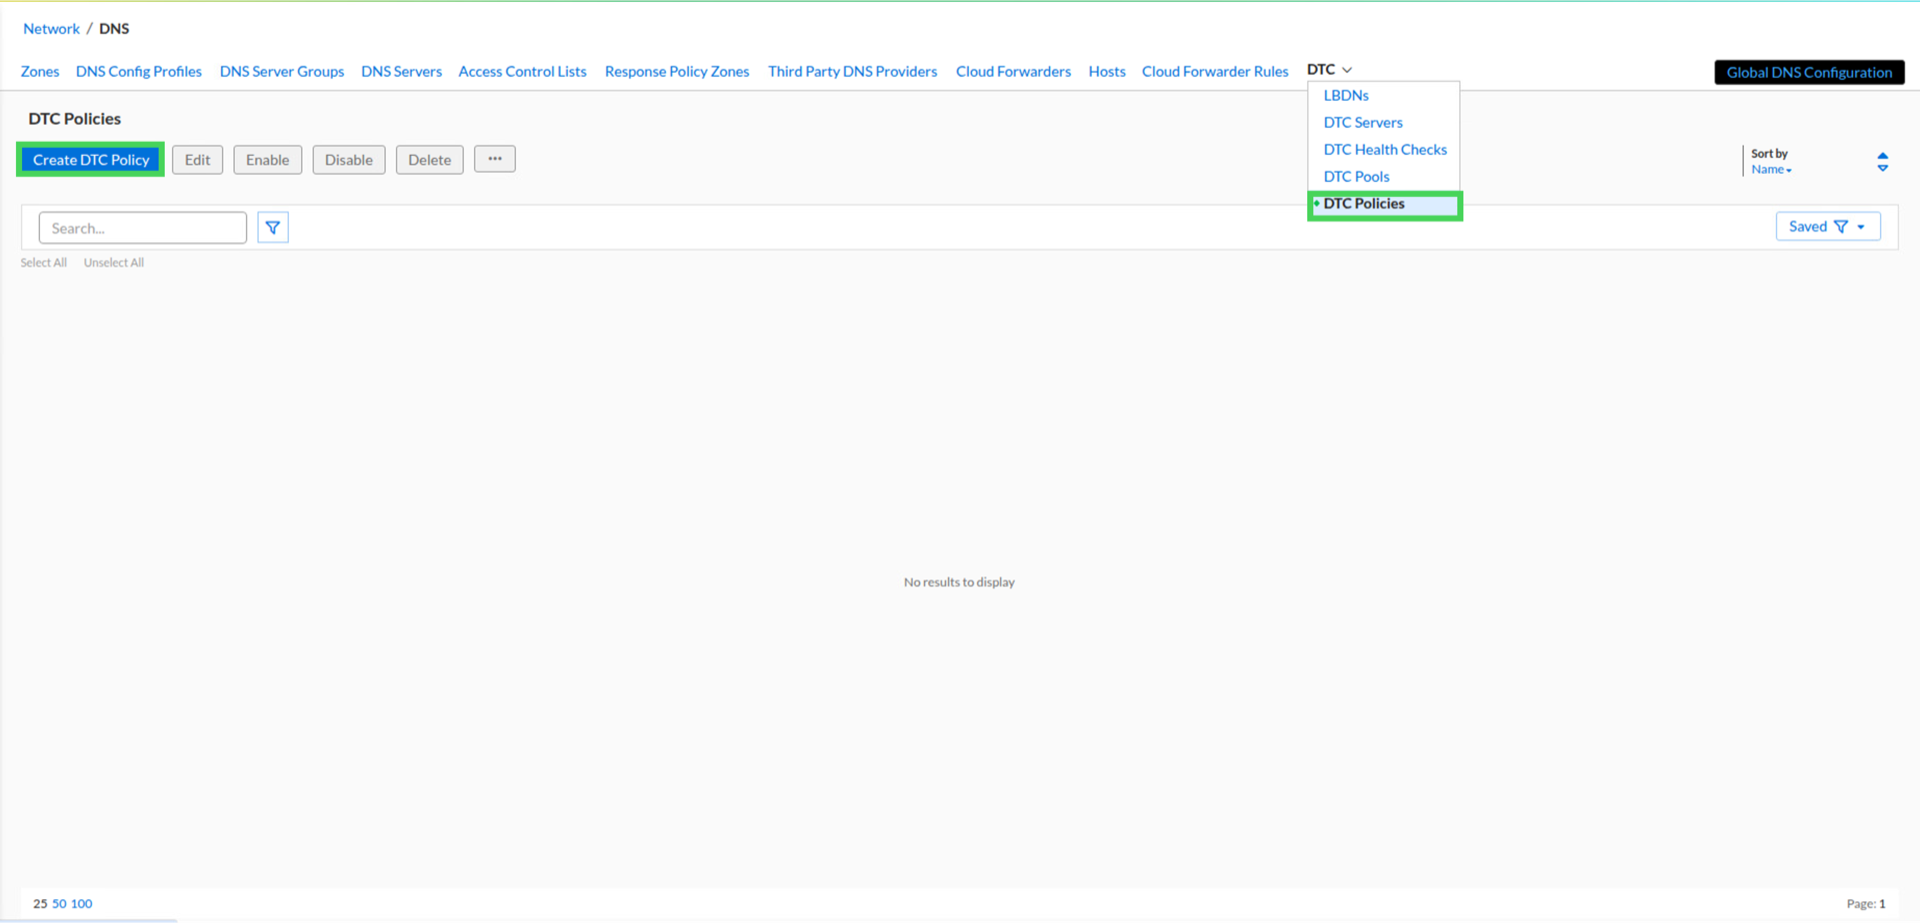
Navigate to Network → DNS.
-
Expand the DTC tab and select DTC Policies.
-
Click Create DTC Policy.
-
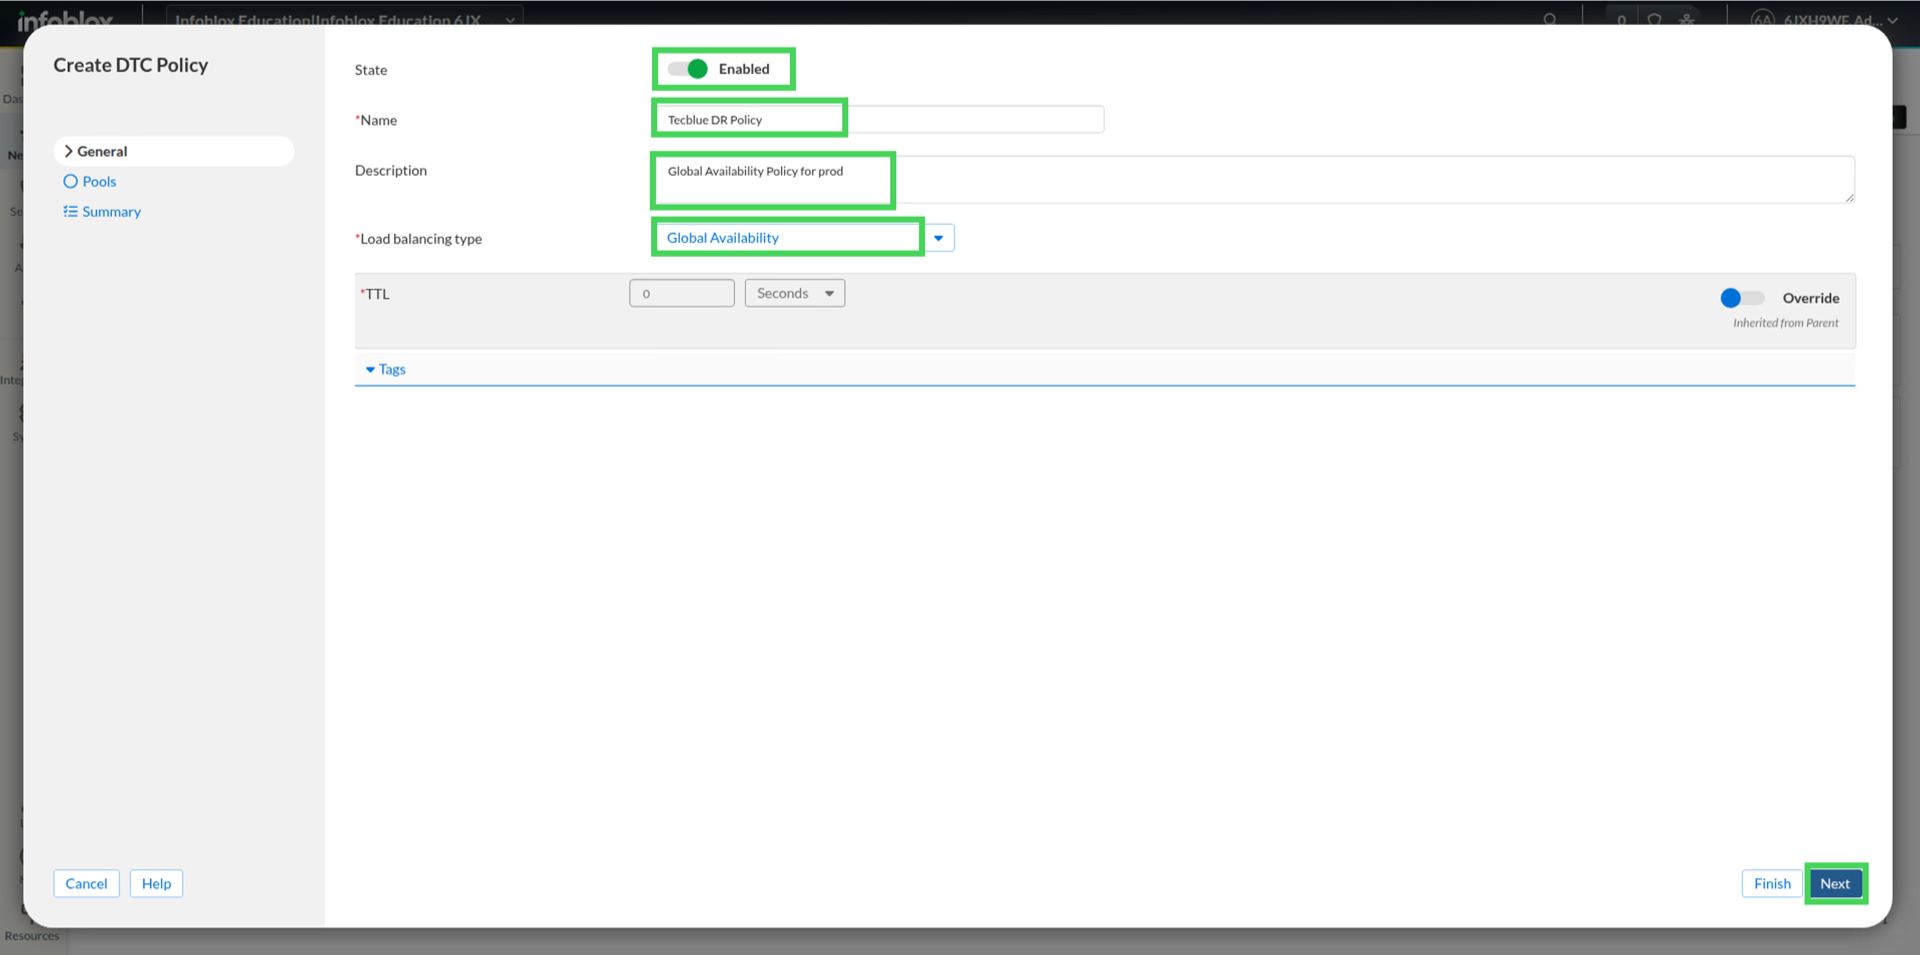
Create the first Policy using these values:
Leave the State as Enabled.
Enter the Name as Techblue DR Policy.
Provide Description as Global Availablity Policy for prod.Choose the Load Balancing Type as Global Availability.
-
Click Next.
-
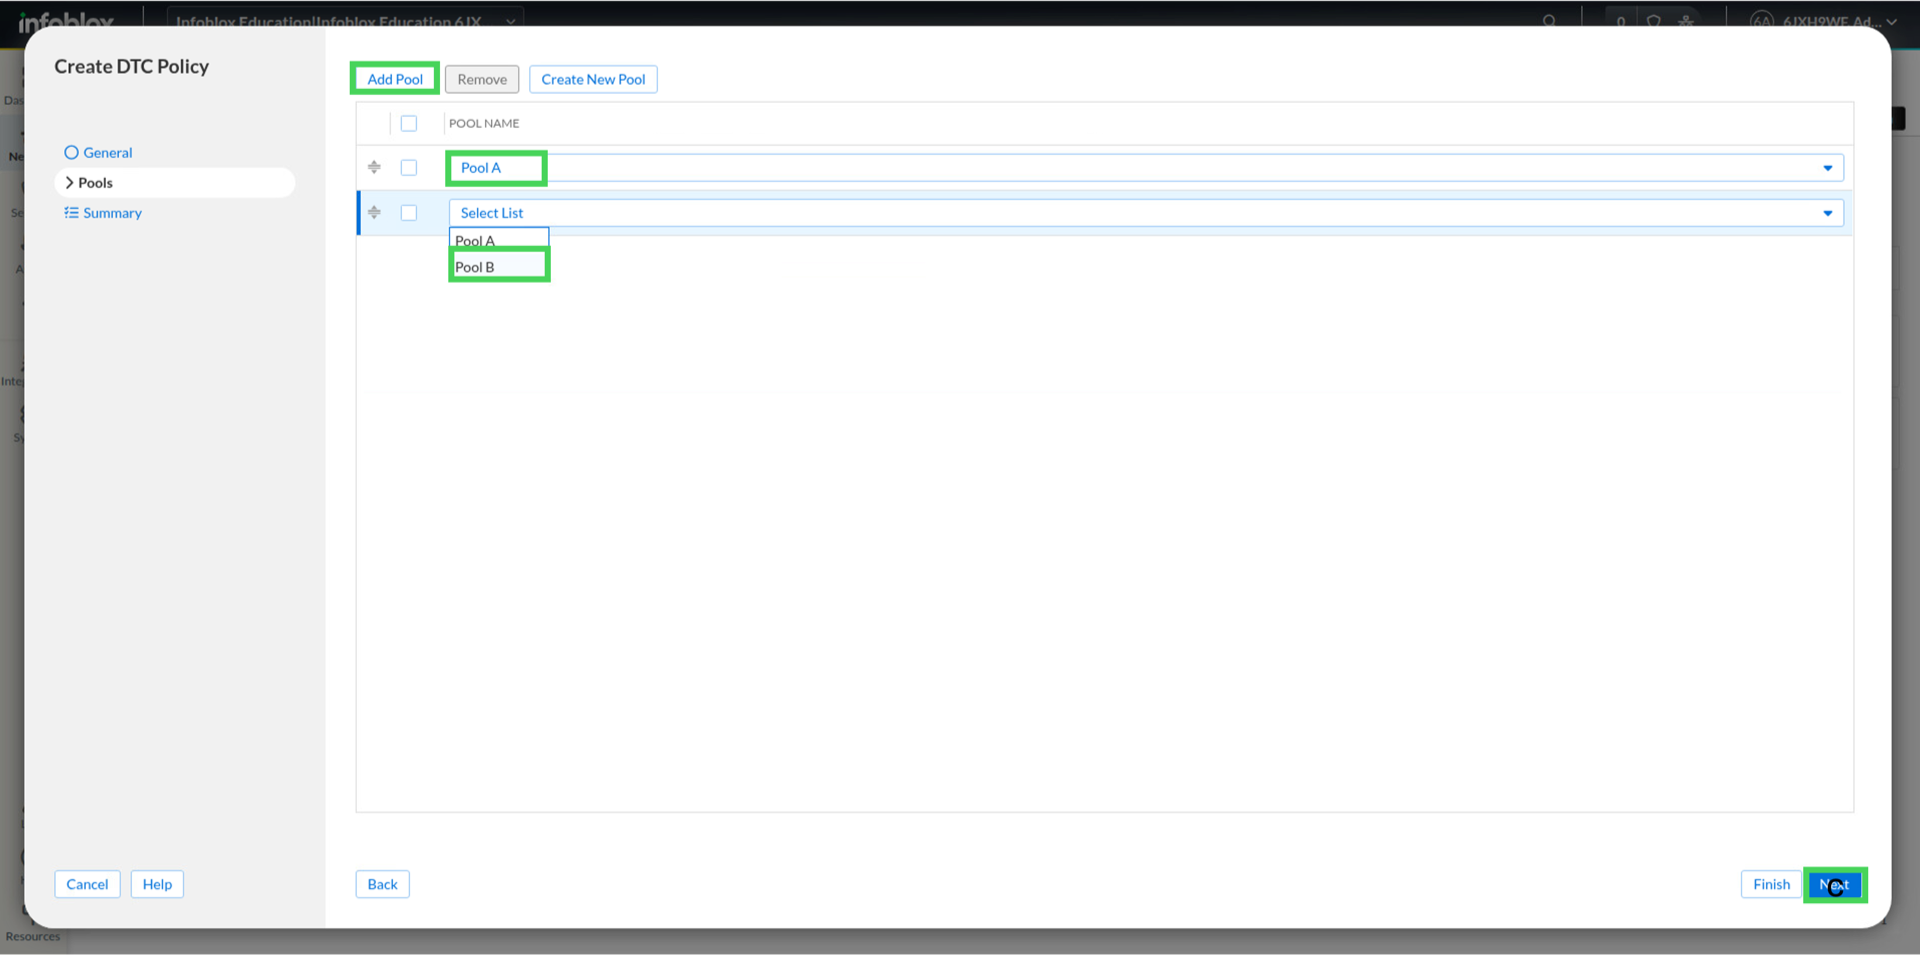
Click Add Pool and choose Pool A.
-
Click Add Pool again and choose Pool B and click Finish and then Save and Close.
Task 2 Solution: Create the LBDN for the Global Availability policy
This step exposes the source-aware policy through a client-facing DNS name. The LBDN becomes the entry point that allows DTC to apply the topology rules whenever a client sends a query.
-
Log in to your lab’s jump-desktop.
-
Use the Education Infoblox Portal credentials to sign in to the Infoblox Portal.
-
Navigate to Network → DNS.
-
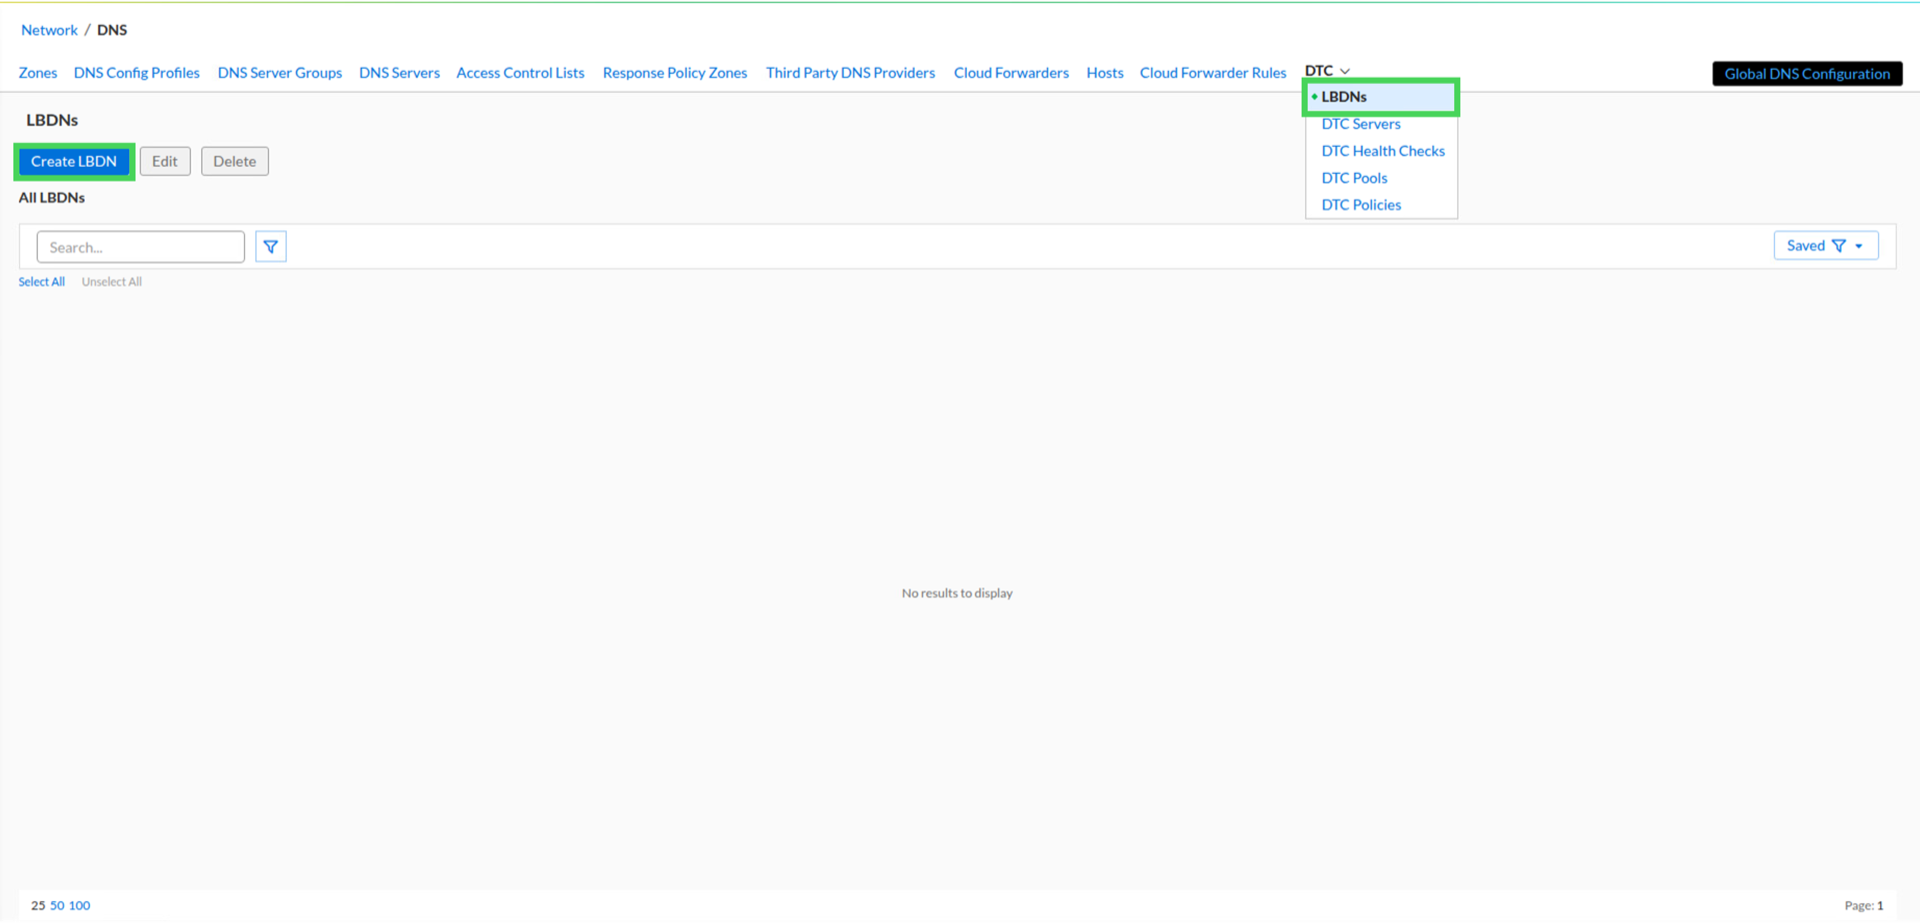
Expand the DTC tab and select LBDNs.
-
Click Create LBDN.
-
Create the LBDN using these values:
For DNS View choose default.
Enter the Name as prod.dtc.techblue.net.
Leave the Precedence field blank.
For Load Balancing Policy choose Techblue DR Policy.
For Description add Production server with fallback.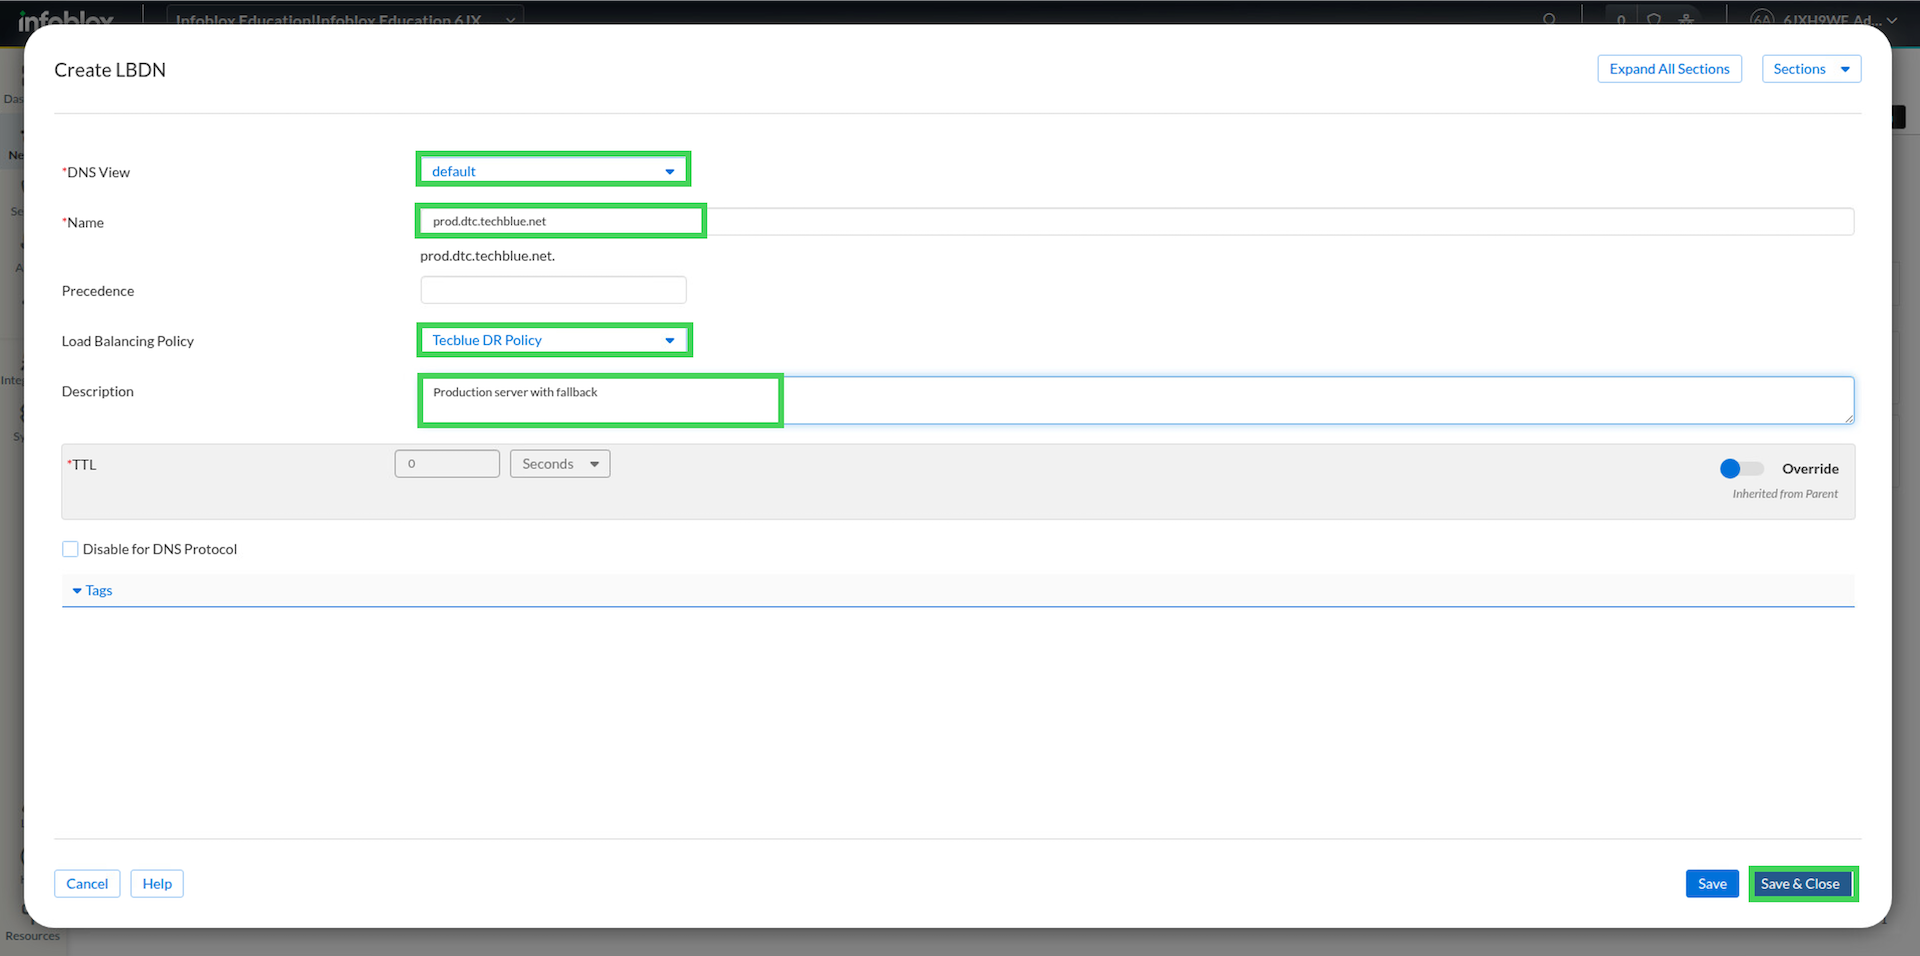
-
Click Save and Close.
Task 3 Solution: Test Global Availability behavior from the client side
This step confirms the steady-state behavior of the policy before any failure is introduced. Because Pool A is preferred, all clients should resolve only Pool A addresses during normal operation.
-
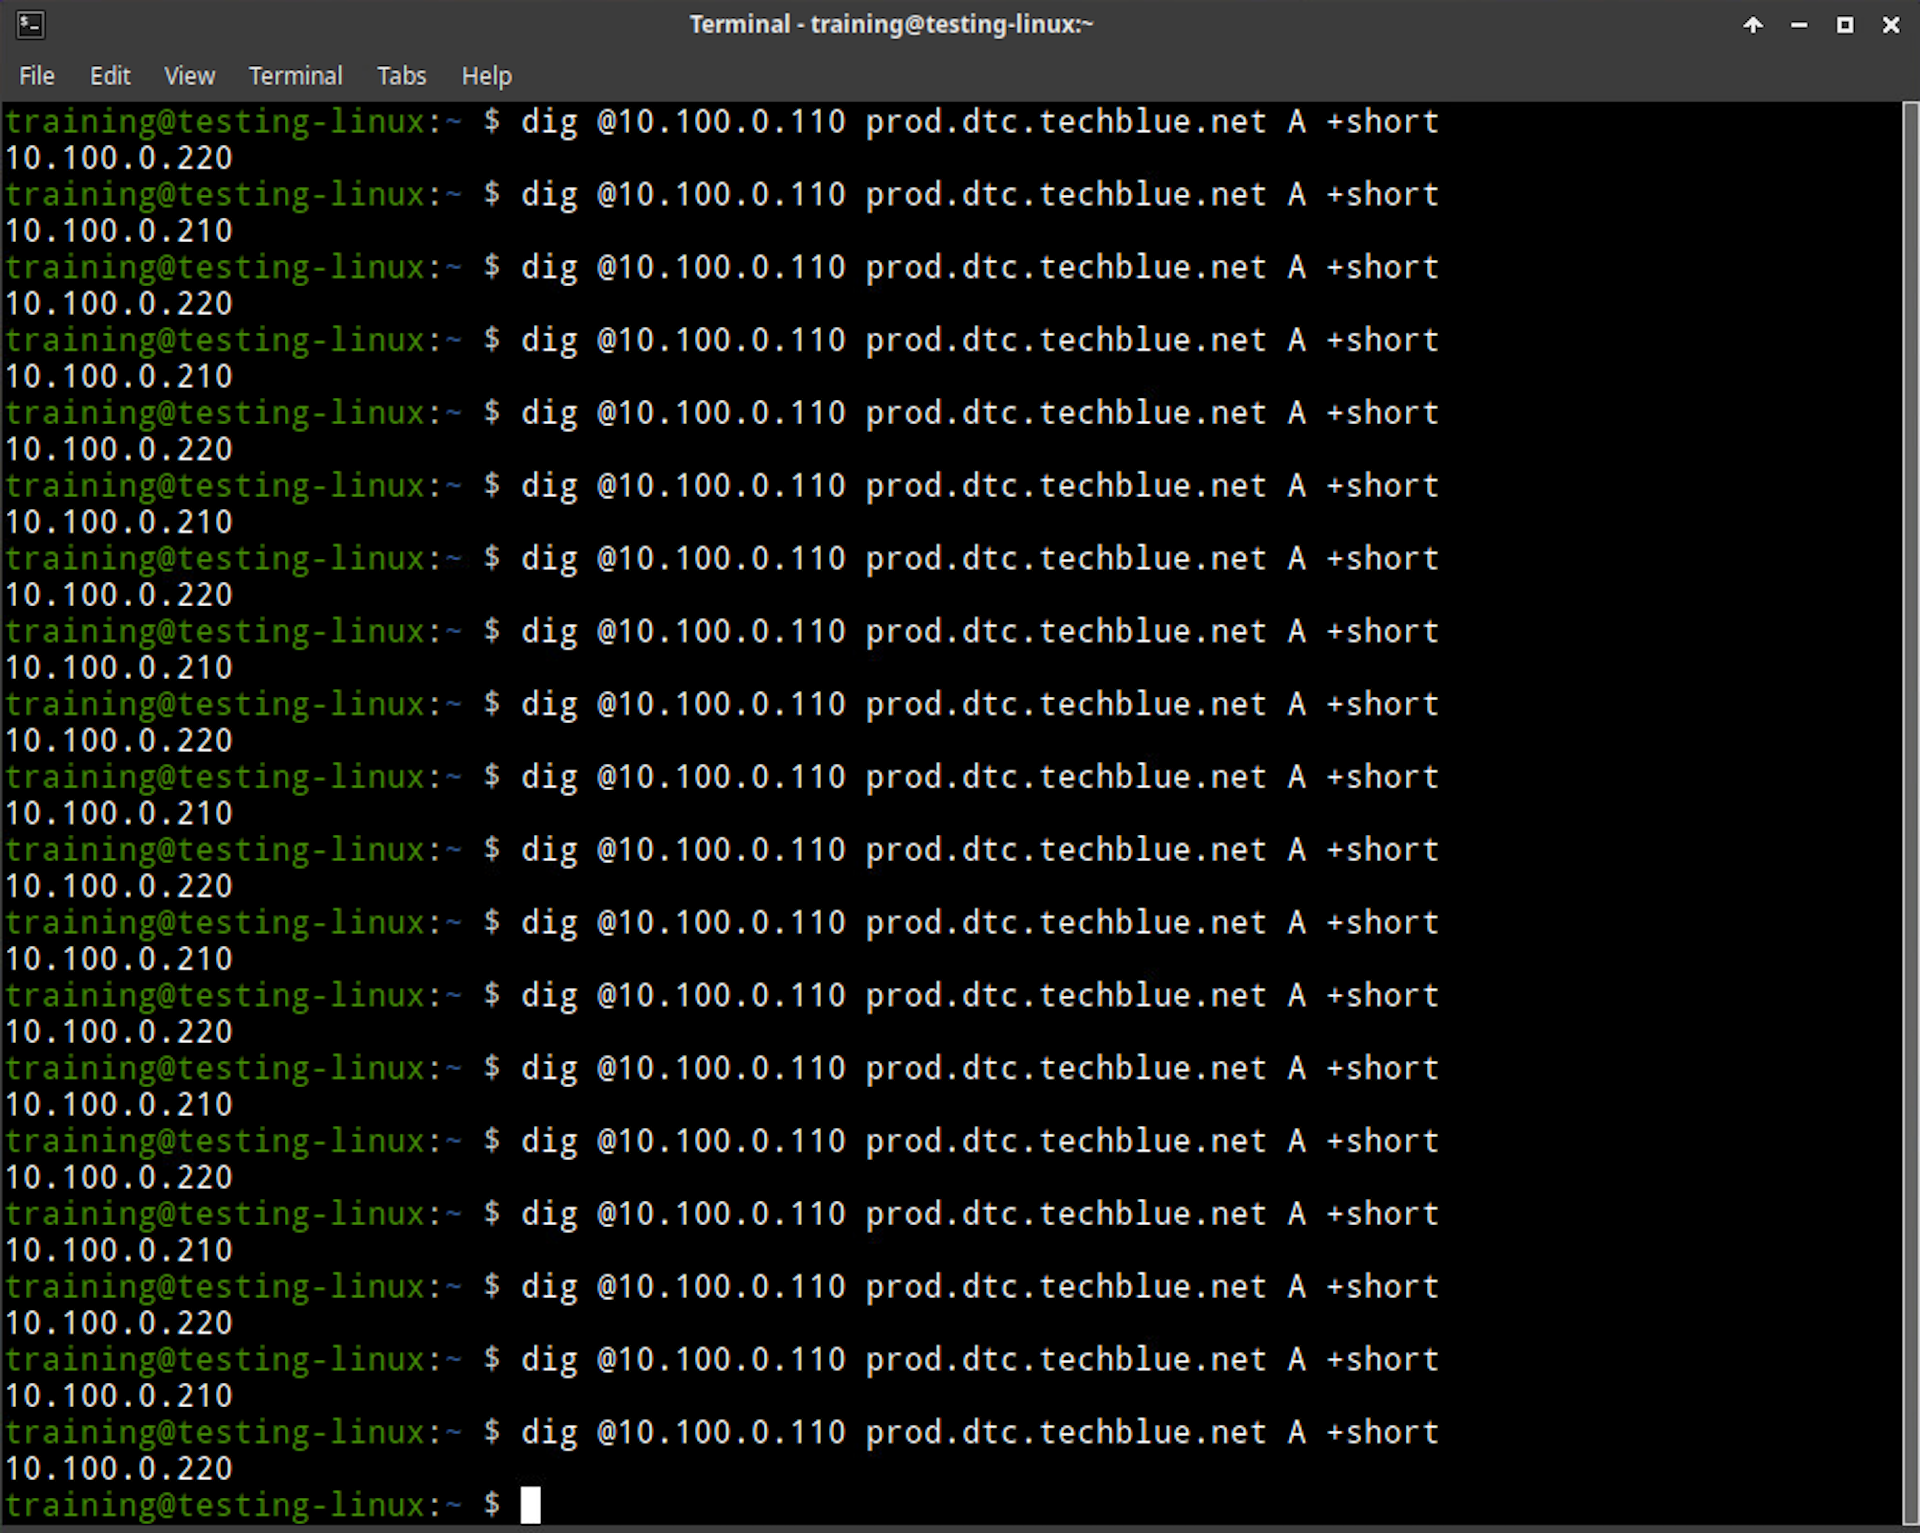
Switch to virtual machine testing-linux and open a terminal window
-
Run dig @10.100.0.110 prod.dtc.techblue.net. A +short
-
Repeat the query a few times and note the responses.
-
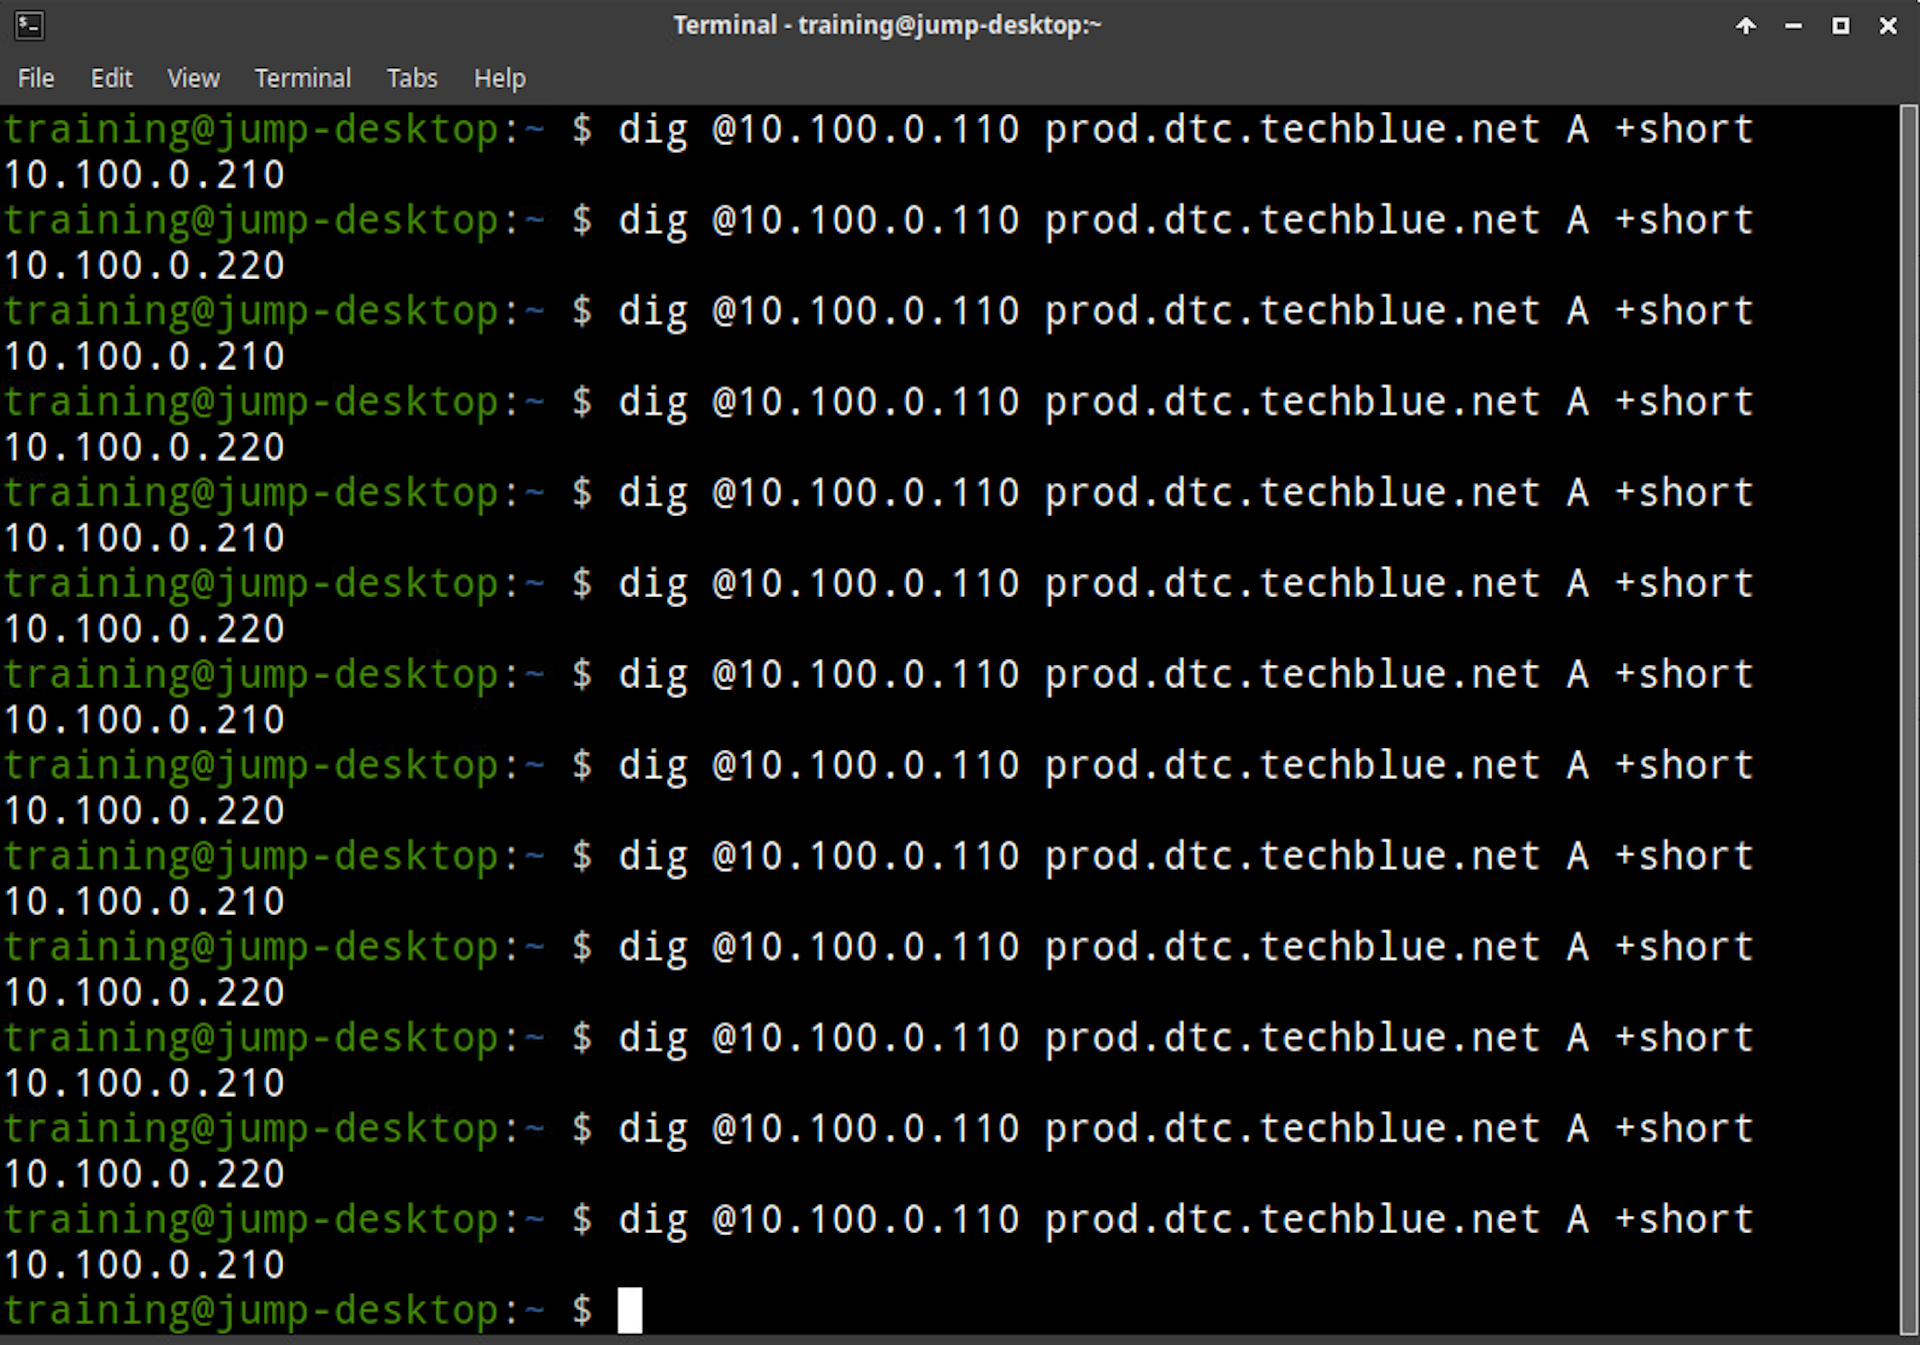
Switch to virtual machine jump-desktop and open a terminal window
-
Run dig @10.100.0.110 prod.dtc.techblue.net. A +short
-
Repeat the query a few times and note the responses.
-
Switch to virtual machine oph3:
username: training
password: infoblox -
Run dig @10.100.0.110 prod.dtc.techblue.net. A +short
-
Repeat the query a few times and note the responses.
-
Confirm that all queries are returning Pool A addresses only
Task 4 Solution: Simulate a DR event
This step removes the web application servers from the primary location. Since the servers are down, the health check for Pool A will fail and trigger DTC to fall back to Pool B.
-
Log in to your lab’s support-server:
username: training
password: infoblox
-
Launch terminal emulator from the taskbar
-
In the terminal window, type in dtc-remove-primary
Task 5 Solution: Test post-DR behavior from the client side
This step confirms that the disaster recovery design is working as intended. After the DR event, all clients should resolve only the alternate pool rather than continuing to use the preferred one.
-
Switch to virtual machine testing-linux and open a terminal window.
-
Run dig @10.100.0.110 prod.dtc.techblue.net. A +short
-
Repeat the query a few times and note the responses.
-
Switch to virtual machine jump-desktop and open a terminal window.
-
Run dig @10.100.0.110 prod.dtc.techblue.net. A +short
-
Repeat the query a few times and note the responses.
-
Switch to virtual machine oph3:
username: training
password: infoblox -
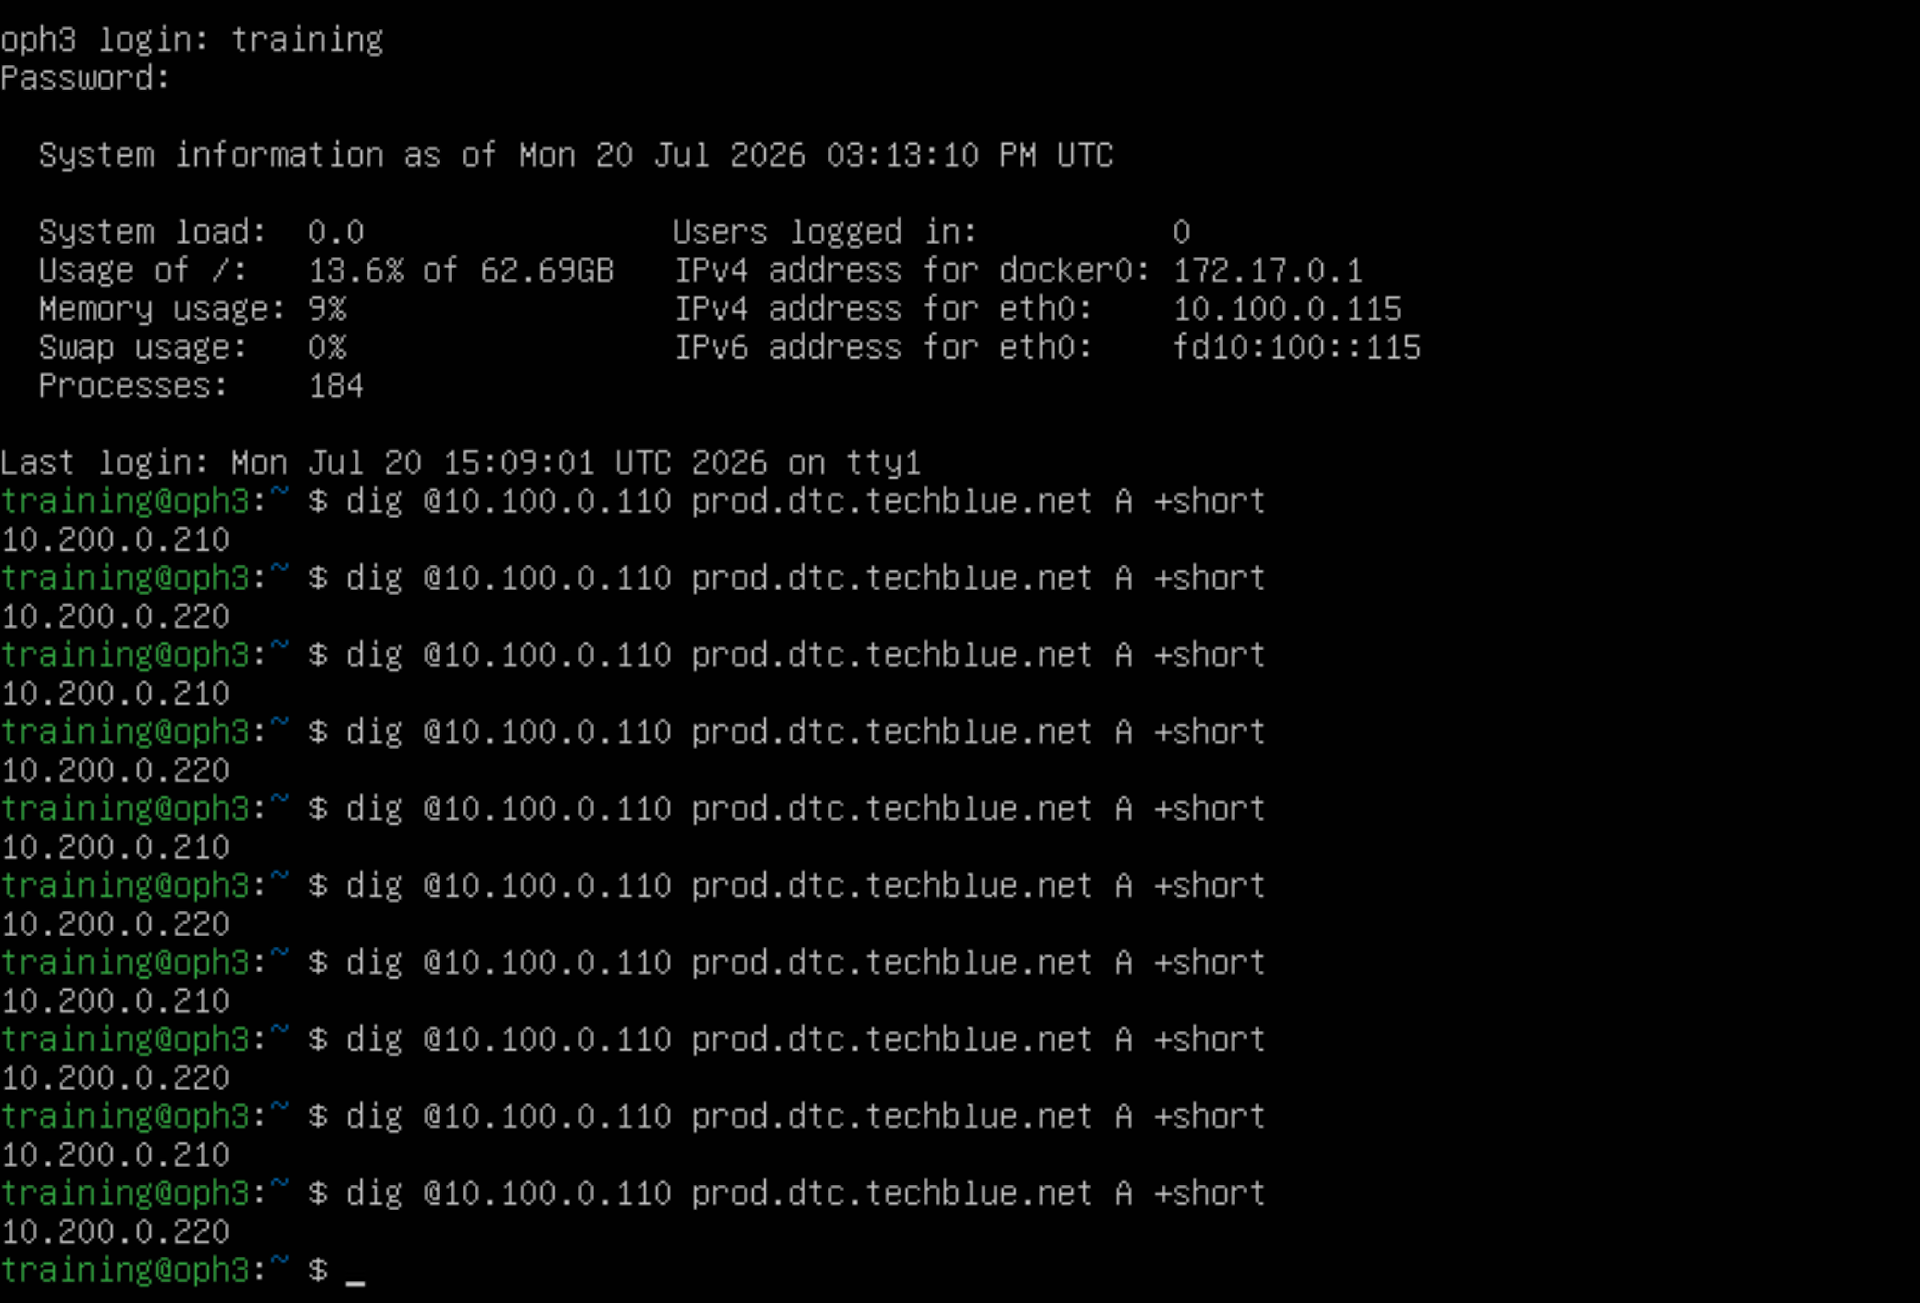
Run dig @10.100.0.110 prod.dtc.techblue.net. A +short
-
Repeat the query a few times and note the responses.
-
Confirm that all queries are returning Pool B addresses only.
Task 6 Solution: Restore the application servers
This step restores the application servers back to working state.
-
Log in to your lab’s support-server:
username: training
password: infoblox
-
Launch terminal emulator from the taskbar
-
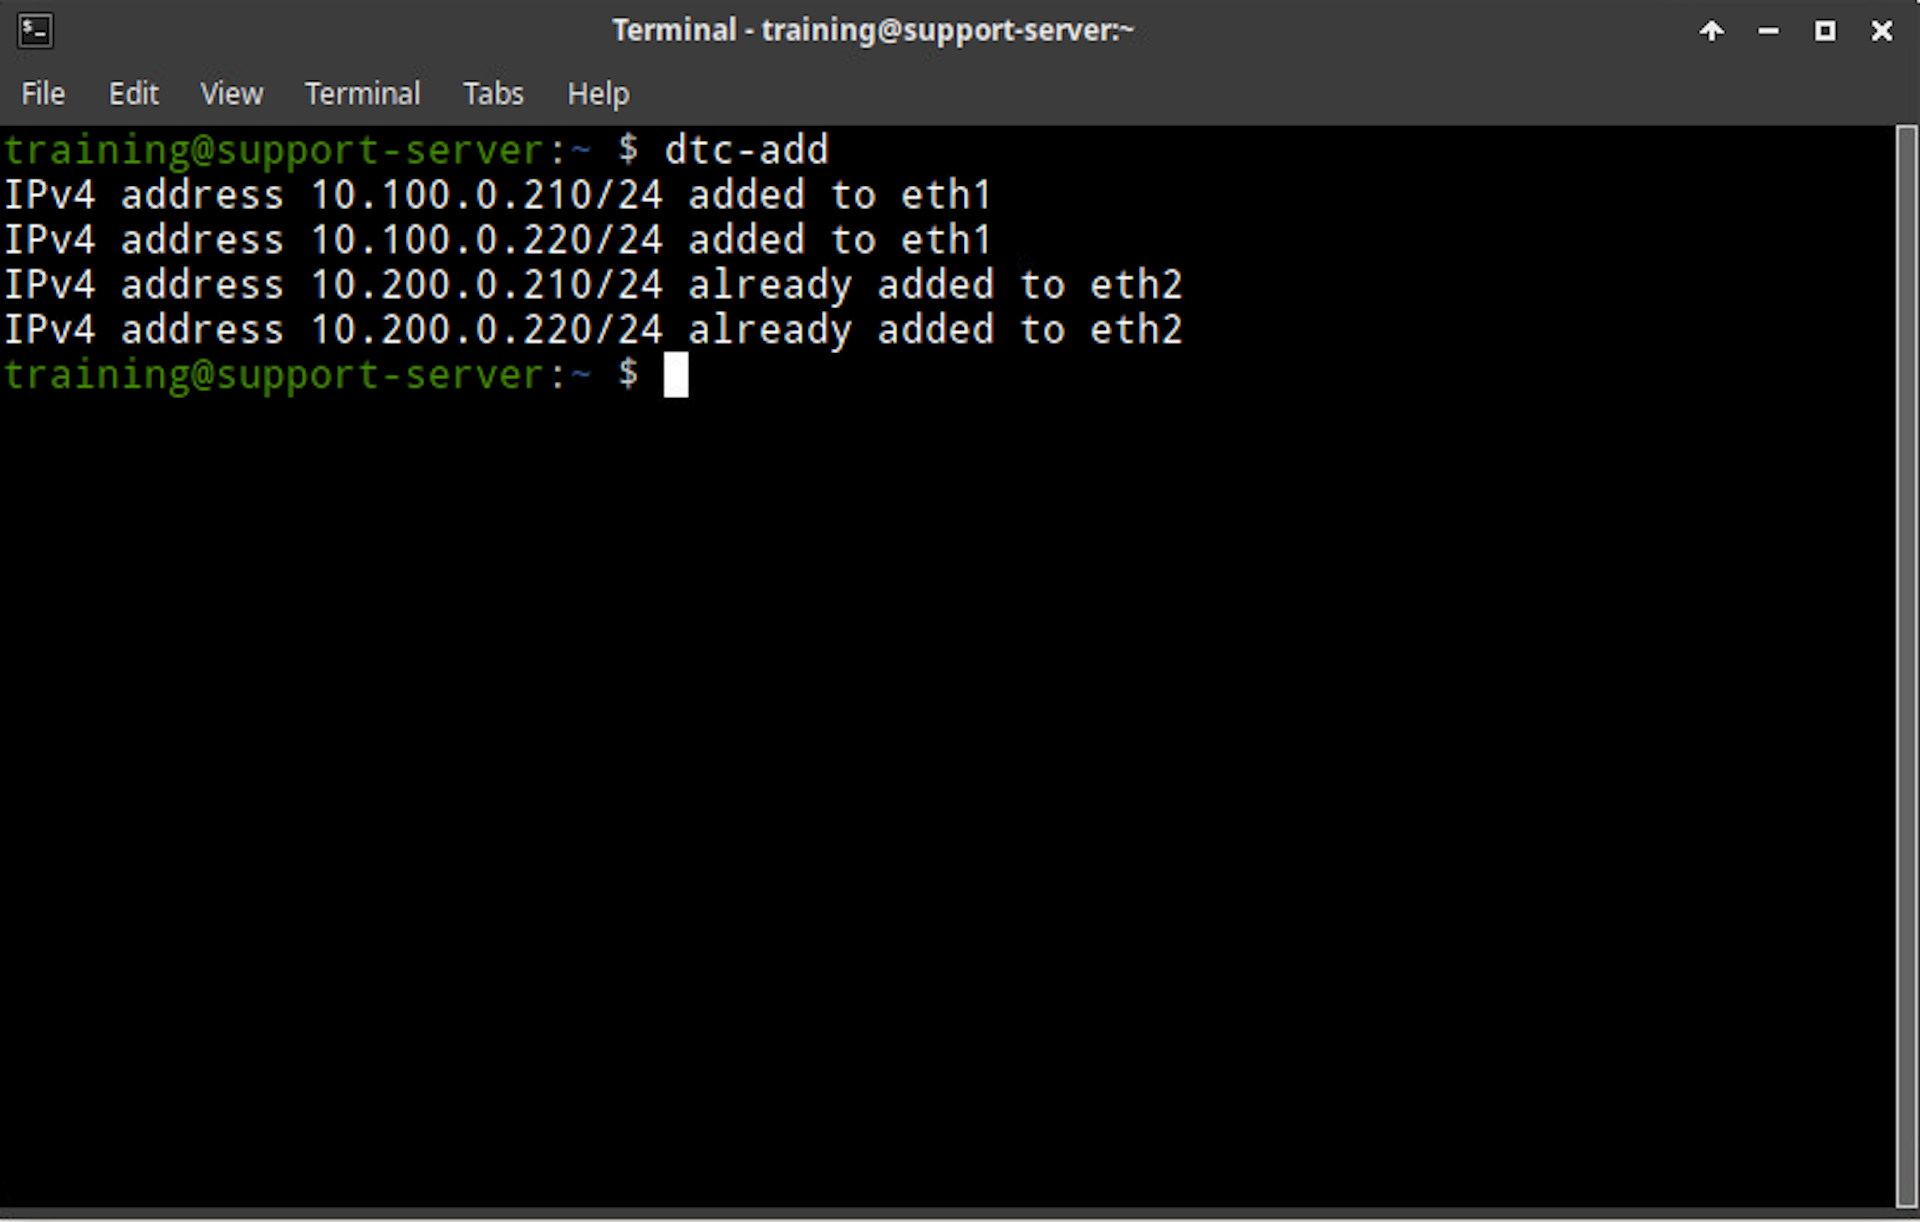
In the terminal window, type in dtc-add