

Infoblox Portal Navigation – Read First
Do things look different? A temporary toggle in the Infoblox Portal allows you to switch between the new and classic navigation experiences while our content is being updated. The toggle will be available through December 14, 2026. Use the toggle button switch between the classic and new navigation.

Scenario
Your organization wants to use DNS Traffic Control to provide load-balanced answers for www.dtc.techblue.net. In this activity, you will provision the necessary objects (servers, healthchecks, and pools) in DTC, and enable the web servers to load balance the site www.dtc.techblue.net.
Estimated Completion Time
-
15 minutes
Prerequisites
-
Administrative access to the Infoblox Portal
-
Lab 2606: Creating a Primary Subzone for DTC in Universal DDI
Learning Content
Tasks
-
Create four DTC Servers
-
Review ICMP health check
-
Create two DTC Pools
-
Enable DTC servers
Task 1: Create four DTC servers
Create four DTC server objects that will represent the backend application targets used throughout the labs.
|
Server Name |
Address |
Description |
|---|---|---|
|
srvr1.dtc.techblue.net |
10.100.0.210 |
Server in Pool A |
|
srvr2.dtc.techblue.net |
10.100.0.220 |
Server in Pool A |
|
srvr3.dtc.techblue.net |
10.200.0.210 |
Server in Pool B |
|
srvr4.dtc.techblue.net |
10.200.0.220 |
Server in Pool B |
Task 2: Review ICMP health check
Review the ICMP health check that can be reused by both pools to determine basic server reachability.
Task 3: Create Pool A and Pool B
Create two DTC pools and place the correct server objects in each pool.
Task 4: Enable the web servers
Enable the target web application servers (DTC servers defined in Task 1).
Solutions
Task 1 Solution: Create four DTC servers
This step creates the destination objects that DTC will ultimately return to clients. Each server will later be grouped into pools and evaluated by health checks, before being presented to clients in a DNS response.
-
Log in to your lab’s jump-desktop.
-
Use the Education Infoblox Portal credentials to sign in to the Infoblox Portal.
-
Navigate to Network → DNS.
-
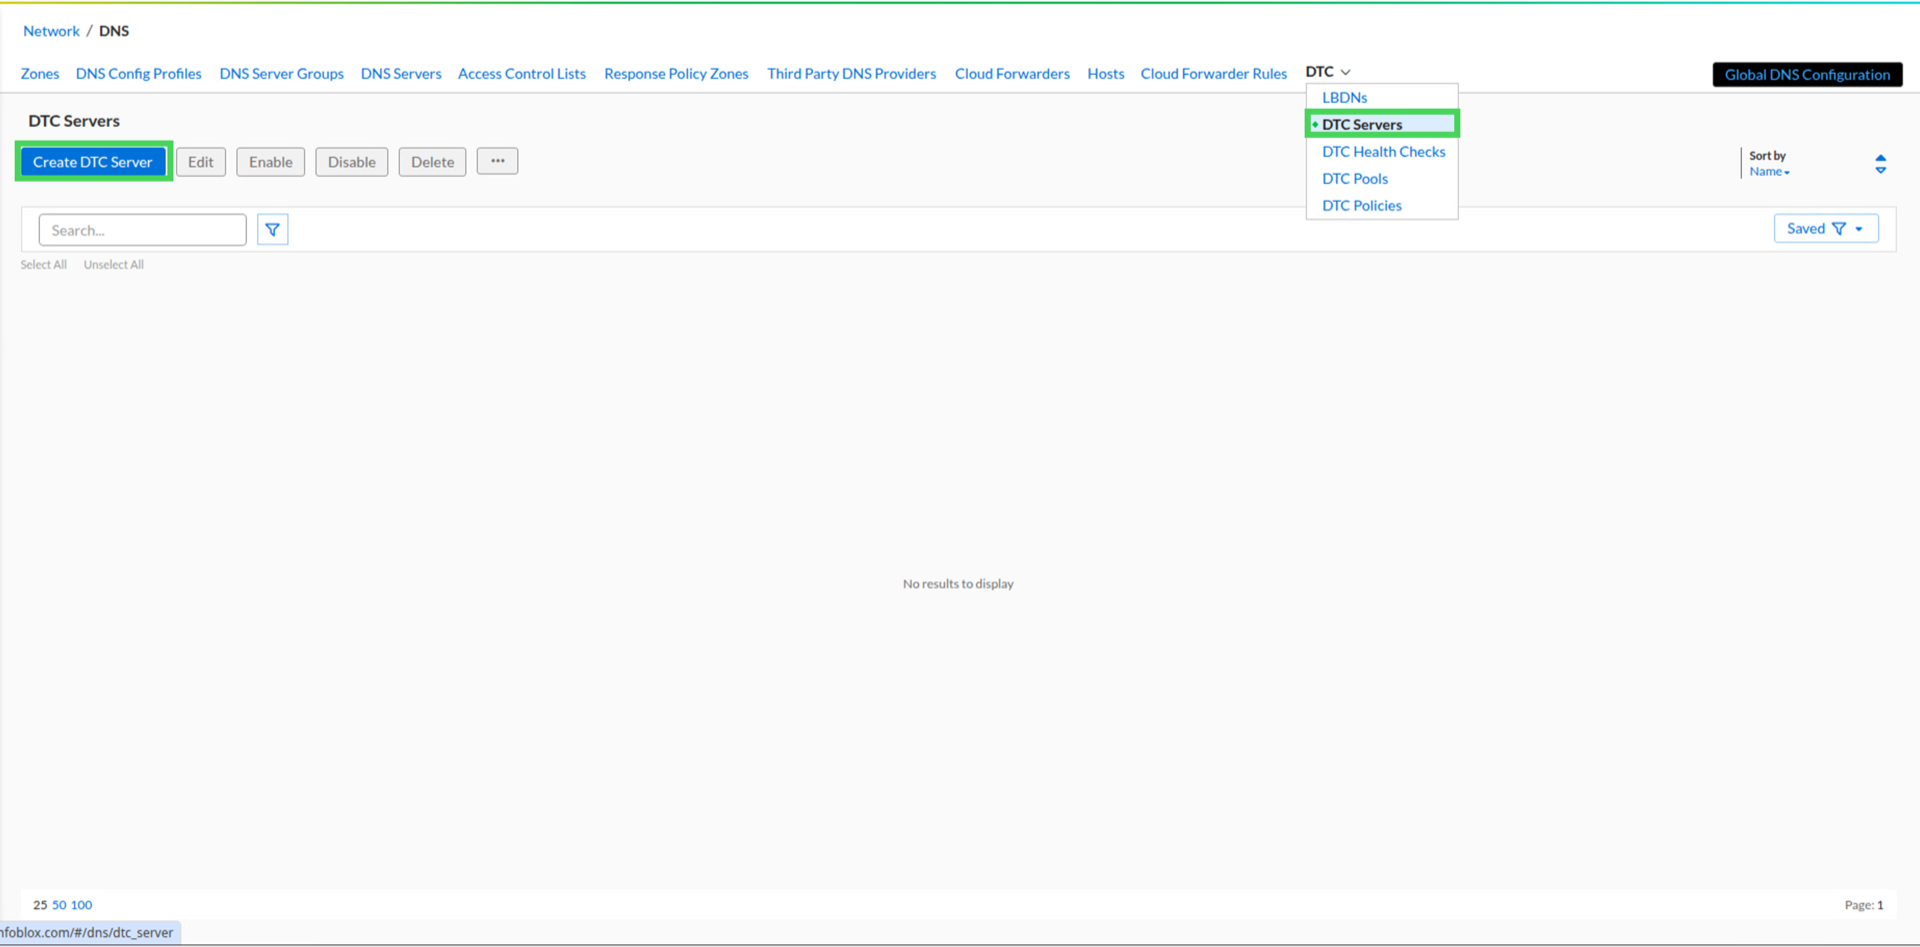
Expand the DTC tab and select DTC Servers.
-
Click Create DTC Server.
-
Create the first server using these values:
Leave State set to Enabled.
Enter the Name as srvr1.dtc.techblue.net.
Enter the Description as Server in Pool A.
Enter the Address as 10.100.0.210.
Check the box to Auto-create DTC Responses so the response record can be synthesized automatically.
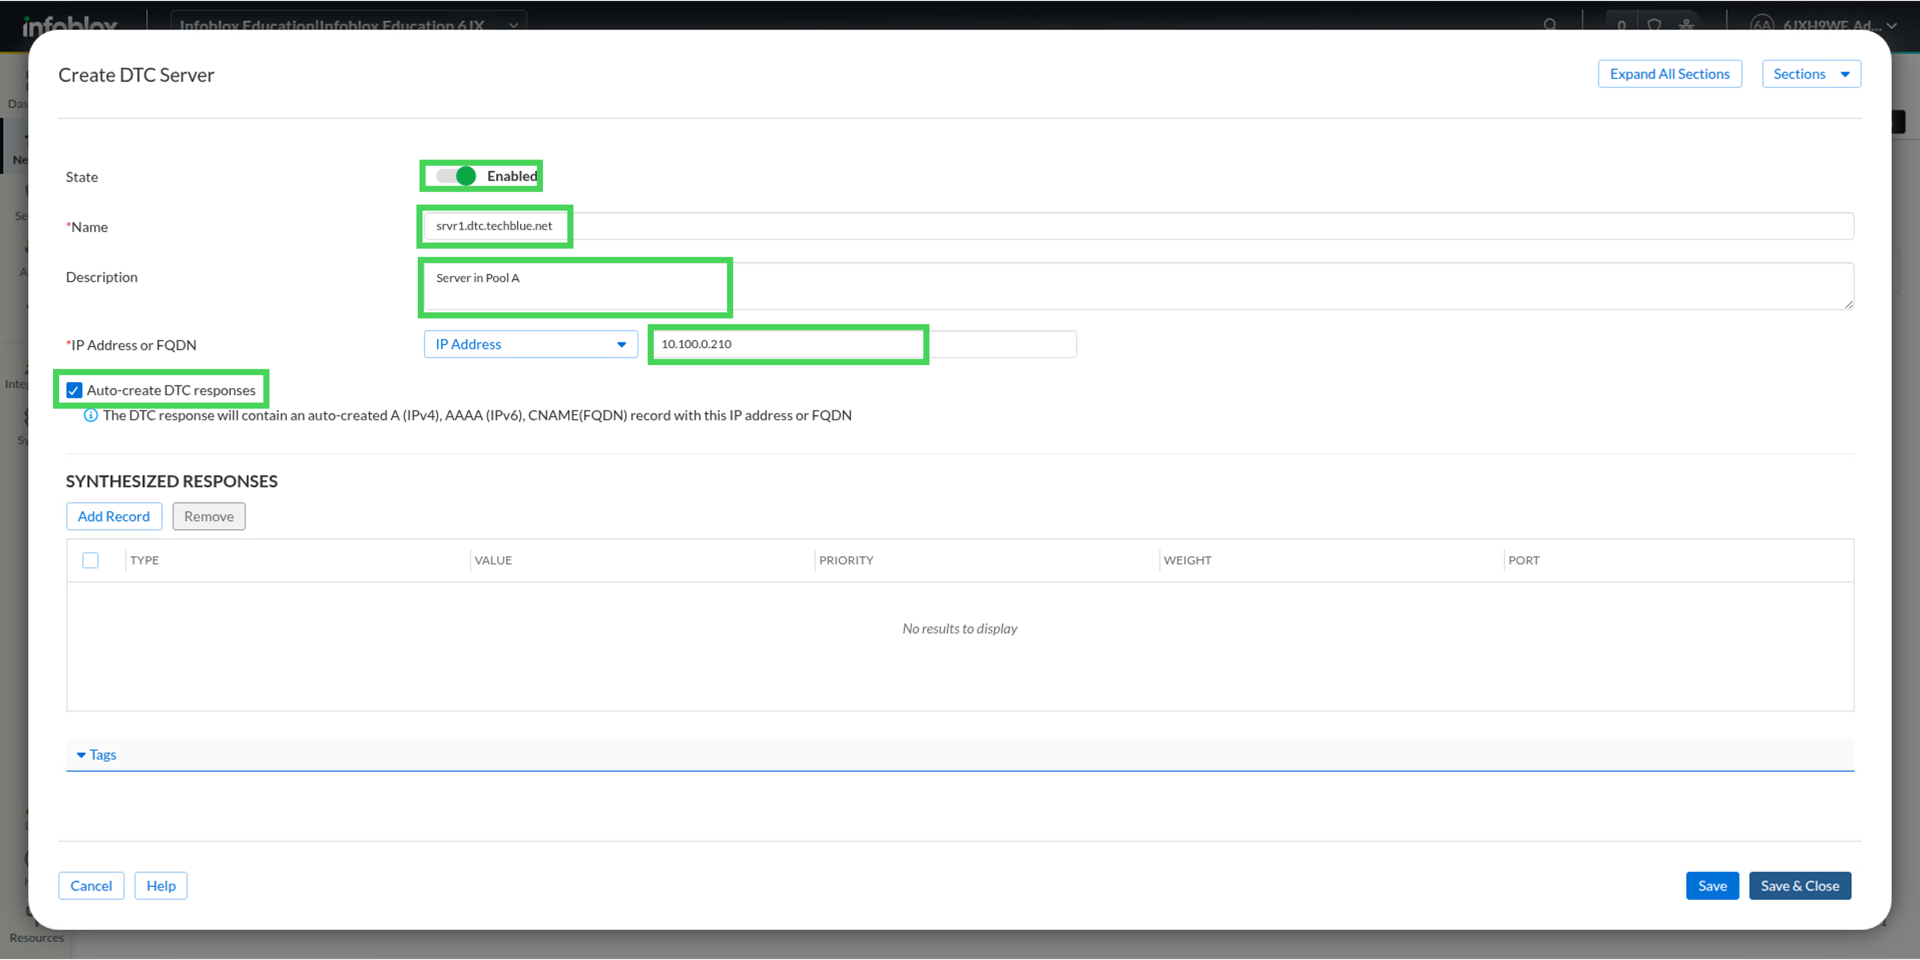
Click Save and Close and confirm that the server appears in the DTC server list.
-
Repeat the steps for the other three DTC Servers.
|
Name |
Address |
Description |
|---|---|---|
|
srvr2.dtc.techblue.net |
10.100.0.220 |
Server in Pool A |
|
srvr3.dtc.techblue.net |
10.200.0.210 |
Server in Pool B |
|
srvr4.dtc.techblue.net |
10.200.0.220 |
Server in Pool B |
Task 2 Solution: Review ICMP health check
This step defines how DTC decides whether a destination is healthy enough to answer traffic. For a simple reachability check, icmp may be enough, depending on your network policies.
-
Log in to your lab’s jump-desktop.
-
Use the Education Infoblox Portal credentials to sign in to the Infoblox Portal.
-
Navigate to Network → DNS.
-
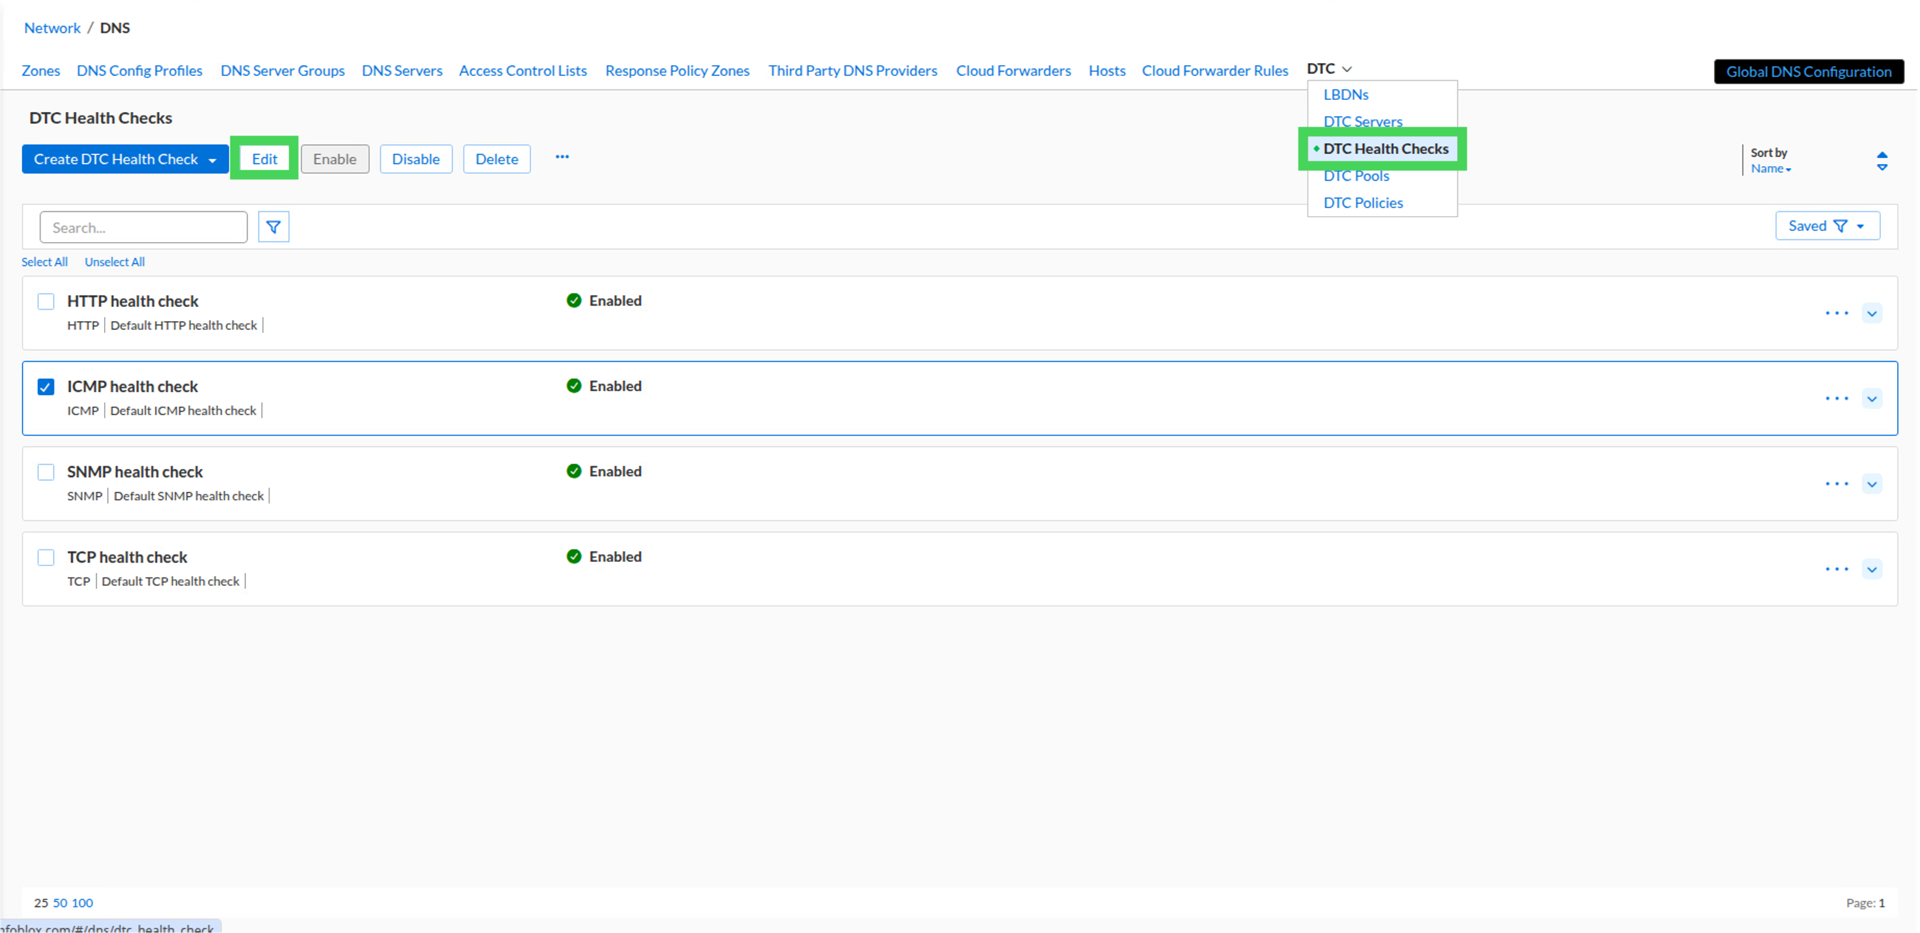
Expand the DTC tab and select DTC Health Checks.
-
Select ICMP Health Check and click the Edit button or choose Edit from the ellipses menu.
-
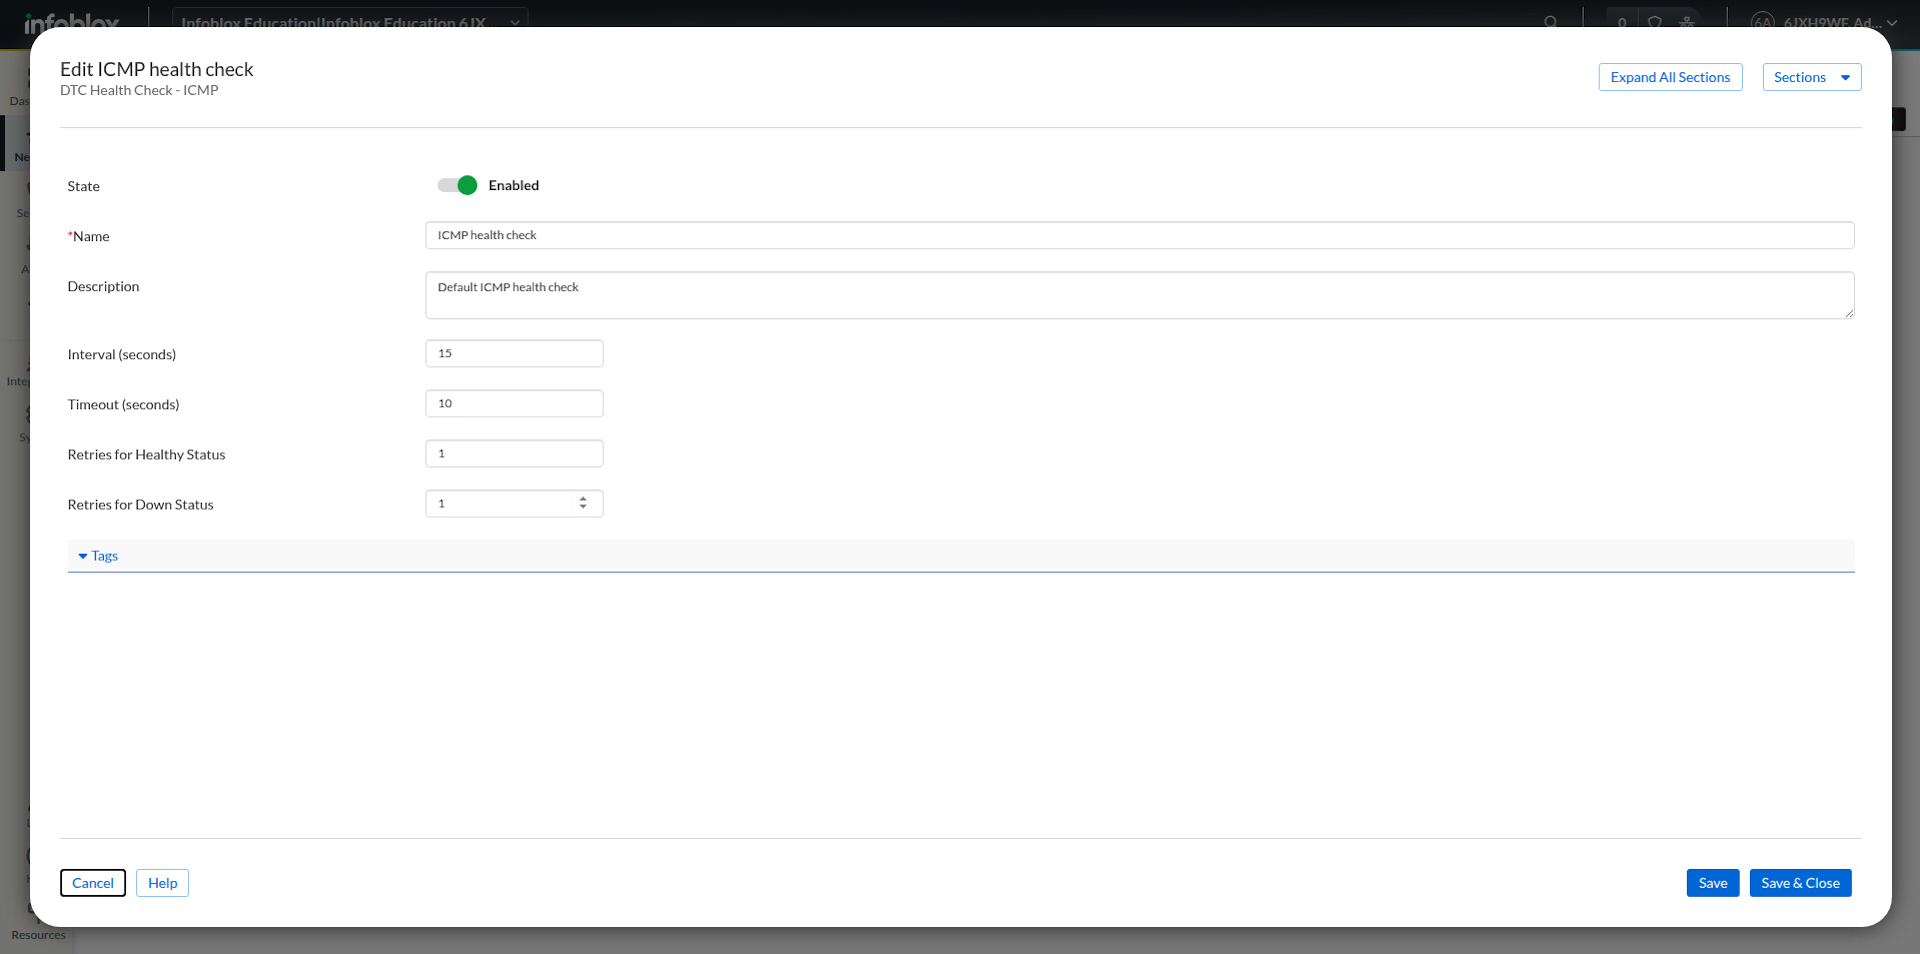
Review the values as per the table below.
|
Field |
Value |
|---|---|
|
Interval (Seconds) |
15 |
|
Timeout (Seconds) |
10 |
|
Retries for Healthy Status |
1 |
|
Retries for Down Status |
1 |
Task 3 Solution: Create Pool A and Pool B
This step groups the application server objects into answer sets that DTC can evaluate and return.
-
Log in to your lab’s jump-desktop.
-
Use the Education Infoblox Portal credentials to sign in to the Infoblox Portal.
-
Navigate to Network → DNS.
-
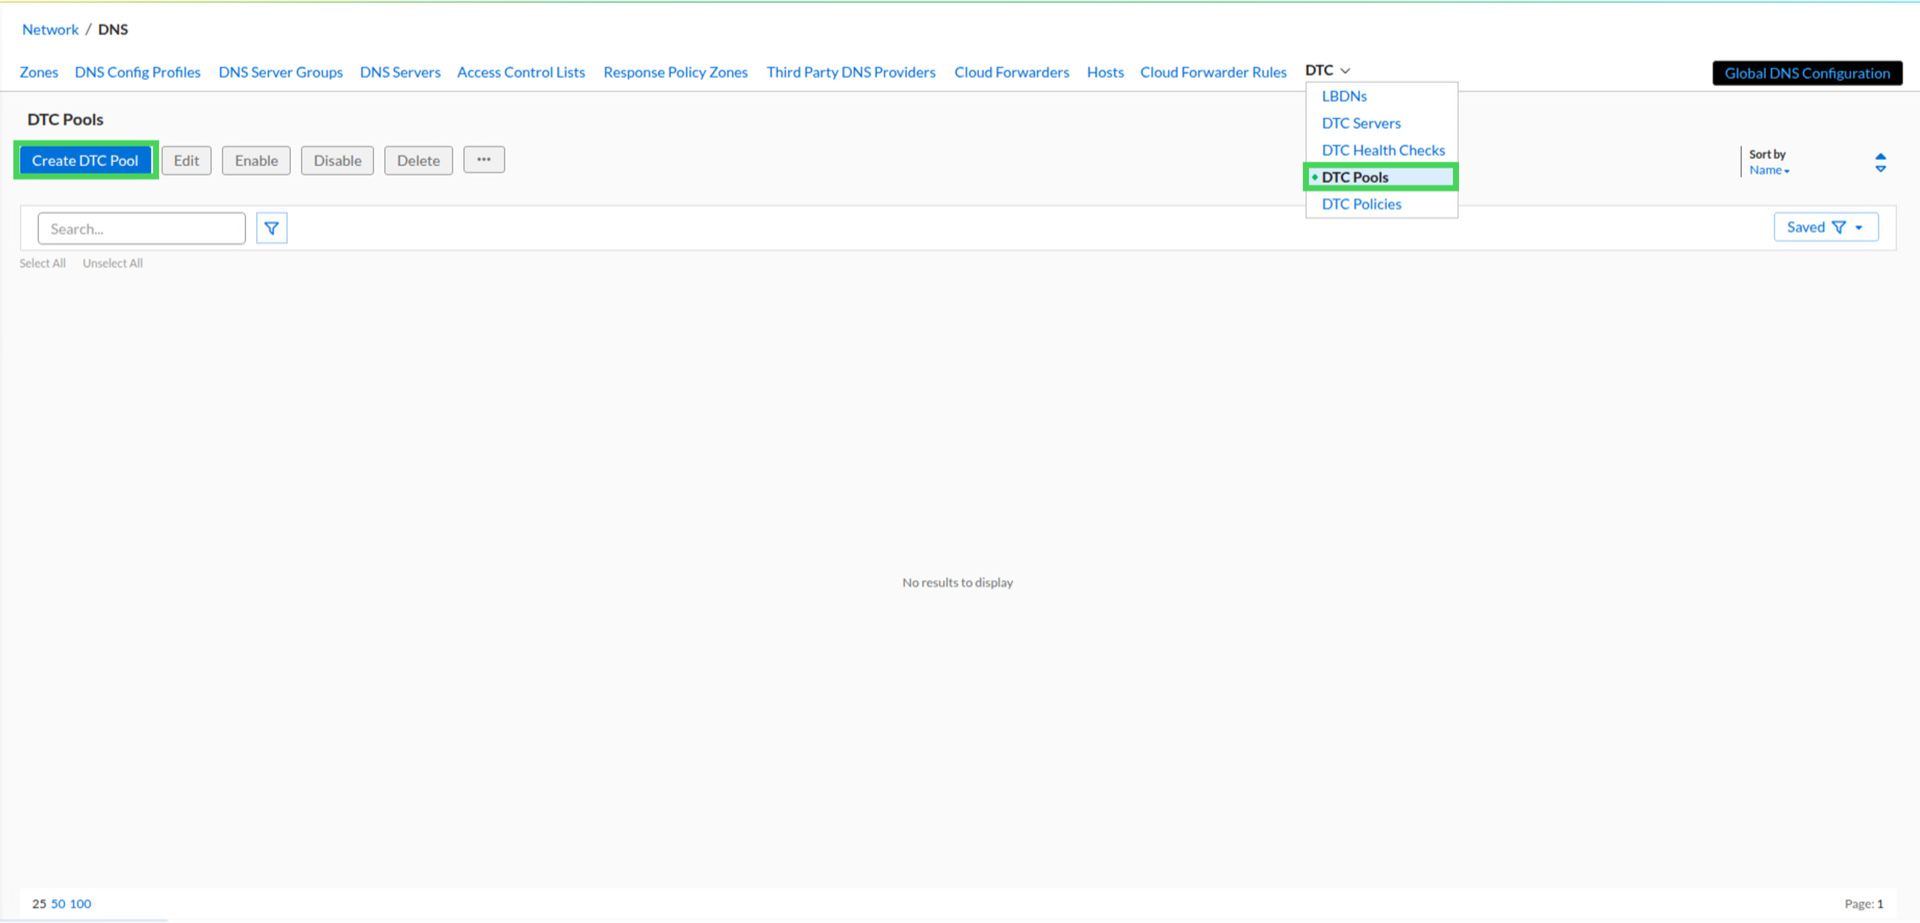
Expand the DTC tab and select DTC Pools.
-
Click Create DTC Pool.
-
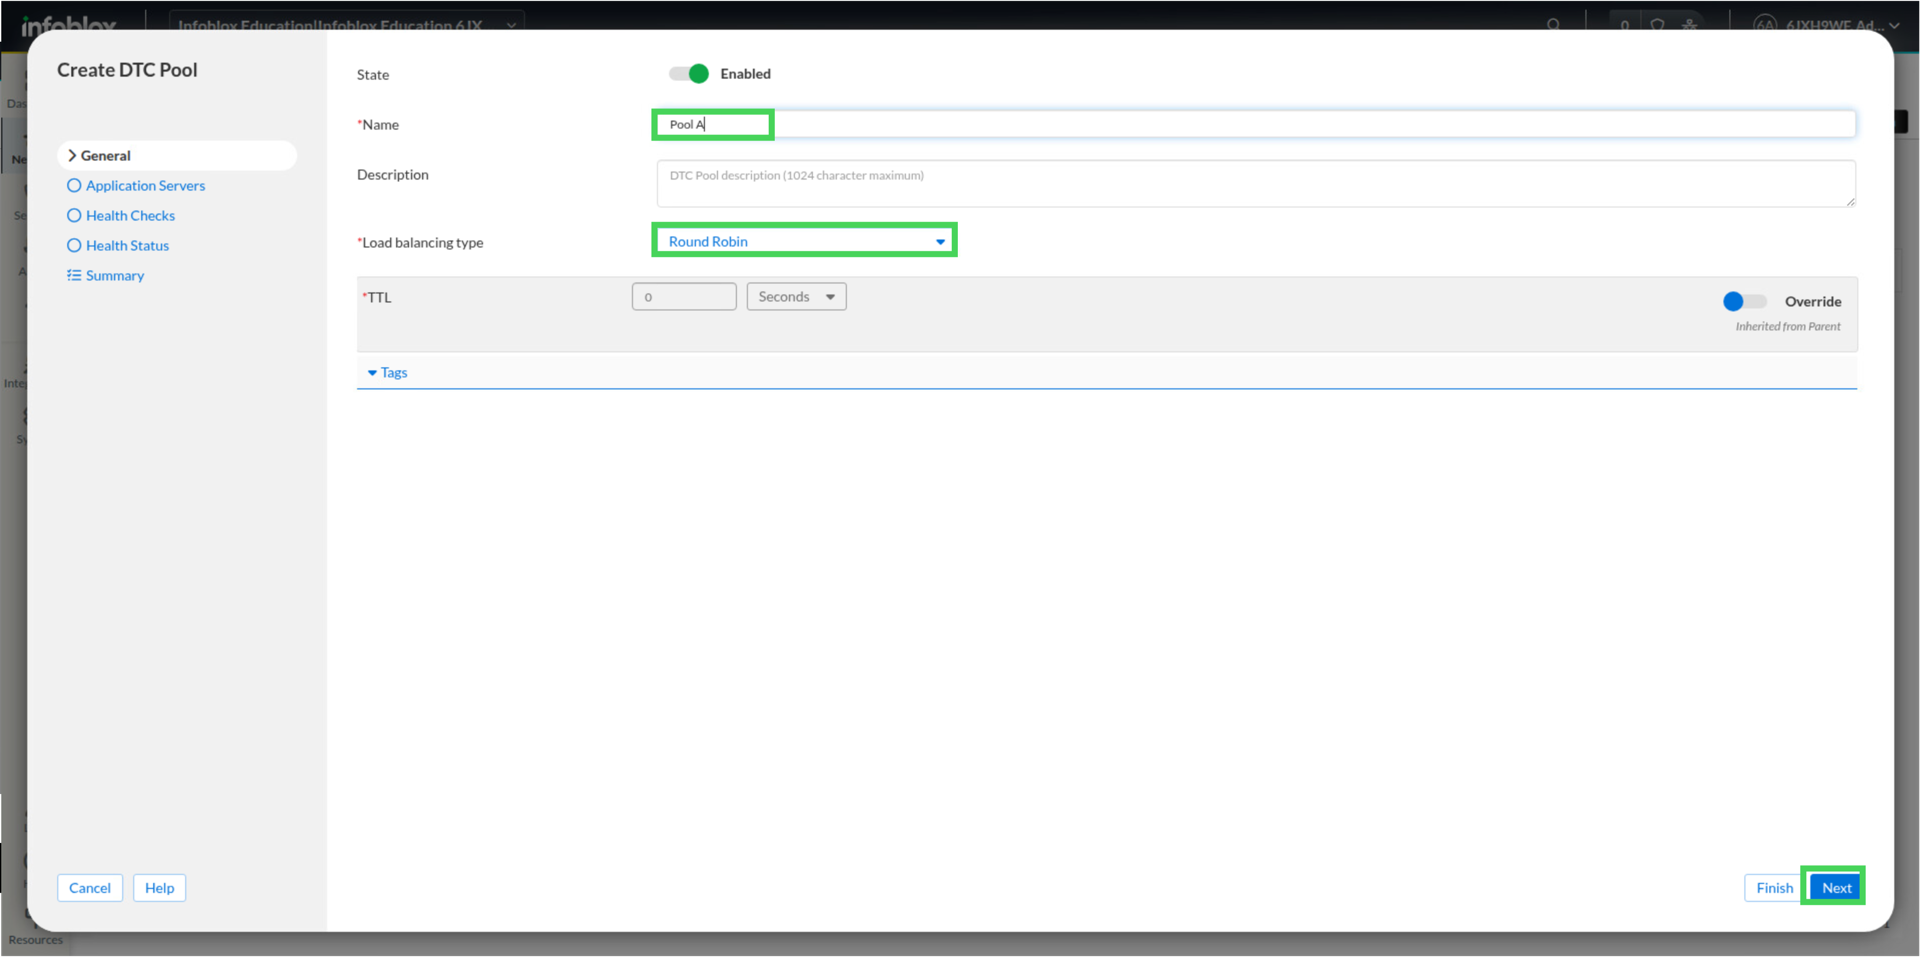
Create the first Pool using these values:
Enter the Name as Pool A.Leave the Load Balancing Type as Round Robin.
-
Click Next.
-
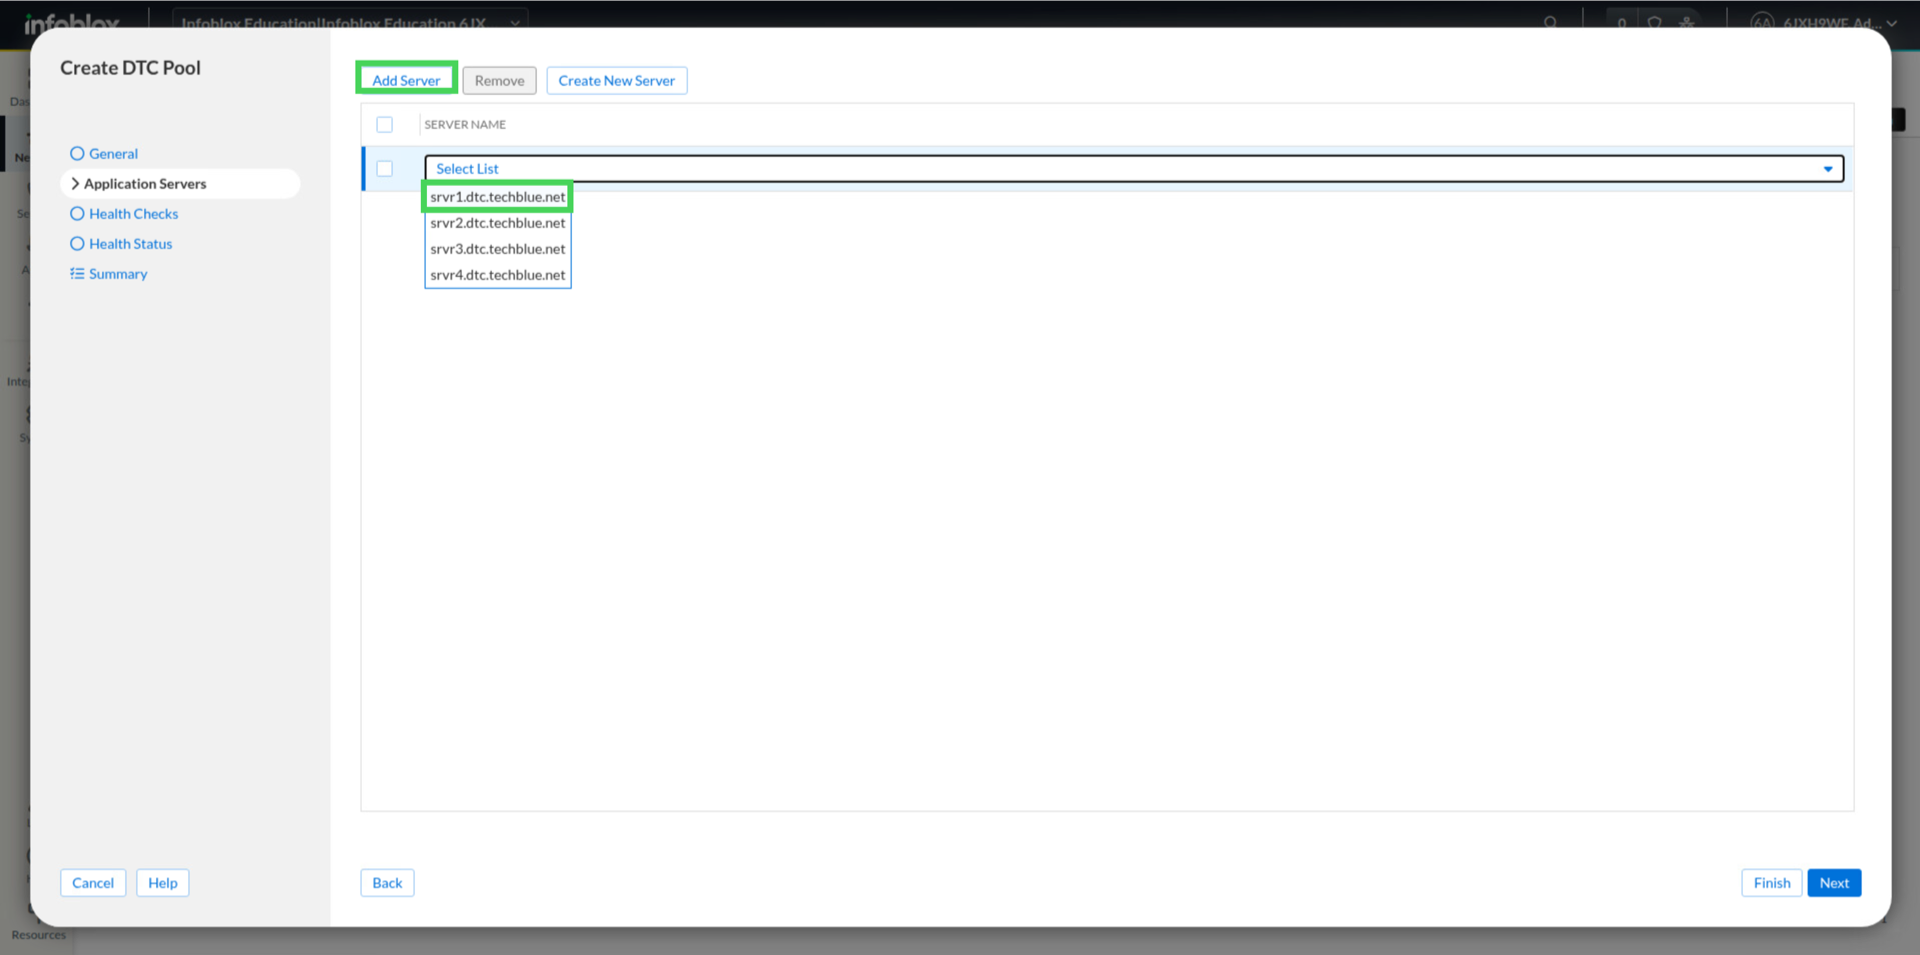
Click Add Server and choose srvr1.dtc.techblue.net.
-
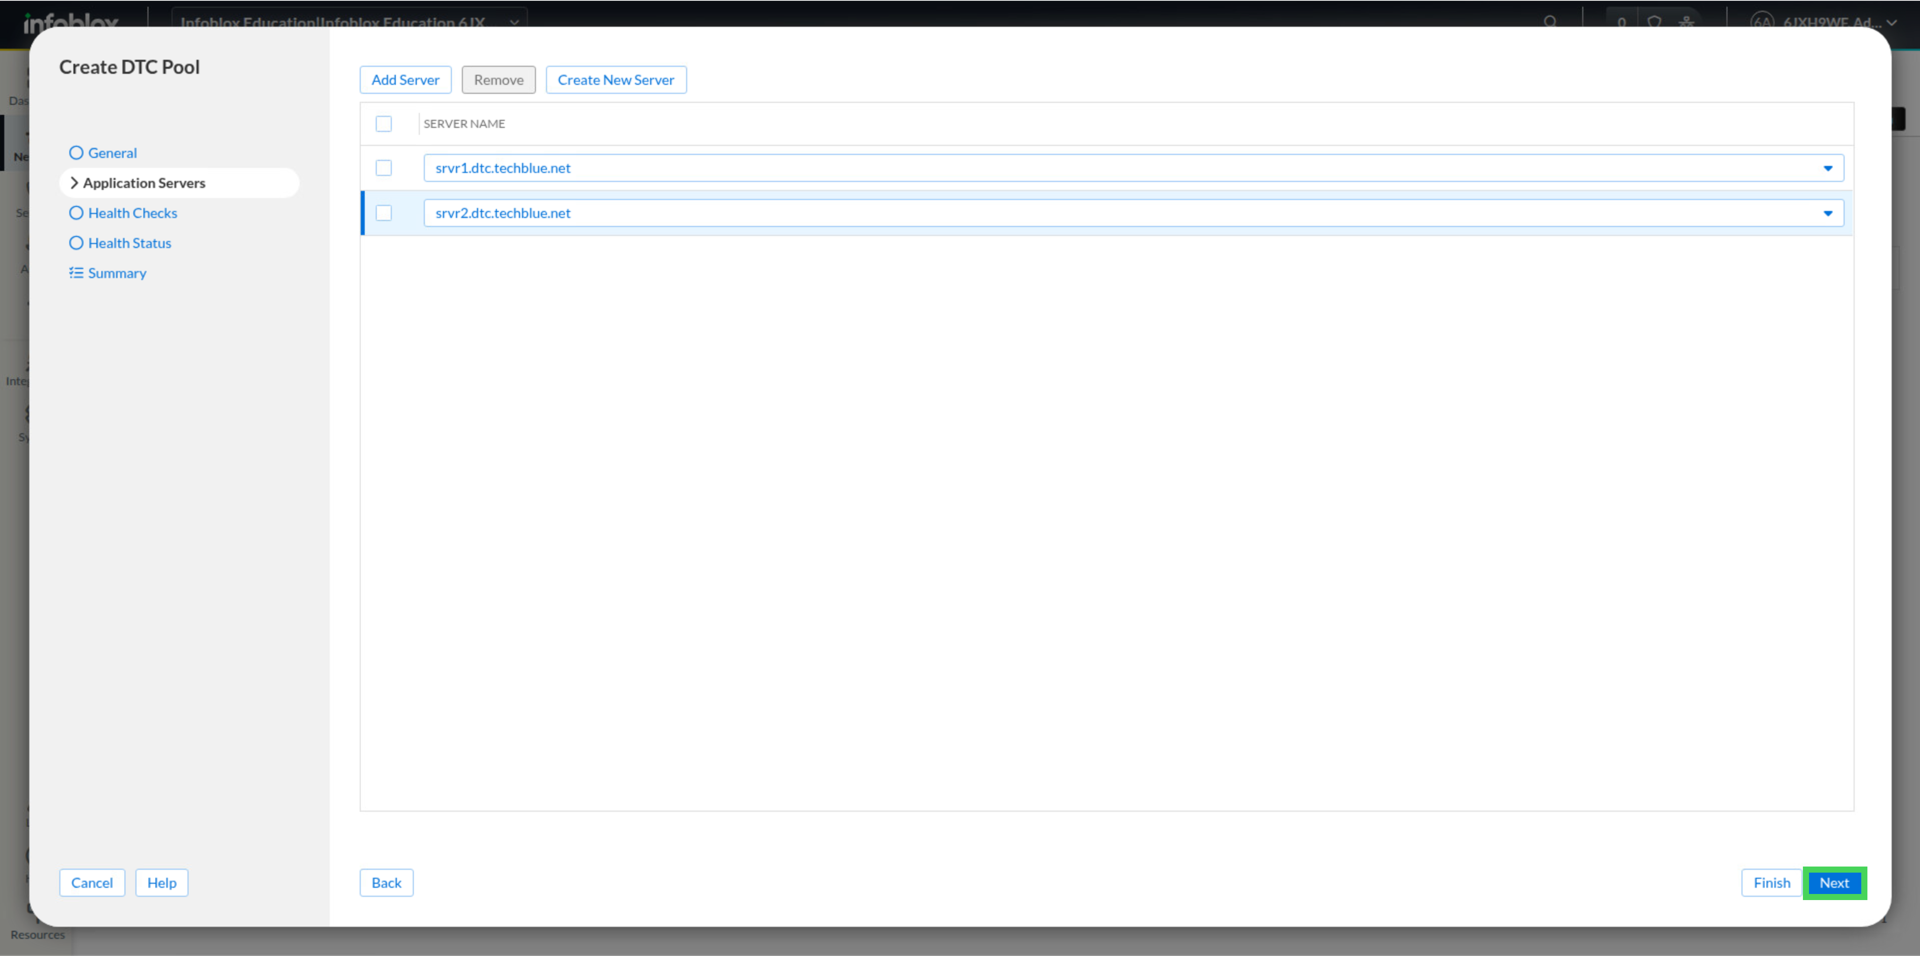
Click Add Server again and choose srvr2.dtc.techblue.net and click Next.
-
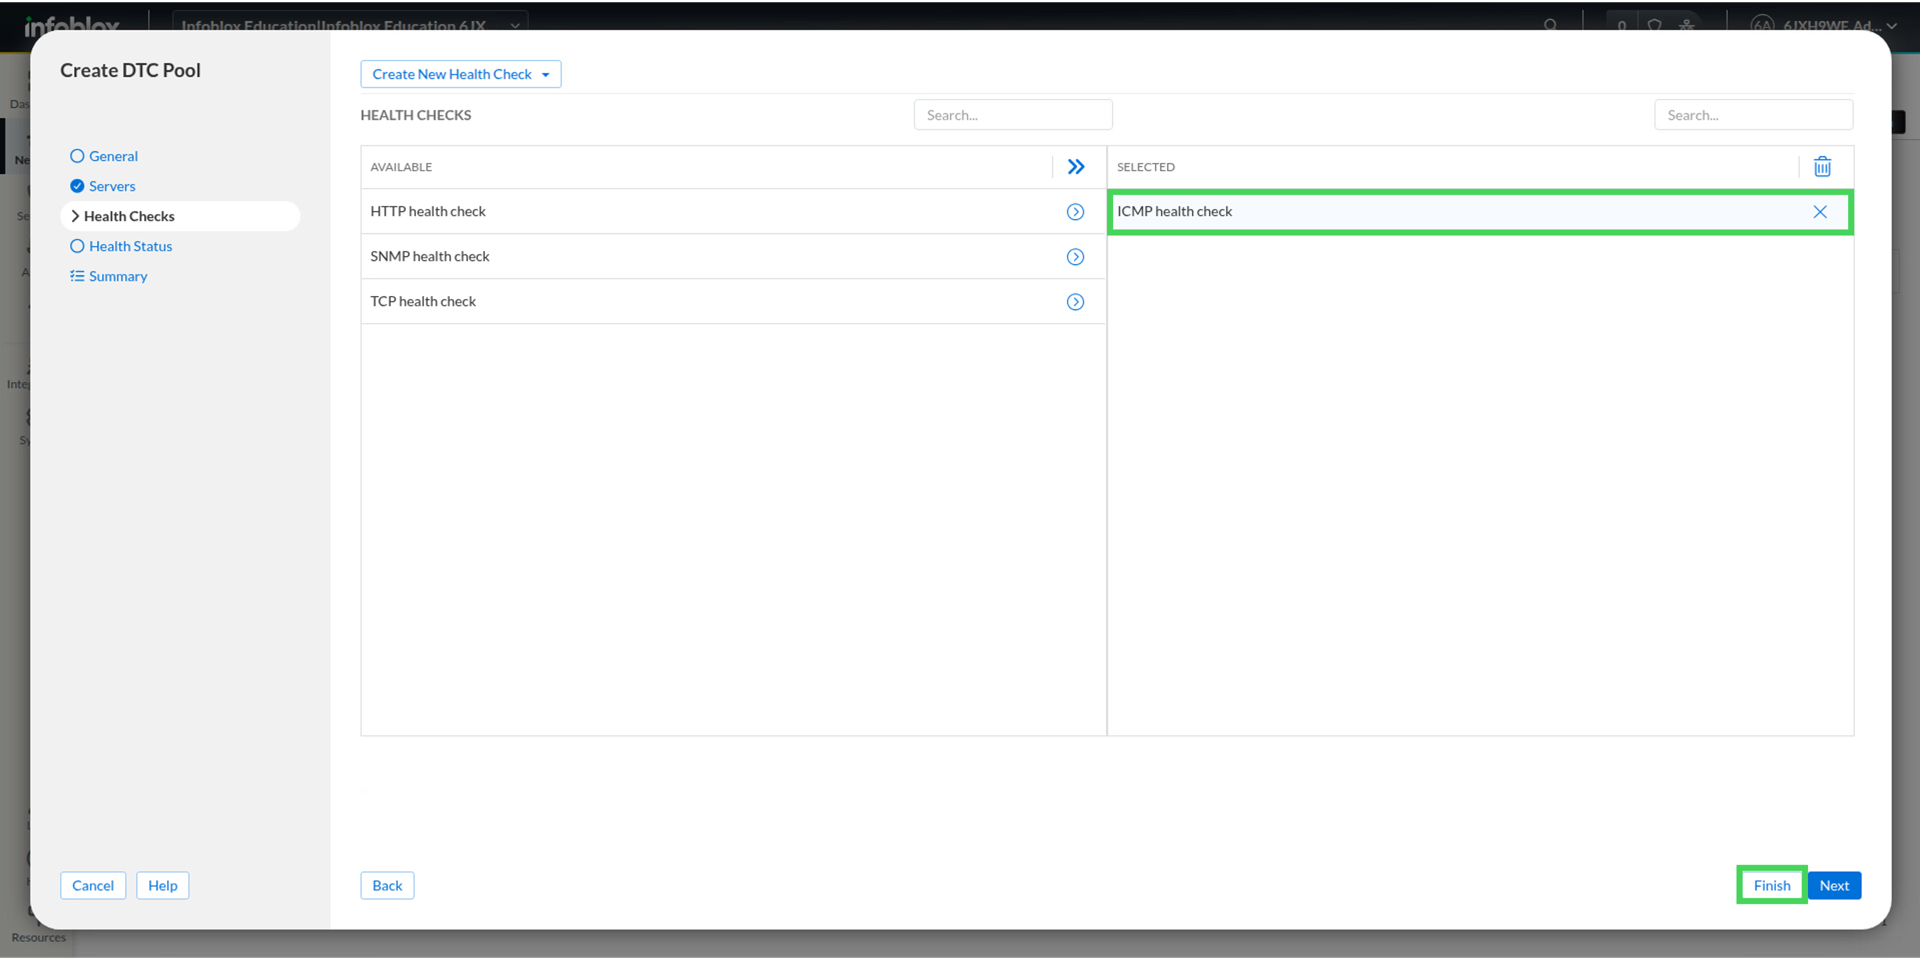
Under Health Checks move icmp health check to the Selected section and click Finish and Save and Close.
-
Repeat steps 1 - 10 to create Pool B with servers srvr3.dtc.techblue.net and srvr4.dtc.techblue.net
Task 4 Solution: Enable the web servers
This step brings up the four virtual web application servers that we added in Task 1. All four web application servers reside within the support server.
To power on the servers,
-
Log in to your lab’s support-server:
username: training
password: infoblox
-
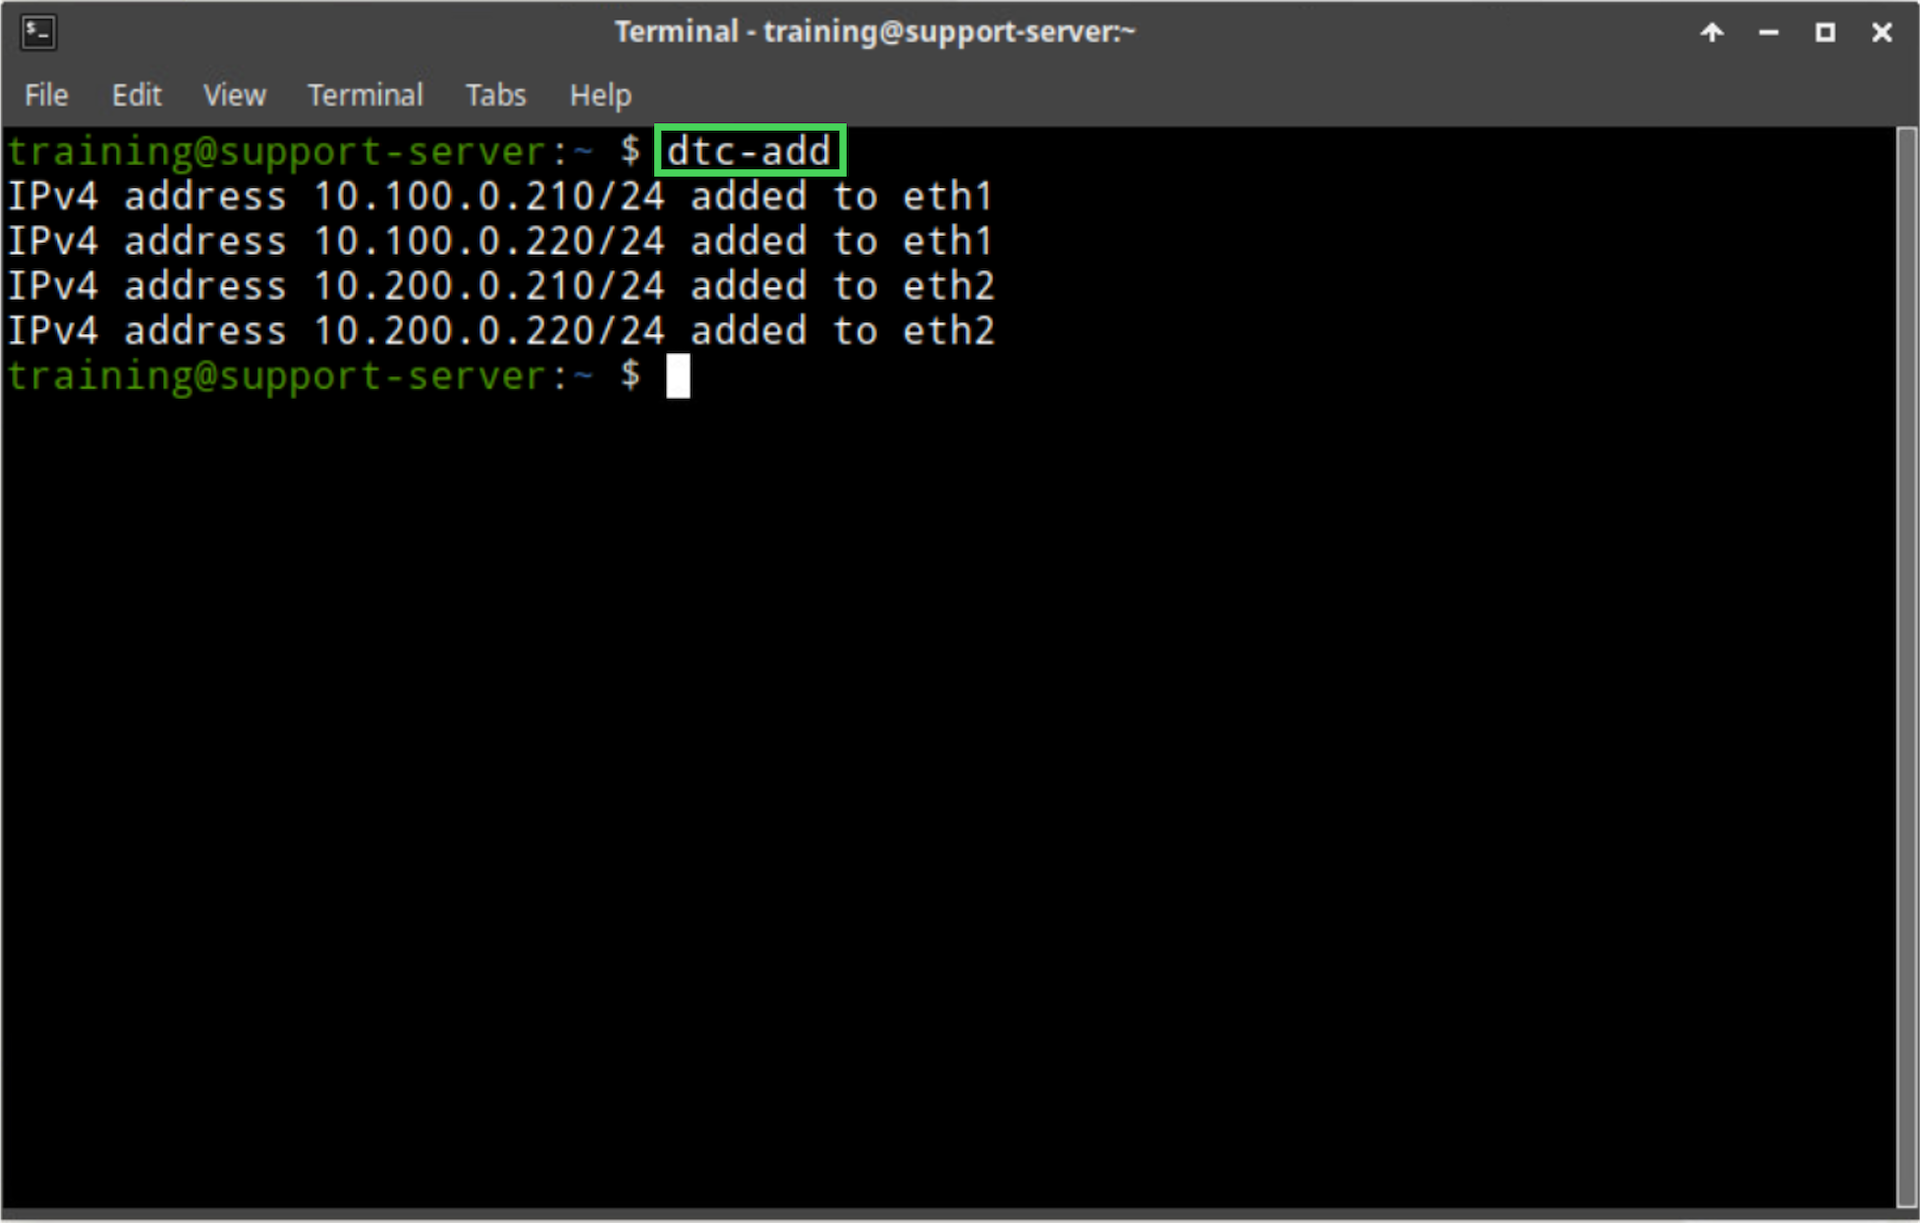
Launch terminal emulator from the taskbar
-
In the terminal window, type in dtc-add
-
Switch to the jump-desktop
-
Open the Chromium browser
-
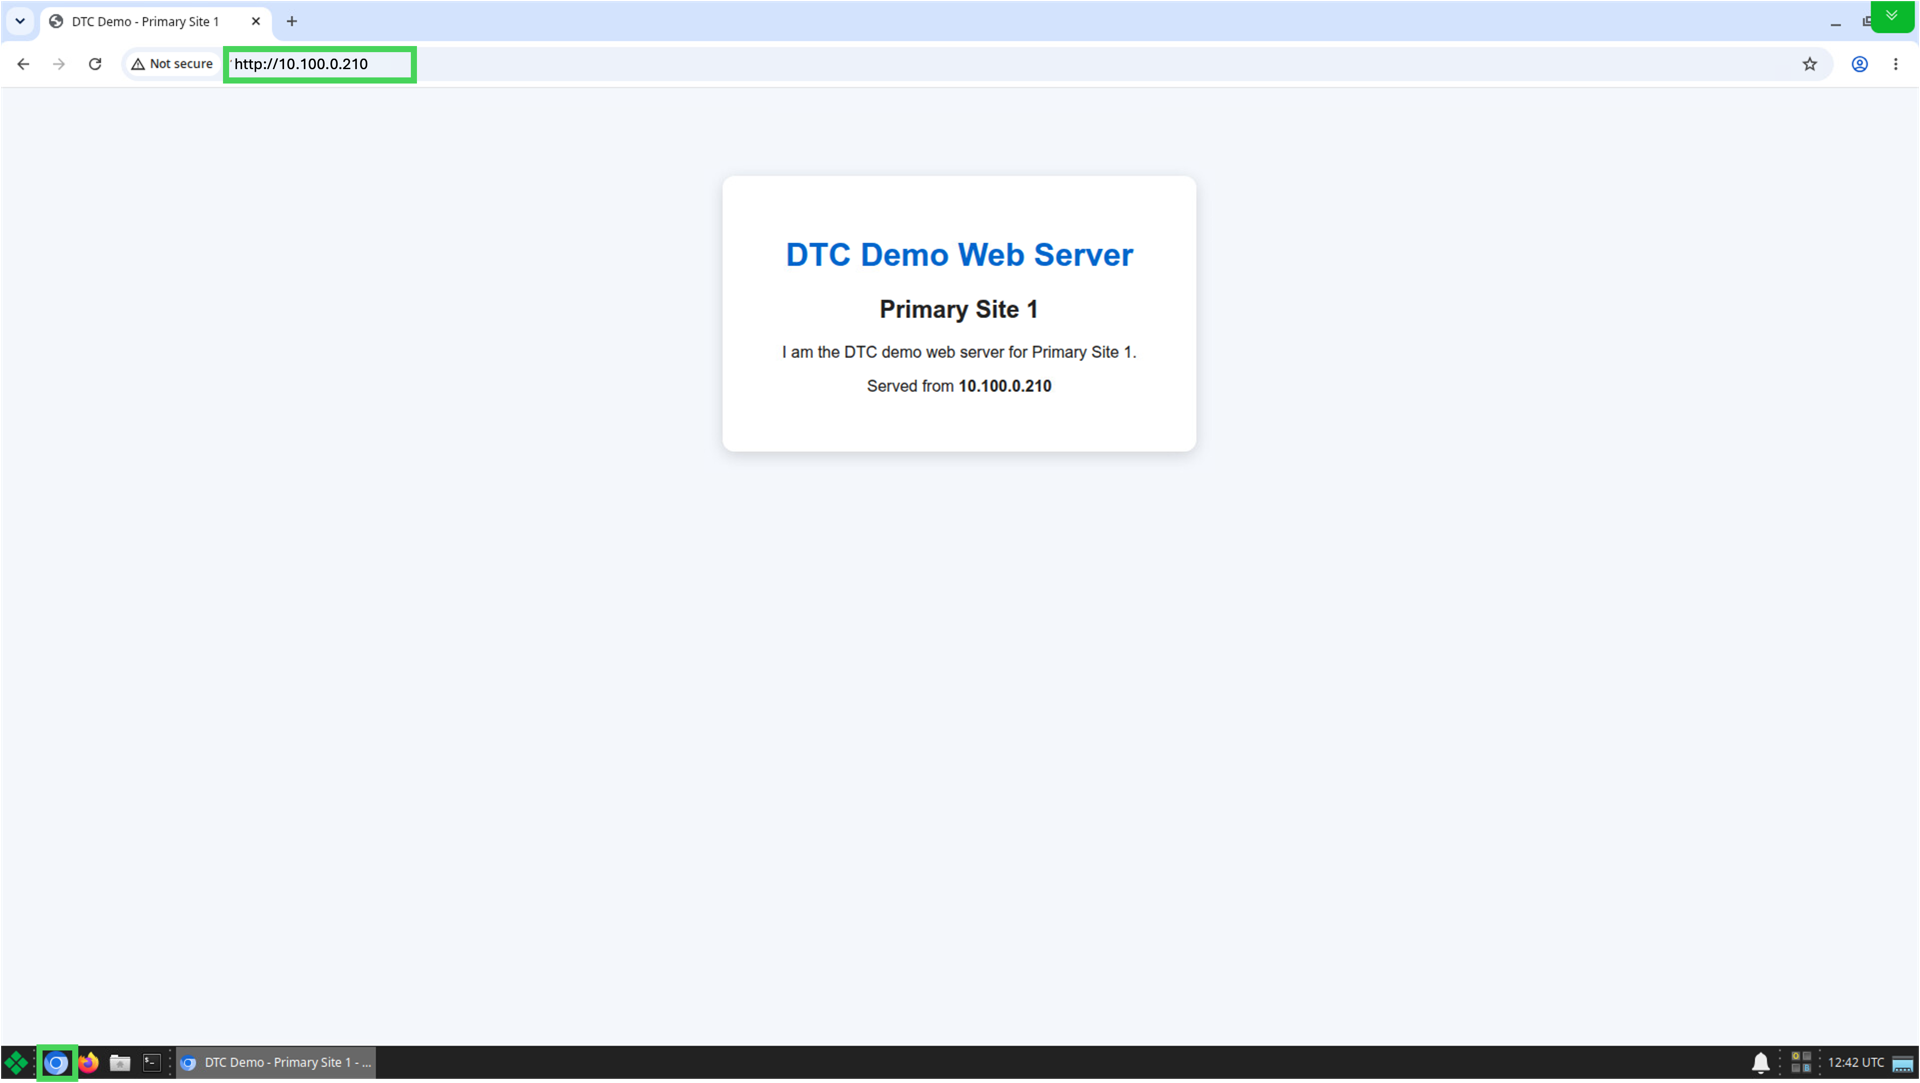
In the address bar, type in http://10.100.0.210 and hit enter.
-
If the web application server was enabled, you will see a test page as below:
-
Repeat this for 10.100.0.220, 10.200.0.210 and 10.200.0.220